I’m excited to say a second maker is emerging in the house. 🙂
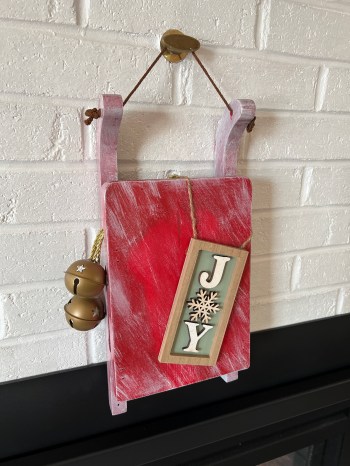
In addition to helping with our 2021 Christmas ornament. Brandi wanted to make a few holiday decorations. First was an old sled that was her mom’s. She sanded off a pineapple and some wording, gave it a new paint job, and added some accessories. Unfortunately I don’t have a picture of what it looked like before she started.
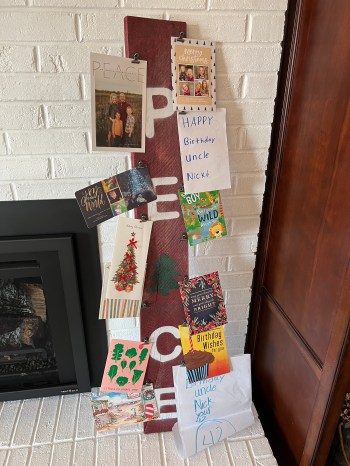
She also wanted some type of tall sign, so she grabbed a piece of twisted pallet wood from my scrap pile and sanded the rough edges. We found this barn red stain at Ollie’s Bargain Outlet for $4, which was perfect.
She wanted to paint the word “peace” on it and I’ve been looking for an excuse to buy a Cricut, so I made the purchase and we created custom stencils. I love the use of a tree for the letter A. After a little spray paint and some hinge clips we had ourselves a place for Christmas (and my birthday) cards.
2021 started well in terms of making, building on the momentum I built in 2020. Then the home projects started. It was a year full of very large projects, which transformed a lot of the house.
For the last three months of 2021 I’ve been on a three month sabbatical from Automattic and I go back to work on the 4th. I’ve joked that I need a vacation now because I’ve been putting a lot of hours in to the kitchen. The last few weeks have been very busy and I’ve accomplished a lot, but the remodel will not be finished. I do have a post coming soon with some major updates.
Once the kitchen is finished I’m looking forward to tinkering with some electronics again and having time to work on much smaller projects.
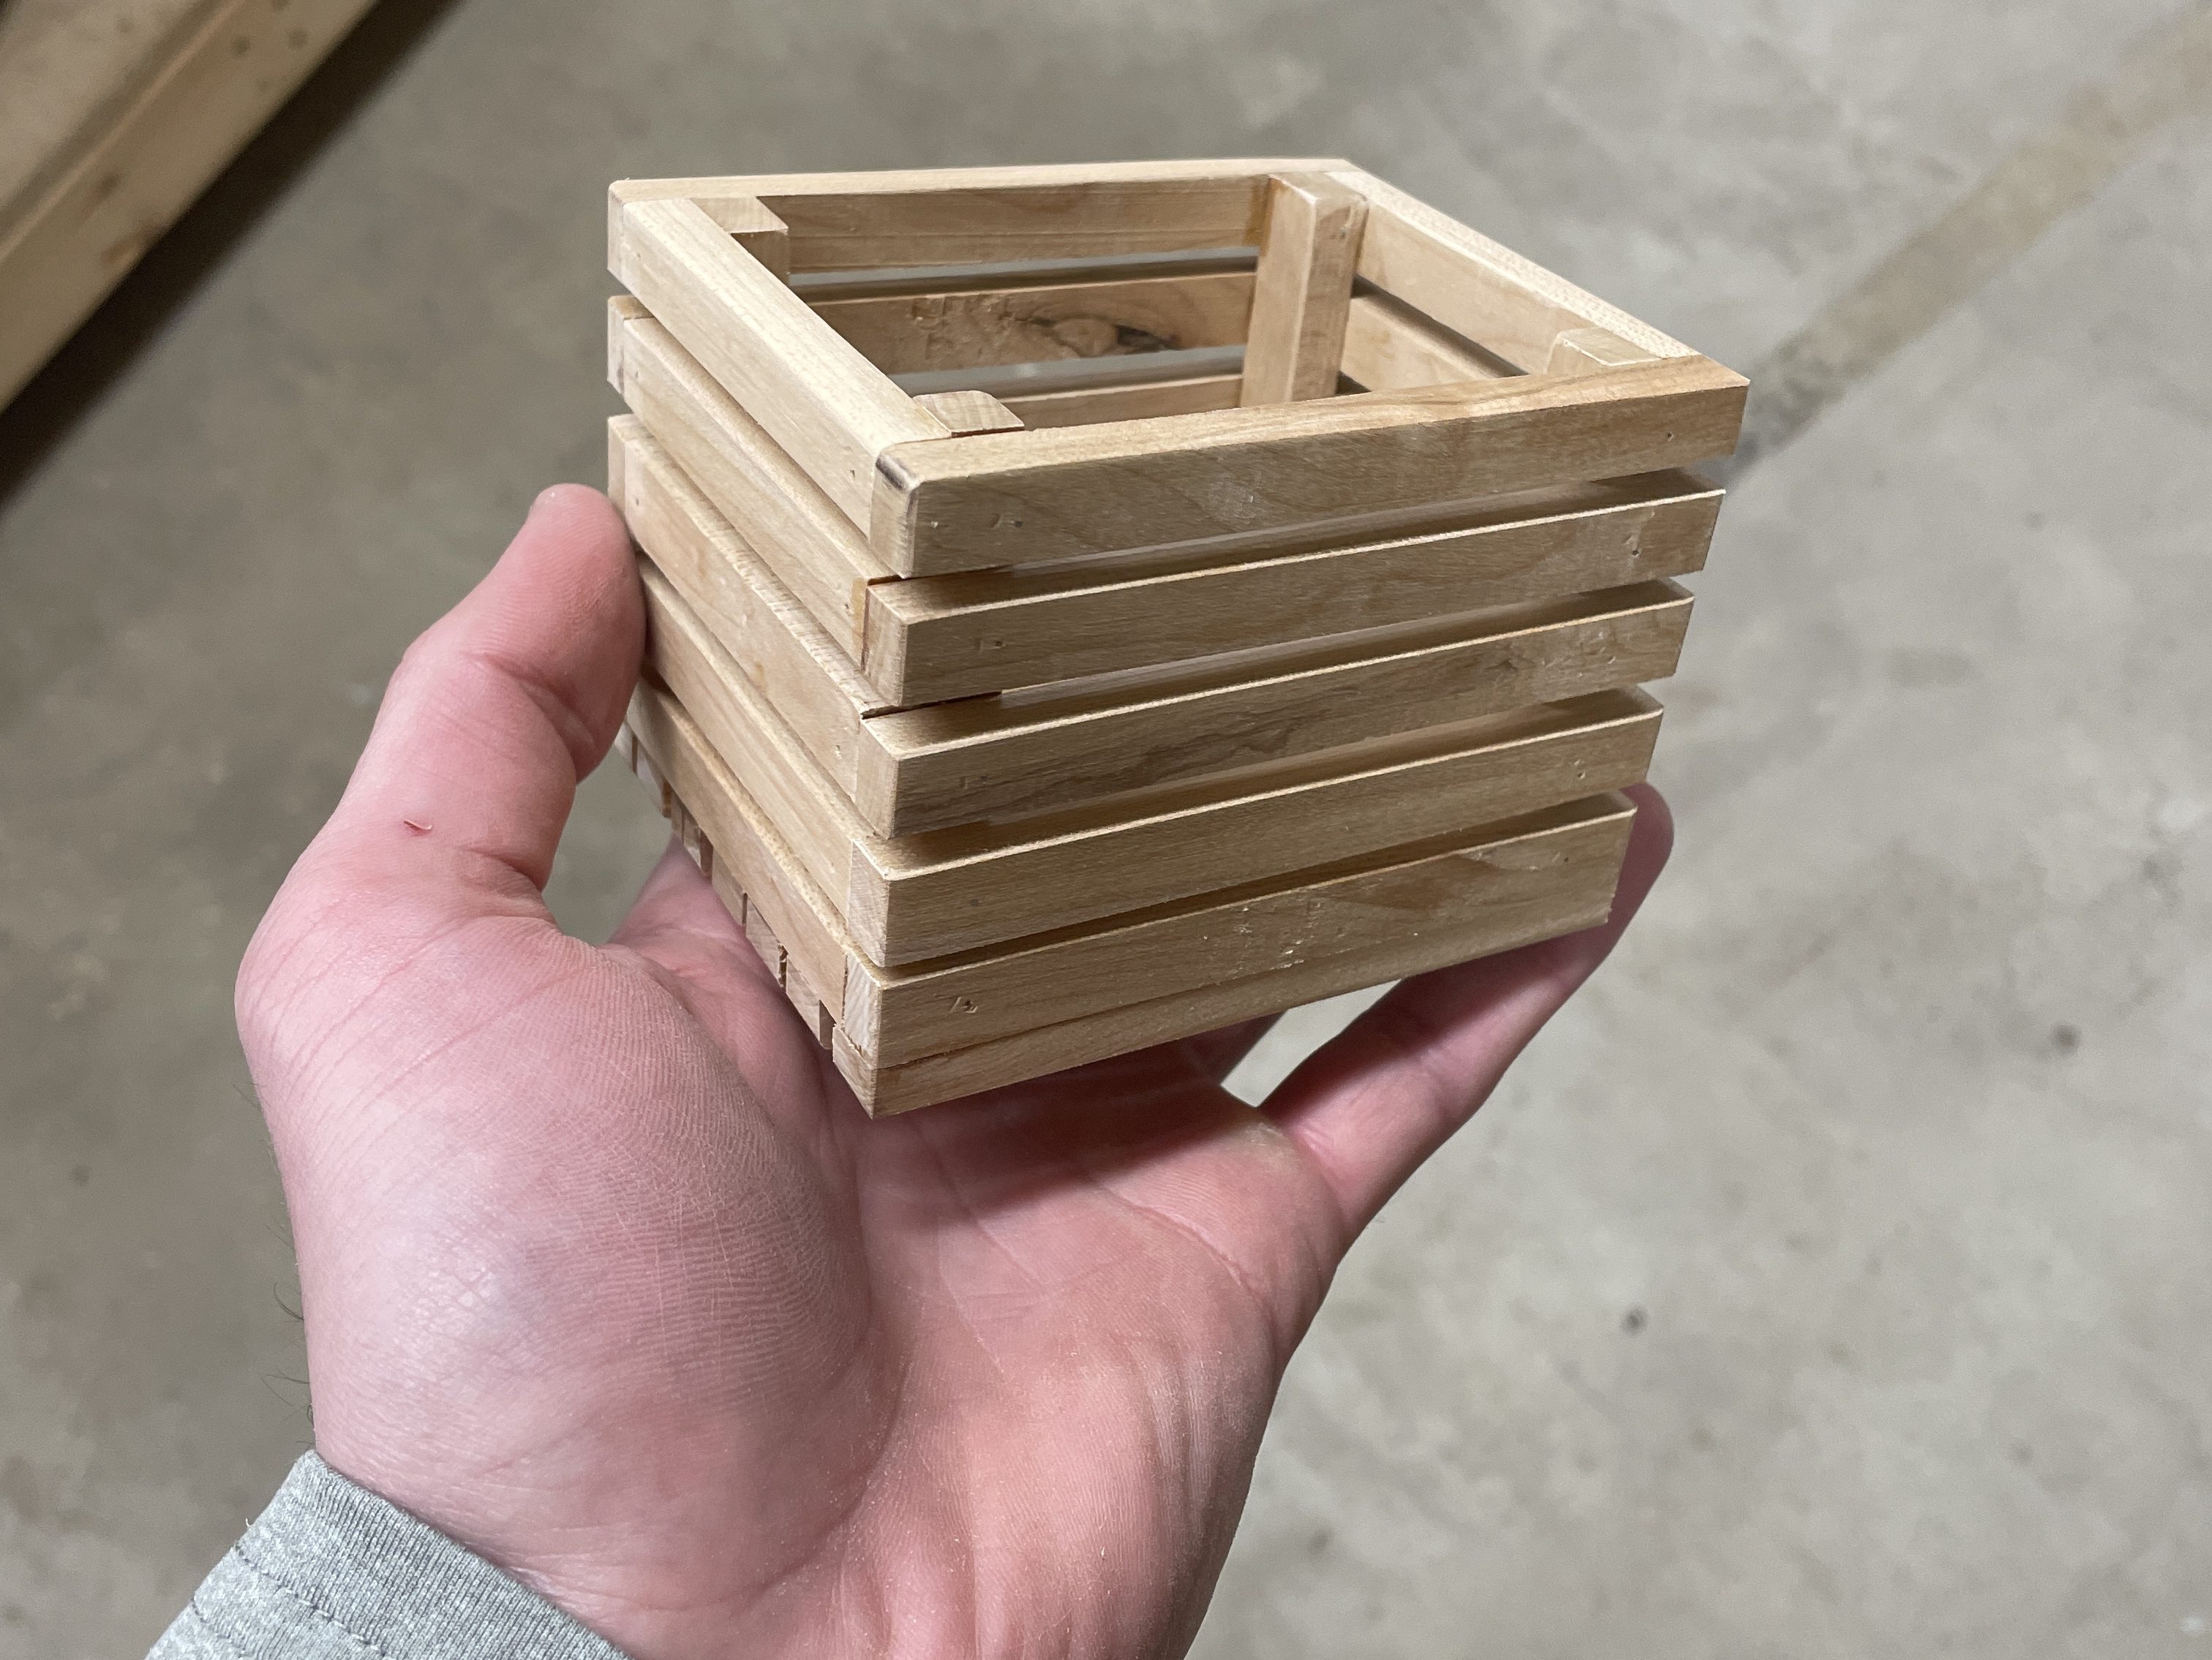
Brandi and I are starting a yearly tradition to make an ornament based on something from our year. 2021 was filled with a lot of home remodeling (to her house which is up for sale and our house still being worked on), so I thought it would be neat to make a mini pallet wood wall. It was a team effort and turned out pretty cool.
Several weeks ago Brandi repainted her bathroom. When we were searching online for new towel racks these shelves caught her eye.
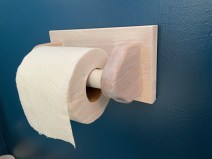
I offered to make a version of those and we had the idea to do a whitewash to match some of the other new decor around the house. We both thought the white would look really good with the deep blue color she had painted. On a shopping trip at Menards we saw this toiler paper holder, which I said could be sanded down and whitewashed to go with the shelves.
Since it was a smaller piece it would be a good test for the whitewashing techniques. I helped her out, but Brandi did most of the work and we both liked the result, especially for our first attempt. It was done by scuffing up the wood with a wire brush and then applying thinned out paint with a small chip brush. We took it back to her house and hung it up.
In the mean time, I had started on the shelves. Since we were going for a weathered whitewash look, I milled some reclaimed lumber to 1″ thick, cut everything to size, did a rough sanding, glued, and screwed.
Some of the pieces had cool characteristics to them that would look good with the whitewash. I did some testing of paint and stain to roughly apply to the wood before whitewashing. I wanted to be able to create more of a dirty/weathered look than what we ended up with for the toilet paper holder.
Going in, I thought a gray or one of the blackish stains would be the winner. We both preferred this dark walnut.
Next, we tested with a different whitewash technique, which involved pouring thinned out paint on the wood and spreading it with a scraper. The results looked really cool.
You can see the scraper at the top of the picture below. I gave the shelves a quick coat stain, since it was going to be painted over.
When Brandi saw the stained shelves in person, she loved how the grain and imperfections of the wood were highlighted, thinking it would be a nice contrast to have some wood grain in the bathroom. So she redid the toilet paper holder and we gave it two coats of spray lacquer.
We also finished the shelves with two coats of spray lacquer. Since the plan was a weathered and whitewashed look I had only done a sanding with 40 grit and you could feel the roughness of the wood. So I did 6 coats of a wipe-on poly as well, which gave things a much better feel. Then I attached the hooks for towels and we hung them up.
Notice the mini crate I posted about the other day? Not sure what she’s going to fill it with. The stained look was definitely the right decision and looks great with the towels and decorations.
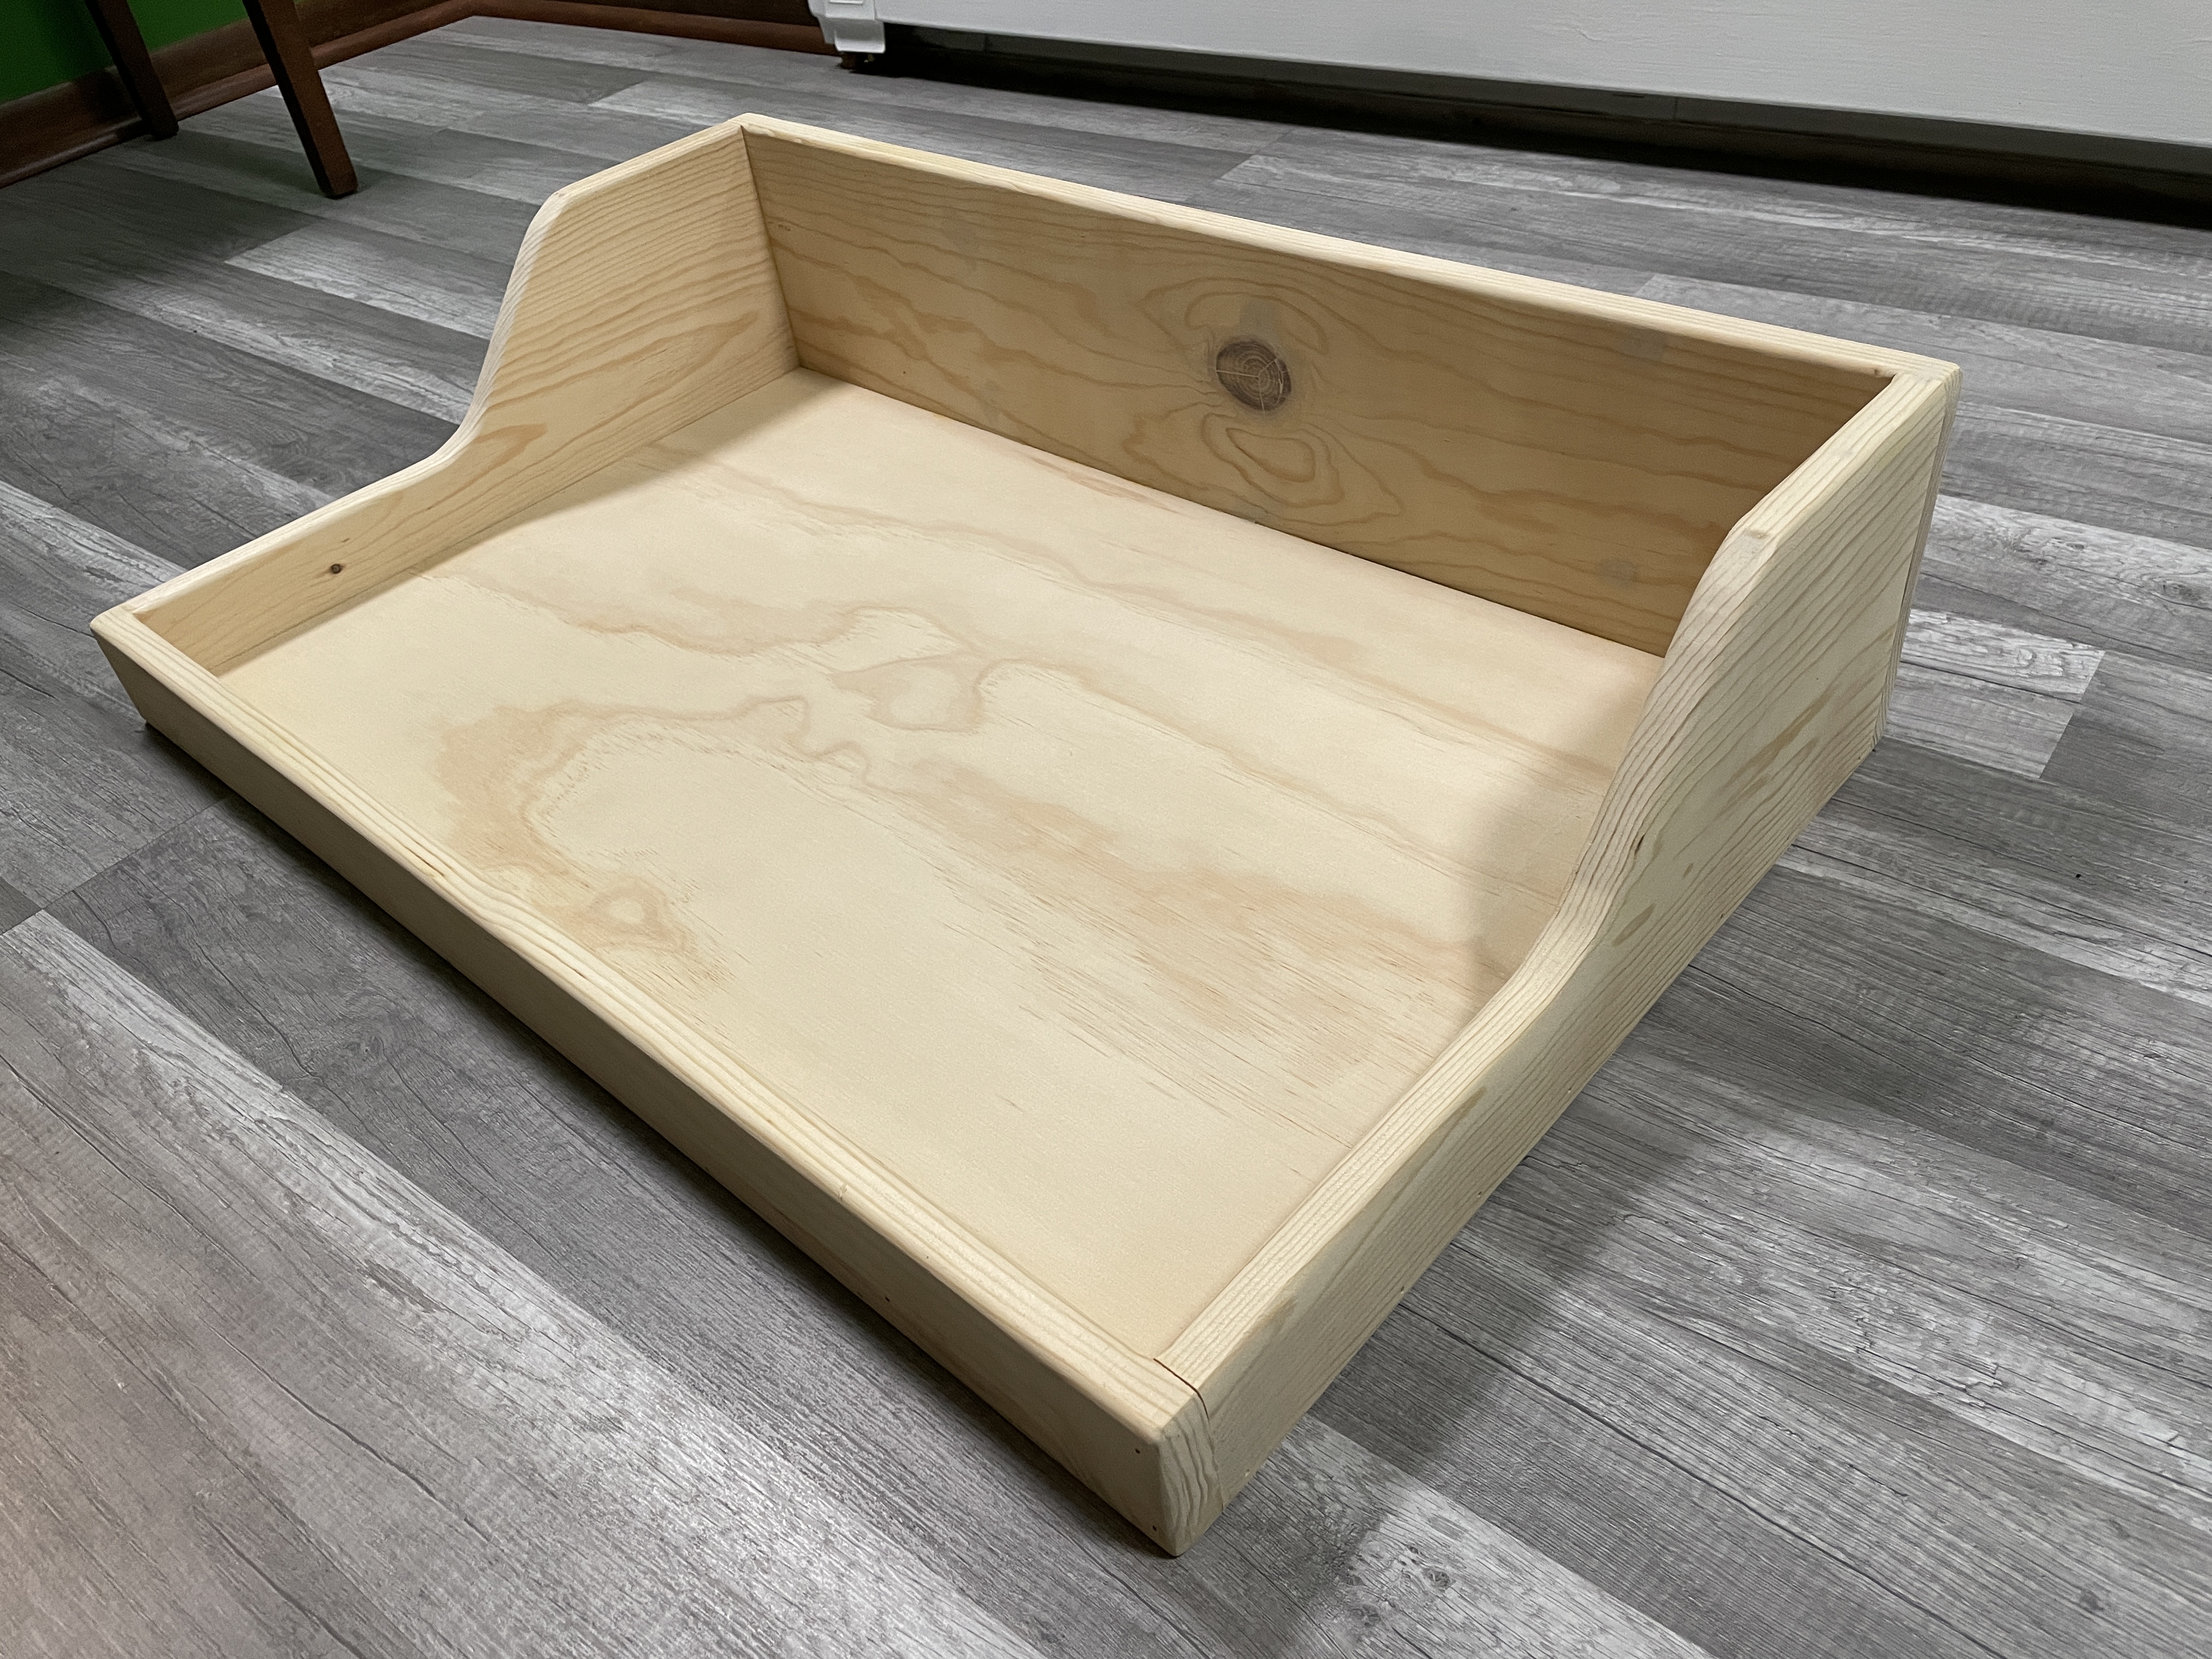
This was a very simple build I knocked out one night. I used solid wood scraps for the sides and plywood for the bottom, all 3/4″ thick. It’s about 30″ wide and 18″ deep. The height in the back is about 7″ tall and the front is about 2-1/2″.
Since this was getting painted, the quality of the wood wasn’t a concern and I didn’t need to do much sanding. I used a roundover router bit on all of the edges. I like it when I don’t have to do the finishing work. Turned out nice.
Once I found the spark, the rest of the year felt balanced, in terms of not doing too much and varying the types of projects. My favorites were the new home office, the Gympac, and the picnic table / benches. 2021 is off to a great start with several posts already published and others being planned. The hobby room updates will allow me to get back to electronics projects.
I posted recaps of my making for 2017 and 2018. I thought I might be able to hit 100 making posts in 2019, but I fell well short of that. November and December of 2018 kind of burned me out. I did a bit in 2019 though…
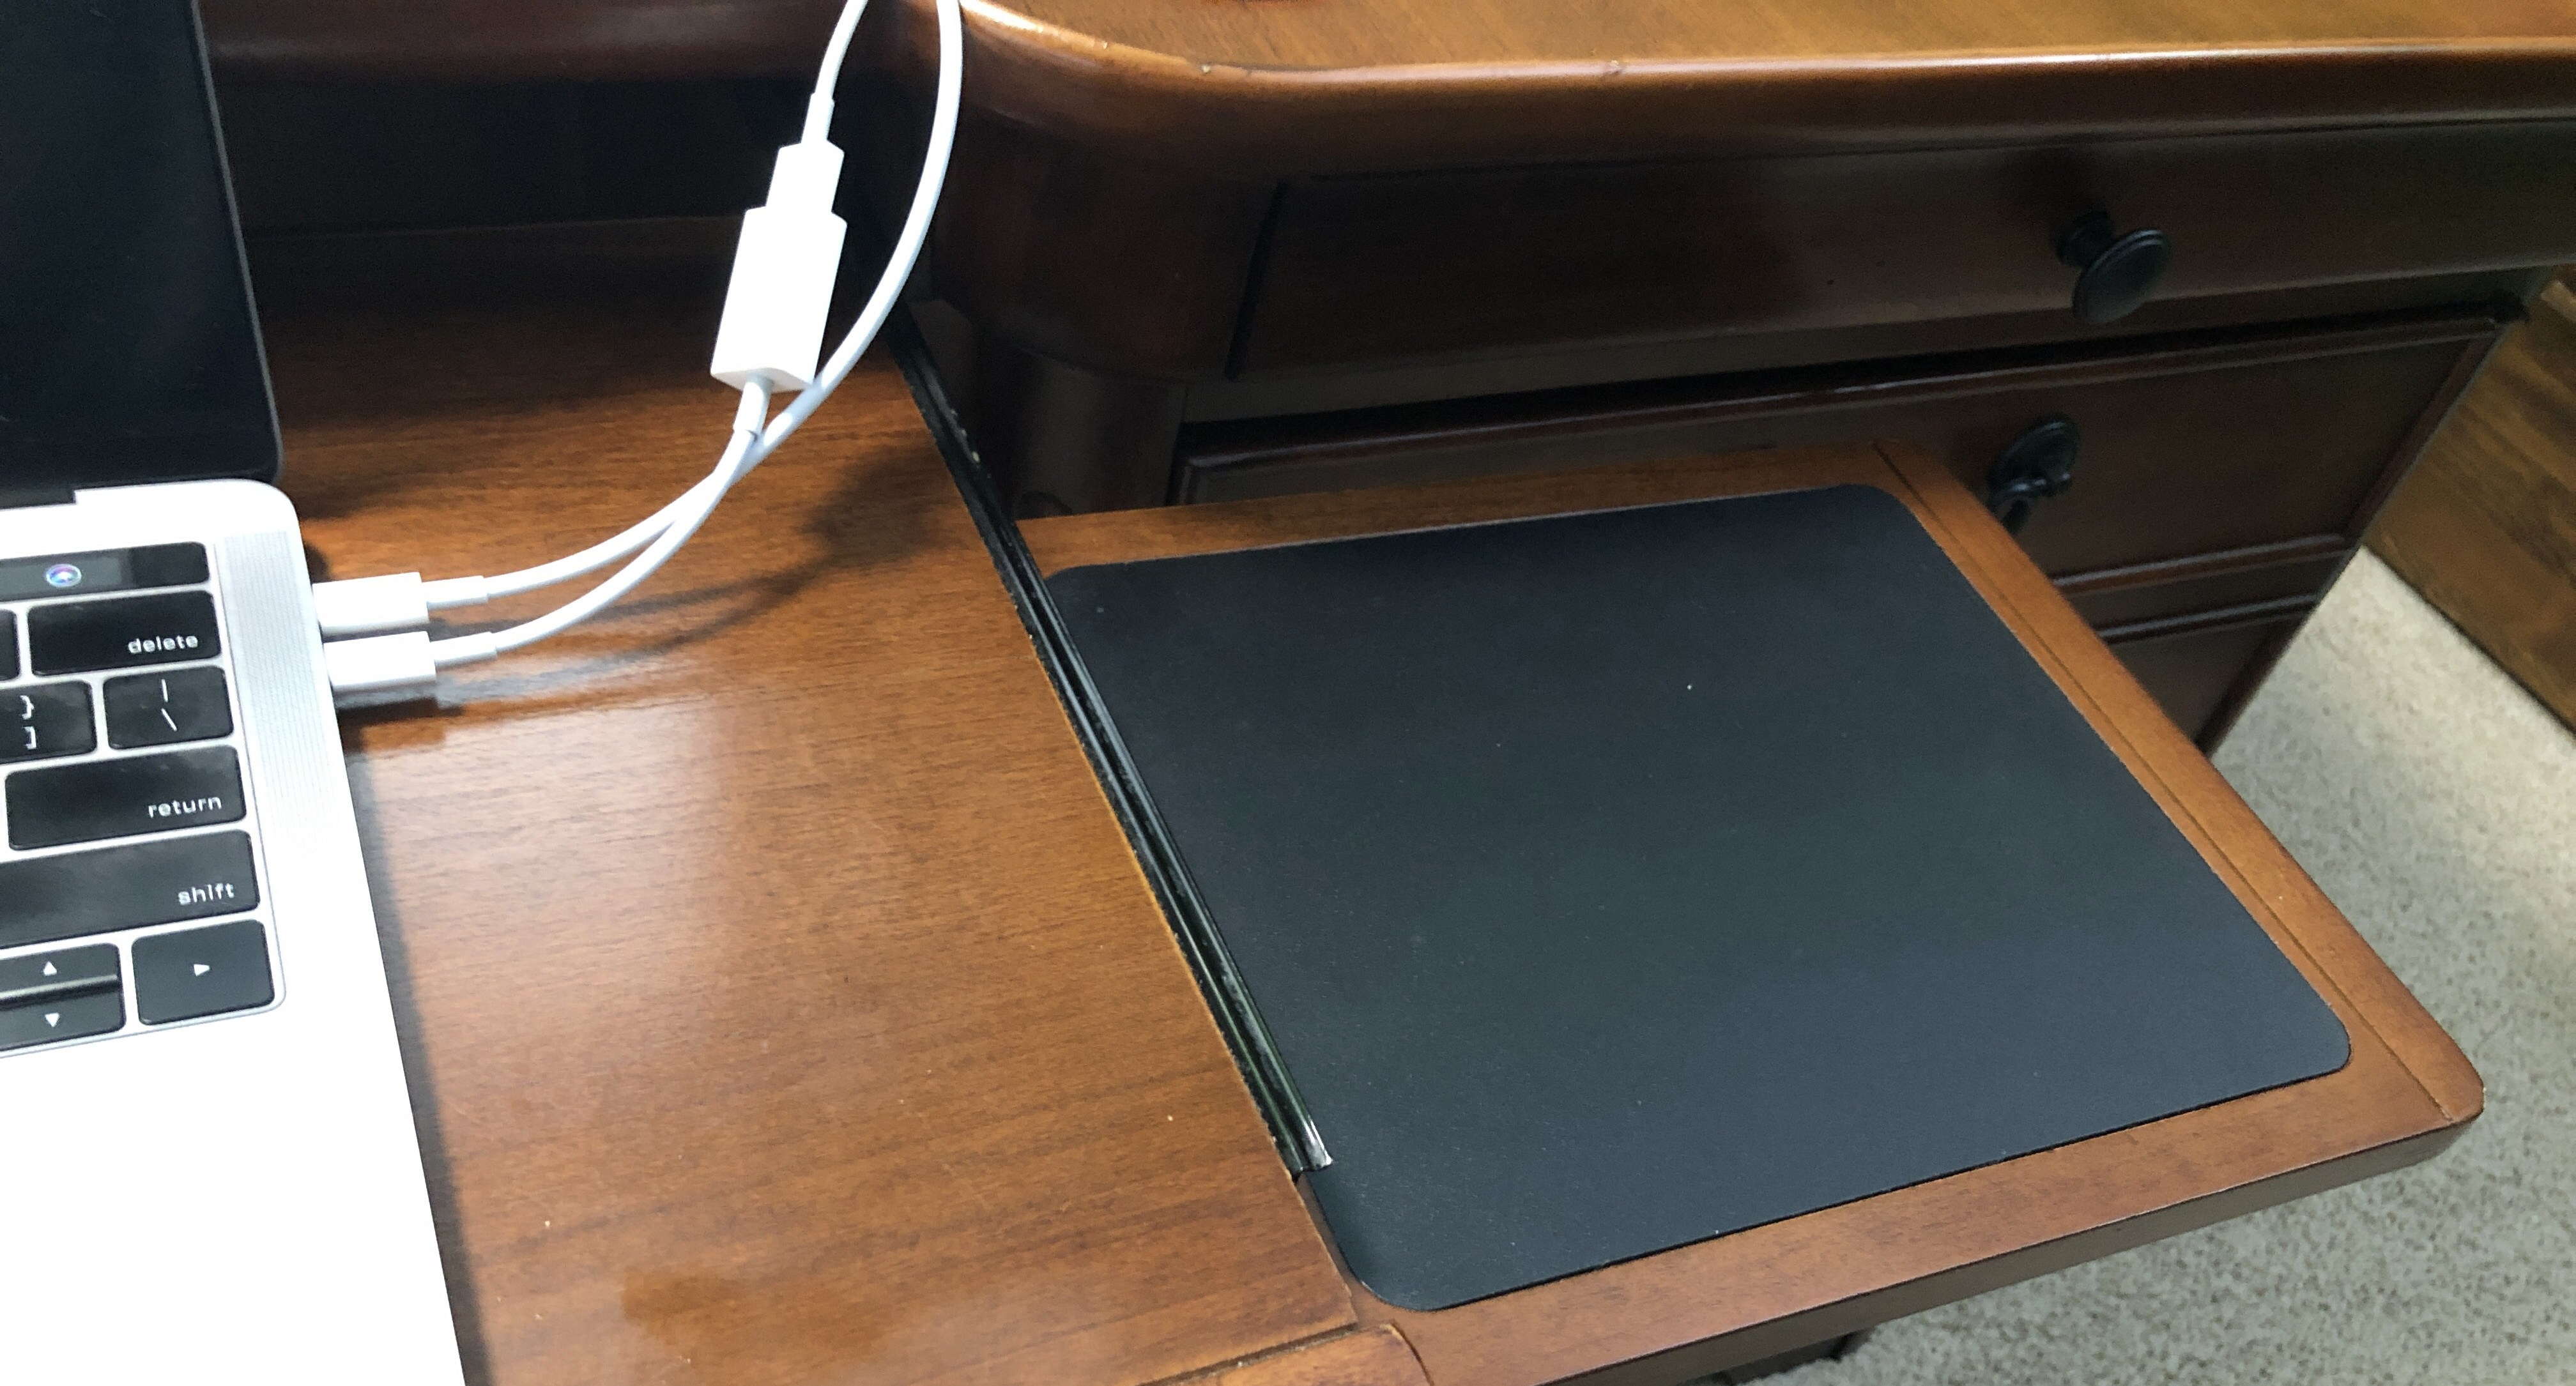
After getting a set of AirPods this year I thought it would be nice to have wireless charging at my desk. I like using the touch pad on my MacBook pro, so this mouse pad drawer doesn’t get used and I got the idea to embed a charger in it.
I bought a cheap $10 wireless charger.
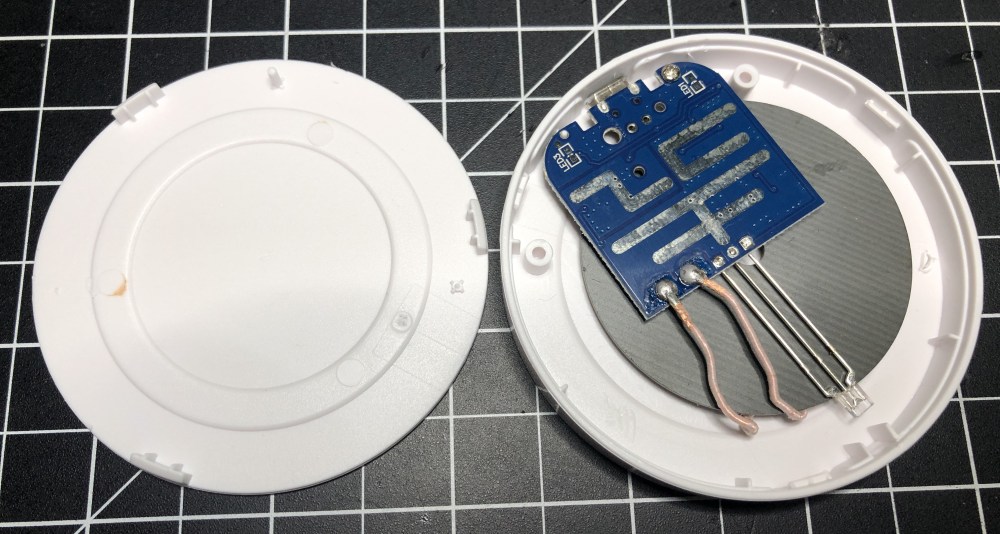
It won’t charge very quick, but it doesn’t have to when I’m sitting there working most of the day. I figured it would be a fun project and the worst that could happen is I fail and I’m out $10. I opened up the case and there wasn’t much to it.
Then there was only one small screw to remove and the electronics were free.
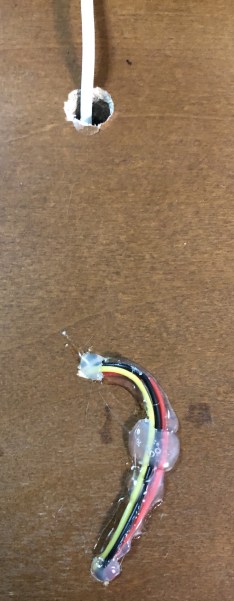
I forgot to take any other pictures until I had put everything back together. After pulling up the top of the mouse pad, there was some foam underneath. I traced the electronics and USB cable to make a cut out in the foam. Then I used a chisel to carve out the particle board until there was a deep enough recess. I drilled a few holes for wires and the LED. I had cut the LED off of the circuit board so I could route it to the front of the drawer. I soldered on some wires to connect the LED back to the board, hot glued everything in place, and then used super glue to put the mouse pad top back on. Overall it was an ugly hack job. Over to the right is a picture of the holes and wiring underneath.
Check out this short video of the charging in action.
BTW, the mouse pad drawer has two identical halves, so if I ever decide to use a mouse again (it’s been at least 5 years since I had one), I’m good to go.