
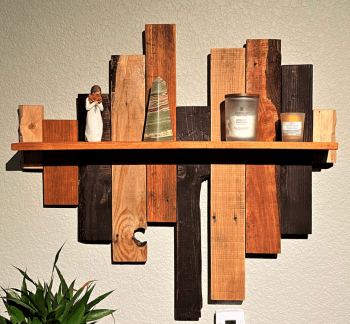
When I first had the idea to do pallet wood walls in the living room, I wanted to create some type of art piece for the wall opposite the TV. I stumbled across this shelf on Etsy when searching for pallet wood art.
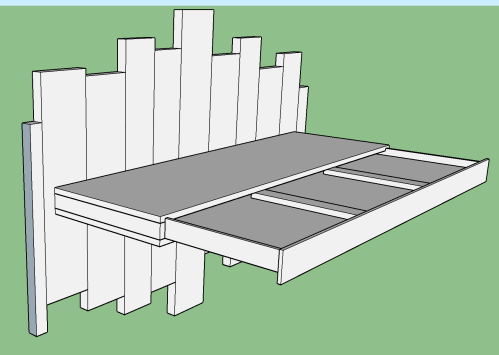
After getting rid of my old recliner and lamp (as part of the living room updates) I quickly realized a light was needed for the new loveseat. I thought it would be cool to integrate a light in to my shelf and as a bonus it would be hidden. It would be a fun challenge to work on. Here are the last models I had mocked up in SketchUp before starting on the build.


Some of the inspiration for the light came after watching someone create a reading lamp by using quad row LED strips. I ordered a roll of the LEDs (quite expensive), a power supply, and a board to use as a dimmer. After doing some testing and reading more of the specs, I ended up getting a much beefier board to handle 10 Amps. I was also melting some of the insulation on cheap electronics wires, so I also grabbed a spool of 18 gauge wire.
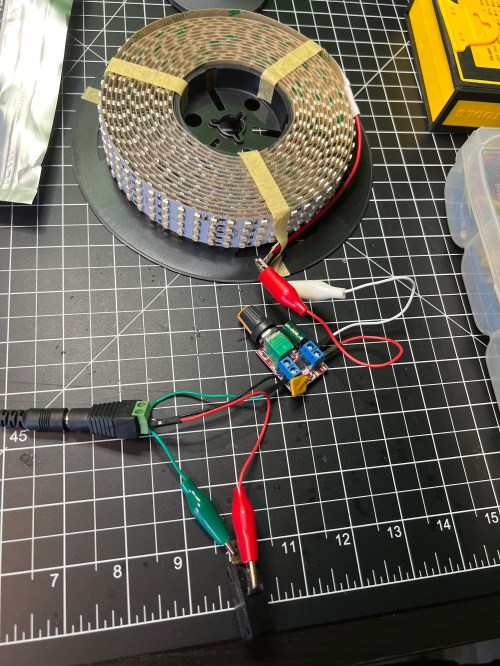

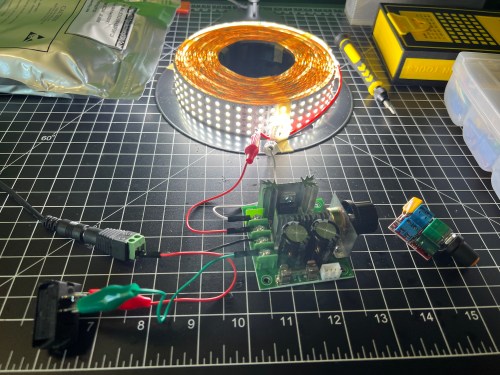
This initial testing was done using a very simple limit switch, but those are only rated for very low currents and would quickly burn up with the requirements of the LEDs. It took some searching, but I finally found a limit switch that said it could handle 10 Amps of DC. The big controller board for the dimmer and this much bigger limit switch introduced some new challenges to my build.

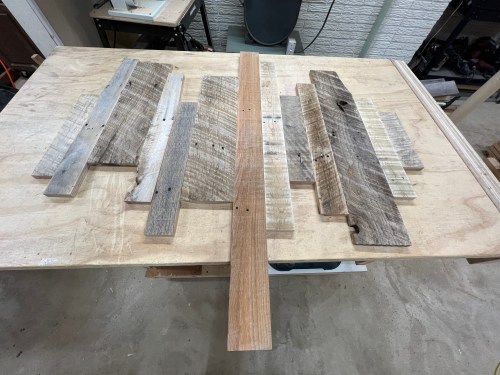
We picked through the wood leftover from the walls to find an assortment of pieces to use for the backer.

I played around with the arrangement, shortened the length of some boards, and ran everything through the planer to get an even thickness. Then I stained five of the boards and glued the pieces together in several steps.


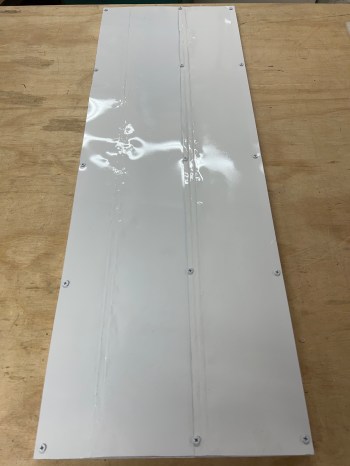
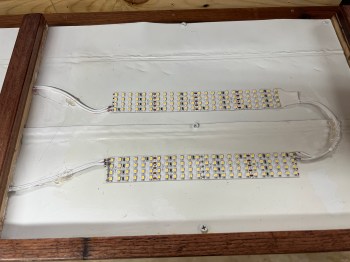
To make the pull-out part of the shelf I started with a piece of plywood. I cut up scrap sheet metal I’d saved from the drop ceiling light fixtures I removed from my shop several years ago. This would be used behind the LEDs so any excessive heat they produced wouldn’t burn in to the plywood or create a fire hazard. I screwed the metal to the plywood and used some white spray paint on it.
I cut scraps of wood for sides and a divider. Then I cut some slots through them, using the table saw, where the light covers would slide in. I also made a face for this piece, leaving it oversized for now. I attached the sides and front face with glue and pocket hole screws from what will be the top side.


I bought two 10-inch full extension drawer slides and attached them to the top. I filled the pocket holes with plugs and wood filler. Sanding would be done later.


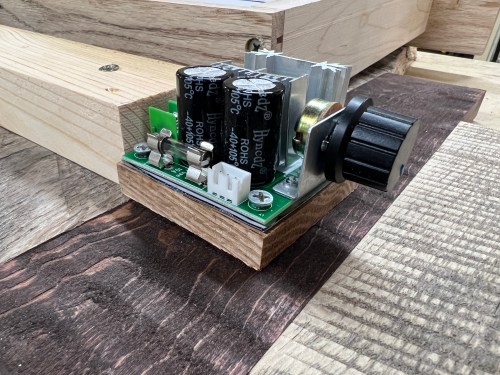
Perhaps the most nerve-wracking step of the project was cutting and positioning a scrap piece of 2×4 to the backer boards. This will hold everything together and allow me to attach the surrounding pieces of the shelf. Thankfully I remembered to cut one end short before glueing and screwing (from both sides) it in place. This is where the dimmer knob and board went. I cut a scrap piece of wood (later replaced with thinner plywood) to prop it up a bit so the knob would be easier to handle.

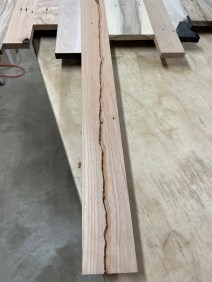
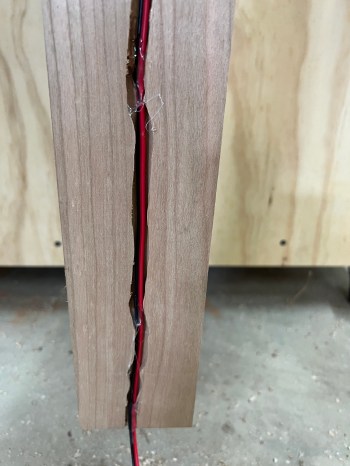
I put a straight bit in my trim router and cut a channel down the back of the longest backer board. This will be where the power cable runs down and behind the loveseat. It’ll never be seen, so I wasn’t concerned with how it looks.
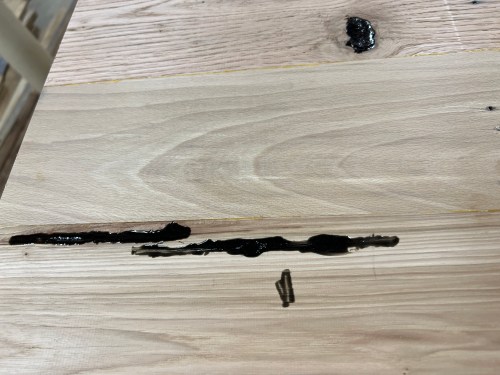
Next I milled up some boards and glued them to make the top and bottom of the shelf. I tinted clear epoxy with black paint and filled in some holes. I also milled and cut a couple of pieces for the sides of the shelf.


I trimmed all of those to the sizes I’d need. Then I cut rabbets in the sides so the edges of the top and bottom wouldn’t be seen and there would be more support. To fit properly around the dimmer switch I had to notch out some areas and drill a hole for the knob shaft.


I was able to do a dry fit and then had to make a bunch of adjustments to make everything fit better. After a shitload of sanding I stained one coat of Red Mahogany.

The next morning I was able to glue and pin nail the bottom and left side to the backer. The top and right will be screwed in place in case I need to take things apart to troubleshoot or replace the electronics.

After giving the stain several days I masked off the dimmer board and used my paint sprayer to apply four coats of water-based poly.

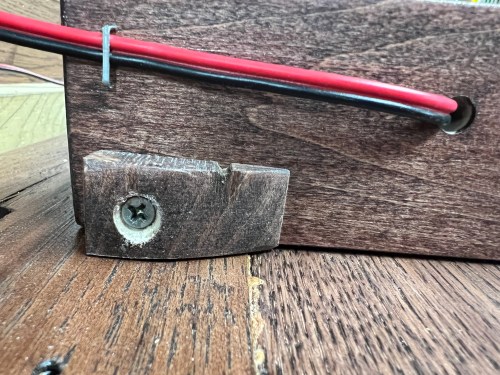
The next day I put in the LEDs and switch, wiring everything up. I had to make one more piece of wood that would trigger the switch when the “drawer” was pulled out.

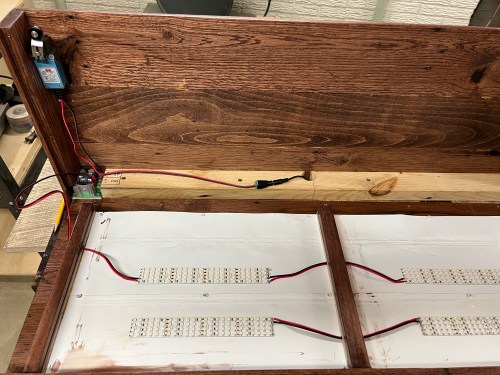


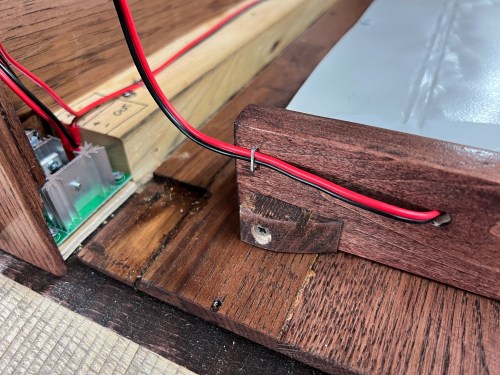
I painted the wires white. A bit of hot glue was used to keep them in place and provide strain relief. I also used hot glue down the back side to hold the wire in the groove.


The final step was to figure out where to cut in keyhole slots.

This turned out to be a bad idea. The shelf was just too heavy. So I drilled all the way through the cross beam and drove two long lag screws through and in to the studs.

We picked up some cool pieces at the Freeland Antique Mall for decor.


Here’s a night comparison which shows how bright the LEDs can be.


This video shows everything in action.
This project ended up being a lot more work than I expected. I’m really happy with the results though and we now have a one-of-a-kind piece in our living room.
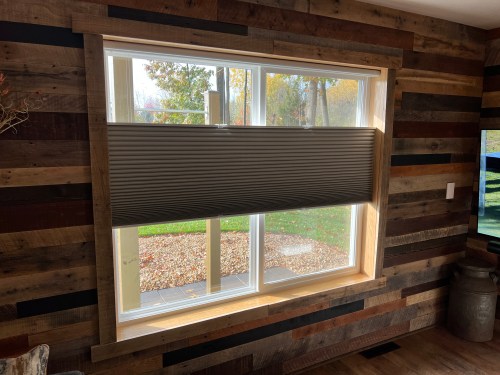
We got a blackout top down bottom up shade made from SelectBlinds for the window, which came in over the weekend. They’re really easy to install. Now the living room is complete and I can focus on the kitchen remodel.

We bought an old milk can at an antique mall for the corner of the room too.

If you’d like the plans, you can download the SketchUp file on GitHub.

[…] way it turned out. I do have one more thing I’m working on for the wall above the loveseat (done now!) and hope to finish this week or next. Then I’ll be spending the rest of my sabbatical to […]
LikeLike
Really cool! I like how the long piece hides the power to the outlet.
I built some floating shelves last year, and ran an outlet behind each shelf, so I could jam in a smart LED strip. Now I have the lights come on automatically at dark, so walking into the room at night doesn’t necessarily mean the lights have to be turned on 🙂
LikeLiked by 2 people
That corner is perfect..loved this.
I like how you insert the descriptions of adjustments as you go along..the unexpected and how you handle it.
LikeLiked by 1 person
[…] Pallet Wood Art/Shelf With a Hidden Dimmable LED Light […]
LikeLike
[…] in the back of our minds. Sometime after doing a couple of walls in the living room and making a shelf/light out of pallet wood, Brandi suggested we do a wood backsplash. We looked up some examples, I thought about the process, […]
LikeLike