I completed this project well over a month ago and was waiting to finish the final project from Quarterly Maker Box #MKR08 so I could them together in the same post. Decided I’ll give that project a post of its own though.
This project from the box was titled Building My Shop in 1:48th Scale.
Making quick and dirty models from simple materials is one of the most important steps in building for me.
What could be simpler, cheaper, and more available than cardboard and hot glue? I’ve actually used cardboard boxes to create some cases for a couple of my electronics projects, the Garage Temperature Sensor & Monitor and Sound Card Oscilloscope.
I created a time-lapse while assembling the model of Adam’s Cave. I tried a completely new angle by attaching the camera to the light above my dining room table.
It can be hard to get details from a time-lapse, so here are some pictures of the completed model.
This week’s challenge can be taken in several different directions. I decided to snap a quick photo and play around with simple image adjustments based on the following idea from the post.
You could also opt for a series of shots showing the same place, person, or object in slightly different light (literally or figuratively, as the case may be).
First, the original.
After duplicating the image several times in the iOS Photos app (to keep the original) I started making quick edits. I spent 5-10 minutes on this and decided to go with 4 variations.
I don’t know anything about touching up photos, but this shows how much you can change the story your images tell with very little effort.
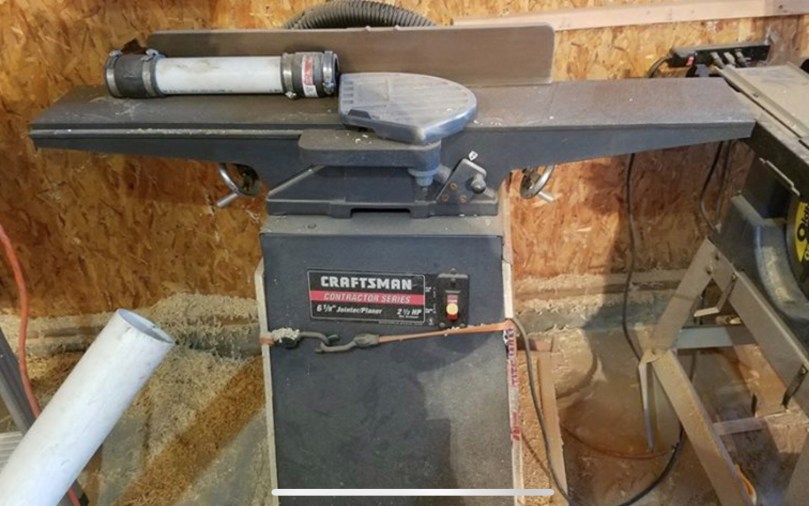
When I saw this Craftsman Jointer (model 113.232240) for $100 I couldn’t pass it up. Most jointers I’ve seen in the $100-150 range are shit.
The manual is dated 5/97, so it’s over 20 years old. My Internet searching suggests this model originally sold for around $600. The only original parts that appear to be missing are the side panels, blade gauge, and push block. I bought a couple of push blocks this summer at an estate sale, so I’m set there.
They don’t make many tools like this anymore. This thing is a beast of solid metal and weighs a ton. Here it is in my basement. It had some rust, but otherwise it was in good shape and the rolling base was built well.
I went at the table and fence with a razor blade, which easily removes most of the surface rust. I sprayed everything with WD-40, let it soak, and then did another pass with the razor blade. I love that feeling when you start to see some shine.
Then I cleaned up the stand and the base. The leveling feet in the stand were rusted and beat to shit, so I trashed them. Drilled holes in the base and properly attached it to the stand with bolts instead of tape like the previous owner.
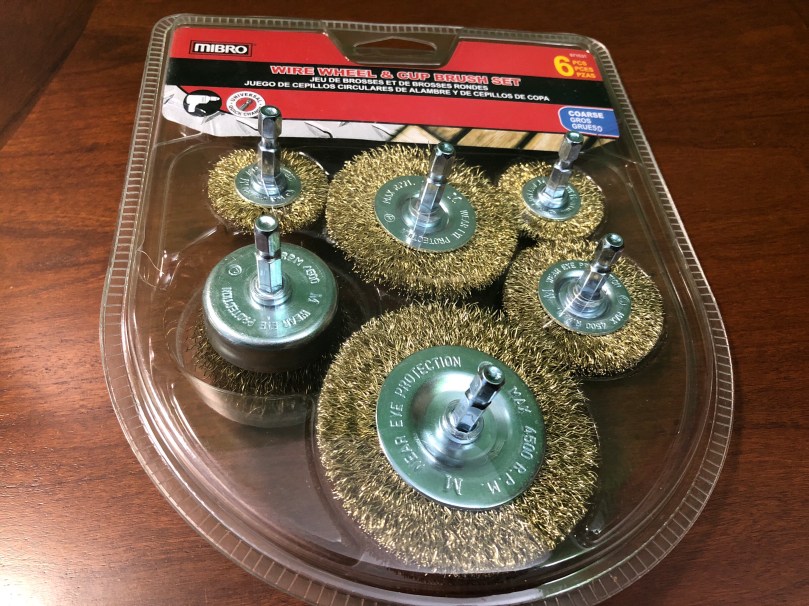
I replaced the bolts on the belt guard which were rusted really bad. A little elbow grease and a brass brush cleaned up some of the rest on other bolts throughout the stand. I removed the screws for the switch and ran them over a brass wire wheel on the grinder. I also took apart a lot of the fence assembly one piece at a time and used the brass wire wheel to clean it all up.
To continue cleaning the tables and fence I had to order a brass wire brush set for the drill. Everywhere in the area sells the steel wire set, which eats at the metal too much.
Look how much of a difference a few seconds makes.
I went over both tables and the fence with the brass brush and followed up with a polishing wheel. Then I put it all back together and applied a coat of paste finishing wax to those surfaces. Look at that shine! I love that you can see the reflection of the blade guard.
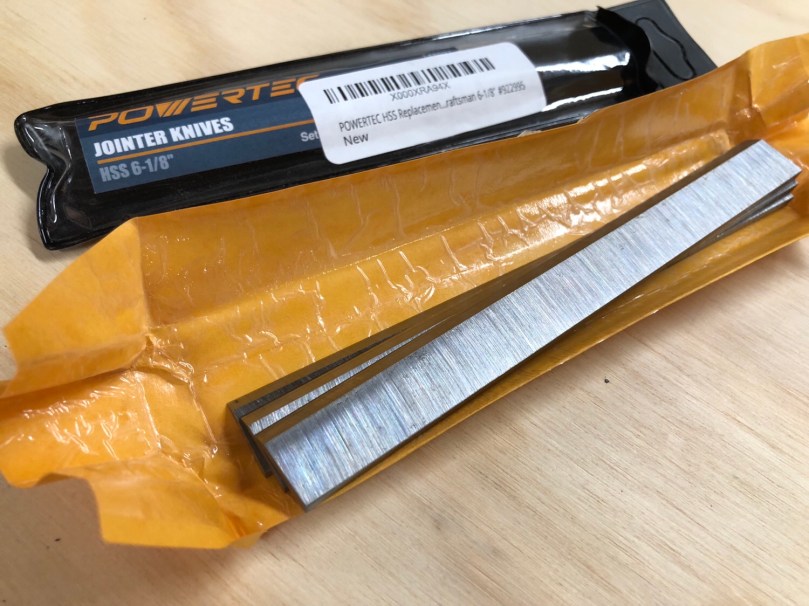
I could see a few nicks in the knives and they had some rust. I’d rather start with a fresh set, especially since they were only $17.
I’m going to add a dust/chip collection chute I can hook my hose up to, but that’ll be an upcoming project. Will wait until that’s completed to do final adjustments to the tables and knives since I’ll be removing the tool from the base several times.
I’m behind on a bunch of electronics subscription boxes and projects, so I’m just going to list out a bunch of stuff. None of its worthy of its own post anyway.
One of the projects for HackerBox #0023 was to build a custom antenna out of PVC, copper wire, and glue. I did a pretty piss poor job of drilling my holes in a straight line (as you can see in the picture), but I connected it to a microcontroller and was able to scan for Wi-Fi networks in the area. Success?
I need to make more time to work with the pan and tilt system built with HackerBox #0024.
The camera that came with the project can only do 640×480, which sucks. One of these days I’ll connect the system to a Raspberry Pi and use one of my unused Pi cameras instead. Would be neat to mount at the front door to track anyone who comes to the house when I’m not home. The face tracking stuff is pretty awesome, even with the shitty camera. Here’s a really rough video of it.
I had to modify the code a lot to get everything working and I put it all on GitHub. If I work on this project more I’ll update that repo.
There wasn’t a lot to do with HackerBox #0025. It was mostly a soldering and look at the blinky lights project. Here are the 3 badges I made. I turned the star and rectangle (with a “Let’s Party” sticker in place) into pins and gave them to my nieces.
The skull badge has a buzzer on it, so I wrote some code (it’s on GitHub) to make it play the Star Wars theme and display some light animations.
Over the holidays I messed with AdaBox006 a bit. The 38 I posted on my birthday was a light painting taken with the Slow Shutter iOS app. I got it the light paintbrush working on both the Circuit Playground classic via a customized Arduino sketch and on the Circuit Playground Express through MakeCode. Both are available in the adabox-006 repo on GitHub. Using MakeCode is a fun way to program and I think it’s going to change the way people learn. Look at how simple and visual that version of the program is…
I did solder everything for HackerBox #0026 and verified some of the functionality, but haven’t done much with it. It was one of the most fun projects so far from HackerBoxes because of how many components were on this PCB. I find soldering to be so relaxing and satisfying.
My supply of resistors (and diodes) has grown over the last year. The previous solution worked well, although the screw tops were a pain. I’d been doubling up some containers if the values were close enough, but had run out of cylinders, so starting chucking parts into the box.
It went to Jo-Ann Fabrics again and was planning to buy another set of the cylinders, but they were either out of stock or don’t carry them anymore. So I found some organizers made for thread which don’t have adjustable compartments like a lot of these things. That was important because I don’t want the parts jumping compartments. The size looked good for the length of the resistors too, even if they had to be angled to fit. The cardboard label cards will make it easy to shuffle things around, compared to sticker labels, if I get a new resistor value.
I think it’s a nice improvement and will save time when I go digging for a resistor. I’m sure I can find a use for the cylinder organizer in my workshop, maybe for small screws.
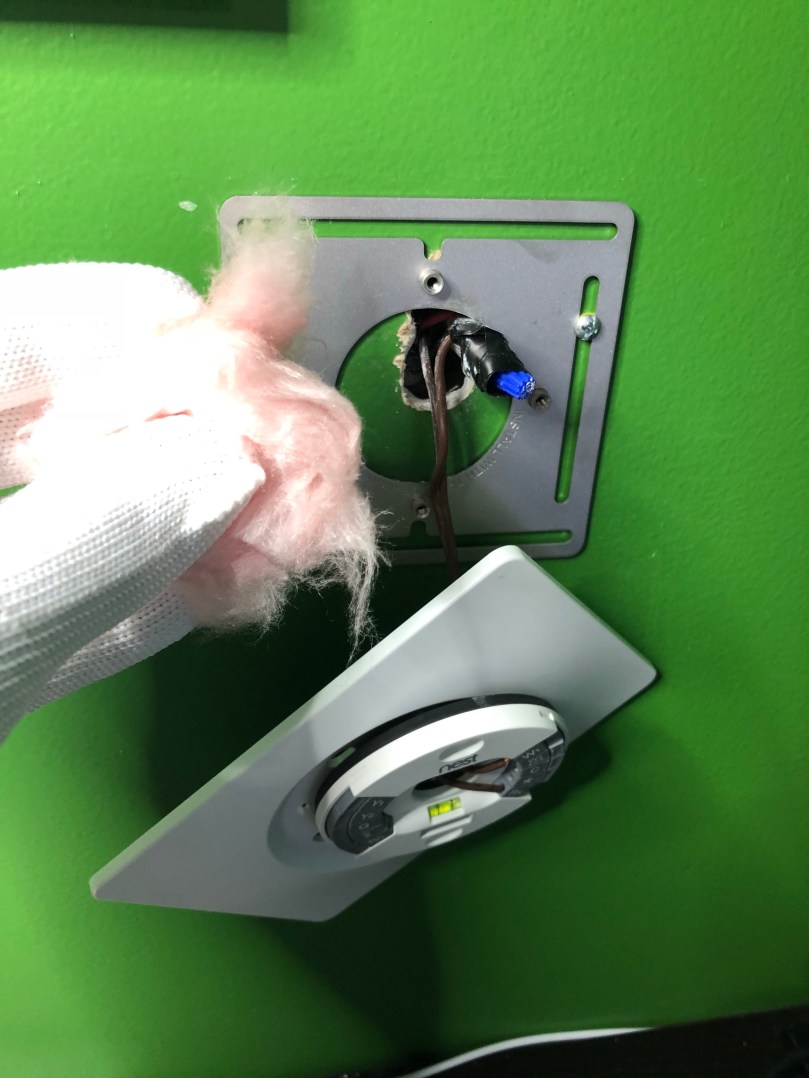
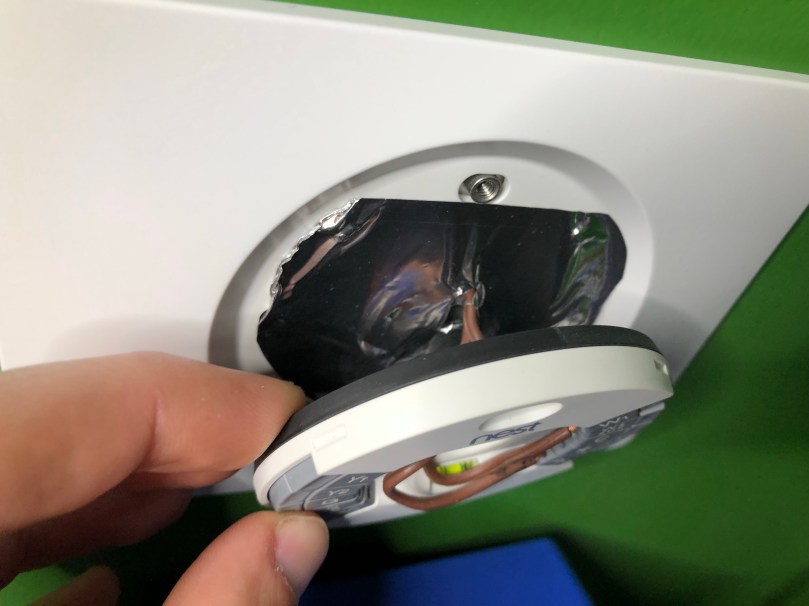
A couple of weeks ago I noticed the heat was staying on in my office pretty much all day. I have a boiler heating system with 4 zones and the thermostat that controls the front of my house is right there in the office. I wasn’t cold in there, but the thermostat wasn’t reporting that the temperature ever reached what I had set.
I pulled the Nest off of its mounting bracket, put my hand near the hole in the wall, and I could feel cold air. So I grabbed an instant read meat thermometer and stuck it through the hole. The reading inside the wall was 10° lower than a foot away from the wall.
For a simple fix, I stuffed a bunch of insulation through the hole and covered it with foil tape.
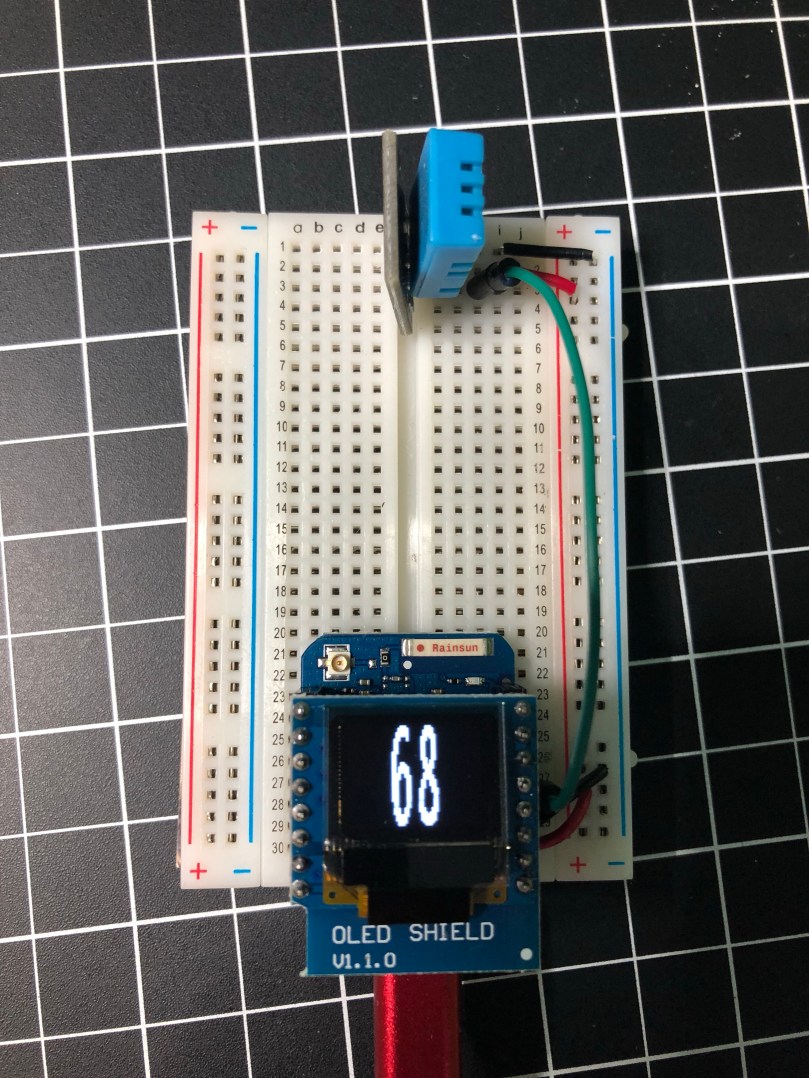
In order to monitor the effectiveness of the fix, I put together a quick temperature sensor instead of having to turn the meat thermometer on and off.
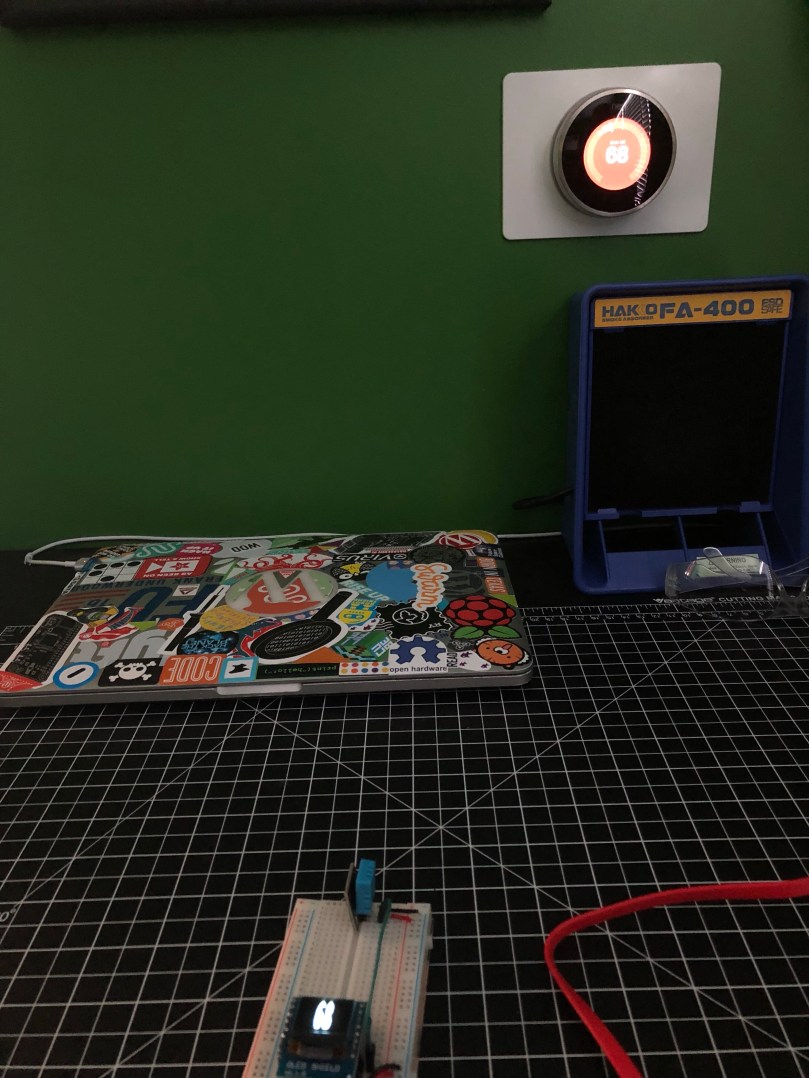
It worked!
Two or three years ago I had the opposite problem with this heating zone; it was always cold in the office. By feeling the wall I came to the conclusion that the thermostat had been installed right next to one of the pipes sending hot water to the upstairs registers. Brilliant! The fix that time was moving the thermostat over between the next set of studs.
After these two issues with the placement of a thermostat, I starting thinking. Why are we still basing our heating on measurements taken from a set position on the wall? With the Internet of Things we can do this much smarter.
Imagine each zone in the house having one or more mobile temperature sensors. Like the simple circuit pictured above, but in a small case. These could be battery-powered or plug-in. Windows, wind, and location of the sun can all affect the heating of different areas of a house. Being able to move the temperature sensor with you as you make dinner in the kitchen or watch a movie from your recliner would be awesome.
These temperature sensors would wirelessly report the temperature back to the home automation system. I use Home Assistant, which would make it easy to set the heating schedules for each zone. If a zone needed to go on or off based on the sensor’s reported temperature and the schedule’s target temperature, it would wirelessly trigger a relay module at the furnace or boiler. The relay would wire in to the furnace/boiler system in place of the wires that come from each thermostat and it would never know the difference. None of these pieces are hard to build and the parts are cheap.
This is all just something that ran through my mind as I was fixing my heating issue. I don’t have plans to build such a system, but if I did I could ditch my 4 Nest thermostats. For someone who works at home, often at random times of the day, I think Nest thermostats are overrated anyway because the learning and auto scheduling system doesn’t do much for me.
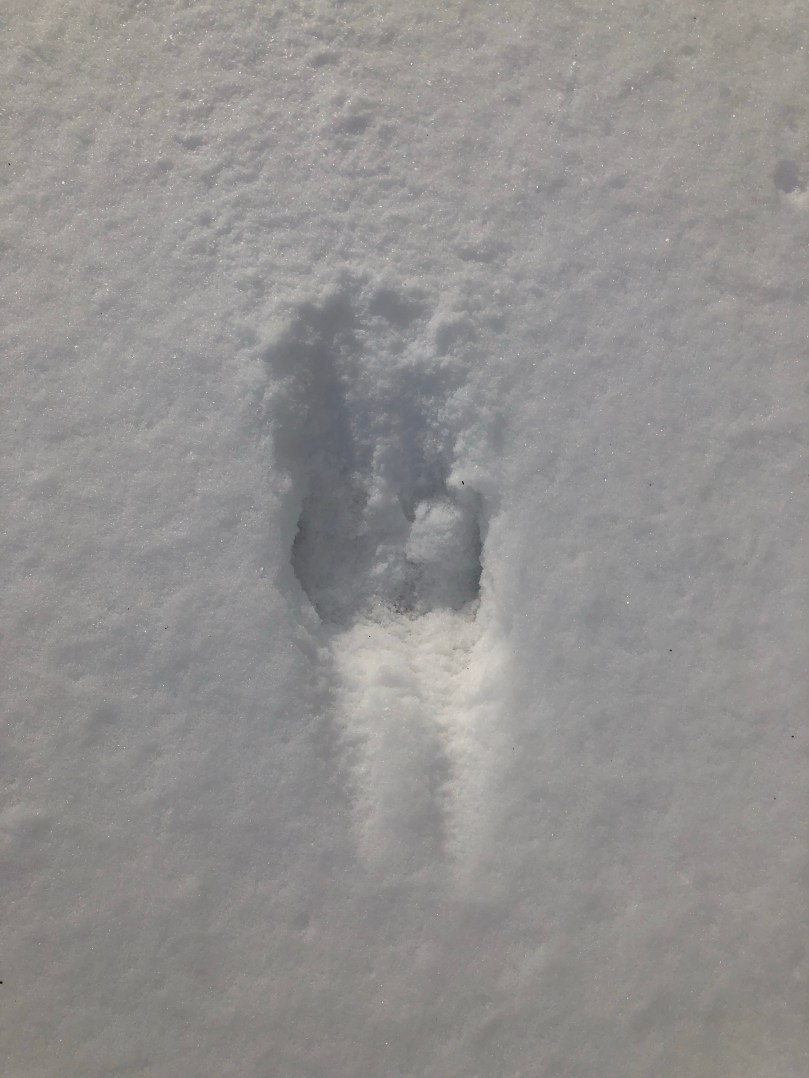
When I see an animal track in the snow I often think back about 20 years to rabbit hunts with my Dad. When you’re in the middle of the woods during winter, you don’t hear a thing. Or at least that’s how it is in Northern Michigan. Sound doesn’t travel because the trees are covered in snow. It’s the purest silence I’ve ever experienced. Maybe the most peaceful bit of nature too.
I’ve needed a workbench in my new shop since day 1. I finally got tired of working on the floor and built one. I created a little video to show the various ways I’ll use the table.
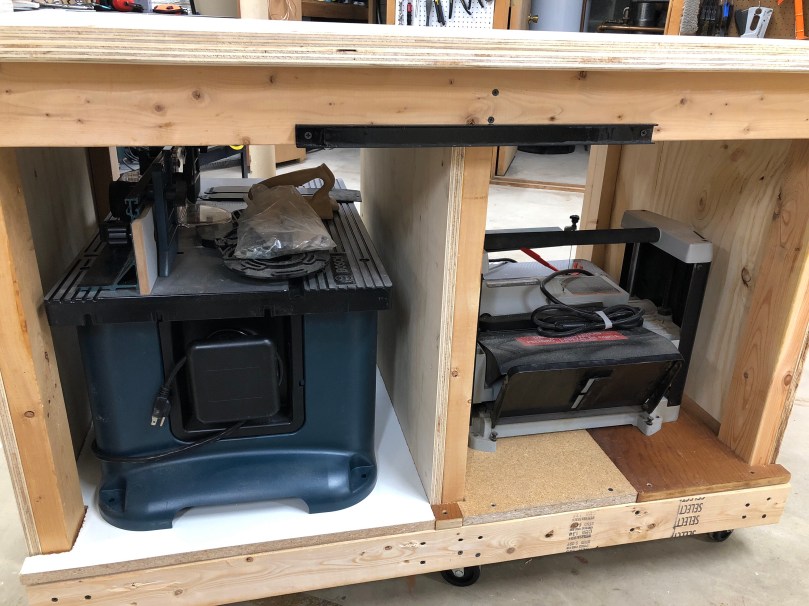
Let me walk you through the build. First I measured a bunch of stuff, especially the tools I wanted to be able to store under the table.
Then I did a quick framing mock-up to visualize the size.
The size felt pretty good so I spent some time in SketchUp. The model is free at my new Misc Plans repo on GitHub. Not everything in the model and the screenshot below are exact to the finished workbench, but they’re a good starting point if you want to build something similar.
At Home Depot I had them cut a sheet of 3/4″ plywood into 3 equal pieces. At home I trimmed them to size for the walls. Then I started cutting 2x4s (all from the walls I took down) for the rest of the framing. I set up an extended fence and a stop block on my miter saw.
That really made quick work so I didn’t have to measure each piece.
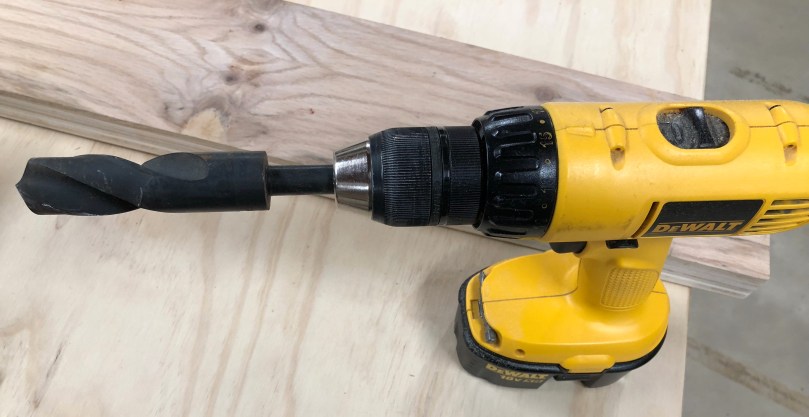
Then I countersunk and drilled holes, glued, and screwed the pieces of 2×4 to create a frame on each wall.
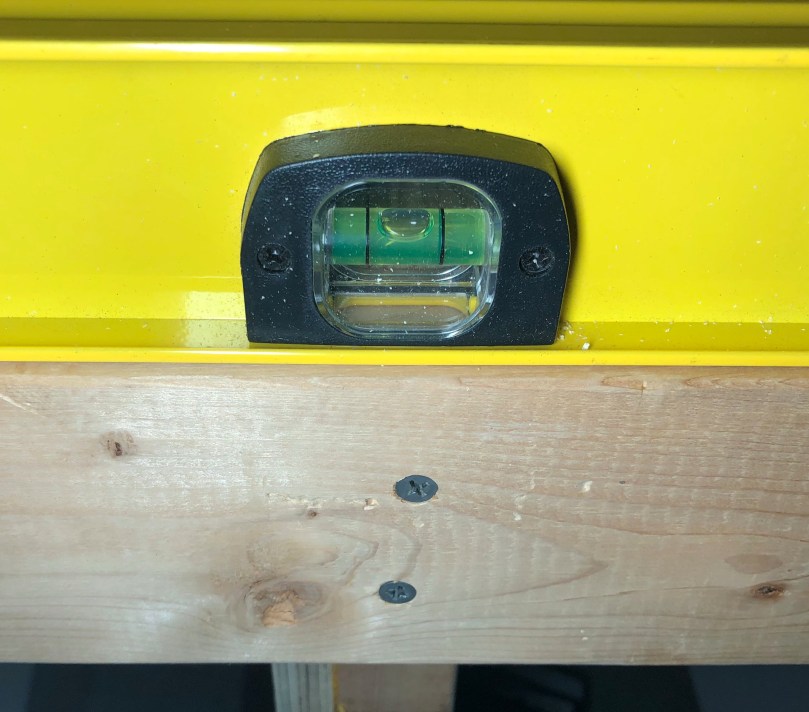
After assembling the 3 walls I started to line everything up and attached the rails. I was thrilled when the power went out as I was finishing up. Some battery lights allowed me to finish the remaining screws.
I couldn’t believe how level it turned out, considering my basement floor is not very flat.
Here’s the frame after the power came back on.
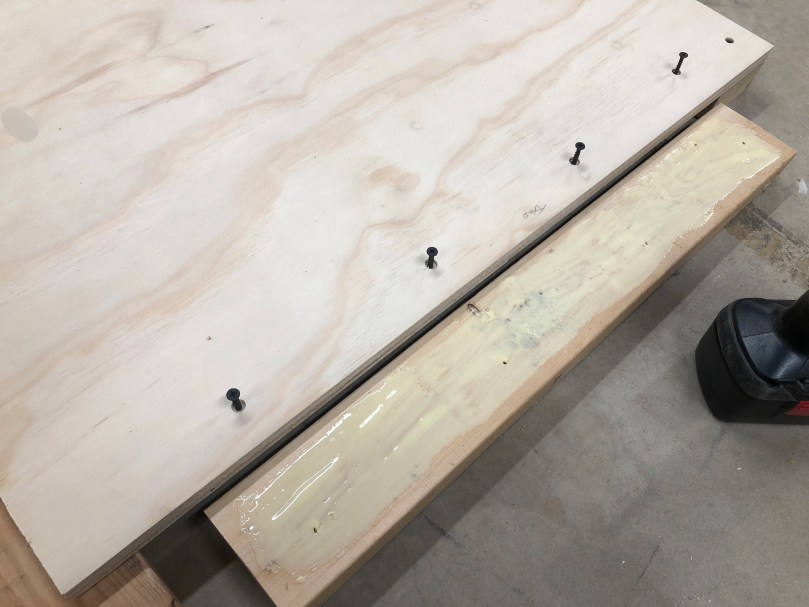
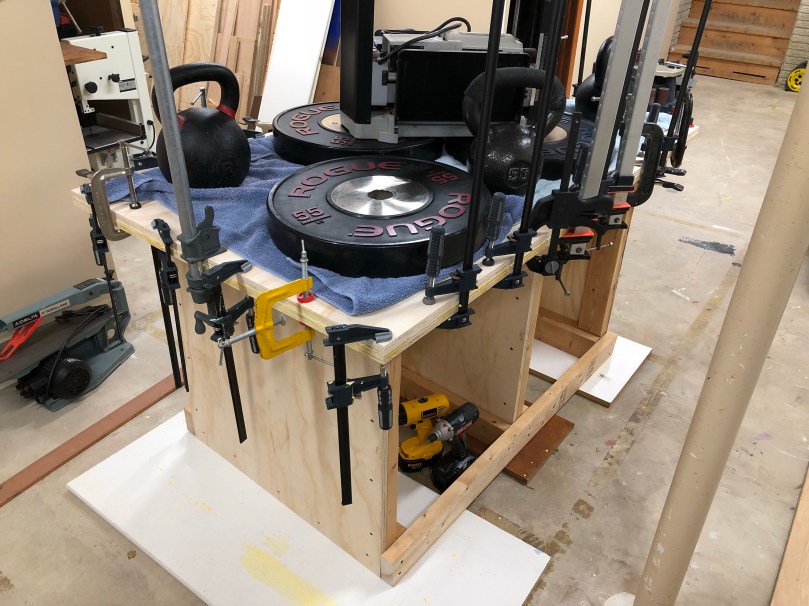
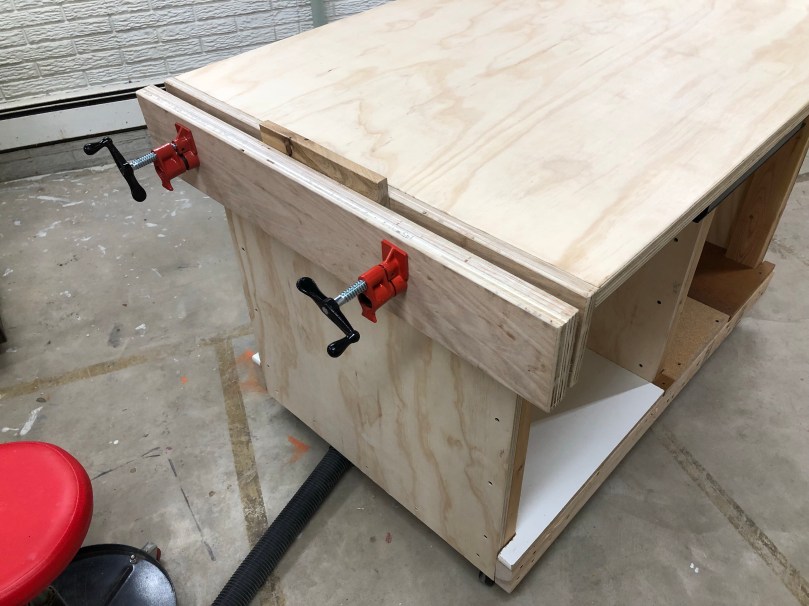
I made another trip to Home Depot. I had them cut 2 sheets of plywood to my exact size of 3×5 feet. Then I used a lot of glue (2-3 times what is pictured below) to laminate the two sheets together. I wanted a solid surface for the top of the workbench.
I hauled a bunch of weights down from the garage and clamped all around the edges. I think I counted 35 clamps being used! There weren’t many left on my clamp racks.
With so much glue, I gave it almost a full day to dry. Then I used my router with a flush trim bit along the edges to even up the 2 pieces, followed by a round over bit to get rid of the sharp edges
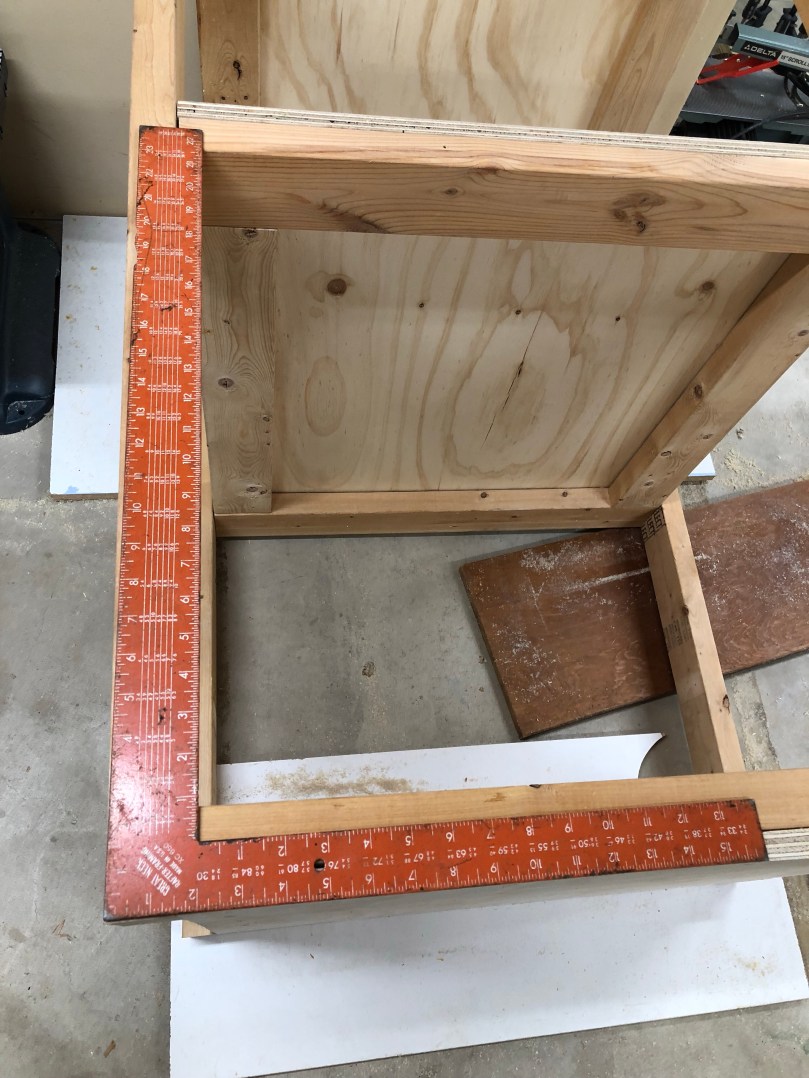
It was time to attach the top to the frame. I measured out the placement on one end and when I went to check the other side it was way off. I hadn’t been testing squareness enough or not in the right places when I assembled the frame. This is where experience and learning the order of operations is important. I measured the diagonals and there was about an inch difference between the two. Shit!
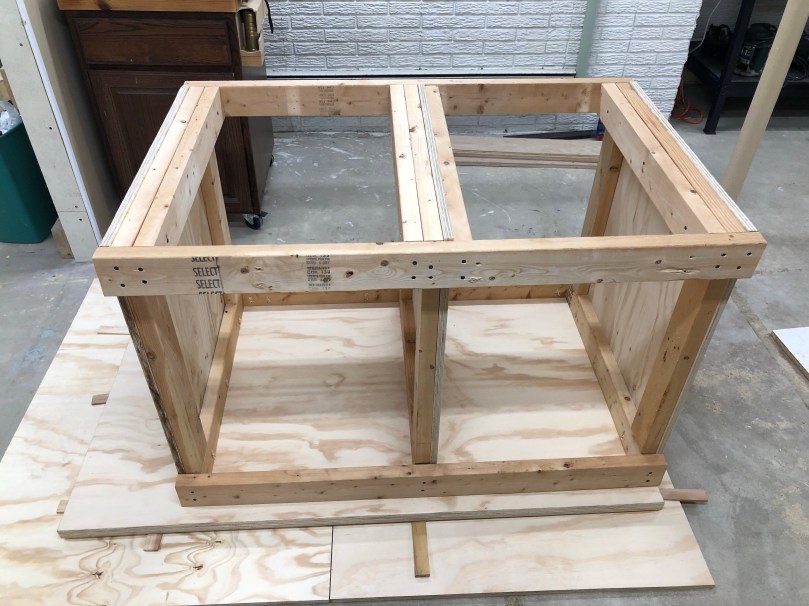
I pushed and pulled on corners and racked my brain trying to think of a good way to square it up. I decided to take the frame apart and go with a different approach. I’m glad I didn’t glue those rails to the walls!
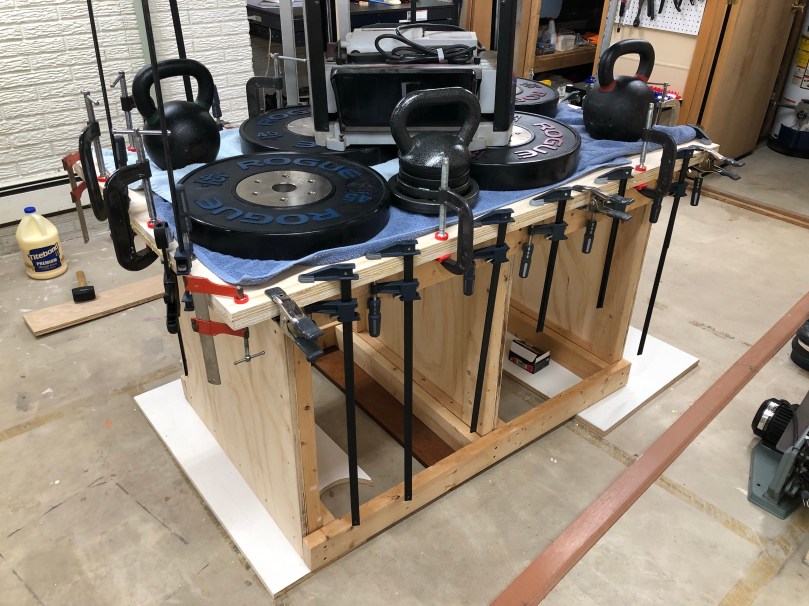
I gave the entire table top a coat of paste finishing wax before moving on. Then I laid out some scrap plywood on the floor, set the top down, and used shims to get it as level as I could. I placed the wall on the end and used pocket holes to screw it in. From there I measured out where the two rails should go and I pocket holed them to the top as well. Then in went the other two walls. I made sure to test squareness of the walls to the top. I didn’t need to test horizontal square because I knew the top was a good rectangle. This was a much smoother way to assemble the frame.
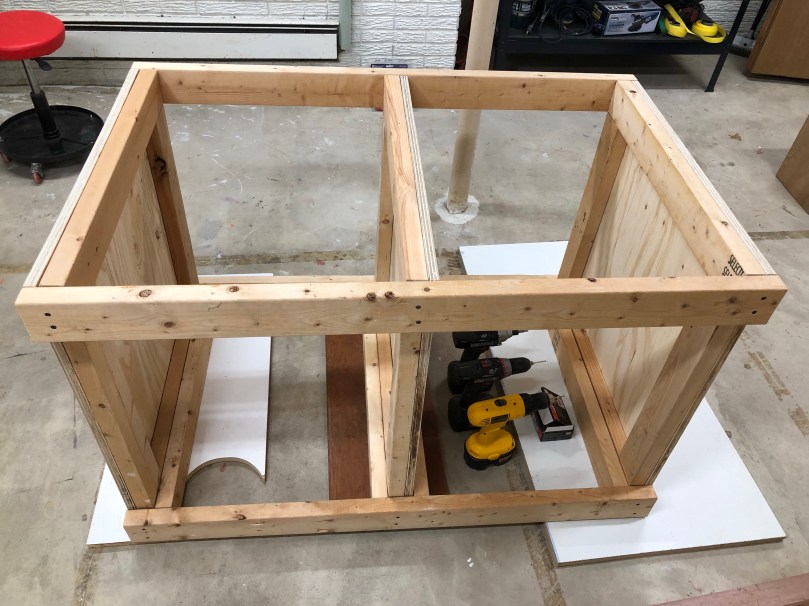
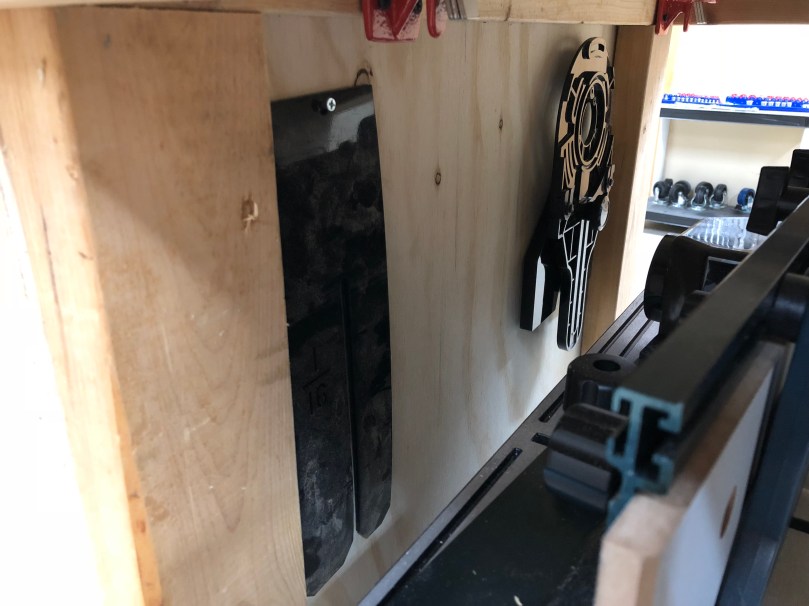
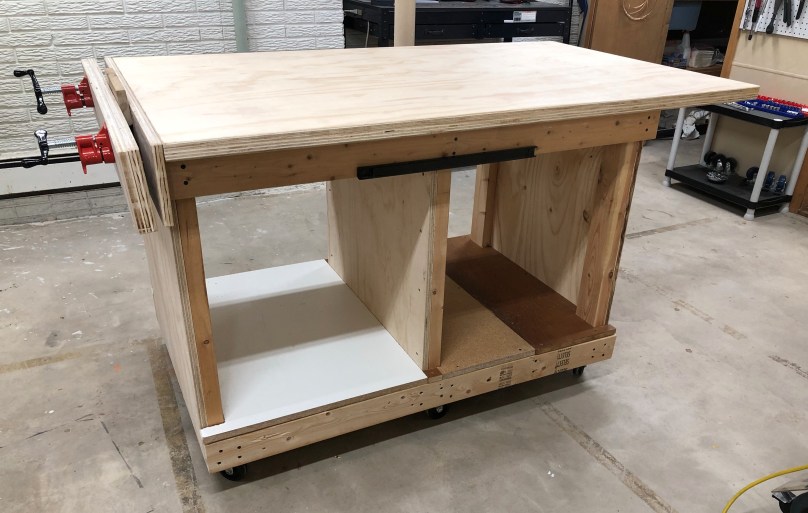
Before flipping it over, I attached 6 castors (3 locking along one side) to the frame. I cut a bunch of scraps to make shelves and attached a metal tool holder on each side.
I had already cut and laminated the pieces for the vise somewhere earlier in this whole process. I also used flush trim and round over bits to route the edges of the vise jaws. In the drill press I used a Forstner bit to make the holes in the vise jaws for the pipes. Then I screwed the single vise jaw to the table and used its holes as guides to continue the holes through the side wall of the table. Unfortunately the Forstner bit wasn’t long enough to go all the way through. I found this massive drill bit in a box of bits my Dad had given me with the drill press. It wasn’t quite wide enough so I still had to file the edges of both holes.
Here is a close-up of one piece of the pipe clamp under the table. I used the drill press to put some holes in the clamp and then locked it in place with some screws.
Hung up a couple of router accessories on the wall.
Voila!
Isn’t she pretty? I don’t know how I lived without this thing. I’ve already used it so much. If you’re putting together a shop I recommend starting with a proper workbench before anything else.
I bought this 36″ paper roll and holder so I could cover the table when doing a glue up or a quick paint or stain job.
It would stick out too much on the sides though. I also didn’t like the mounting method and how much space it would take up under my 12″ overhang. So I found a place on the floor under my tool bench (that you see in the picture) to put it.