After organizing my hand tools, I wanted to continue with the same ideas to organize the clamps I’ve acquired. Everything should have a place to go with first order retrievability being key. Here are all of the clamps laid out (I actually got some more and replaced the pipes in the 2 on the left) before I started building anything.

As you can see, I’ve acquired a lot of clamps in a short period of time. Almost all of these were bought at estate sales, which I’ve found is a great way to build out a workshop for the first time. Once I could see everything I started looking at different ideas on Google Images and YouTube. Woodworkers love their clamps and there is no shortage of clamp rack designs out there.
The first rack I wanted to build was for all of the F-style bar clamps. I measured various parts of my clamps and scribbled some sketches.

Then I mocked up a rough prototype on a scrap of 2×4.

I felt good about the design, so I moved over to some 1/2″ plywood. I cut a piece to 48″ by 2 5/8″. Then I drew a line 1 9/64″ from the long edge and marked every 1 5/16″. Let me explain some of those weird measurements. Maybe you can read from the prototype, but I wanted the slots to be 9/32″ wide since the widest bar on any of the clamps was about 1/4″. Drawing the long line at 1 9/64″ came from a 1″ gap from the edge and half of the 9/32″ hole. I wanted about 1″ between each slot, but it was quicker to mark every 1 5/16″ because I had almost 40 marks to make. This also give me a little fraction of extra space between clamps. It probably makes more sense when you see how I drilled the holes.

Then I drew lines to the edges of each hole, stood it up on the table saw, and cut out each slot.

You’ll notice the end of the slots aren’t rounded anymore. This is because I worked it across the blade after cutting to the second side of each hole. I took it to the router table and did a quick rounding of each slot’s opening so it will funnel the clamp in.
Most of this designs for this type of clamp use slots like this. Some people store these clamps with the bar at the back of the rack though and the pads facing out towards you. I decided on the opposite with the bars facing out because it makes it easier to grab a clamp.

I did do something I hadn’t seen by mounting this piece with a 1 5/8″ gap between it and other piece of plywood screwed to the wall. This allows the clamps to hang over the edge instead of having the top pad of each clamp sitting on top of the wood. Each clamp is a lot more secure like this and shouldn’t accidentally pop off. You can see this better in the video at the end.
The second rack I built was for miscellaneous clamps. There isn’t much to explain about this. For the C clamps I cut a bunch of 1″ inch holes and then sliced down the middle on the table saw. By the way, get a set of Forstner bits if you don’t have them; they work infinitely better than spade bits.

The 3rd rack would be for the wider bar clamps and pipe clamps. It was built similar to the first rack, but I wanted the bars/pipes along the wall because they’re heavy and would have more support this way. The holes I drilled for these slots were with a 1 1/4″ Forstner bit and 2.5″ from one hole center to the next. This little sketch shows I wanted the edge of the hole to be an inch from the back and each slot would be 3 inches deep. I left the rounded back side of each slot since it’ll mostly be used for pipe clamps. I once again used the router table on the slot openings and finished it off on the spindle sander since everything was a bit rougher with the thicker 3/4″ plywood and wider slots.

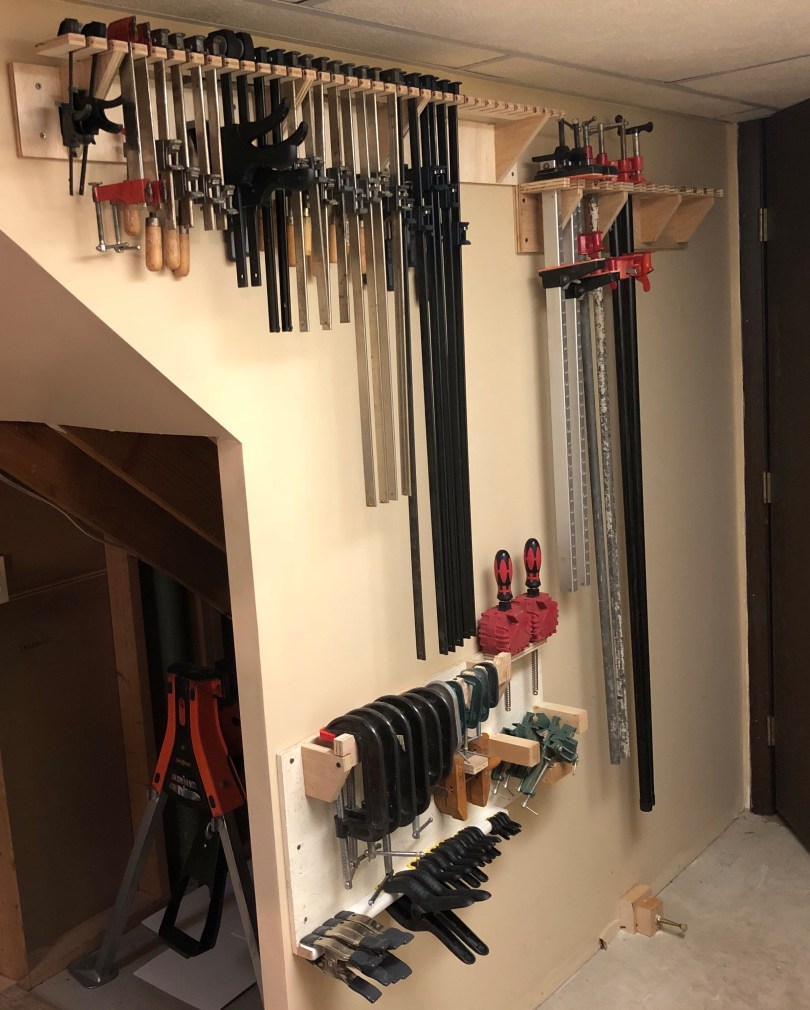
It’s hard to get a good picture since this is basically a hallway area, but here’s the finished project.

Check out the video below for a walk through of how it all ended up.

[…] the post about my DIY clamp storage racks last week I mentioned getting most of my clamps at estate sales. I put together a solid collection […]
LikeLike
[…] clamps at an estate sale, though I have no idea what they would be used for. Pretty cool to add to my collection, especially since they didn’t charge me anything for […]
LikeLike
[…] If you want to see how I built my clamp racks, check out my post. […]
LikeLike