
When I saw this Craftsman Jointer (model 113.232240) for $100 I couldn’t pass it up. Most jointers I’ve seen in the $100-150 range are shit.
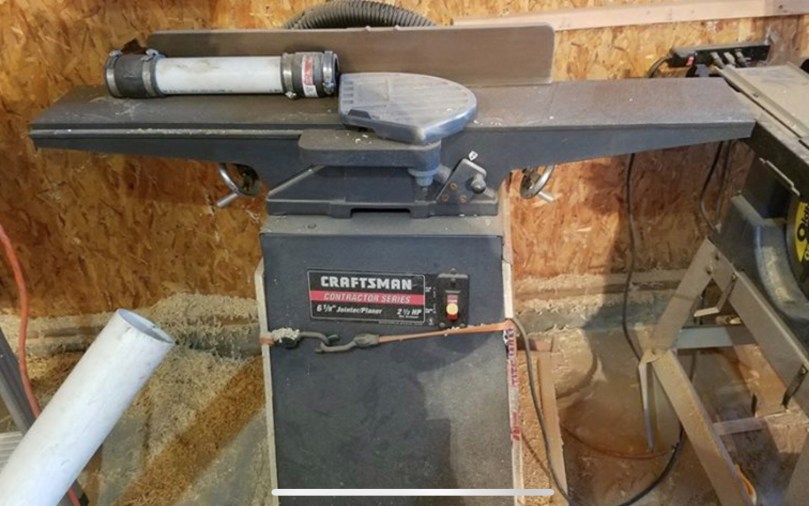
The manual is dated 5/97, so it’s over 20 years old. My Internet searching suggests this model originally sold for around $600. The only original parts that appear to be missing are the side panels, blade gauge, and push block. I bought a couple of push blocks this summer at an estate sale, so I’m set there.
They don’t make many tools like this anymore. This thing is a beast of solid metal and weighs a ton. Here it is in my basement. It had some rust, but otherwise it was in good shape and the rolling base was built well.

I went at the table and fence with a razor blade, which easily removes most of the surface rust. I sprayed everything with WD-40, let it soak, and then did another pass with the razor blade. I love that feeling when you start to see some shine.

Then I cleaned up the stand and the base. The leveling feet in the stand were rusted and beat to shit, so I trashed them. Drilled holes in the base and properly attached it to the stand with bolts instead of tape like the previous owner.

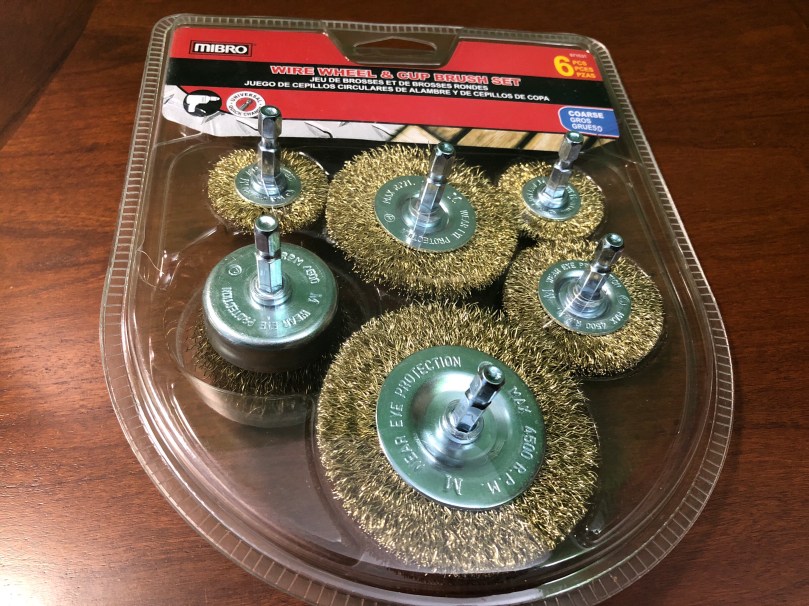
I replaced the bolts on the belt guard which were rusted really bad. A little elbow grease and a brass brush cleaned up some of the rest on other bolts throughout the stand. I removed the screws for the switch and ran them over a brass wire wheel on the grinder. I also took apart a lot of the fence assembly one piece at a time and used the brass wire wheel to clean it all up.

To continue cleaning the tables and fence I had to order a brass wire brush set for the drill. Everywhere in the area sells the steel wire set, which eats at the metal too much.
Look how much of a difference a few seconds makes.

I went over both tables and the fence with the brass brush and followed up with a polishing wheel. Then I put it all back together and applied a coat of paste finishing wax to those surfaces. Look at that shine! I love that you can see the reflection of the blade guard.

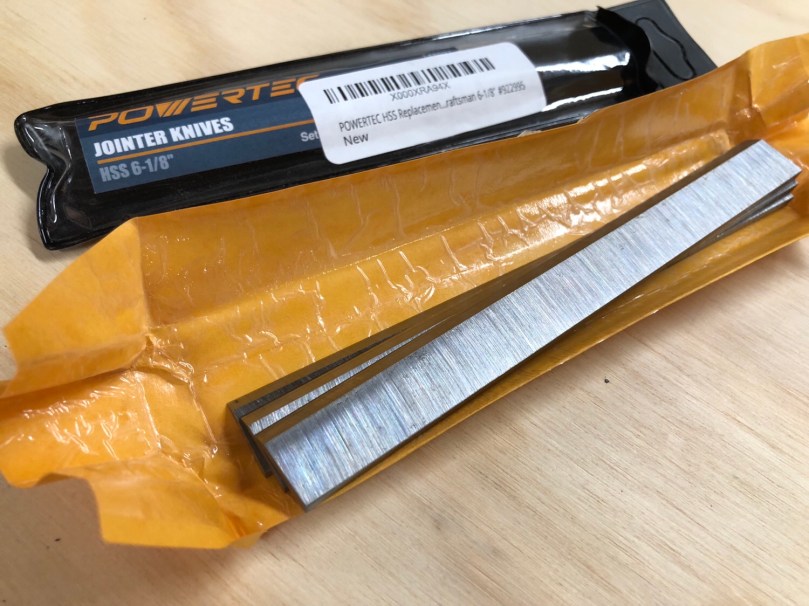
I could see a few nicks in the knives and they had some rust. I’d rather start with a fresh set, especially since they were only $17.
I’m going to add a dust/chip collection chute I can hook my hose up to, but that’ll be an upcoming project. Will wait until that’s completed to do final adjustments to the tables and knives since I’ll be removing the tool from the base several times.

Nice find and great clean up on it
LikeLike
[…] took a few weeks after restoring the Craftsman Jointer (model 113.232240) to get going on a dust/chip collection upgrade, but now it’s done. It’s not going to […]
LikeLike
[…] I bought this used Craftsman jointer, cleaned it up, replaced the blades, and built dust collection. It pairs so well with a planer and even the table saw. I’ve used it a lot more than I expected. […]
LikeLike
Hi Nick – nice job on the restoration!
I inherited the same model from my father. Mine sustained some damage to the trunnion that swivels with the face for adjustment. I haven’t had any luck finding a replacement part. All of the Sears parts online sites don’t carry the part, and I haven’t found one in trawling Ebay. I am considering contacting a foundry to try sand-casting a replacement, since welding the part together isn’t an option (It is high-zinc content pot metal.) Any suggestions are welcome.
LikeLike
Hi Nick!
Came across your blog while trying to find info on the 113.232240. Mine is a little newer, 2000. I’m having difficulty finding replacement blades. When I bought the machine, there were no blades in it so I can measure to find replacements. Where did you get blades and do you possibly have a parts number? Thanks!
LikeLike
There is a list to the blades in the post, but here it is.
You should be able to do a Google search for the model number and find a manual with part numbers.
LikeLike
I have the exact model and am restoring it as well. I was hoping you had some luck with the blade installation tool? I saw something in the manual but can’t find anything online about it.
LikeLike
Nope, I did it by hand.
LikeLike