It took a few weeks after restoring the Craftsman Jointer (model 113.232240) to get going on a dust/chip collection upgrade, but now it’s done. It’s not going to win any beauty awards, but it’s functional and works awesome. Not bad for making it up as I went.
The previous owner had installed these two side panels and basically let everything fall to the bottom of the stand. Not sure how well it worked, but I knew I could do better.
I figured I could build some type of chute that would fit up between the motor and the bottom of the machine.
My first idea was to create some type of cardboard model that I could reference for building a real box. This was a terrible idea trying to work up under the machine and as soon as I took it out, it basically fell apart.
Then I had an idea to cut up this popcorn tin and build the dust chute out of it.
I’m still not sure how I managed to keep all my fingers or not even draw a single drop of blood; those edges get extremely jagged and sharp.
In the mean time I made a trip to Home Depot and found some PVC pieces that would work with my dust collection hose.
The tin pieces worked ok, but I wasn’t confident in the duct tape holding up, especially as a means of keeping it connected to the stand. It was not a wasted effort though because I ended up using the pieces as you’ll see in the video.
While working on this project, I realized I really enjoyed the engineering process and solving problems when I made a mistake. I didn’t include footage of the mistakes but there were some epic ones. At some point in the build I stopped checking the fit inside the stand, so when I put it in place I shouldn’t have been surprised that some of the lower parts were smacking into the motor. After fixing that problem, the box for the power switch was in the way, which is why I moved it to the other side of the stand. Finally I forgot the motor needed to be raised in order to get the belt back on and there was no room to spare. Luckily this last problem was the easiest to fix because the motor mount could be flipped over, getting me 3-4 inches of clearance. I picked a 6 inch longer belt at AutoZone.
I imagine you could build something similar for most jointers. If you come across this post and it helps you out, let me know.
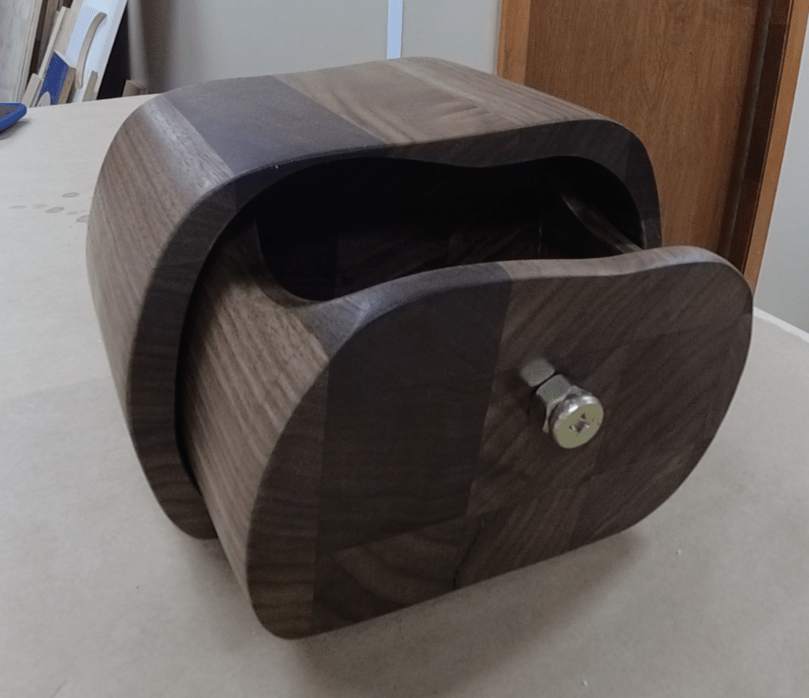
My buddy Kevin told me about a local shop that sells woodworking tools, supplies, and wood so we took a ride out to Barn Door Lumber Company a few weeks ago. While looking through their scrap pile, this butcher block cutoff caught my eye. It was roughly 1.5 x 6 x 23 inches.
I had bought a 10″ bandsaw (RIKON 10-305) not too long before and hadn’t used it yet.
I thought it would be a fun project to chop up this piece on the table saw, glue it into a large block, and then create a bandsaw box. That’s when you create a box out of a block of wood by only making cuts with a bandsaw. Seemed like a good project to get my feet wet. My sister’s birthday was coming up so it would also make a good gift.
The first thing I did was square up the edge.
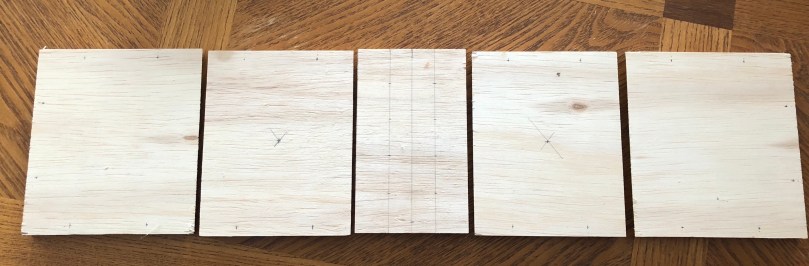
Then I sliced 5 pieces. I’m still learning a lot and forgot to set a stop block on my sled, which would have helped with getting pieces that were exactly the same size. The order of operations and remembering little tricks like that are what I’m struggling with the most on this woodworking adventure.
I glued each piece.
Quickly realized I only needed glue on 4 pieces. I told myself the last two pieces would just get a really good bond. Then I clamped everything together.
Of course I forgot to flip that last piece around so that 2 glued sides were facing each other. The glue side ended up facing out and I put 3 clamps in place before remembering. So I backed off the clamps and added a piece of parchment paper.
After squaring up an edge on the table saw I was ready for some work on the bandsaw. Or so I thought…
After another trip to the table saw I finally had my block of wood. I was ready for the bandsaw!
I quickly found out the blade that came with the saw wasn’t up for the job because it couldn’t make the turns I wanted. I got everything cut but there were several mistakes. Learned a lot though and had fun with the project.
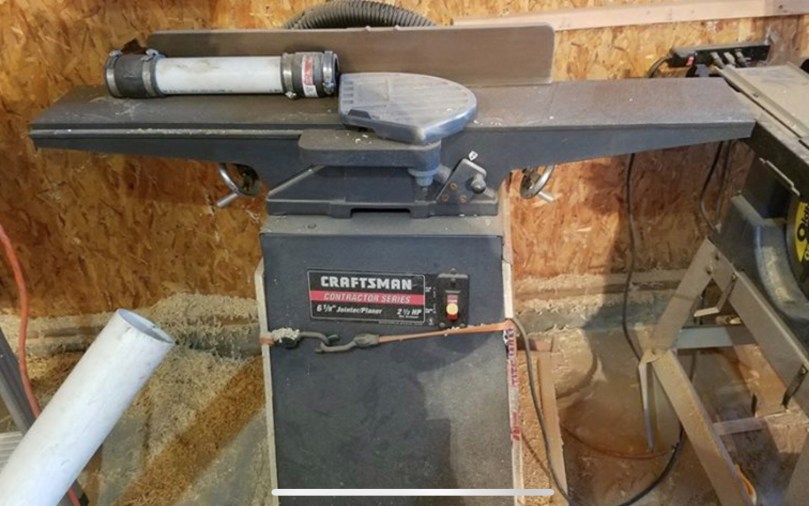
When I saw this Craftsman Jointer (model 113.232240) for $100 I couldn’t pass it up. Most jointers I’ve seen in the $100-150 range are shit.
The manual is dated 5/97, so it’s over 20 years old. My Internet searching suggests this model originally sold for around $600. The only original parts that appear to be missing are the side panels, blade gauge, and push block. I bought a couple of push blocks this summer at an estate sale, so I’m set there.
They don’t make many tools like this anymore. This thing is a beast of solid metal and weighs a ton. Here it is in my basement. It had some rust, but otherwise it was in good shape and the rolling base was built well.
I went at the table and fence with a razor blade, which easily removes most of the surface rust. I sprayed everything with WD-40, let it soak, and then did another pass with the razor blade. I love that feeling when you start to see some shine.
Then I cleaned up the stand and the base. The leveling feet in the stand were rusted and beat to shit, so I trashed them. Drilled holes in the base and properly attached it to the stand with bolts instead of tape like the previous owner.
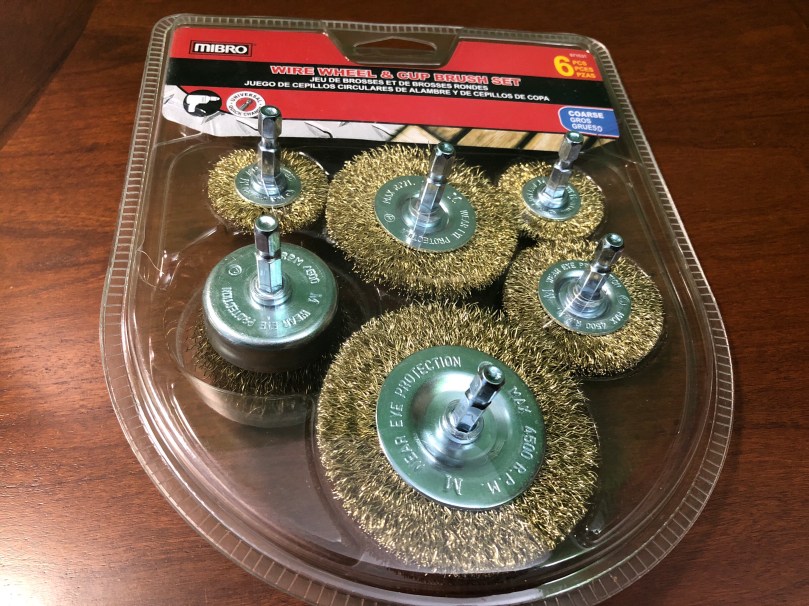
I replaced the bolts on the belt guard which were rusted really bad. A little elbow grease and a brass brush cleaned up some of the rest on other bolts throughout the stand. I removed the screws for the switch and ran them over a brass wire wheel on the grinder. I also took apart a lot of the fence assembly one piece at a time and used the brass wire wheel to clean it all up.
To continue cleaning the tables and fence I had to order a brass wire brush set for the drill. Everywhere in the area sells the steel wire set, which eats at the metal too much.
Look how much of a difference a few seconds makes.
I went over both tables and the fence with the brass brush and followed up with a polishing wheel. Then I put it all back together and applied a coat of paste finishing wax to those surfaces. Look at that shine! I love that you can see the reflection of the blade guard.
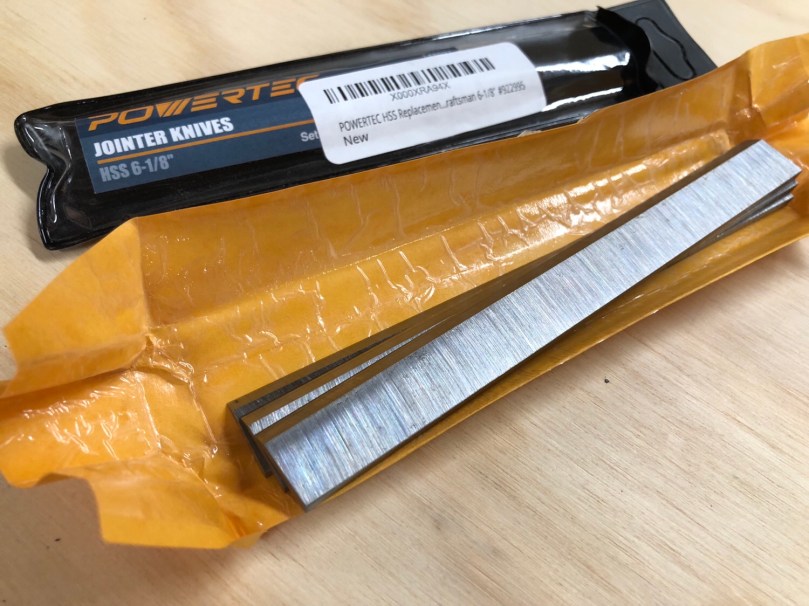
I could see a few nicks in the knives and they had some rust. I’d rather start with a fresh set, especially since they were only $17.
I’m going to add a dust/chip collection chute I can hook my hose up to, but that’ll be an upcoming project. Will wait until that’s completed to do final adjustments to the tables and knives since I’ll be removing the tool from the base several times.
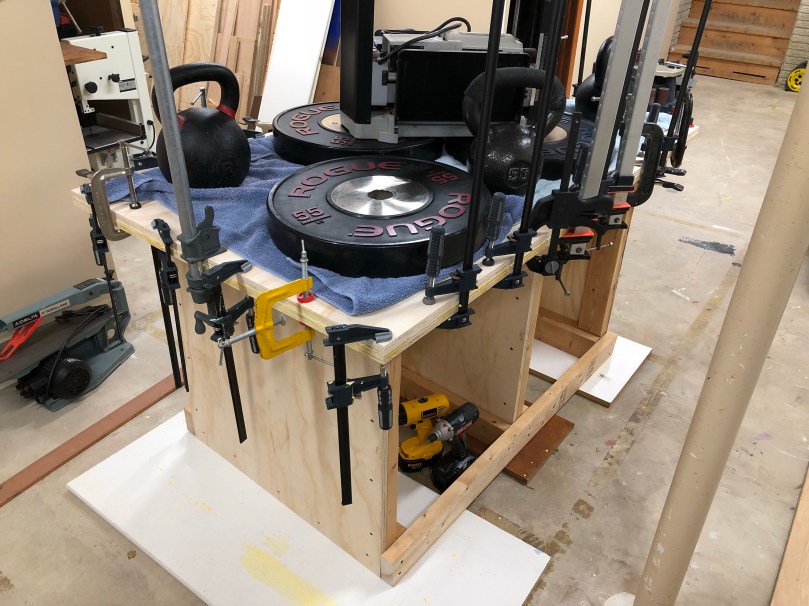
I’ve needed a workbench in my new shop since day 1. I finally got tired of working on the floor and built one. I created a little video to show the various ways I’ll use the table.
Let me walk you through the build. First I measured a bunch of stuff, especially the tools I wanted to be able to store under the table.
Then I did a quick framing mock-up to visualize the size.
The size felt pretty good so I spent some time in SketchUp. The model is free at my new Misc Plans repo on GitHub. Not everything in the model and the screenshot below are exact to the finished workbench, but they’re a good starting point if you want to build something similar.
At Home Depot I had them cut a sheet of 3/4″ plywood into 3 equal pieces. At home I trimmed them to size for the walls. Then I started cutting 2x4s (all from the walls I took down) for the rest of the framing. I set up an extended fence and a stop block on my miter saw.
That really made quick work so I didn’t have to measure each piece.
Then I countersunk and drilled holes, glued, and screwed the pieces of 2×4 to create a frame on each wall.
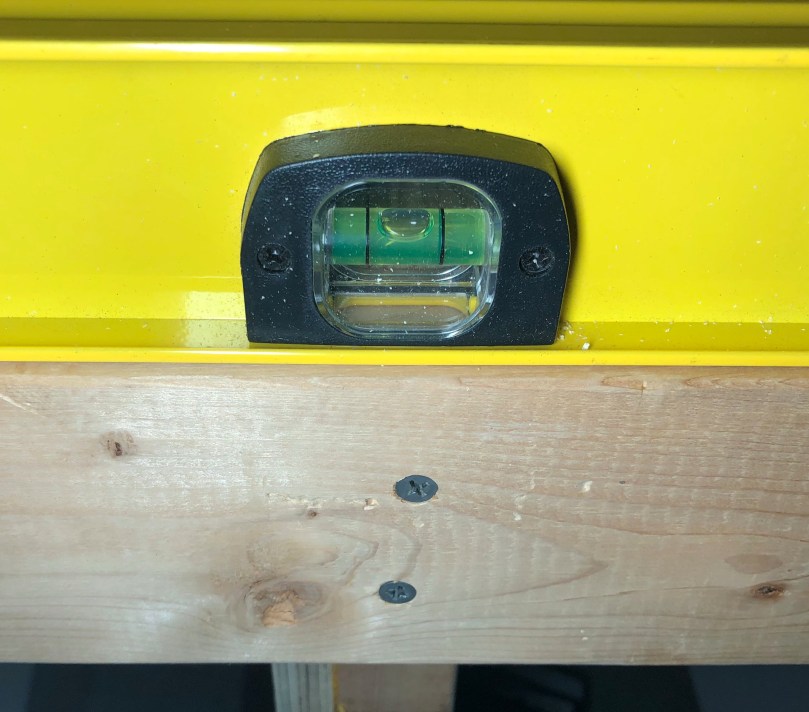
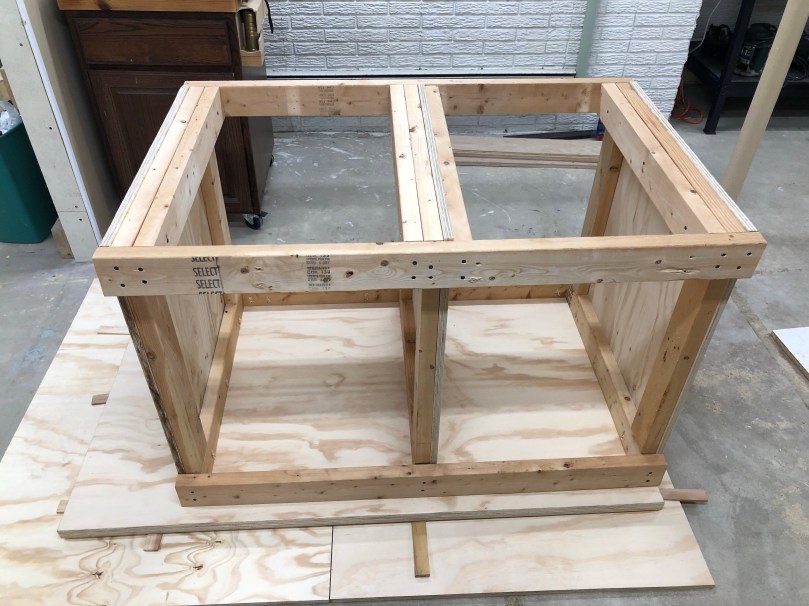
After assembling the 3 walls I started to line everything up and attached the rails. I was thrilled when the power went out as I was finishing up. Some battery lights allowed me to finish the remaining screws.
I couldn’t believe how level it turned out, considering my basement floor is not very flat.
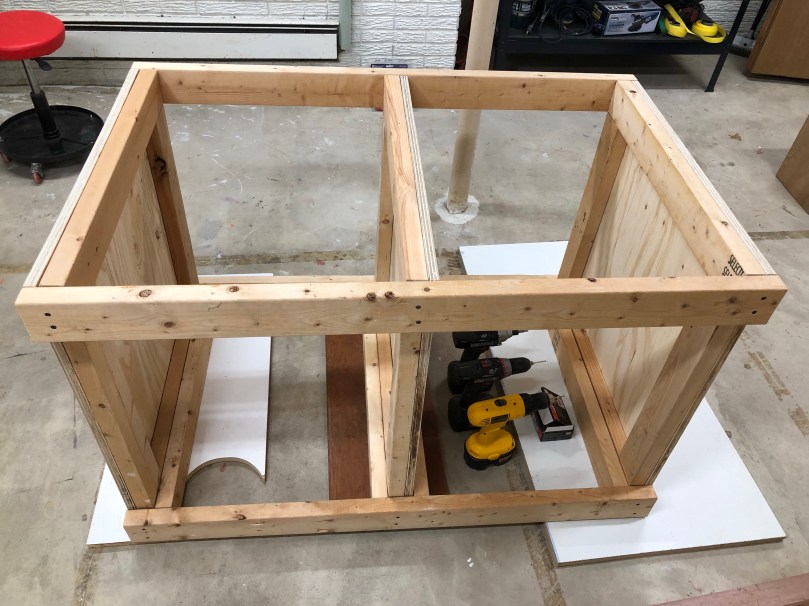
Here’s the frame after the power came back on.
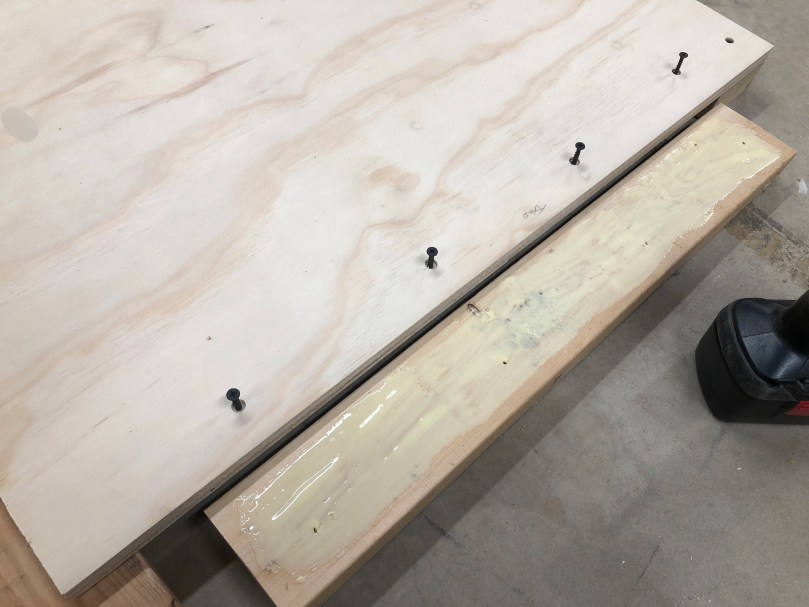
I made another trip to Home Depot. I had them cut 2 sheets of plywood to my exact size of 3×5 feet. Then I used a lot of glue (2-3 times what is pictured below) to laminate the two sheets together. I wanted a solid surface for the top of the workbench.
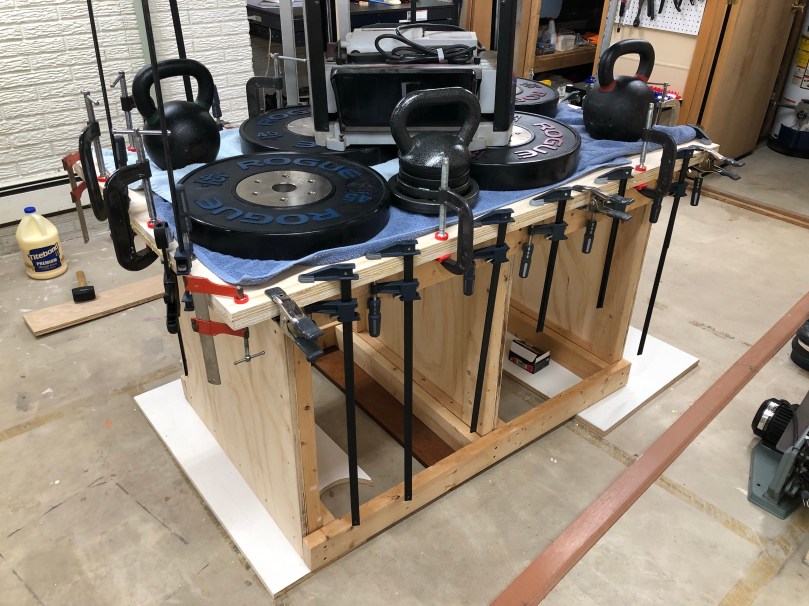
I hauled a bunch of weights down from the garage and clamped all around the edges. I think I counted 35 clamps being used! There weren’t many left on my clamp racks.
With so much glue, I gave it almost a full day to dry. Then I used my router with a flush trim bit along the edges to even up the 2 pieces, followed by a round over bit to get rid of the sharp edges
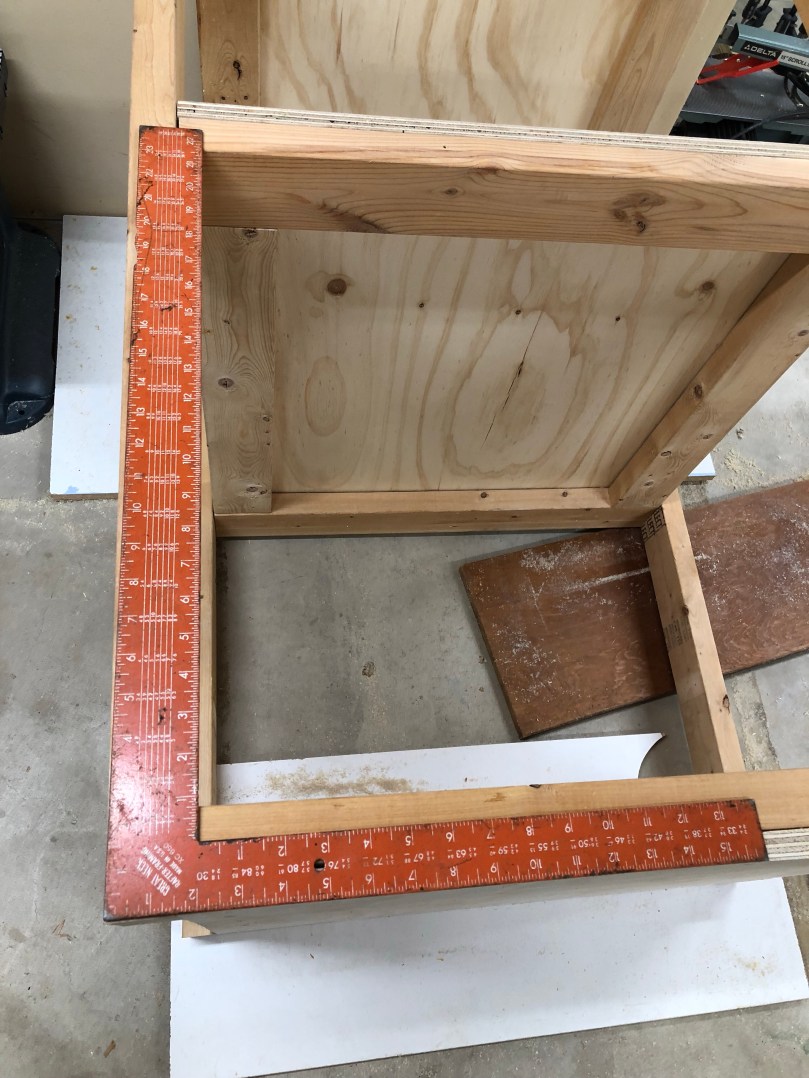
It was time to attach the top to the frame. I measured out the placement on one end and when I went to check the other side it was way off. I hadn’t been testing squareness enough or not in the right places when I assembled the frame. This is where experience and learning the order of operations is important. I measured the diagonals and there was about an inch difference between the two. Shit!
I pushed and pulled on corners and racked my brain trying to think of a good way to square it up. I decided to take the frame apart and go with a different approach. I’m glad I didn’t glue those rails to the walls!
I gave the entire table top a coat of paste finishing wax before moving on. Then I laid out some scrap plywood on the floor, set the top down, and used shims to get it as level as I could. I placed the wall on the end and used pocket holes to screw it in. From there I measured out where the two rails should go and I pocket holed them to the top as well. Then in went the other two walls. I made sure to test squareness of the walls to the top. I didn’t need to test horizontal square because I knew the top was a good rectangle. This was a much smoother way to assemble the frame.
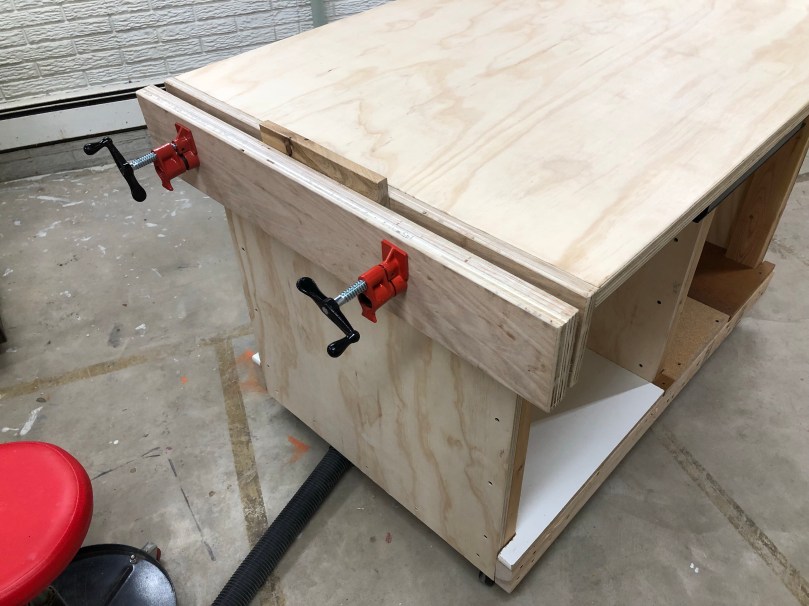
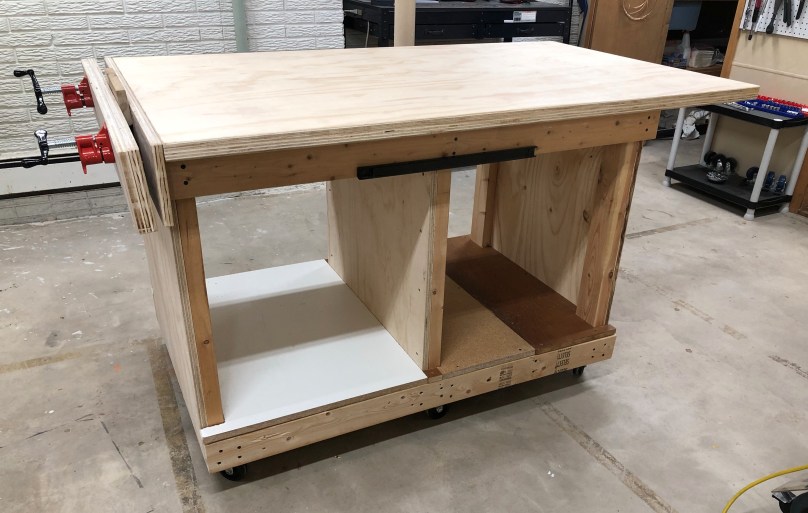
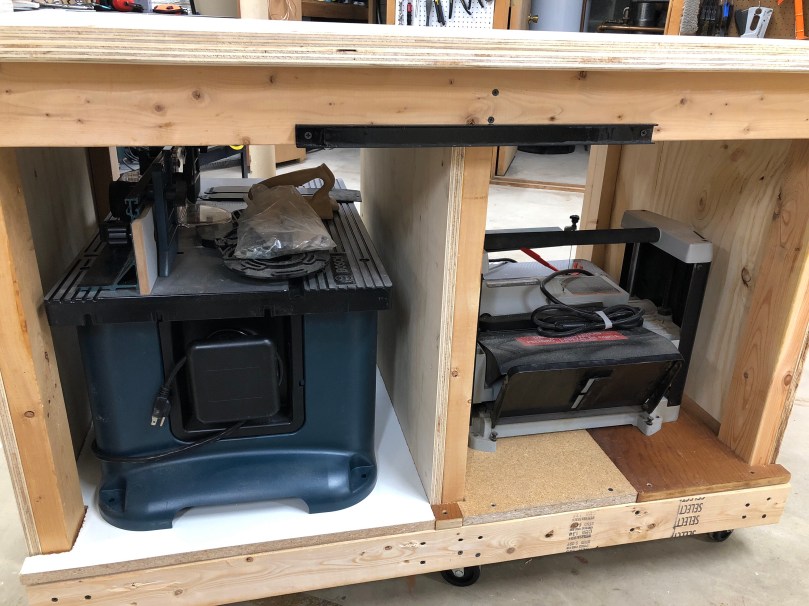
Before flipping it over, I attached 6 castors (3 locking along one side) to the frame. I cut a bunch of scraps to make shelves and attached a metal tool holder on each side.
I had already cut and laminated the pieces for the vise somewhere earlier in this whole process. I also used flush trim and round over bits to route the edges of the vise jaws. In the drill press I used a Forstner bit to make the holes in the vise jaws for the pipes. Then I screwed the single vise jaw to the table and used its holes as guides to continue the holes through the side wall of the table. Unfortunately the Forstner bit wasn’t long enough to go all the way through. I found this massive drill bit in a box of bits my Dad had given me with the drill press. It wasn’t quite wide enough so I still had to file the edges of both holes.
Here is a close-up of one piece of the pipe clamp under the table. I used the drill press to put some holes in the clamp and then locked it in place with some screws.
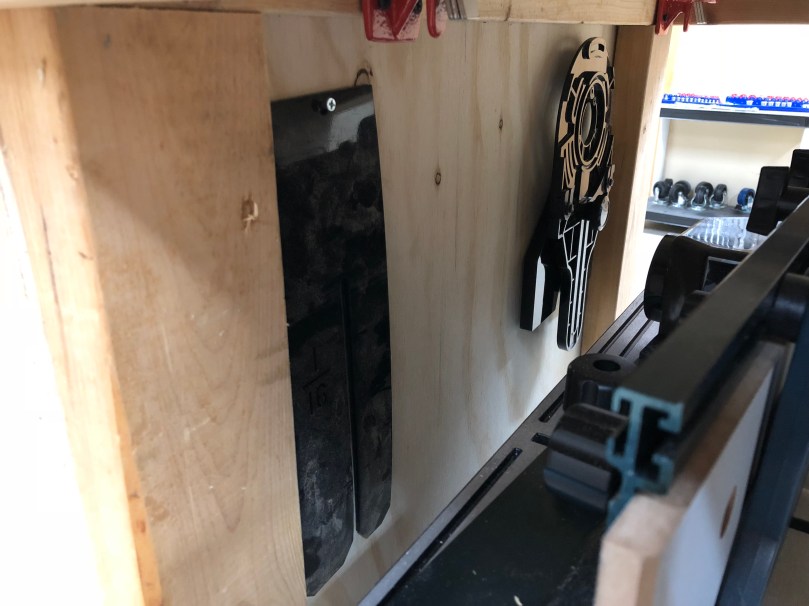
Hung up a couple of router accessories on the wall.
Voila!
Isn’t she pretty? I don’t know how I lived without this thing. I’ve already used it so much. If you’re putting together a shop I recommend starting with a proper workbench before anything else.
I bought this 36″ paper roll and holder so I could cover the table when doing a glue up or a quick paint or stain job.
It would stick out too much on the sides though. I also didn’t like the mounting method and how much space it would take up under my 12″ overhang. So I found a place on the floor under my tool bench (that you see in the picture) to put it.
It’s been too long since I posted about designing a speaker in SketchUp, but other projects moved up on my priority list between then and now. Well, over the last few days I finally made the speaker. In the end, the delay was worth it, because several of the steps were a lot easier with tools I’ve acquired over the last few months.
I did those tests around the same time I was designing the speaker. Several months passed before I touched any of the components again. Since I wanted to use my own buttons, switch, and LEDs I needed to figure out the best ways to connect in to various points on the board. This involved a lot of poking and prodding with a multimeter. I figured everything out and did all of the soldering and wiring prep work to help with assembly once the box was built.
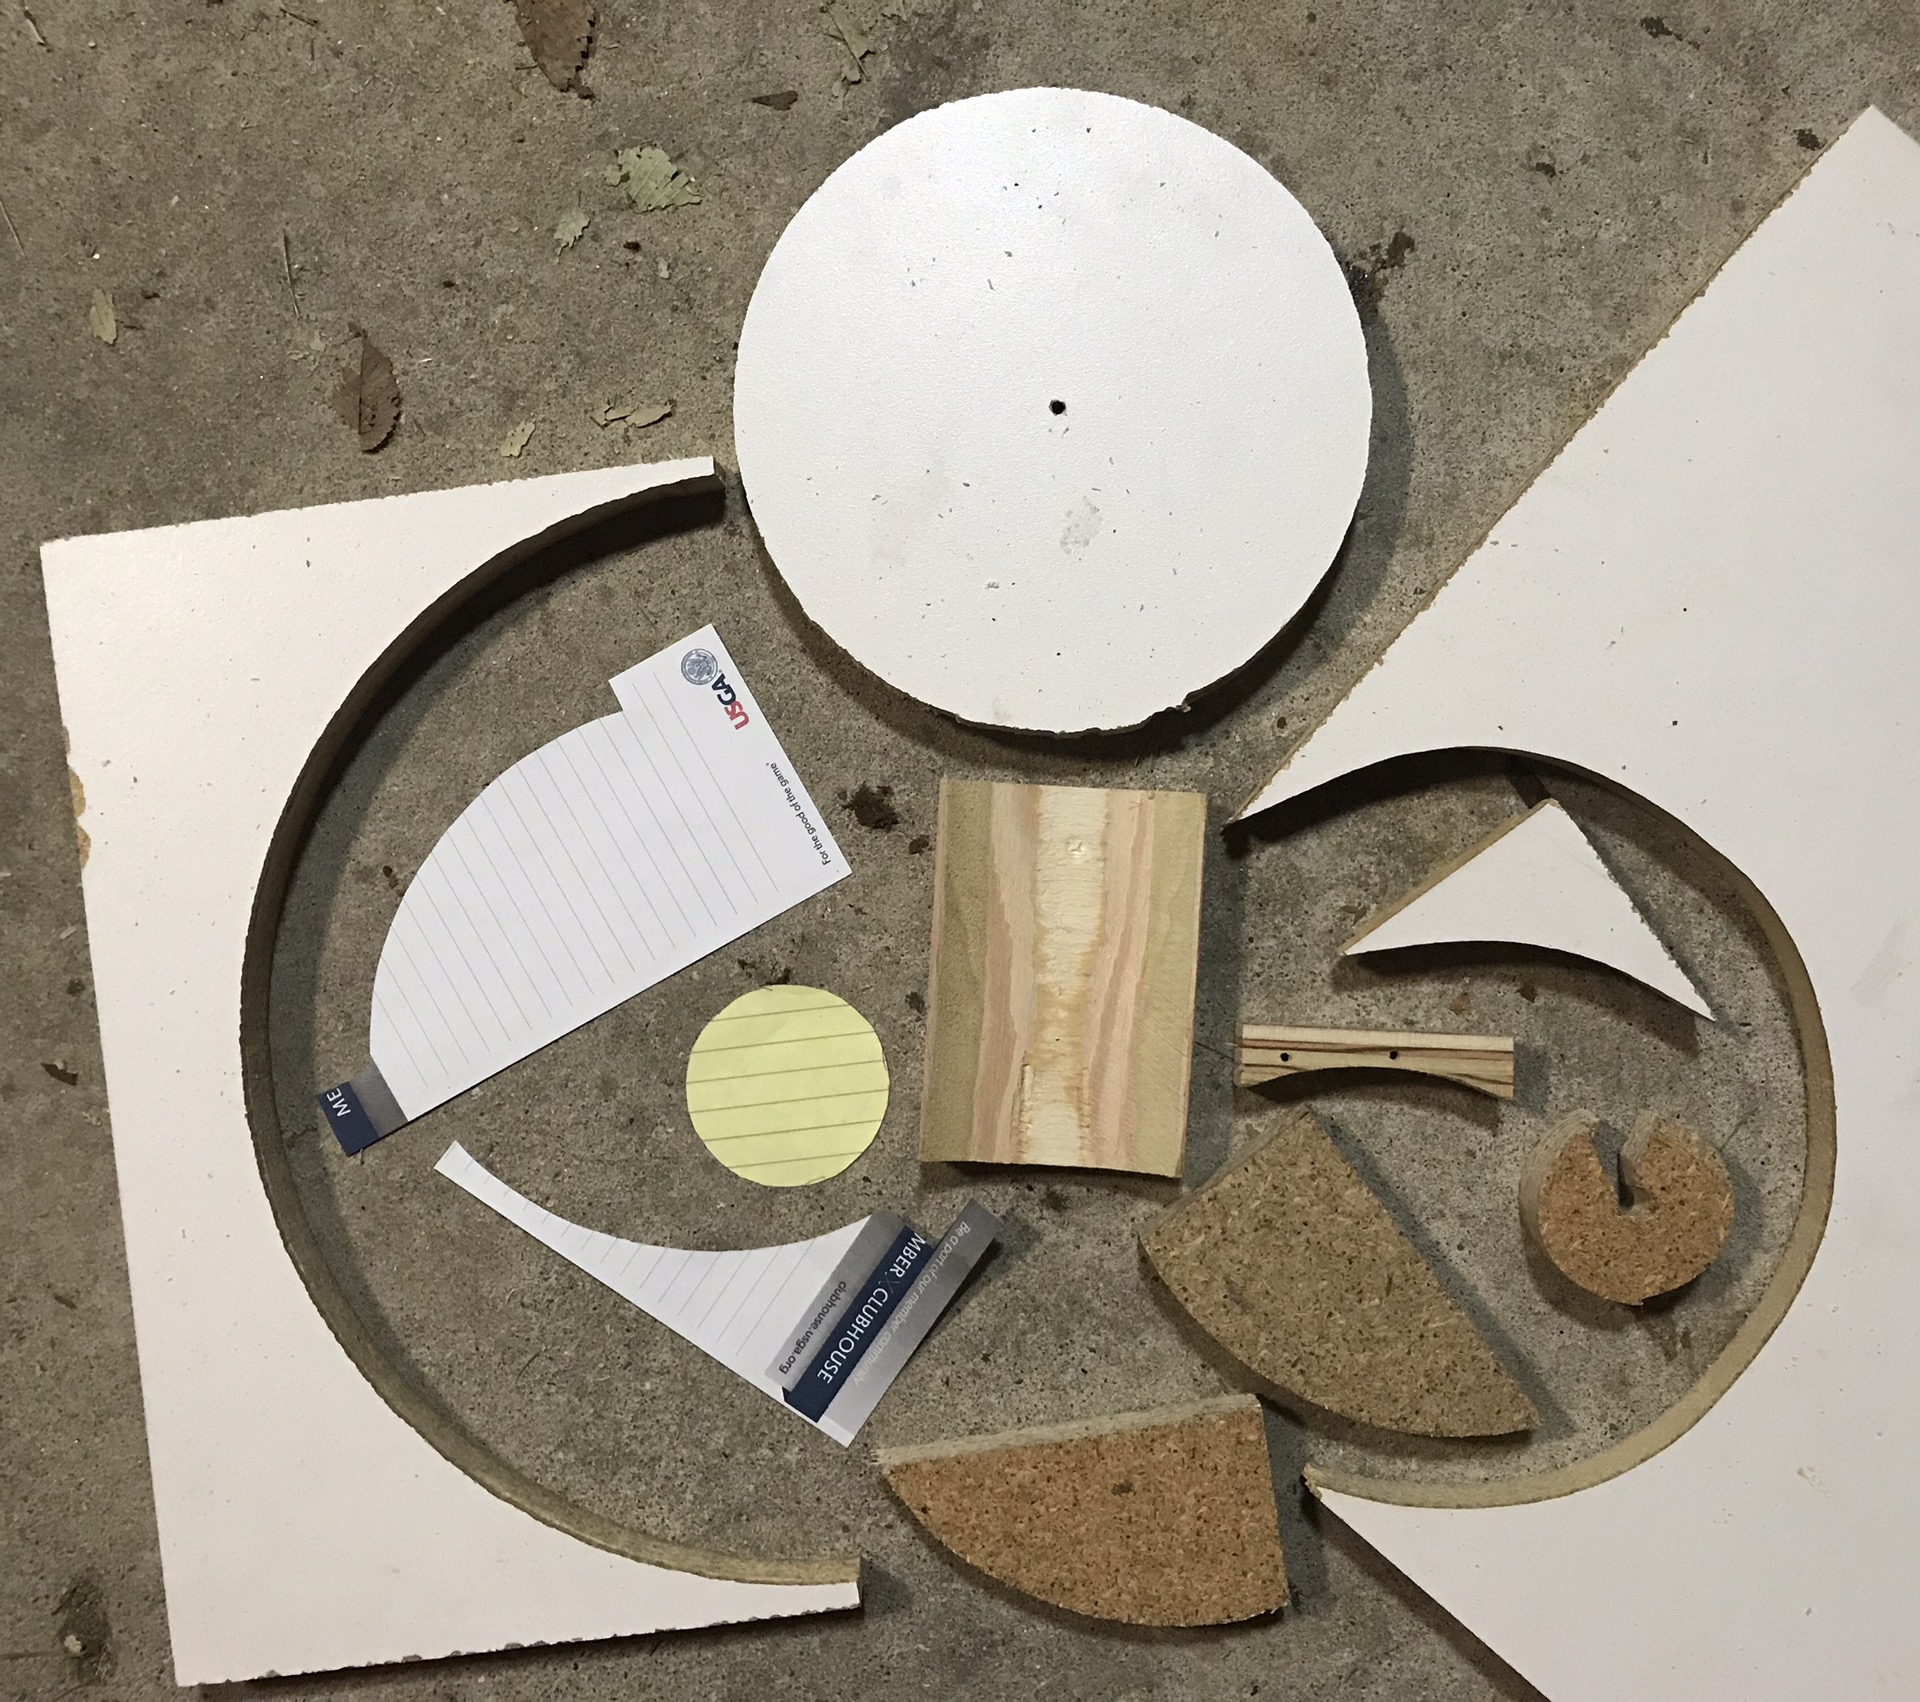
I had taken some general measurements when iterating on the design, but I thought it would be a good idea to create a cardboard model before cutting any wood. This mockup of the walls was an inch too short, but it let me get an idea of what kind of space would be on the inside. Knowing that the 1/2″ plywood would use up a lot more area, I increased several dimensions and changed the angles on the 3 front pieces.
After cutting the 3 front pieces and two sides, I measured and marked all of the spots where I needed to drill holes.
Then I spent a lot of time with the drill press. There was a lot of measuring and calculating because pretty much everything going on the front face needed some kind of recess.
It was looking pretty good!
Since I hadn’t updated my SketchUp plans for the changes, it was tricky getting the correct sizes for the top, bottom, and back pieces. I ended up screwing some parts together in a step-by-step process and then making small cuts on the new pieces to inch up on the fits. At the end I had to do a bunch of sanding on the front face, which was the last piece I screwed together. It was really cool seeing the design come to life.
Time for some finishing work. I sanded edges and cleaned off all of the dust before I did a quick coat of spray paint. I wanted to try a neat technique I’d seen, so I did a bunch of sanding to rough up the paint. Then I coated everything with 2 coats of stain/poly, while doing a light sanding in between. After the first coat of stain, I unscrewed everything to apply the final coat because I wanted to make sure nothing was stuck together on the joints.
After letting everything dry it was time to work on the guts. I used the time-lapse recording option on my YI 4K Action Camera for the first time, which worked well, so here it is with voice-over to explain what I’m doing during the assembly process.
I wanted to give it a coat of Minwax paste finishing wax when I was done, but with all of the buttons and speakers in the way it would have been too hard to work around them. Should have done it before. I’m pretty thrilled with how the paint and stain combo turned out.
The dimensions ending up being 5″ tall, 10″ wide, 4.5″ deep at the sides, and 5.75″ deep in the middle. It weighs just under 4 pounds with most of that coming from the 2 speakers. It’s hard to get a sense for the size in the cropped images above, so for scale here is a comparison with a beer bottle.
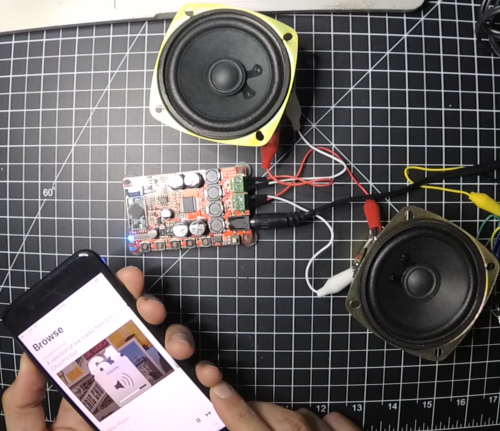
I’ve been using an old Jawbone Jambox for music in my garage gym. This is so much more convenient because it plugs in and has a permanent spot. No more worrying about a dead battery or trying to find the Jambox when it’s time for a workout.
Whenever I was using the Airdyne or Ski Erg, it was hard to hear the Jambox. Judging by the test below, I should be able to crank the tunes now. I played 30 seconds of “Welcome to the Jungle” with both speakers, starting at the 1:00 mark, and increasing the volume every 5 seconds.
After organizing my hand tools, I wanted to continue with the same ideas to organize the clamps I’ve acquired. Everything should have a place to go with first order retrievability being key. Here are all of the clamps laid out (I actually got some more and replaced the pipes in the 2 on the left) before I started building anything.
As you can see, I’ve acquired a lot of clamps in a short period of time. Almost all of these were bought at estate sales, which I’ve found is a great way to build out a workshop for the first time. Once I could see everything I started looking at different ideas on Google Images and YouTube. Woodworkers love their clamps and there is no shortage of clamp rack designs out there.
The first rack I wanted to build was for all of the F-style bar clamps. I measured various parts of my clamps and scribbled some sketches.
Then I mocked up a rough prototype on a scrap of 2×4.
I felt good about the design, so I moved over to some 1/2″ plywood. I cut a piece to 48″ by 2 5/8″. Then I drew a line 1 9/64″ from the long edge and marked every 1 5/16″. Let me explain some of those weird measurements. Maybe you can read from the prototype, but I wanted the slots to be 9/32″ wide since the widest bar on any of the clamps was about 1/4″. Drawing the long line at 1 9/64″ came from a 1″ gap from the edge and half of the 9/32″ hole. I wanted about 1″ between each slot, but it was quicker to mark every 1 5/16″ because I had almost 40 marks to make. This also give me a little fraction of extra space between clamps. It probably makes more sense when you see how I drilled the holes.
Then I drew lines to the edges of each hole, stood it up on the table saw, and cut out each slot.
You’ll notice the end of the slots aren’t rounded anymore. This is because I worked it across the blade after cutting to the second side of each hole. I took it to the router table and did a quick rounding of each slot’s opening so it will funnel the clamp in.
Most of this designs for this type of clamp use slots like this. Some people store these clamps with the bar at the back of the rack though and the pads facing out towards you. I decided on the opposite with the bars facing out because it makes it easier to grab a clamp.
I did do something I hadn’t seen by mounting this piece with a 1 5/8″ gap between it and other piece of plywood screwed to the wall. This allows the clamps to hang over the edge instead of having the top pad of each clamp sitting on top of the wood. Each clamp is a lot more secure like this and shouldn’t accidentally pop off. You can see this better in the video at the end.
The second rack I built was for miscellaneous clamps. There isn’t much to explain about this. For the C clamps I cut a bunch of 1″ inch holes and then sliced down the middle on the table saw. By the way, get a set of Forstner bits if you don’t have them; they work infinitely better than spade bits.
The 3rd rack would be for the wider bar clamps and pipe clamps. It was built similar to the first rack, but I wanted the bars/pipes along the wall because they’re heavy and would have more support this way. The holes I drilled for these slots were with a 1 1/4″ Forstner bit and 2.5″ from one hole center to the next. This little sketch shows I wanted the edge of the hole to be an inch from the back and each slot would be 3 inches deep. I left the rounded back side of each slot since it’ll mostly be used for pipe clamps. I once again used the router table on the slot openings and finished it off on the spindle sander since everything was a bit rougher with the thicker 3/4″ plywood and wider slots.
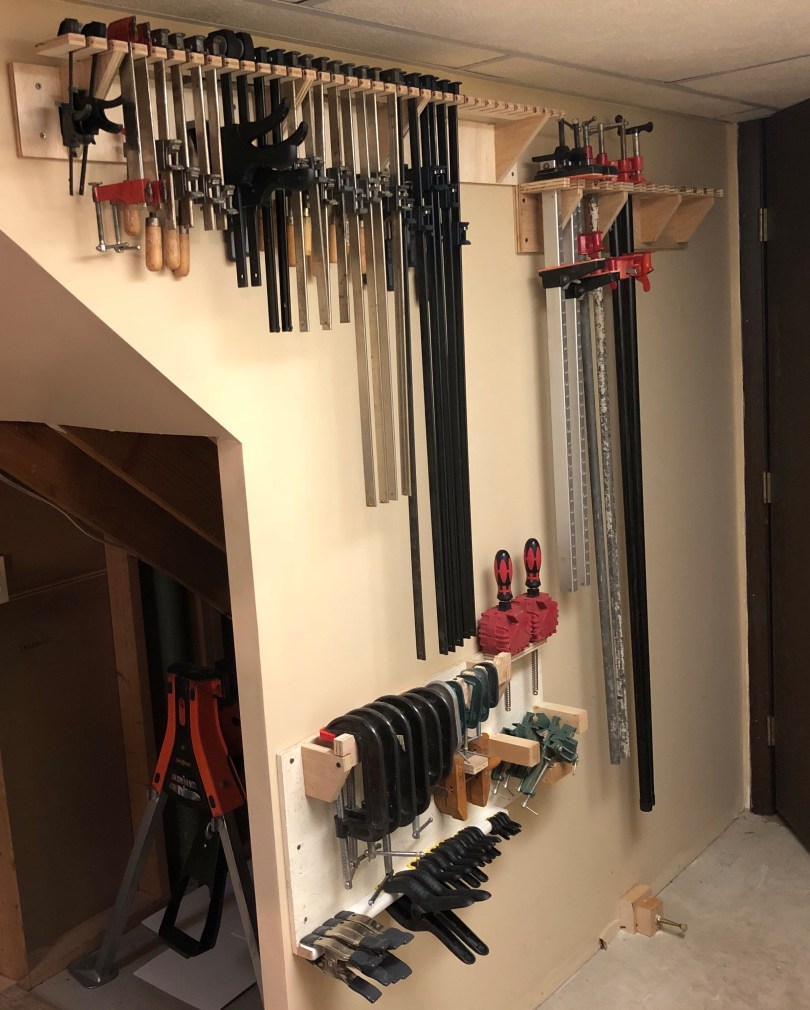
It’s hard to get a good picture since this is basically a hallway area, but here’s the finished project.
Check out the video below for a walk through of how it all ended up.
I found a couple of push blocks for $1/each at an estate sale. These will probably come in handy more for a router table when I build one and if I ever get a jointer.
After organizing all of my hand tools, I had floor space back and was able to spend some time building this weekend. I made a cross-cut sled, following most of the instructions from a build by The Wood Whisperer.
Since I had extra pieces of the oak runners already cut to size I made a mini sled too.
The sleds will make it easier and safer to use the saw. I already used the large sled to cut the pieces for the mini sled and then during the mini build I used it to cut the block that covers the blade when it goes through the back. Really handy accessories!
I gave a good coat of paste finishing wax to the table saw surface, miter slots, fence, rails, and the bottom of both sleds. Everything slides really well now.
I didn’t like how sketchy it was cutting the long thin runners, so I moved this push stick up in priority on my project list so I’ll have it the next time I need it. Figured I might as well make two because they’ll get chewed up over time.
Made some adjustments to the side storage to put the push sticks in each reach at the front.
Added a platform underneath and felt dumb pretty dumb doing it. At first I cut a sized piece before realizing there is no way to get it in there without removing the saw from the rolling base, which I definitely was not going to do. I ended up ripping the piece in half and screwing in a couple of supports down the middle to connect the two sides. I may store my circular and jig saws here too.
With the plans to turn an area of my basement into a workshop, I wanted to have some type of dust collection system in place. Here’s the video of what I built and then I’ll go into some details.
Originally I had some grand ideas, but I did more searching and came across a neat mobile dust station. It seemed like a good solution for me since the area I’ll be using isn’t very large and there is a pole in the middle of the room. I’ll probably have most of the larger tools and work table on wheels, so I scrapped the initial idea to have dust collection feeds going to several different places around the room.
I ordered a knock-off cyclone unit for about $25 on Amazon. I noticed it was going to take several weeks to be back in stock, so I wondered if I could make my own. Sure enough there are countless examples of people building their own. I cancelled the order and had my next project. Most of the builds shared online are based on the Thien Baffle Cyclone Separator, which is one guy’s improved version of the Cyclone. I found a video where someone used polycarbonate to create a clear cylinder, which I thought looked really cool when dust was whipping around inside. I ended up using many of his methods to construct my own cylinder.
Here are some sketches I did before and through the build process.
The final build ended up pretty close to this sketch.
Dimensions of my baffle and the other parts at the bottom of the cylinder.
Pieces to support the seam of the cylinder and house the infeed hose.
Cutting the outer hole, an inside circle, and forming the cylinder were easily the most difficult parts of this build. I used straps to help keep the polycarbonate shape, because it wants to go right back to being a flat sheet. If I were to do this again, I’d use a wider sheet than 24″ or find some thinner than the 0.093″ I got from Home Depot in the hopes it would be easier to form the cylinder.
Once formed and screwed in, the 2 screws at each end of the sheet pulled right out of the top circle after a few minutes. It needed some support down the seam, so I learned how to cut a cove with a table saw that would allow a piece of wood to fit up nicely against the curve of the cylinder. Don’t get me started on how many circles and curves there were during this build.
I didn’t take any pictures during the frame/stand build but there isn’t anything exciting to say there. To get the rainbow effect on the LEDs I’m using a cheap Arduino Nano clone with some pretty simple code, which is available at my rgb-led-rainbow repo on GitHub.
I’m happy with how the project turned out, but it took much longer than I expected. I probably should have started out my shop with something easier to get more comfortable with woodworking. I did learn a lot and used so many different tools throughout the process.
If you have any specific questions about my build, leave a comment and I’ll do my best to answer. I decided not to do a detailed description or video because there are a lot of examples out there, including the two YouTube videos and the Thien baffle design I linked to above. I took most of my ideas from others and gave things my own twist.
A couple of weeks ago I learned what the adjustment dial (called the clutch) on a power drill does. I’ve had a DeWalt power drill for about 15 years and never understood how to use this feature; I always thought it was a speed change. I felt pretty dumb when I found out while watching the video below (which should start at the correct spot). Using this has already been a game changer!