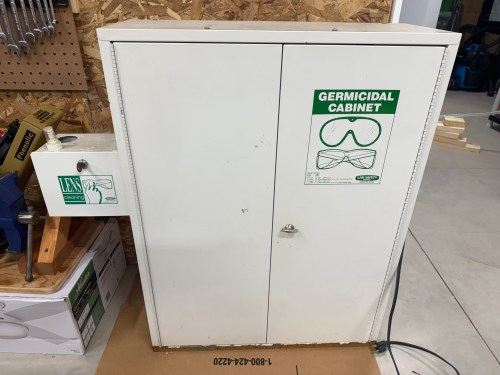
I’ve wanted some type of cabinet in my workshop for PPE and earlier this year I saw a cool cabinet that I thought might be perfect. Fast forward to the new house, the wall, and a new shop (post coming soon), so when I saw the Facebook Marketplace listing again I jumped on it.
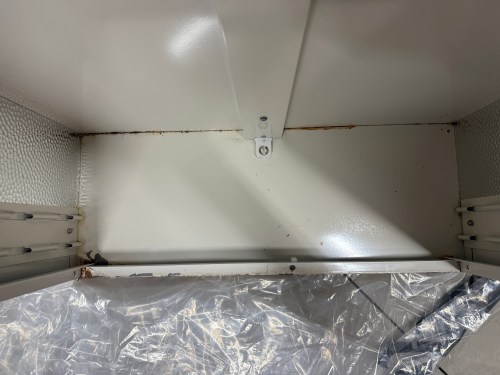
Aren’t the graphics great on those green stickers? I only paid $25 for this Sellstrom Model 2000 Germicidal Cabinet. A new one is currently 51% off on Amazon, which brings it down to $599 and replacement UV light bulbs cost over $100! This unit had some rust, like it had been sitting in a puddle, but otherwise it barely seemed used. The light bulb still works and so does the timer pictured below, which can be set to run for up to 5 minutes. You can also see the UV light bulb on inside the cabinet, through that tiny window.
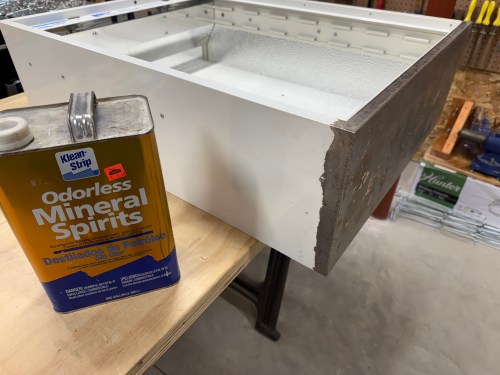
I used a razor blade to scrape as much of the rust off as I could and then used a sanding block. I cleaned the areas with mineral spirits and masked them off with painter’s tape. The bare metal got a coat of rusty metal primer.
The few inside corners were painted with a non-matching white, which nobody will see. I painted the bottom exterior area with some black, which turned out great. I hung the cabinet near the door and surrounded it with my glove dispenser and other safety stuff.
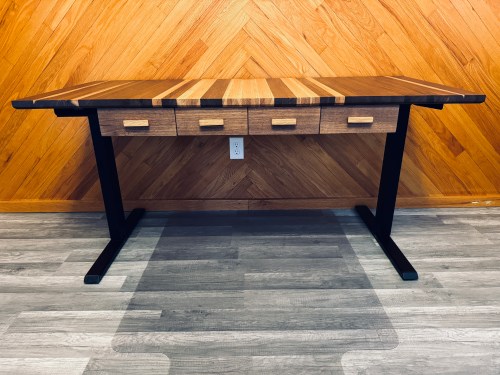
Over the years, without success, I’ve tried to stand some while working. Hopefully a motorized adjustable base will encourage me to stand for certain tasks and even if I can do a couple of 20-30 minute sessions each day it’ll be a big help.
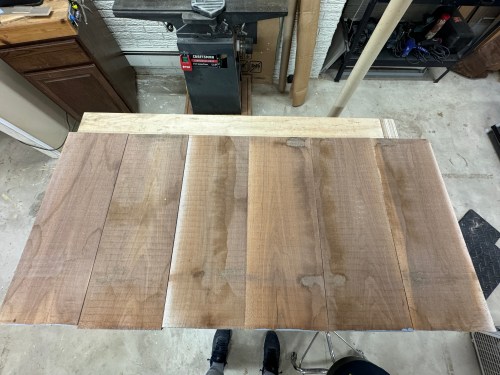
I got to work processing walnut boards and white oak flooring.
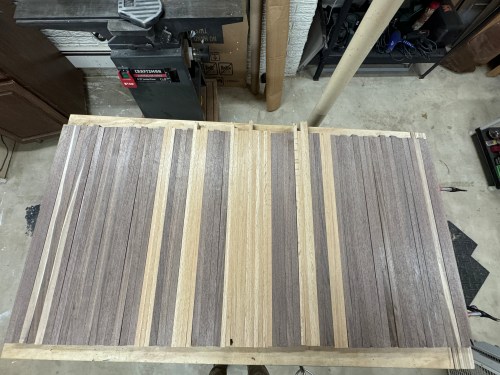
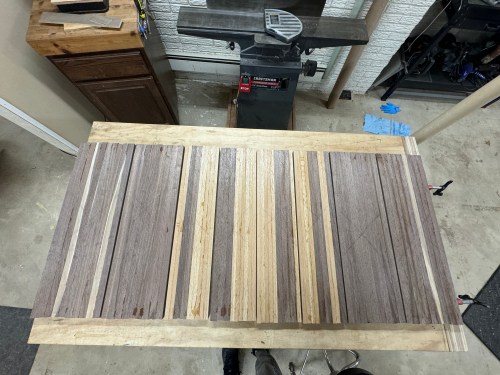
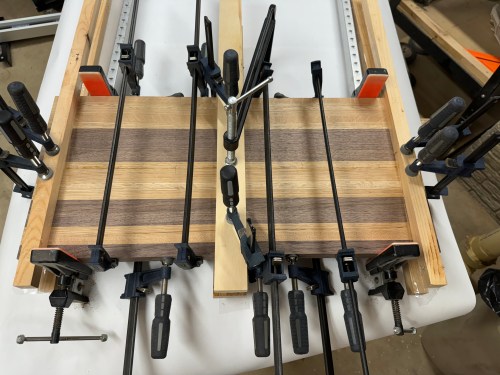
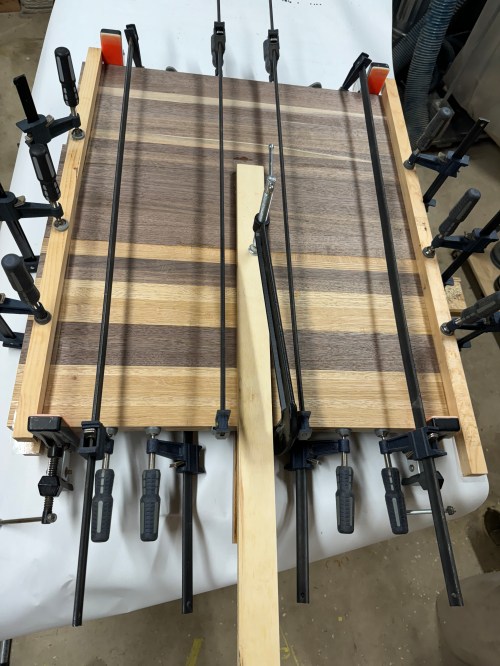
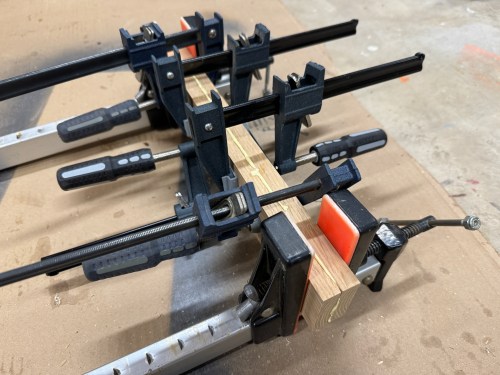
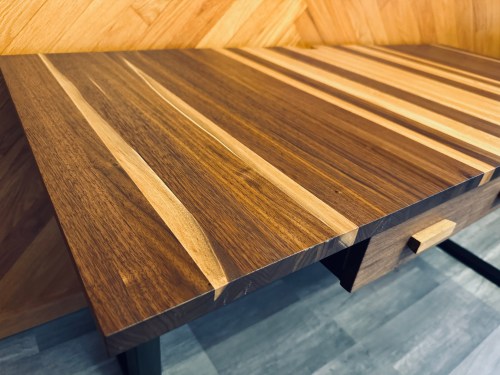
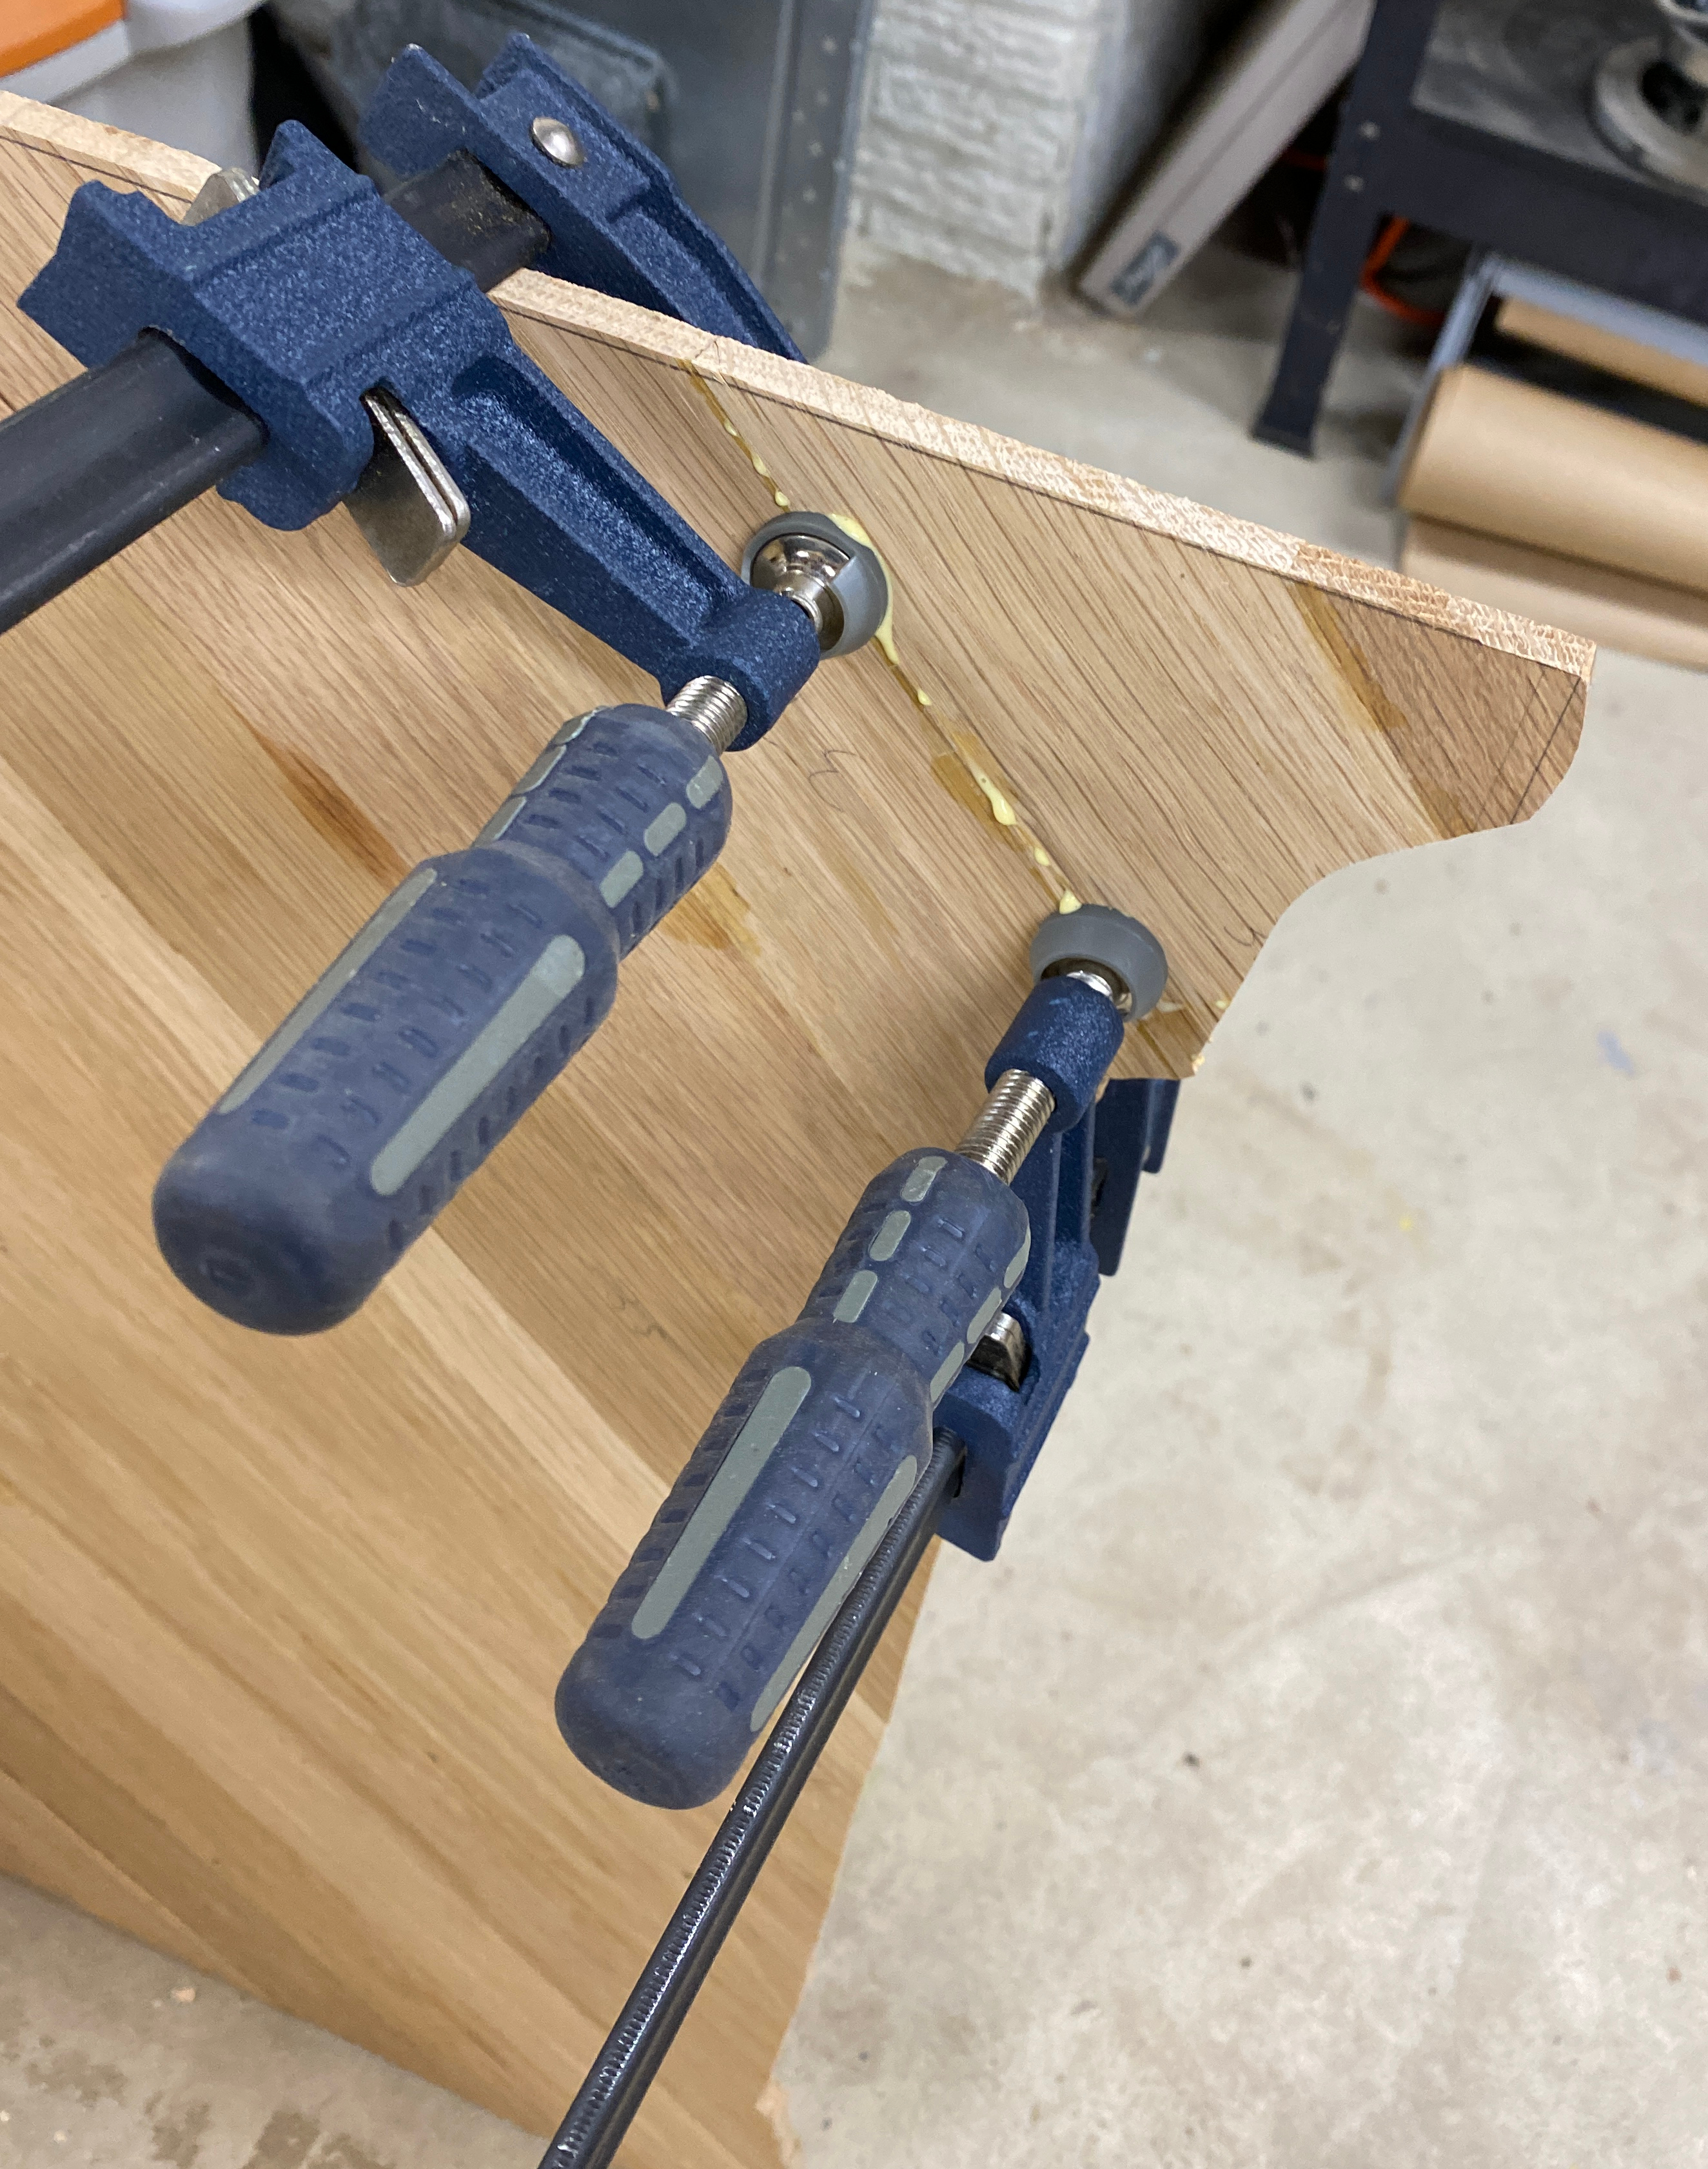
There was a lot of jointing, cross-cutting, ripping, planing, more ripping, and trimming. I’m excited to use that box of off-cuts to make an end grain cutting board or two! I felt like the key to this build was going to be the glue-ups. I started with sections of 9-10 pieces and ended up with eight of those.
I ran each section through the planer, with the help of some shimming for a couple, to flatten them. I made a temporary sled to square up the sides to the faces.
To help assemble the sections, I used a couple of biscuits on each glue joint.
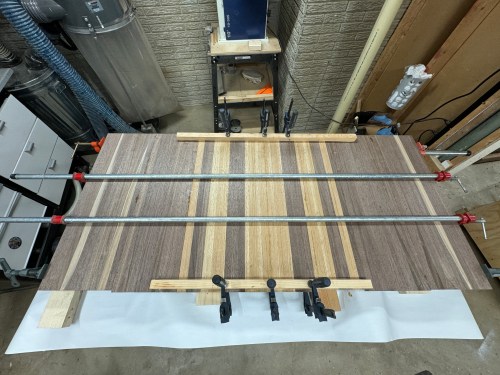
I glued up two sections at a time, which gave me four bigger sections. Then I glued up two of those at a time and one final glue up.
I drilled and put in all of the bolt inserts, which will attach the top to the desk base.
I took three passes with the router to put a big chamfer along the bottom edge.
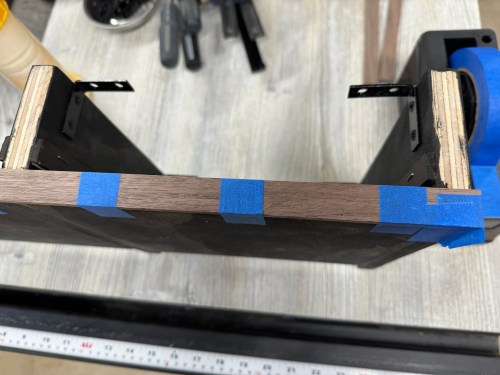
With a jigsaw, I rough cut out a spot in the back to pass cables through. Then I did some sanding to smooth it out and added a chamfer with the router. Here is it, viewed with the desk bottom facing up.
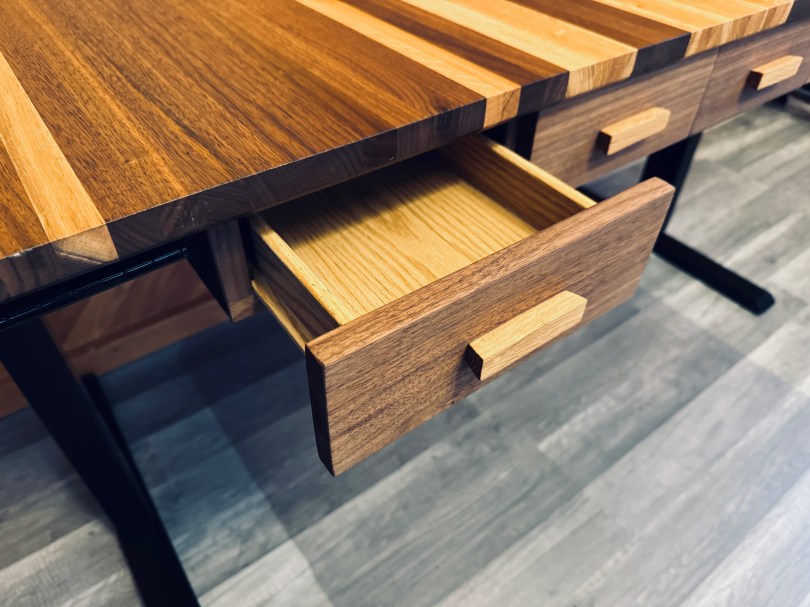
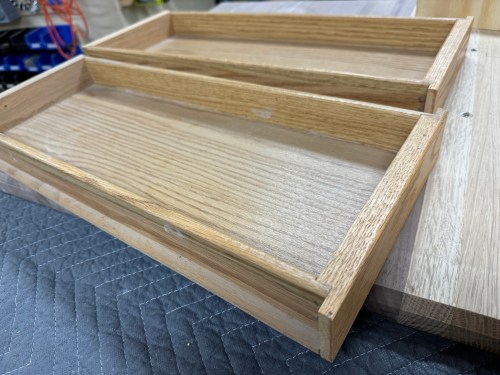
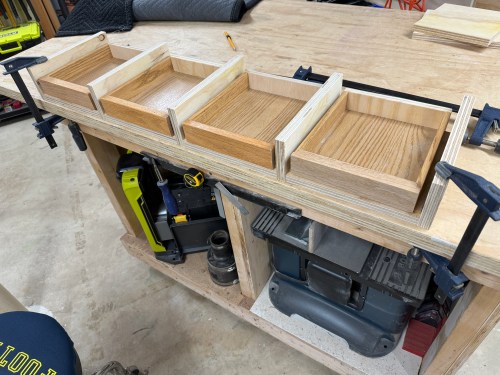
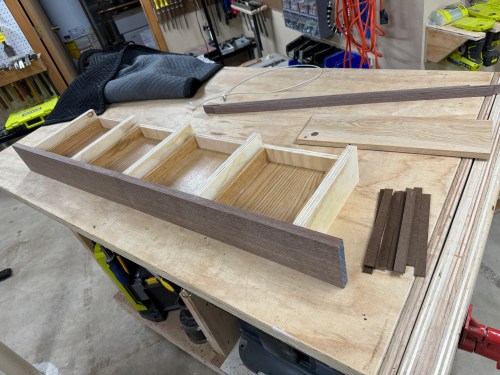
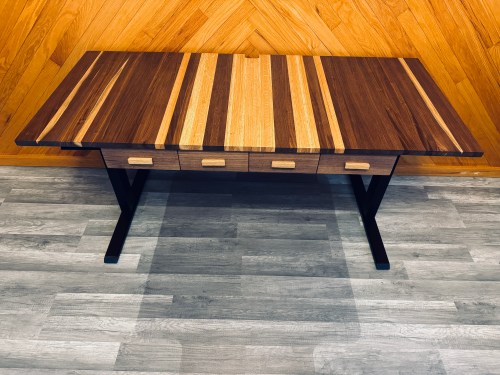
Due to the base’s cross support, there’s was limited depth for drawers, but there was width for them. I took some old kitchen cabinet drawers, chopped them in half, and closed them up with scrap plywood.
Then I worked on what I’m calling the drawer box even though it’s not a box. I also cut top rails from hardboard and oversized drawer faces from walnut. Grabbed strips of walnut for face-framing and glued together pieces of oak to make drawer pulls.
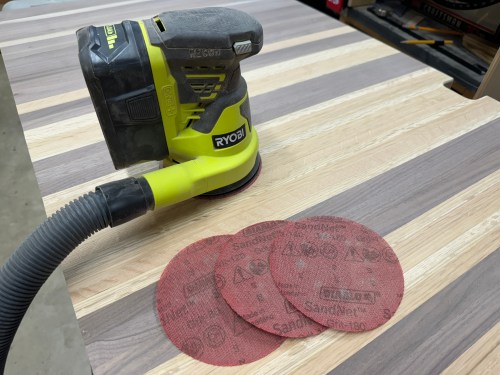
All the sanding! I went through 80, 120, 180, and 220 grits on the top and sides of the desk.
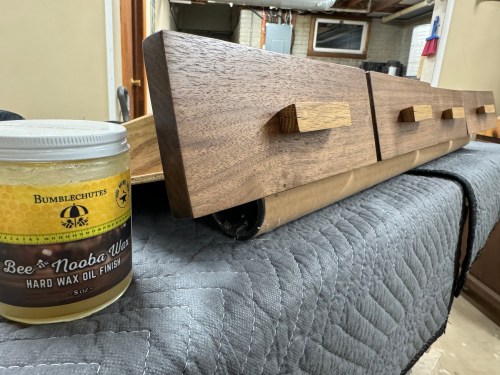
Time to put some finish on, which is always a favorite step to see how it’s really going to look. It was my first time trying out a hard wax oil and I used Bee Nooba Wax from Bumblechutes. It was very easy to apply and I’ll definitely be using it on future projects. I applied one coat to the bottom and three coats to the sides and top.
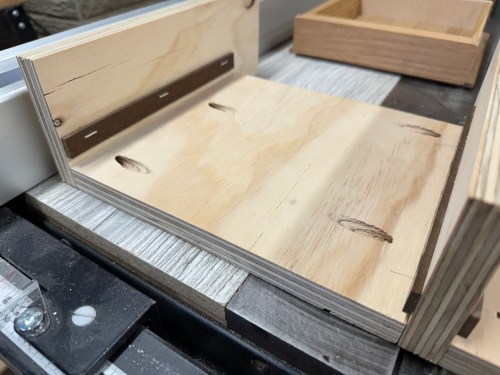
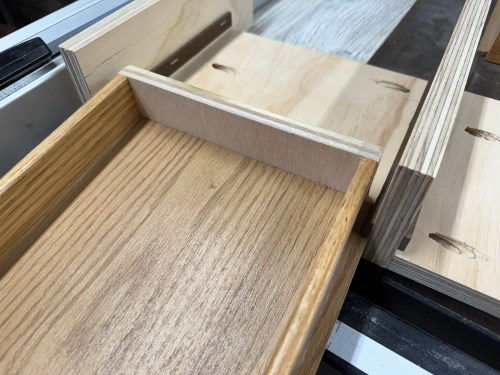
Then it was back to the drawers. I stained the “box” black and ended up having to trim some things to fit better around the rail of the desk base. I sized the drawer faces, made oak handles with 10° angles, assembled everything, and applied finish.
It turned out great! I can’t wait to see it in our new house later this year!
First up was upgrading the power cords on my table saw and jointer to be longer and beefier. I chopped a couple of 15 foot lengths off an old extension cord my Dad gave me years ago, which I still haven’t used. After wiring them in to the switch I installed a new plug on the end.
I also replaced the metal castors I had originally put on the table saw cart because they were horrible. The new ones roll real smooth.
I needed spots for more clamps and had empty space in the clamp storage area. I’ve wanted to redo that area anyway.
I got creative, using a couple pieces of copper pipe saved from the old shower and some old microwave mounting rods.
The shop closet is in need of a lot of love. The lighting has always bugged me and it was a good place to start so I’d be able to see when tackling the rest of the room. The pull string and single bulb had to go.
After wiring, I mounted the lights to a scrap of plywood and that to the joists. I had to add an outlet because my router and other network equipment are in here and they had been plugged in to the light fixture. There was an open ground, so I opened up the light in the adjacent furnace room and connected the ground wires.
What a difference!
It’s very bright in the closet now and the motion sensing works great. I thought about wiring half of the outlet to the switch so I could mount LED strips under each shelf that would turn on with motion as well. Maybe a later project if I think it’s needed. After I reorganize and get everything accessible at the front of shelves I think it’ll be fine though.
The other part of the closet that really annoyed me was the spray paints because I could only see the front cans and had to move things out of the way to get to back rows. It was hard to know exactly what I had.
I cut out the shelf and cross supports above the cans and removed the sheet of plywood that was the can shelf. This allowed me to gain extra height and assemble an entire unit to drop in place. I cut rabbets in the surrounding plywood box and used interweaving hardboard to create the internal compartments.
Talk about a stressful glue-up! With space for 40 cans, it still wasn’t enough storage, but I have a lot of duplicates that’ll eventually get used up.
The rest of the closet is still a mess and an accumulation of junk. It needs a cleaning and complete reorganization, so I don’t have any plans to build anything. If plans change or anything seems useful, I’ll be sure to share.
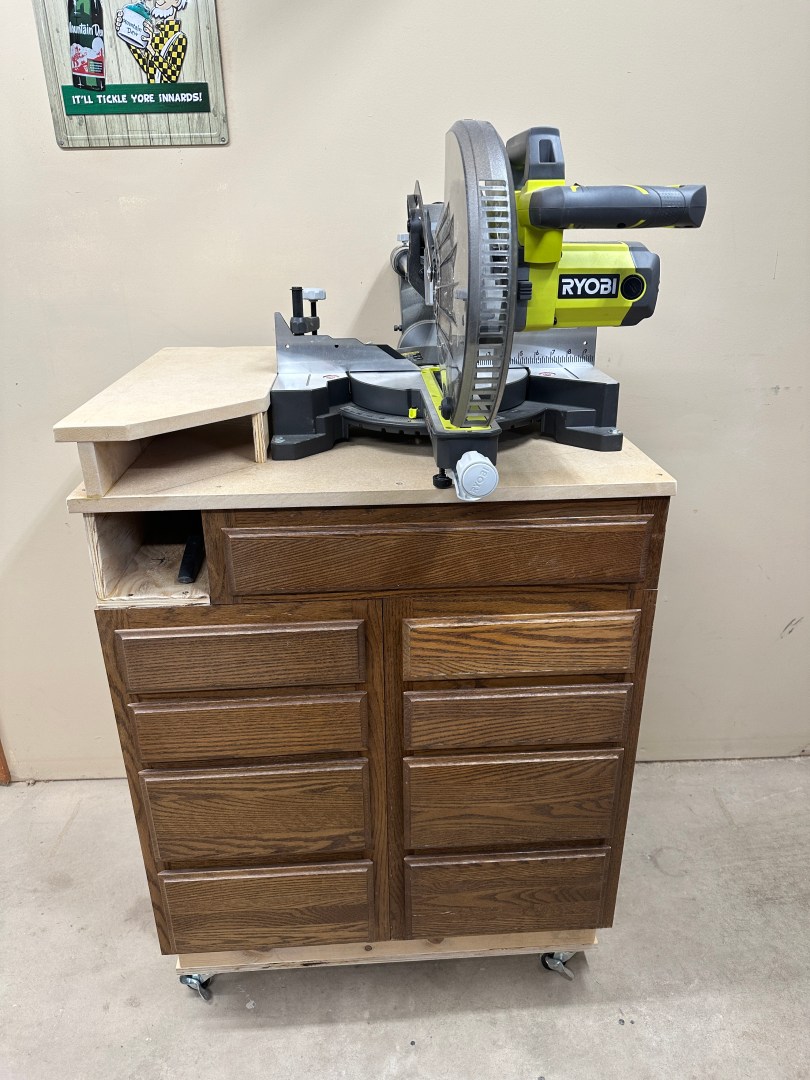
Not having a blade guard always made me nervous and features of newer saws made me jealous. Things like a slider, positive angle stops, and a cut line are really nice to have. This new saw is beautiful and was definitely the right price!
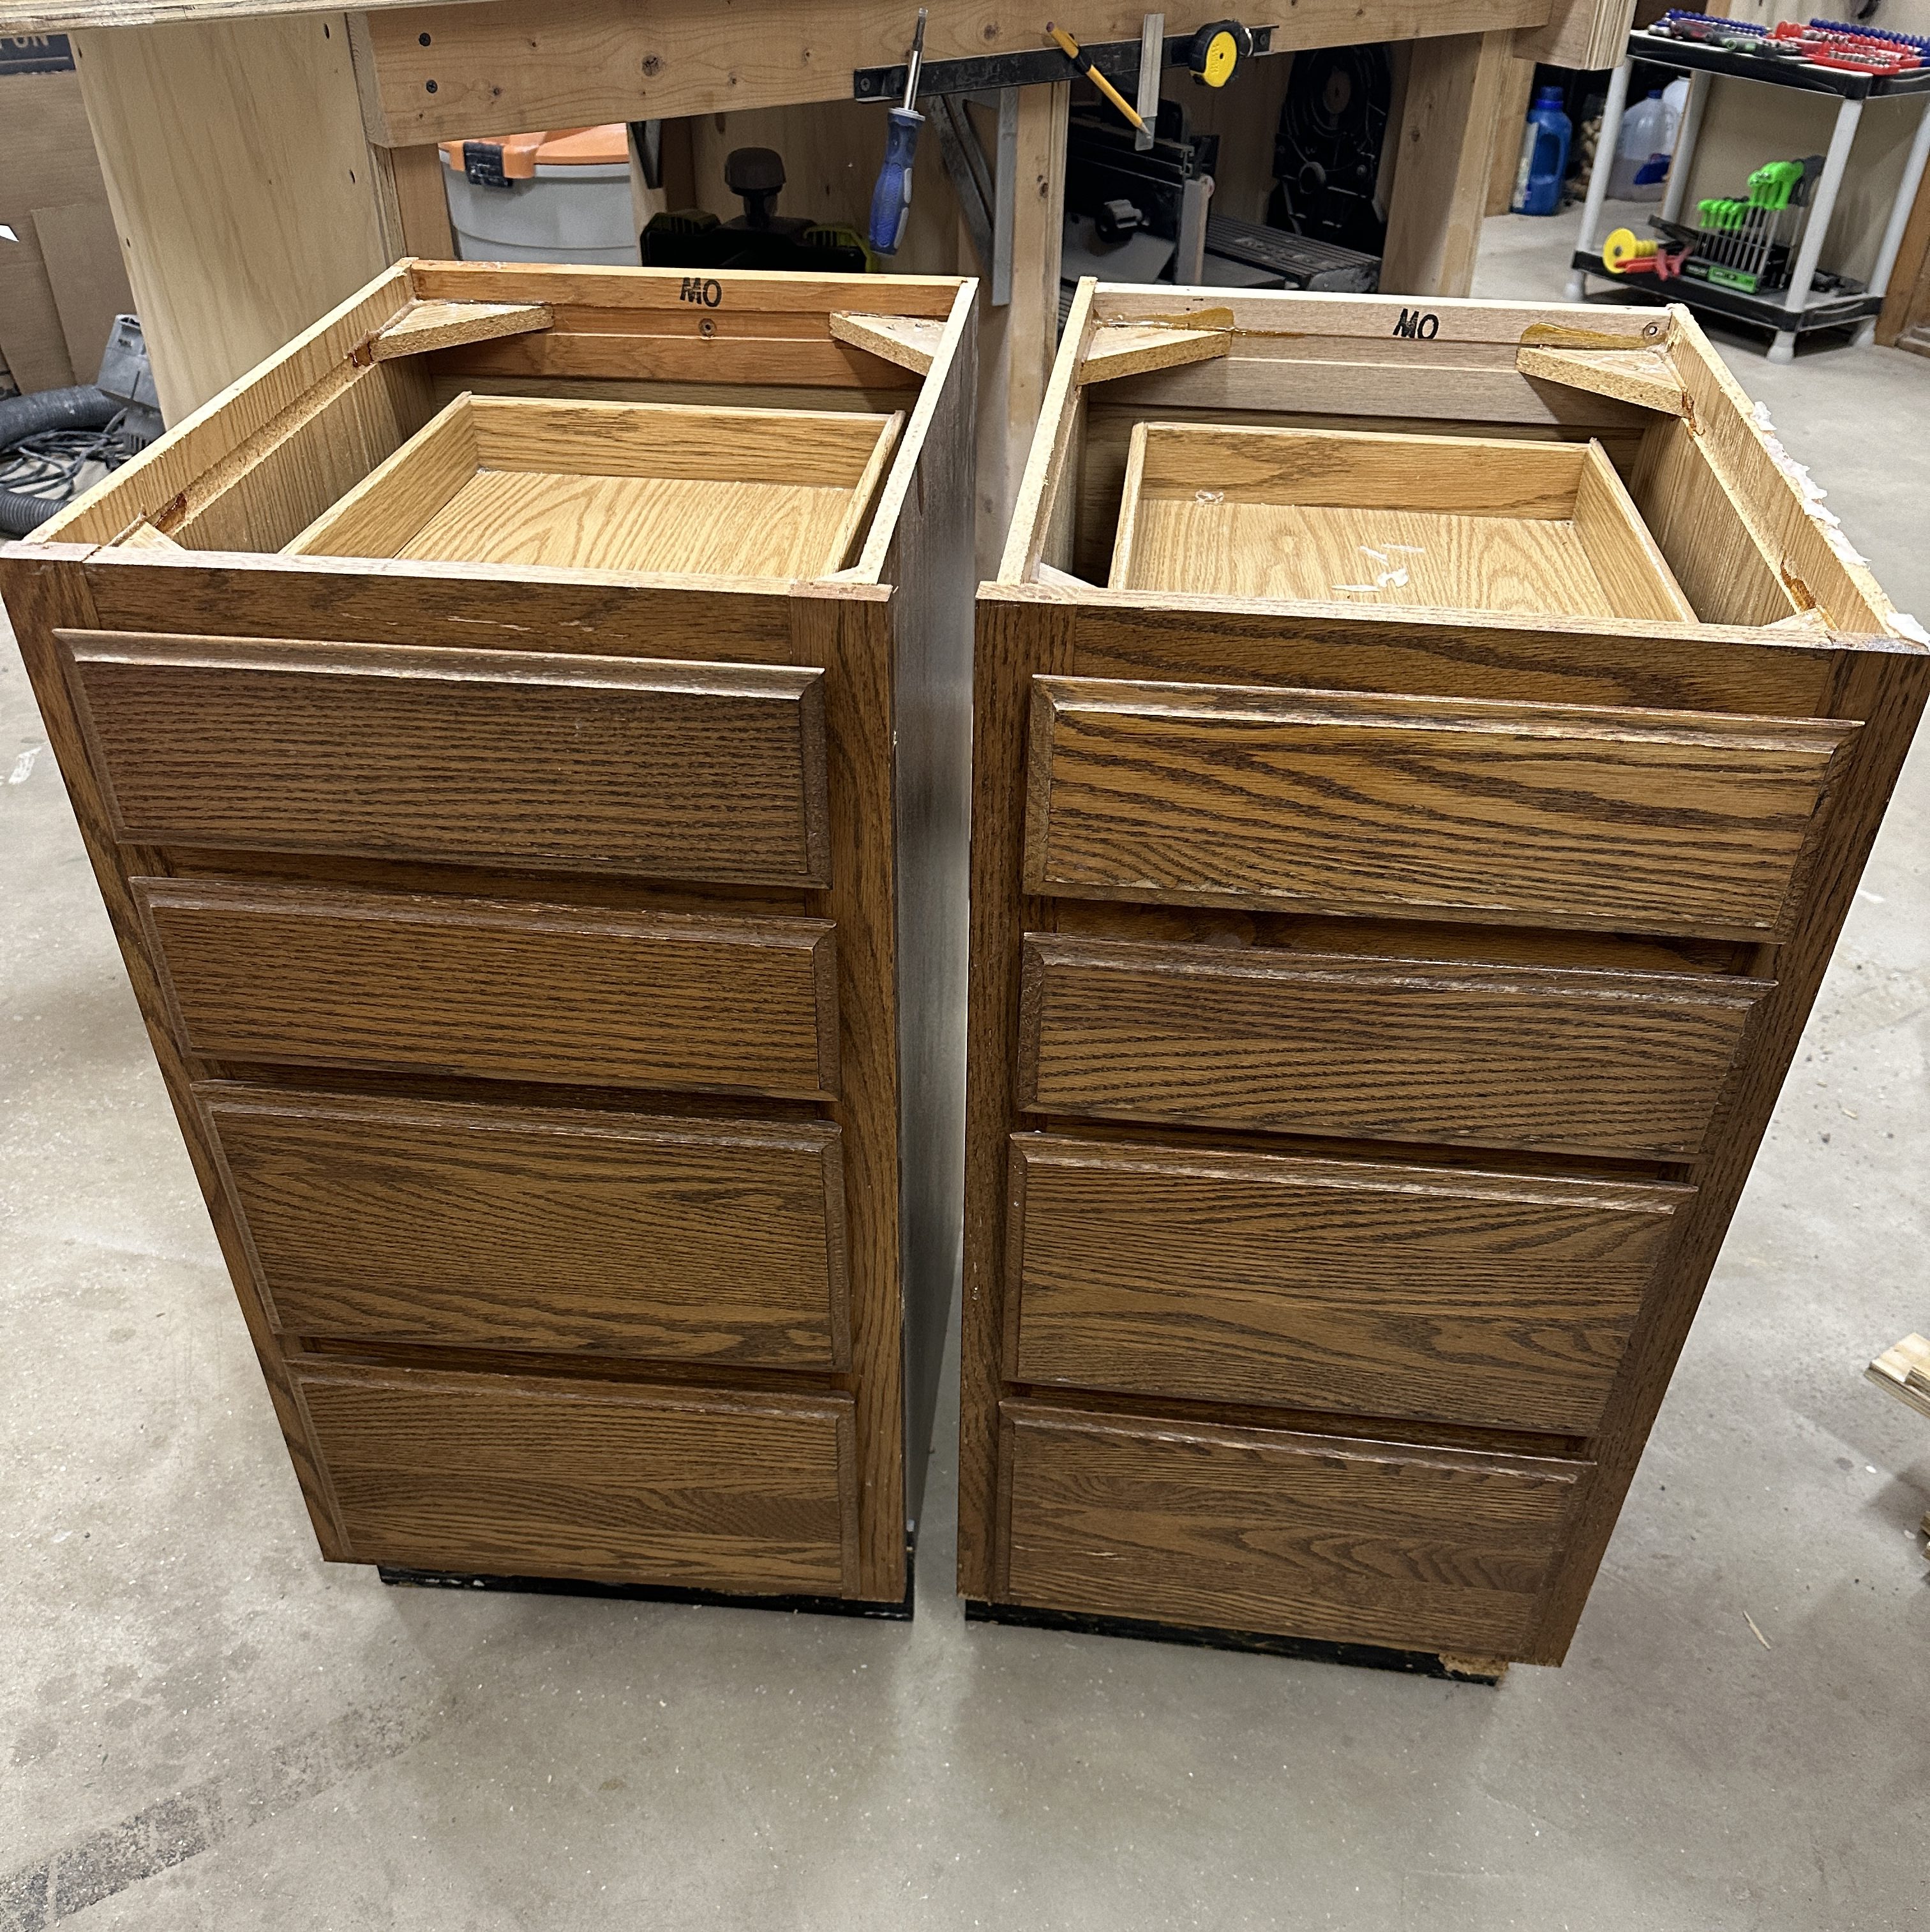
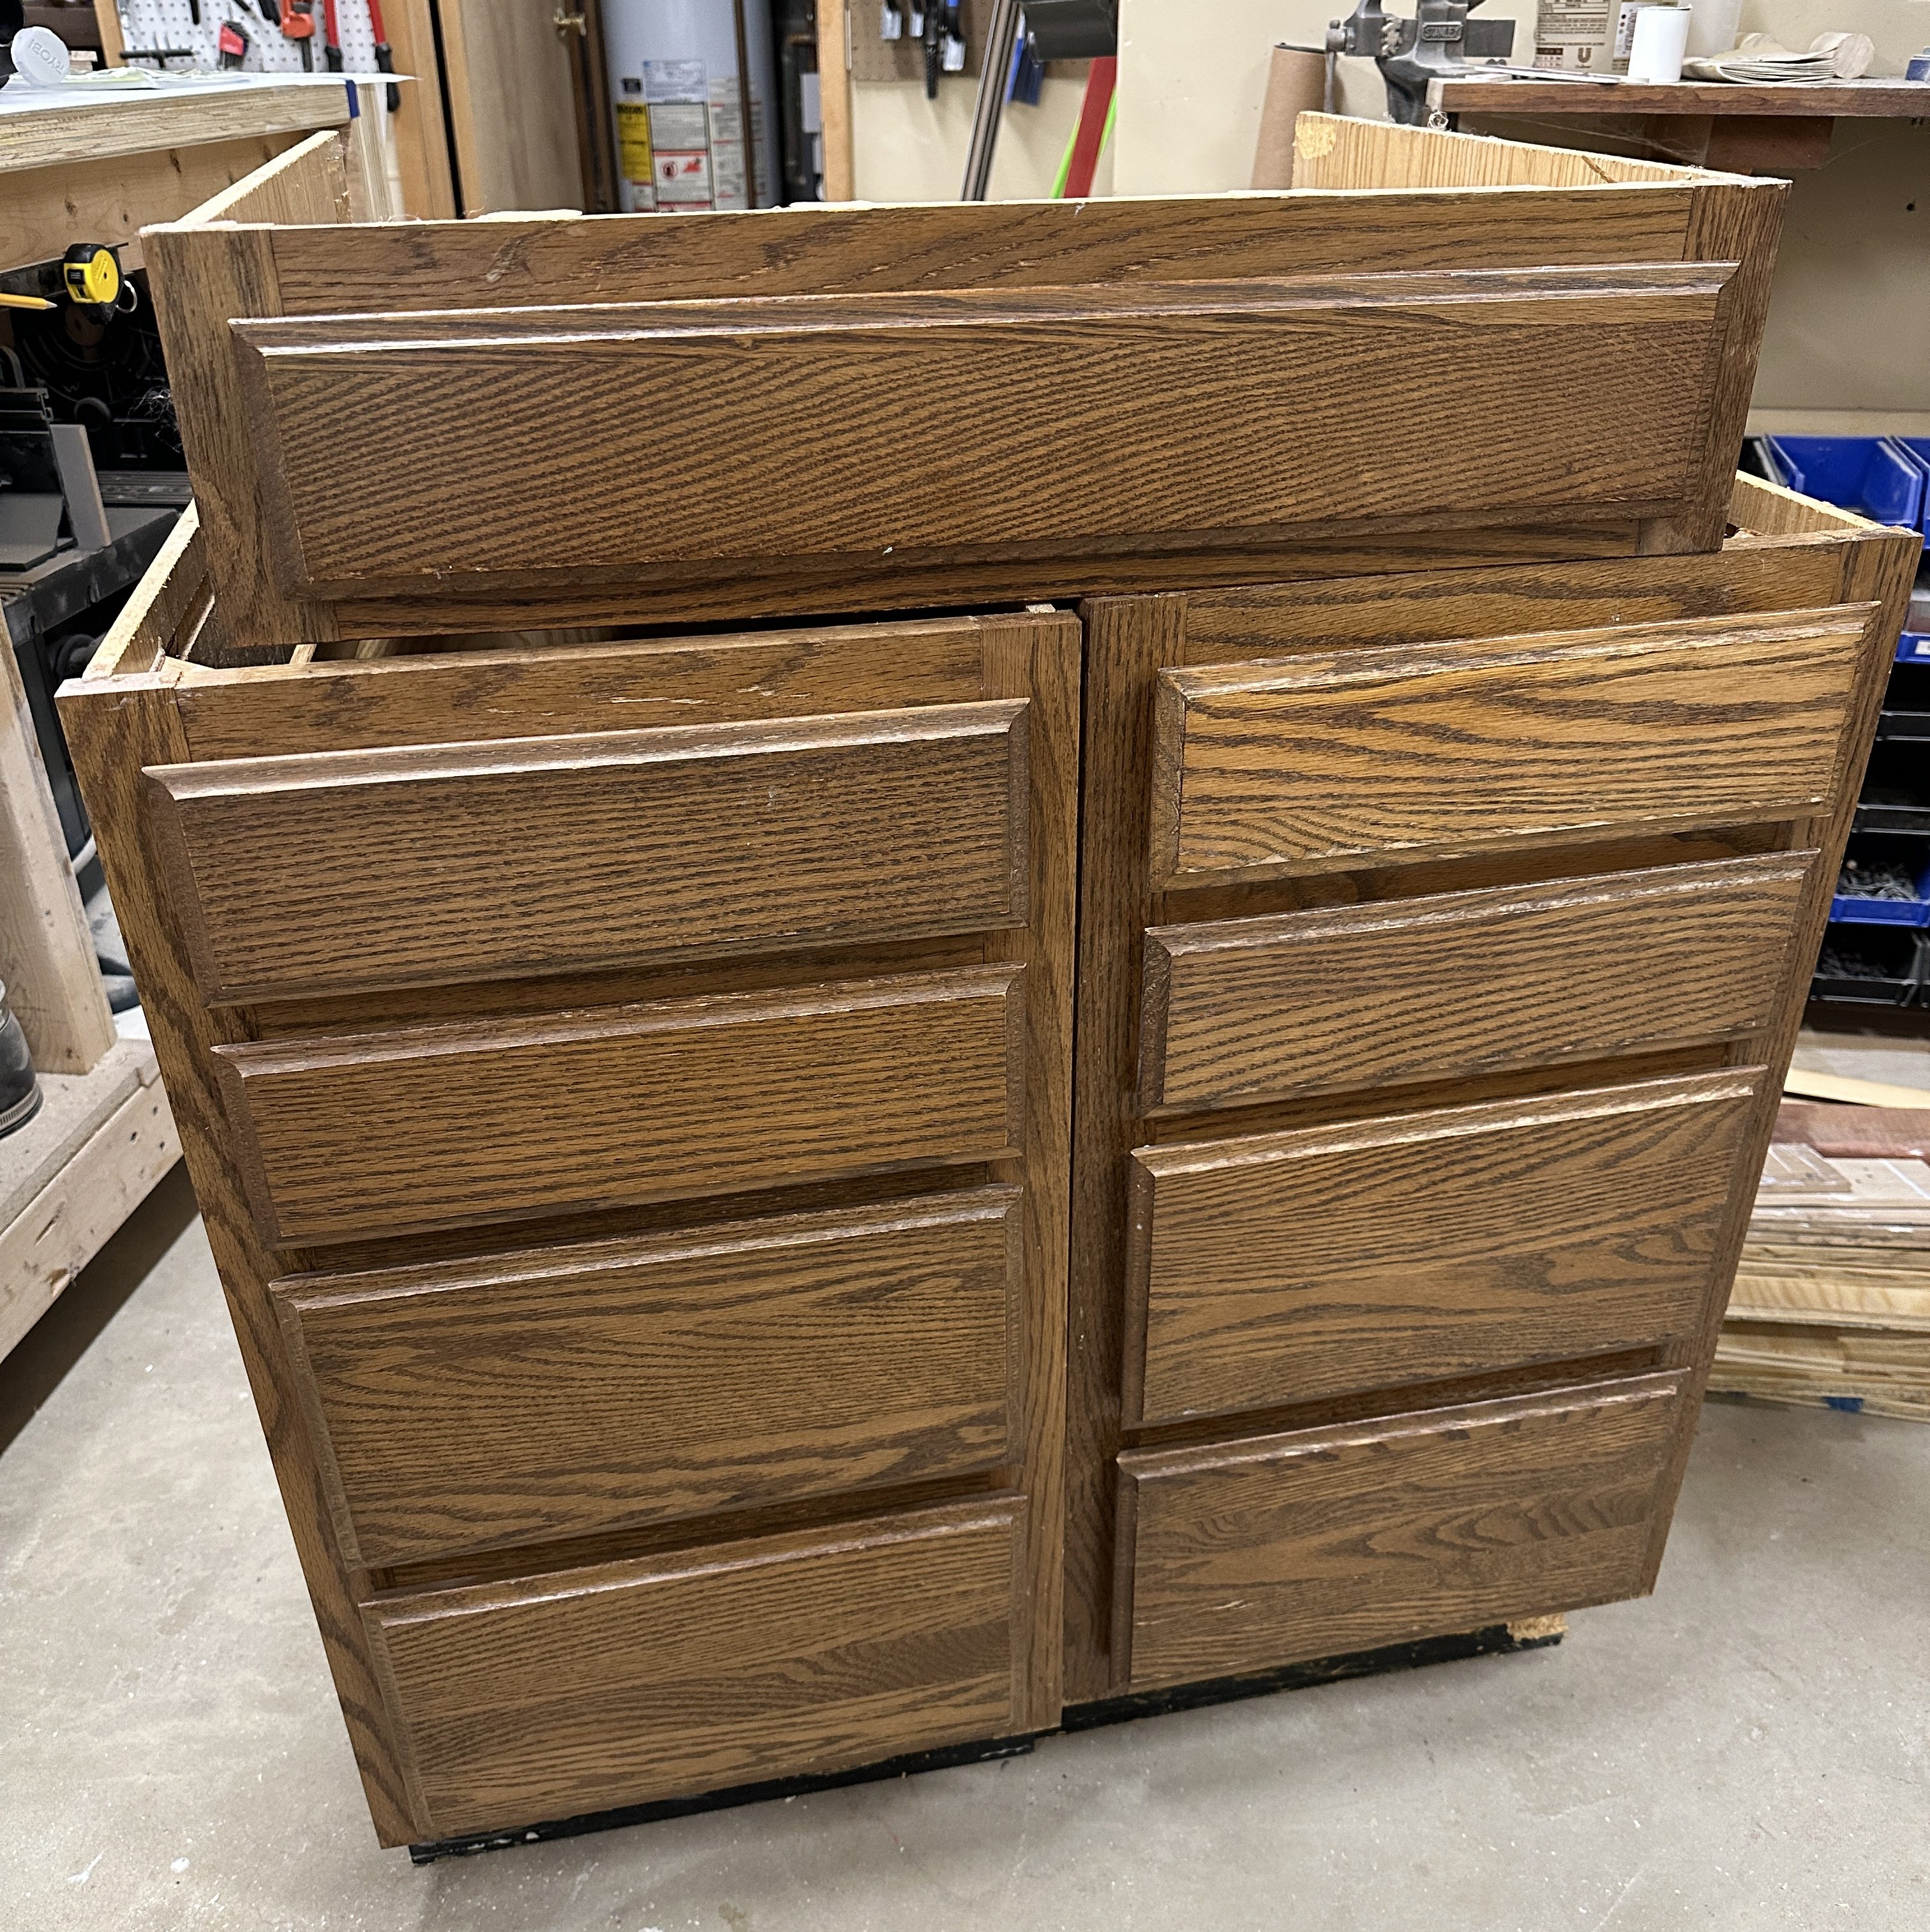
Due to the sliding feature, I needed a lot more depth in my space to use the saw. I also knew I wanted a mobile cart because the stand from the other one always stayed where it was, which was often in the way. I had saved the two side cabinets from the bathroom vanity and still had a wide drawer from the kitchen desk I removed.
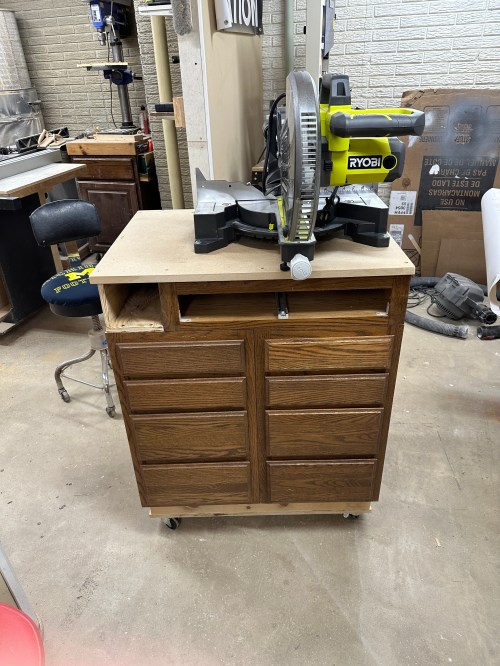
I combined the cabinets and added reinforcements all over to give more stability and connection points because the cabinet walls were so shitty. I made a base, replaced the toe kick, added casters, attached the drawer, and whipped up a little cubby.
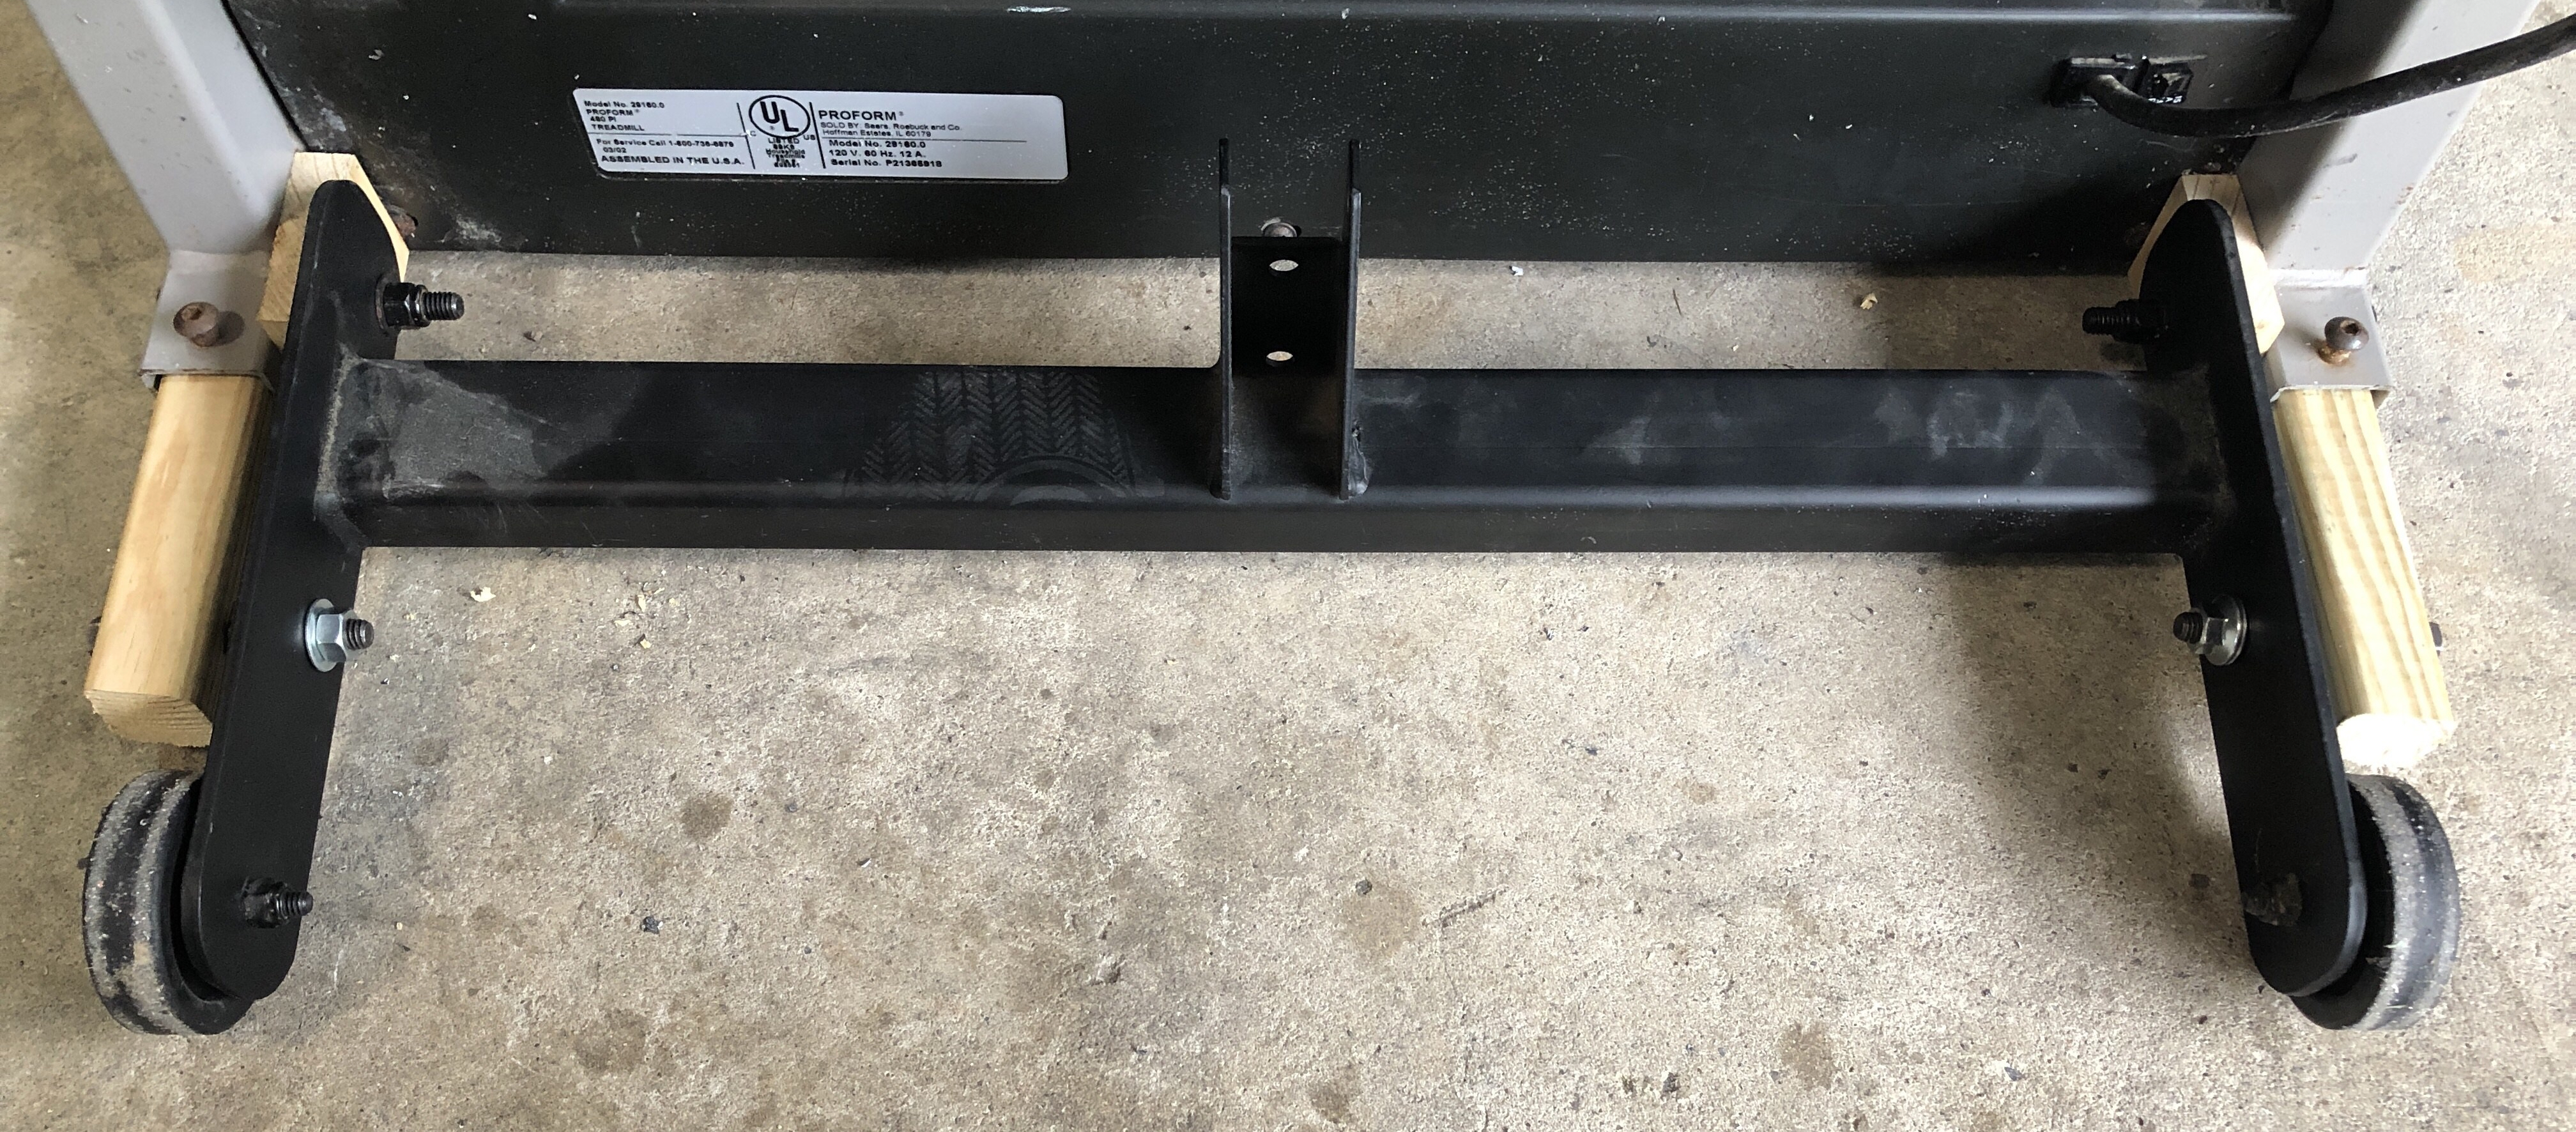
The base of an old treadmill has been sitting in my basement, which was a decent piece of MDF. I removed the plastic and chopped it up to make the top of my stand.
The final thing to do was make a riser to the left of the saw for more support while making cuts. The cart turned out great and is so easy to move around.
I took the opportunity to clean the shop and do some rearranging. I moved the drill press out of the dusty area and pulled the band saw in. I also moved the jointer out since it doesn’t get used much and is an awkward size, so it was also in the way. It feels like I have a whole new shop and being able to move the miter saw around is going to be a huge improvement to my workflows.
We’re taking a break this week from the kitchen remodeling, but made time for a small project in the basement. I removed some old linoleum at the bottom of the basement stairs, which was under the door jambs so probably original from 1979. Then I trimmed a couple of sections I had cut out when removing the newest layer of kitchen flooring to fit the area.
I’m excited to say a second maker is emerging in the house. 🙂
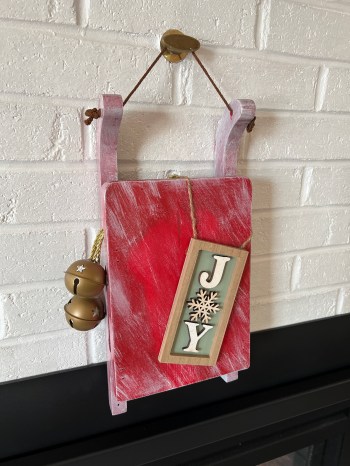
In addition to helping with our 2021 Christmas ornament. Brandi wanted to make a few holiday decorations. First was an old sled that was her mom’s. She sanded off a pineapple and some wording, gave it a new paint job, and added some accessories. Unfortunately I don’t have a picture of what it looked like before she started.
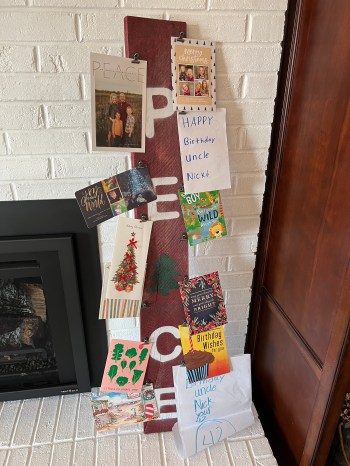
She also wanted some type of tall sign, so she grabbed a piece of twisted pallet wood from my scrap pile and sanded the rough edges. We found this barn red stain at Ollie’s Bargain Outlet for $4, which was perfect.
She wanted to paint the word “peace” on it and I’ve been looking for an excuse to buy a Cricut, so I made the purchase and we created custom stencils. I love the use of a tree for the letter A. After a little spray paint and some hinge clips we had ourselves a place for Christmas (and my birthday) cards.
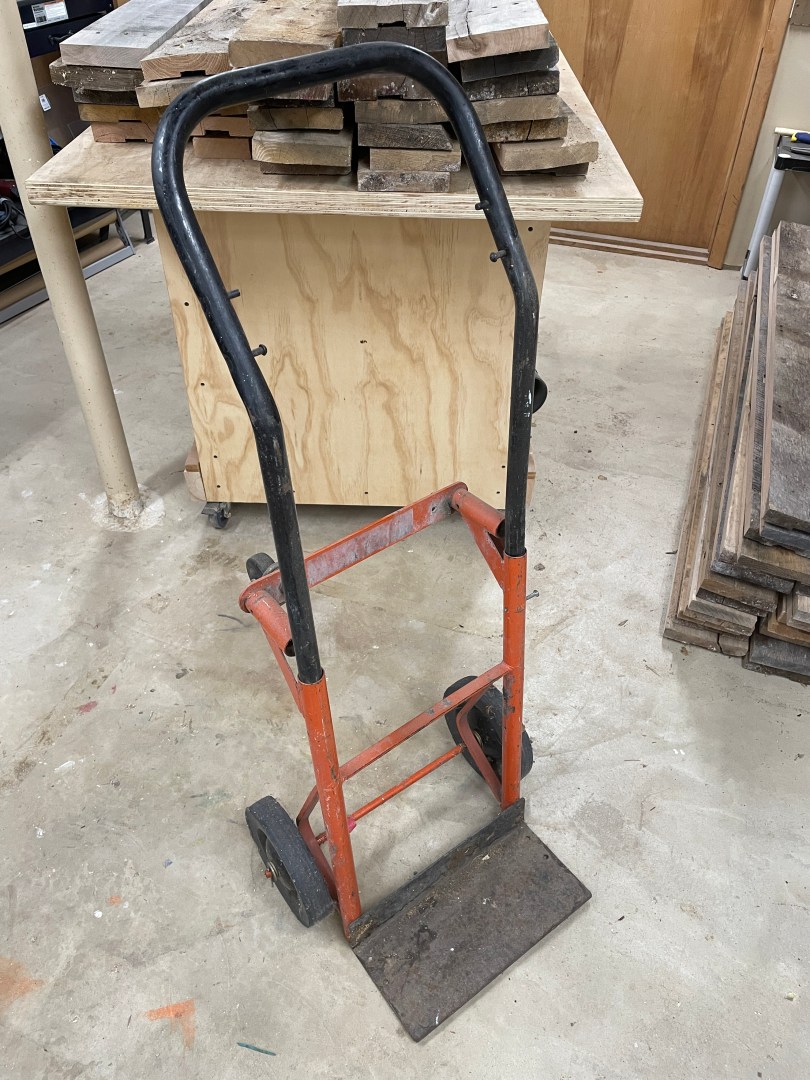
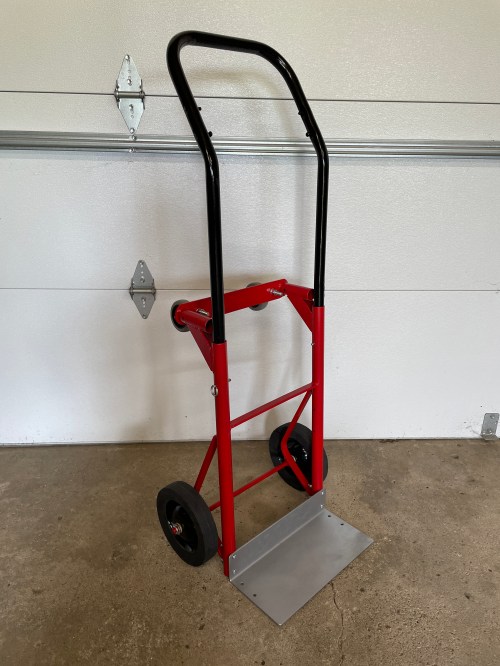
Last winter I picked up this hand truck for $5 on Facebook Marketplace.
This weekend I cleaned it up, painted it, and replaced some parts. Looks and works great now! Just in time to move a couple sets of washers and dryers.
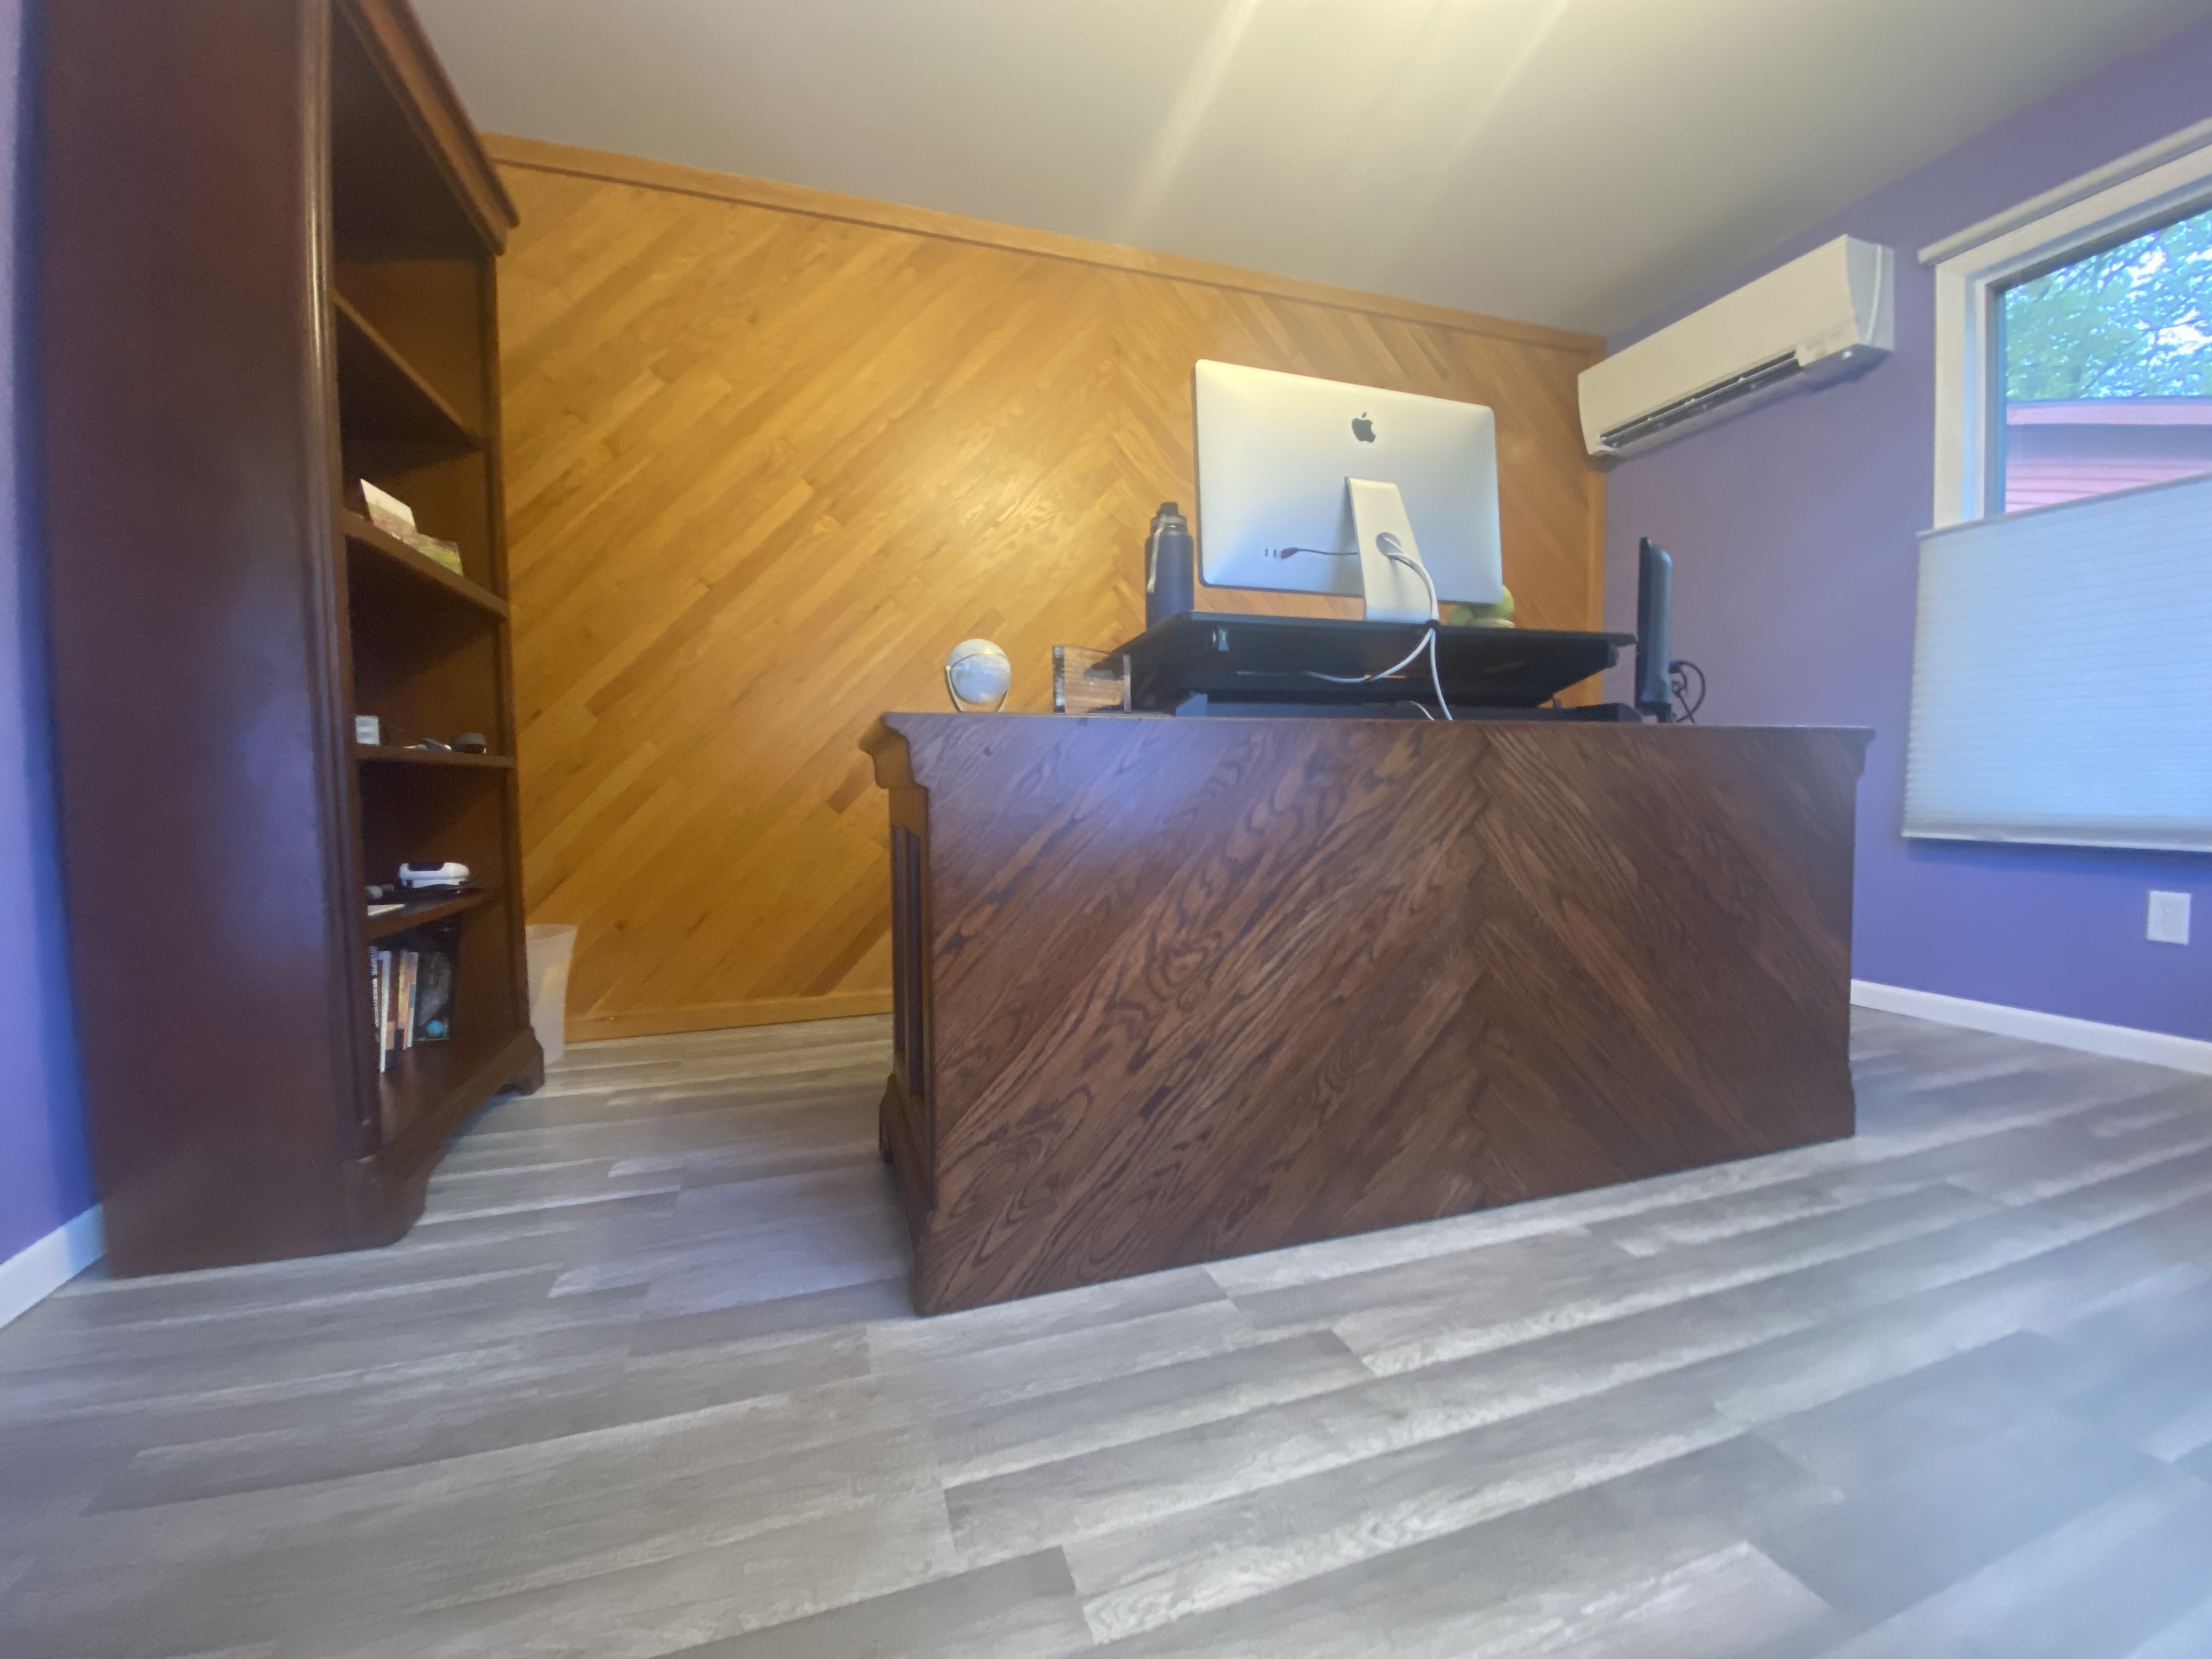
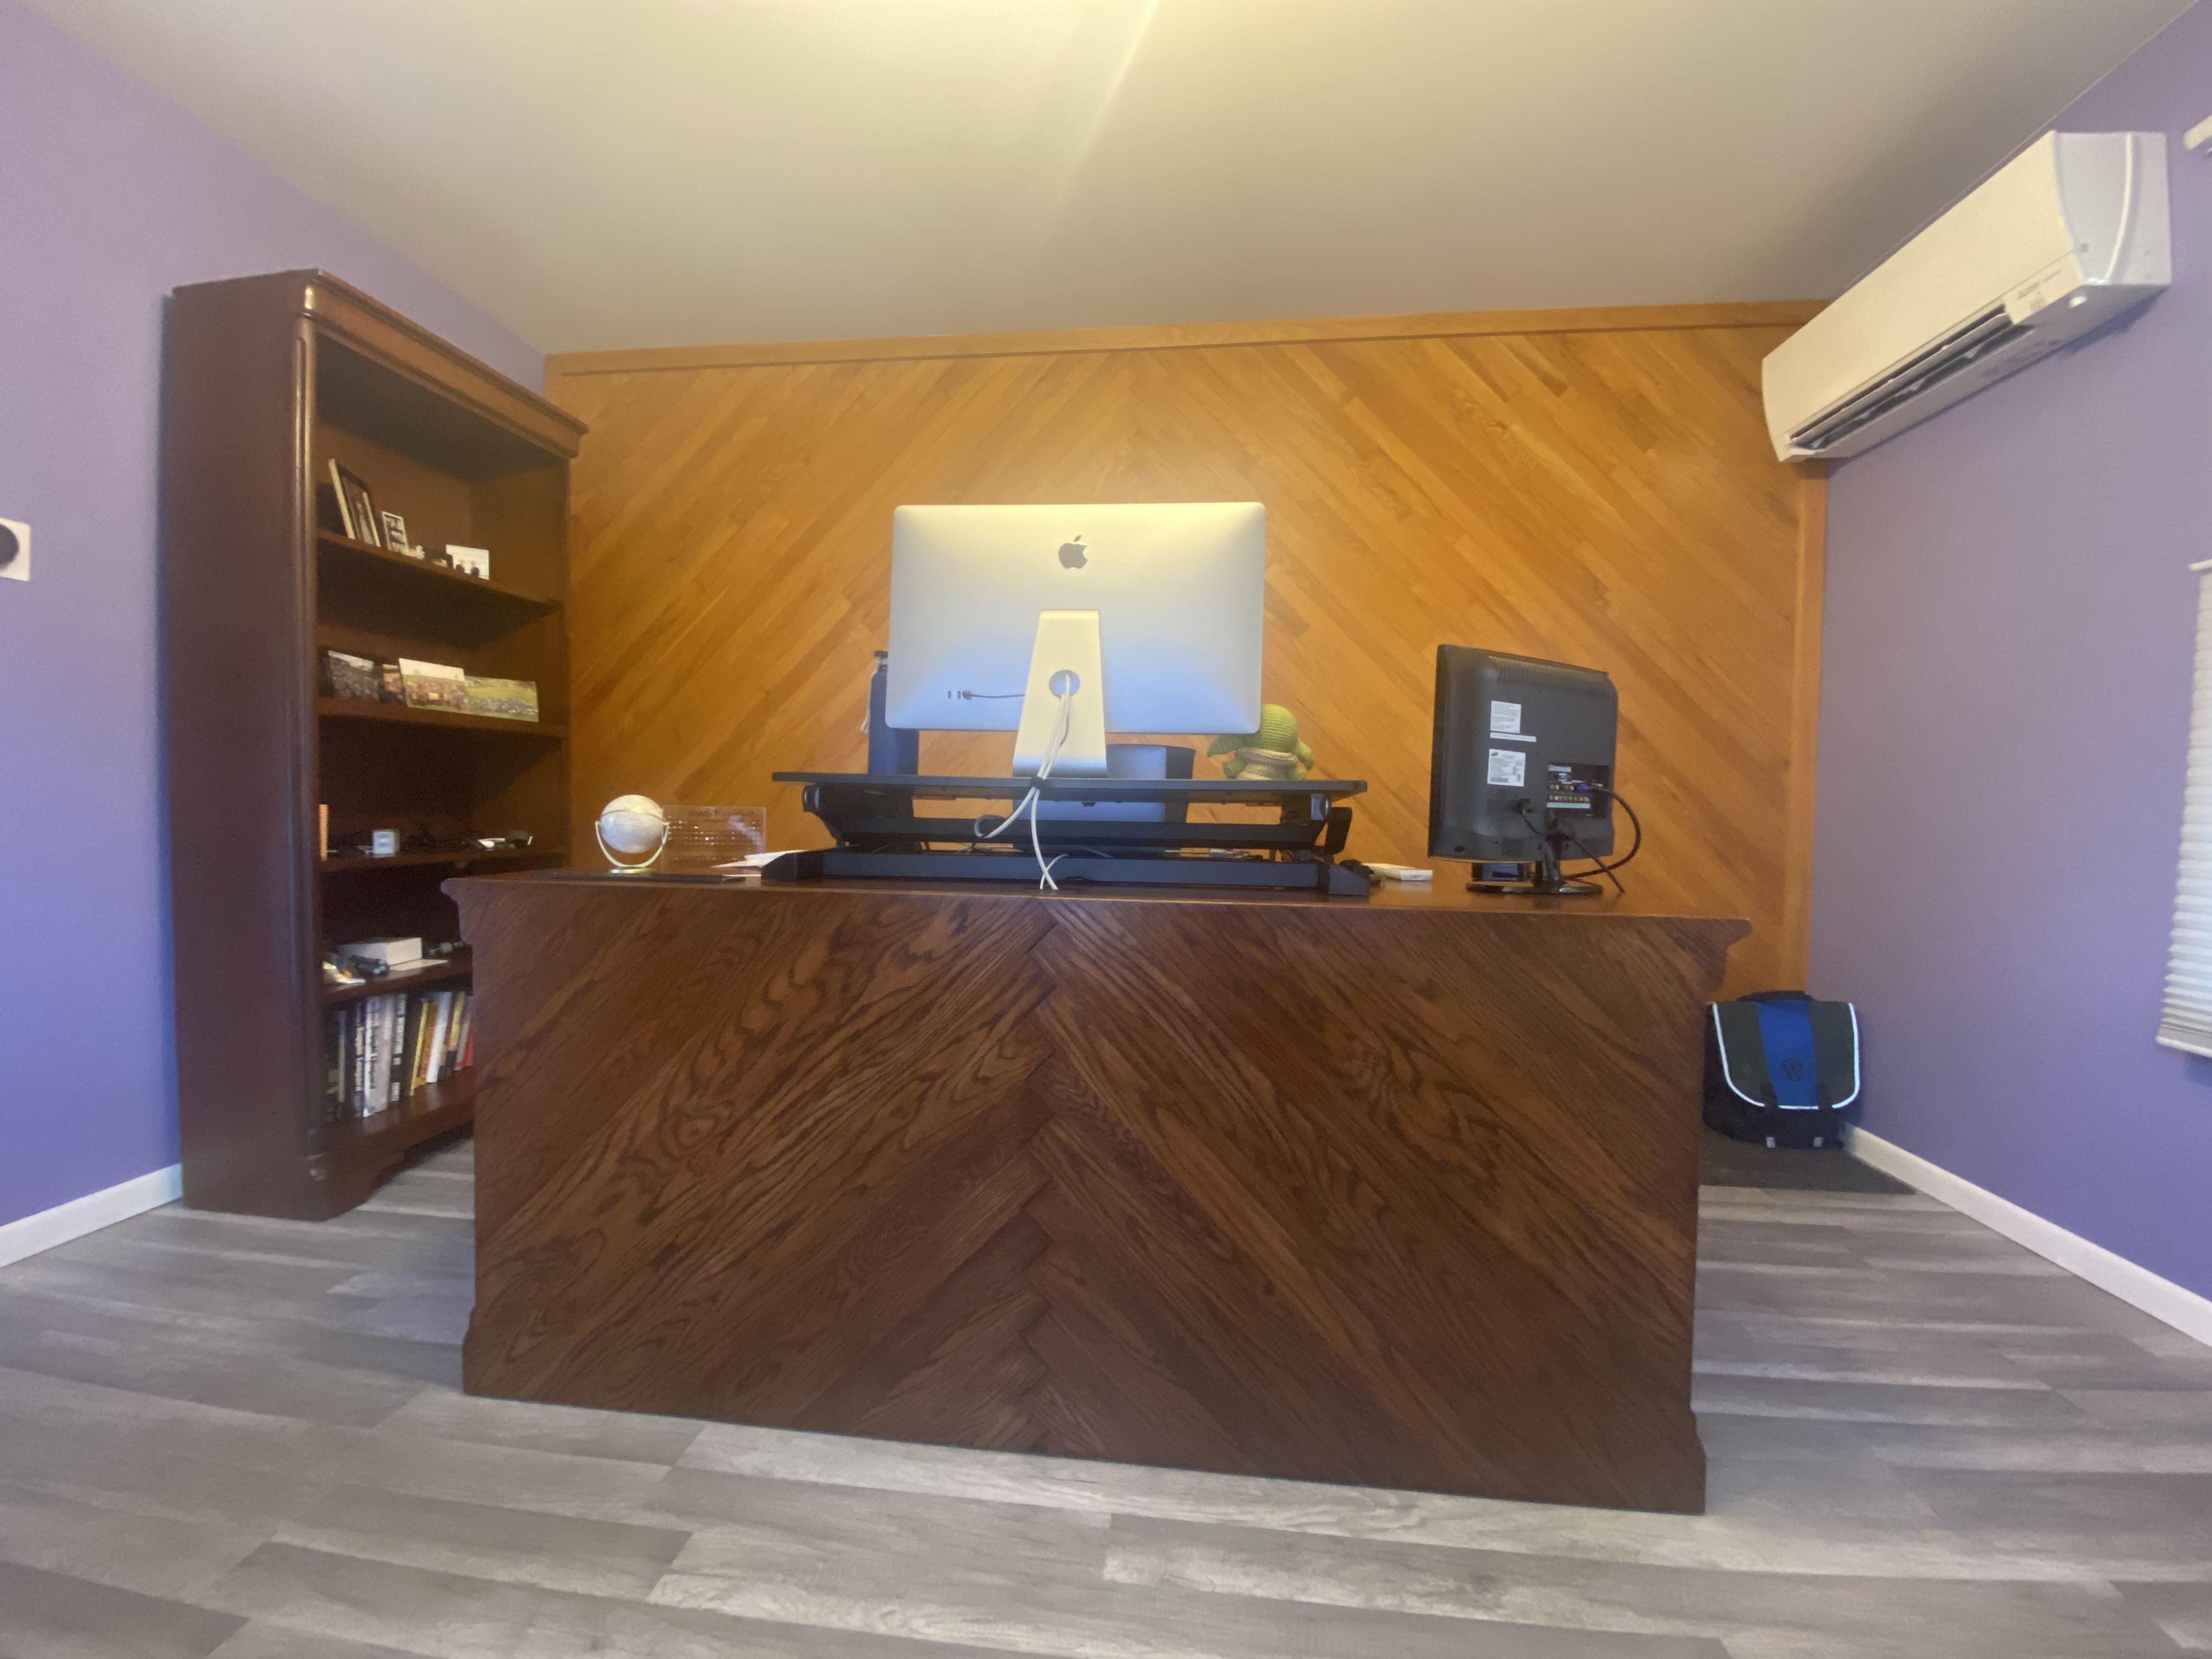
The idea for this actually started a year ago, when I rotated my desk in the old office.
The back of my desk is obviously meant to be up against a wall, so it’s not a finished look with the particle board and the big access holes. At the time, I was thinking I could create some type of artsy piece for the back using reclaimed pallet wood. I didn’t have any motivation to make anything over the winter though.
Fast forward to this year and moving my office to a newly redone room across the hall. With better lighting, the back of the desk stuck out even more.
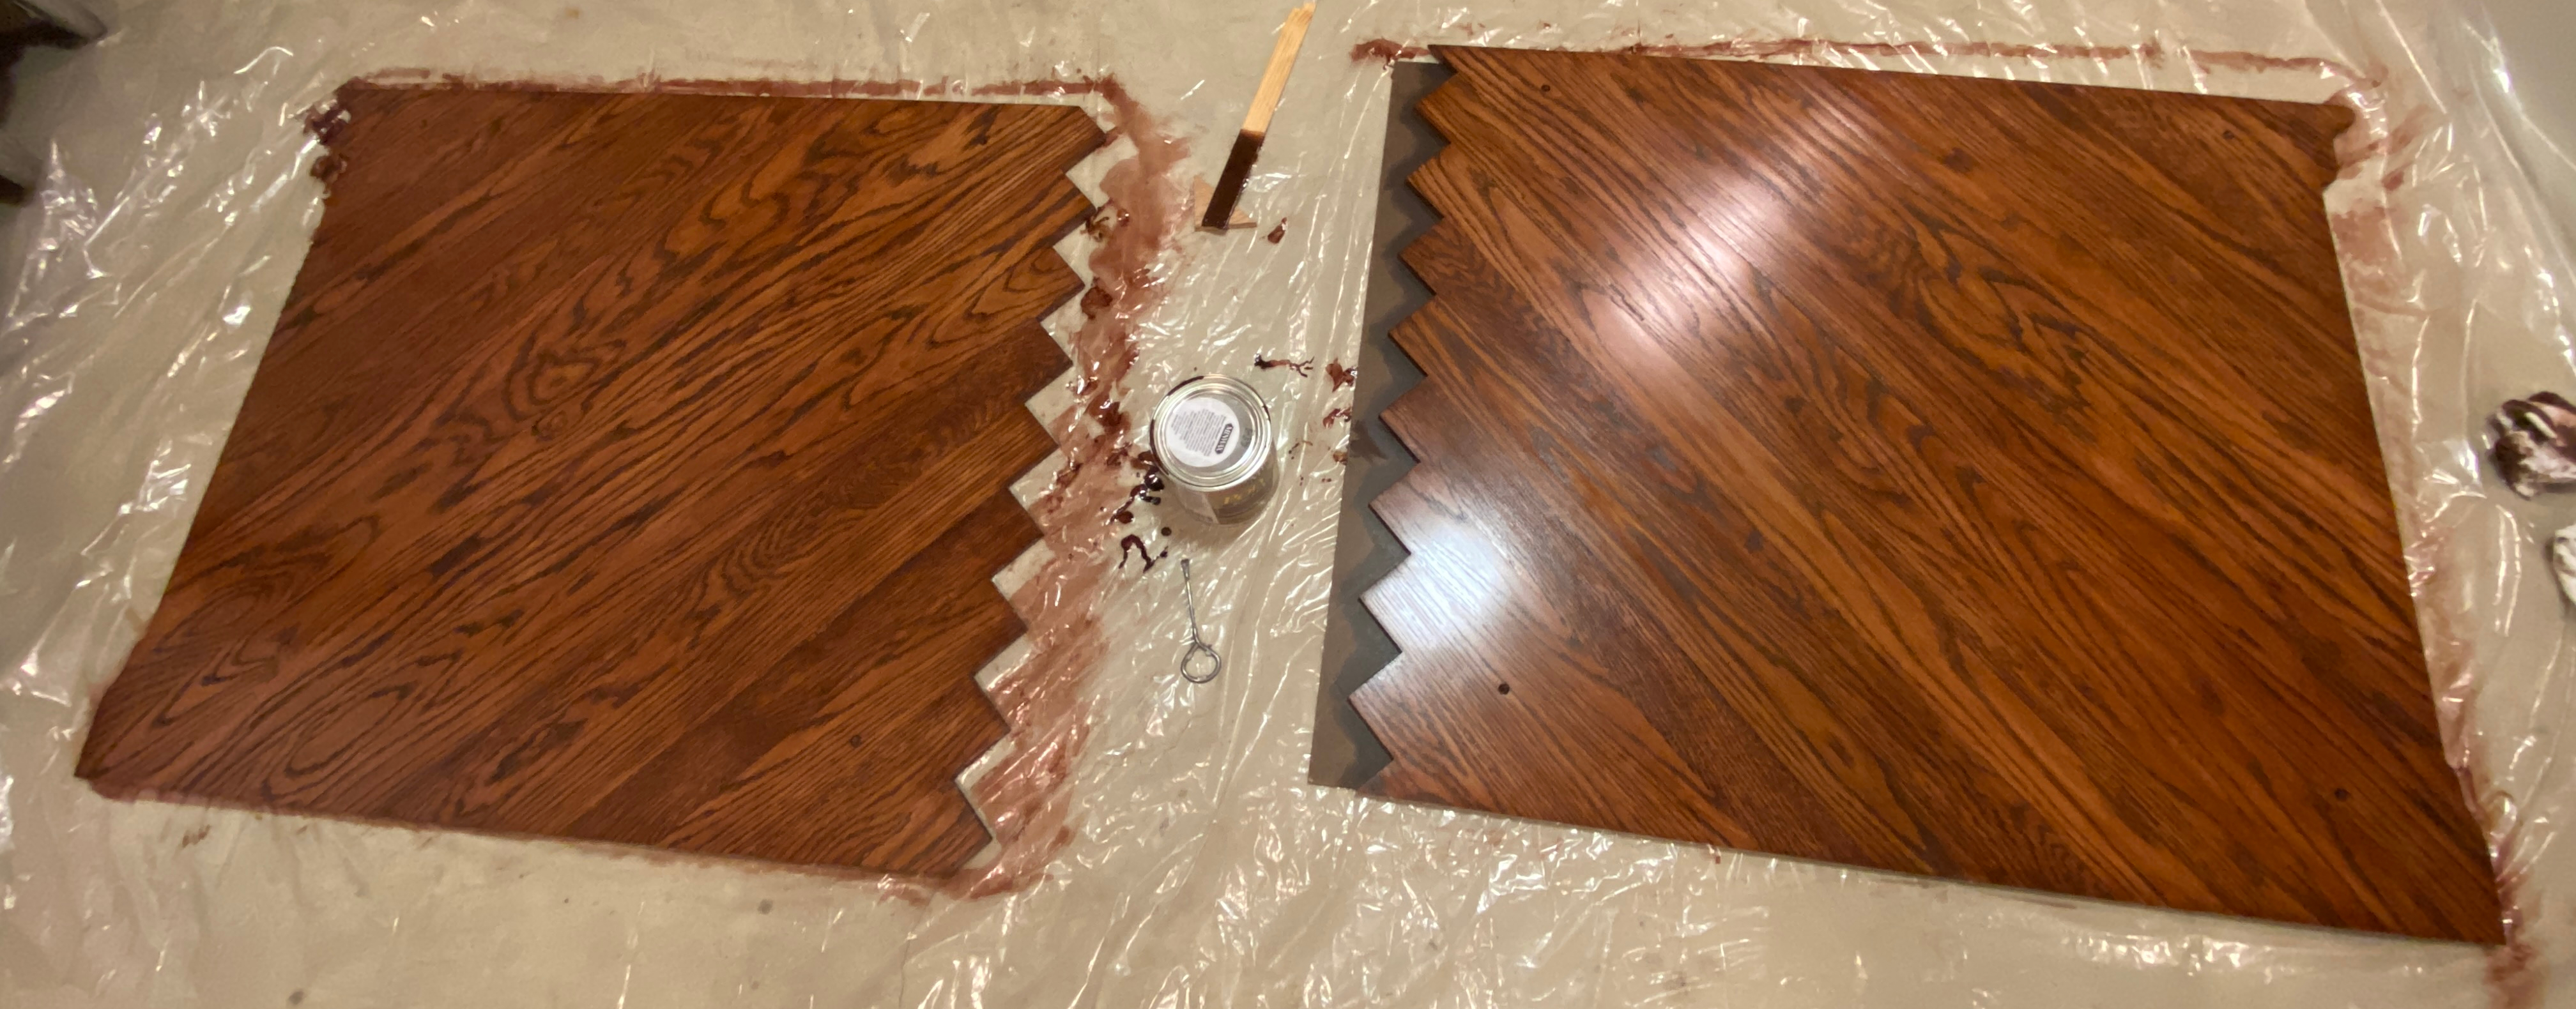
My idea came back to me and inspired part of the plant stand. I acquired a bunch of reclaimed oak flooring from the 50s to use for both projects. Hopefully the following pictures tell a little bit of the story about how the idea went from my brain, to a 3D model/plan, and came to life.
SketchUp model39 different sized piecesFlooring boards before processingMaking sure all of the pieces workStarting to glue up panelsKeeping everything lined up was trickyMaking sure it fits the deskWhoops! A corner on each side broke while cutting out the profilesFinishing!
It was probably the most complicated build I’ve done. Really happy with how it turned out!
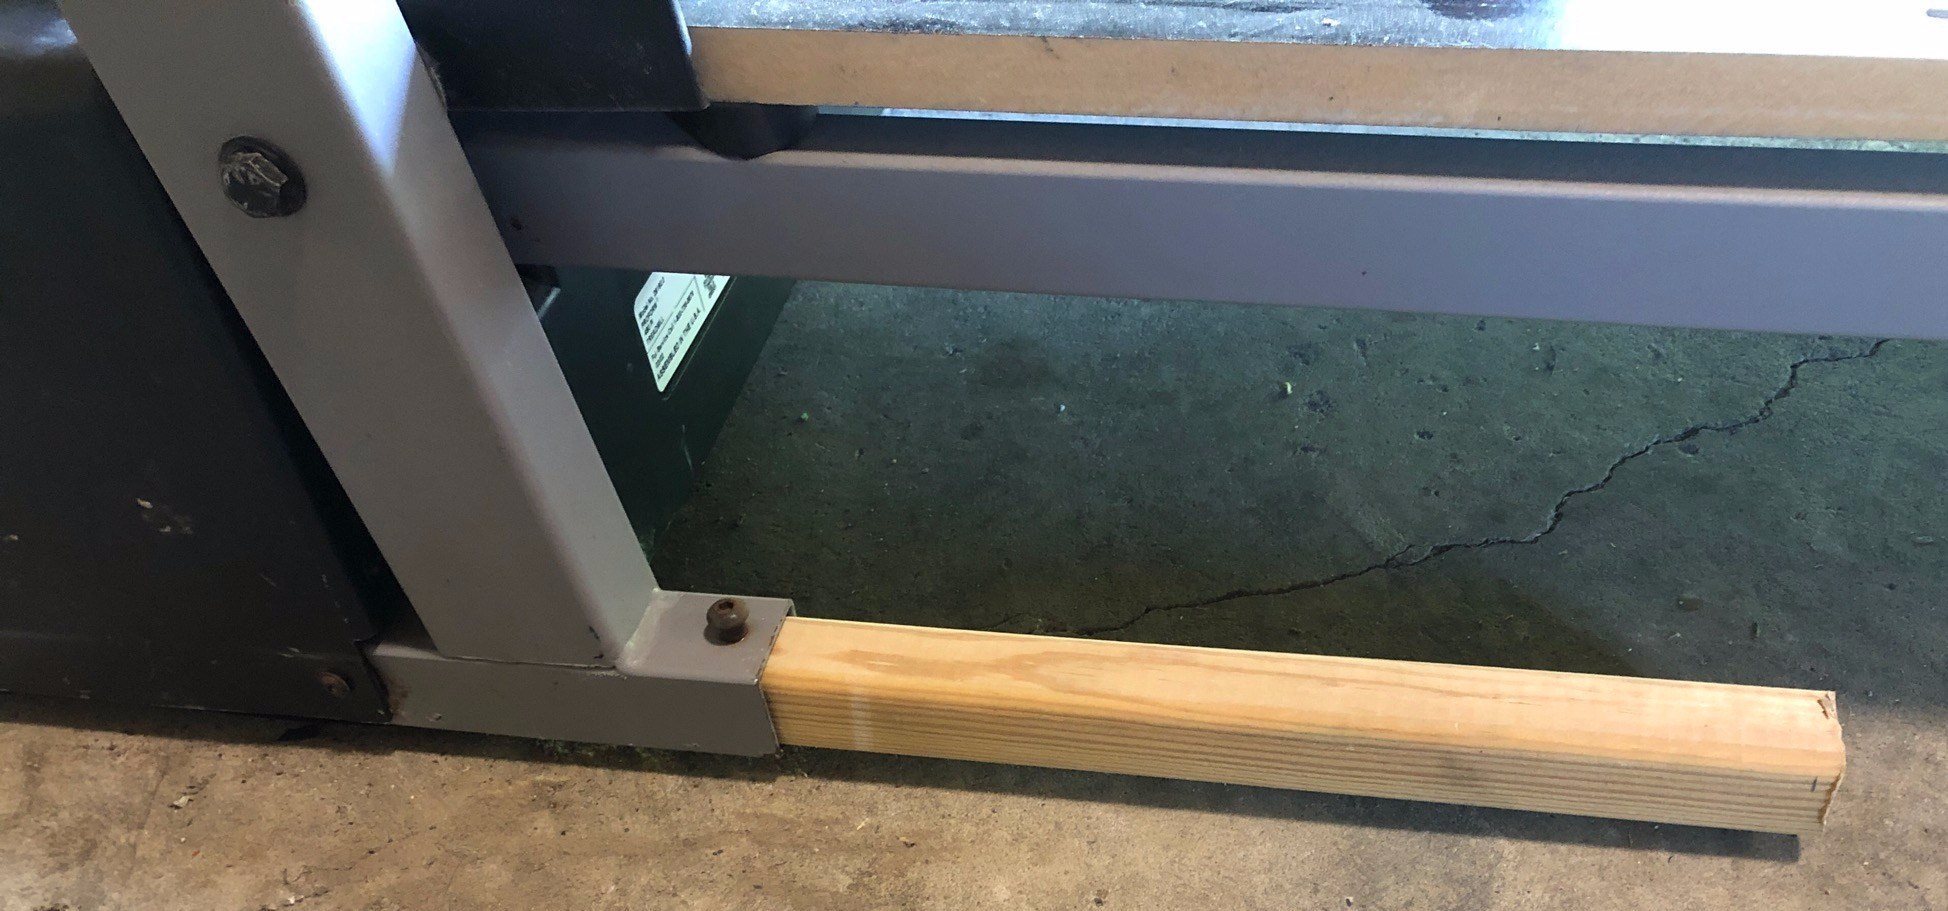
Last August I picked up a free treadmill and didn’t use it once because it had a major issue. When I’d get on it and crank up the speed, either the belt was slipping or the motor couldn’t handle the load. I never got around to troubleshooting the problem. A couple of weeks ago I saw another free treadmill which was able to fold up. That was another problem with the first treadmill; it took up way too much space in the garage.
So I picked up this second treadmill and gave it a quick test when I got it home. It worked just fine at speed, but the front end wanted to tip back. I found the manual online and noticed it was missing the support leg extensions and wheels. I grabbed a couple of 1.5″ posts from my scrap wood, hammered them in, and they fit perfectly.
No more tipping over!
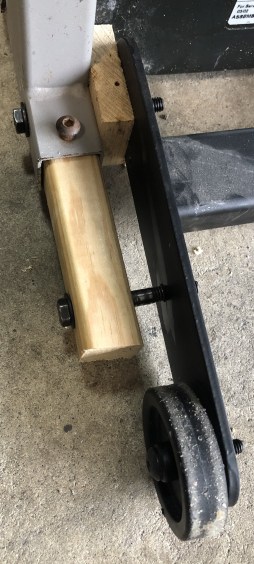
Last weekend I disassembled the first treadmill to salvage a bunch of parts, like the motor and speed controller. The support wheels were part of a framed piece, which I thought I could fit on to the treadmill I was keeping, so I saved them too.
Today I cut a couple of spacer blocks, chopped the leg posts, drilled some holes, and voila! The bolts I used were also saved from the other treadmill. I love when a plan works out and especially when it involves upcycling parts.
I was a little worried the posts wouldn’t be able to handle the weight of the treadmill when propped up to wheel around, but it works great. I probably won’t move the treadmill around the garage often, but it’s nice that it’ll be easy to do with the wheels instead of having to pick it up or shuffle it across the floor.
How many times will I use this treadmill in the next year though?
Following up on fixing my table saw crosscut sled, I decided it was time to build a new cart for the saw. The mobile base kit I used from Harbor Freight seemed like a good idea and worked ok in the beginning. Over time, the weight of the saw seemed to bend the base. With only two small swivel castors and the other two wheels being stationary, it became a real bitch to move around the shop, especially as I filled out the space with more tools.
The solid wood came from the cabinets I rebuilt, the plywood (except the one 3/4 piece) is from a truckload I got for free, the drawer is the same as the ones I upcycled for the sanding station, and I think I paid $10 for the casters at a garage sale.
Here are some planning measurements and sketches. Other than trying to keep the same height for my saw, the dimensions were based on the drawer.
I took those and most of the plan from the mobile table saw cart I linked above to make a model in SketchUp. You can grab the plans off GitHub if you want them.
Creating a model really helps me find measurement errors and think about the assembly order. The Cut List extension in SketchUp is a huge time saver too.
Note that the cut list above isn’t the final one in case you want to make this. I made some modifications along the way. The Sketchup model should be pretty close to what I made though.
I really liked the assembly process for this build, which made it easy to square everything up. Makes a huge difference being able to move the saw around the shop better.
Of course I had to add one of the free Harbor Freight magnetic strips. Much better plate to store the tape measure and splitters than with magnets on the fence.
While I was at it, I attempted to seal up a bunch of gaps in the saw’s body with spray foam. What a mess! I also made covers for the front and back that’ll stay in place except when I need to make a bevel cut.
I ended painting them black to blend in. Hopefully these little things make a big difference with dust collection.