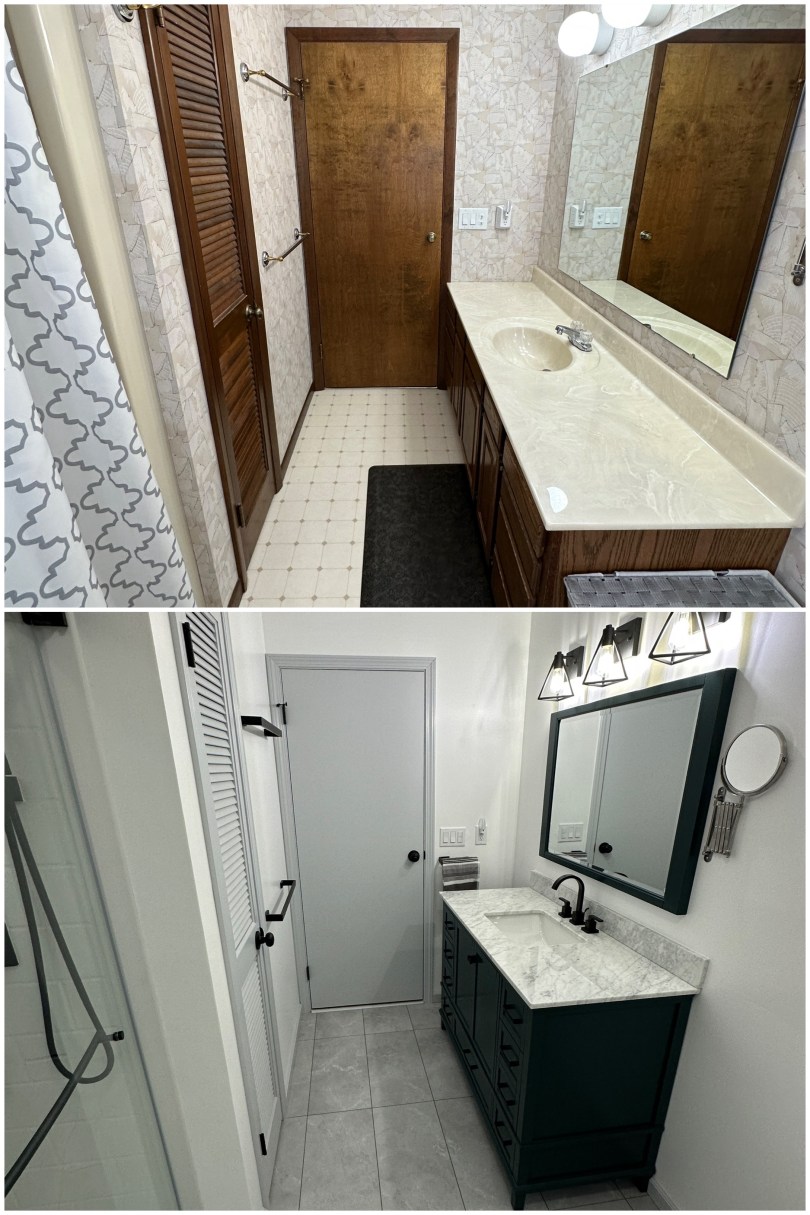
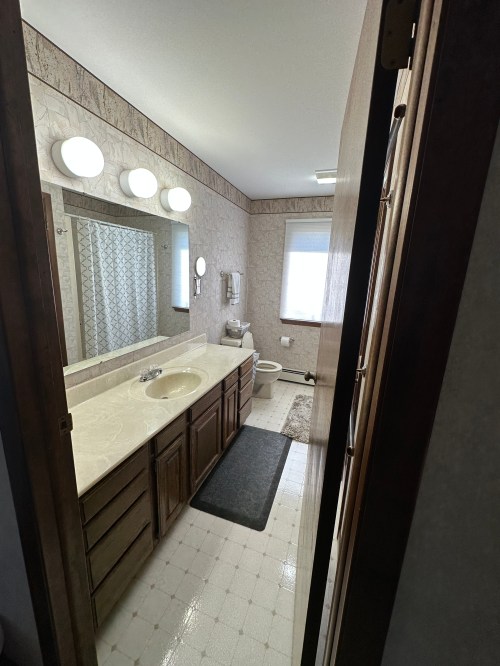
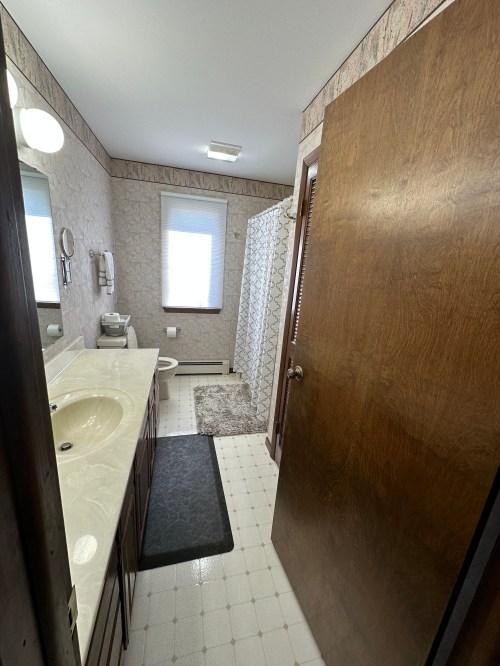
I’ve done a lot of home remodeling over the last three years and the guest bathroom was the final area needing an overhaul. Here are the standard before pictures.


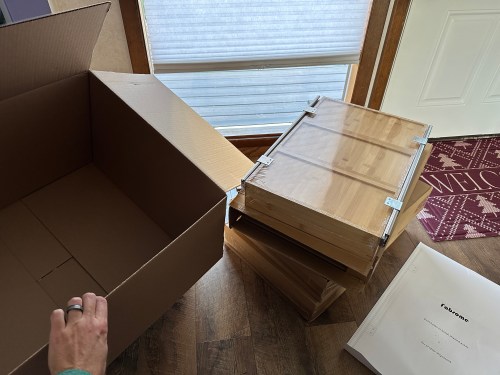
This is Brandi’s main bathroom, so I had wanted to improve the shelving situation in the closet for over a year. A smaller vanity was going in, so storage space would be lost. With three feet of depth in the closet there was a lot of wasted area and room for improvement. I bought three pull out drawers (Amazon). The closet shelves are made from particle board, so instead of using the included screws for attachment I picked up bolts, washers, and nuts.


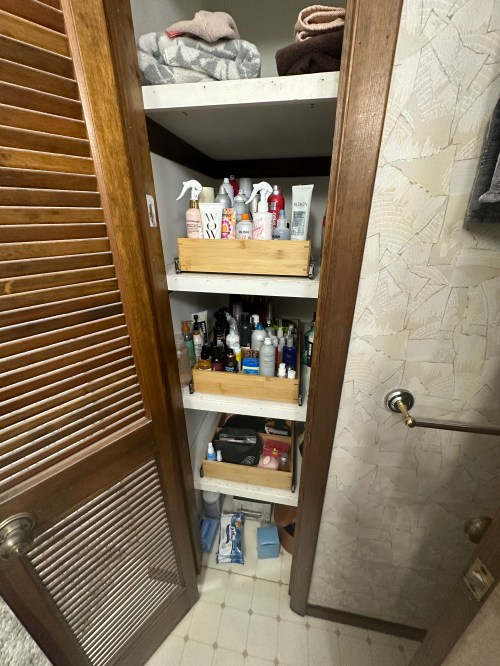

After an hour install and some organizing it was a huge improvement. We even have room on the top shelf for spare towels now.
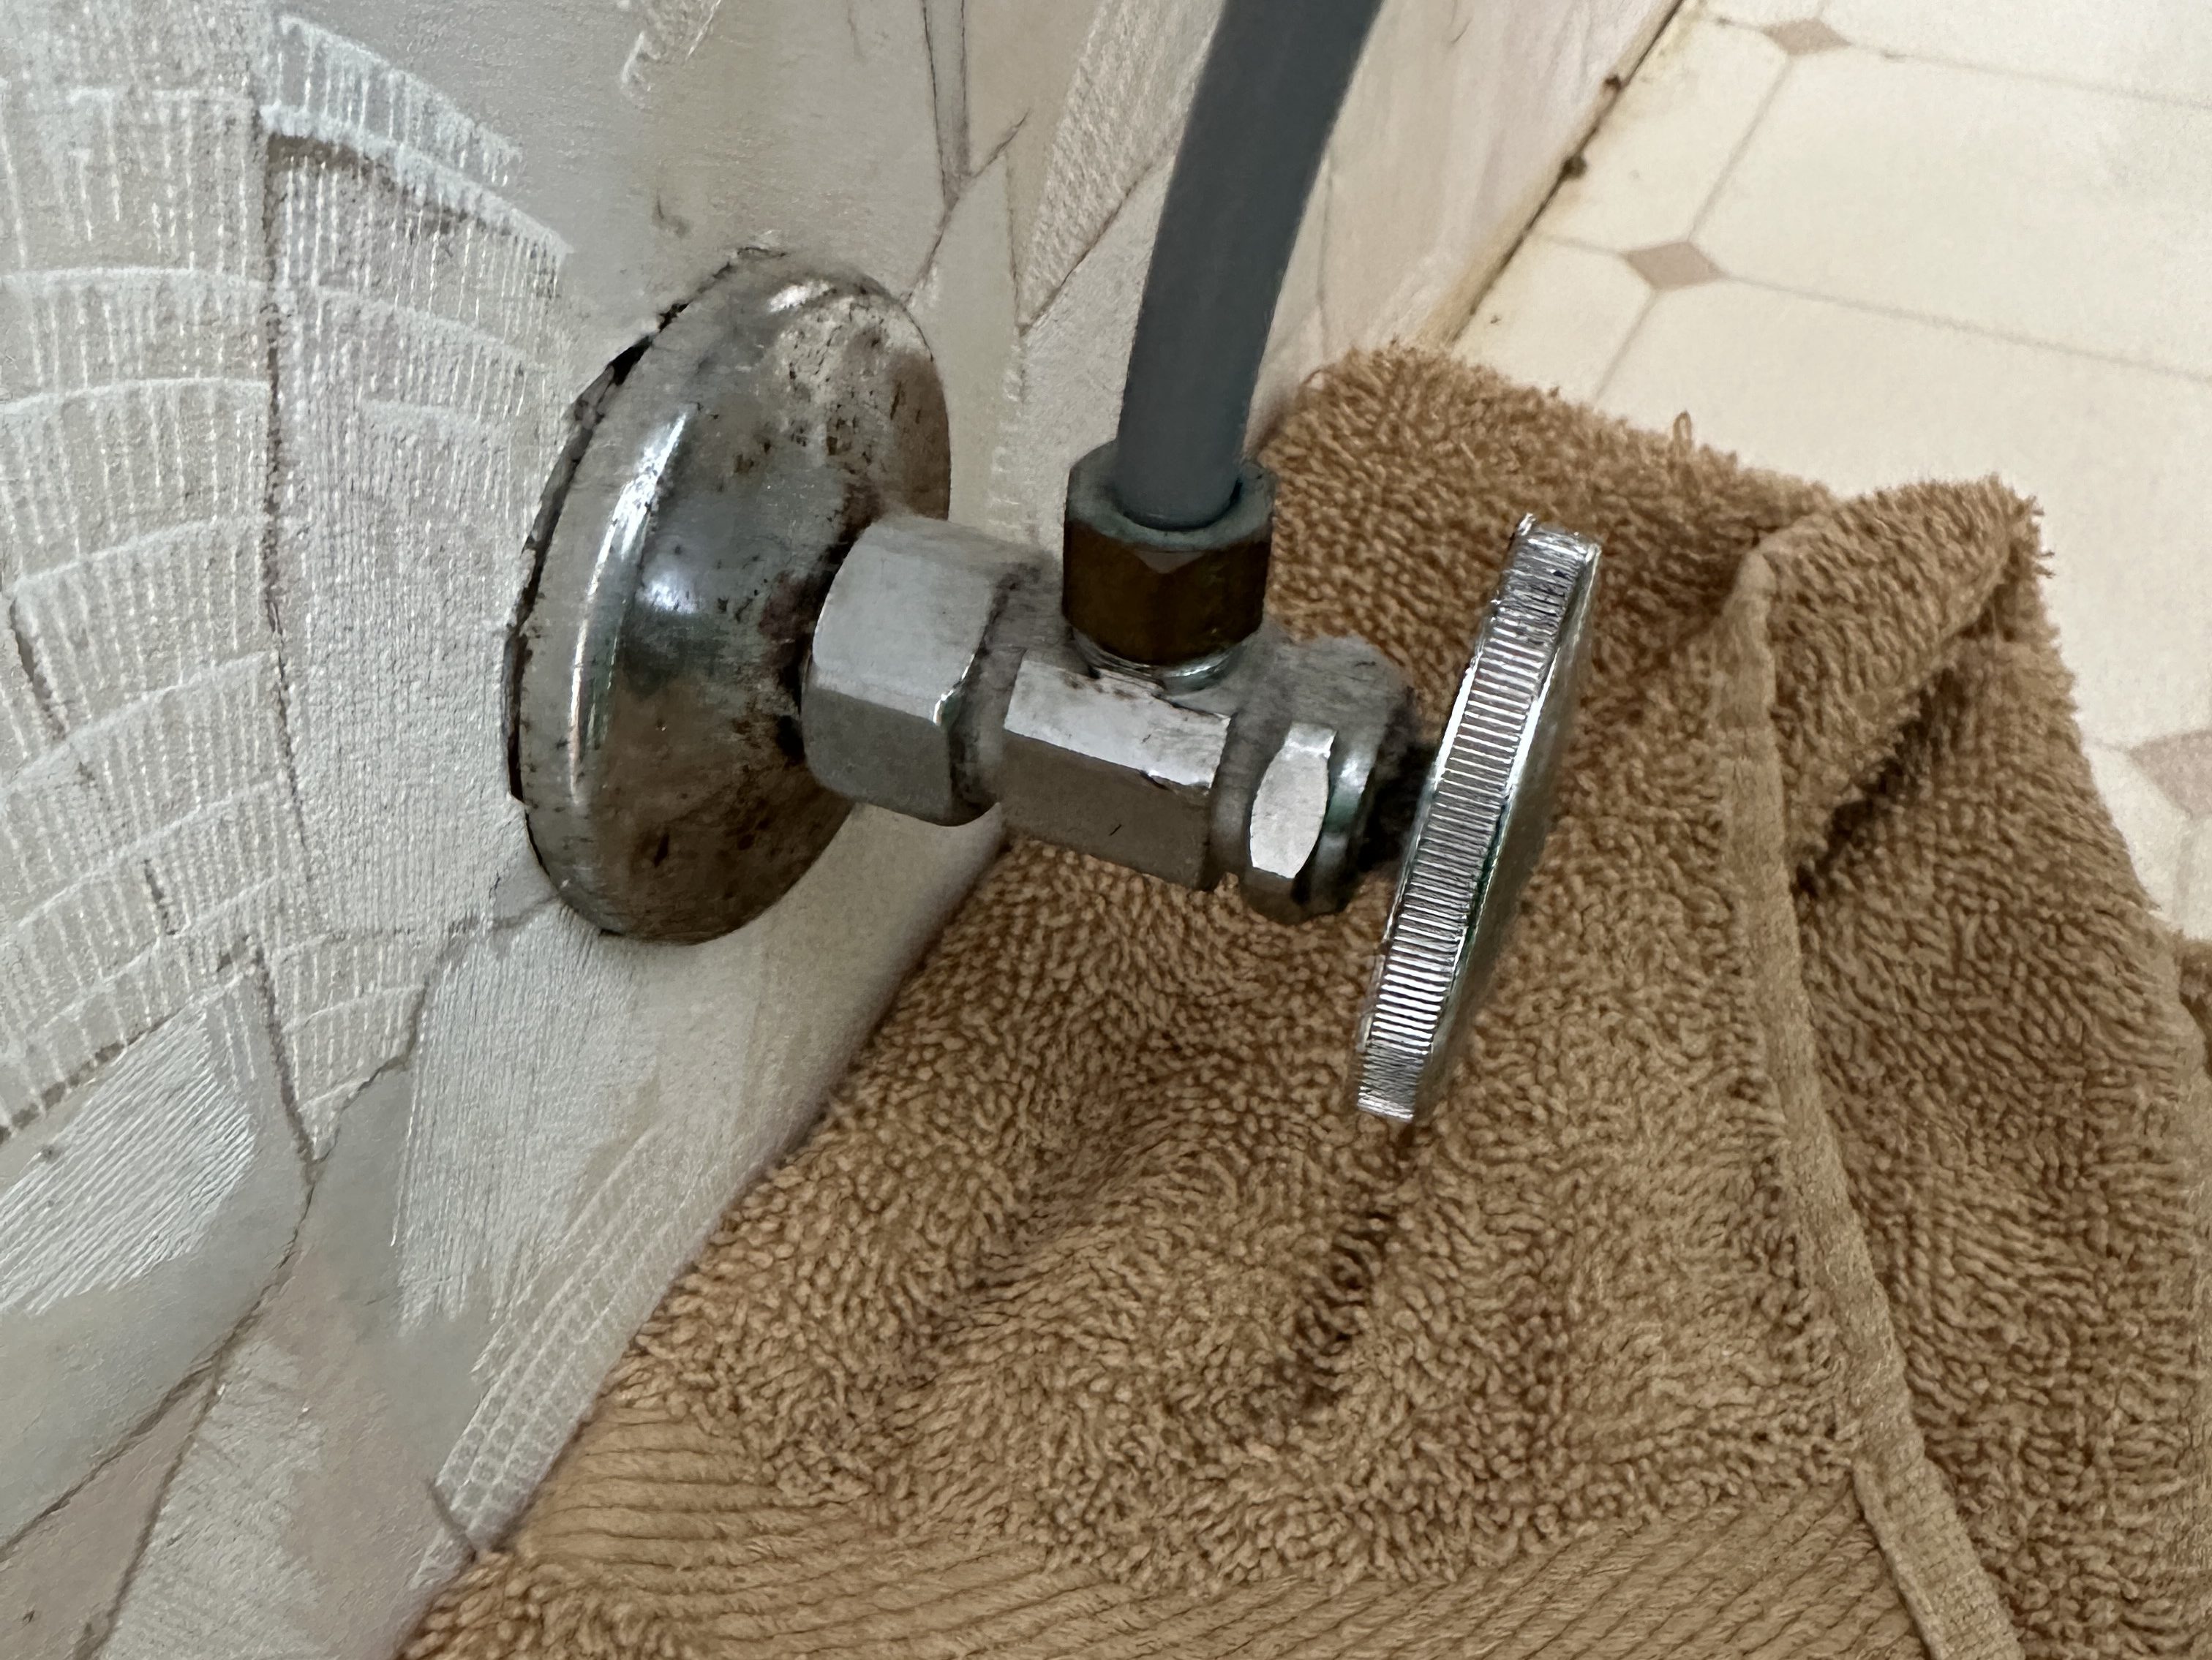
Just like the other bathroom, there weren’t shut-off valves on the sink’s water lines, so I installed some. Next up was taking down trim and everything on the walls so the fun job of removing wallpaper could be done; it was more trouble than it had been anywhere else in the house. Had to pull out the vanity, lights, mirror, and toilet to complete the job. Of course the toilet valve wasn’t completing turning off, so I put a new valve in there as well. Scrubbing and washing the walls was an exhausting step of this project and we were glad when it was done!

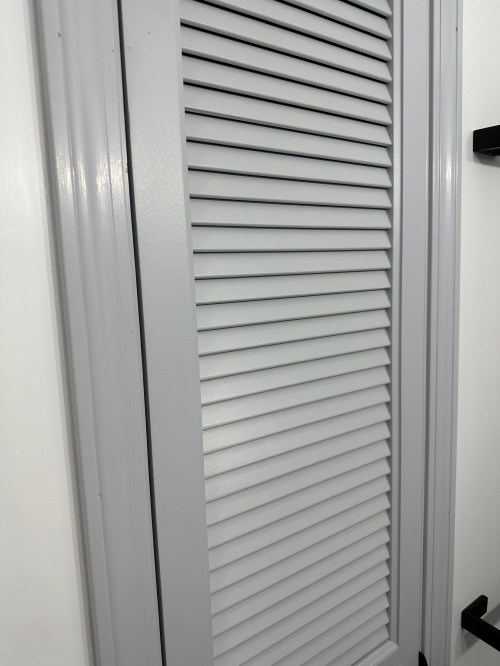
The walls under the wallpaper were in rough shape and needed a lot of patch work. I brushed some primer on the areas where the drywall paper was torn off. It was a good time to freshen up the ceiling before installing anything new in the room, so I gave it a quick coat of paint. We did primer and paint on the register and trim around the window and two doors. Since the closet door was slatted I needed to use my paint sprayer. I used plastic sheeting to make a temporary spray booth in the basement.


Dad came down to help for a couple of days. We removed some drywall and chopped up the shower for removal with a reciprocating saw. It went very smooth, thanks to having watched Removing A Fiberglass Bath And Surround and following exactly what he did.

With the water to the house turned off, we cut the lines, made an access hole through the closet, and installed shut-off valves. It felt good to turn water to the house back on with the valves working as they should.

We brought in the shower pan for a test and it fit like a glove! We quickly decided we should pull flooring so the subfloor under the shower was closer to the level under the old vanity. It was a pain in the ass because there was linoleum with a layer of luan (attached with far too many staples) over an even older layer of linoleum. After digging through my rack of plywood I found some that was the correct thickness to bring the shower subfloor up with the rest of the room.
We started working on the drain, which needed to move over a bit from the old one. We bought parts to construct our own P-trap. There was still a lot of trimming PVC pieces, but we ended up with something that worked. Here’s what we had to work with and the cut-out piece of circle is where we had to get to.


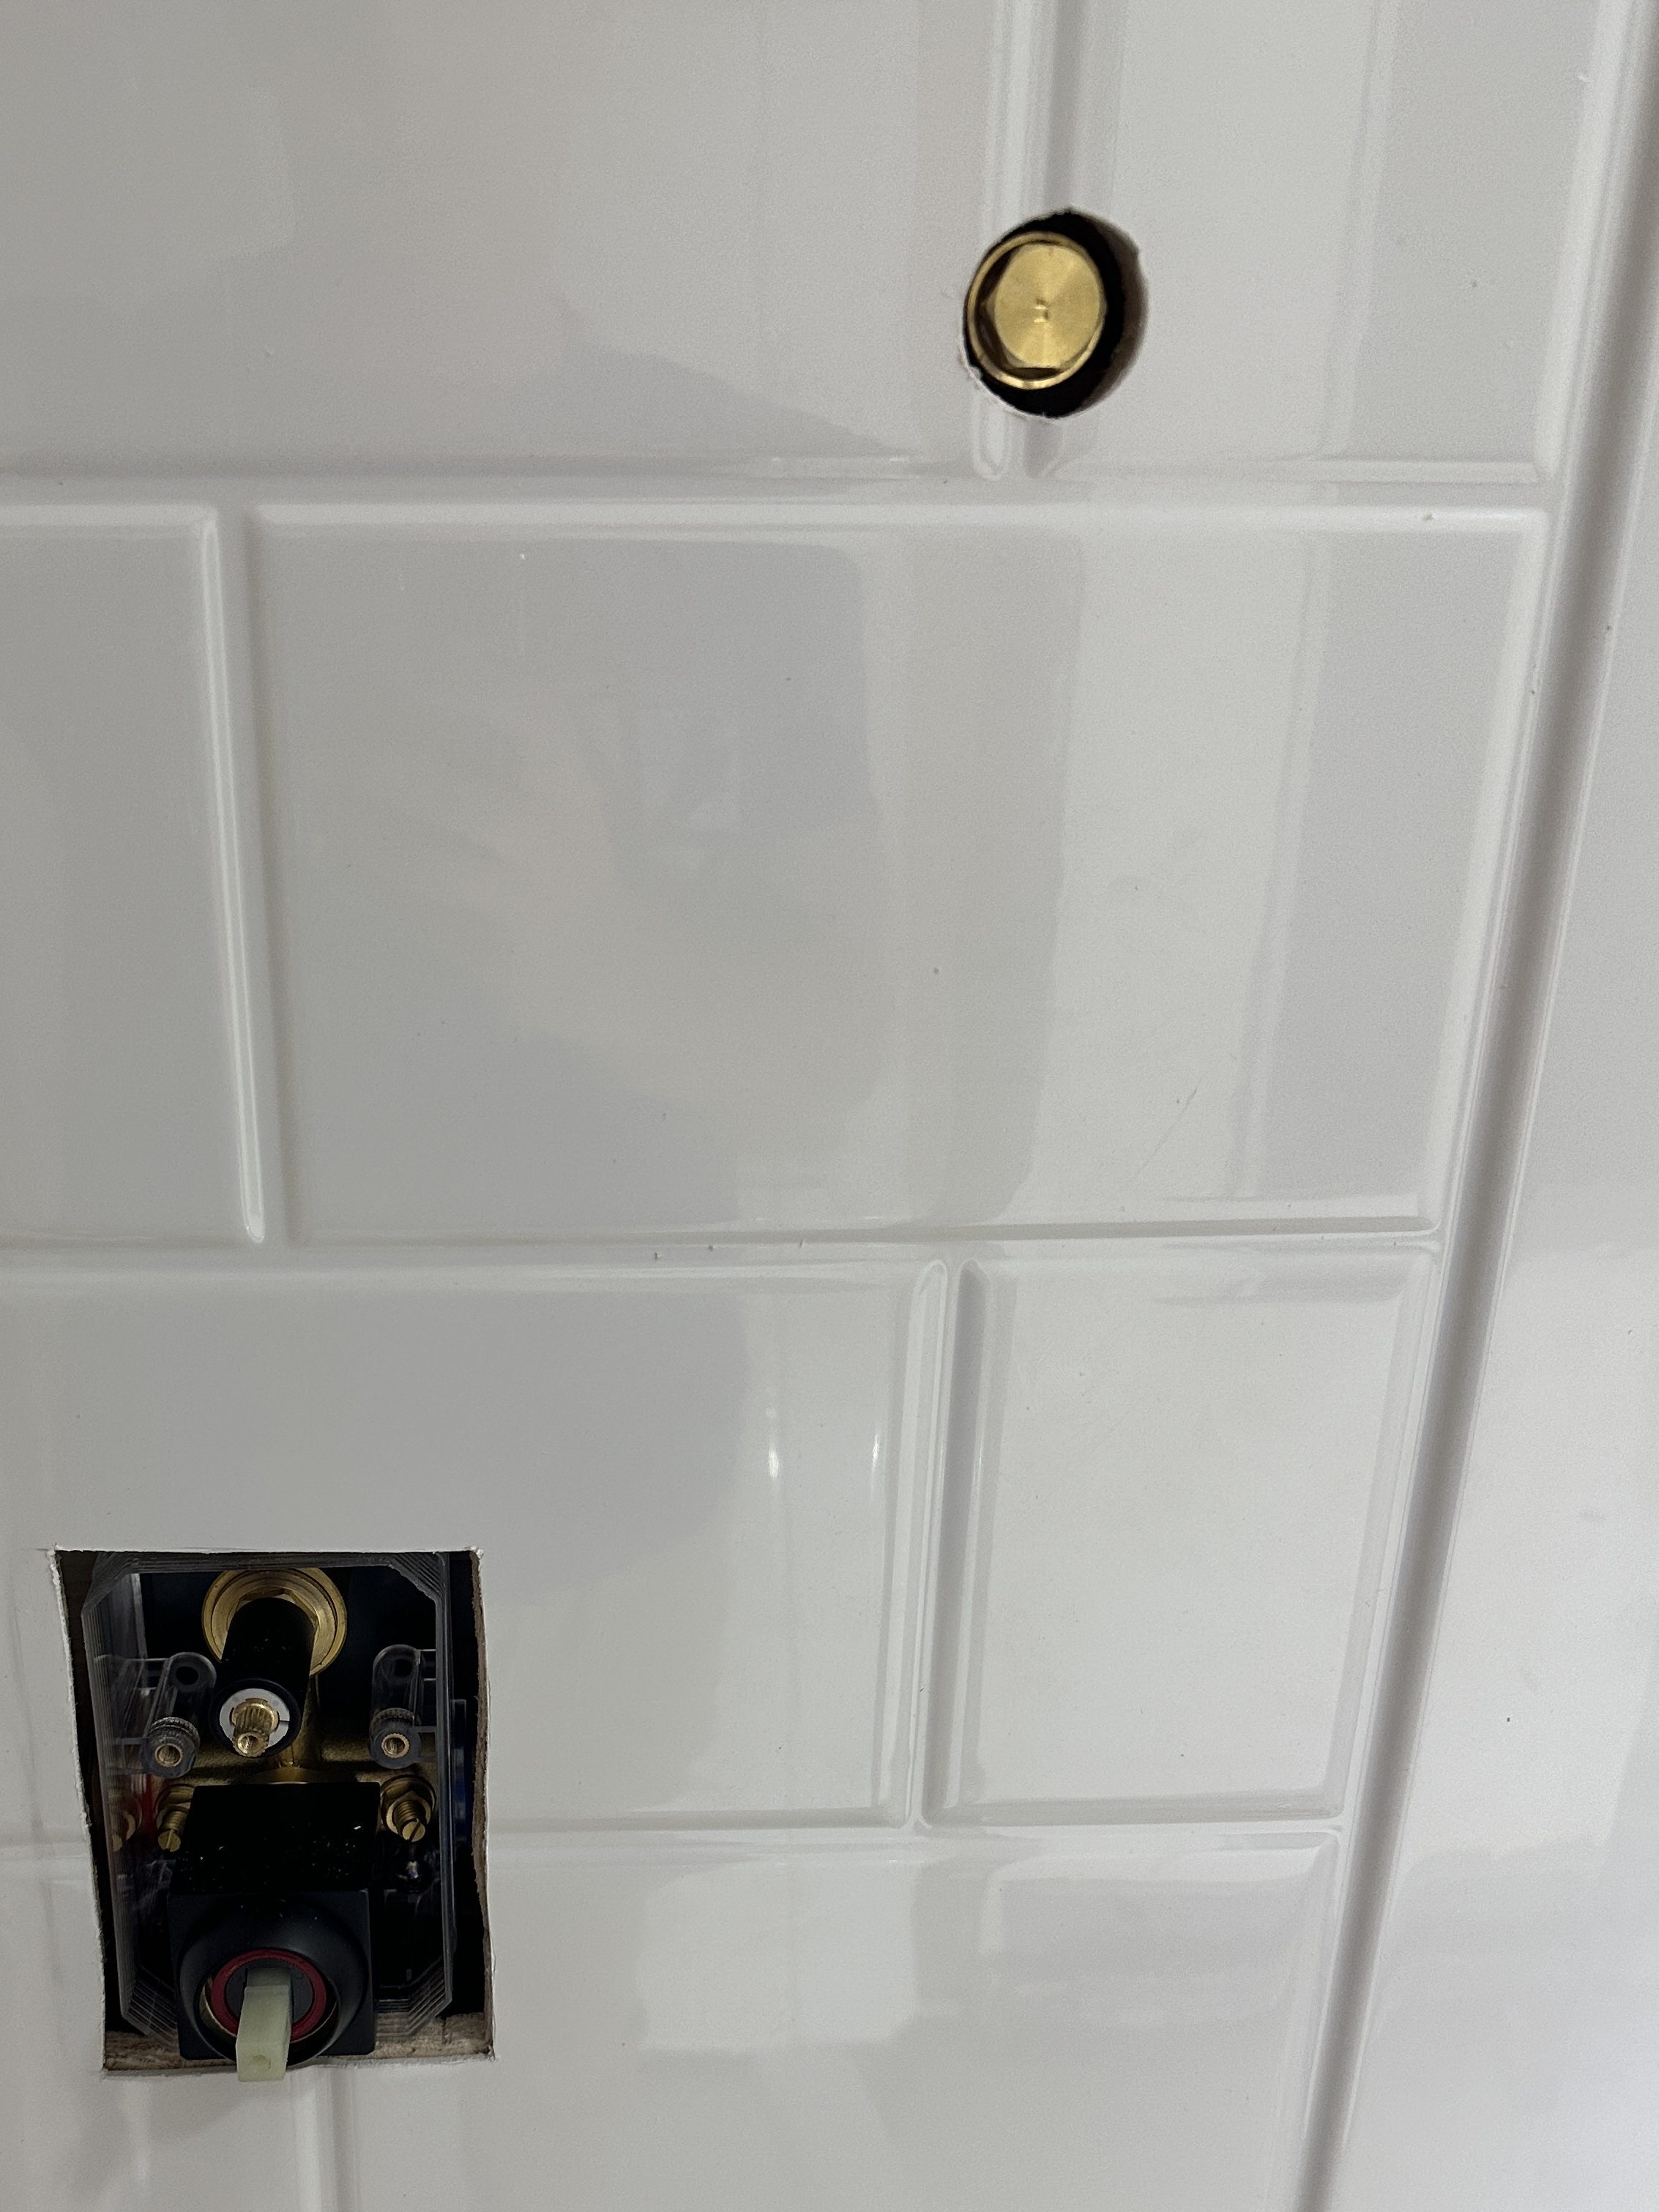
Then it was on to all of the plumbing for the water lines. This was a bit of a challenge, because the shower fixture instructions were weak on details. I picked up a lot of tips for working with PEX from How To Convert Old Copper To New Pex | Tub And Shower Plumbing. After temporarily installing a couple of caps, a pressure test showed a leak-free system.

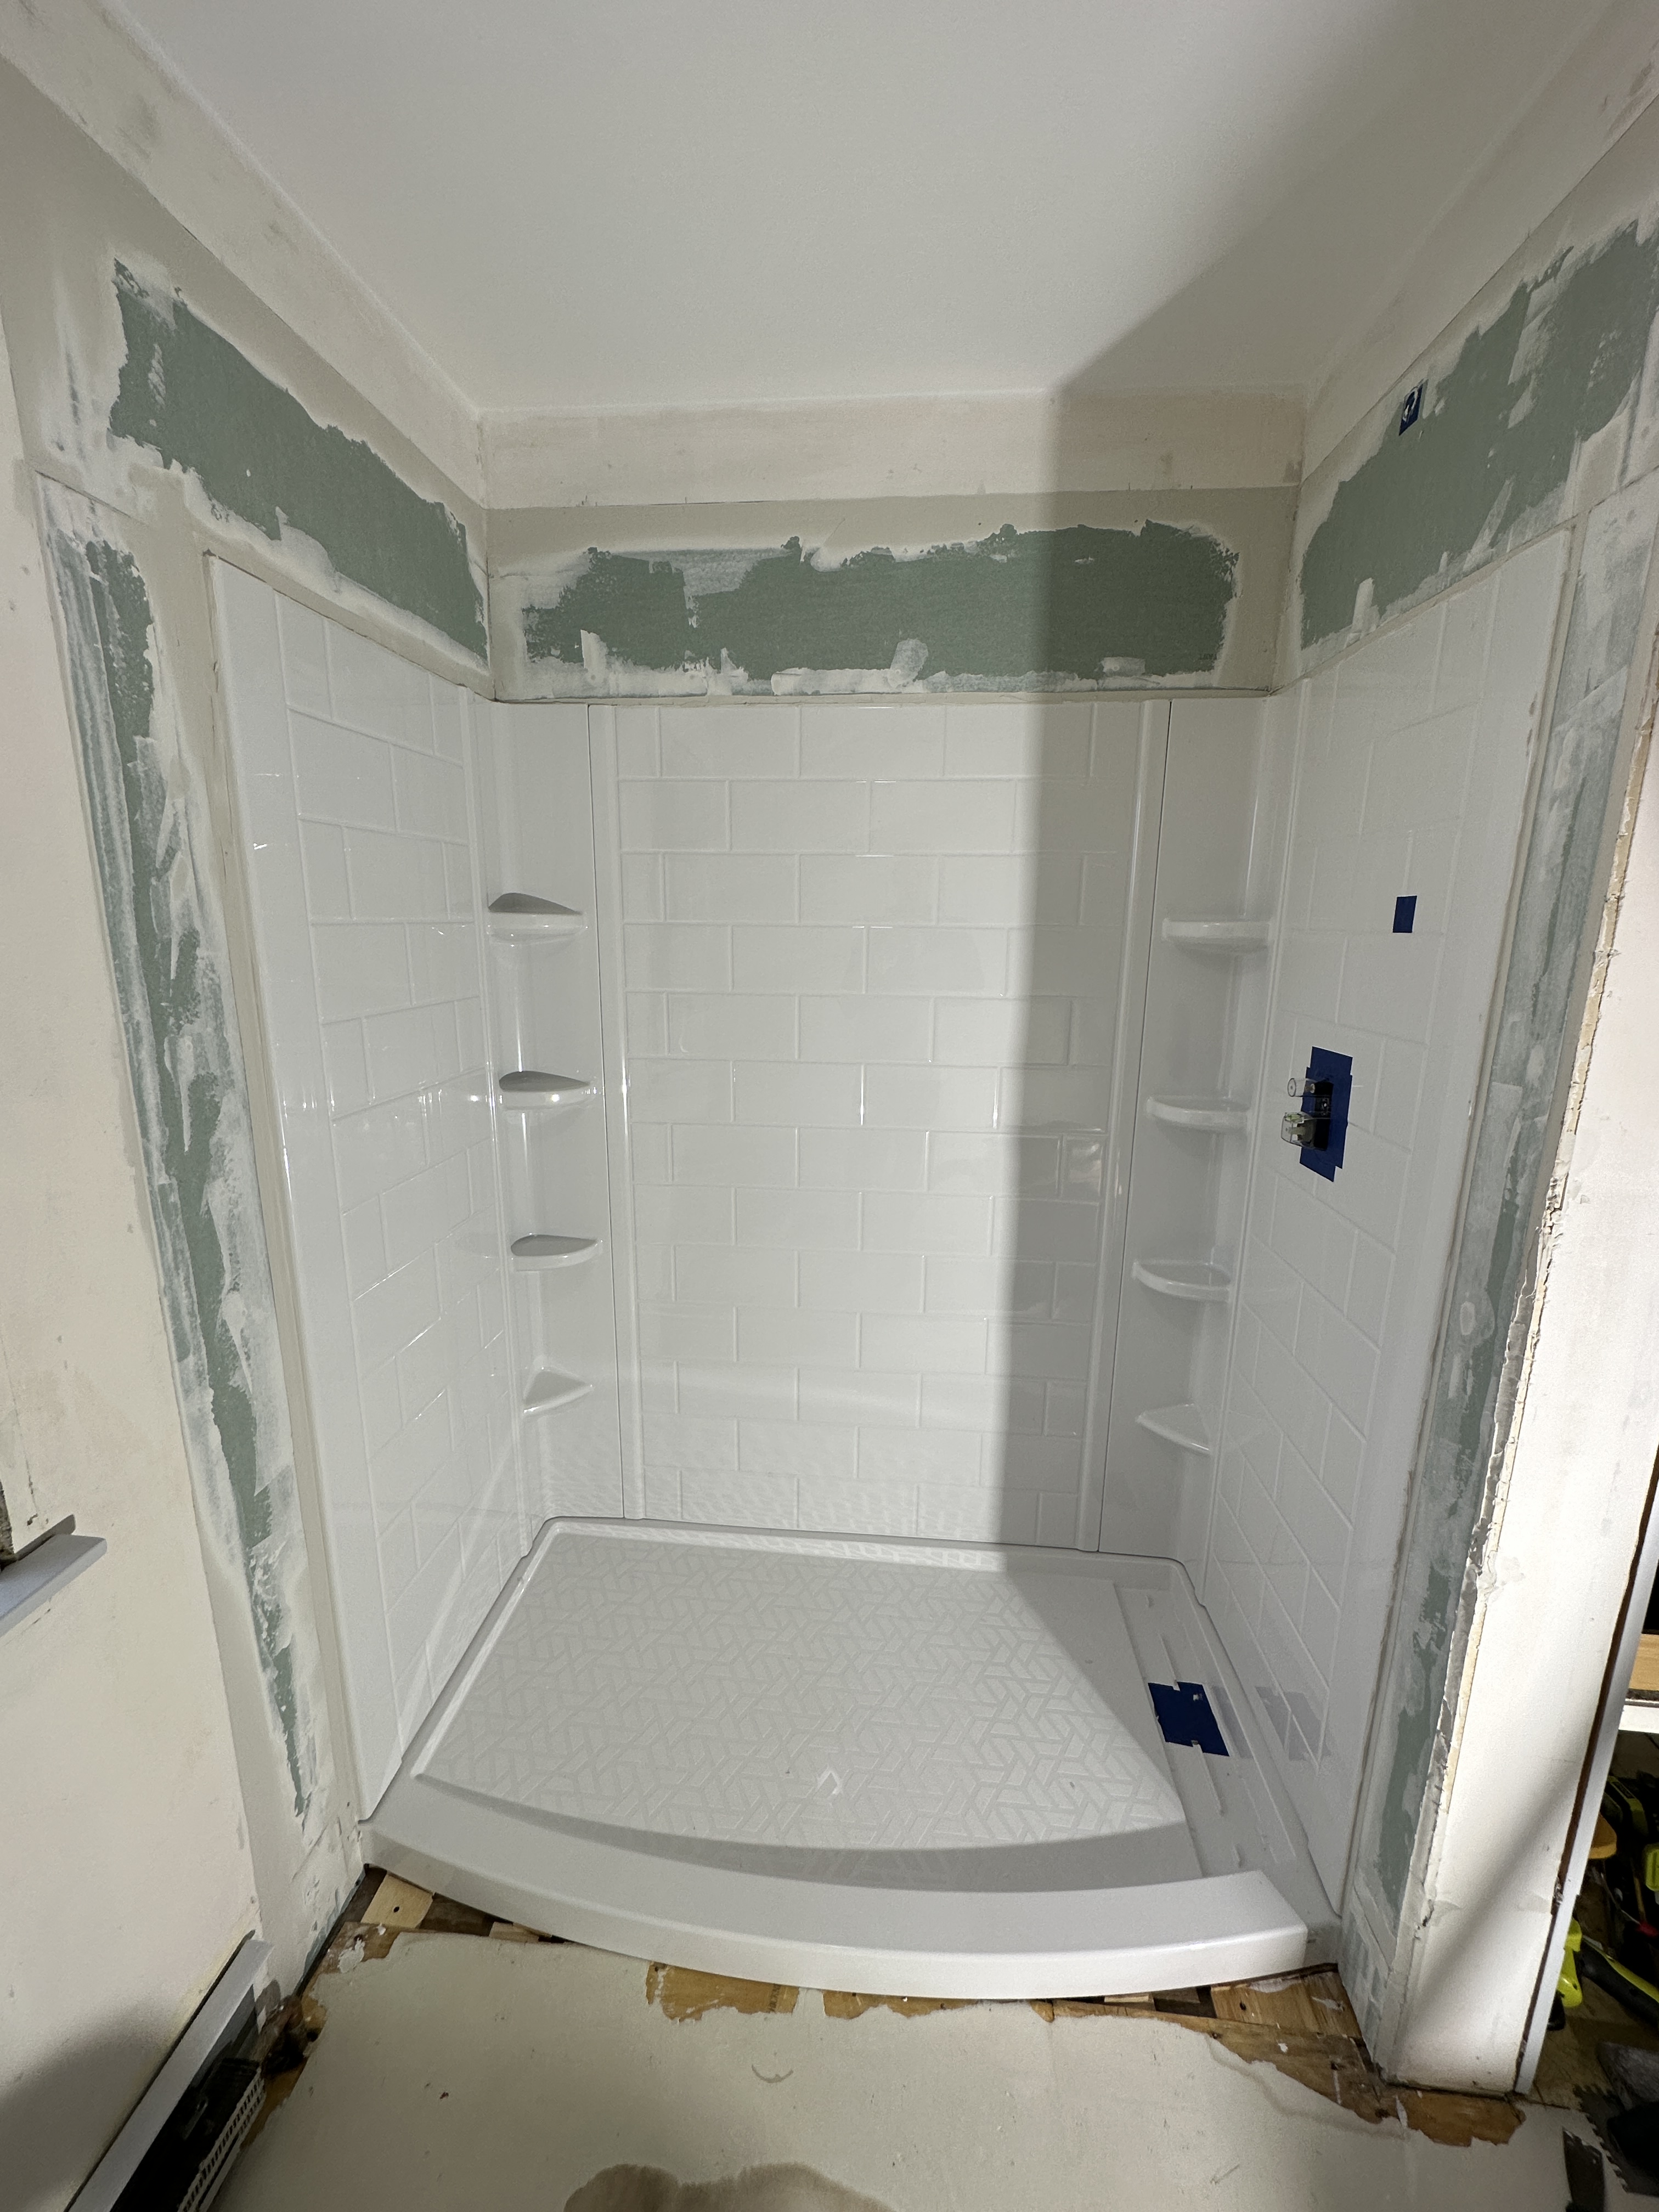
After that it was finalizing the shower pan and getting the walls up. Cutting holes through the shower wall was nerve-racking!
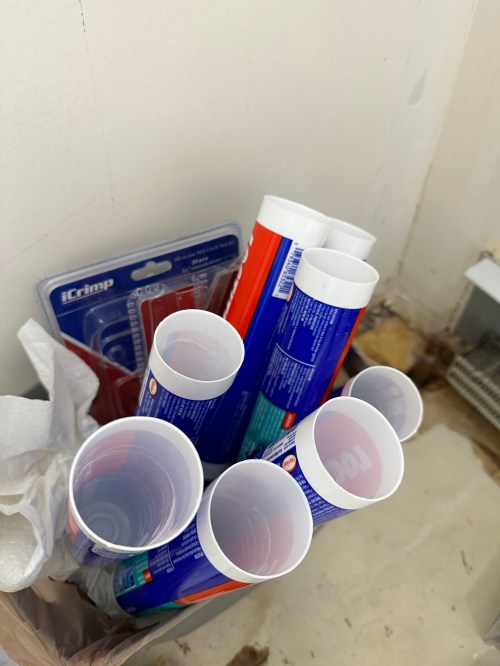
I had to shim out the left wall which wasn’t plumb. Then it was time to dry fit the shower walls and get them attached. I got a nice tight fit on the back. I figured there was no way I would use all eight recommended tubes of the adhesive, but I did. Not sure how I would have completed that step without the Ryobi Caulk & Adhesive Gun, which worked awesome.

I cut pieces of 1/2″ greenboard and screwed them to the walls. We taped plastic over the window, closet, and door.

Then it was time for a lot of drywall work. This was after the first coat of mud.
Over 24 hours later the thickest parts of the mud still weren’t dry. Up to this point, the project had been full of mistakes and having to do a few things multiple times before getting them right. I really thought things might move along after getting that first coat of mudding done. Boy was I wrong!
Since I couldn’t do anything with the drywall yet, I made runs to the home stores for all of the trim and a new subfloor. The lowest layer of linoleum had that paper backing on it, which you can see in pictures above. I wanted it gone in order to have a more level surface for the new plank flooring. I actually spent about 30 minutes trying to remove some of the paper before I decided to do a new layer of subfloor over the top. That plan changed before I even picked up the new plywood though because a third layer would have given me different problems to deal with around the doors, toilet, and register. It took me forever to remove that layer of subfloor, and probably would have been a lot less work to get the paper off. Here are pictures when I got down to the single subfloor layer, my measurements, and with the new plywood (before being screwed down).
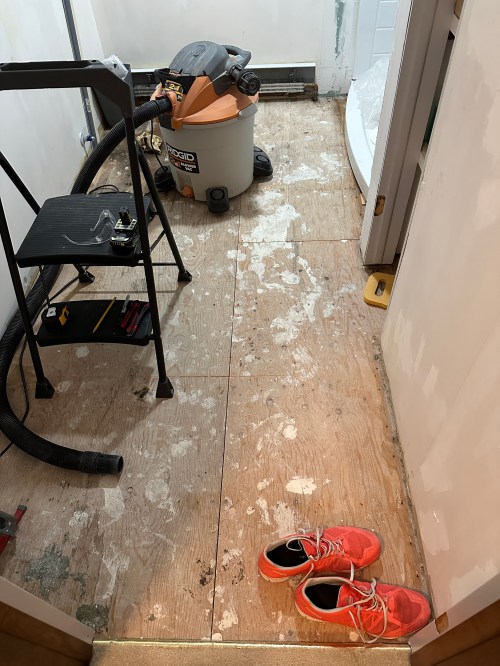


Taping the seams and the second and third applications of drywall mud were much harder than it looked on YouTube. I picked up a steel mud pan, which made things much easier and I was finally getting the hang of it with my fourth (because I’m a newb) and final coat. Then it was primer and two coats of paint, which went smooth. I brought the new subfloor back in and screwed it down.
At some point I took a piece of scrap plywood and made a door for the shut-off valve access. I used white gaffer’s tape over the edges of the wall so the cut drywall wouldn’t keep crumbling and making a mess. It got primer and paint when the brush was out for other things.


After painting the room it was time to install the shower doors and fixtures. I caulked everything as well.
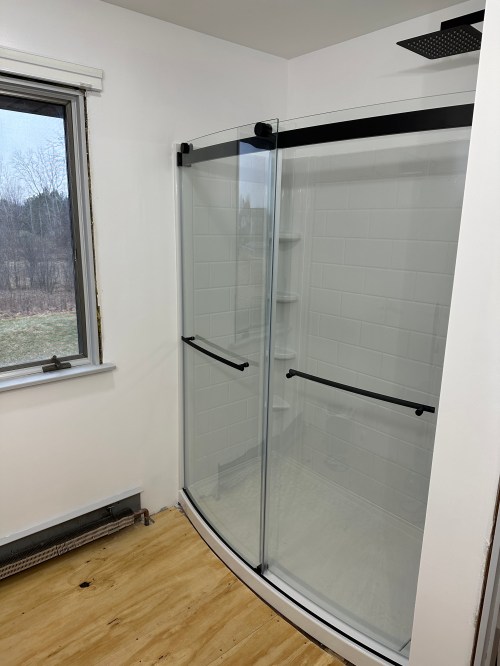


Unfortunately the doors have a major flaw and the top rail sags a lot from the weight of the glass. This means it’s impossible to properly align the doors. I got it the best I could so they roll smooth and hopefully don’t leak. I called American Standard and found out they’ve redesigned the mounting brackets because of this problem. They’re sending me a set as soon as they get them in stock. 🤞
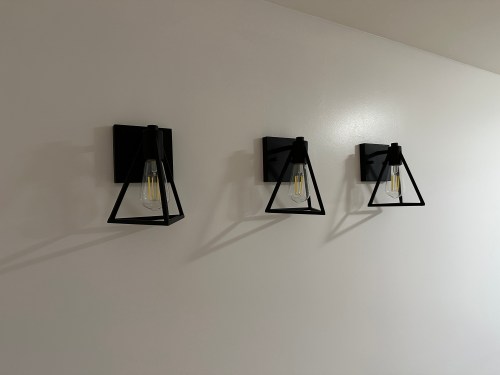
Lighting was a quick job. I also replaced an old outlet with a GFCI.

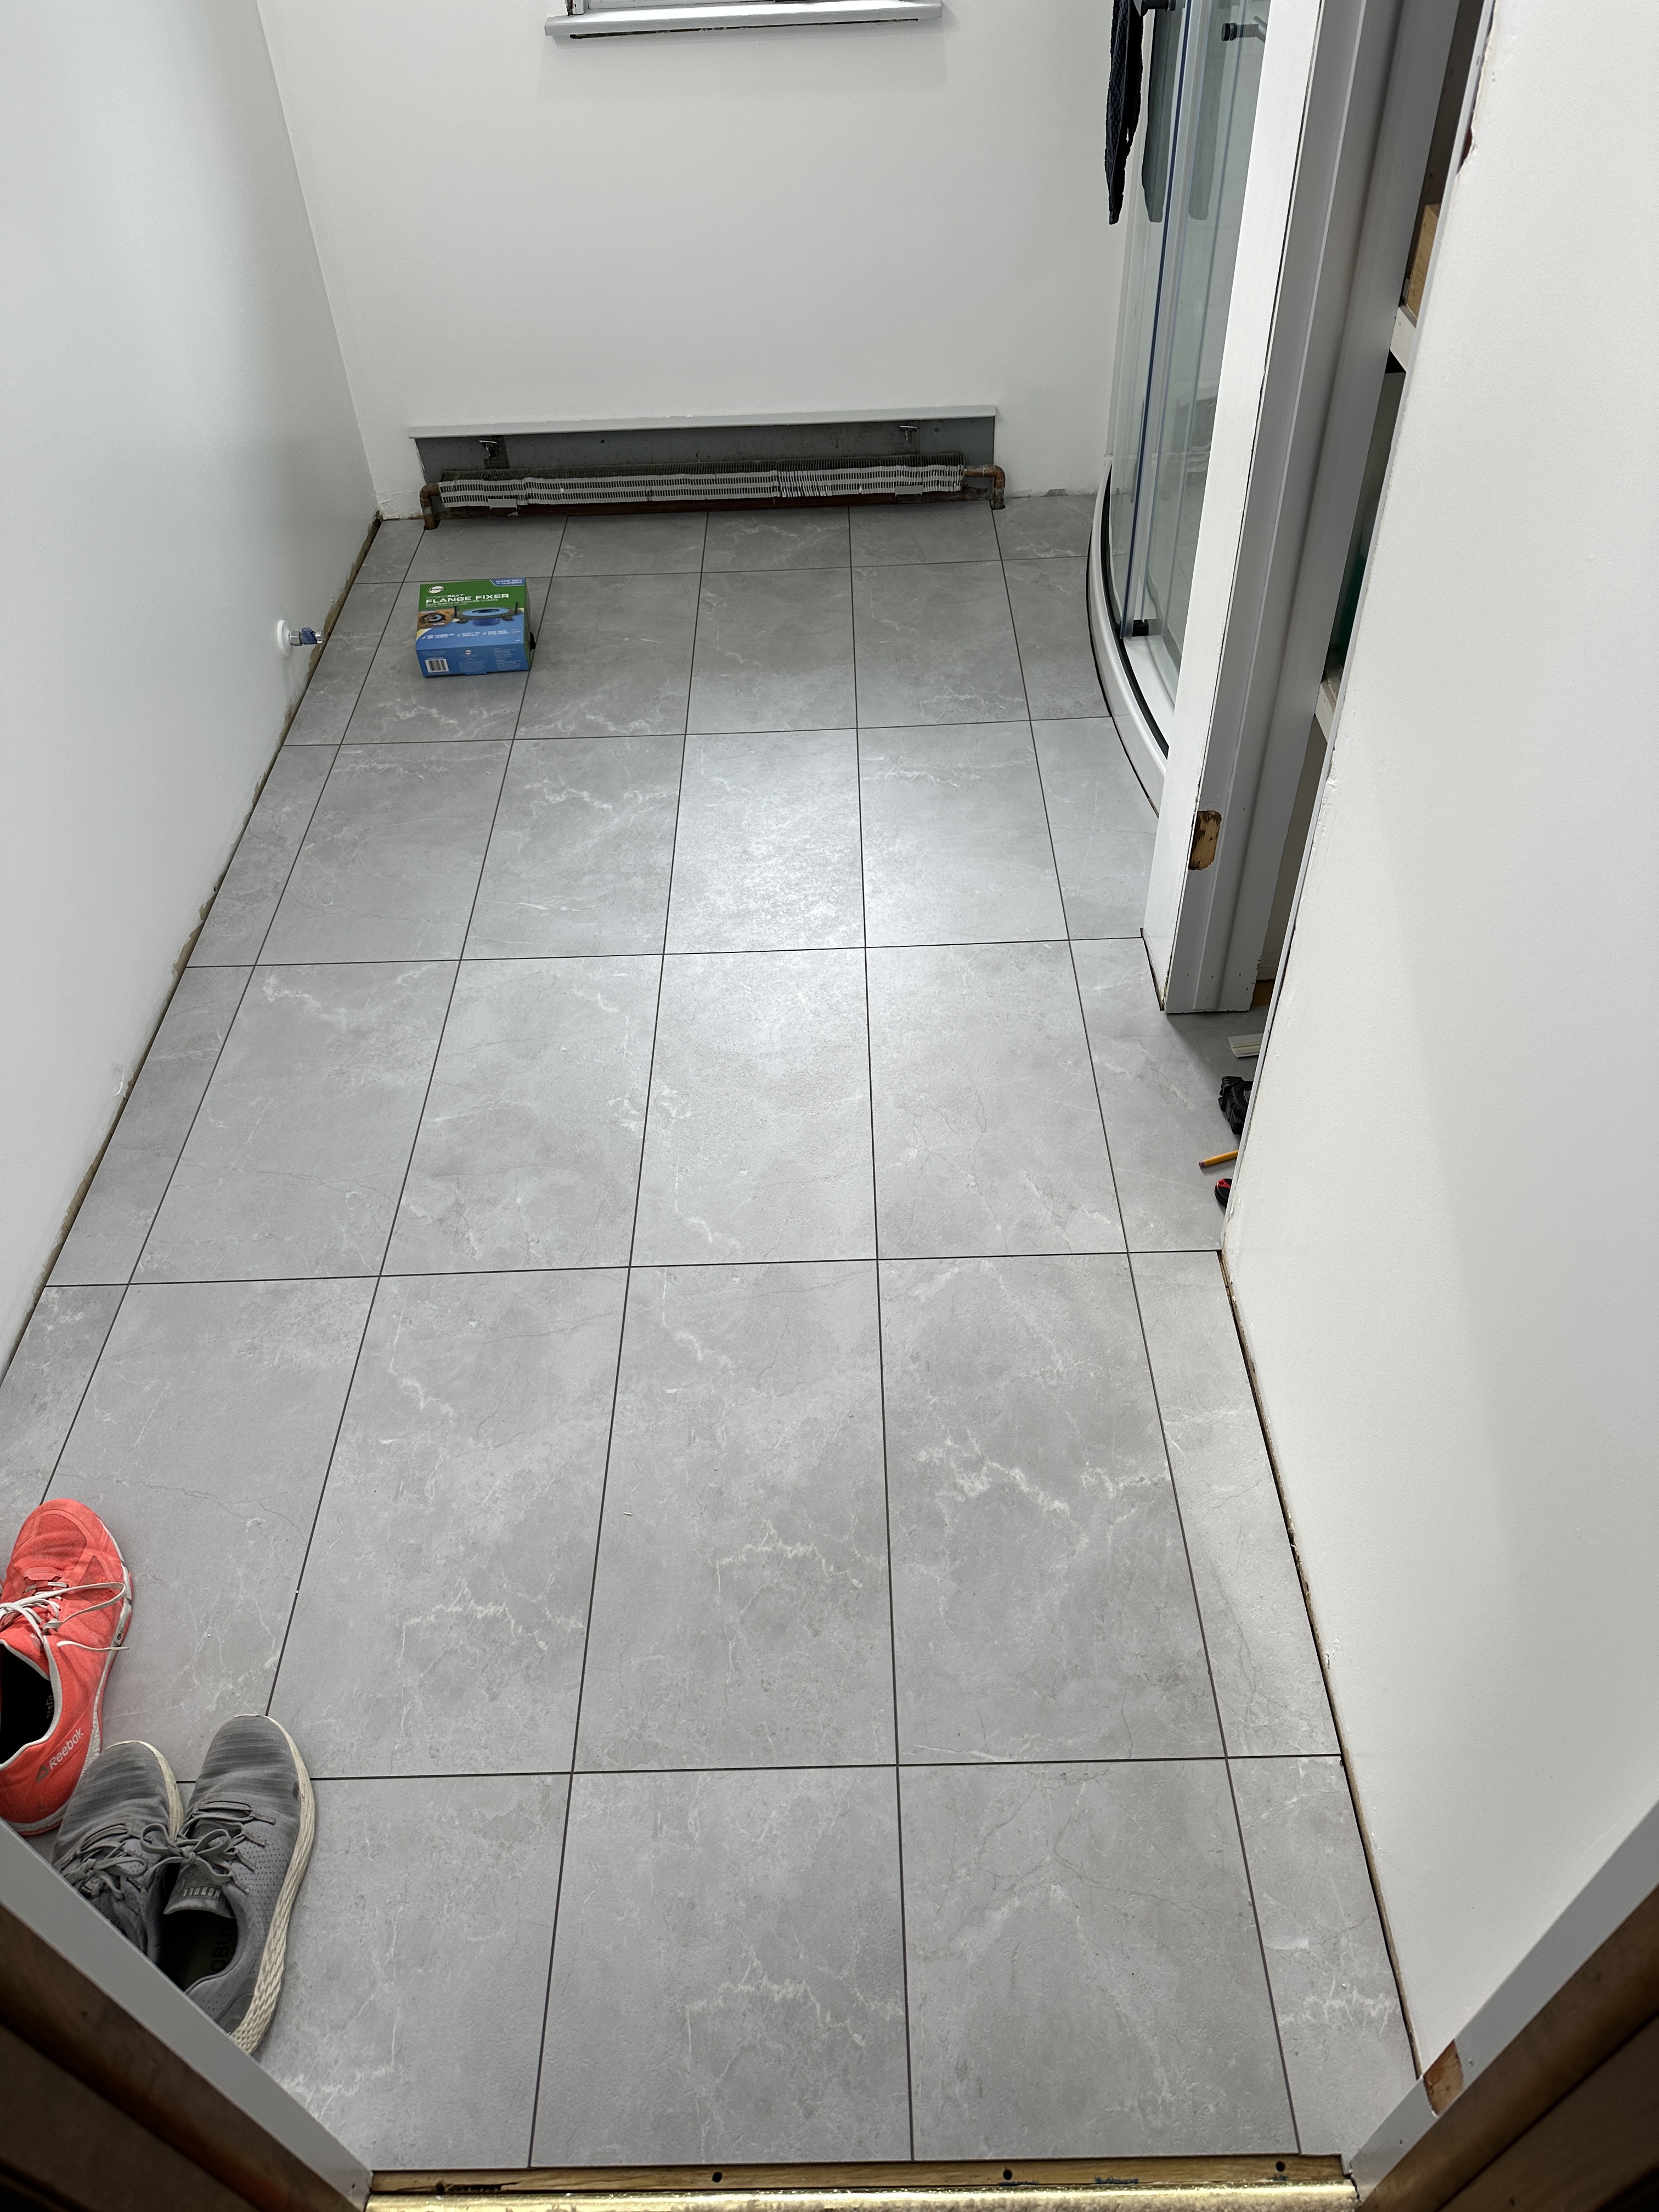
I went with a waterproof vinyl plank flooring that looks like tiles. I’ve done quite a few floors now, so this was easy.
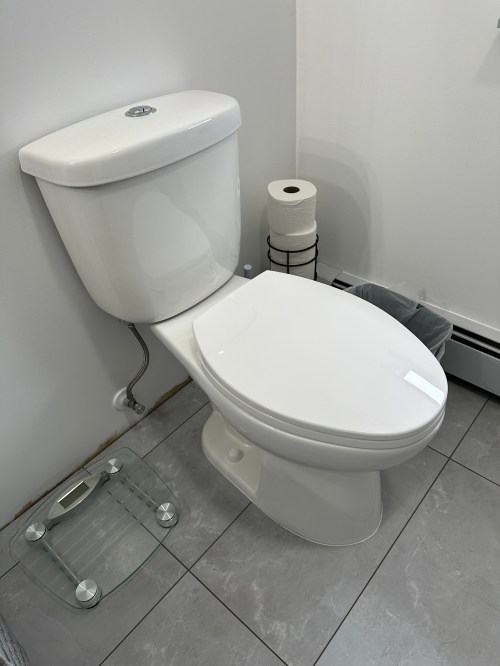
Vanity and toilet went in. Mirror was hung. Doors went up.


I put up accessories and did all of the trim work, which needed three coats of paint, even after primer.


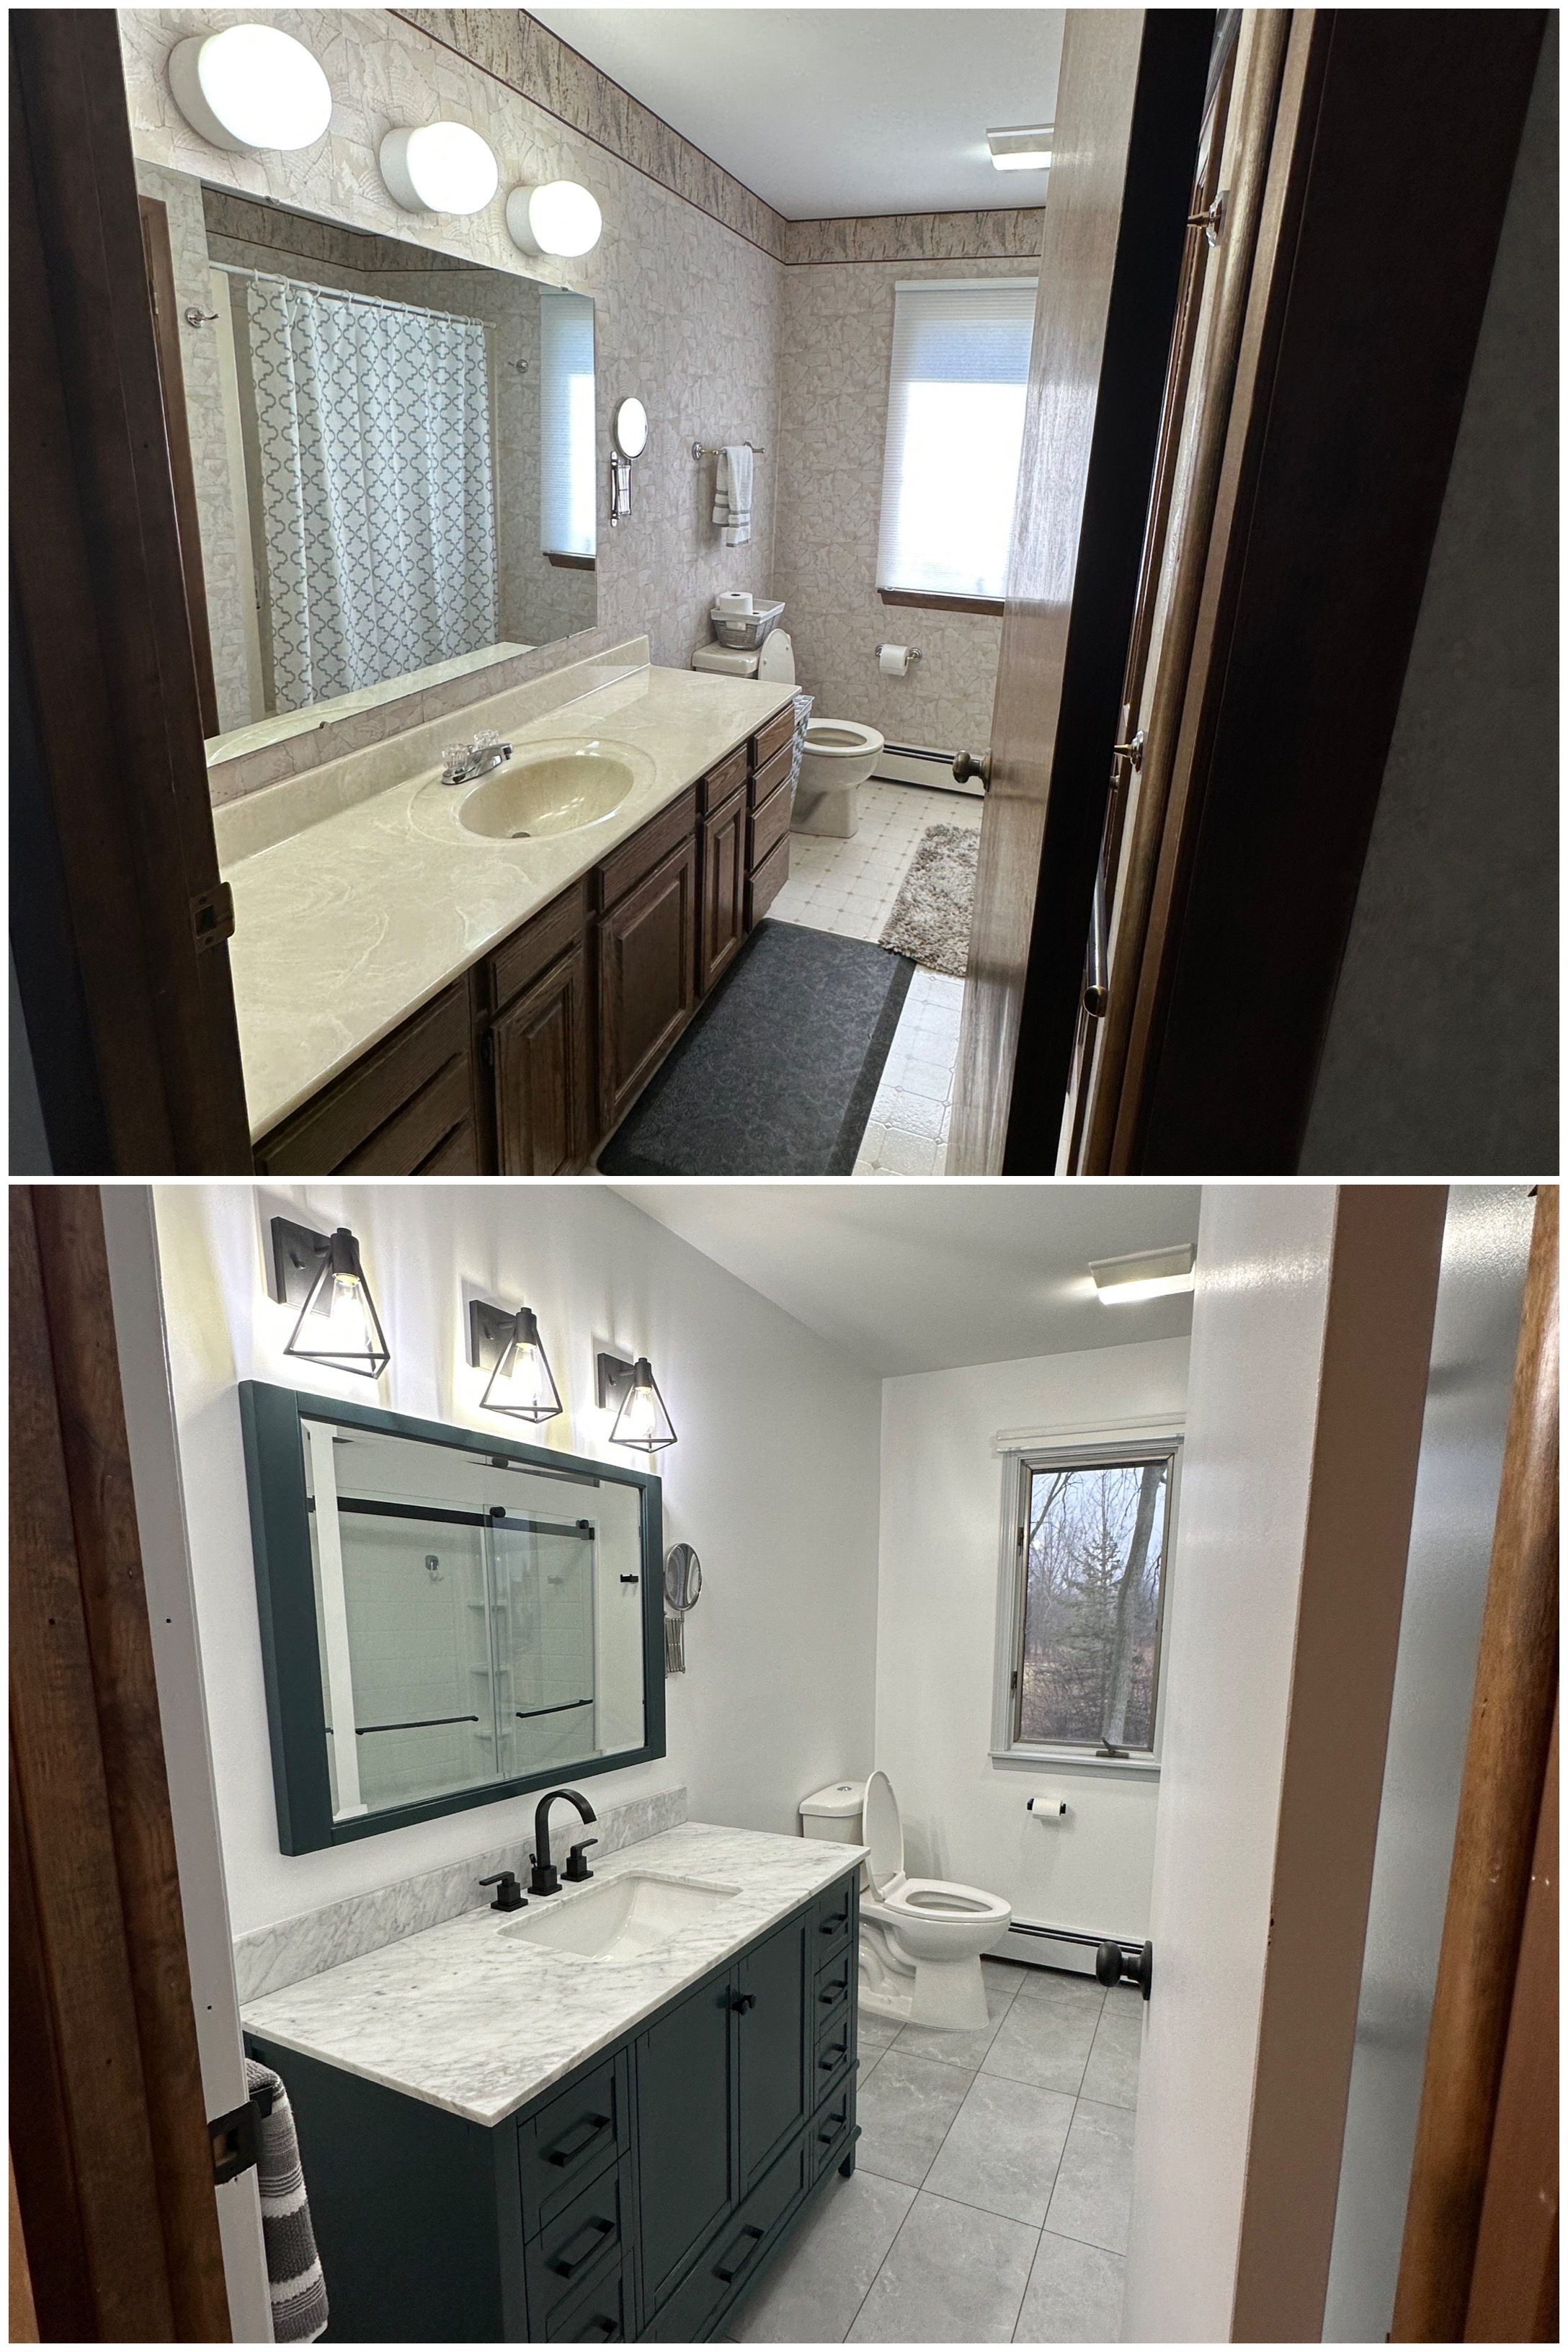
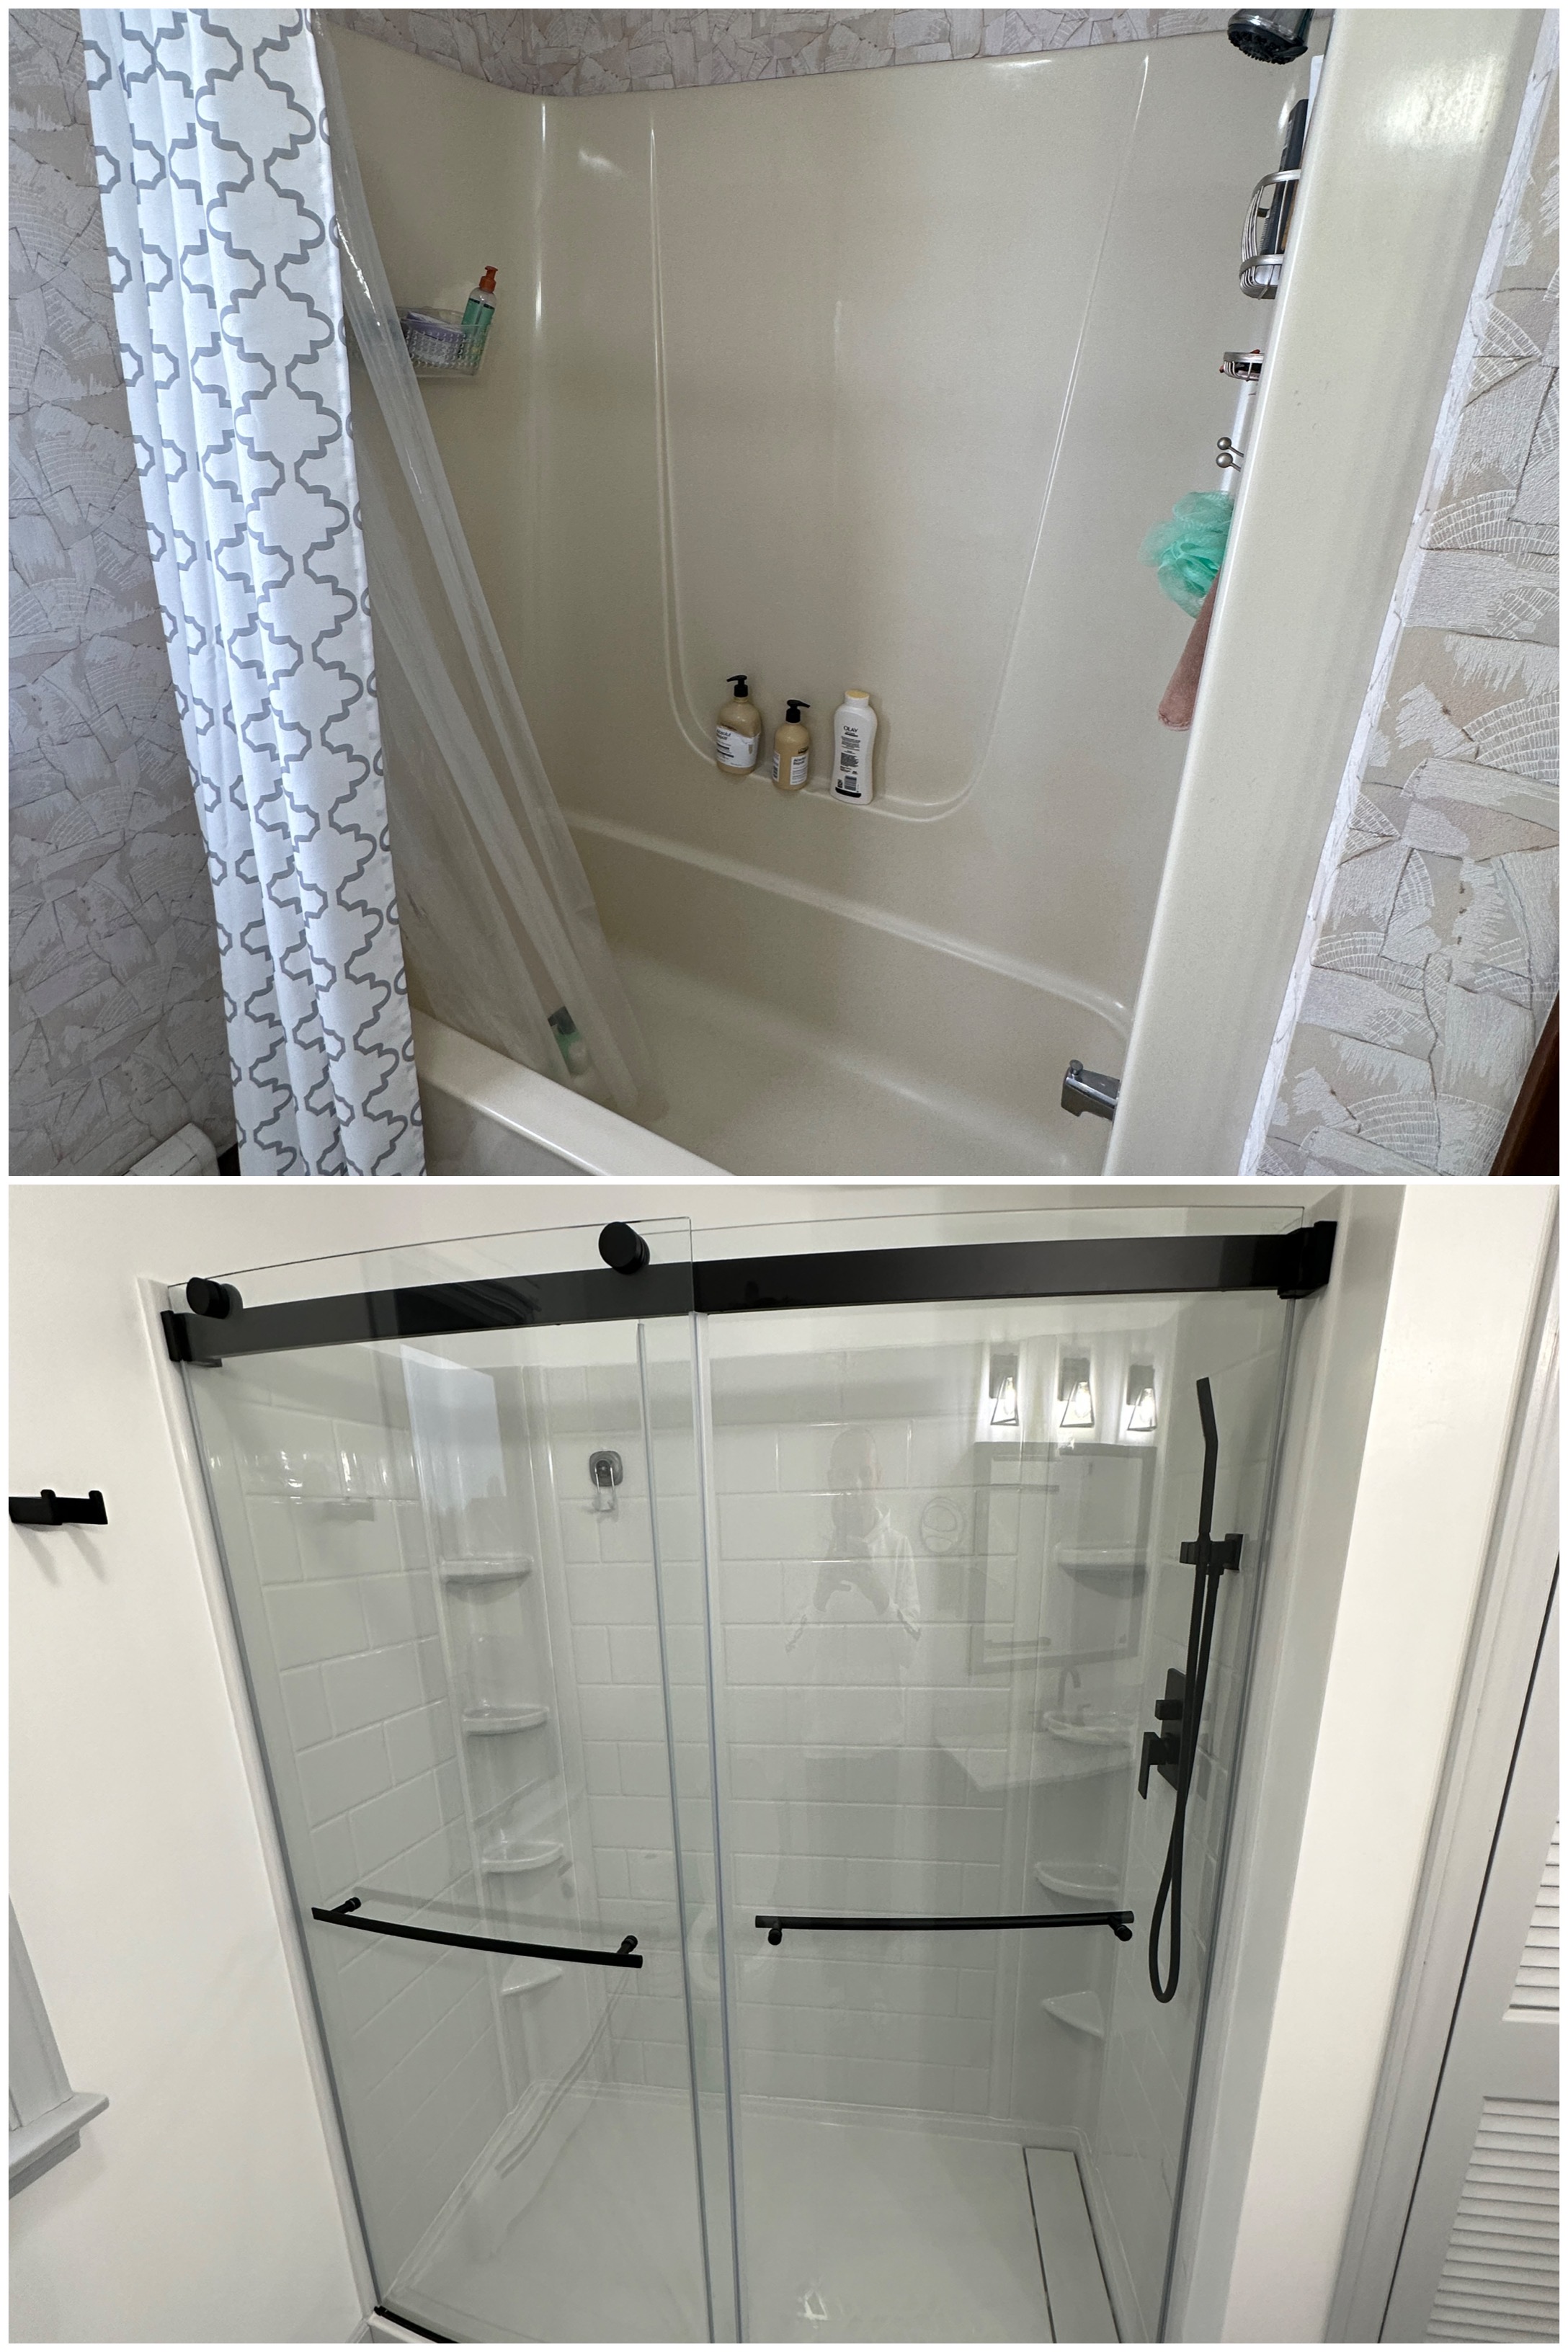
Here’s the final result.


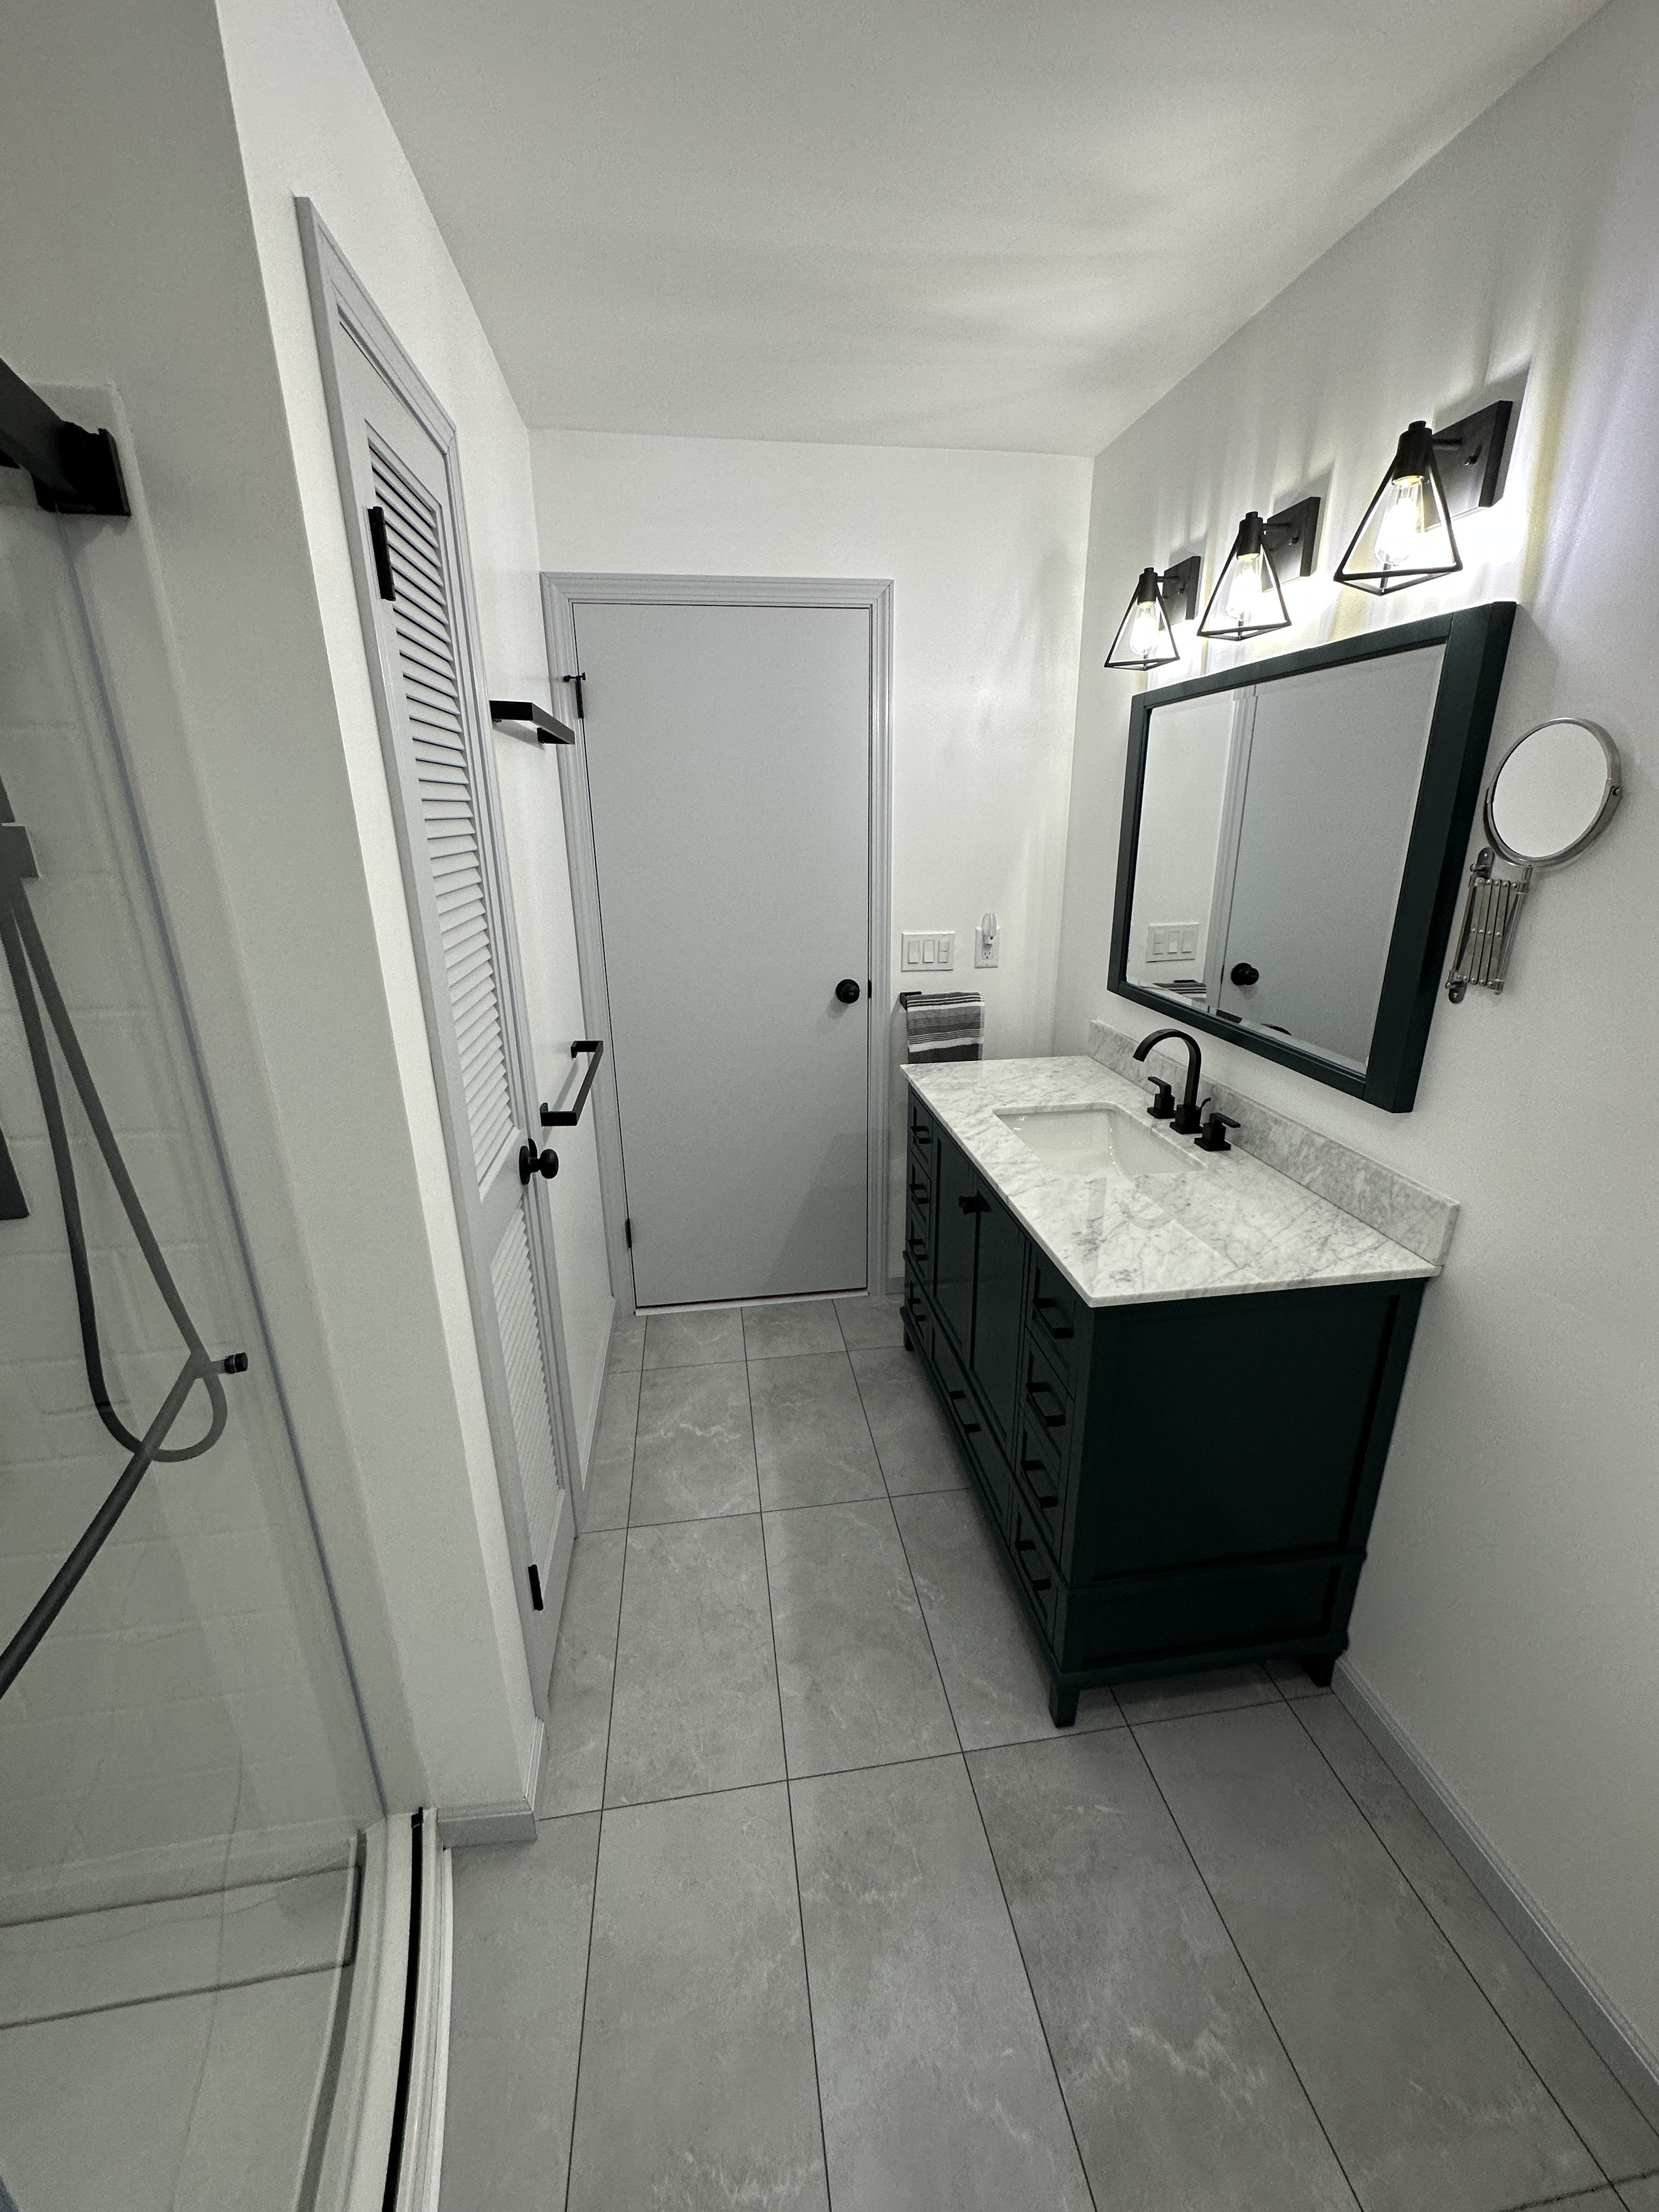
Quite a transformation in just over three weeks! Check out the before and after comparisons.


This bathroom is so nice now! I was hoping Brandi got used to my bathroom after using it for a few weeks and would want to stay there. No such luck.
There have been a lot of home remodeling projects over the last few years and I’m finally done. They were all needed, but I’m glad they’re over. Time for some fun little projects I’ve had on the back-burner for too long.

Wow!!! Nice Job Nick!
LikeLiked by 1 person
[…] the counter of our new vanity not extending to the wall where the outlet is, we wanted a dedicated spot for our electric […]
LikeLike
[…] always stayed where it was, which was often in the way. I had saved the two side cabinets from the bathroom vanity and still had a wide drawer from the kitchen desk I […]
LikeLike
[…] One of the chapters focused on lists, which is something I use often. Usually I prefer Apple Notes because is syncs between my iPhone and MacBooks (work and personal), allowing me to quickly update the lists. Here’s a list I started partway through my bathroom remodel. […]
LikeLike
[…] A Full Bathroom Remodel […]
LikeLike