
If you haven’t seen it, check out part 1 of this series about improving a Delta Sidekick 12″ Compound Miter Saw (Model 36-235).
I’ve been keeping a list of improvements I wanted to make to the miter saw and haven’t made time to work on any of them. When I made a frame a few weeks ago I noticed the fence to the right side of the blade wasn’t square. After looking things over, I found a large crack, which I’ll share in part 3. Now I had an excuse to prioritize the improvements and give the saw some love.
I removed several things from the saw and decided the first thing I’d build was a zero clearance insert plate. The original plate was a little beat up.

I actually made two plates since it’s not much extra work. I can either use the second one for bevel cuts, which I don’t think I’ve done once since I bought the saw, or keep it as a spare. I really liked the natural wood look, but it’s better to paint them red to signify the dangerous area.
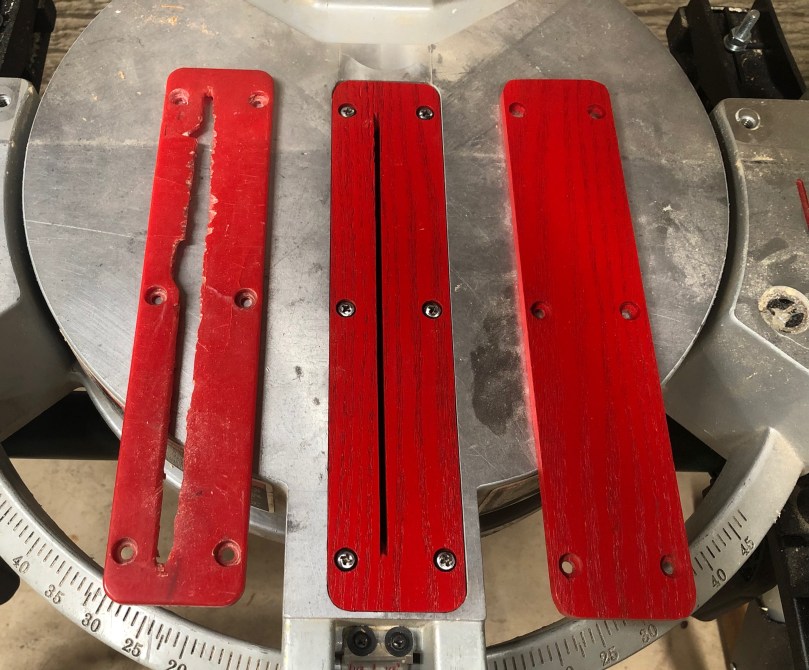
Check out the difference in that slot! Cuts will be much cleaner and I’ll no longer have to worry about things clogging up underneath. The new inserts also fit much tighter than the original.
I used a piece of reclaimed pallet wood (oak I think) to make these. Here’s a video of the process, which took about 2 hours.
Check out part 3 of this series where I build a new fence.

[…] on the table and fence. I think that about covers it for what I’d done so far. Check out part 2, where I make new insert […]
LikeLike
[…] you haven’t seen the other posts, check out part 1 and 2 of this series about improving a Delta Sidekick 12″ Compound Miter Saw (Model […]
LikeLike
[…] Improving a Delta Miter Saw: Part 2 […]
LikeLike