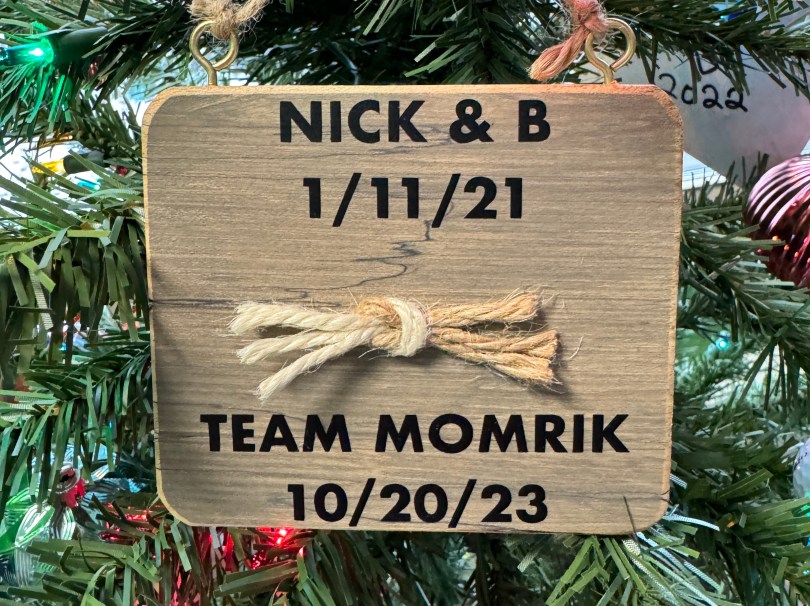
After getting married in October, of course we were going to center our ornament around that this year. We took some leftover pieces that didn’t get used for the kitchen backsplash, glued two together, cut it to size, rounded the corners, softened the edges, and added a couple of screw eyes.
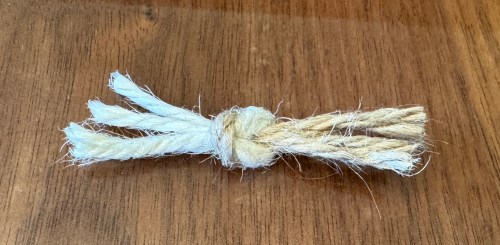
We bought two different colors (hard to tell in this photo) of twine and tied a square knot. Obvious symbolism.
After having a Cricut for almost two years, we finally cut vinyl on it.
A little super glue gel to attach the knot.
Then we sprayed three coats of lacquer to help set it and hopefully hold on to the vinyl better.
We also have some bonus ornaments this year. I drilled a hole through one of the golf balls Brandi had made for some twine. The other two were Huichol art we did on our honeymoon in Playa Mujeres. Can you guess who did which one?
Making ornaments is a yearly tradition for us. Check out 2021 and 2022.
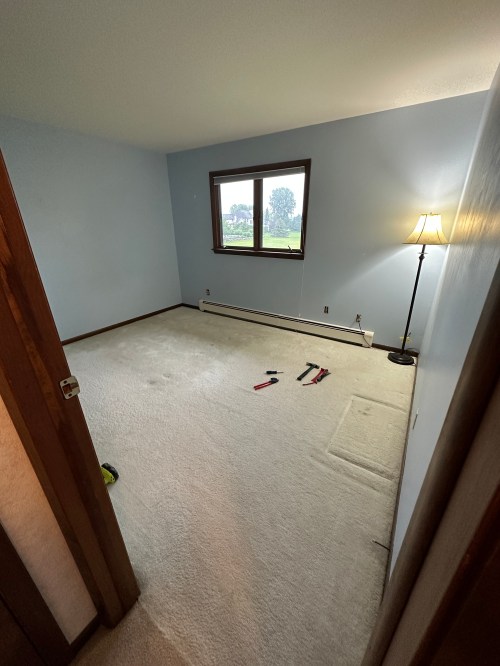
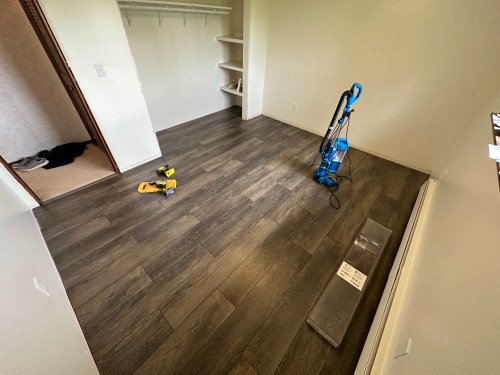
We had the idea to convert one of the spare bedrooms in to a closet for Brandi. Here’s what the room looked like after clearing it out.
After pulling out the carpet (and maybe painting?), we decided to design and build (not ourselves!) a house. Very exciting and we’ve been working through the process for a few months now.
So plans changed for the room. We painted the walls and inside of the closet with a white to brighten things up. Here you can see a bit of how dirty it looked in the closet.
We painted some shelving (the actual shelves are missing here) in the corner of the closet instead of installing new stuff. Here’s a look after paint.
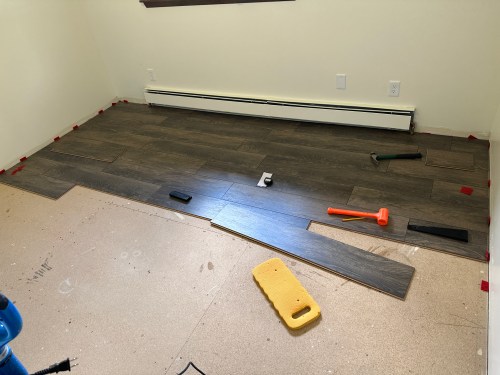
With the upcoming move we bought cheaper flooring from Menards instead of getting the stuff we’ve used from Sam’s Club. The cheaper stuff is definitely harder to work with and I did the room by myself in about 6-7 hours.
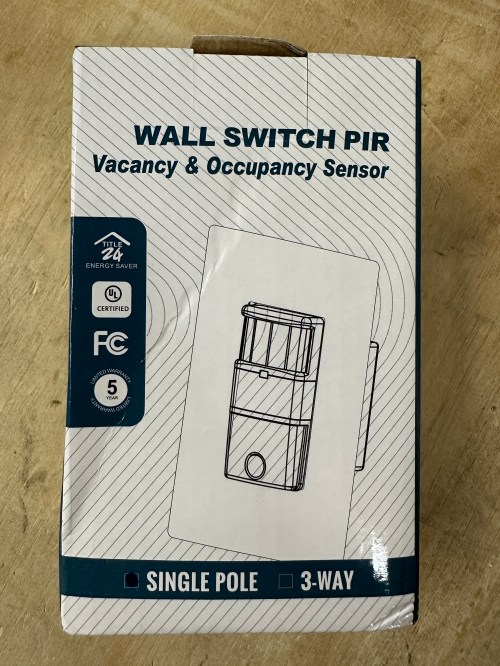
The room didn’t have any ceiling lighting, which I’ll never understand. So I installed a ceiling fan and rewired the switch, which previously controlled an outlet.
I cleaned up and restained the trim instead of buying new stuff. There wasn’t any trim in the closet, so I bought white PVC trim for simplicity. I still need to get some quarter round for the room since a few flooring edges show.
I don’t like the floor style, but the next owner’s can worry about it. This was cheap and did the job. If we hadn’t already tore out the carpet, we would have left the room alone, saving a bunch of time and money.
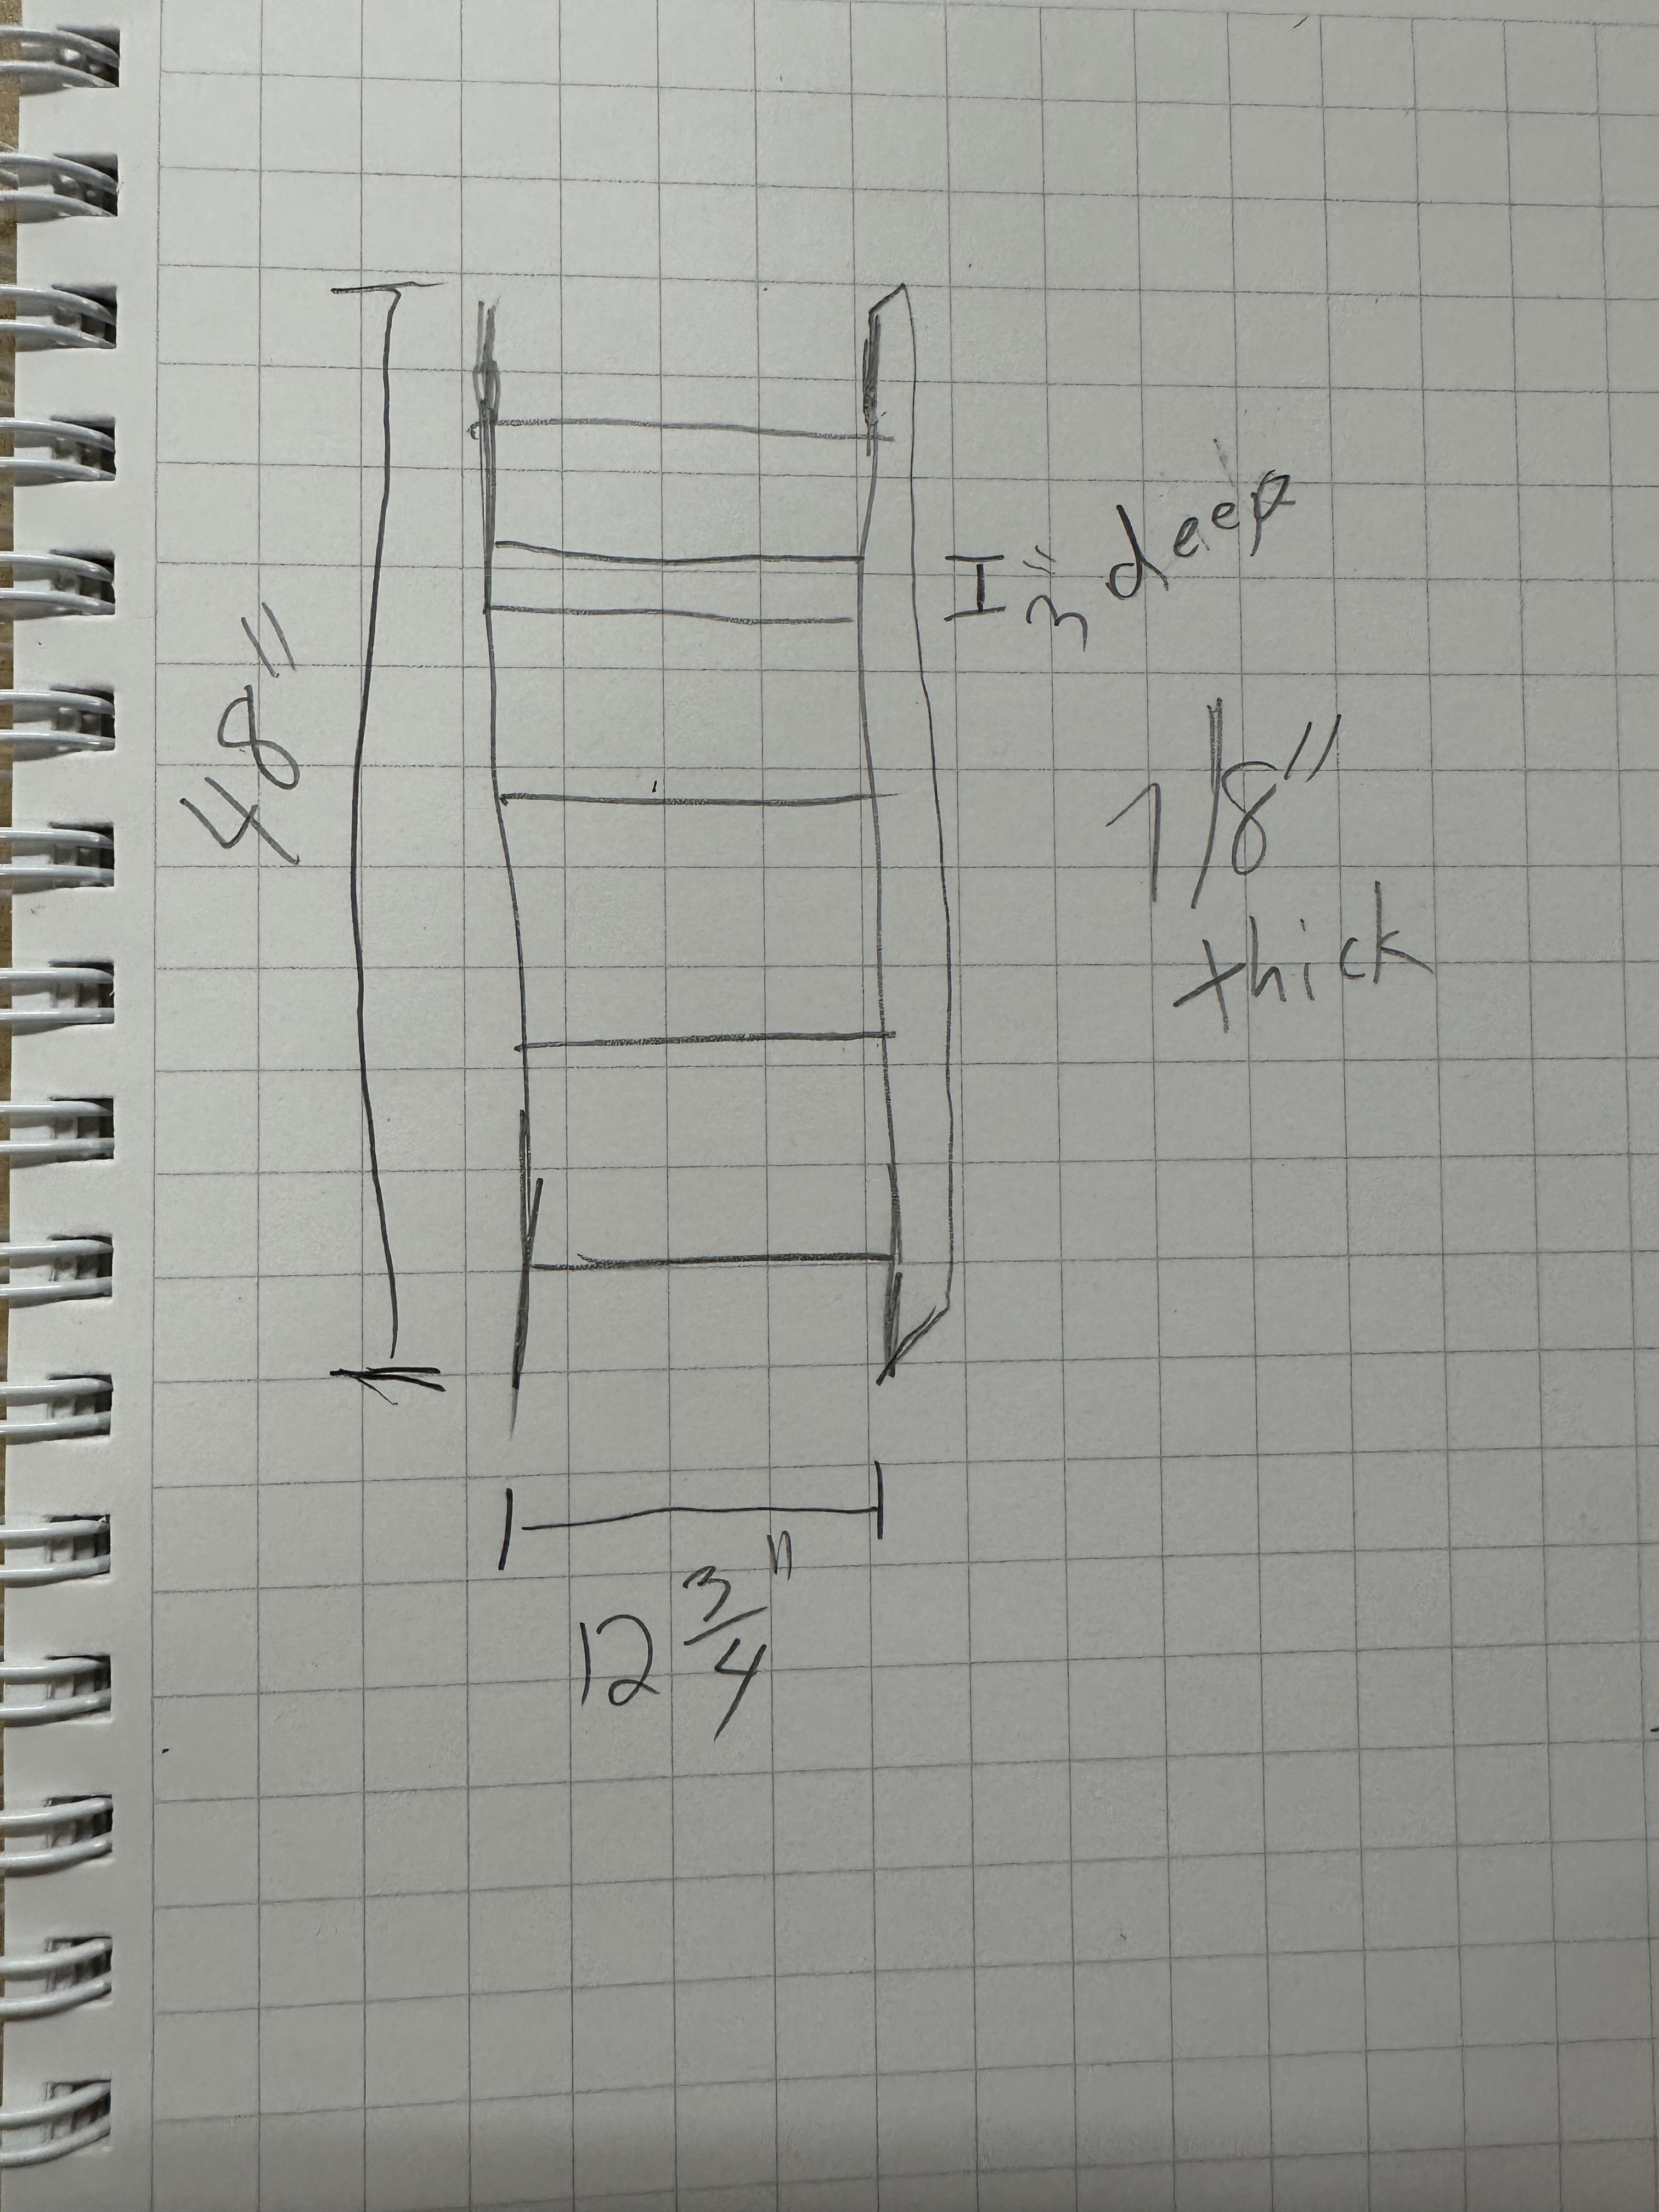
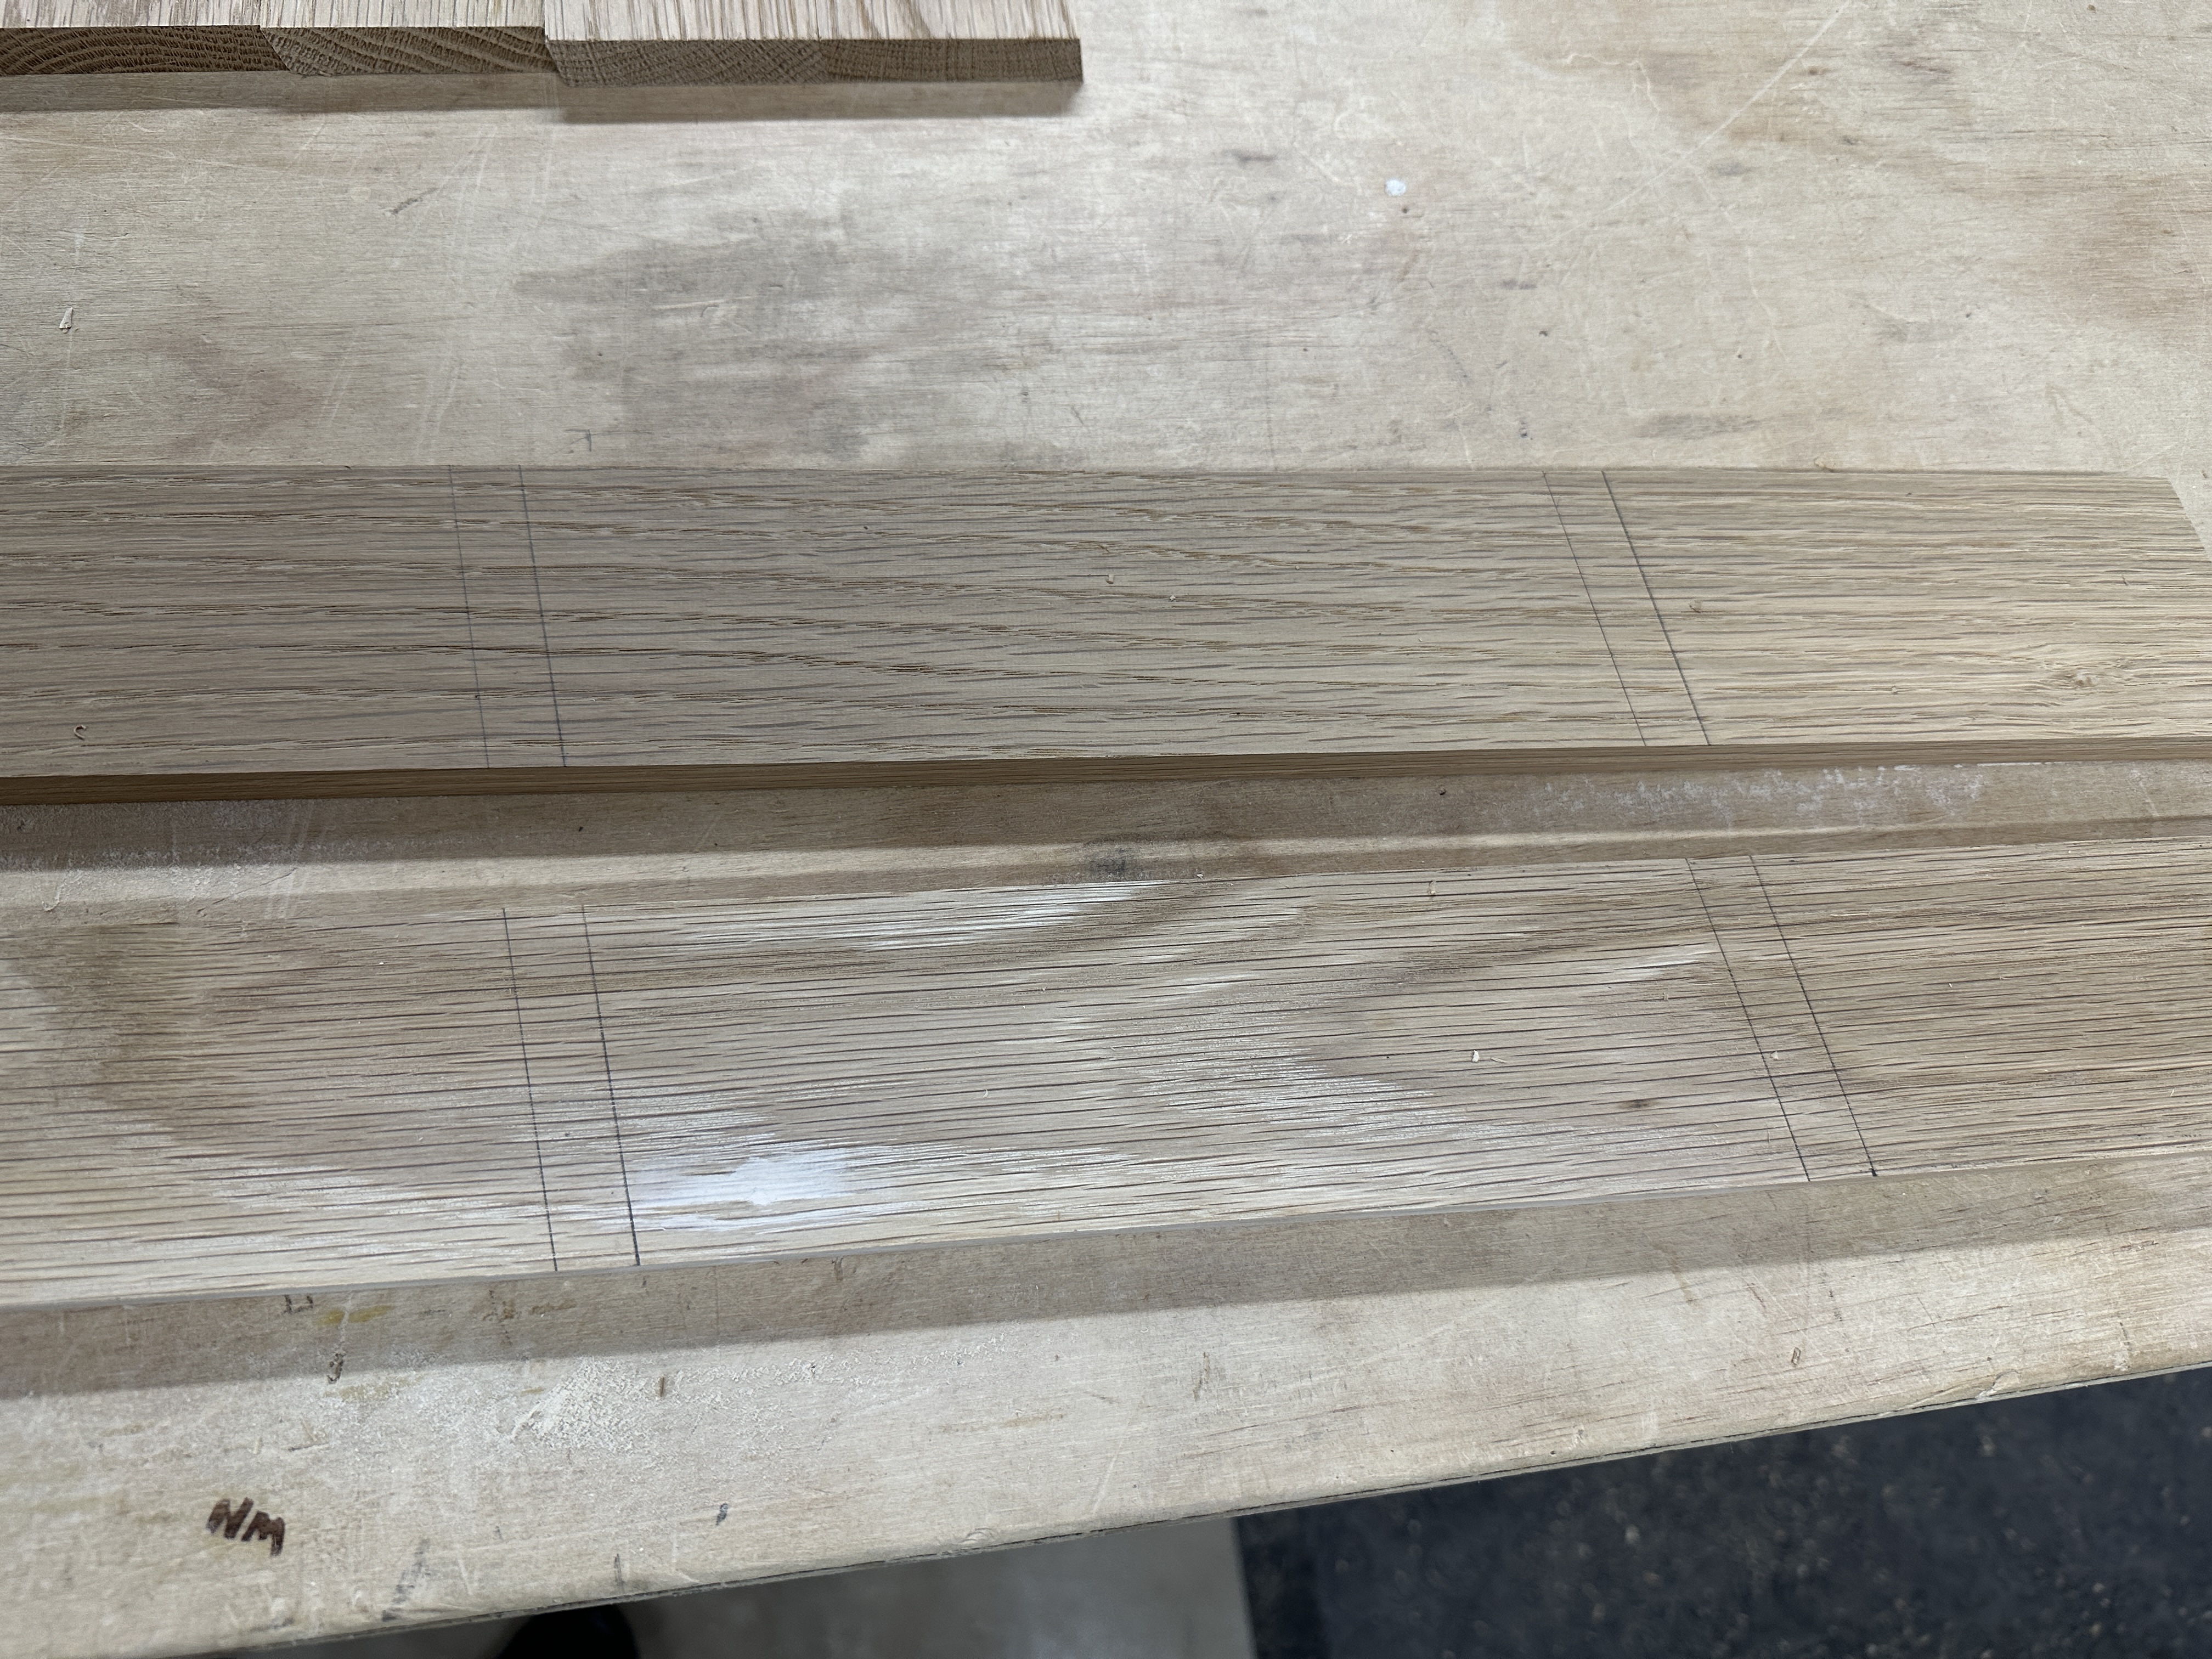
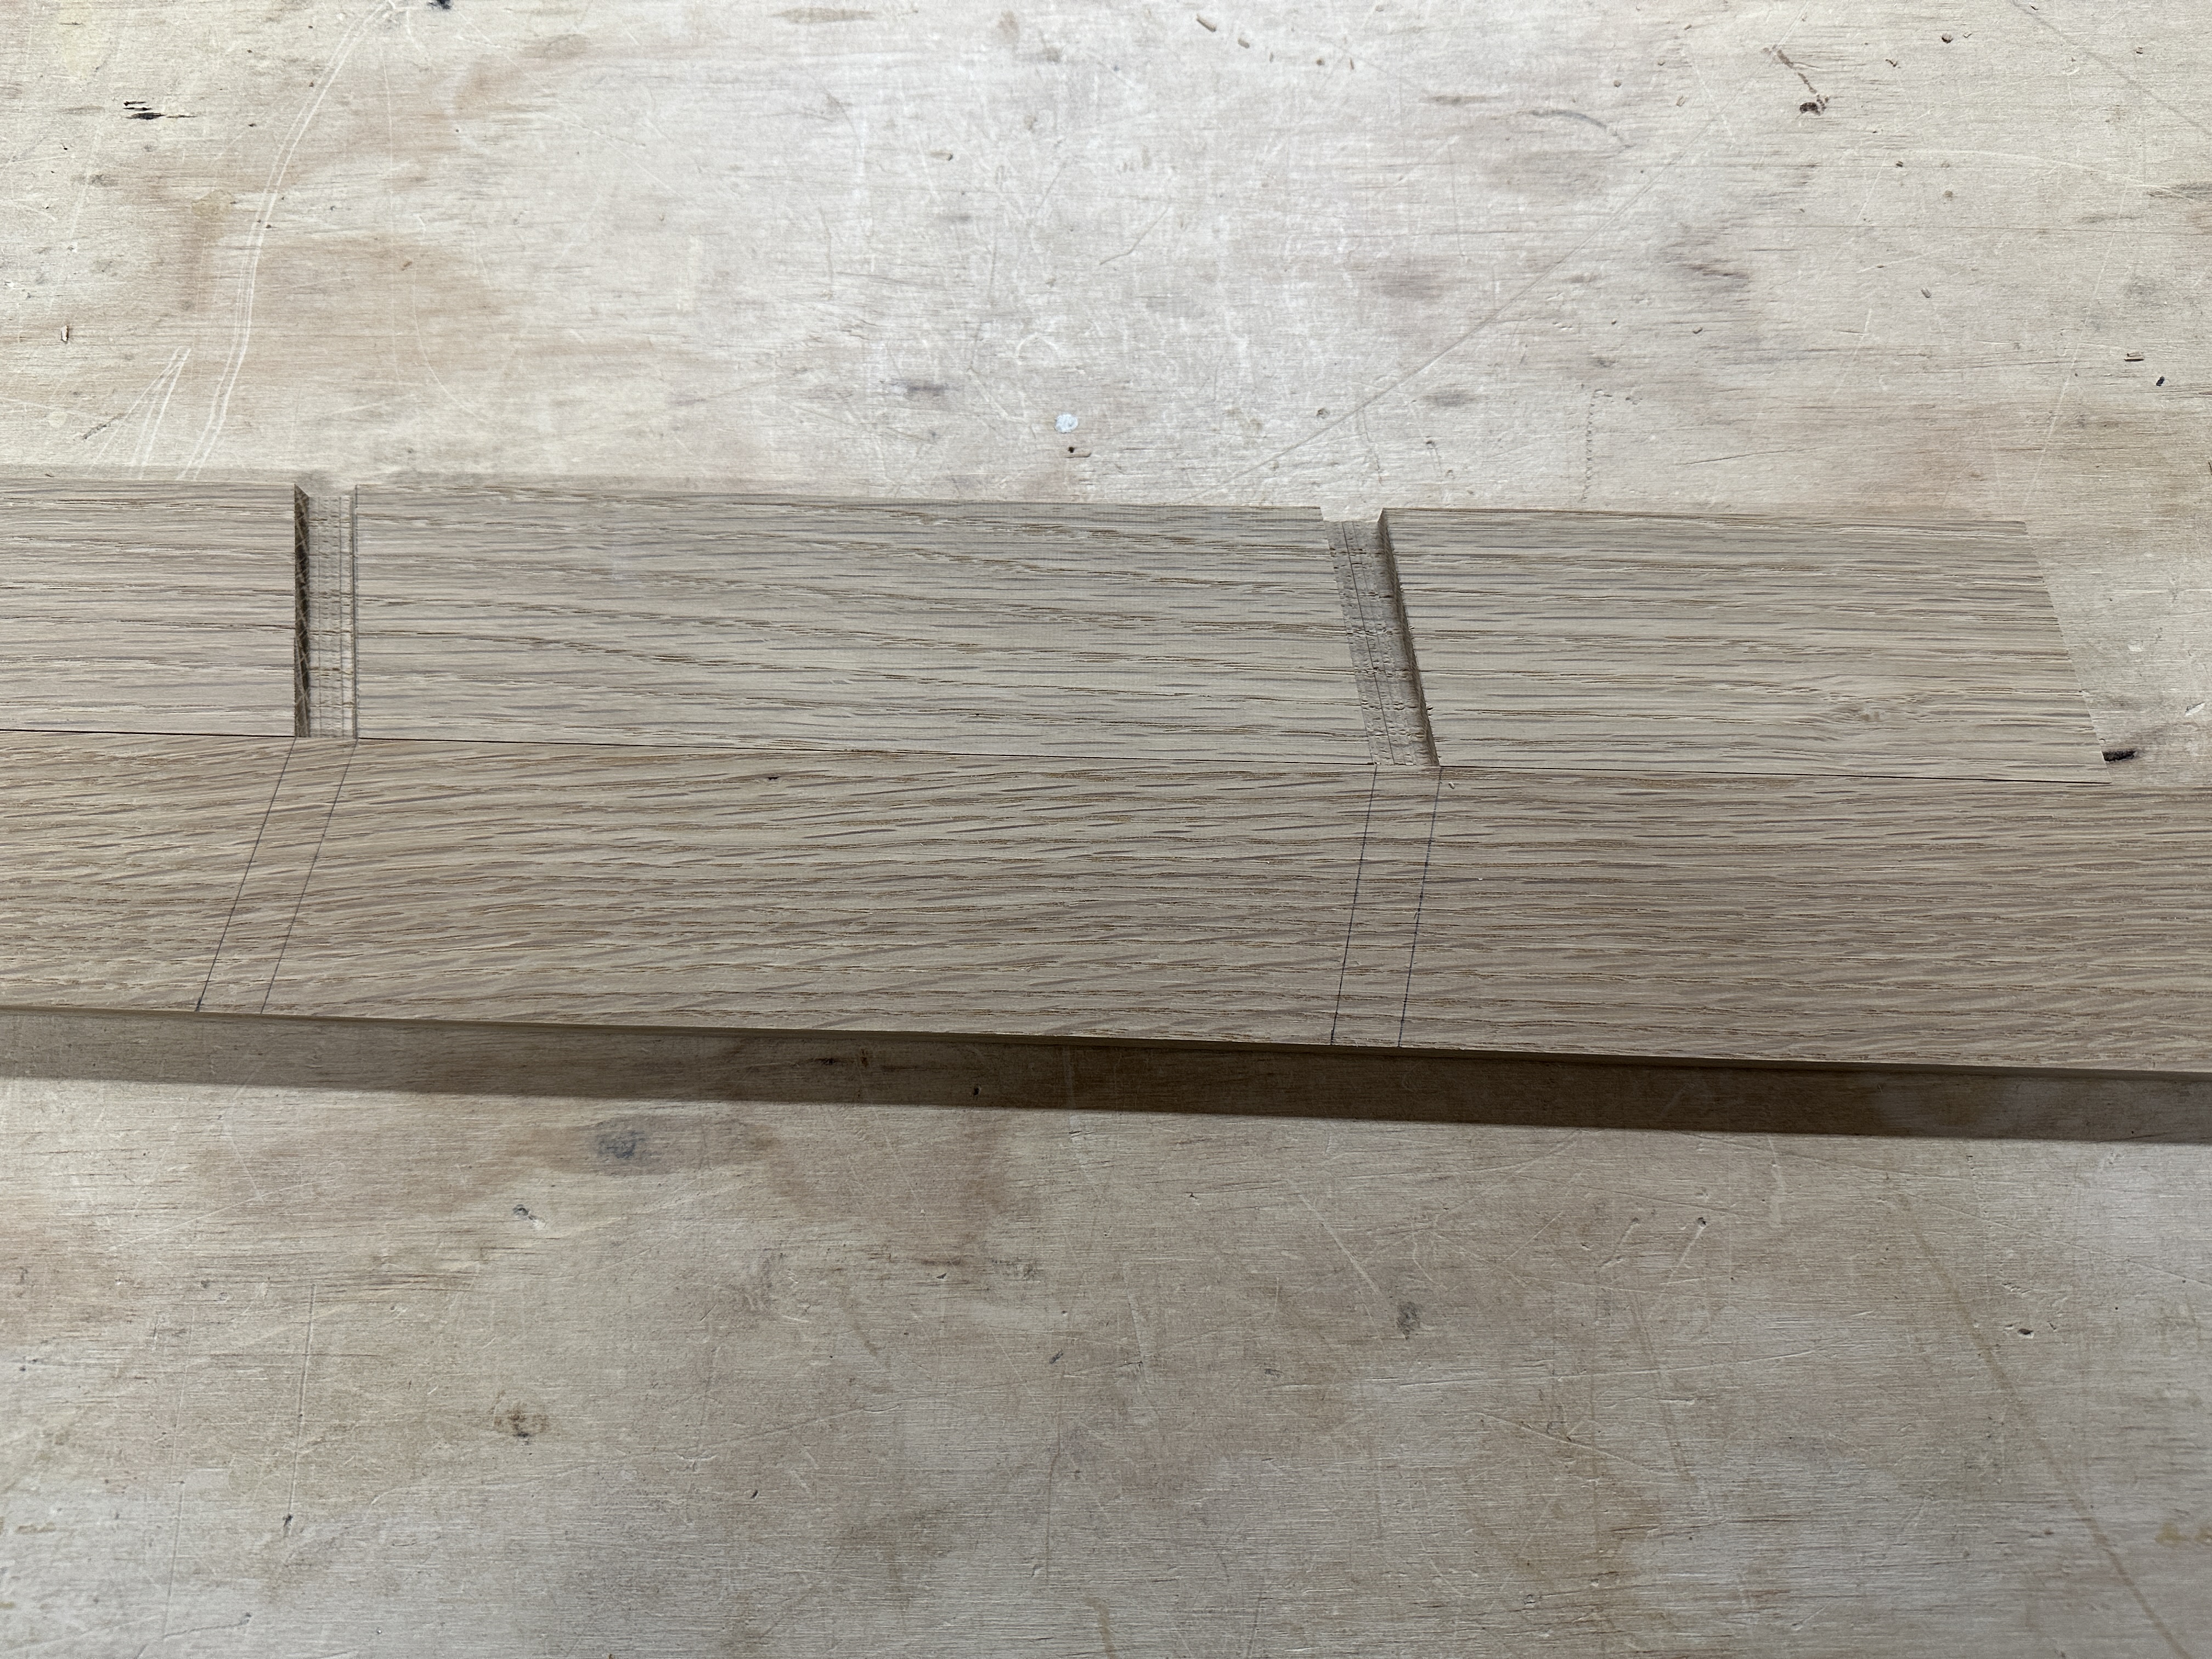
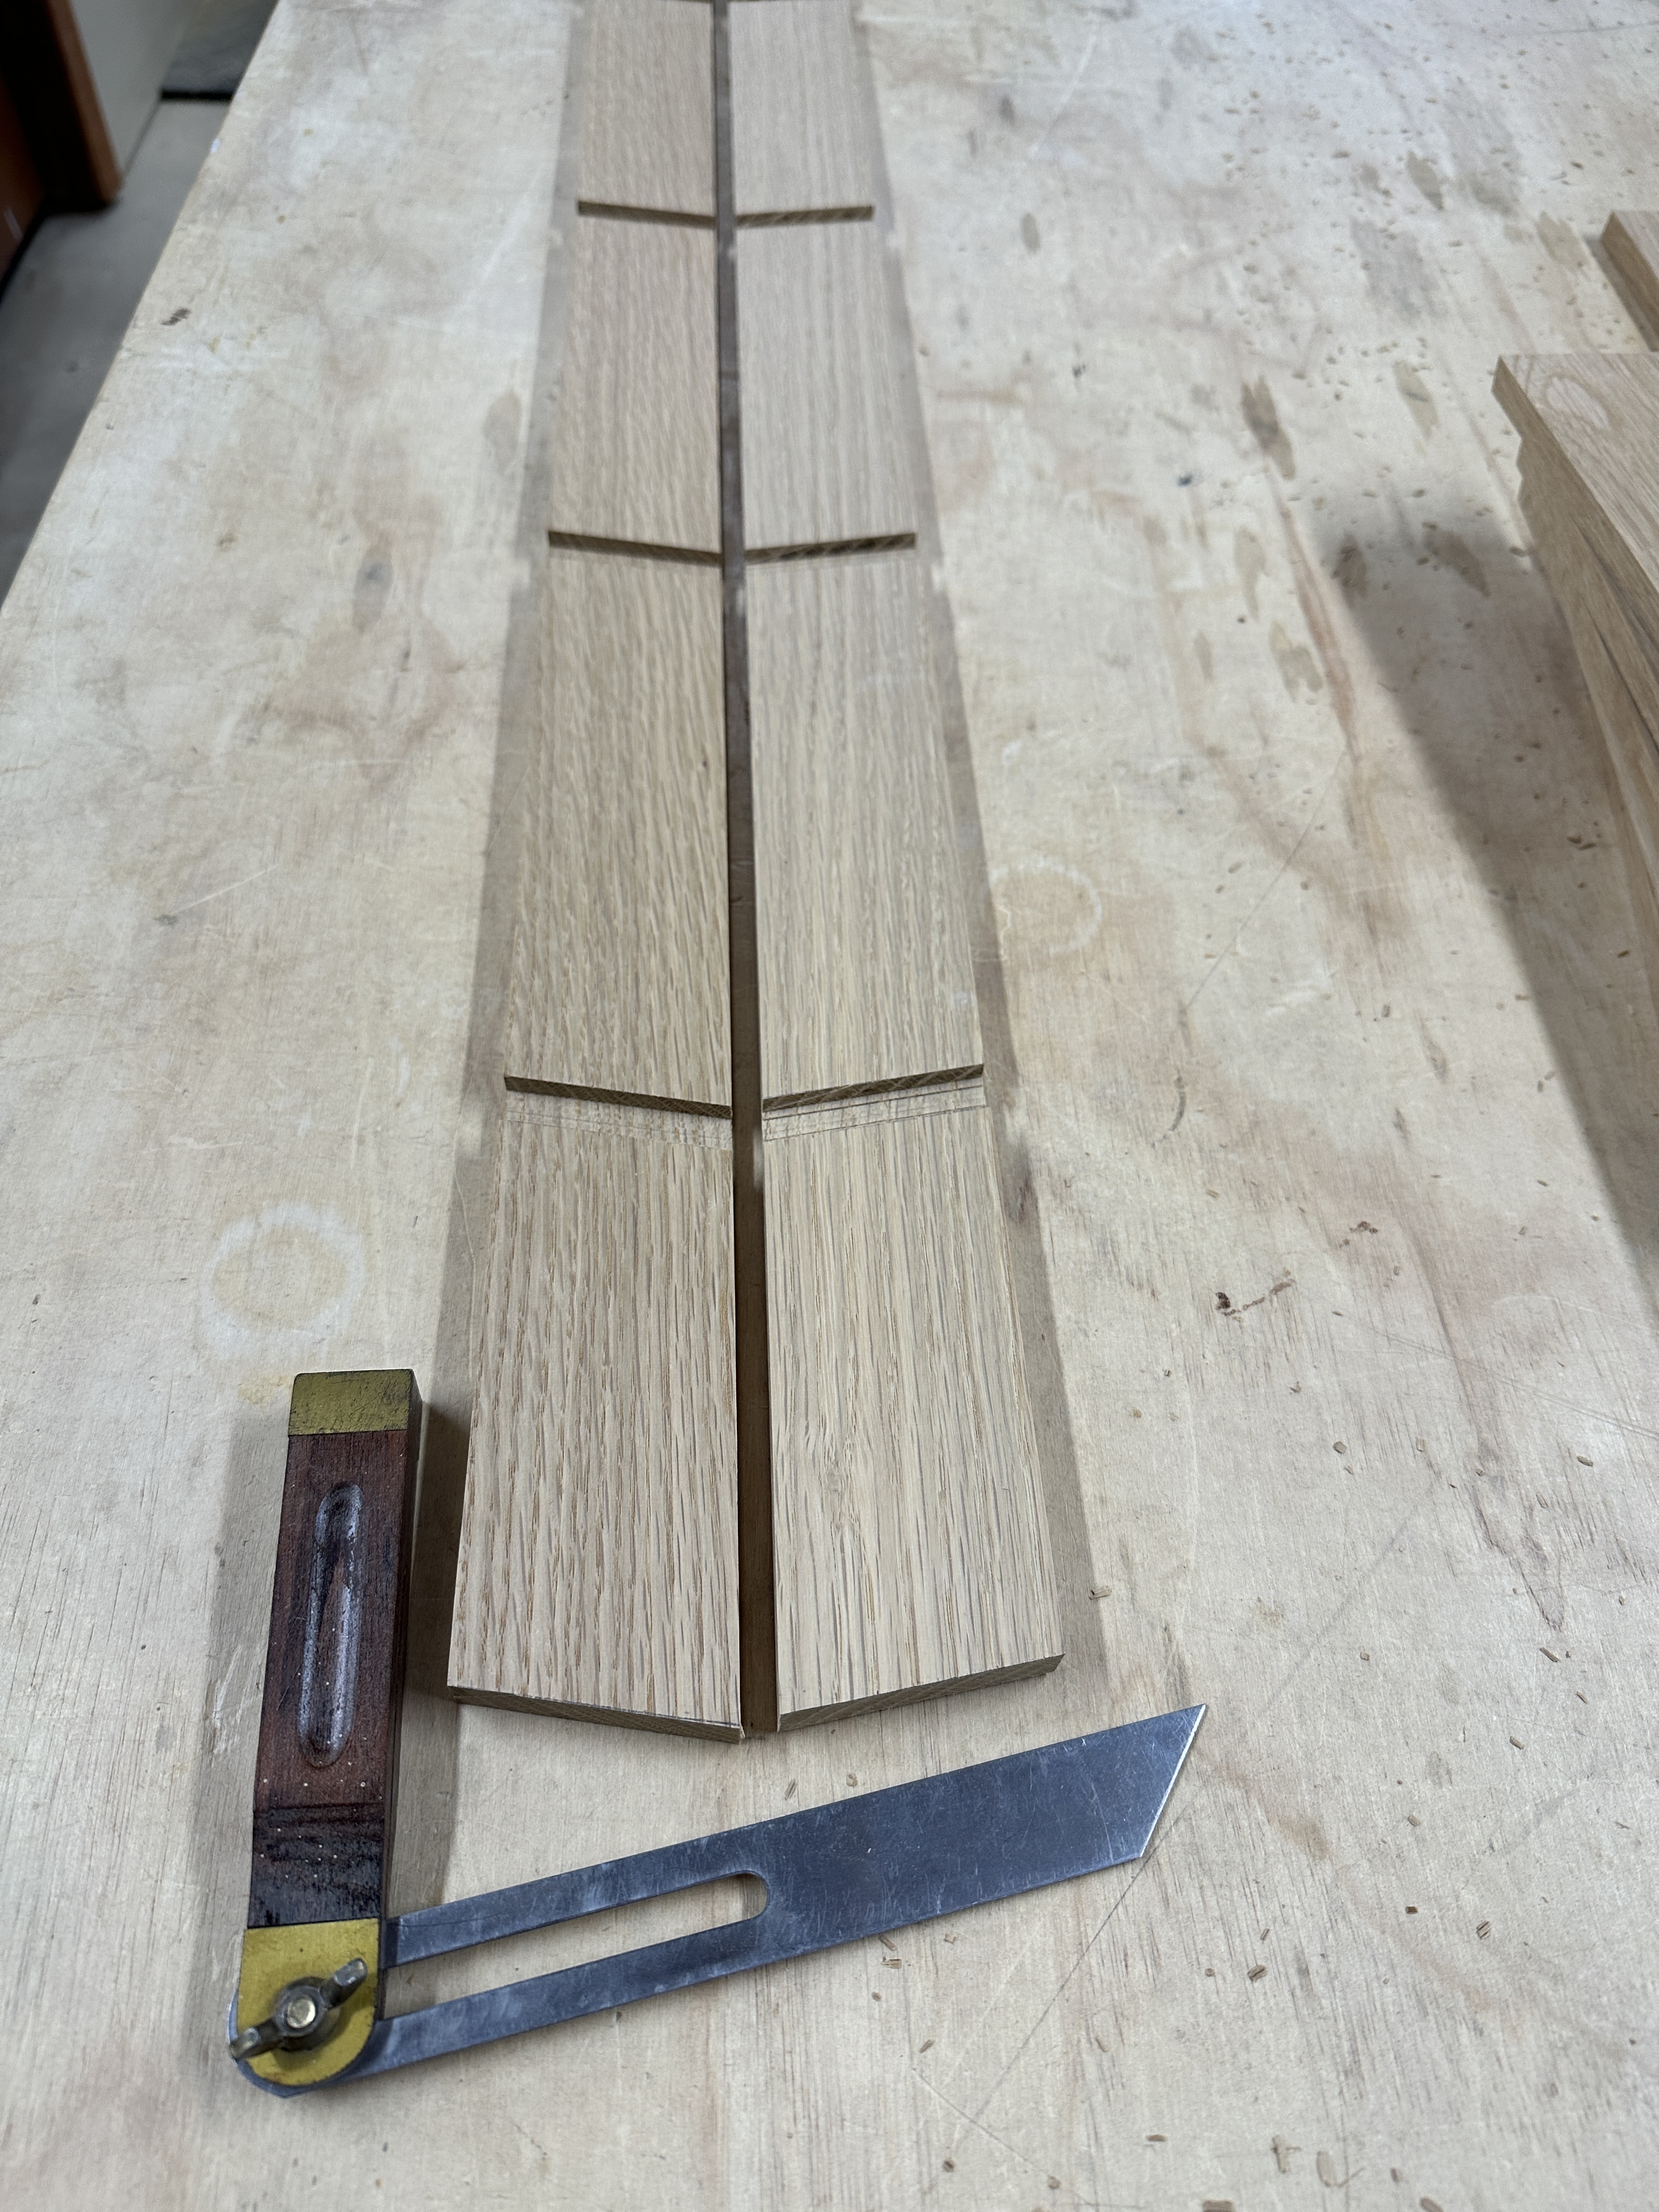
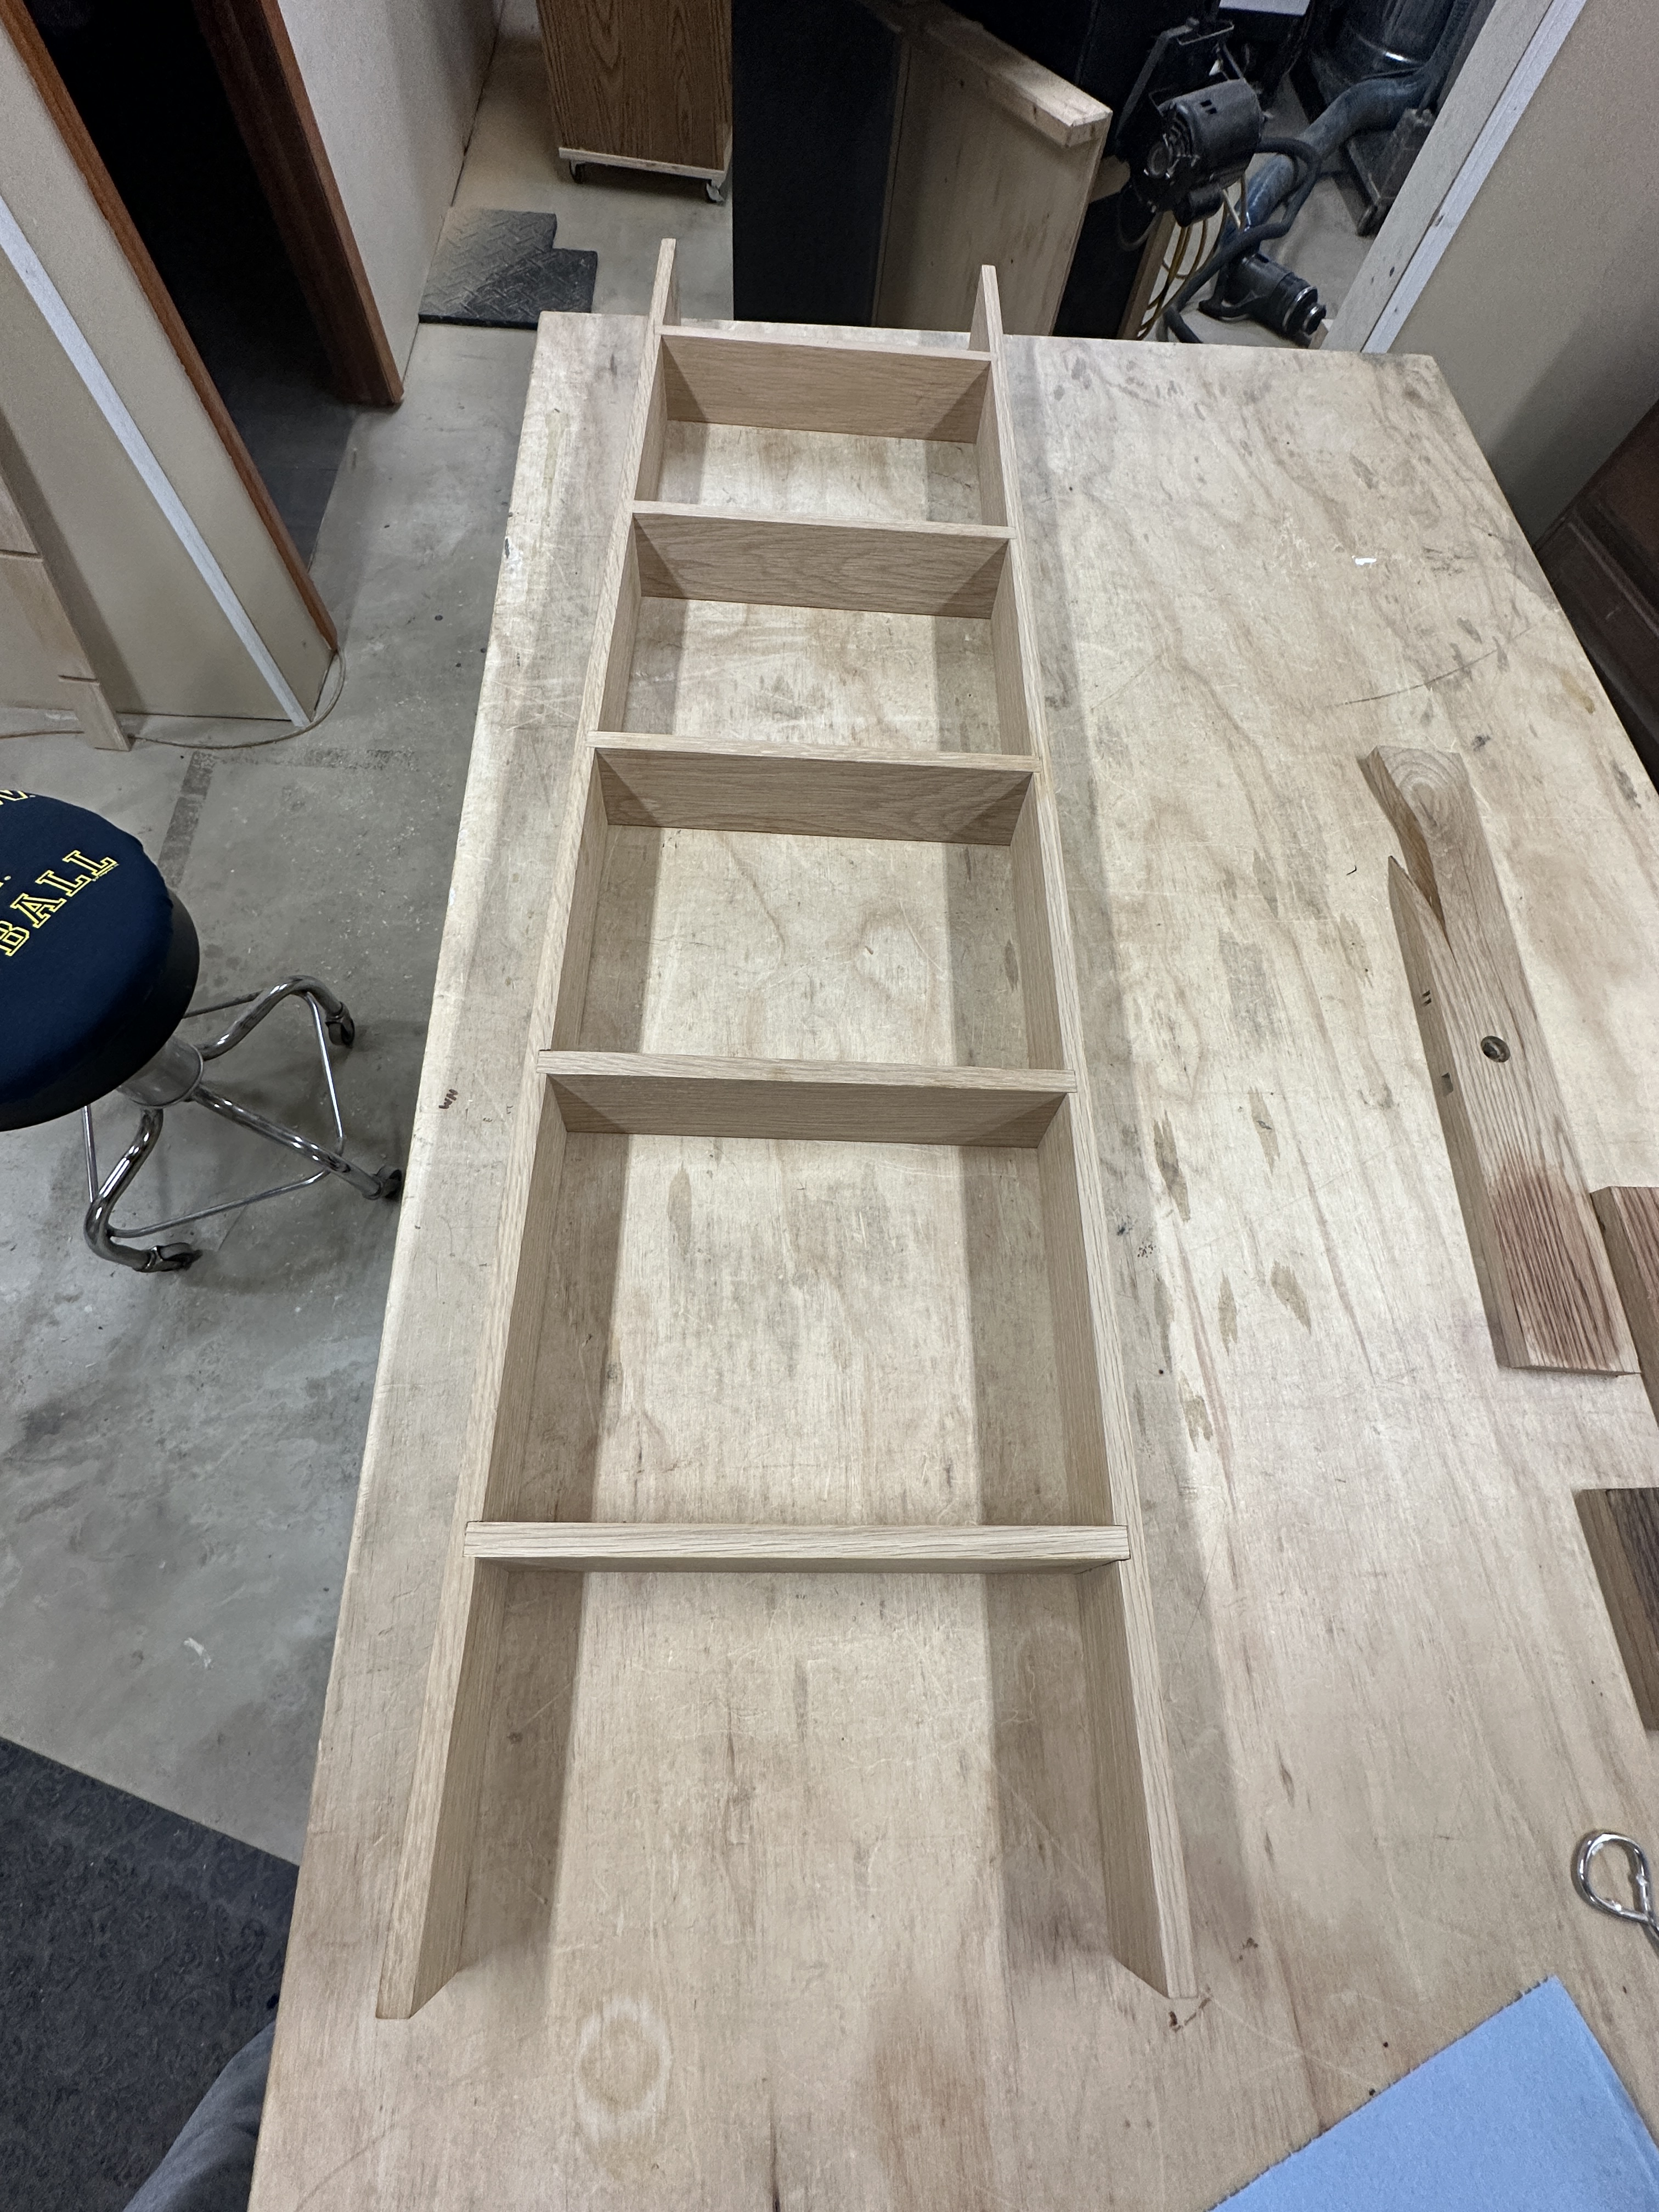
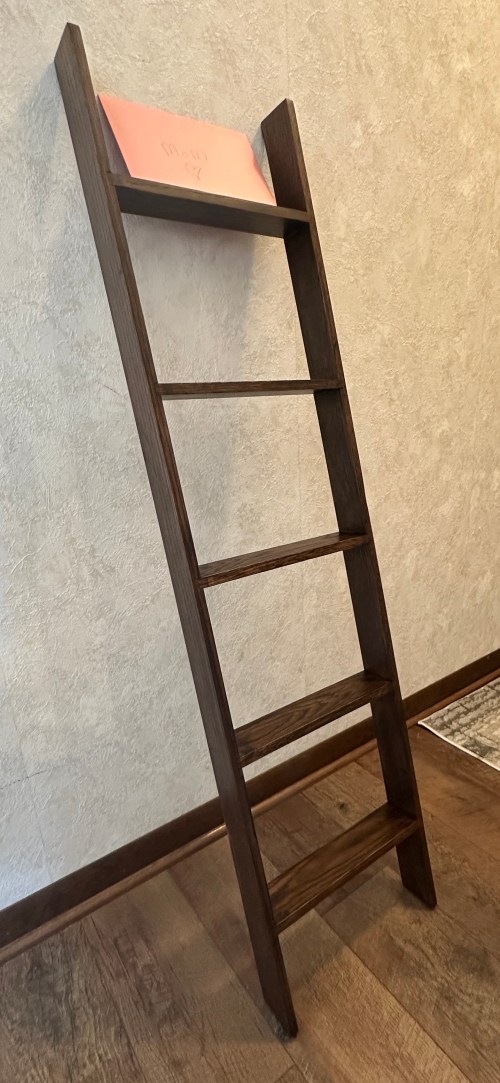
So I whipped one up for Mother’s Day. Very similar process and dimensions. I used pieces of old oak flooring and stained it.
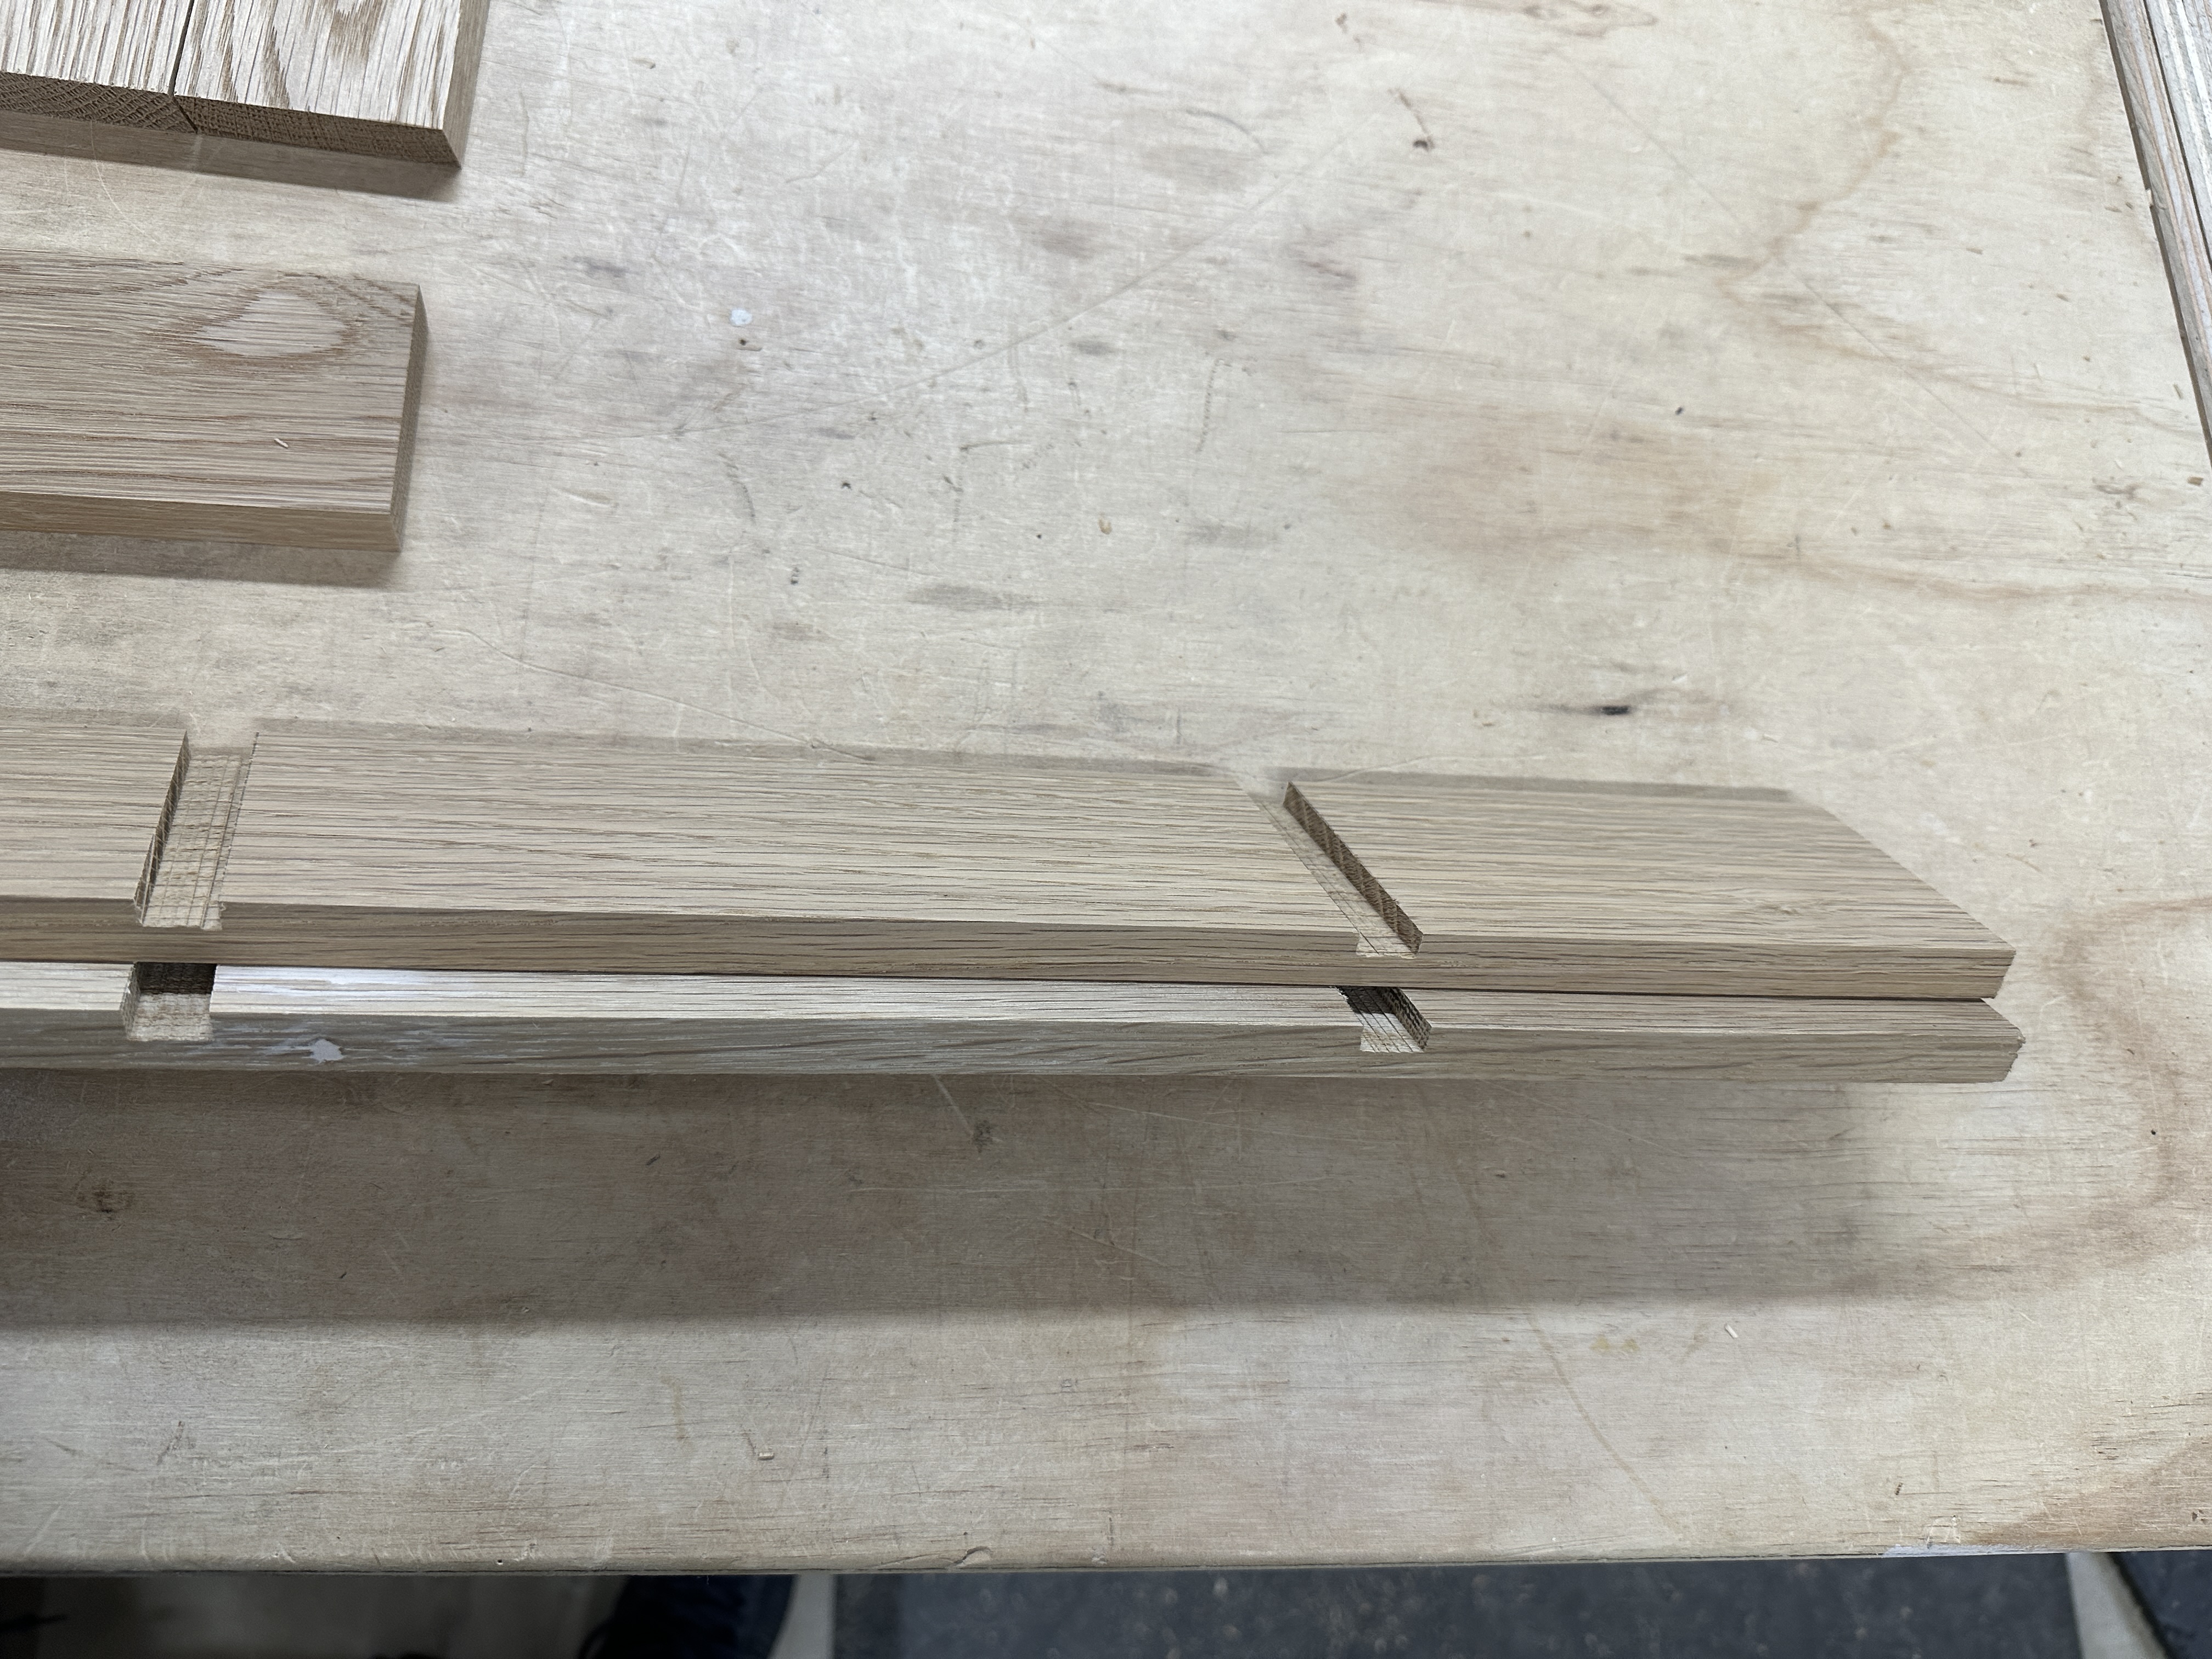
My new sliding miter saw has a depth stop, so I used that to the dados and cleaned them up with a chisel. Can you spot the huge mistake though? I marked and cut the dados the same way in both sides of the ladder. Since everything is on a 10° angle, I couldn’t rotate the pieces to work, and ended up with two left sides. Milled up a board for a new right side, which went much quicker.
I prefer to walk golf courses. It’s great exercise, gives me time prepare for shots as well as reflect, and it’s faster than riding. I bought a Clicgear 3.0 three wheel cart in 2011 and with some minor fixes over the years it’s worked great.
I’m not getting any younger and I want to keep walking as long as I can, so I’ve thought about a motorized push cart. Then I came across the Club Booster V2 by Alphard (save $50!), which converts your own push cart into a motorized one. The reviews were awesome so I ordered a refurb unit for $647. Here’s my first test after assembly.
I was impressed, but the dragging front wheel while turning didn’t work very well, so I quickly ordered the Swivel Conversion Kit for $89. The kit replaced the front wheel with an axle where the original back wheels mounted to make it a four wheel cart with a swivel front. It makes a huge difference for maneuverability and stability.
By the time I finished my first nine holes I felt very comfortable controlling it. I’ve played two 18 hole rounds and this upgraded cart let’s me play faster and leaves me fresher for the back nine. I’m surprised how much energy I save not having to push the cart. I’m thinking about doing a detailed review post.
There were two problems though. The parts took up too much floor space in the garage and looked messy. I also forgot to take the wheelie bars for the first round I played.
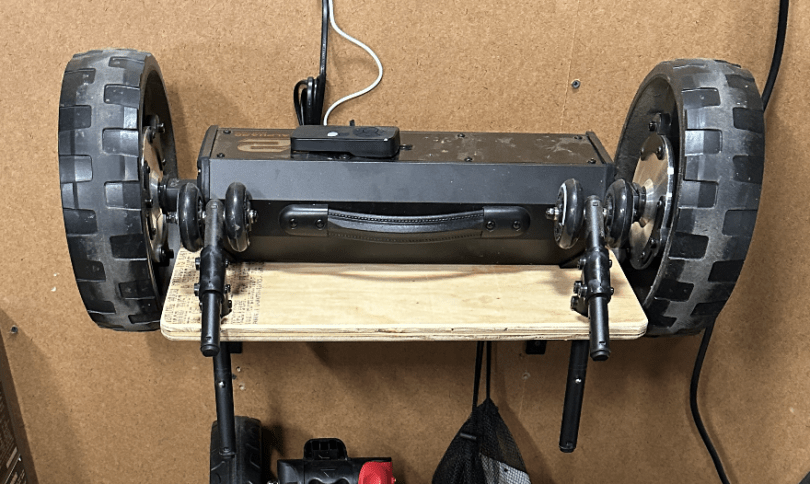
I needed some type of rack to keep things organized, help me remember to grab everything, and make changing easy. I thought about having slots for the axle or something to prevent the unit from falling to the floor. After cutting a piece of plywood and laying things out, I realized a simple shelf with holes for the wheelie bars is all I needed.
Just what I needed. I love a quick build.
With a motor this is a vehicle for my golf clubs, so it needed a name. I’ve been struggling to think of anything, so I asked ChatGPT.
Those are some good ones and I chuckled. Brandi’s idea was to call it R2-D2, but I don’t like reusing a specific name. I like the style, so I settled on CB-V2 since the unit is like my own droid.
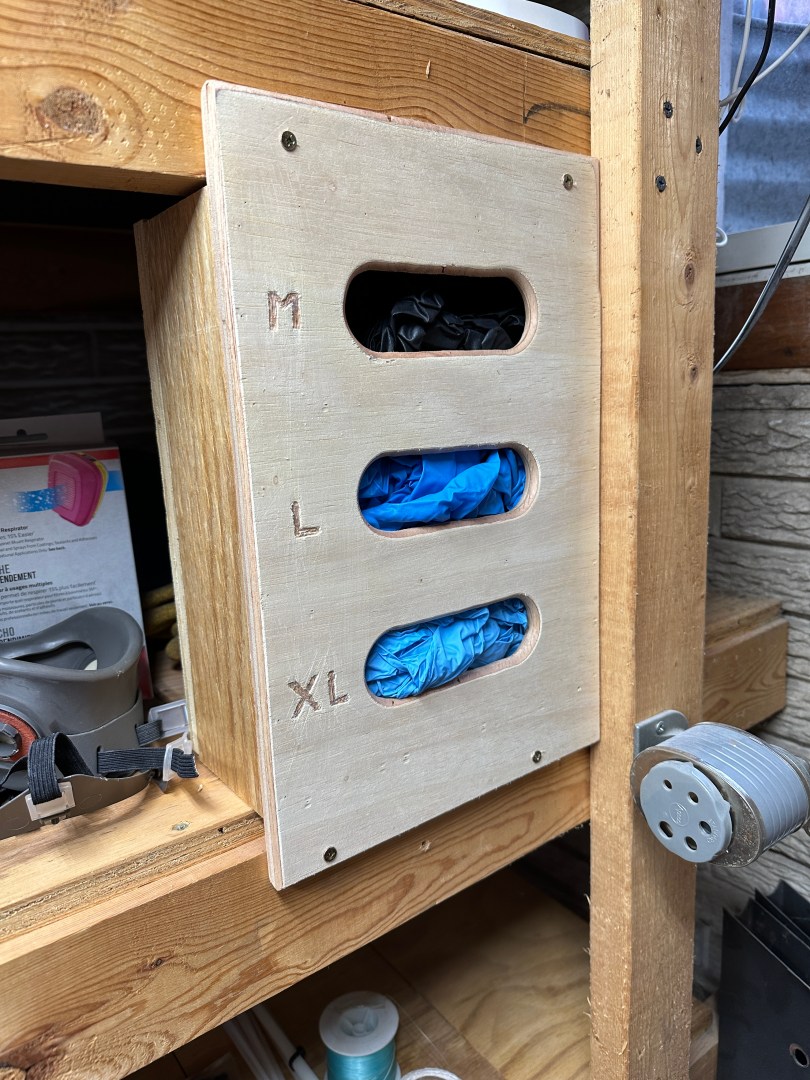
As I was finishing my closet reorganization I couldn’t help myself and had to make something. I have three sizes of nitrile gloves.
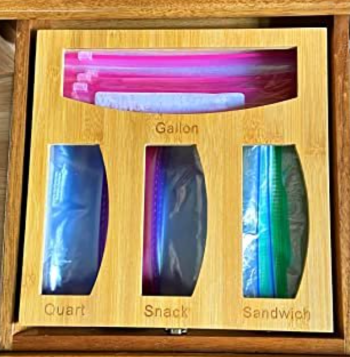
This gave me an idea based on plastic bag organizers I’ve seen on Facebook Marketplace.
I made a quick sketch, took some measurements, and grabbed plywood scraps.
It was a simple construction, using wood glue and pin nails to hold it together. I did screw on the back in case I ever need to get inside. I carved in the letters with whatever bit was on my rotary tool.
The top and bottom were made long so I could screw the unit in place.
I did finish organizing and cleaning the closet, so here are before and after pictures.
I’m glad that’s done. Time for some non-shop projects.
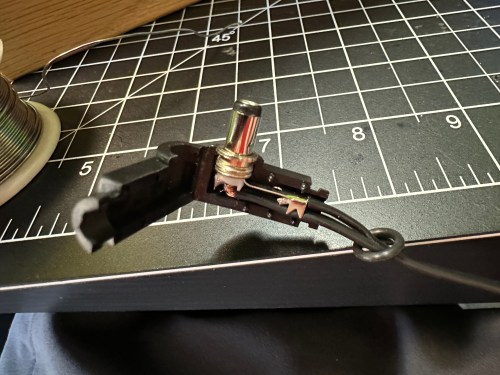
I might end up getting a right angle jack to help with the strain relief. We’ll see how this holds up.
Yeah…
It hadn’t failed, but was heading that way. I didn’t help that I don’t have any heat shrink large enough to go over the end of that barrel jack. I ordered a pack of right angle barrel jacks from Amazon and soldered the wires in.
Didn’t work. The jack wasn’t long enough or the wrong size to make a good connection to the power source. I wish I had checked connections before soldering the wires on. I ordered a different style of jack in two sizes, 5.5 x 2.1 mm and 5.5 x 2.5 mm.
The 5.5 x 2.5, on the left, turned out to be the correct size. After confirming (multiple times) the positive and negative sides of each connection I slipped on some heat shrink, soldered the wires to the jacket, and blasted flames at the heat shrink.
The right angle is a much better connection because of how the battery sits in the jacket pocket and the extra length will help with strain relief. I feel better about having a soldered connection as well. It’s a win all around.
First up was upgrading the power cords on my table saw and jointer to be longer and beefier. I chopped a couple of 15 foot lengths off an old extension cord my Dad gave me years ago, which I still haven’t used. After wiring them in to the switch I installed a new plug on the end.
I also replaced the metal castors I had originally put on the table saw cart because they were horrible. The new ones roll real smooth.
I needed spots for more clamps and had empty space in the clamp storage area. I’ve wanted to redo that area anyway.
I got creative, using a couple pieces of copper pipe saved from the old shower and some old microwave mounting rods.
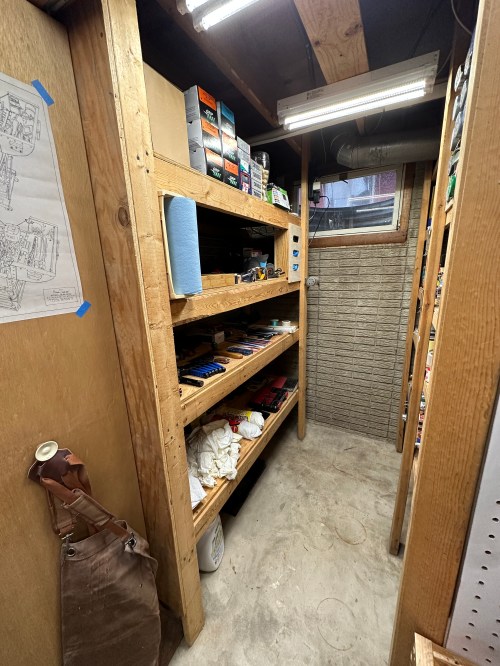
The shop closet is in need of a lot of love. The lighting has always bugged me and it was a good place to start so I’d be able to see when tackling the rest of the room. The pull string and single bulb had to go.
After wiring, I mounted the lights to a scrap of plywood and that to the joists. I had to add an outlet because my router and other network equipment are in here and they had been plugged in to the light fixture. There was an open ground, so I opened up the light in the adjacent furnace room and connected the ground wires.
What a difference!
It’s very bright in the closet now and the motion sensing works great. I thought about wiring half of the outlet to the switch so I could mount LED strips under each shelf that would turn on with motion as well. Maybe a later project if I think it’s needed. After I reorganize and get everything accessible at the front of shelves I think it’ll be fine though.
The other part of the closet that really annoyed me was the spray paints because I could only see the front cans and had to move things out of the way to get to back rows. It was hard to know exactly what I had.
I cut out the shelf and cross supports above the cans and removed the sheet of plywood that was the can shelf. This allowed me to gain extra height and assemble an entire unit to drop in place. I cut rabbets in the surrounding plywood box and used interweaving hardboard to create the internal compartments.
Talk about a stressful glue-up! With space for 40 cans, it still wasn’t enough storage, but I have a lot of duplicates that’ll eventually get used up.
The rest of the closet is still a mess and an accumulation of junk. It needs a cleaning and complete reorganization, so I don’t have any plans to build anything. If plans change or anything seems useful, I’ll be sure to share.
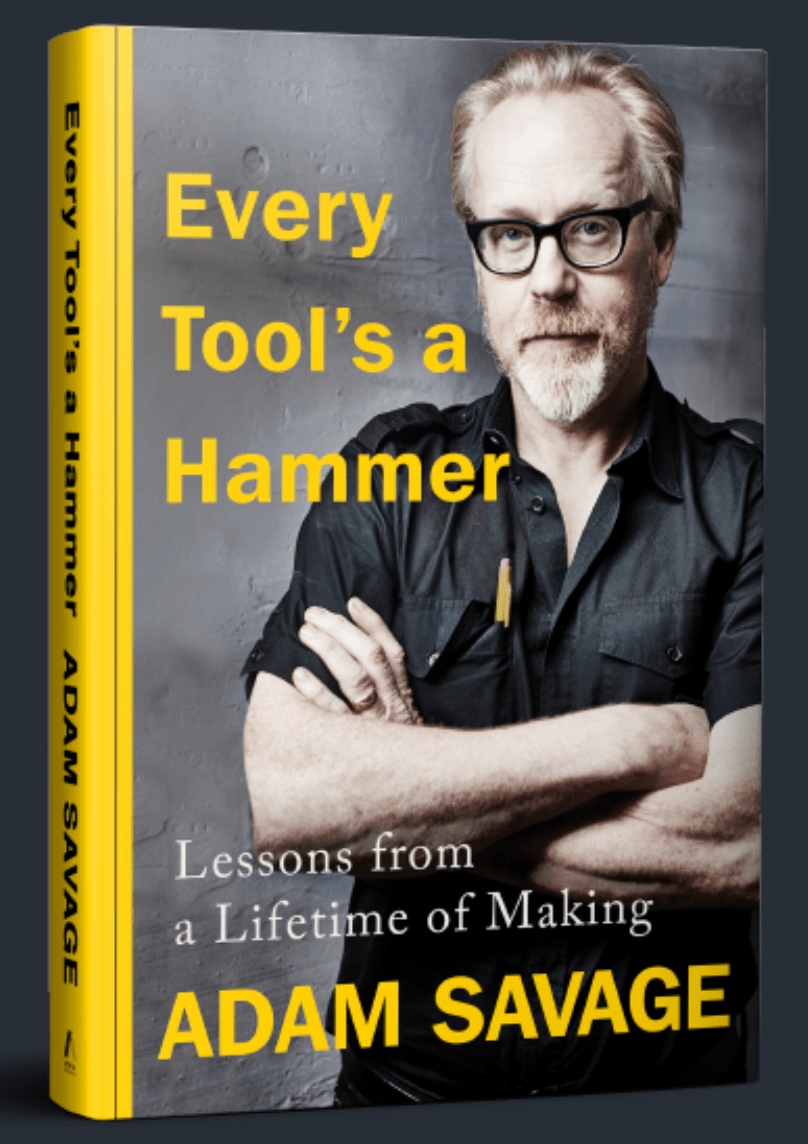
I’m a big fan of Adam Savage and Tested, so when I saw he was writing a book, I preordered it from Amazon.
That was four years ago. I’m embarrassed to say the book had been untouched on my Kindle since it was released in May of 2019. I finally turned the page on the flights to Madrid and easily finished it.
Putting something in the world that didn’t exist before is the broadest definition of making, which means all of us can be makers. Creators.
Everyone has something valuable to contribute. It is that simple. It is not, however, that easy. For, as the things we make give us power and insight, at the same time they also render us vulnerable. Our obsessions can teach us about who we are, and who we want to be, but they can also expose us. They can expose our weirdness and our insecurities, our ignorances and our deficiencies.
If you’re a creative of any type I highly recommend reading Adam’s book. I learned a lot and it felt good to know other people think the way I do about a lot of things.
One of the chapters focused on lists, which is something I use often. Usually I prefer Apple Notes because is syncs between my iPhone and MacBooks (work and personal), allowing me to quickly update the lists. Here’s a list I started partway through my bathroom remodel.
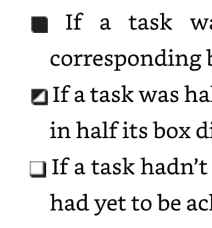
Adam writes out his lists and makes a checkbox next to each item. When something is halfway or mostly complete he splits the box diagonally and fills in the upper left area. On completion, the entire box is filled in. It’s such an important process for him that after the Lists chapter was another titled Checkboxes!
Whenever I put a list to paper I’m going to try this method.
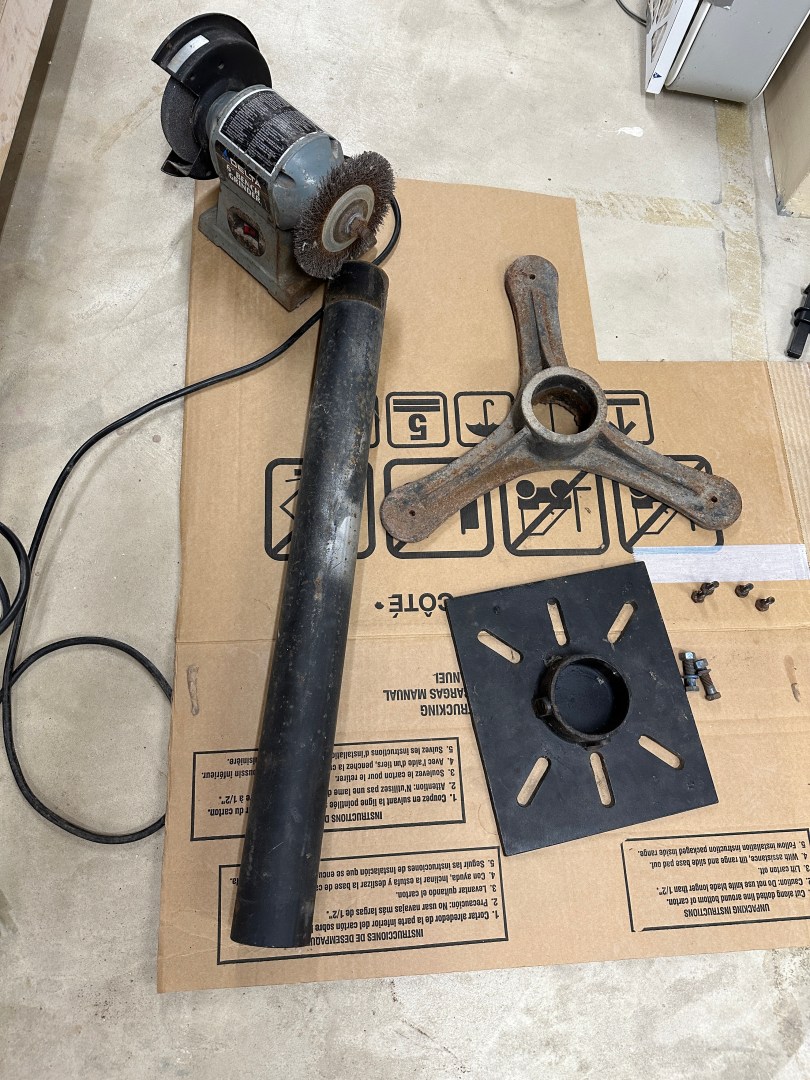
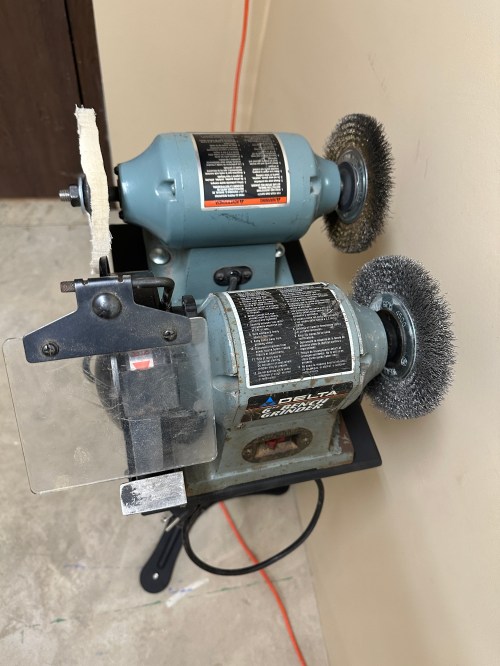
In early 2018 when I bought a band saw, I installed a bench grinder on the same cart and never liked how much vibration the grinder sent through the saw. I’d been been keeping my eye on Facebook Marketplace for a heavy grinder stand and found one about two years ago, along with a second grinder. It was finally time to clean things up and mount both grinders. I forgot to take a picture before disassembling things, but I did find a really small thumbnail from the Messenger chat that I zoomed in. You can kind of see how rusty things were.
I separated the parts and used a flap disc on an angle grinder and a brass wire wheel on a drill to clean up a lot of the rust.
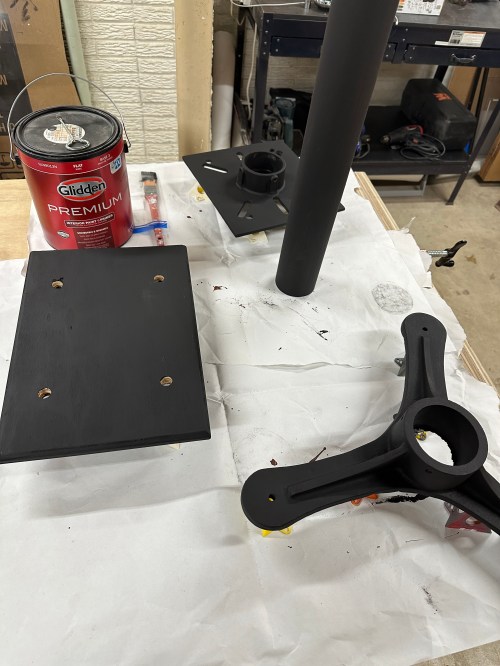
Then the stand parts got a coat of rusty metal primer.
Then I cut a larger top plate from 3/4″ plywood and chamfered the edges. I drilled out mounting holes for both grinders and transferred those to new holes in the metal top plate. It all got two coats of black paint.
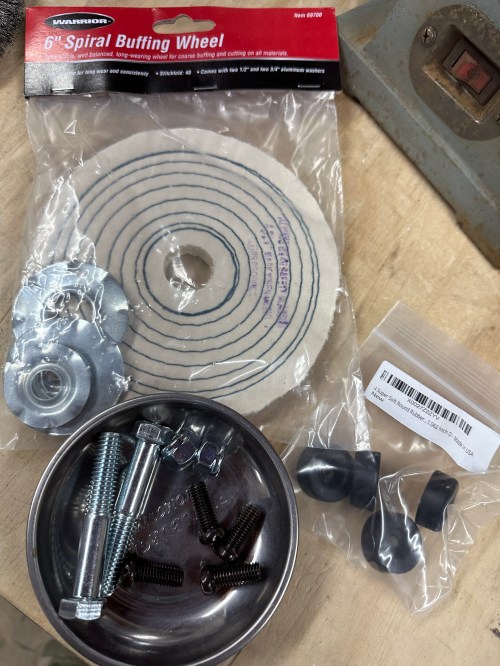
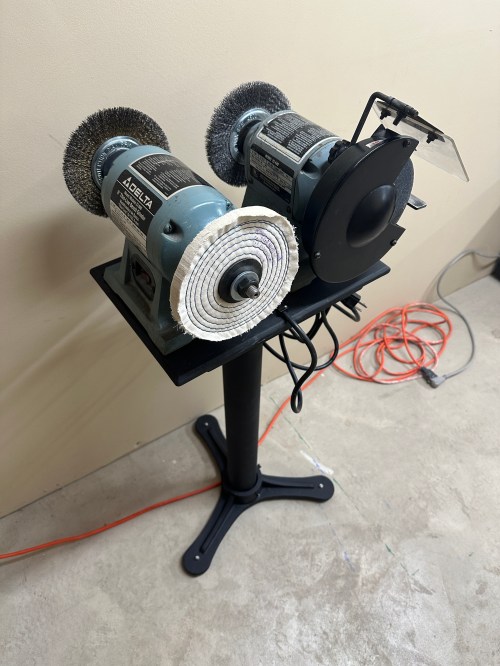
I cleaned up the grinder with a wire brush, but didn’t bother with a new paint job. I bought a new buffing wheel, mounting bolts, and some rubber feet (time will tell if they’re too small). I found some bolts in my bins that were the right size for tightening the stand’s top and bottom to the cylinder.
After the paint dried I installed clips and a hook for the power cords and assembled everything.
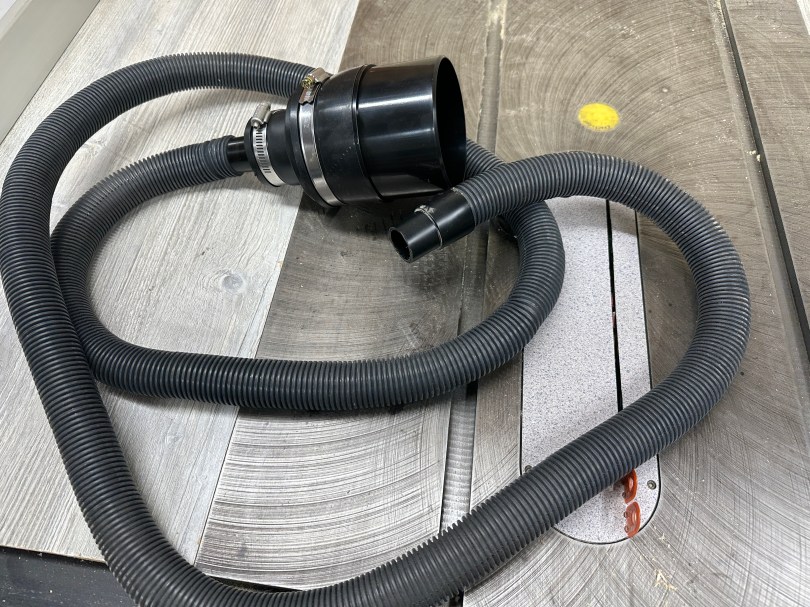
I’ll have to create some adapters for tools with dust ports smaller than 4″, though the hose kit did come with some for use with 2.5″ ports. Now that I have a system with enough power I can build something around the miter saw.
I think it was time to finally knock this off my todo list!
My table saw cart got dust collection built in, I set something up for the jointer, and my planer has an easy connection, but the rest of the major dust creation tools have been neglected far too long. Each machine needed a dedicated solution that was easy to connect to the main line or I wouldn’t bother to use any dust collection at all. I pulled out some hoses I picked up at estate sales years ago and bought couplers and connectors that would fit the main line.
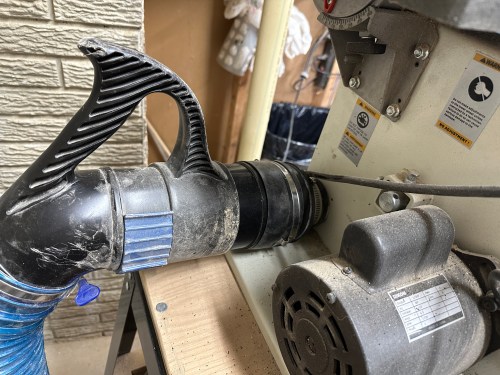
The band saw was a quick solution by using a coupler and a reducer on the port at the back.
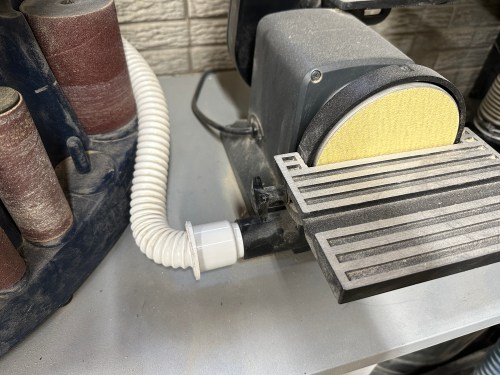
My sanding cart has three machines, four dust collection ports, and five places to sand. Three of those ports are the same size and after cutting away some excess plastic on a hose it was the perfect fit. I zip tied the hose to a bracket on the back of the station and routed the hose out to the bottom front. It’s easy to swap the small end of the hose from port to port. My spindle sander had a larger port, so I used a coupler and another old hose, feeding it under the drawers as well. I can easily connect the main line to either hose.
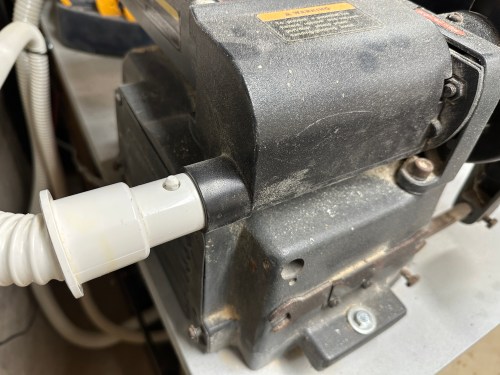
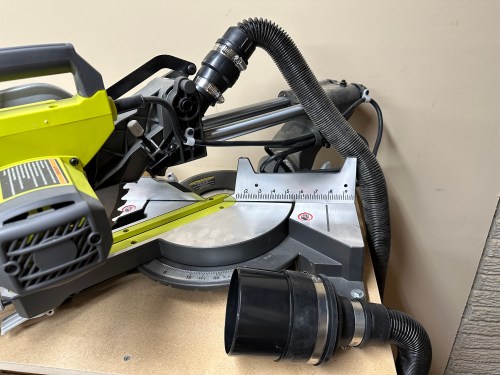
Some fittings on another hose got my new miter saw all set. Time will tell how well dust collection works here because miter saws are notoriously bad at it. I may have to build a shroud of some kind behind the blade.
The final hose got a fitting to work with my random orbital sander, track saw, and circular saw. It’ll remain a portable hose I pull out to use with those tools or for corner clean up around the shop.
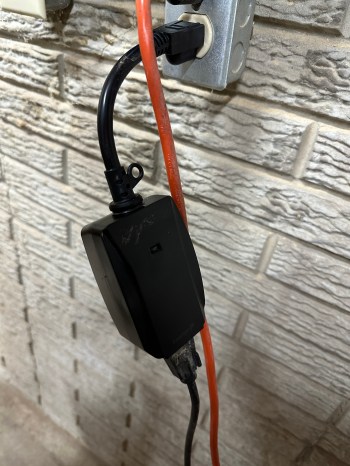
Even though I’m never more than a few steps away from the dust collector, having to go back and forth to turn it on and off was a nuisance. I’d seen several remote control solutions for $50-100, which always seemed like too much, so planned to build my own. Then a recent Amazon search came up with a $13 product so I bought one. It works great!
Feels good to finish this project. I’m looking forward to breathing less dust and not having to clean up as much.