
The last big stage of remodeling the kitchen was a new backsplash. Last year we watched John Heisz’s End Grain Backsplash video, since I’m a subscriber, and I think it got the wheels turning in the back of our minds. Sometime after doing a couple of walls in the living room and making a shelf/light out of pallet wood, Brandi suggested we do a wood backsplash. We looked up some examples, I thought about the process, and we decided that would be the plan.
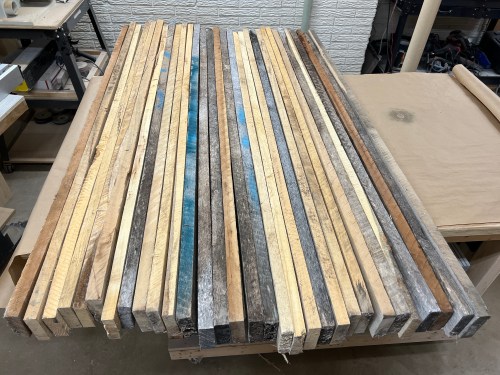
Several months ago my dad brought me another load of pallet wood and it took up space in my shop, waiting for us to get started. In late February I finally started milling the wood. This load was in much worse condition than the larger load I used for the living room walls, though I was able to use some leftovers from the earlier projects. First step was trying to get a flat face and a flat edge on every board, while discarding any pieces that were too twisted. I took a lot of passes at the jointer, cut some boards in two, and trimmed off bad sections.

While working on the rest of the kitchen we kept discussing ideas for the backsplash. Something we kept coming back to was using a shou sugi ban technique to burn the face of the wood and then potentially staining the wood. I cut up some scraps to do some samples. We bought a couple of new gray stains at Menards and tried various combinations.
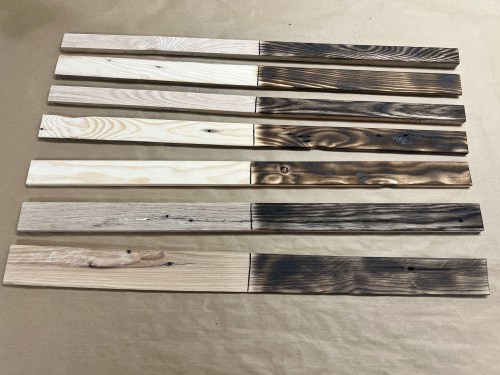
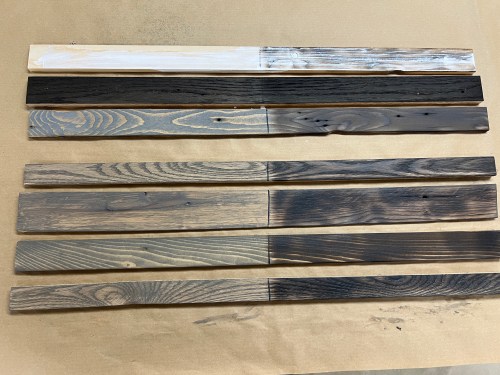

We didn’t like how dark the burnt wood was turning out and it would have taken so much time to do on all of the pieces. We decided on this gray gel stain.

B offered to help with the rest of the wood processing, which saved a lot of time with so many pieces of wood. I cut everything to a width at the table saw, while she grabbed the pieces coming out of the saw and stacked them up. With so much hard wood in the mix, I ended up overheating another general purpose blade, which I had done while processing everything for the walls. This time I learned though and picked up a cheap ripping blade from Menards, since it was the only one they had in the size I needed. This blade made an incredible difference, allowing me to finish cutting to width. Then I stood each board on it’s flat edge to run through the saw, so I’d get two boards out of each and have much thinner material. This process is even harder on a blade but it went smooth. Here you can see how burnt some of the edges were before I switched blades.

After lining everything up on edge like this I noticed the widths had too much variance, so I ran everything through the table saw again to get more consistency and cut away those burn marks. I also trimmed/squared the ends on the miter saw at some point. I set up the planer and we ran each piece through twice on each side. With Brandi grabbing boards on the exit side I was able to keep feeding the input side, which cut the work time in half. We ended up with 83 pieces, which would be more than enough, according to my math.

Next up was everyone’s favorite step, sanding. We did it assembly line style with me using 120 grit and B doing using 180. It took us 1-2 hours.

Since the gel stain needs to be wiped off pretty quickly, we used an assembly line for that as well. I applied the stain with a staining pad, B wiped it off and transferred the piece over to the drying rack, which I’m so glad I didn’t break down after painting the cabinets. I had only found out about staining pads while researching gel stains that morning and it worked really well. We knocked out this step in two hours.

Something that stuck with me from Heisz’s project was how he said he’d create panels if he ever did it again. I definitely didn’t want to have to apply poly by hand after putting up the backsplash so panels would allow me to use a sprayer outside and put on a lot of coats to seal things up. I used 1/4″ plywood to cut all of my panel backs.

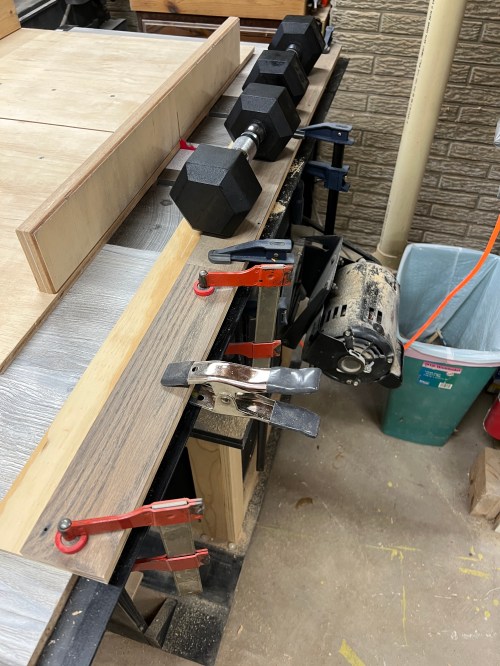
Then we glued individual boards to the panels row by row, using clamps along the edge and a lot of weights from our garage gym. There was a lot of trial and error through this process.


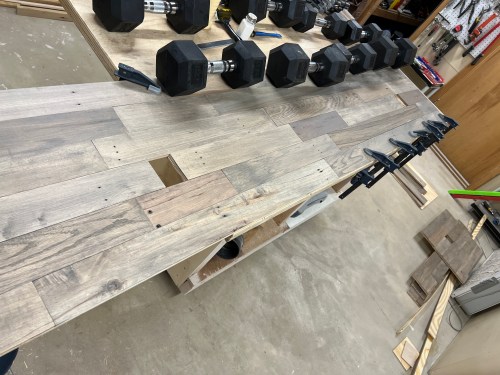
I had to cut the outlets and a couple of notches for some window trim. Then we did a final fit in the kitchen and trimmed to final lengths. This was really the first time our entire vision of the kitchen came to life. With something as unique as the backsplash, we had no idea if we could pull it off. It turned out better than we visioned and we couldn’t be happier with our color choices! While everything was in place for the test fit, I cut trim from extra boards.
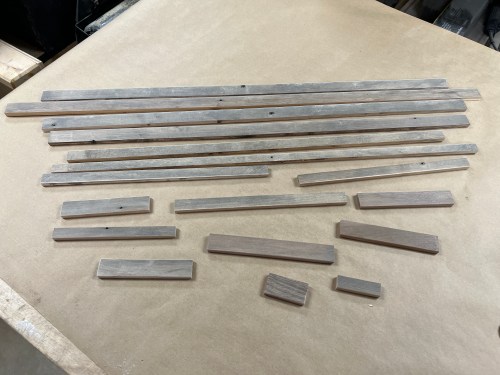
Some of that needed a little edge sanding and stain. We let that dry for a day and then sprayed five coats of water-based polyurethane.

In between coats we fit some of the extra boards inside the open-shelf cupboard I’d made and sprayed those with three coats of poly. It was a beautiful day in the 50s with a slight breeze and clear sky, so the coats were dry within minutes. After the final coat on everything, we went for a walk and then started installing pieces. First up was the cupboard. I had not made a panel here so it was easy to just tack the boards up with a brad nailer.


Since I used hardboard to cover the beat up (due to removing tile) drywall and these panels were about a half inch thick, I used outlet extenders everywhere. I also installed GFCI outlets everywhere within six feet of the sink.


I brad nailed all of the panels up and used pin nails for the trim. I finished other odds and ends like making a new ledge for the big window and adding the white trim around the cupboards and big window.

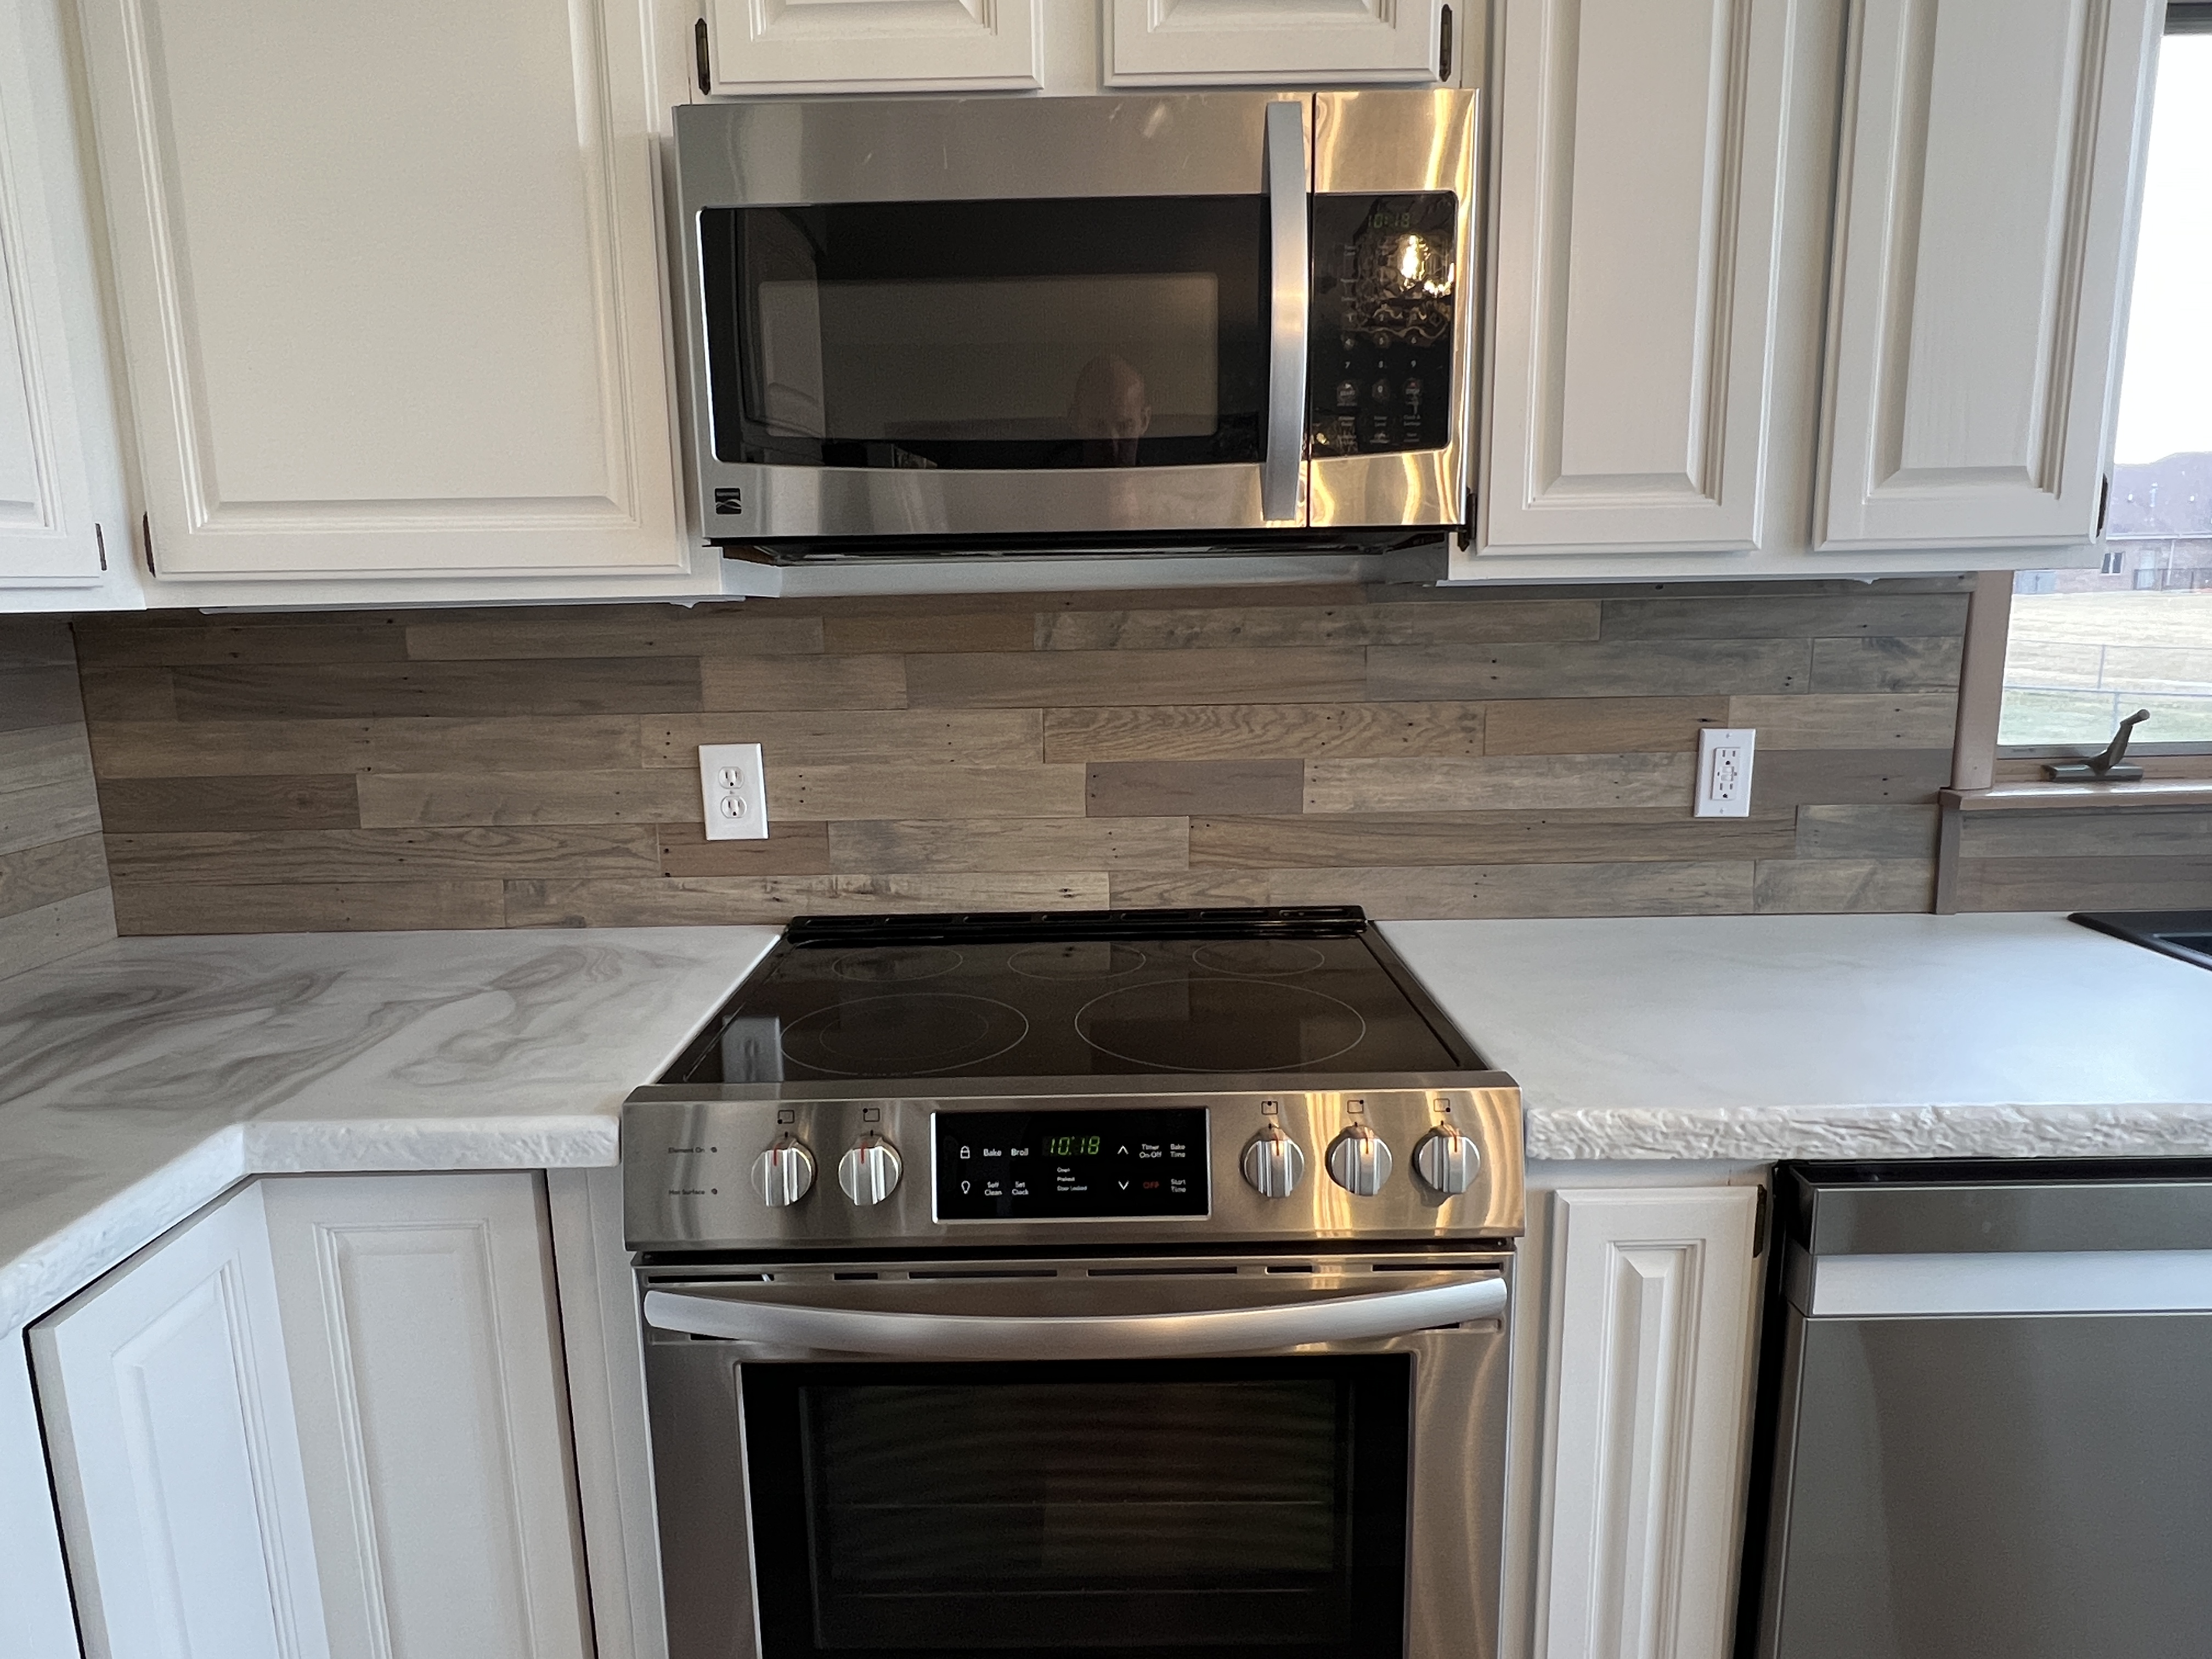

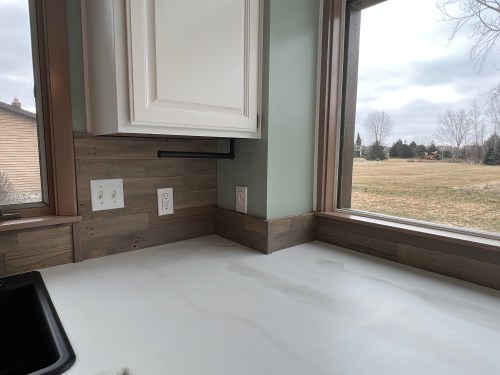


We are thrilled with how well the backsplash turned out!
That’s a wrap on the kitchen and I’m so glad it’s done. In a couple of days I’ll post a full recap.

[…] Kitchen Remodel: DIY Pallet Wood Backsplash […]
LikeLike
Love this backsplash, what a great idea!
LikeLike
[…] Kitchen Remodel: DIY Pallet Wood Backsplash […]
LikeLike
[…] our ornament around that this year. We took some leftover pieces that didn’t get used for the kitchen backsplash, glued two together, cut it to size, rounded the corners, softened the edges, and added a couple of […]
LikeLike