When the film “Downton Abbey” was released in 2019, I went to see it with a few friends, and Brandi was actually one of them. Several of them had never watched the show, so I thought it was odd they even went, because they were completely lost. You really need to form that bond with all of the characters by watching the show; each one has so much important backstory.
Fast forward to the end of October 2021 and I convinced B to watch the series after she’d enjoyed some other British based things. It took us over three and a half months to get through the six seasons on Netflix plus the movie on Amazon Prime. I enjoyed it all even more than my first viewing and can’t wait for the story to continue in the new movie coming out in May.
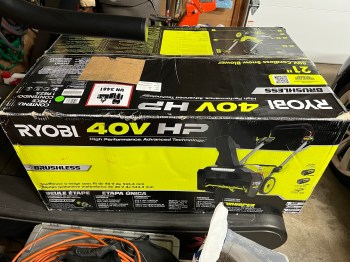
Last month I was messaging my brother, who said he loved his 40V Ryobi snow blower and lawn mower. I’ve had an Ariens 520 two stage snow blower for over a decade, but haven’t used it much the last few years. It used up a lot of space in the garage, took a long time to get started for the winter season, was slow to use, and left me smelling like exhaust. The thought of getting away from gas yard tools was exciting and I have a large collection of Ryobi’s 18V power tools, so they’re a brand I trust.
The only steps involved in assembly were to twist on the chute, secure it with a screw, and tighten the handle. I immediately loved how compact it folded up.
We got snow the next day, so I put it to a test.
The snow blower was easy to start with the push of a button. It was very quiet, light, easy to maneuver, and has a bright LED light. Right away I noticed it didn’t have the power to throw the snow very far as you can see in the video. I would be throwing the snow right in to an upcoming path, so would be moving the same snow 2-3 times! Not a good start.
The triggers on the handle that need to be held in order to keep it running were awkward to use and I accidentally let go multiple times. Then after less than 10 minutes of use, I let go and the motor wouldn’t start again. Both batteries had about 75% charge left and the LED headlight was coming on without a problem. I could hear a bit of a clicking sound from the motor.
I loaded it in my car and returned it to Home Depot the next morning.
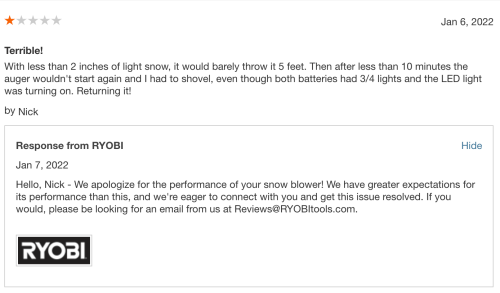
I was extremely disappointed in the machine and due to my positive experience with other Ryobi products, I felt the need to leave an online review, which I almost never do. To my surprise, I got a response the next day.
I also received the following email.
My name is Christian, and I am the Product Development Coordinator for RYOBI Snow Blowers.
We received your online review on the RYOBI 40V HP 21” Snow Blower. We understand you have had an issue with your RYOBI Snow Blower. It is our policy to make absolutely sure that 100% of our customers are pleased with their experience with RYOBI. Could you please call me at 864-642-8094? I would like to investigate this issue with you and make sure that your experience with our products moving forward is a positive experience and that you walk away understanding that our customer service is unmatched.
If you prefer you can reply to this email, and we can discuss your experience to find a solution that meets your needs.
I emailed back…
I returned it to Home Depot two days after it was delivered (the night after trying it). We had less than 2 inches of light snow and the unit was pretty terrible. It barely threw the snow 5-6 feet, so I would end up going over the same snow multiple times to do the driveway. Then after maybe 10 minutes of use, the auger wouldn’t start again. The LED light was on and both batteries had 3/4 charge. Maybe there was something wrong with the motor on this unit, but it seemed very under powered and I wasn’t confident it would be able to handle any real storm. It was quite disappointing because I have a lot of Ryobi hand tools and they all work great. I was hoping to replace my gas snow blower and lawn mower with Ryobi units for ease of use, space saving, and not having to deal with gas, but I’ll be sticking with them now.
Their next reply…
This issue your snow blower experienced has become know and we have since corrected the issue with our units in inventory!
I would like to offer to upgrade you to our brand new RYOBI 40V HP 21″ Whisper Series Snow Blower as I see you were not impressed with the previous models performance. This kit has an upgraded controller and 2x 7.5Ah batteries for increased power and runtime.
Would this be something you are interested in? I want to make sure you are taken care of.
The unit had some damage to the knob used to adjust the auger speed so I asked if they could send me a replacement part and I would fix it myself.
Apparently it’s not an easy fix, so they sent me another snow blower. FREE! Same model, fully complete with the batteries and charger. I was floored!
This new model is better in every way.
Build quality of the machine feels much sturdier.
Larger batteries provide more power and runtime.
The handle folds away in one step instead of two.
Triggers to keep it running were replaced with the more traditional bar you find on lawn mowers.
I’ve had the chance to use this snow blower during a few different sized Michigan snow storms and it did a great job. It throws the snow much better than the other model and it didn’t miss a beat. The machine maneuvers so much better than a heavy gas snow blower and is actually fun to use. There’s no worry about it starting up, so I can just throw in the batteries, push start, and be good to go.
I quickly sold my Ariens gas snow blower, gave the “broken” Ryobi to my brother, and am enjoying the extra space in the garage. Isaac had an older Ryobi model and said this one is awesome.
One minor negative is the snow blower doesn’t come with any kind of shovel tool to clear snow out of the chute or auger. I came up with my own solution though.
Before I purchase a lawn mower I’m waiting to see if Ryobi releases one in their Whisper series before spring. If they don’t, I’ll buy one of their current models. The mowers fold up better to save even more space, which will be great.
This whole experience with Ryobi’s customer service makes me happy I switched to Ryobi a few years ago. It even pushed me to buy their cordless nail guns to replace my pneumatic ones last week. One of my shop projects after the kitchen is finished will be to build a system to better organize and store all of my cordless tools, so I’ll share my Ryobi collection then.
Six weeks ago I said progress would be slow going since I was back to work. I wasn’t wrong, but we’ve been knocking out odds and ends, mostly on weekends. Small changes can make a big difference and always seem to take two to three times as long as you’d expect.
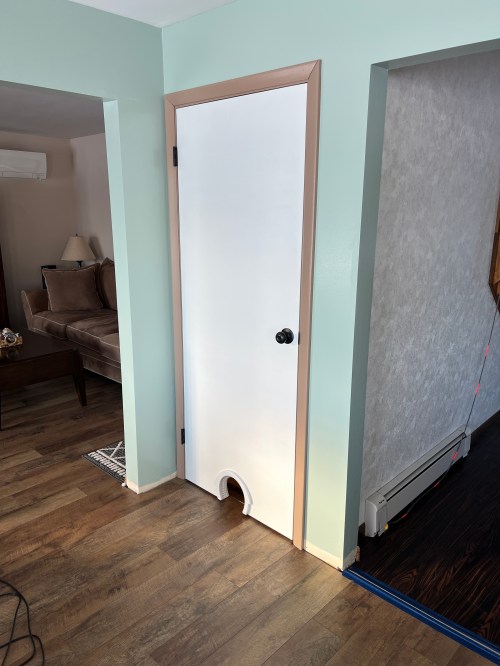
I put in a bullnose on the stairs to the basement, we painted trim and the door, and rehung the door. Of course the door no longer fit after all the paint, so that turned in to a 2+ hour headache!
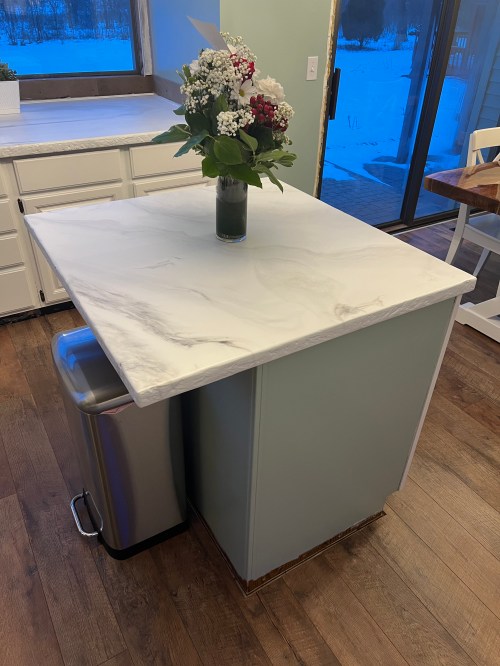
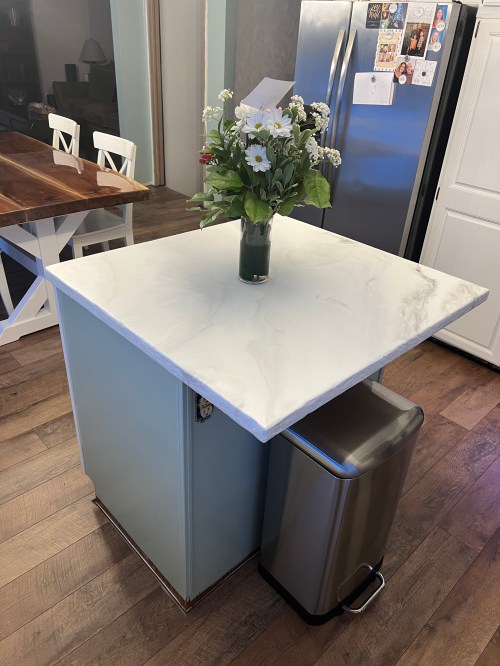
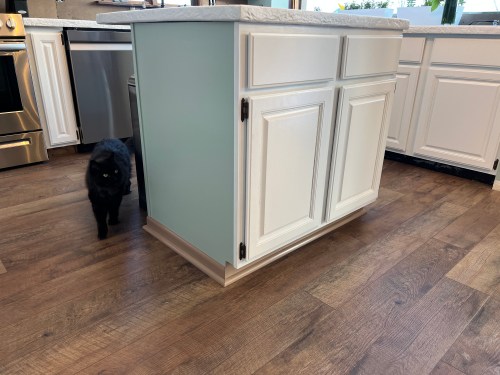
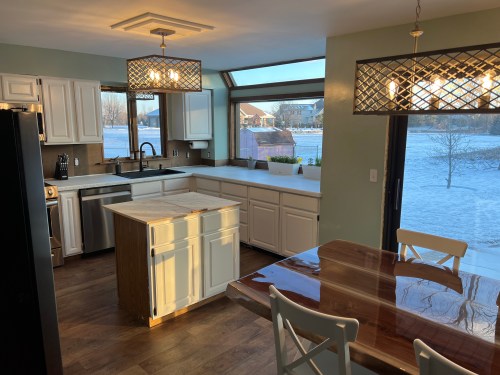
We painted the sides of the island to match the walls. Then painted trim and quarter round for the base and nailed it up. Our inspector Ninja had to approve the work.
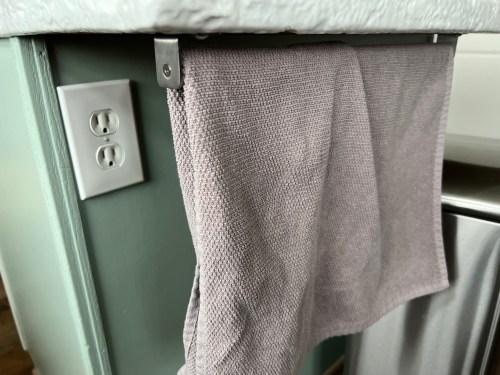
I installed a banana hook under the cupboard, which folds up out of sight when not being used. The island got an IKEA towel rack and I replaced the outlet with a white one.
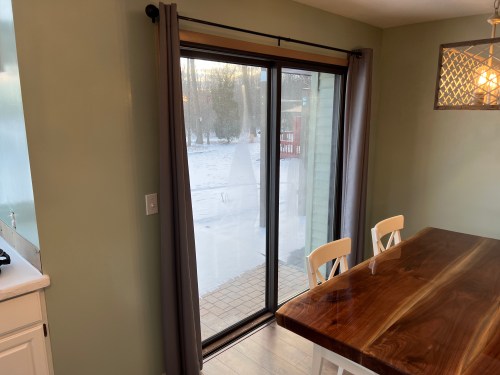
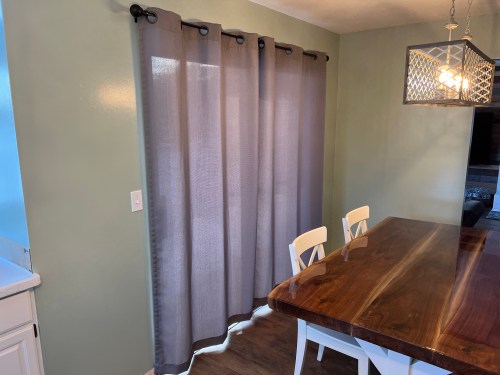
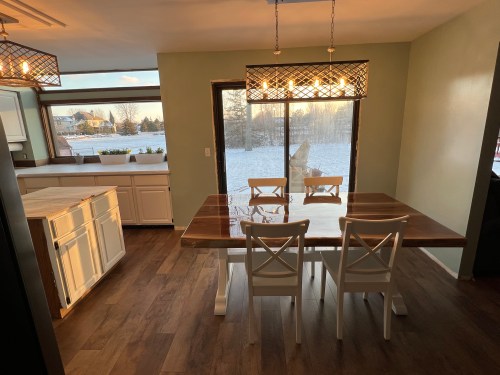
We did the trim around the sliding door, put in the floor transition pieces, and mounted a curtain rod.
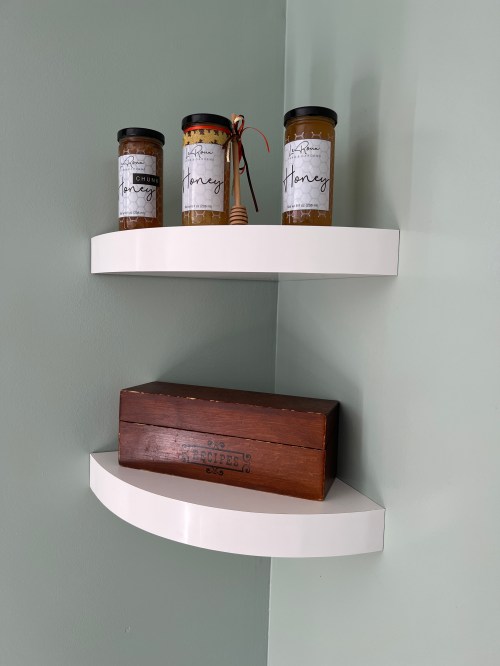
We put a couple of floating shelves from Menards in the corner. I love the old recipe box Brandi found at an estate sale!
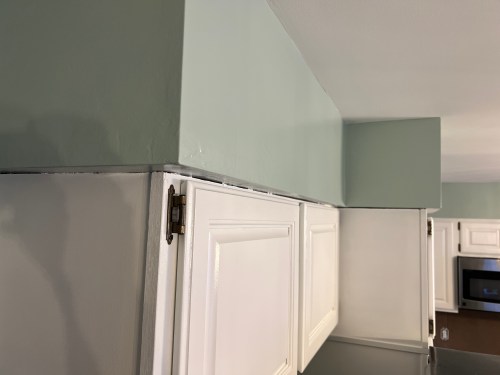
We patched up the old floor trim, cut new toe kicks under the cupboards, did all new quarter round, painted everything, and installed it around the entire room. The brown really is different; I call it “chocolate milk.”
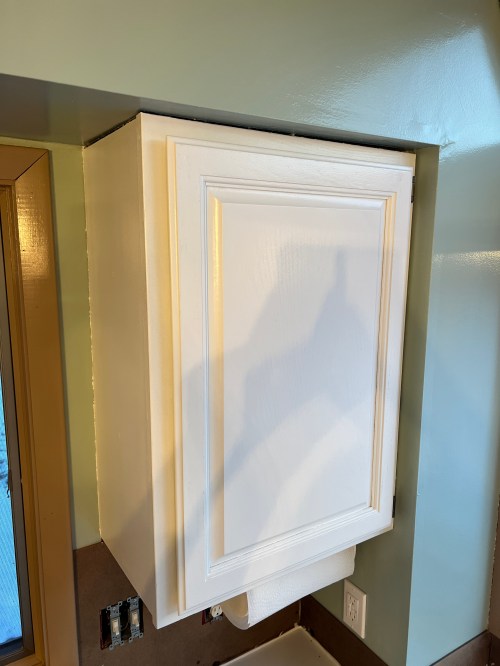
There were ugly gaps around most of the cabinets, which really stood out with the new colors. We found some simple trim at Lowes, which was only $3.06 for eight foot lengths. Since the white is a close match there was no need for paint. It took me a bit to figure out how to deal with the odd face frame corners, but it turned out really nice and made a huge improvement. There are still a couple of pieces to install after the backsplash is done.
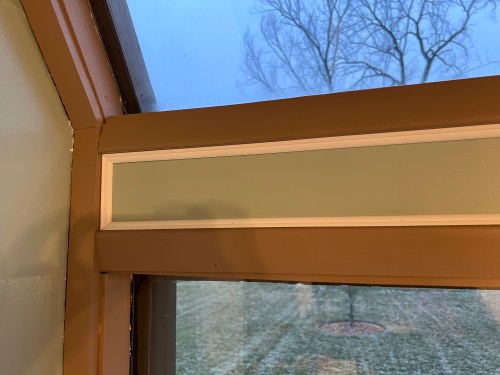
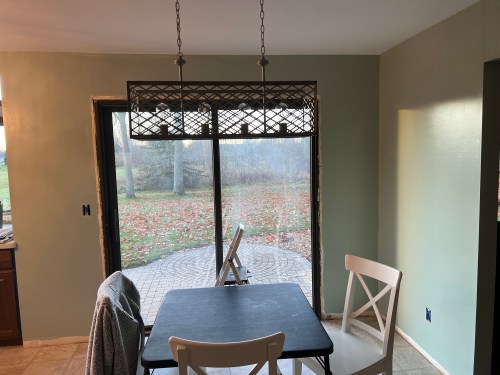
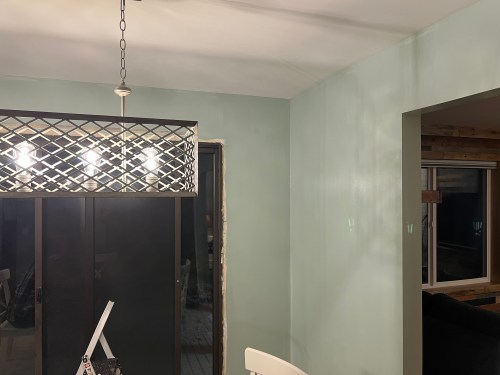
The trim around the big window had a similar problem at the edges. We decided to use the same stuff there. It really adds a decorative element with the triple color combination. This is all that could be done until the backsplash is finished.
It didn’t feel like we were making any progress at all over the last six weeks, but as I selected pictures for this post and started typing it really was a lot of small projects that add up. Now it’s time to work on the backsplash; the final step of the project and one we’ve been talking about since it all started. This weekend I’ll be mocking up test pieces and we’ll hopefully decide on the direction we’re going. Stay tuned!
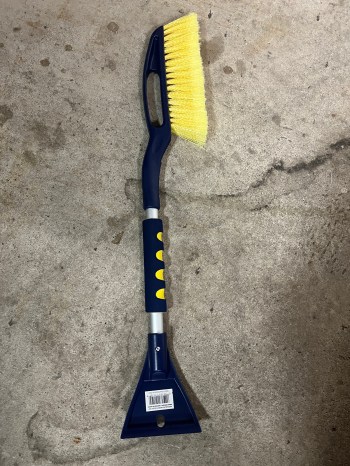
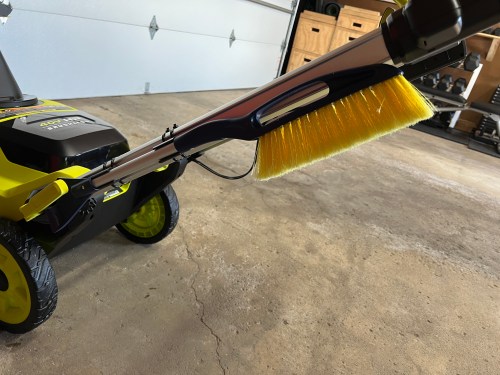
My new Ryobi snow blower didn’t come with any kind of tool for clearing out the chute, so I came up with my own solution. I also wanted a brush to clean off the snow before storing the machine in the garage, so I grabbed a clearance car brush/scraper from Meijer for just about $4.
I took it to the band saw to remove some of the scraper. I might cut more after using it.
I picked up a couple of 1/2″ PVC couplers from Menards for 29¢/each, so I’d have a backup in case my first idea didn’t work.
I cut out about 1/4 of the PVC, drilled some holes, spray painted it black, and grabbed a couple of zip ties.
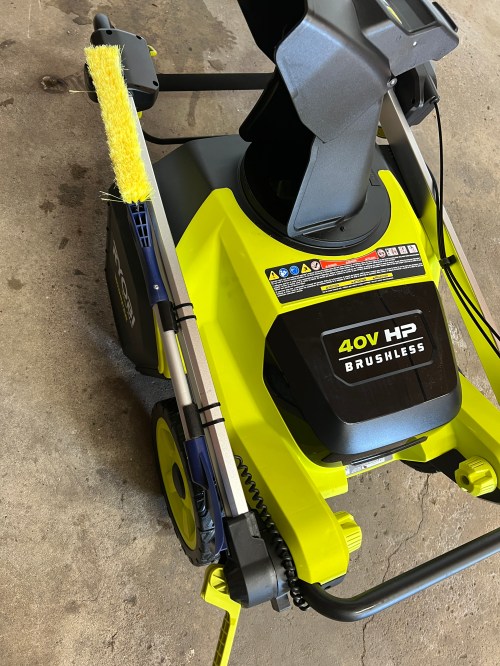
It was quick work to figure out where to attach it to the snow blower handle so the brush wouldn’t interfere with it folding open or closed.
Works great! Here’s a quick video showing how it snaps in and pops out.
Update
The foam grip on the brush handle was useless; out in the cold all it did was twist in your hand. I removed it, giving me more surface area to use a second clip, which makes it snap in more securely.
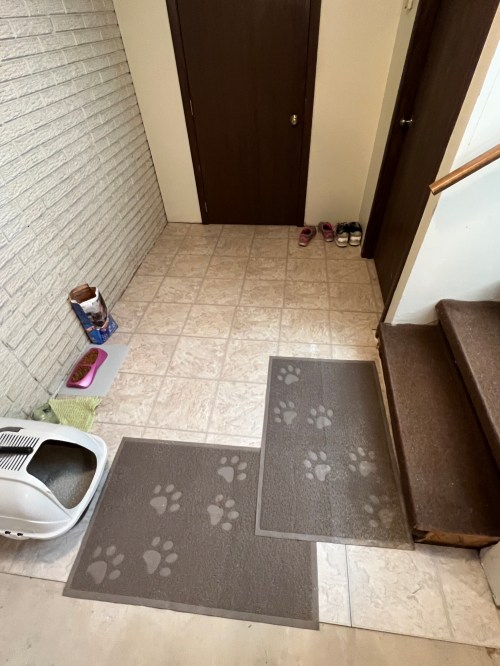
We’re taking a break this week from the kitchen remodeling, but made time for a small project in the basement. I removed some old linoleum at the bottom of the basement stairs, which was under the door jambs so probably original from 1979. Then I trimmed a couple of sections I had cut out when removing the newest layer of kitchen flooring to fit the area.
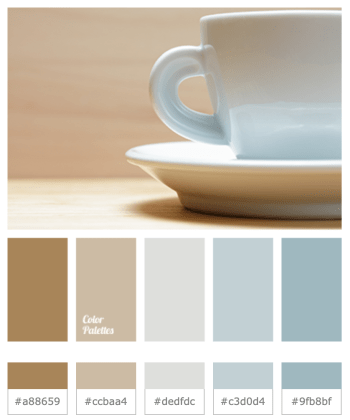
One of the first things we talked about before starting the remodel was colors. We wanted to go for an old farmhouse look. This photo we found on Google was a look we liked.
We browsed some color palettes and really liked this one.
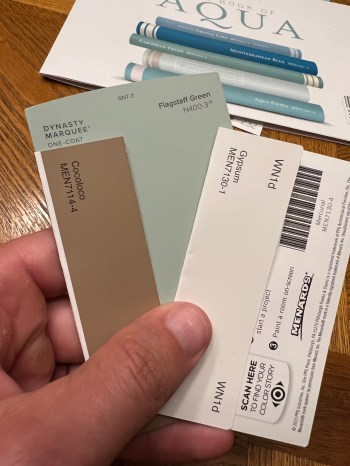
After some trips to the hardware stores we had a pile of paint samples.
We decided to go with more of a green and collected even more samples. Here’s where we ended up, from left to right the colors would be used for trim, walls, and cabinets.
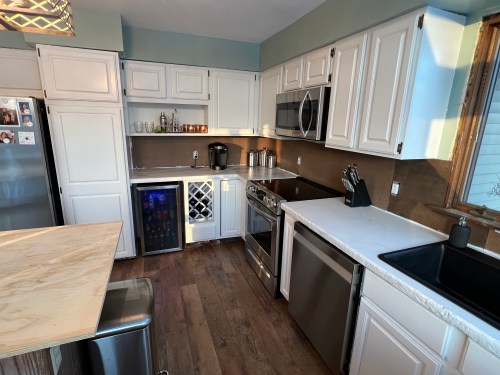
Some of the wall color has been shown in previous posts because we actually painted them before Thanksgiving, when Mom visited for a couple of days to help. We were worried about covering the red-ish walls, but after a coat of Zinsser Bulls Eye 1-2-3 Primer we were confident two coats of paint would do the job and it did. Mom was really impressed with the Dutch Boy® Dura Clean® Kitchen & Bath paint I bought from Menards. The room was much brighter and looked bigger already.
Fast-forward several weeks, after doing the counters and the table, it was time to tackle the cabinets. I made a small piece to fill a gap between the lazy Susan and the range.
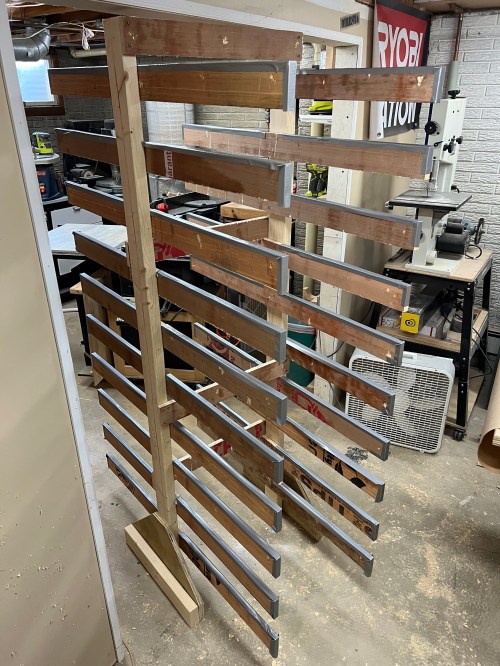
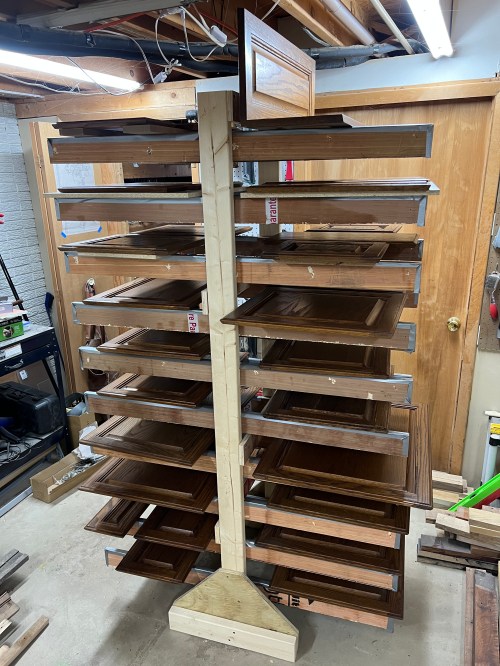
We removed all of the cabinet doors and drawer faces, numbering everything (including each hinge) with a sharpie and blue painter’s tape I numbered everything, so it could go back exactly where it came from. Then with TSP and help from chisels we cleaned everything real good. In order to paint them all I needed a storage solution. So I grabbed a bunch of scraps from my lumber racks and about 90 minutes later I had a simple drying rack. It turned out to be the exact size I needed.
Then I used Klean-Strip Liquid Sander Deglosser on all of the pieces as well as the cabinet frames. Since my cabinets were oak, which has a deep grain, I applied two coats of Aqua Coat White Cabinet Wood Grain Filler. You really want to use white instead of clear for something like this so you can see where you’ve applied it. I didn’t bother with grain filler on the backs or on the frames. The next step was sanding off the excess grain filler, which took me almost nine hours and brought the total time for the grain filling process to almost 20 hours! It did make a big difference, but you can still see quite a bit of the grain after painting. I’m not sure it was worth it.
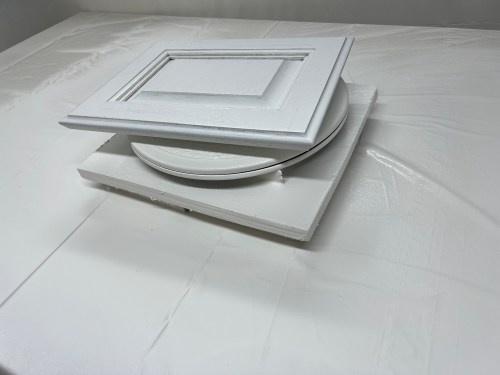
It was finally time for primer and paint! I hung plastic sheeting from the ceiling to make an L and covered my work table. Then I built up a base with some scraps and put a swivel stand on top of that. Overspray got everywhere in the shop, but at least it was basically paint dust because the small particles were dry by the time they landed.
I sprayed primer on both sides of the doors and drawer faces and then 2 coats of paint on the backs and 3 coats on the fronts, using the green tips in my HomeRight Super Finish Max HVLP Paint Sprayer. I did thin out the primer and paint a little bit with some water. I did primer and 3 coats on the cabinet frames by hand with a 1.5″ brush and a 4″ foam roller.
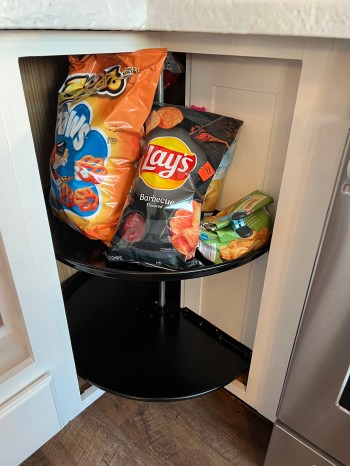
The original plan was to spray paint the cabinet hinges black, but after cleaning them we decided to keep them as they were. It would add a bit to our rustic farmhouse style. Before we put the doors and faces back on, I let them sit on the rack for about four days to give the paint time to cure more. I did spray paint the two shelves in the lazy Susan (aka “snack Susan”) cabinet black. By the way, reinstalling that think was a huge pain in the ass.
Next up was flooring. The first layer to deal with was a floating floor Dad helped me install in May of 2013. I cut out a large section to reuse at the bottom of our basement steps, where Ninja has his litter box, food, and water. Then it was quick work to pull up the rest and haul it away; it was barely an hour of work to get rid of that entire layer. Under that floor was old linoleum that peeled up pretty well. The third layer of floor was luan, which was held down by 10 times more staples than necessary. Then a 4th layer to come up was even older linoleum. I filled up an entire Powerade bottle with staples and about 20 large nails. Those bottom 3 layers of flooring took two days!
Dad called and asked if I wanted some help, so he came down on Saturday morning and we installed the same Select Surfaces Barnwood Spill Defense Laminate Flooring from Sam’s Club I had put in the living room. After helping my brother install some in his house, this was my third time working with the product, so it only took us about 6 hours to do the entire room. We were able to continue it from the living room because I made sure to stop with full width pieces there. He ran up and down the stairs all day making cuts while I measured everything and installed each piece. It was a huge help to have him here.
On Sunday Brandi and I reinstalled all of the cabinet pieces after putting on new felt pads. Then I hung a new paper towel holder and installed a couple of LED under cabinet lights where old ones had been.
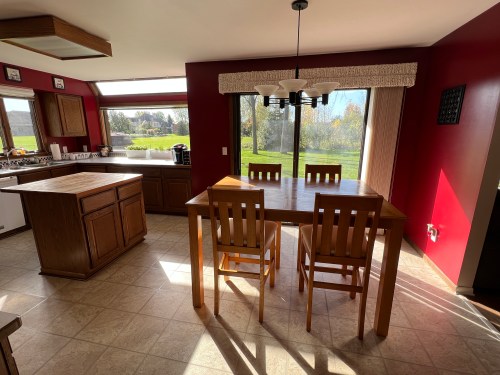
The weekend of work completely transformed the look of the kitchen. Our vision has finally become a reality and I feel extremely proud of everything we’ve done. Check out these before and after looks!
We’ll attach the island counter next weekend after the epoxy has fully cured, since we use it so much. I still need to do a backsplash, paint three sides of the island and the door to the basement, and do all of the trim work. Today is my first day back to work after a three month sabbatical, so progress on the remaining items will be slower.
I’m excited to say a second maker is emerging in the house. 🙂
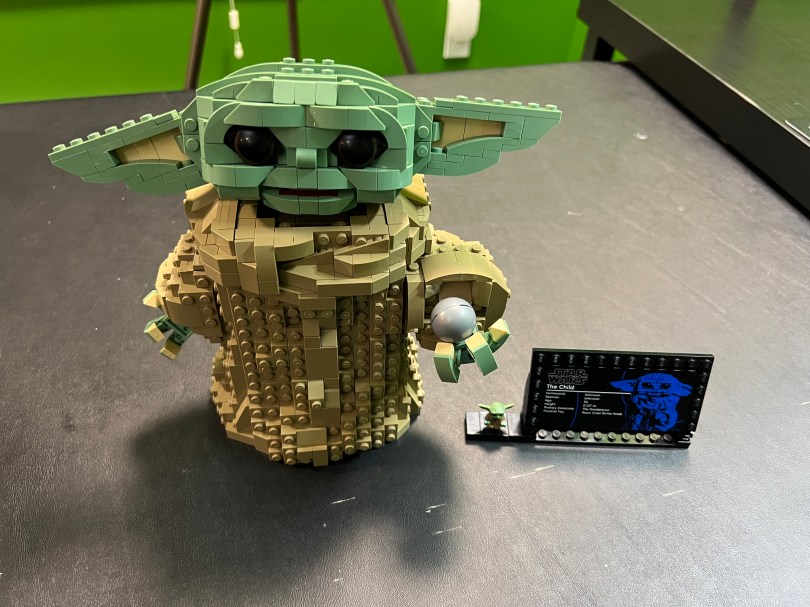
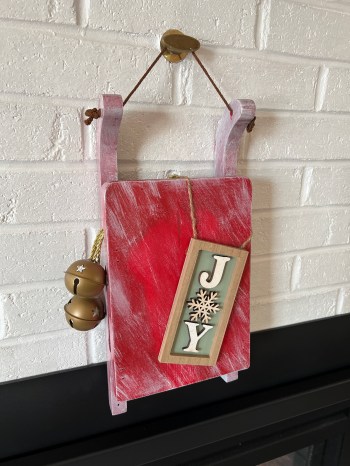
In addition to helping with our 2021 Christmas ornament. Brandi wanted to make a few holiday decorations. First was an old sled that was her mom’s. She sanded off a pineapple and some wording, gave it a new paint job, and added some accessories. Unfortunately I don’t have a picture of what it looked like before she started.
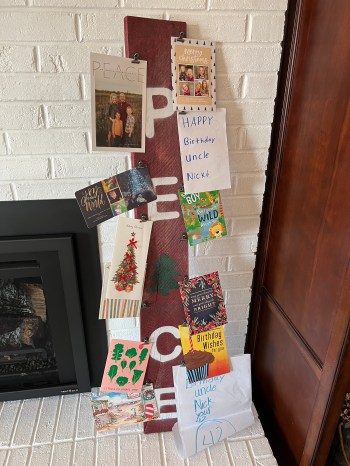
She also wanted some type of tall sign, so she grabbed a piece of twisted pallet wood from my scrap pile and sanded the rough edges. We found this barn red stain at Ollie’s Bargain Outlet for $4, which was perfect.
She wanted to paint the word “peace” on it and I’ve been looking for an excuse to buy a Cricut, so I made the purchase and we created custom stencils. I love the use of a tree for the letter A. After a little spray paint and some hinge clips we had ourselves a place for Christmas (and my birthday) cards.
2021 started well in terms of making, building on the momentum I built in 2020. Then the home projects started. It was a year full of very large projects, which transformed a lot of the house.
For the last three months of 2021 I’ve been on a three month sabbatical from Automattic and I go back to work on the 4th. I’ve joked that I need a vacation now because I’ve been putting a lot of hours in to the kitchen. The last few weeks have been very busy and I’ve accomplished a lot, but the remodel will not be finished. I do have a post coming soon with some major updates.
Once the kitchen is finished I’m looking forward to tinkering with some electronics again and having time to work on much smaller projects.
When I bought my house I eventually got a tall dining table and I’ve hated it for years. It was a bitch to get in and out of the chairs and my legs bumped up against the apron when I sat down. It was definitely getting replaced during the kitchen remodel. After selling the table, we used a card table for a few weeks.
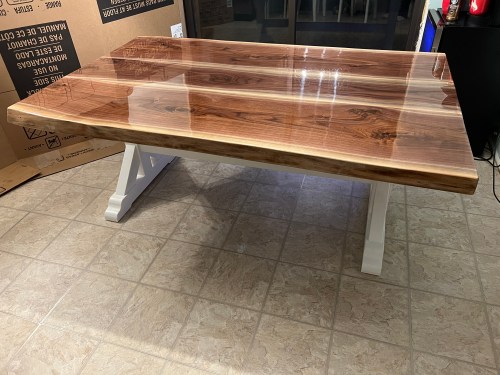
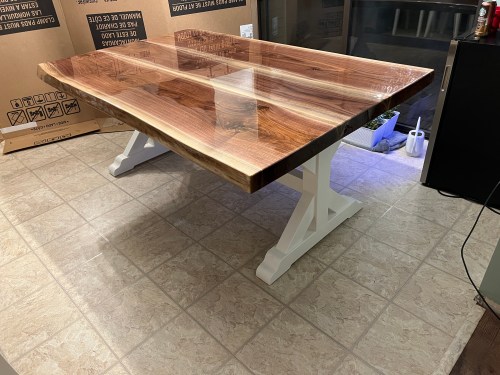
I don’t remember the first time I saw a live edge table, but I’ve wanted one for a long time. I would have loved to build one but as I started working on the kitchen, it was clear time wasn’t going to be on my side. Since the table would be the showcase of the space, I decided to have the top built for me. I found a local maker on Facebook Marketplace (business name removed because I can no longer recommend him), which showed some awesome work. I give him a call, visited his shop, and gave him the job. I love black walnut, especially with some of the sapwood, so that’s what I went with. A few weeks later he delivered this beauty!
It’s 2.5 inches thick, 73 inches long, and averages about 45 inches wide. It’s fucking heavy!
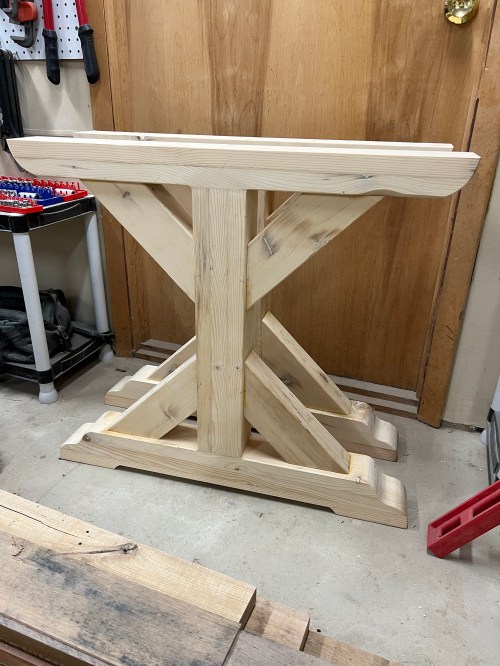
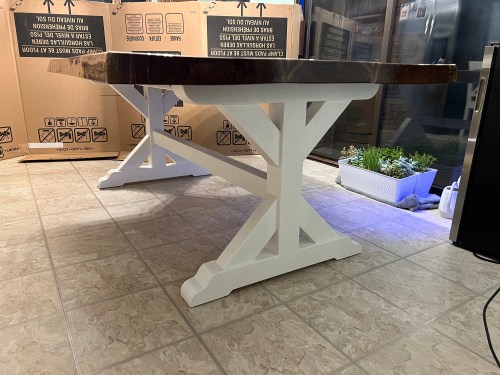
I thought about buying a table base kit online or having one made. We should have this table for a very long time and I wanted some part in it, so I decided to make the base. We’re going for a bit of a farmhouse kitchen vibe, so I went with a trestle base. I took ideas from these free plans as well as some custom tables I found on Etsy and Marketplace and I put my own twist on everything. For chairs we picked up four INGOLF from IKEA.
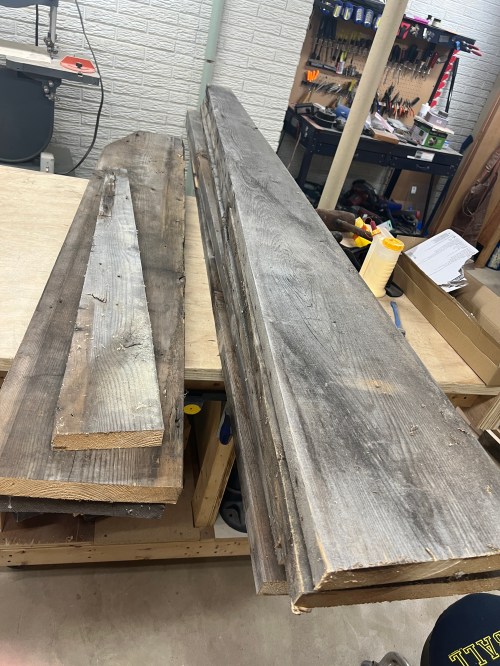
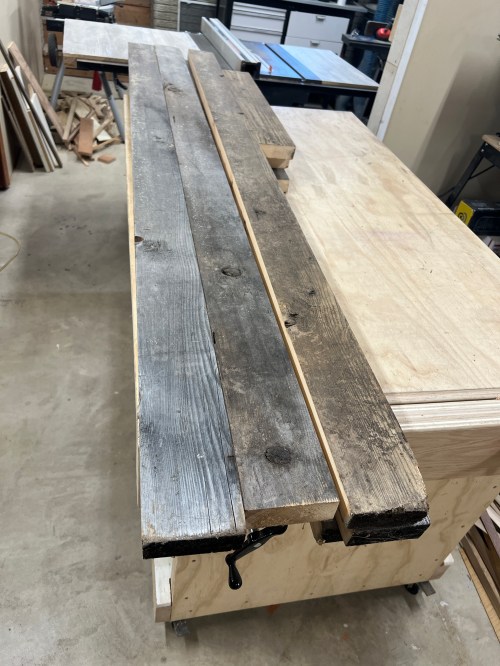
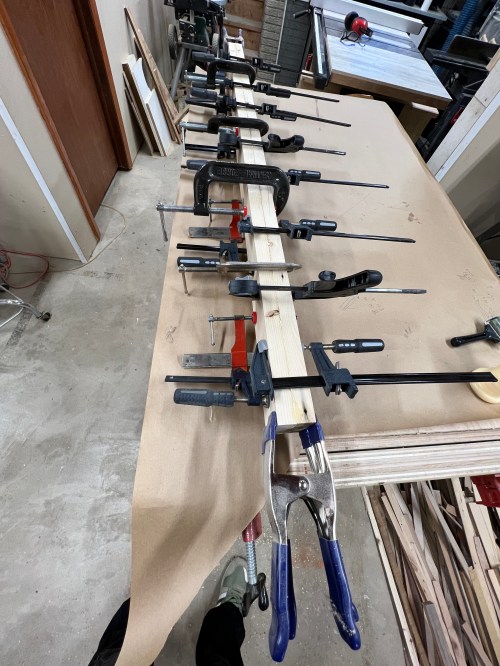
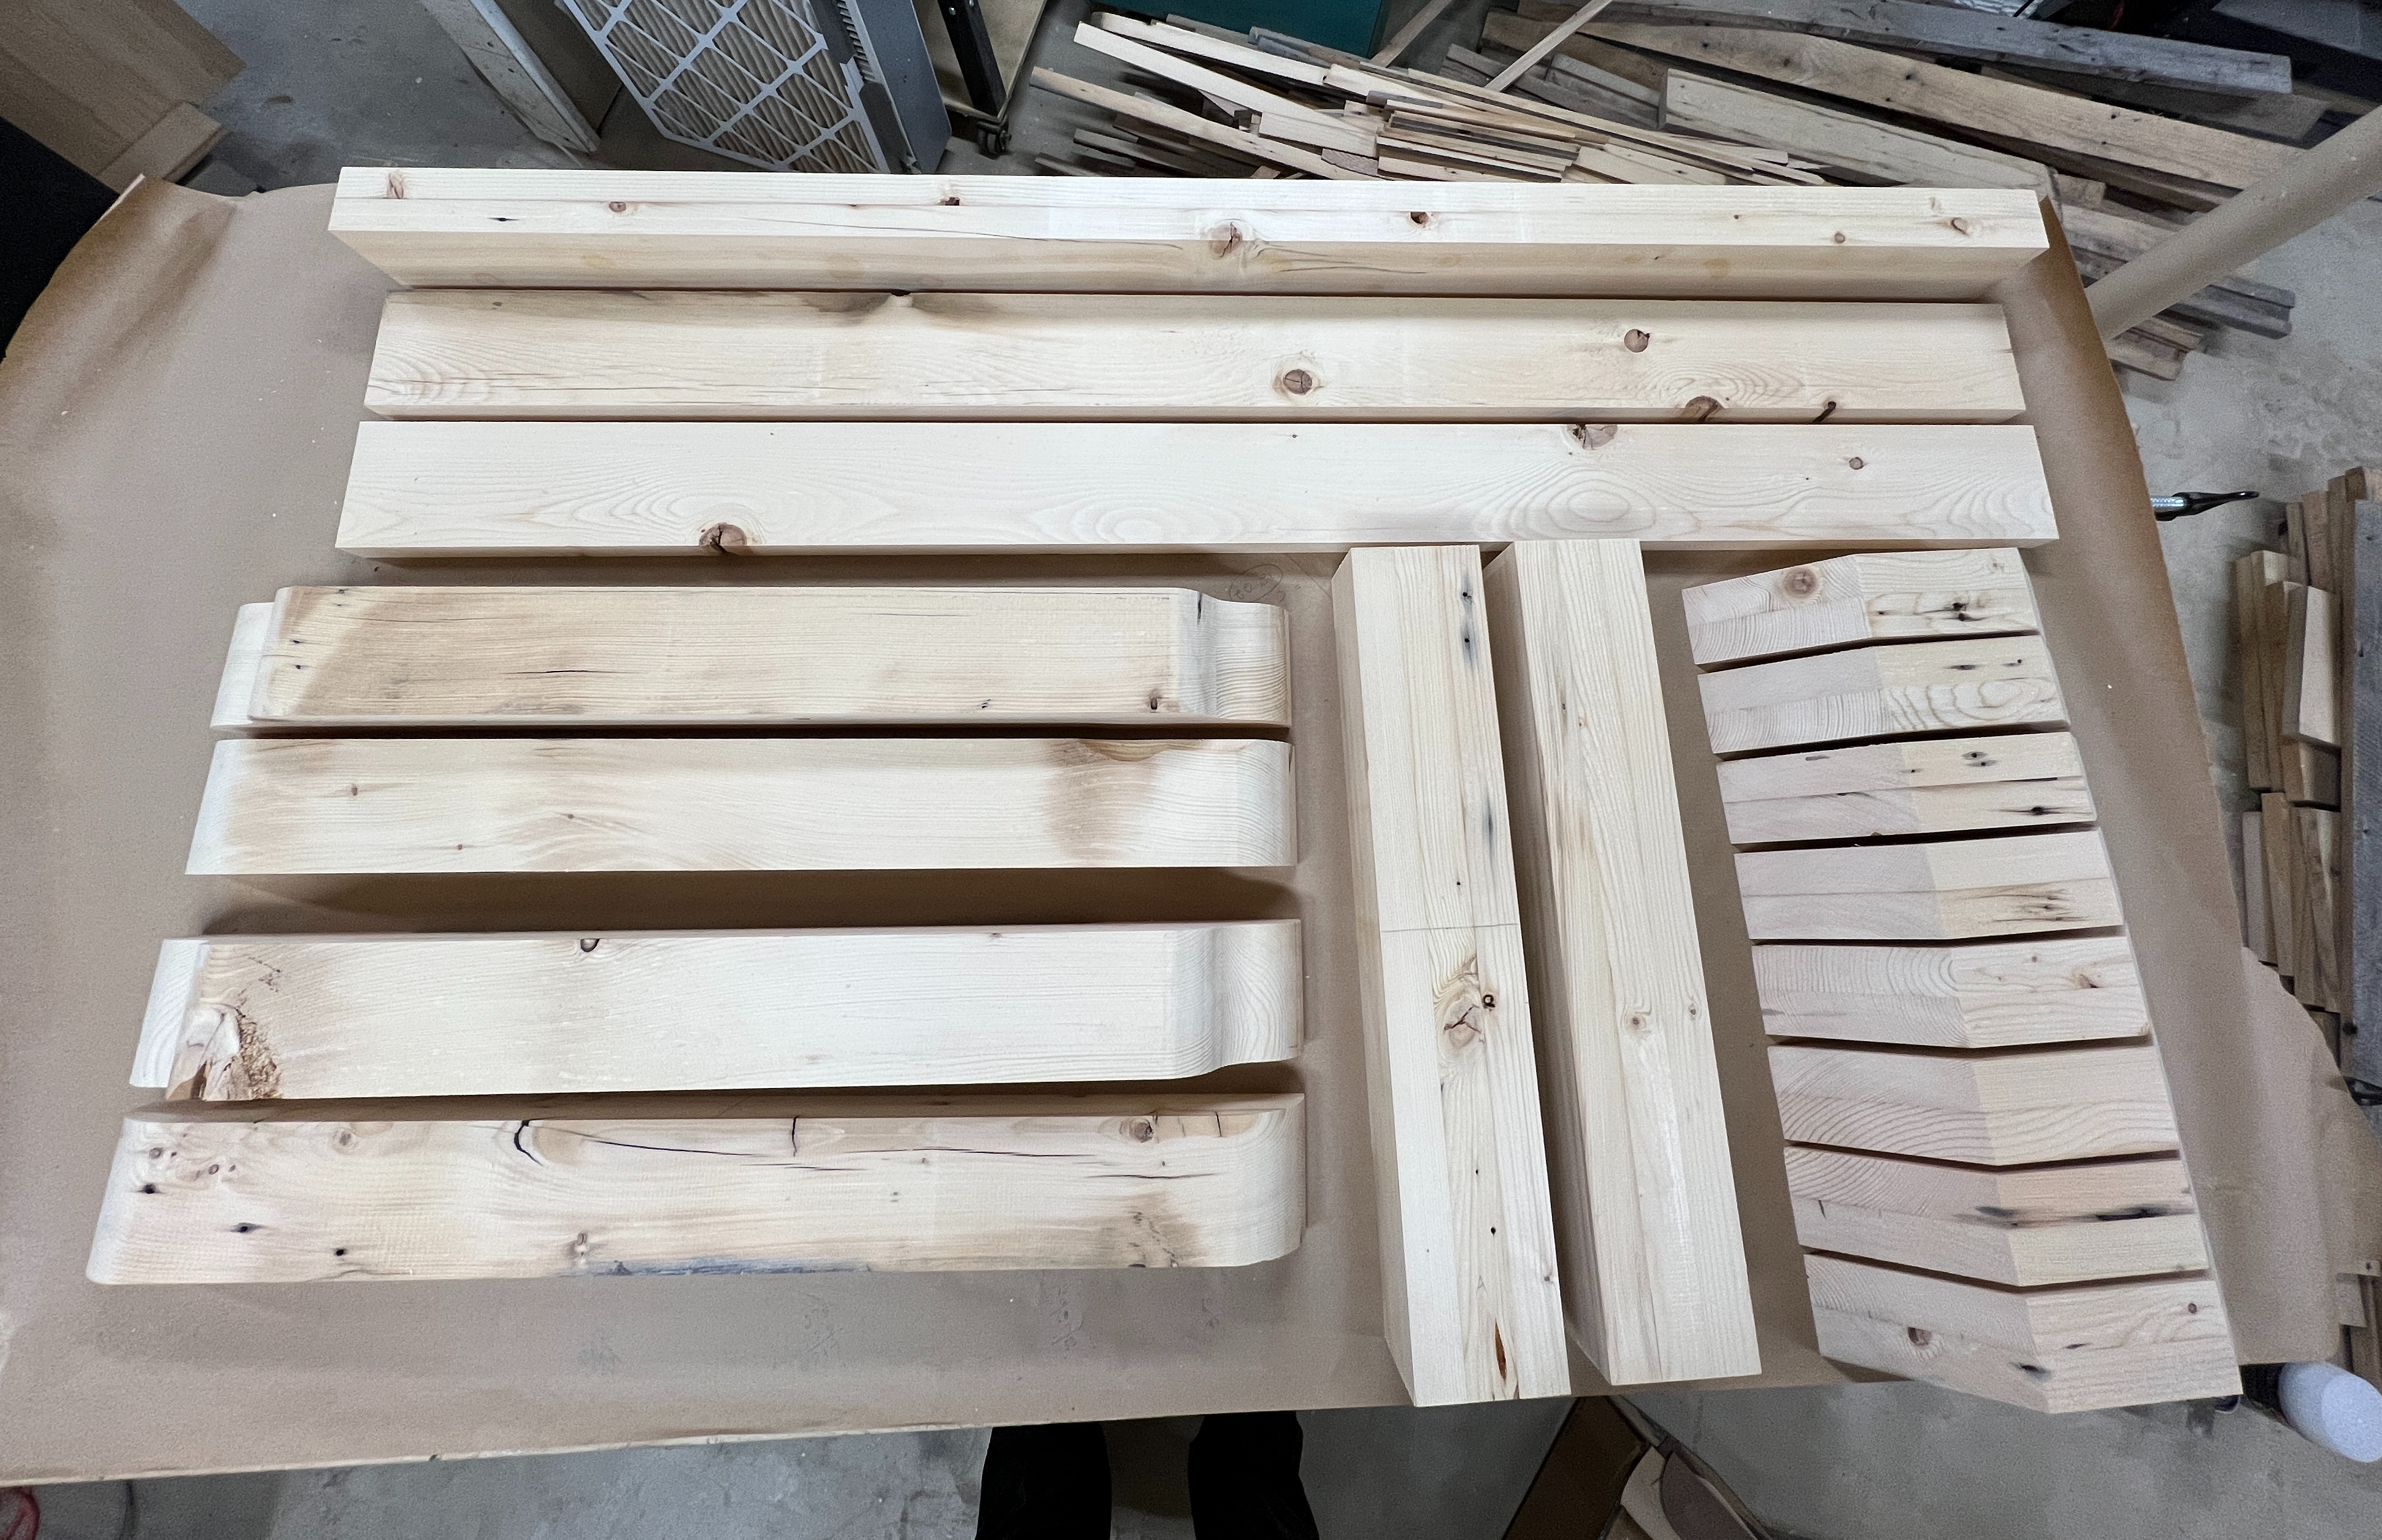
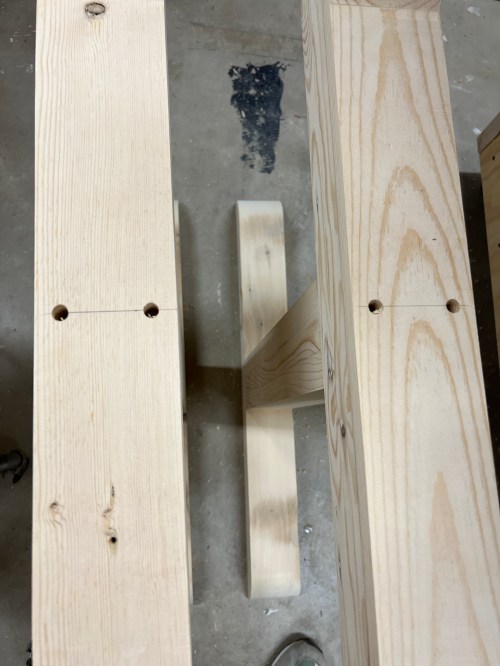
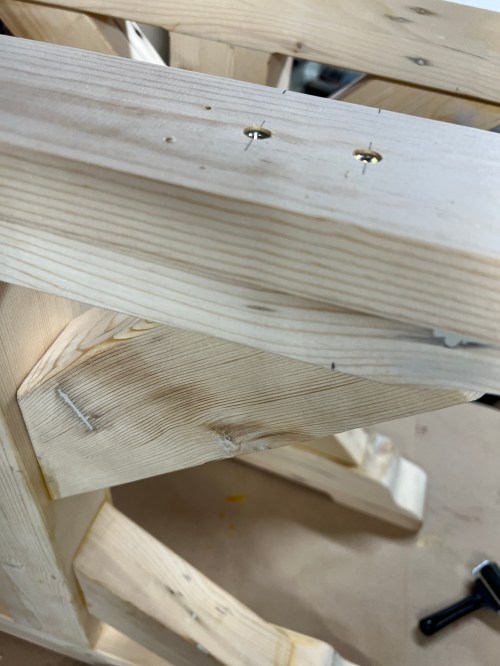
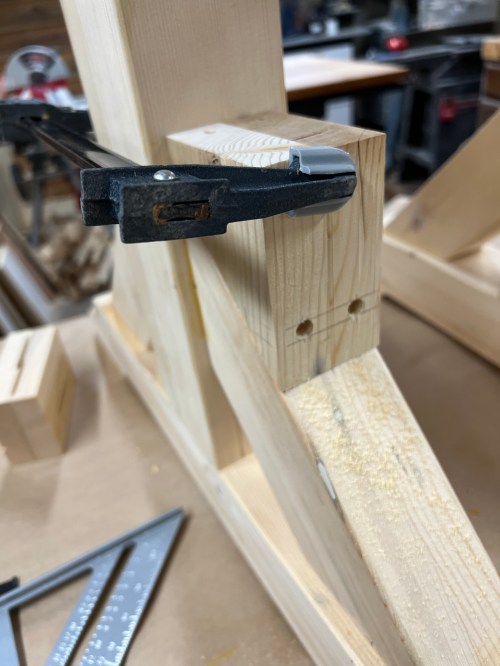
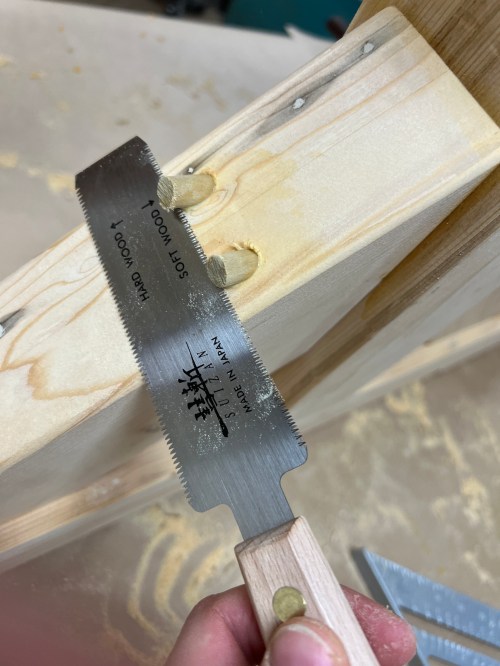
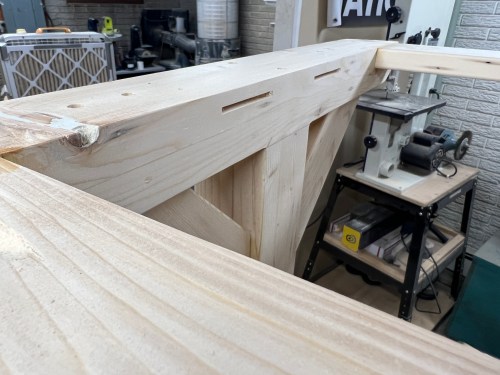
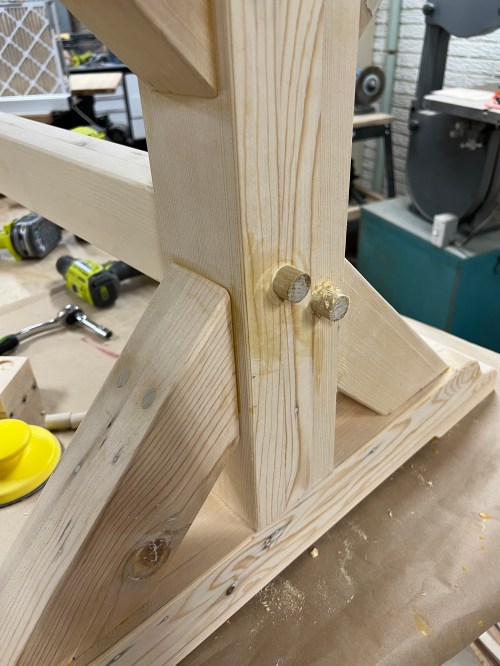
I still had a stack of the free reclaimed wood I picked up over three years ago and used up most of it for this project. Since there are so many different ways to do a build like this I’m not going to explain everything I did. Here’s a timeline of photos instead.
I bought a biscuit joiner, which I’d been thinking about getting for a couple of years anyway. It was my first time using one and it definitely got broken in. This was a fun project with a lot of challenges, so there were plenty of mistakes, solutions, and learnings. I’m glad I decided to do it myself.