Are wooden utensils worse than paper straws? I’m actually surprised these passed legal with the risk of slivers.
Are wooden utensils worse than paper straws? I’m actually surprised these passed legal with the risk of slivers.

I’d seen something similar released before with no desire to try it. B brought a bottle home, so I have to give it a try. It’s terrible and I dumped out over half the bottle. You get a little bit of marshmallow smell and taste, but the aftertaste is horrible and it’s very sweet. Only gets a 1/10.

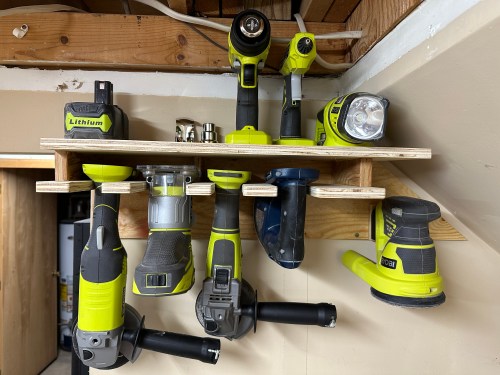
I’ve been keeping my Ryobi cordless 18v tools on some shelves on a wall next to a drain pipe.

As you can see, I outgrew the area. I also had several sanders in the drawers of my sanding cart and even more tools in a box on the floor.

Look at that picture again. Wouldn’t that wall be a great place for cordless tool storage? It’s not in a weird location, is further away from the big tools that make all the dust, and in reach while working at the assembly table.
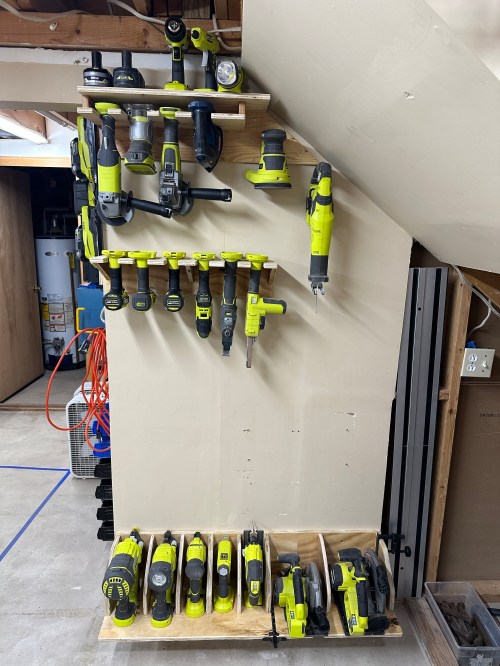
I took down the vise shelf, chopped and cleaned the plywood, and installed it on the wall entering the shop.

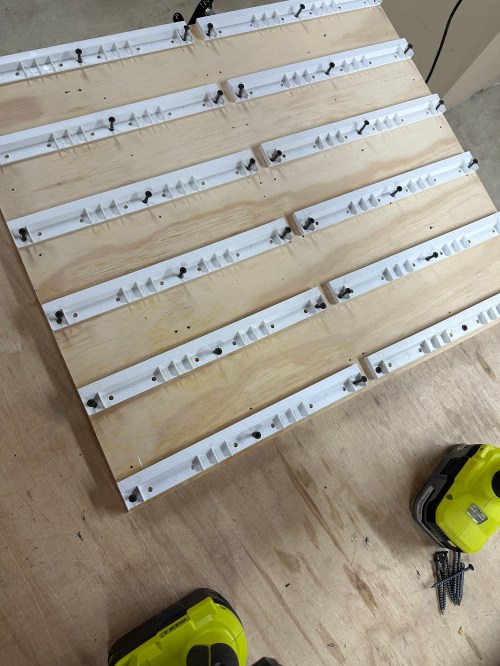
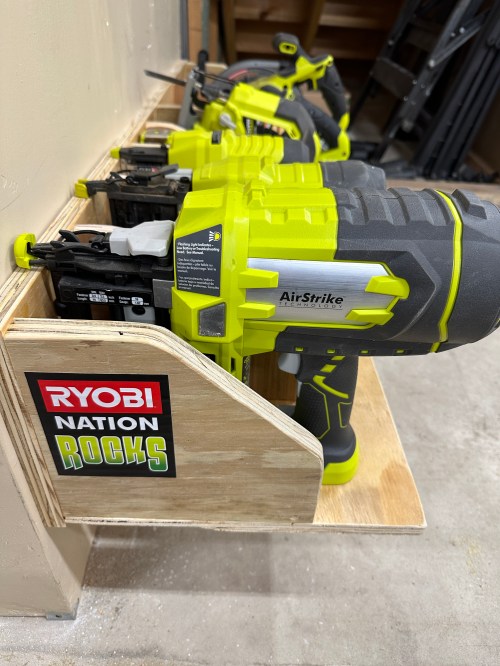
After taking down the nail bins I took the opportunity to spread them out on the backer board since I have more vertical space in the new location. Then I moved the nail bins around the corner, under the rest of my bin storage.

I had a blank canvas.

Before building anything I had to figure out tool arrangement, so I marked out space on the floor to match the area of the wall.

After gathering all of my tools I messed around with layouts and tool groupings.


When I had something I liked, I started making shelves one row at a time.


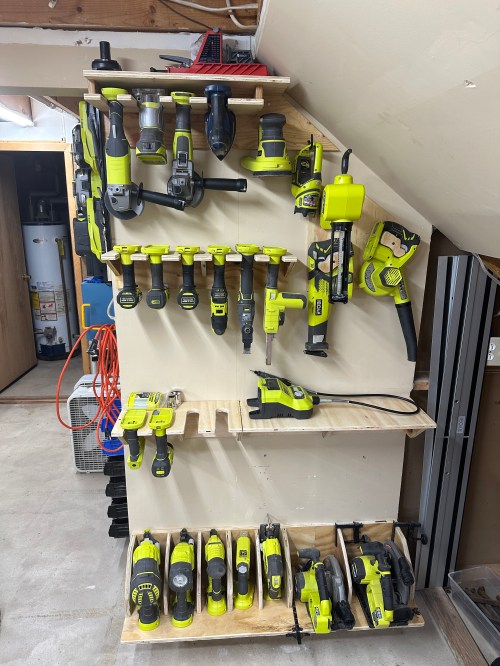

As you may have noticed from the photos, I kept changing things as I went, and there were a lot of iterations I didn’t get pictures of. When I was about 80% done with everything I remembered I had the rotary tool and my Armor Tool Auto-Jig Pocket Hole System stored in the drill press press cabinet. I definitely wanted both tools out in the open where I’ll be more likely to use them. All of the changes were worth it; every tool has a place and I love it. I’ve been wanting something like this for years.
As I was building, it was so handy to turn around and grab a tool or a battery that was already in its place. No more walking over to the other area and reaching around the corner. Little things like the magnetic strip for bits and accessories make a big difference too. Another bonus is this project used a bunch of odd scraps I had in my wood collection.
Are you a Ryobi fan? What are your favorite tools?

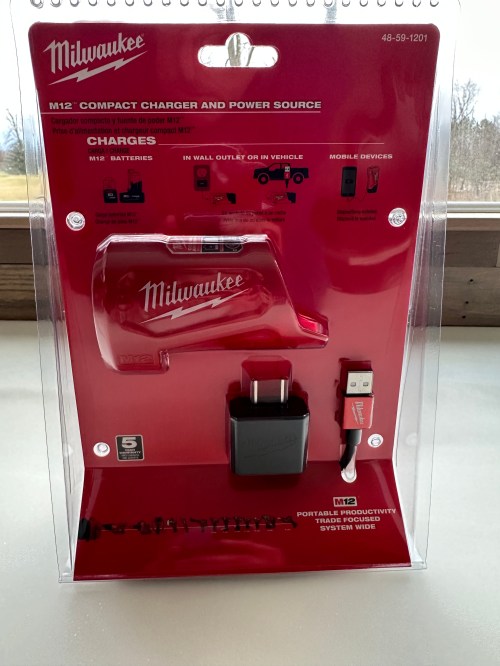
B got a Milwaukee M12 heated jacket over Thanksgiving to wear in the coolers when she’s at work.

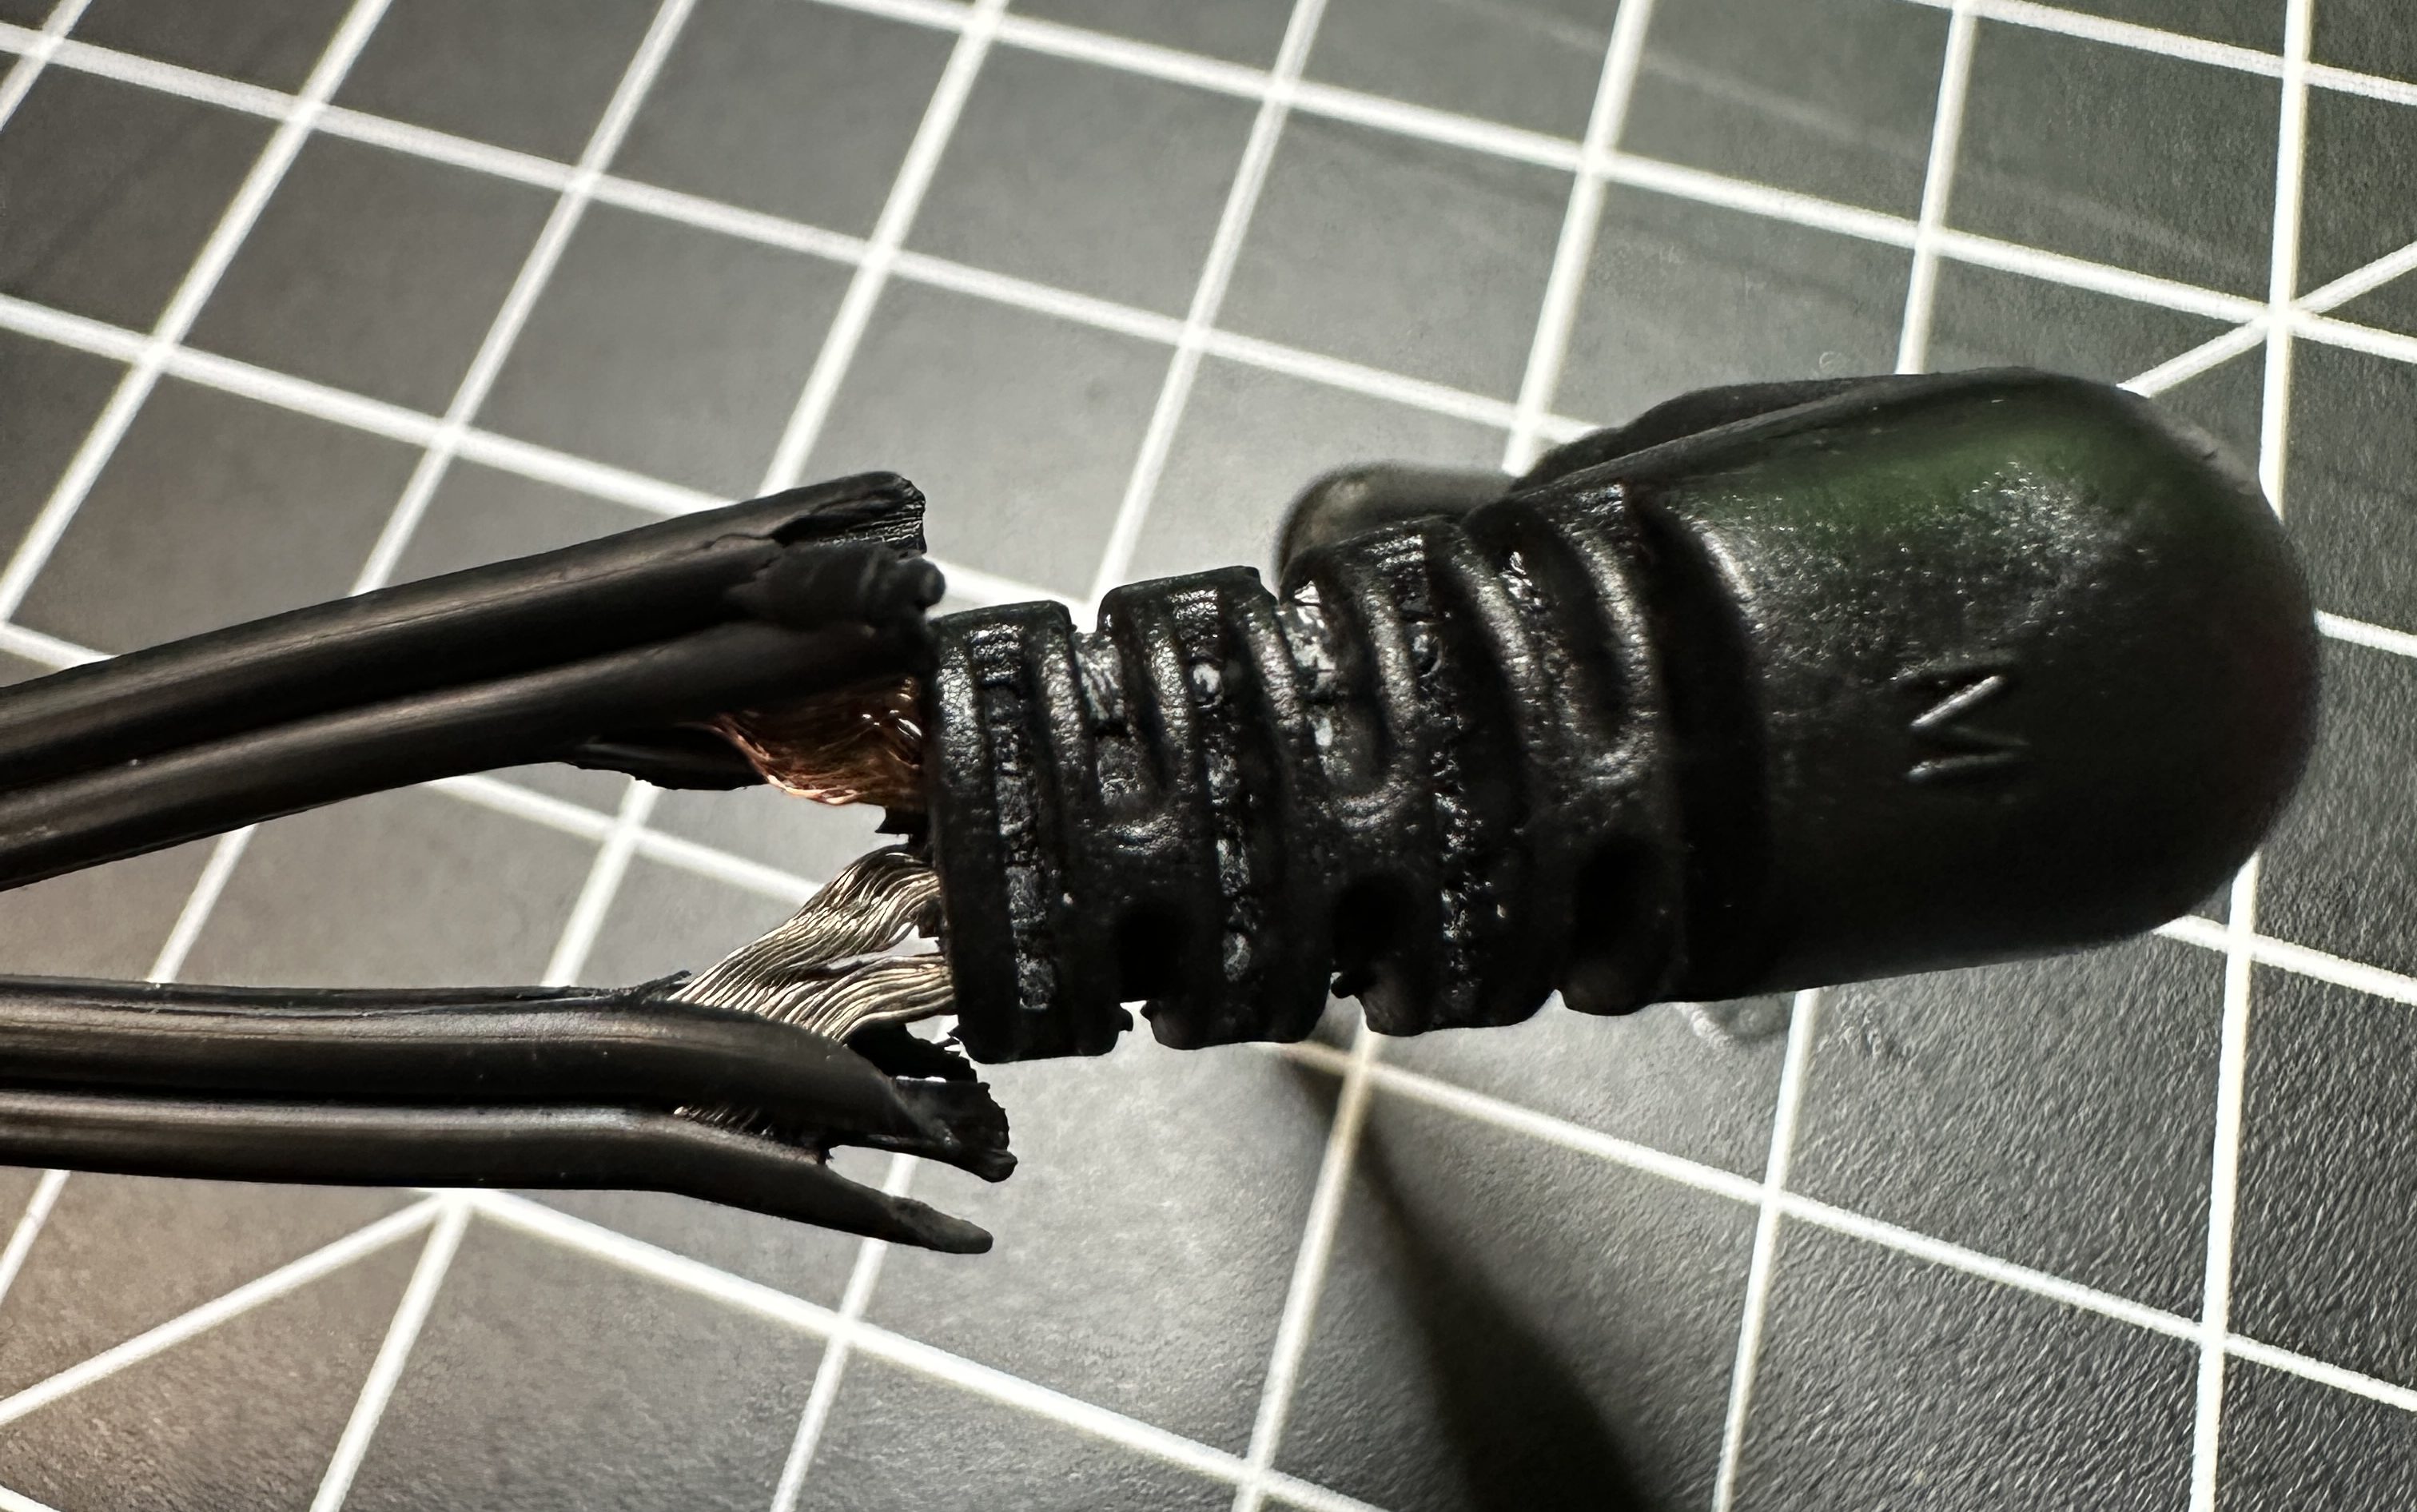
The pocket where you connect the batter is on the back left, which is an awkward position. In less than two months the wire frayed by the barrel jack.

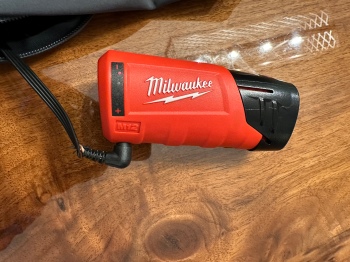
The exposed wires caused a short in the M12 Power Source, which is the red plastic shell that connects the battery.
The part was dead in the water and gives an error status. What terrible designs in the jacket’s wiring and the power source. Luckily, the battery does have fault protection and still worked. I checked the item on Milwaukee’s web site and other people had the same problems. After leaving a review, it looked like Milwaukee reached out to them. So I left my own review with a picture of the wire…
My partner got the jacket less than 2 months ago. The wire frayed by the connector causing a short, which appears to have killed the power source. I read 12.5v out of the battery just fine, but nothing from the power source. Terrible design in the jacket and with no protection in the power source. I can fix the connection and barrel jack on the jacket without an issue, but not much we can do about the power source.
Their social media team sent me an email the next day…
We are sorry to hear you are experiencing some issue with your M12™ Power Source! As a one-time courtesy, our team would like to assist with a replacement!
About a week later they emailed me again, with a return label to send them both the battery and the power source and they sent us replacements. Kudos to Milwaukee for sending the new version of the power source and a 3.0 Ah battery when the previous one was 2.0 Ah. B will be happy about the extra battery life.

By the time we got both items it was exactly three weeks after I had left my review. I isolated the wires with some cardboard between them so I could make sure the jacket worked with the replacements. It was a success, so I separated the two sides of the wire, tested which side came from which part of the jack, and then cut it off.
I stripped back insulation, put shrink tube around each wire, connected a new jack, put shrink tube around both wires, and gave it a couple wraps of electrical tape.


I might end up getting a right angle jack to help with the strain relief. We’ll see how this holds up.

I’ve had a bunch of pegboards in my shop for over five years, and I’ve figured out what works and what doesn’t. I love that a lot of my tools are in direct view and can quickly be accessed. I didn’t love a few areas that I go to frequently though. The first wall I wanted to tackle looked like this.
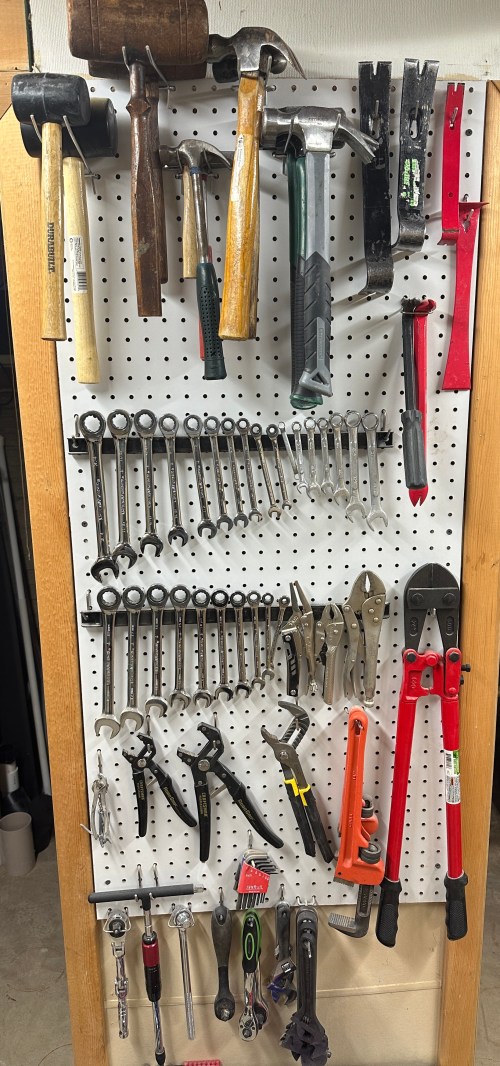
The main problem was the hammers. They’d become crowded and it was a pain to pull one out when it was second or third in line. I moved all of the other tools up on the wall and lined up my hammers on the assembly table.

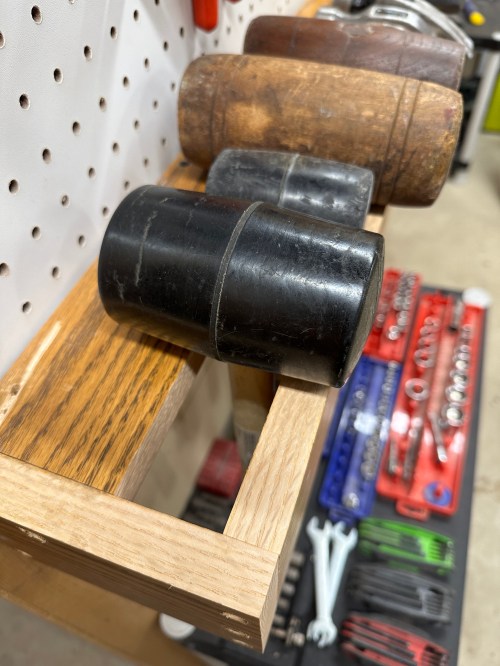
After taking measurements, I cut up oak pieces from my old kitchen light box. This storage shelf came together pretty quick and has room for even more hammers. Now I can quickly grab any hammer without disturbing the others.
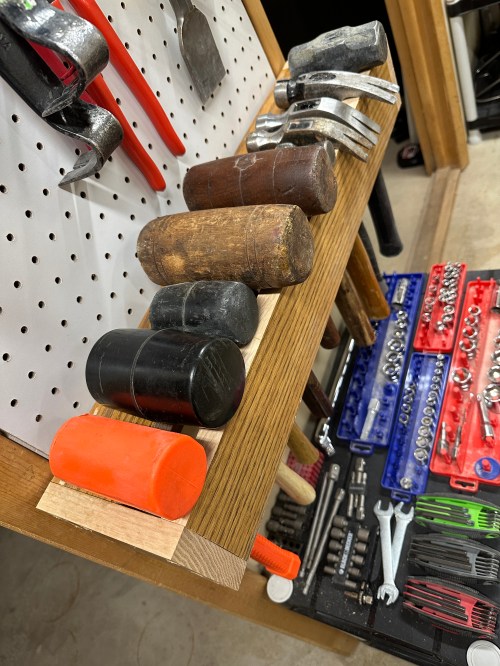
Here’s the updated wall.

The next wall to the right was making poor use of space, especially since I don’t grab some of the saws very often. Take a look and see they were nearly occupying half of the wall. The files never worked well on those individual hooks either, which always pulled out of the wall.
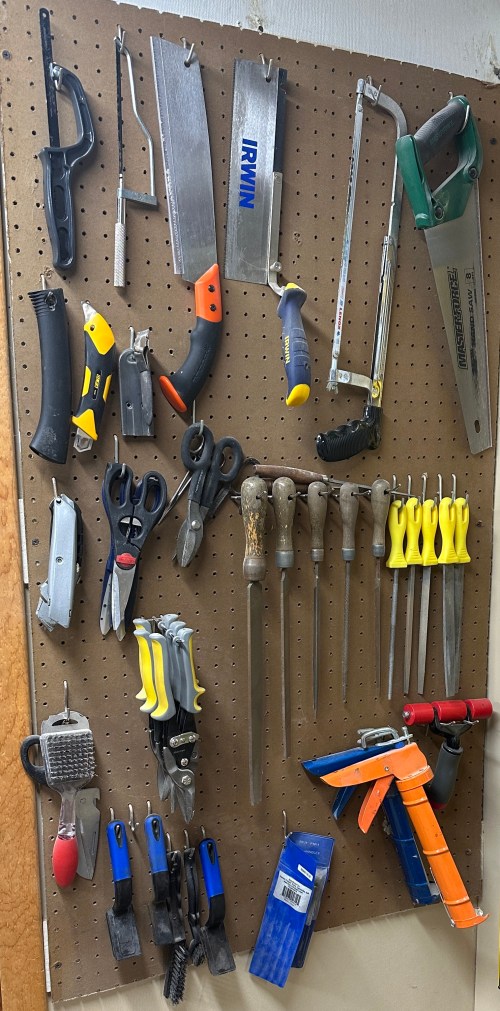
By moving stuff around I was able to get several more saws, like my Japanese pull and coping, as well as other tools up on the wall.
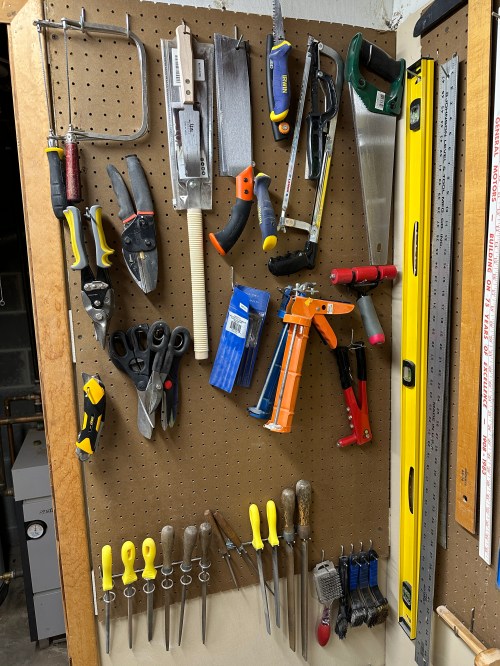
Over to the right again was tools used primarily for measuring and alignment. In February of 2018 I made a shelf for the squares, which has taken up way too much space. I really liked the grooves in that shelf, but the squares weren’t secure enough. Here’s how the wall looked before I touched it.

I reorganized everything else first and then made a new shelf that was longer so I could add slots in each groove to drop one of each square’s legs down.

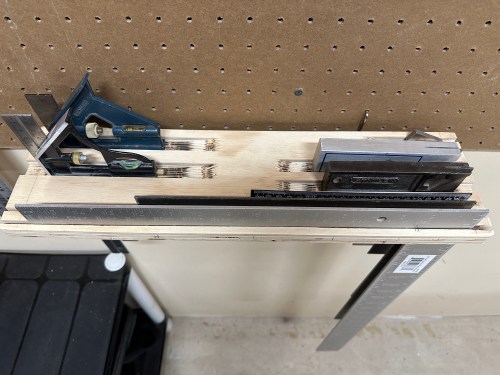


Huge improvement and look how much extra space I have for more tools! I need to get myself a nice set of chisels.

Last up was the pegboard on my bench.

I’d been using four of the pegboard holders made for screwdrivers here and don’t care for them; the holes are too big and the spacing is too wide. All you need is scrap plywood with holes drilled in it, which allows you to run two deep and have plenty of expansion room. I also made a holder to store the wood carving set that had been unopened in a box buried on the bench for years.

So much better. Now I can tackle the reorganization of my shop closet.
The Breadboard Pi Bridge is a neat way to connect the Raspberry Pi to a breadboard for prototyping. I preordered this kit in March of 2019 from RasP.iO after I’d seen Alex Eames release some cool kits there before. It shipped less than two months later, but it took me until February of 2021 to assemble it. Then it sat on the shelf until now when I finally did the testing and put together the video.
The build was simple with only having to solder some headers to a circuit board. I look forward to using this when I make some projects based on Pis.
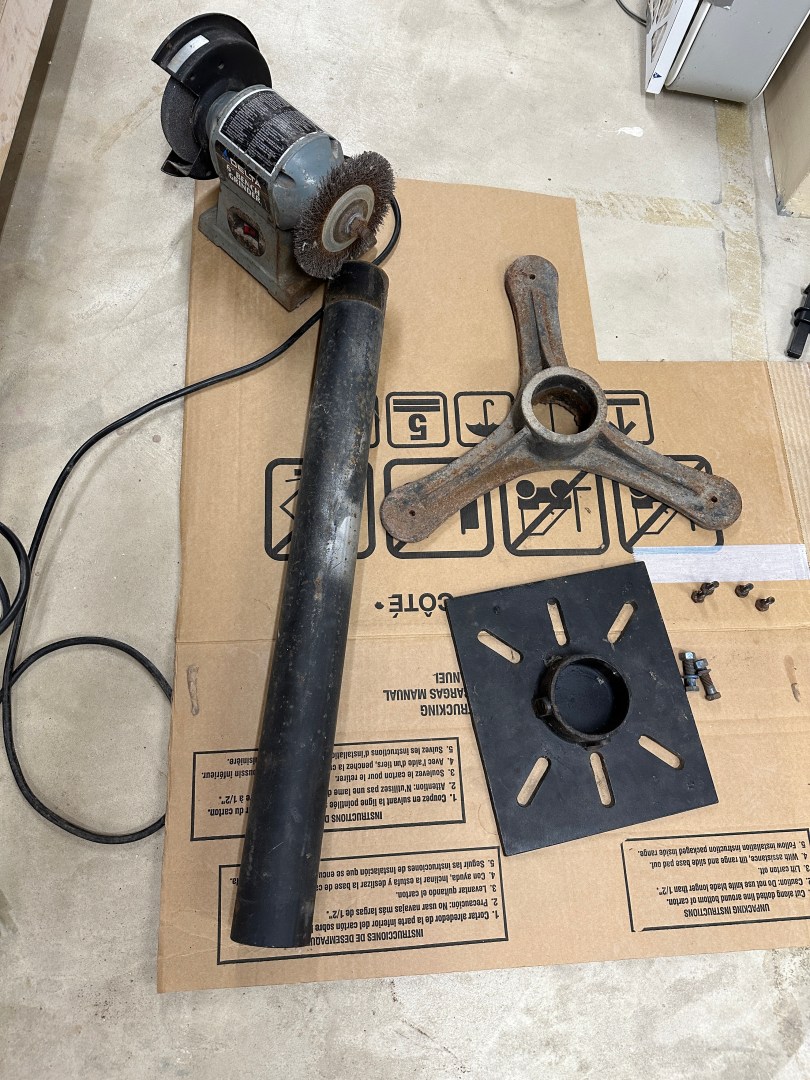
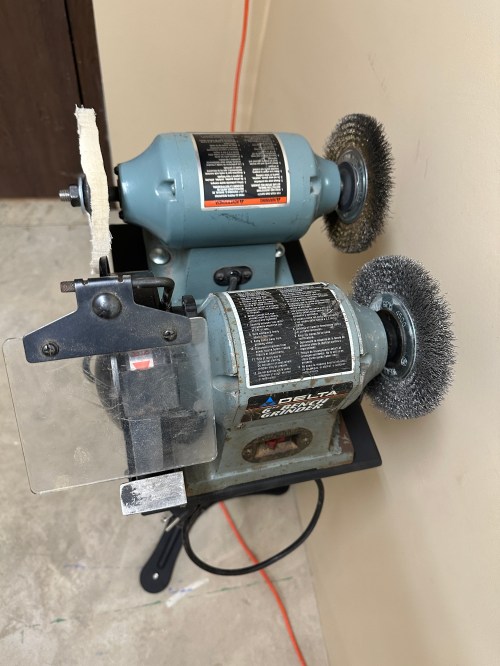
In early 2018 when I bought a band saw, I installed a bench grinder on the same cart and never liked how much vibration the grinder sent through the saw. I’d been been keeping my eye on Facebook Marketplace for a heavy grinder stand and found one about two years ago, along with a second grinder. It was finally time to clean things up and mount both grinders. I forgot to take a picture before disassembling things, but I did find a really small thumbnail from the Messenger chat that I zoomed in. You can kind of see how rusty things were.

I separated the parts and used a flap disc on an angle grinder and a brass wire wheel on a drill to clean up a lot of the rust.

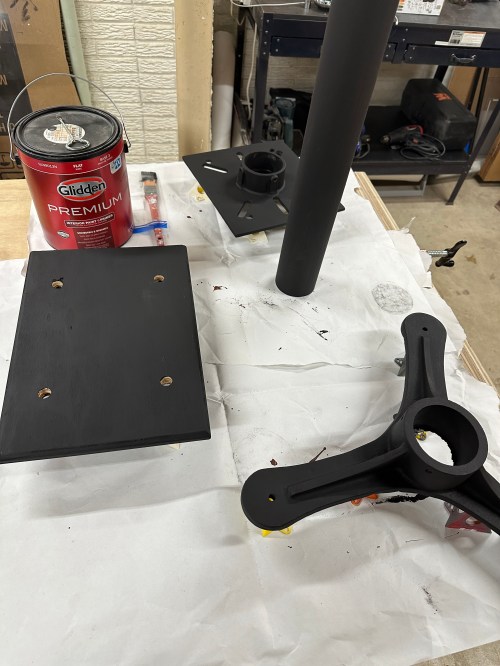
Then the stand parts got a coat of rusty metal primer.


Then I cut a larger top plate from 3/4″ plywood and chamfered the edges. I drilled out mounting holes for both grinders and transferred those to new holes in the metal top plate. It all got two coats of black paint.
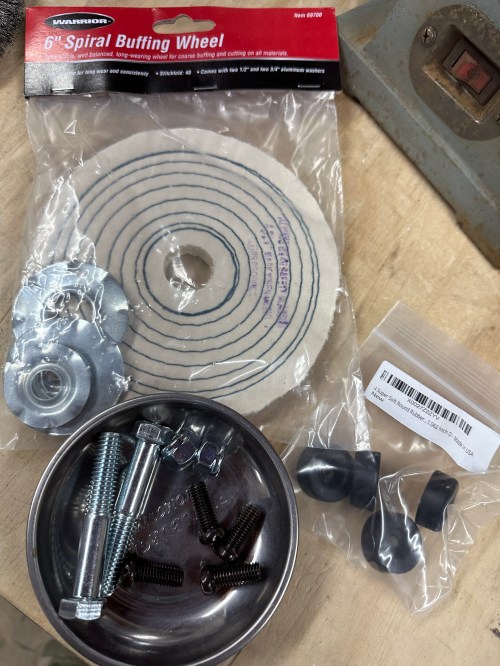
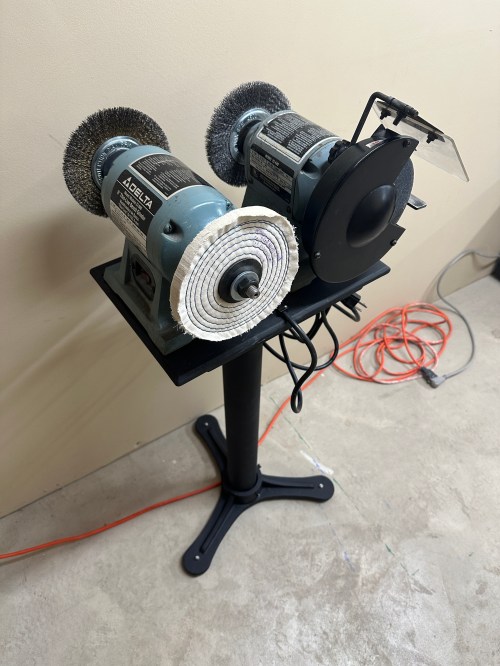
I cleaned up the grinder with a wire brush, but didn’t bother with a new paint job. I bought a new buffing wheel, mounting bolts, and some rubber feet (time will tell if they’re too small). I found some bolts in my bins that were the right size for tightening the stand’s top and bottom to the cylinder.
After the paint dried I installed clips and a hook for the power cords and assembled everything.


Over four years ago, I modded a Harbor Freight dust collector and closed the post by saying…
I’ll have to create some adapters for tools with dust ports smaller than 4″, though the hose kit did come with some for use with 2.5″ ports. Now that I have a system with enough power I can build something around the miter saw.
I think it was time to finally knock this off my todo list!
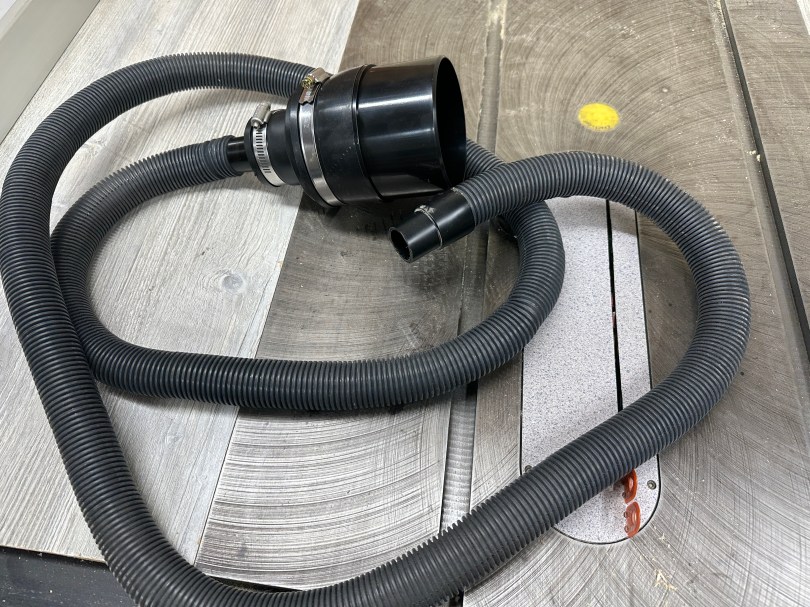
My table saw cart got dust collection built in, I set something up for the jointer, and my planer has an easy connection, but the rest of the major dust creation tools have been neglected far too long. Each machine needed a dedicated solution that was easy to connect to the main line or I wouldn’t bother to use any dust collection at all. I pulled out some hoses I picked up at estate sales years ago and bought couplers and connectors that would fit the main line.
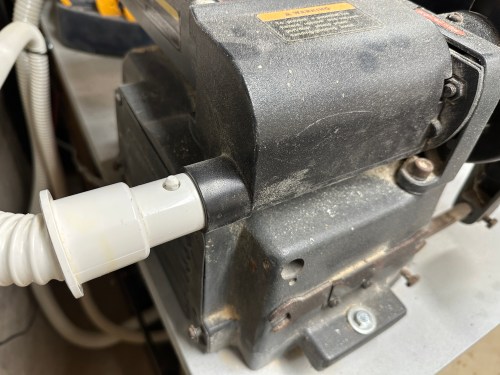
The band saw was a quick solution by using a coupler and a reducer on the port at the back.
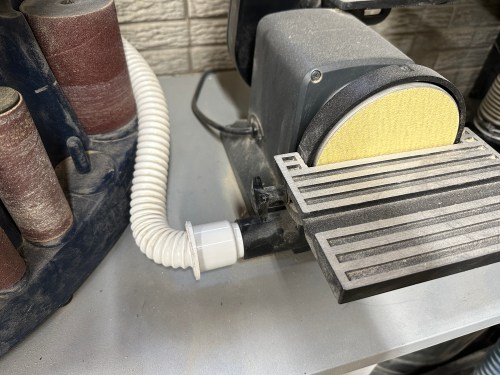
My sanding cart has three machines, four dust collection ports, and five places to sand. Three of those ports are the same size and after cutting away some excess plastic on a hose it was the perfect fit. I zip tied the hose to a bracket on the back of the station and routed the hose out to the bottom front. It’s easy to swap the small end of the hose from port to port. My spindle sander had a larger port, so I used a coupler and another old hose, feeding it under the drawers as well. I can easily connect the main line to either hose.


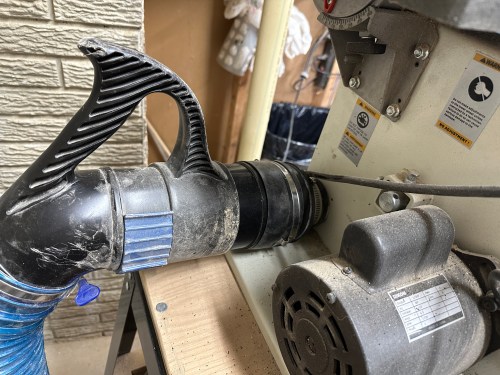
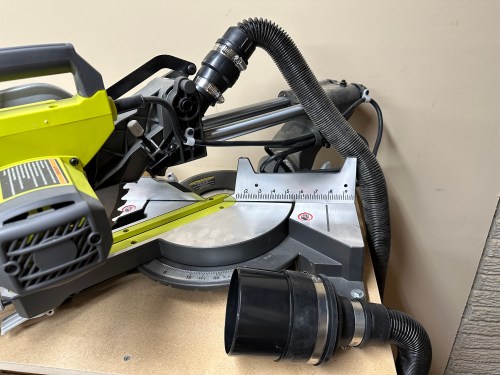
Some fittings on another hose got my new miter saw all set. Time will tell how well dust collection works here because miter saws are notoriously bad at it. I may have to build a shroud of some kind behind the blade.
The final hose got a fitting to work with my random orbital sander, track saw, and circular saw. It’ll remain a portable hose I pull out to use with those tools or for corner clean up around the shop.


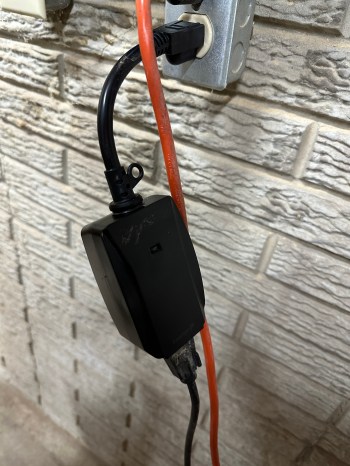
Even though I’m never more than a few steps away from the dust collector, having to go back and forth to turn it on and off was a nuisance. I’d seen several remote control solutions for $50-100, which always seemed like too much, so planned to build my own. Then a recent Amazon search came up with a $13 product so I bought one. It works great!

Feels good to finish this project. I’m looking forward to breathing less dust and not having to clean up as much.
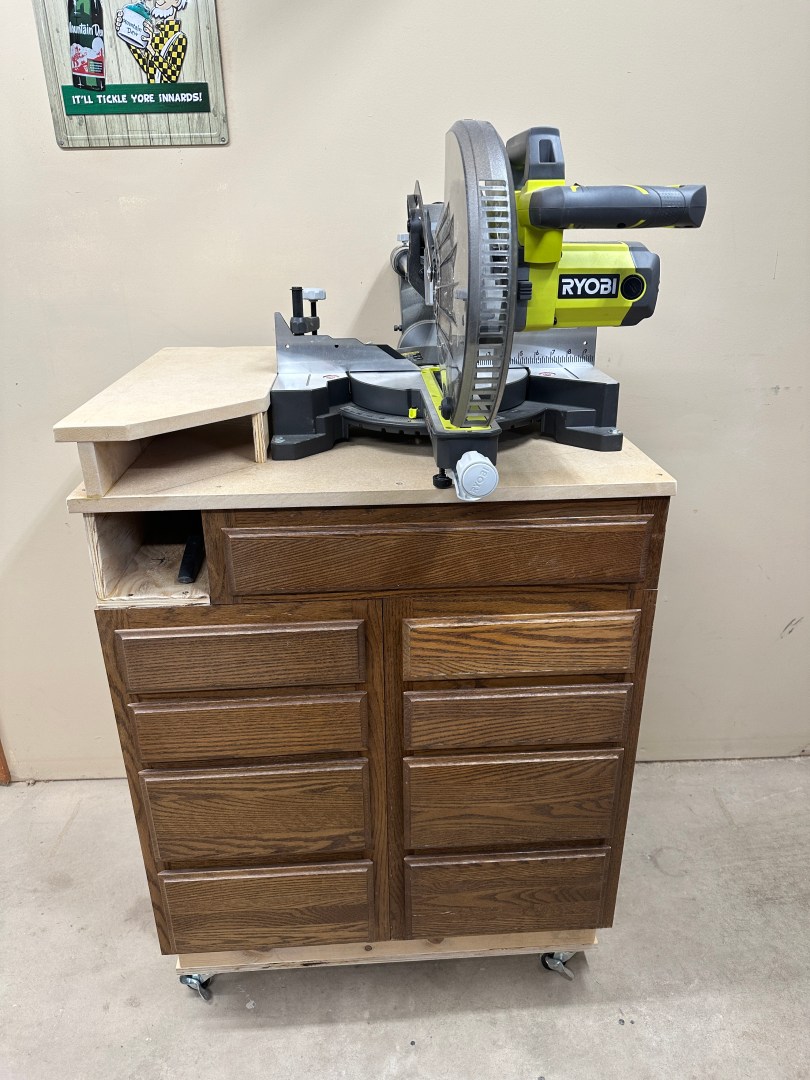
I picked up a new Ryobi 10″ miter saw.


The used 12″ Delta had served me well, especially after all of the improvements I did:
Not having a blade guard always made me nervous and features of newer saws made me jealous. Things like a slider, positive angle stops, and a cut line are really nice to have. This new saw is beautiful and was definitely the right price!
Due to the sliding feature, I needed a lot more depth in my space to use the saw. I also knew I wanted a mobile cart because the stand from the other one always stayed where it was, which was often in the way. I had saved the two side cabinets from the bathroom vanity and still had a wide drawer from the kitchen desk I removed.
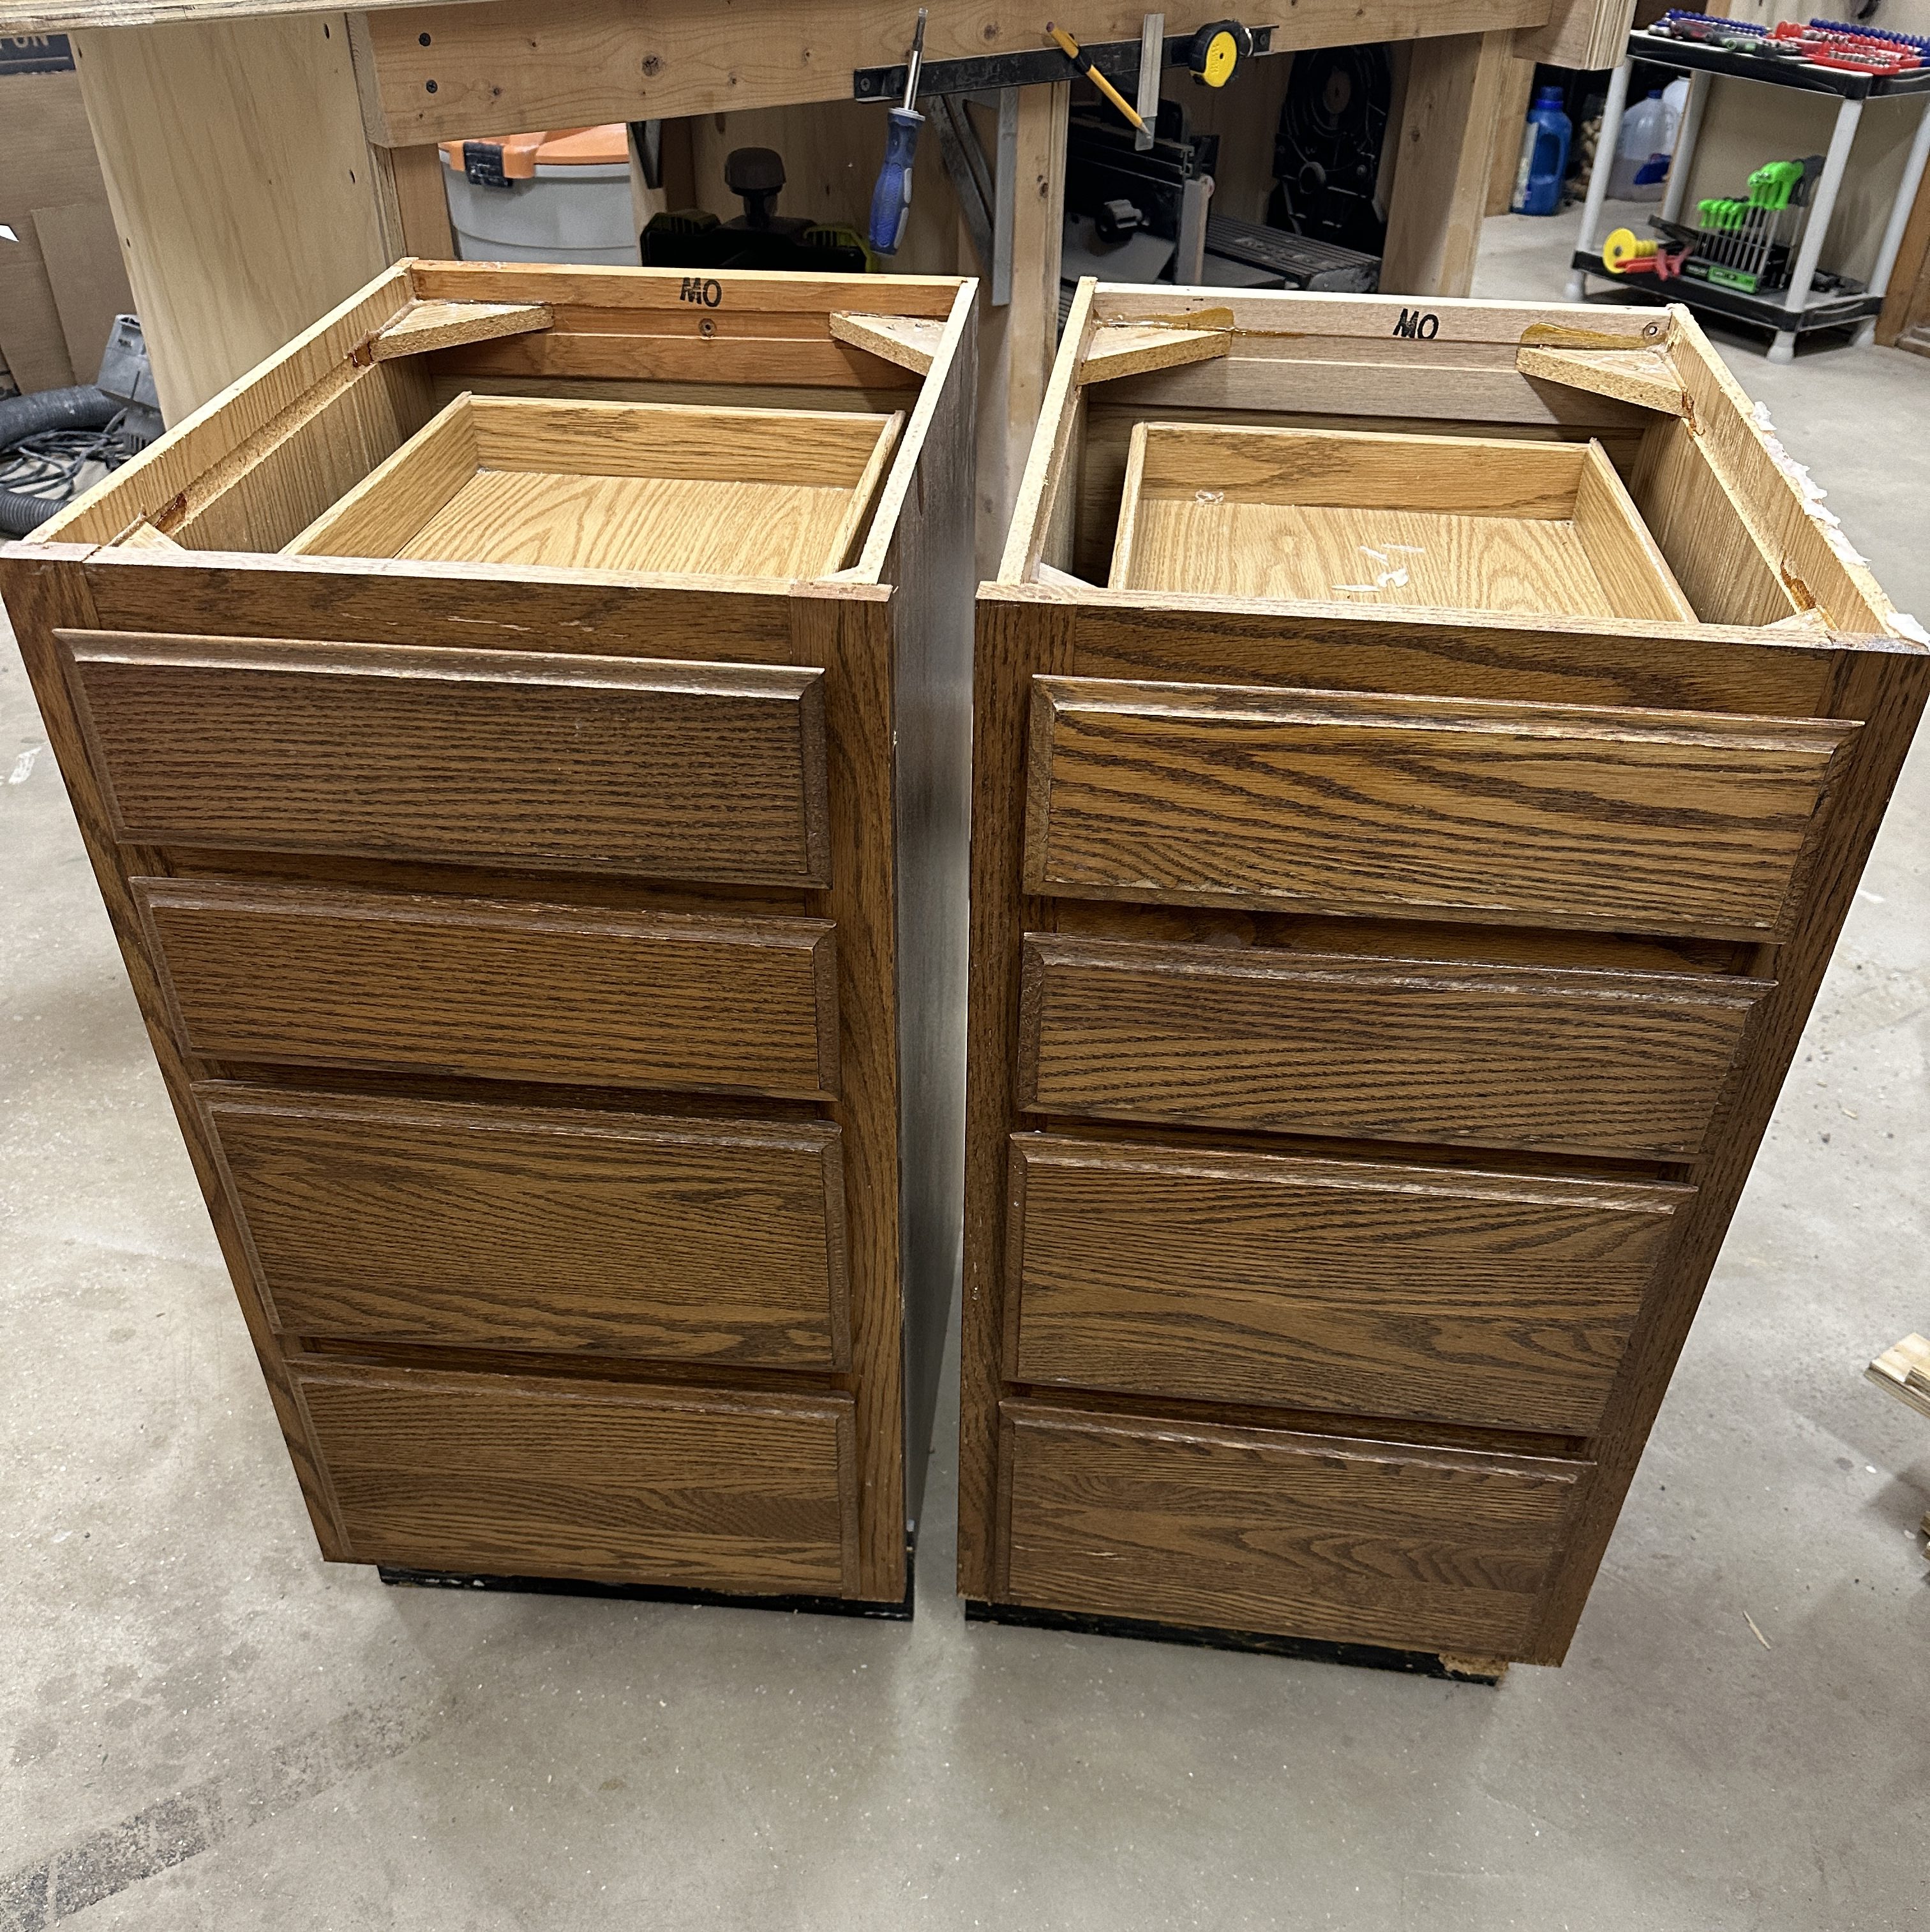
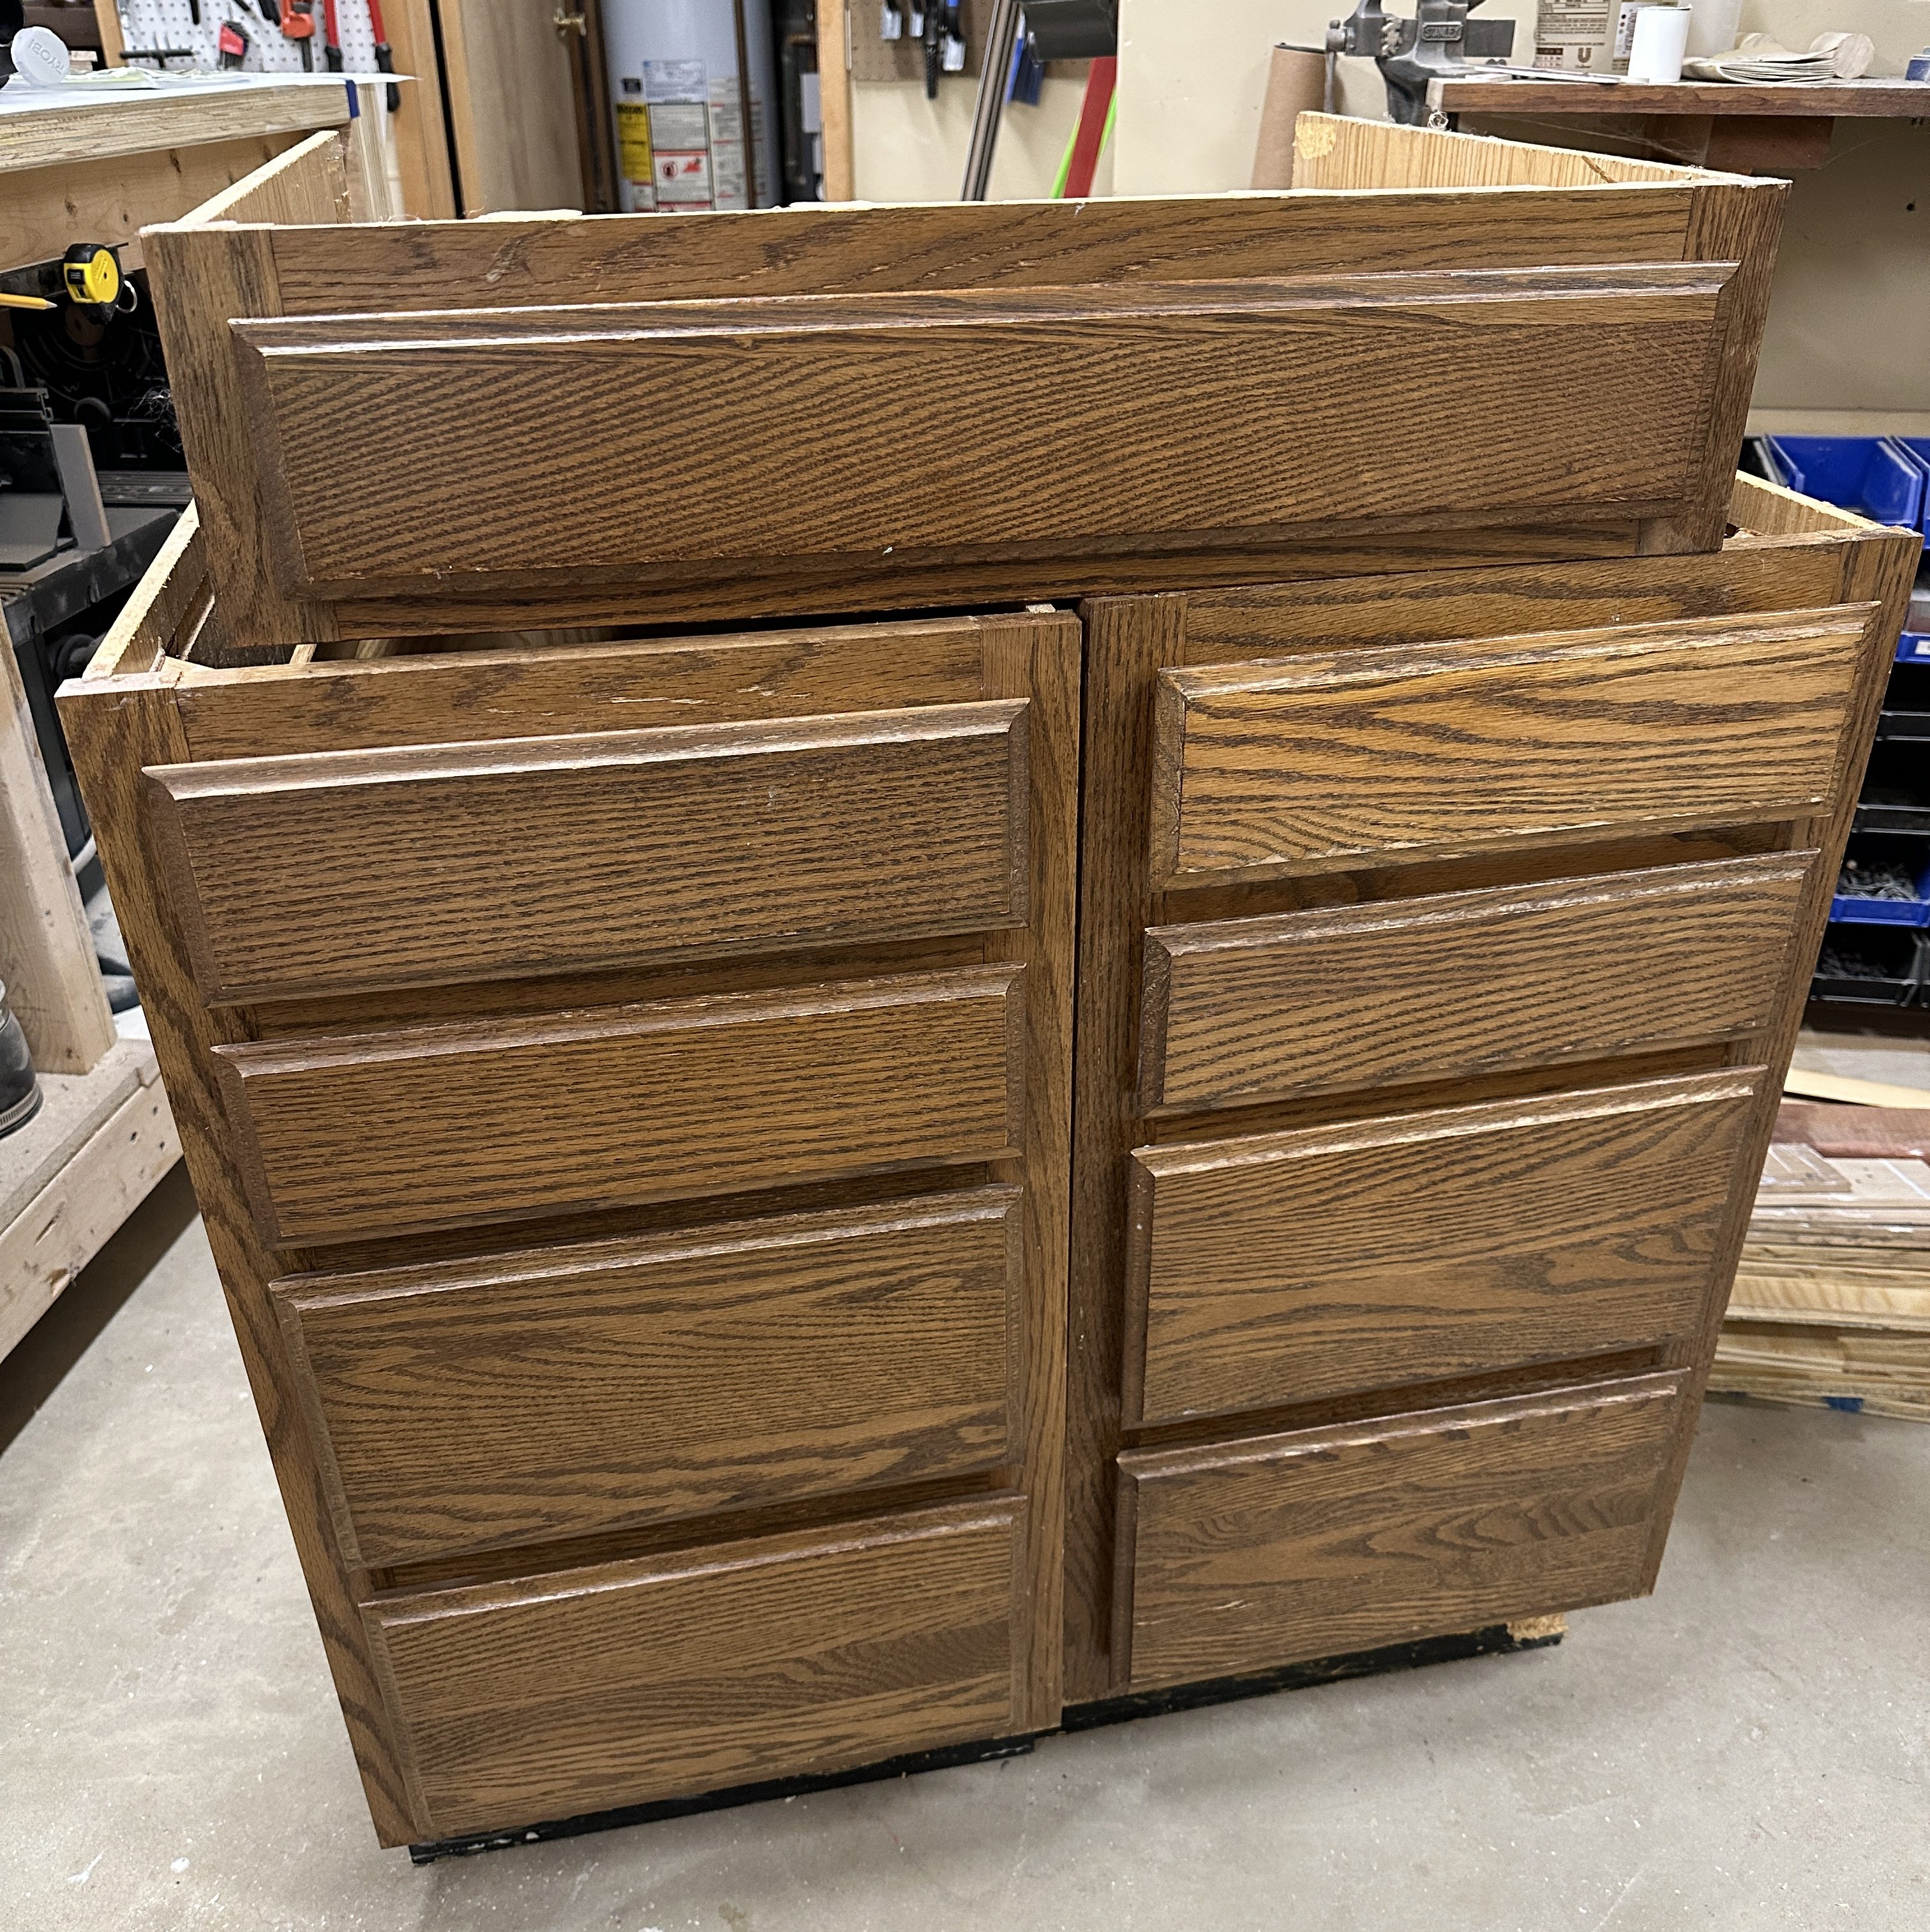
I combined the cabinets and added reinforcements all over to give more stability and connection points because the cabinet walls were so shitty. I made a base, replaced the toe kick, added casters, attached the drawer, and whipped up a little cubby.

The base of an old treadmill has been sitting in my basement, which was a decent piece of MDF. I removed the plastic and chopped it up to make the top of my stand.


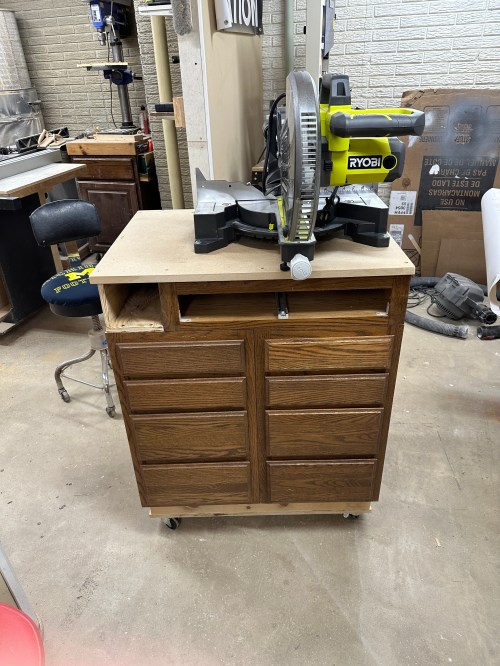
The final thing to do was make a riser to the left of the saw for more support while making cuts. The cart turned out great and is so easy to move around.


I took the opportunity to clean the shop and do some rearranging. I moved the drill press out of the dusty area and pulled the band saw in. I also moved the jointer out since it doesn’t get used much and is an awkward size, so it was also in the way. It feels like I have a whole new shop and being able to move the miter saw around is going to be a huge improvement to my workflows.


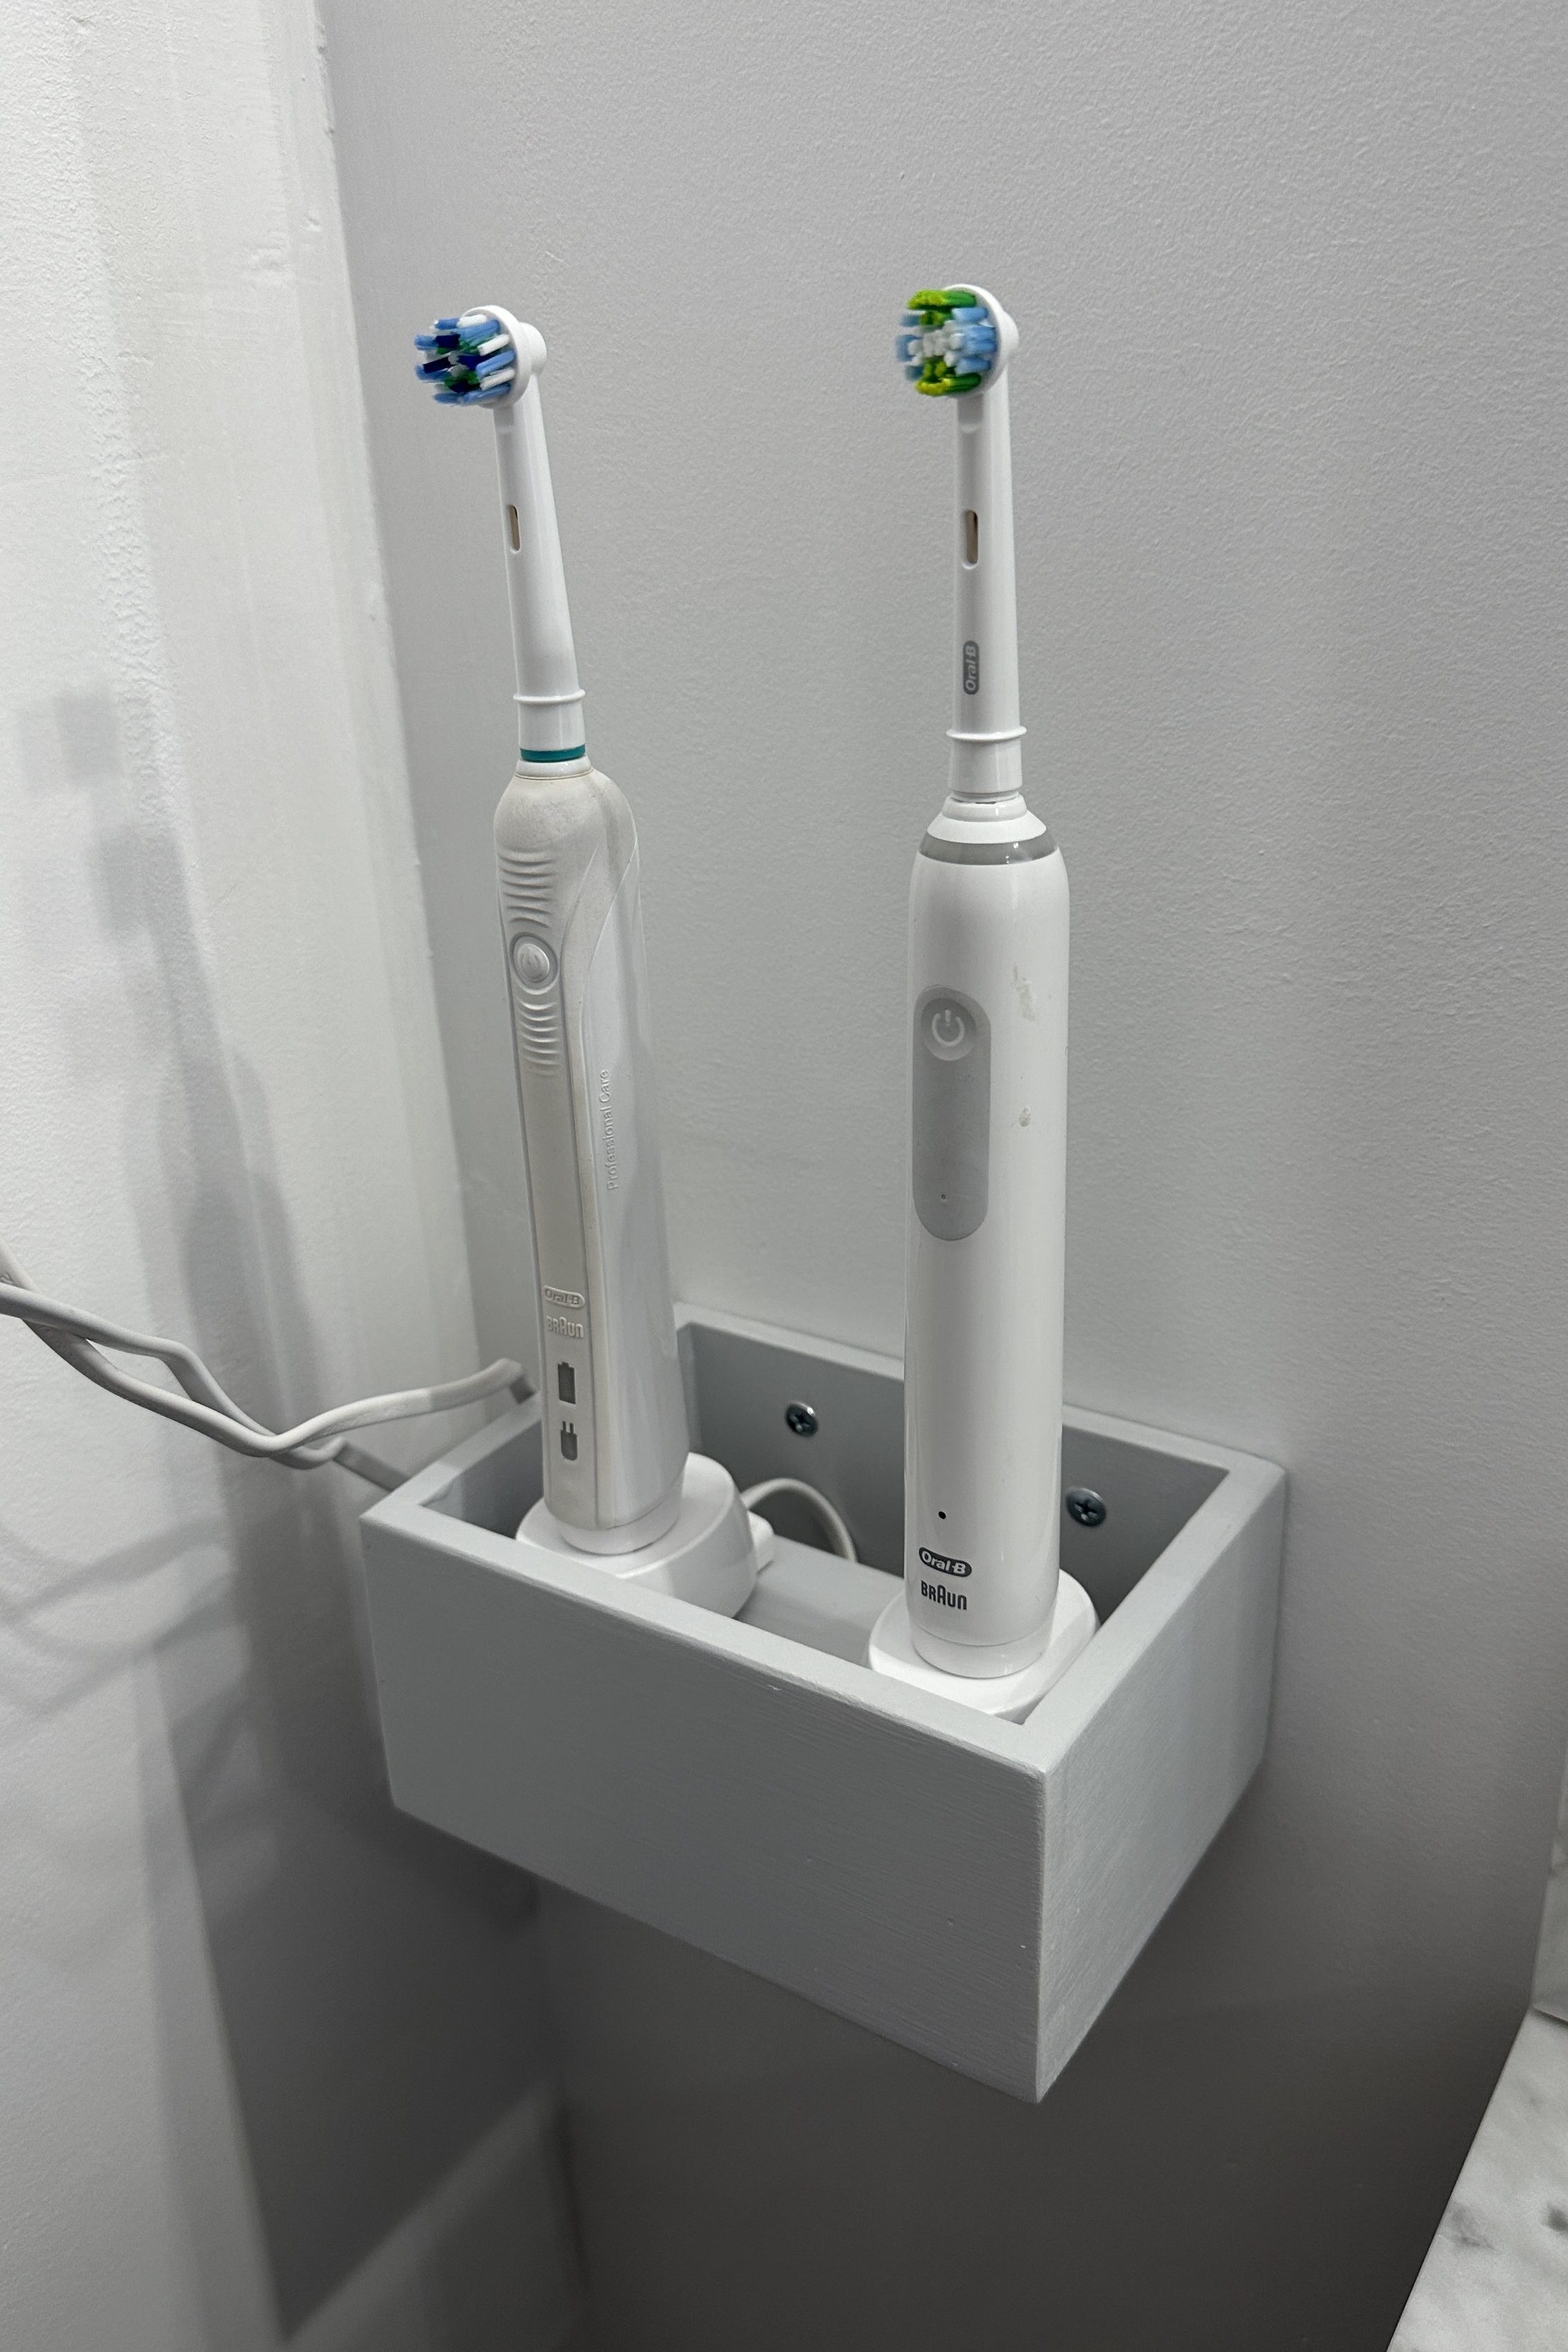
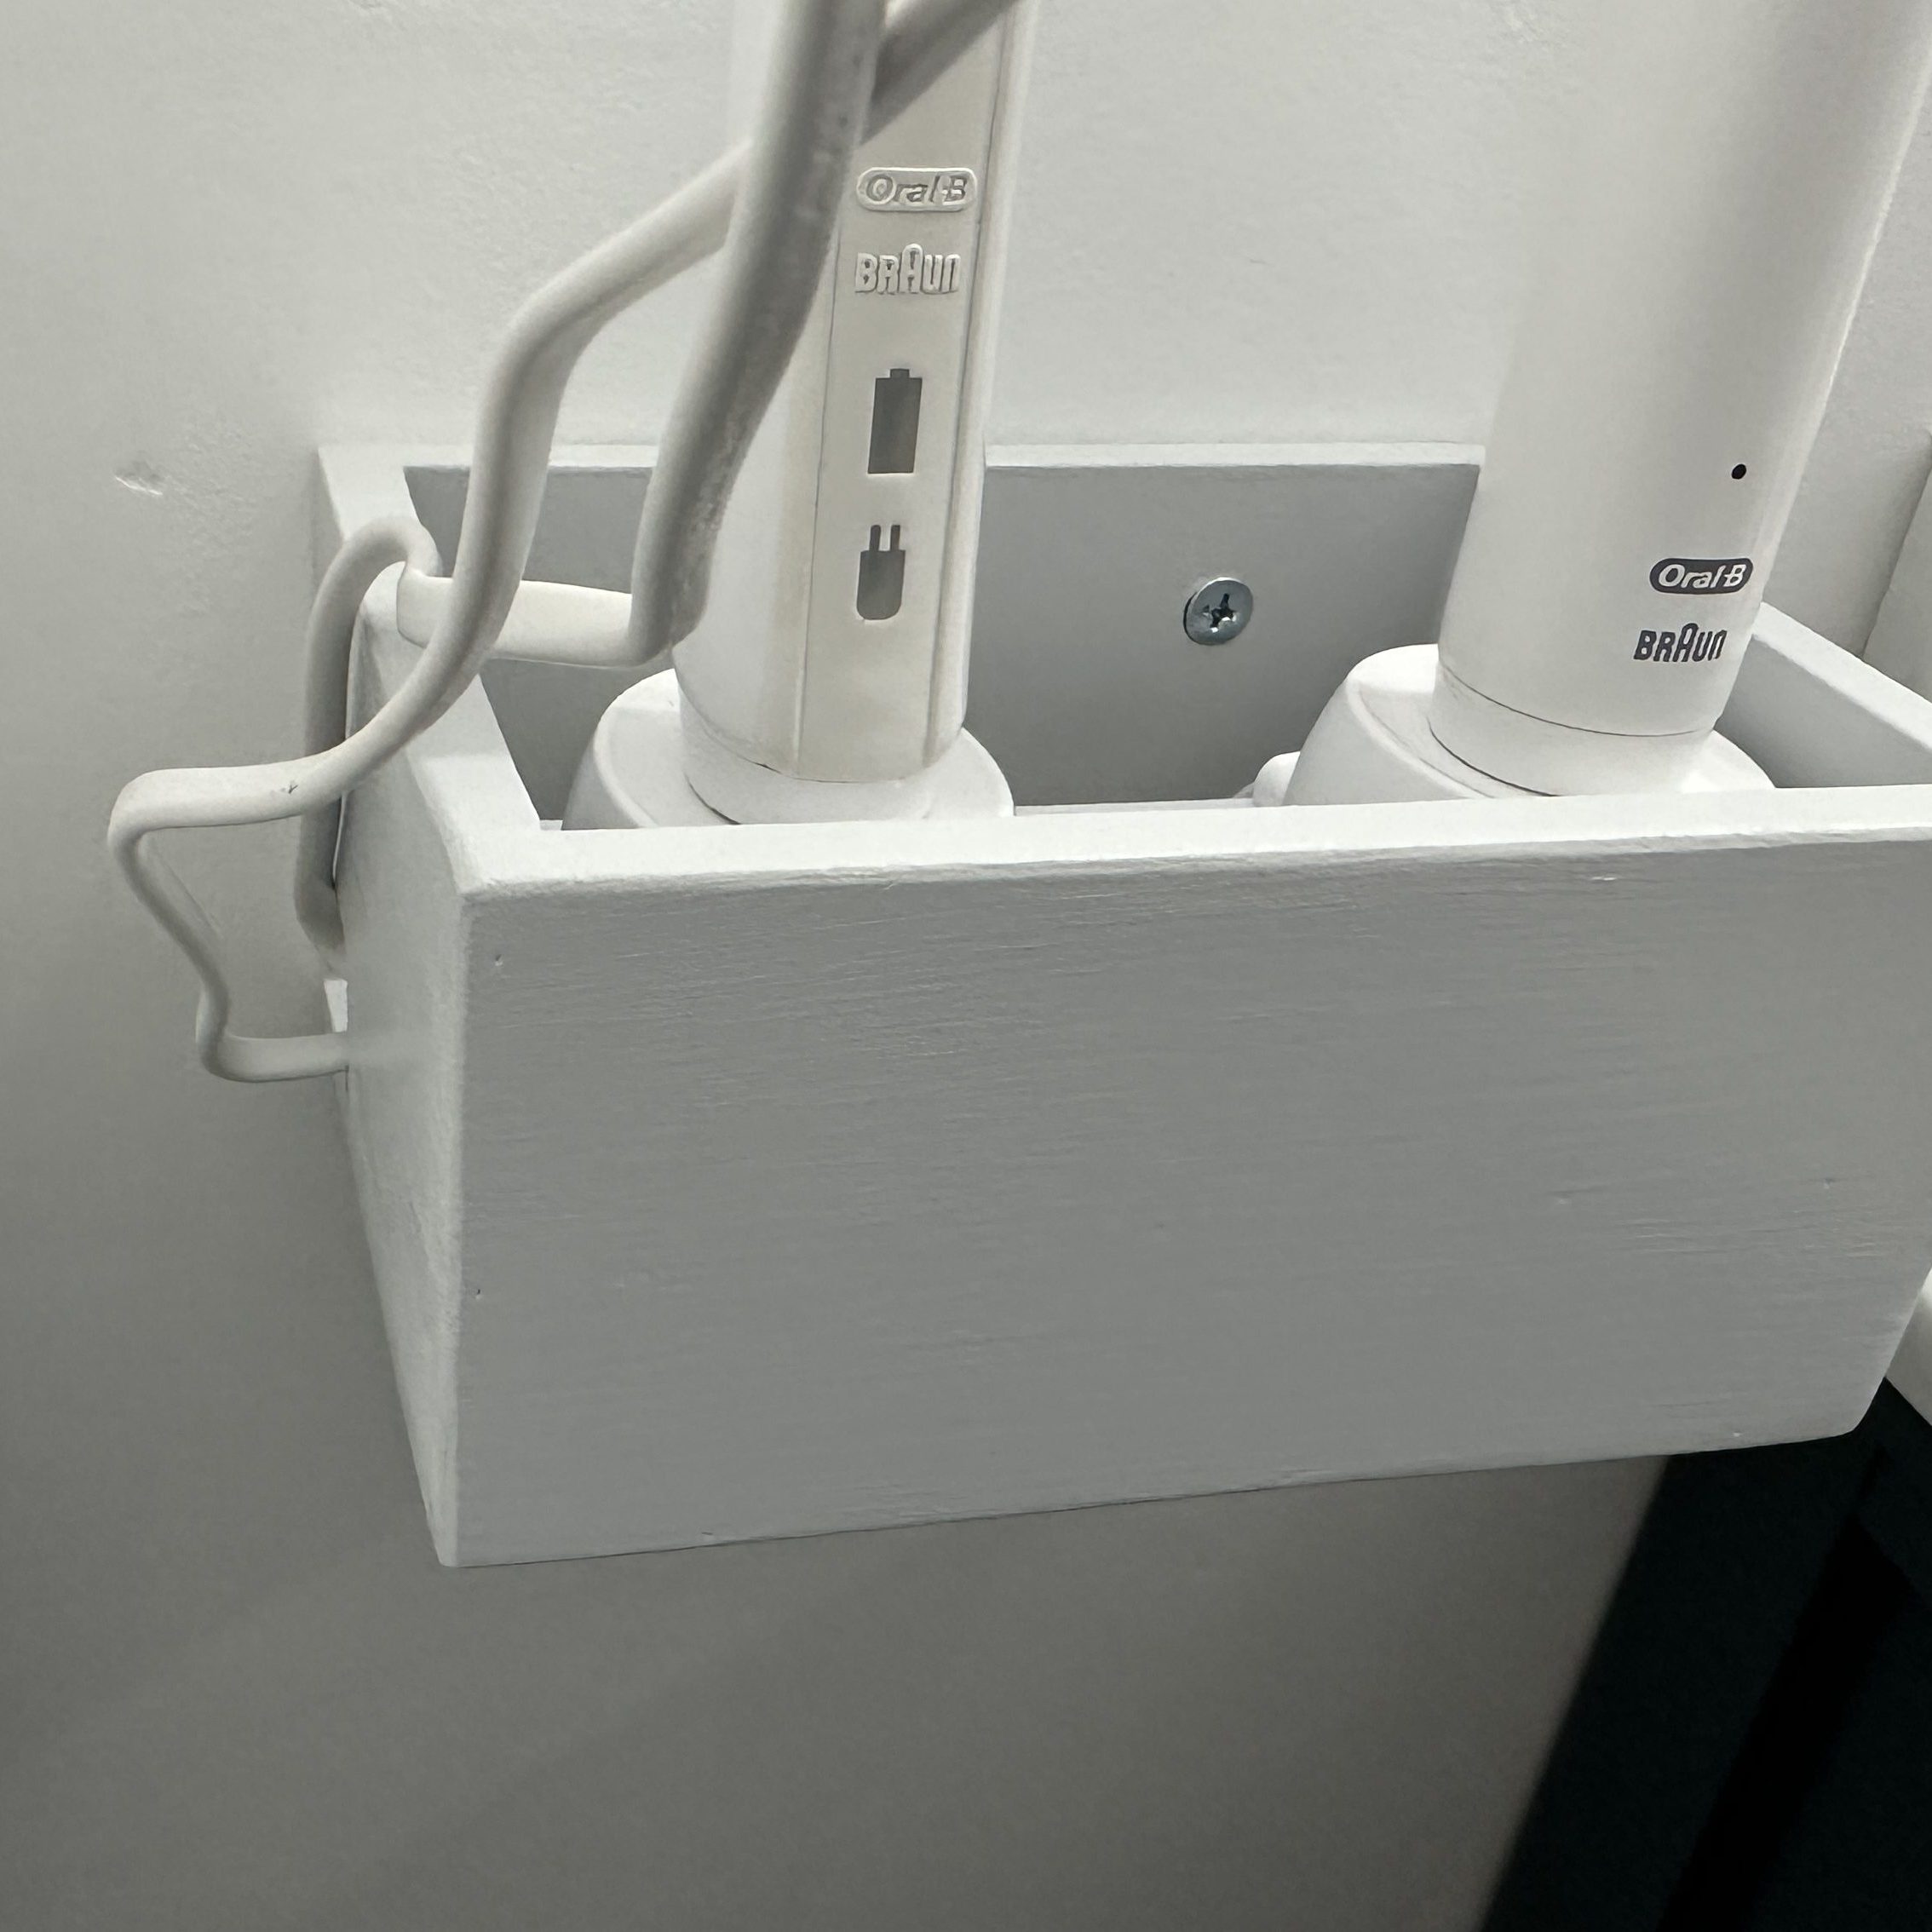
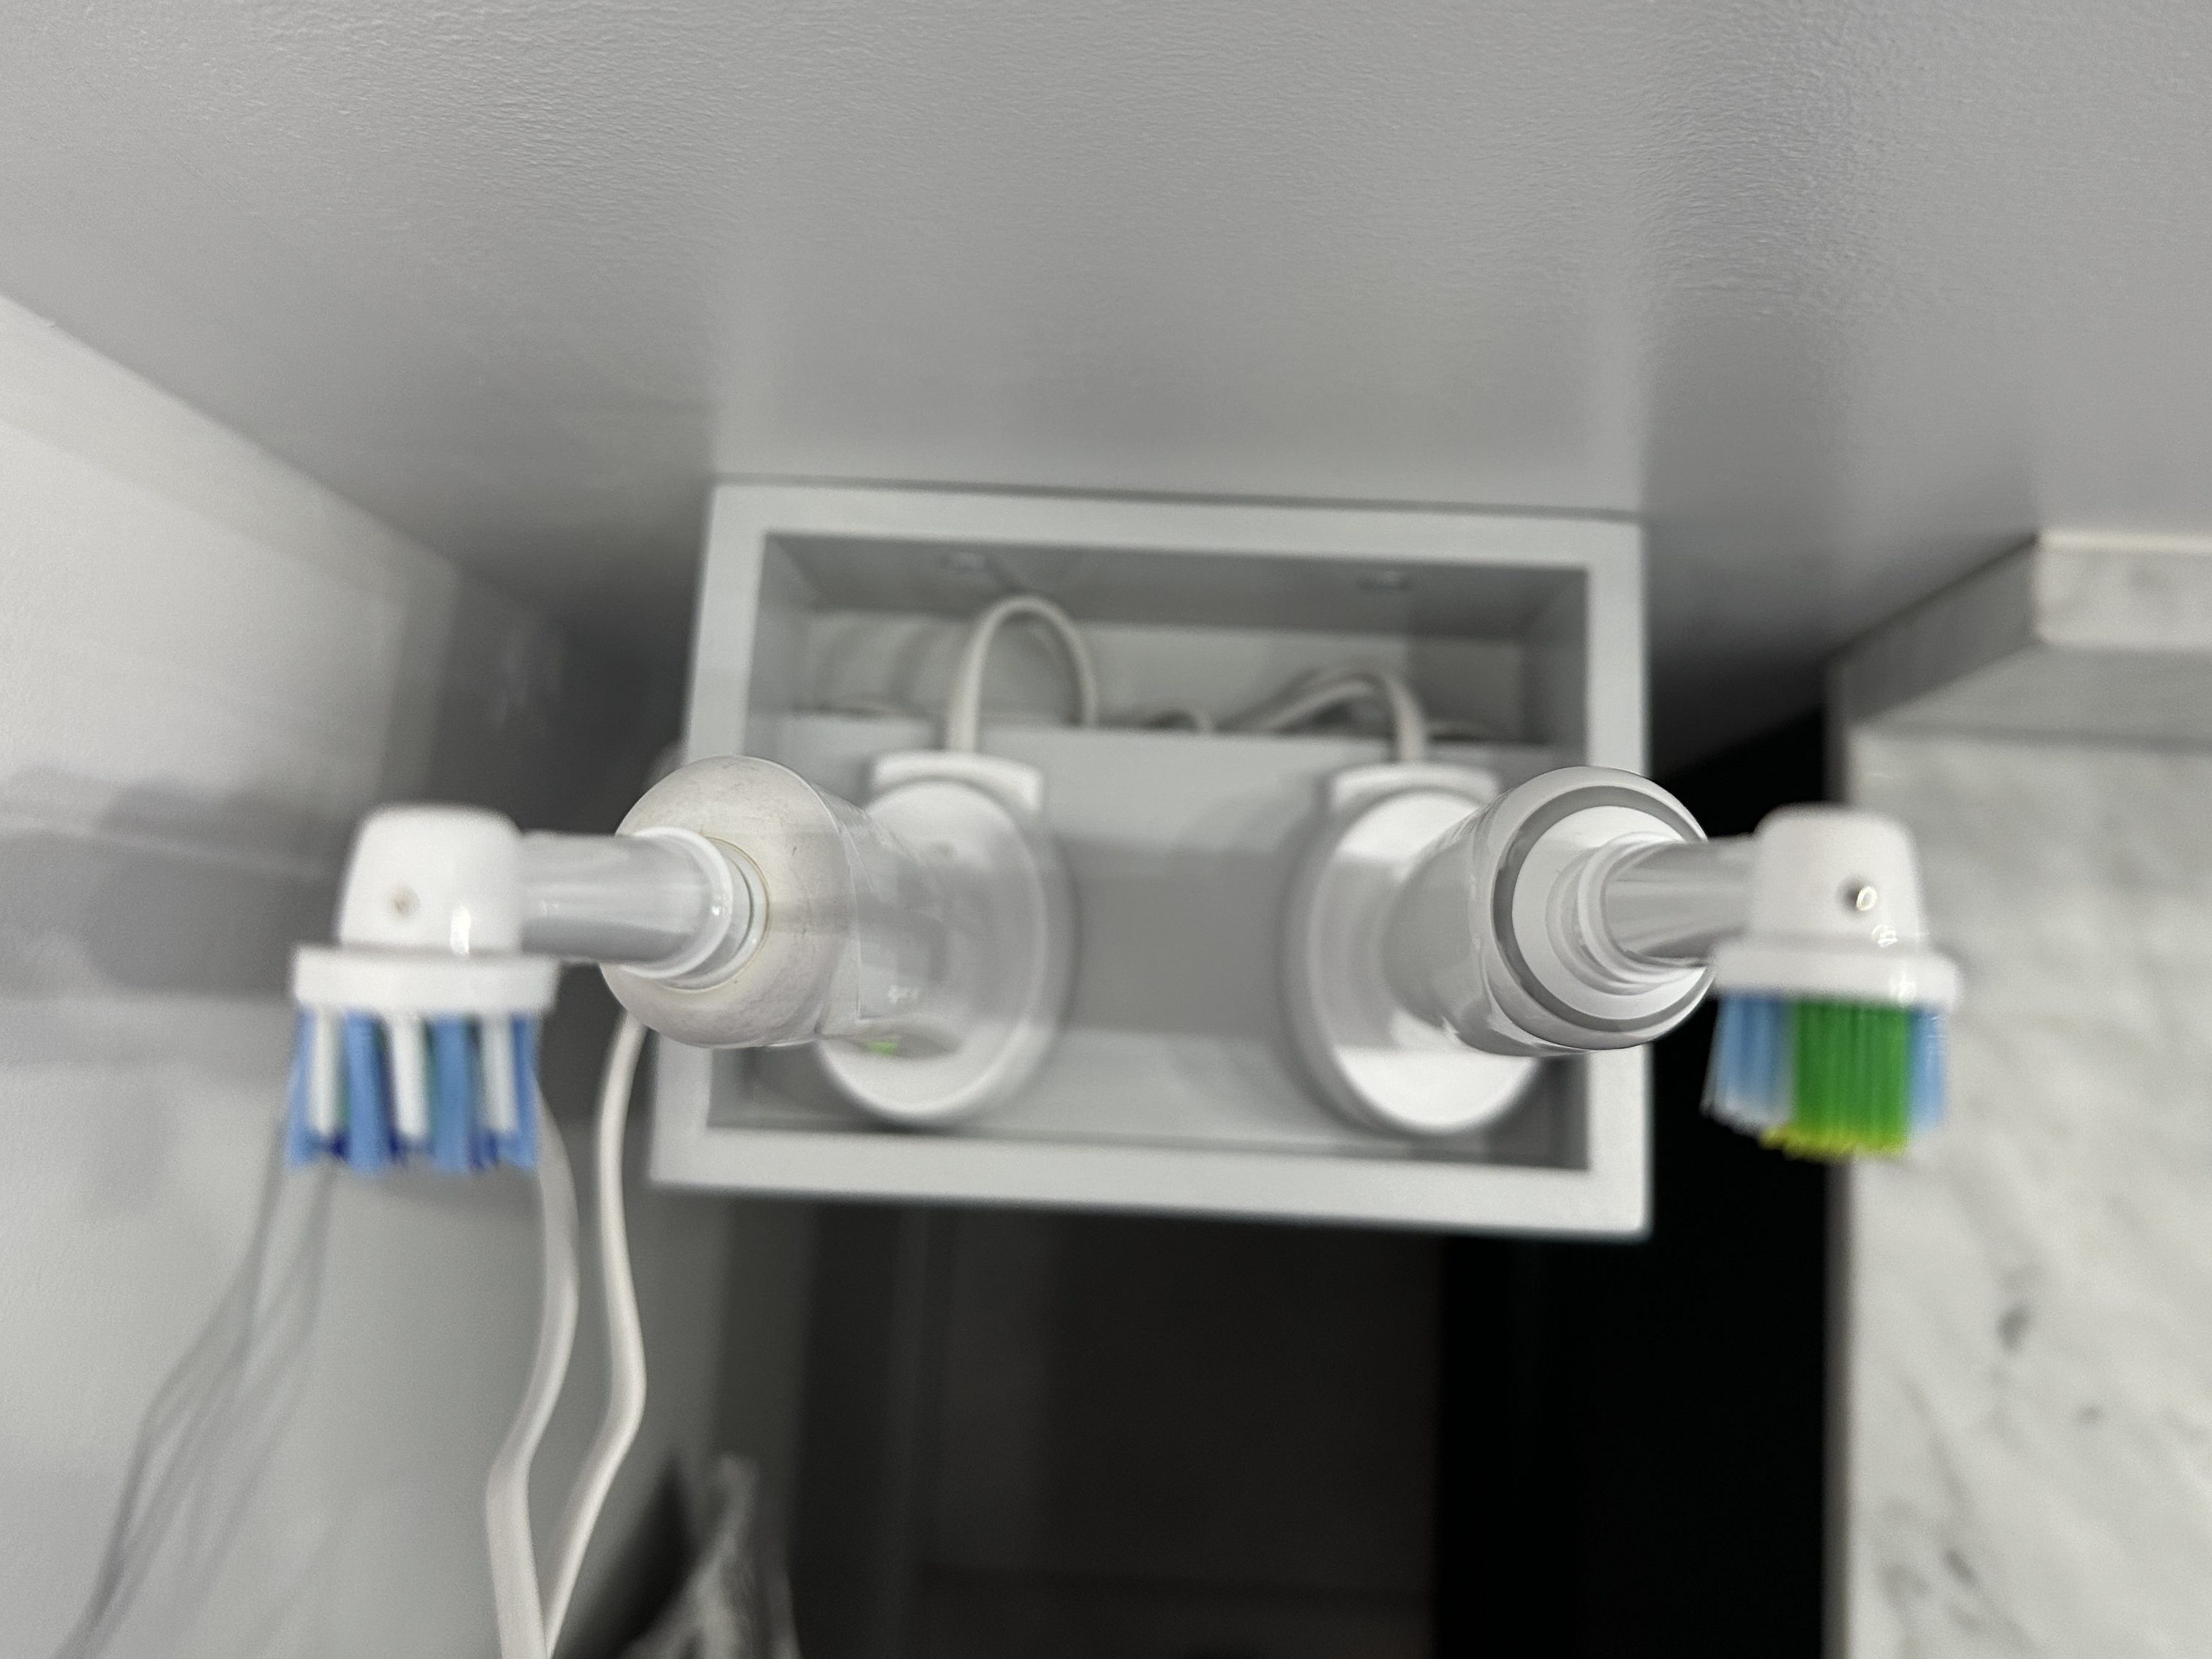
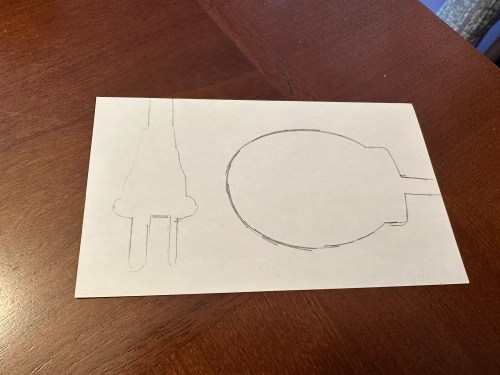
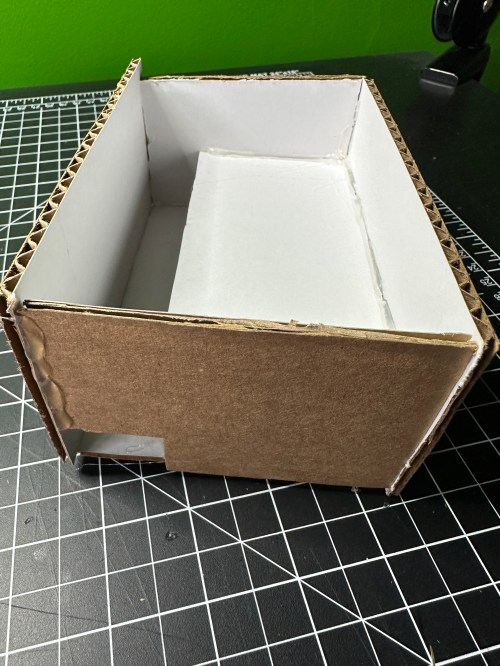
With the counter of our new vanity not extending to the wall where the outlet is, we wanted a dedicated spot for our electric toothbrushes. I outlined the base of one charger and then made a rough model with cardboard and hot glue.


After a successful test fit with the brushes, I moved over to wood and used all scraps since it was getting painted.


It was a simple build, a lot of fun, and definitely a functional one.