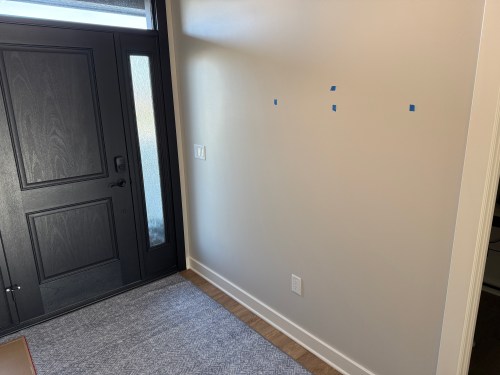
We left our foyer empty in the house design so I could build some things for it.
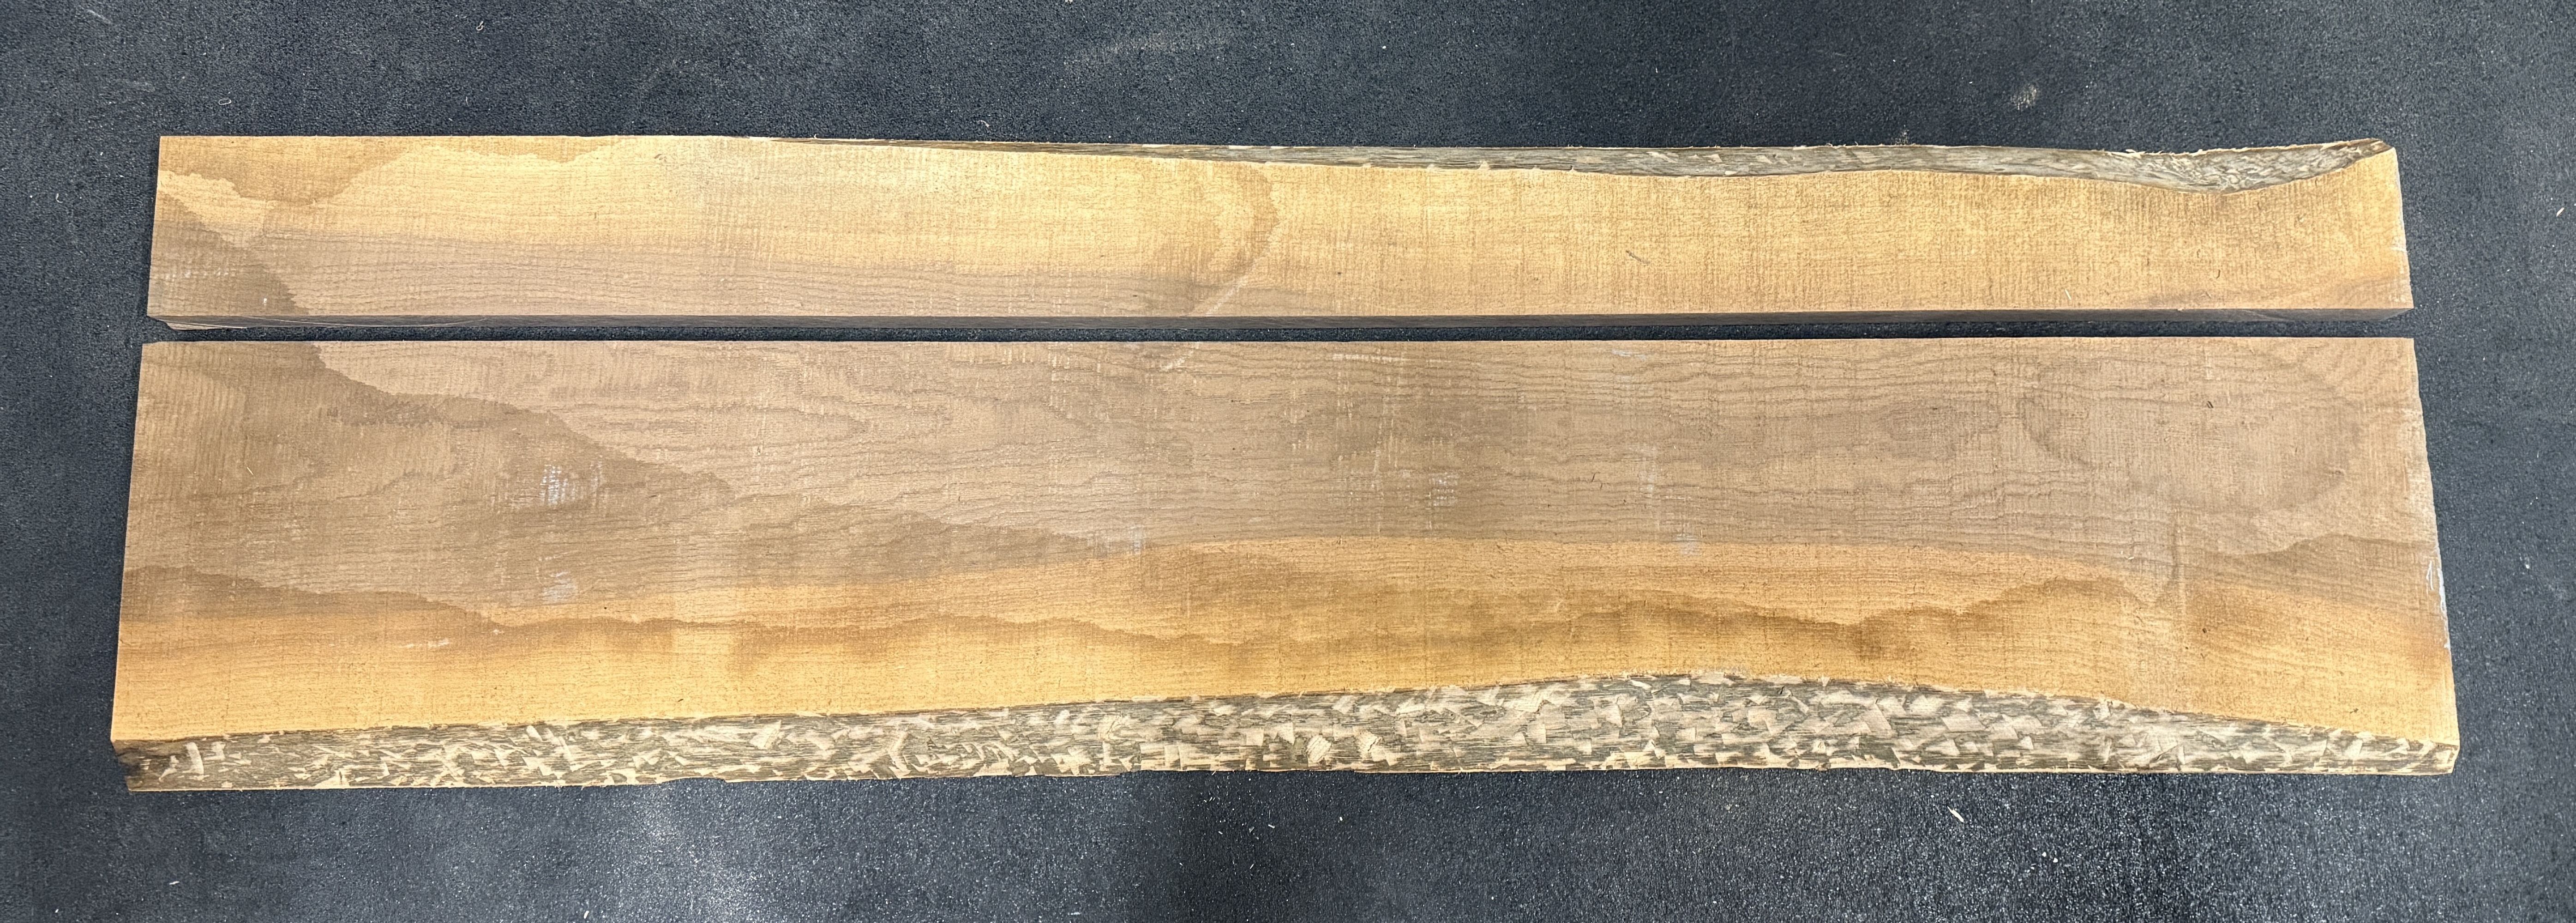
First up was a coat rack. I pulled out a piece of walnut and got the bulk of the bark off the live edge. This piece has a lot of sapwood, which should turn out sweet.
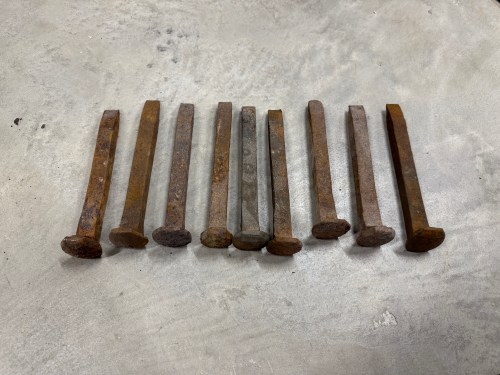
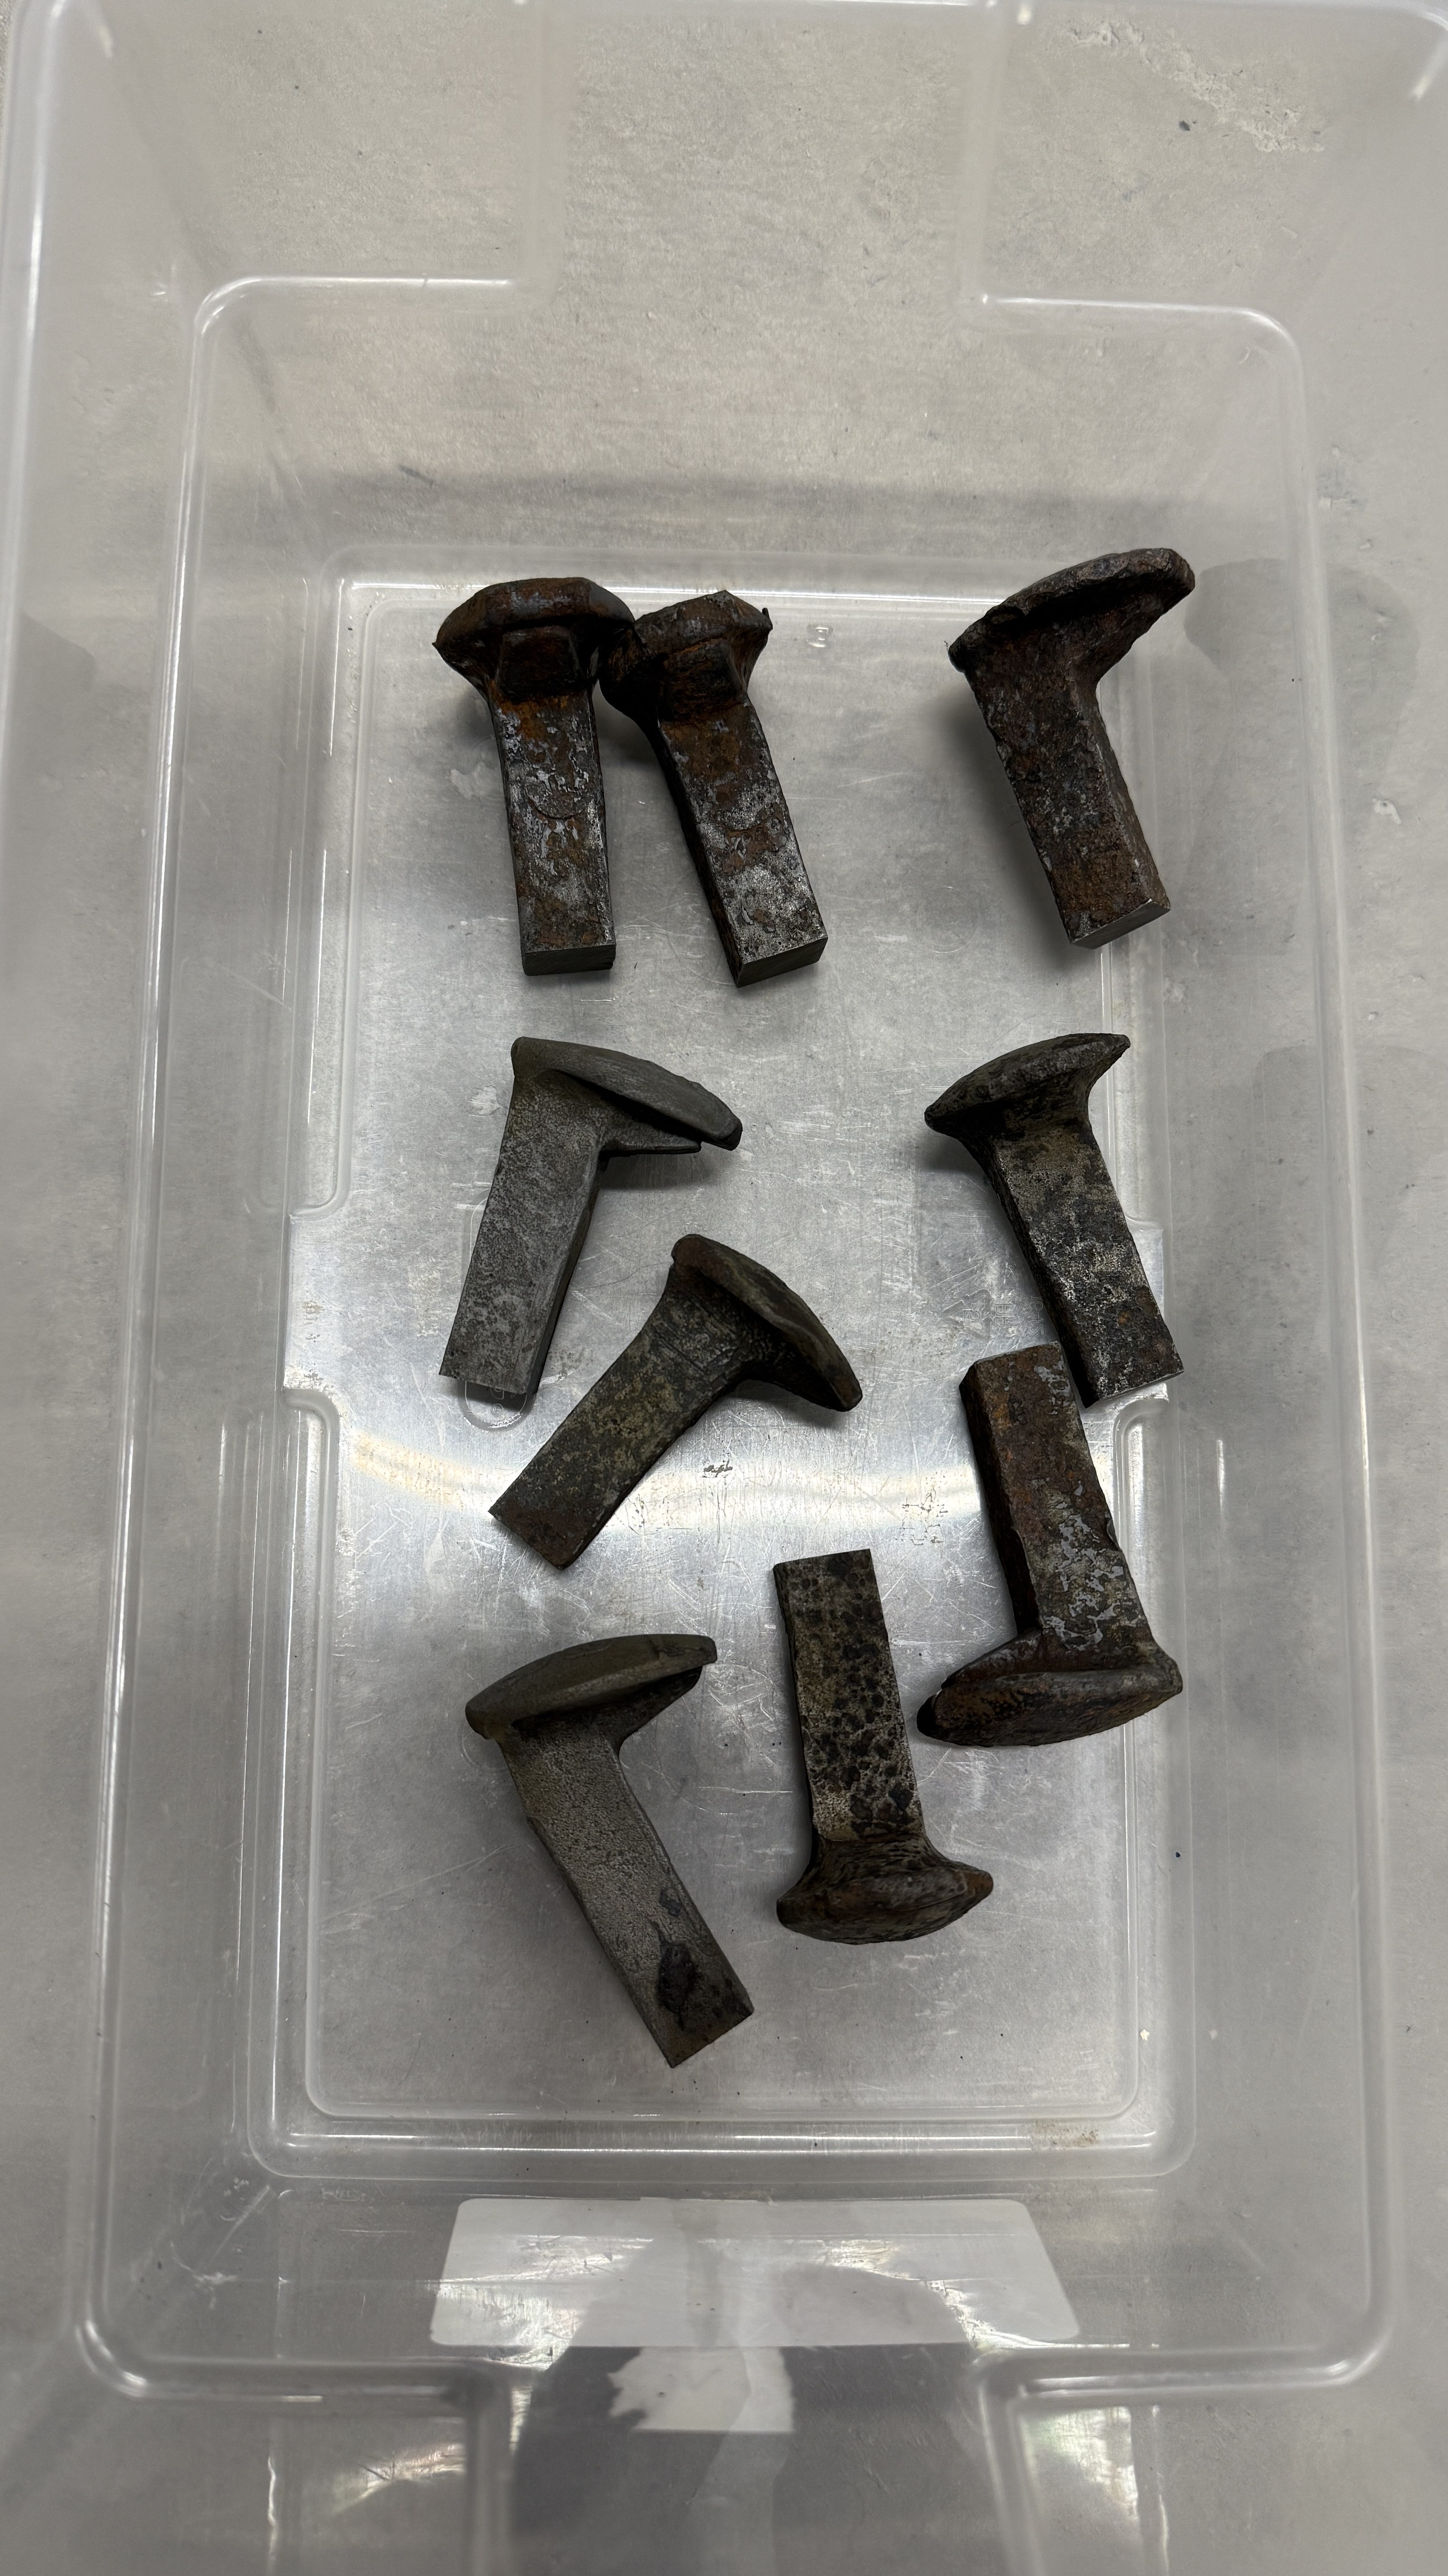
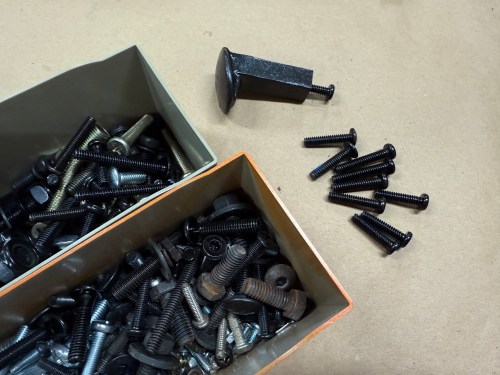
Before getting ahead of myself by sizing the board in any way, I wanted to make the hooks from railroad spikes so I could see how much space they’d need. I bought about 20 of these on Facebook Marketplace a few years ago and still have a bunch.
I don’t have much for metal working tools, so I knew I wouldn’t be able to get consistent length by cutting with an angle grinder. In order to give myself a decent chance at success, I screwed a couple pieces of plywood to my drill press vise and drew a reference line. Then I cut all nine spikes.
At the disc sander I flattened the ends. For the spikes to lay square to the sanding surface I propped them up on some wood.
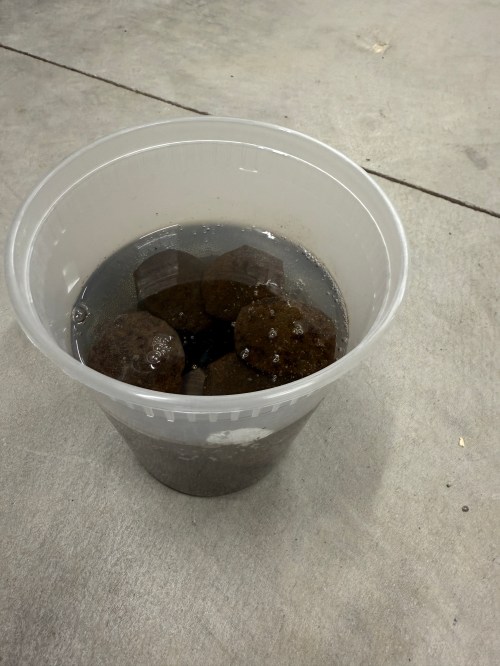
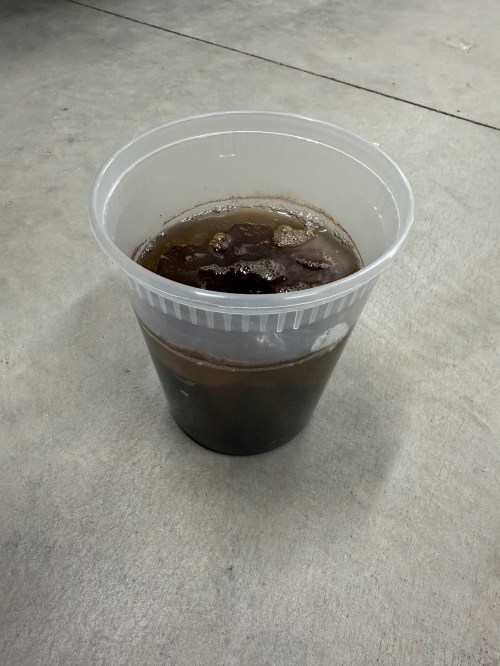
I soaked the pieces in a 50/50 mix of white vinegar and water overnight.
Rinsed and wiped them off.
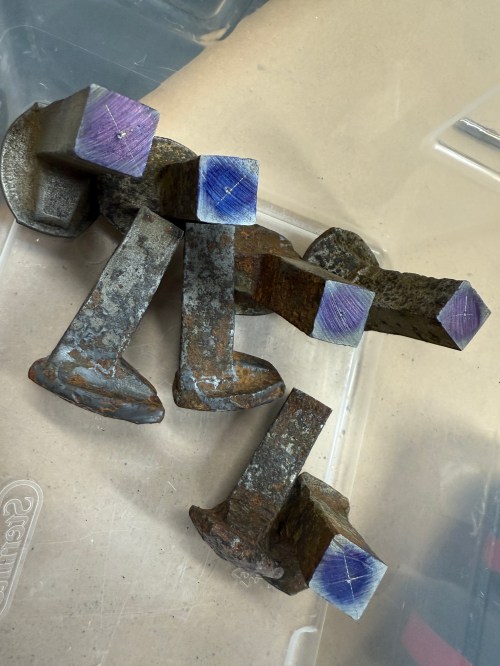
Marked the centers as best I could. Then I stepped through 3/32, 5/32, and 13/64 drill bits on each part. I broke one 3/32 bit and luckily it was deep enough in the hole where it wouldn’t matter.
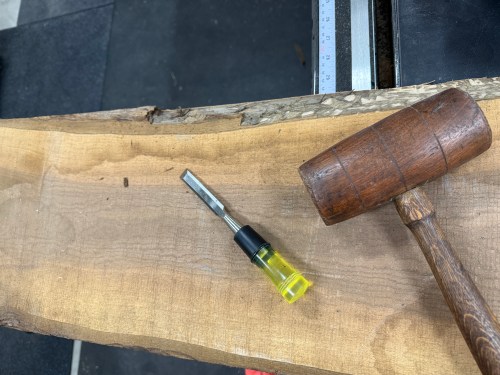
Then came my favorite part, adding threads in the holes. I used a 1/4-20 tap.
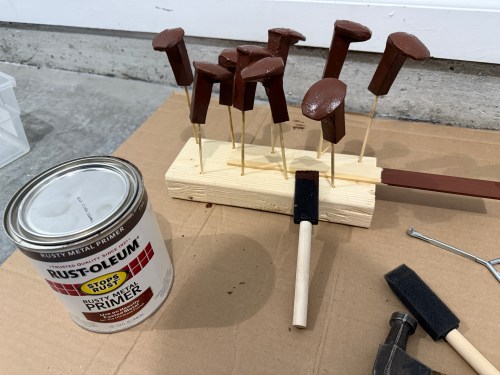
I cleaned up the rest of the rust on a bench grinder wire wheel. Then primer and paint.
Back to the wood. After doing a rough mockup, I cut a length of the larger board and ripped it to create pieces for the shelf and main.
Then they went through the planer.
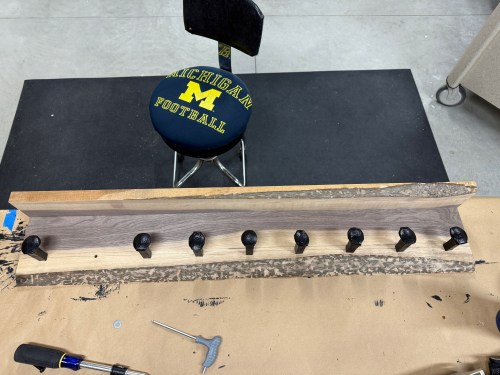
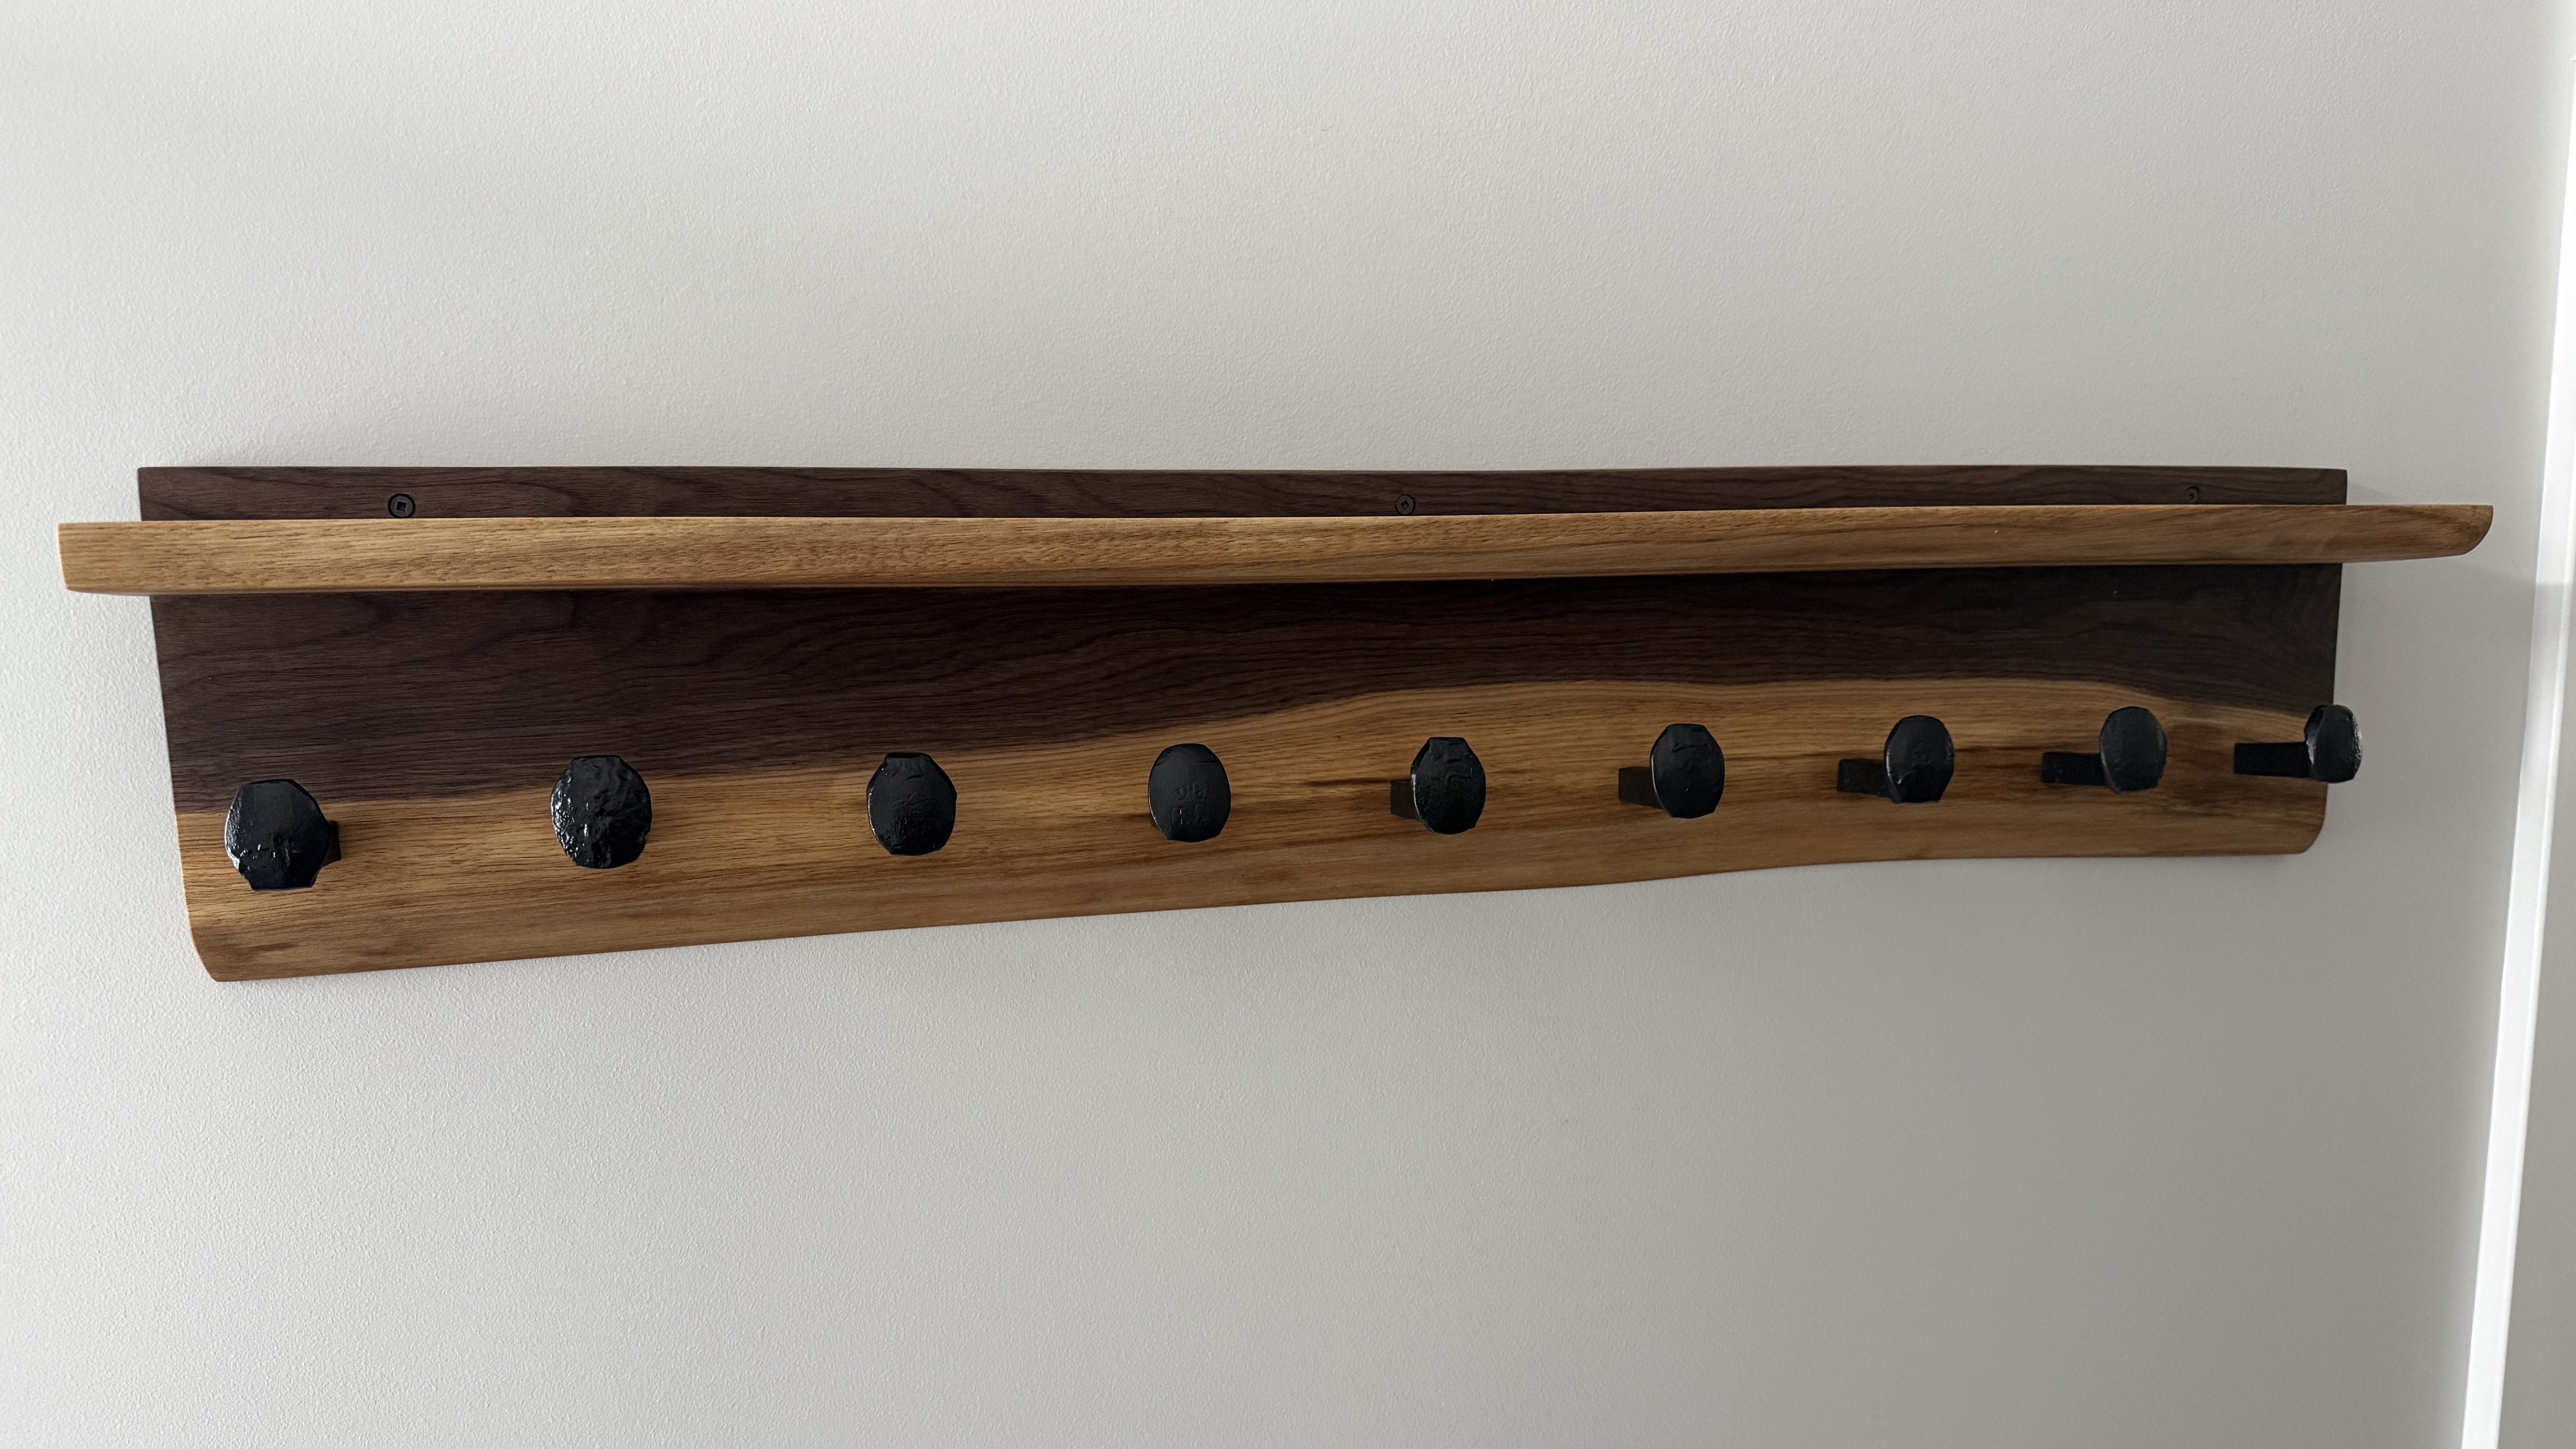
Drilled a bunch of holes, found some bolts in my collection, and did a dry fit.
I applied three coats of the All-Natural Wood Finish from Bumblechutes mixed 1:1 with Citrus Solvent. It was the first time I’d used this on a project and I’ll definitely be using it more. It went on easy with a foam brush and light sanding with 400 grit between coats. Then to finish it off, one coat of their Bee’Nooba Wax, which I’ve used before.
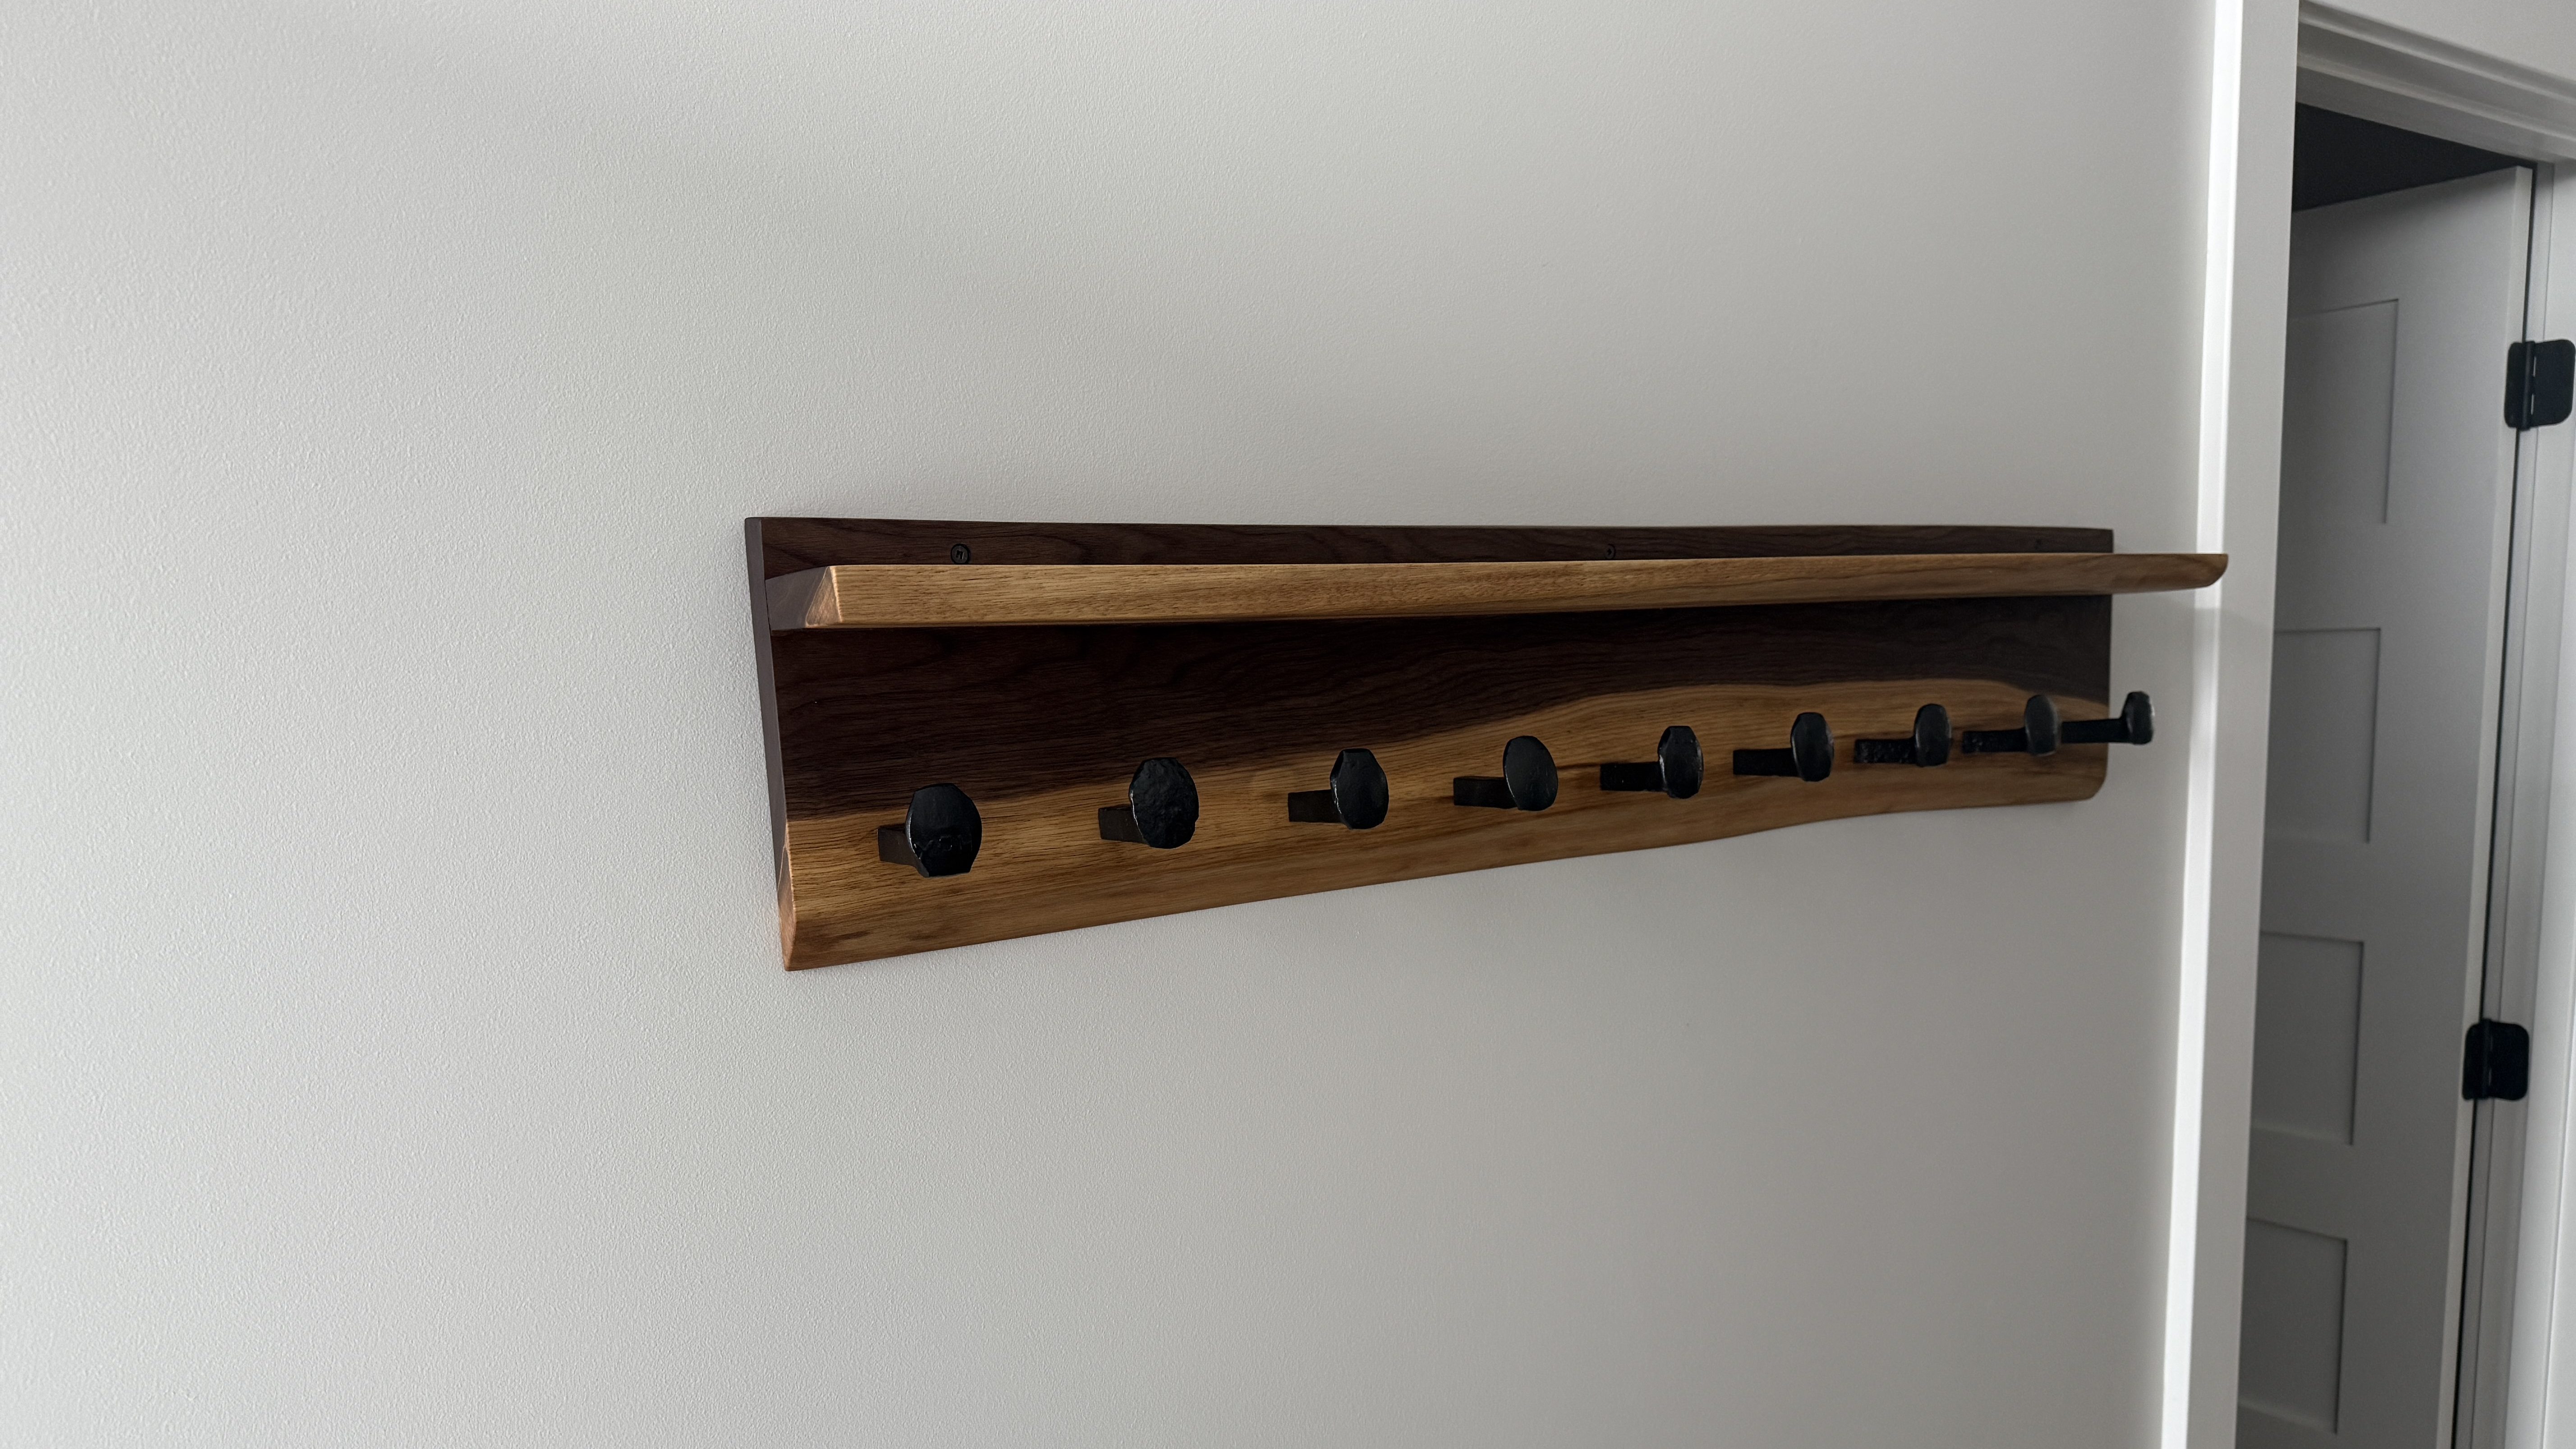
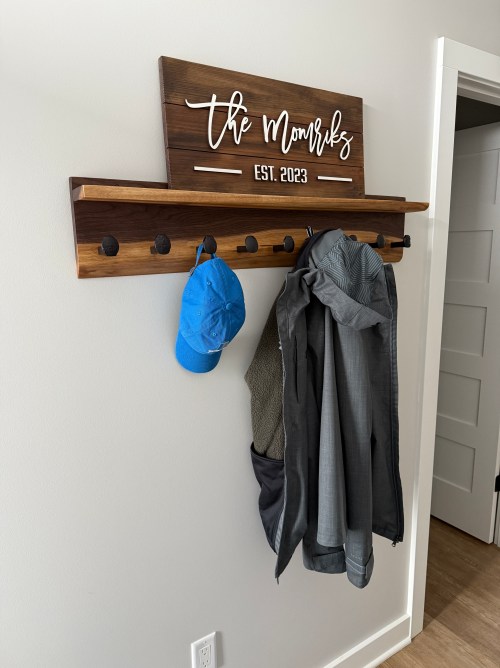
When bolting on the railroad spikes I applied a little thread locker. I mounted it to the wall and put up a sign my sister gave us.
Now I need to figure out what kind of bench to build.
I prefer to walk golf courses. It’s great exercise, gives me time prepare for shots as well as reflect, and it’s faster than riding. I bought a Clicgear 3.0 three wheel cart in 2011 and with some minor fixes over the years it’s worked great.
I’m not getting any younger and I want to keep walking as long as I can, so I’ve thought about a motorized push cart. Then I came across the Club Booster V2 by Alphard (save $50!), which converts your own push cart into a motorized one. The reviews were awesome so I ordered a refurb unit for $647. Here’s my first test after assembly.
I was impressed, but the dragging front wheel while turning didn’t work very well, so I quickly ordered the Swivel Conversion Kit for $89. The kit replaced the front wheel with an axle where the original back wheels mounted to make it a four wheel cart with a swivel front. It makes a huge difference for maneuverability and stability.
By the time I finished my first nine holes I felt very comfortable controlling it. I’ve played two 18 hole rounds and this upgraded cart let’s me play faster and leaves me fresher for the back nine. I’m surprised how much energy I save not having to push the cart. I’m thinking about doing a detailed review post.
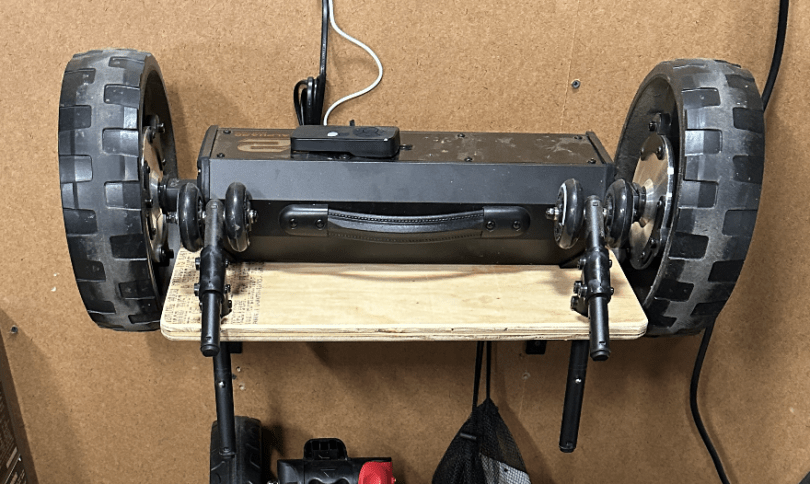
There were two problems though. The parts took up too much floor space in the garage and looked messy. I also forgot to take the wheelie bars for the first round I played.
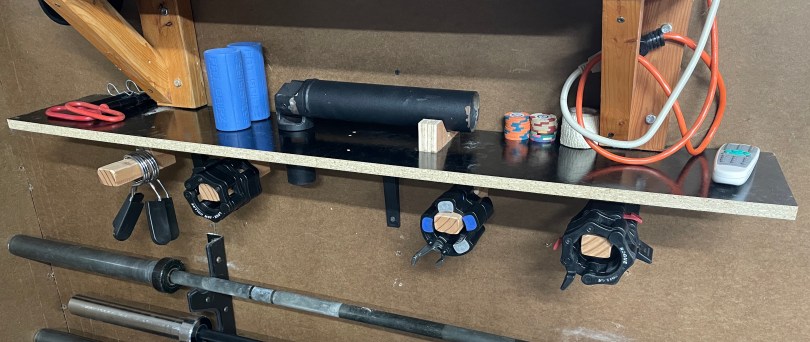
I needed some type of rack to keep things organized, help me remember to grab everything, and make changing easy. I thought about having slots for the axle or something to prevent the unit from falling to the floor. After cutting a piece of plywood and laying things out, I realized a simple shelf with holes for the wheelie bars is all I needed.
Just what I needed. I love a quick build.
With a motor this is a vehicle for my golf clubs, so it needed a name. I’ve been struggling to think of anything, so I asked ChatGPT.
Those are some good ones and I chuckled. Brandi’s idea was to call it R2-D2, but I don’t like reusing a specific name. I like the style, so I settled on CB-V2 since the unit is like my own droid.
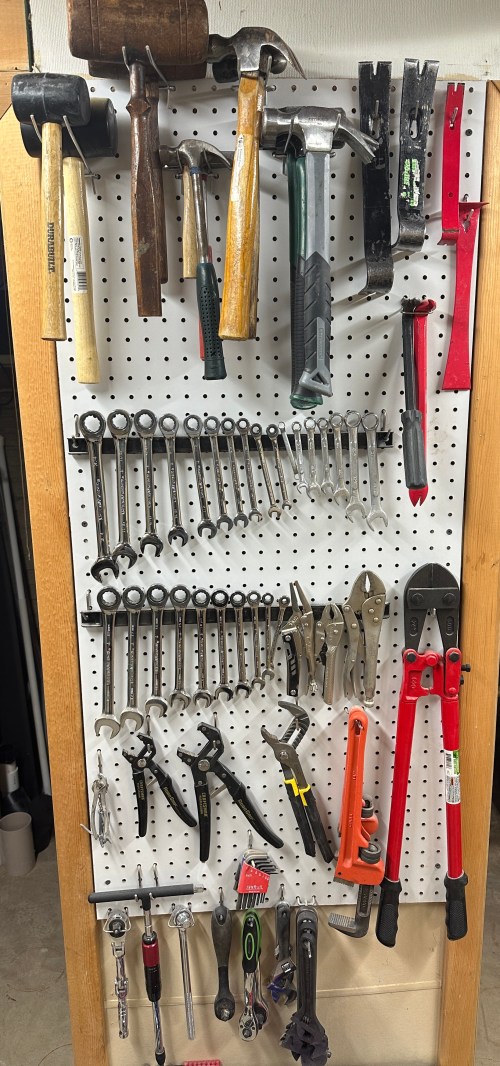
I’ve had a bunch of pegboards in my shop for over five years, and I’ve figured out what works and what doesn’t. I love that a lot of my tools are in direct view and can quickly be accessed. I didn’t love a few areas that I go to frequently though. The first wall I wanted to tackle looked like this.
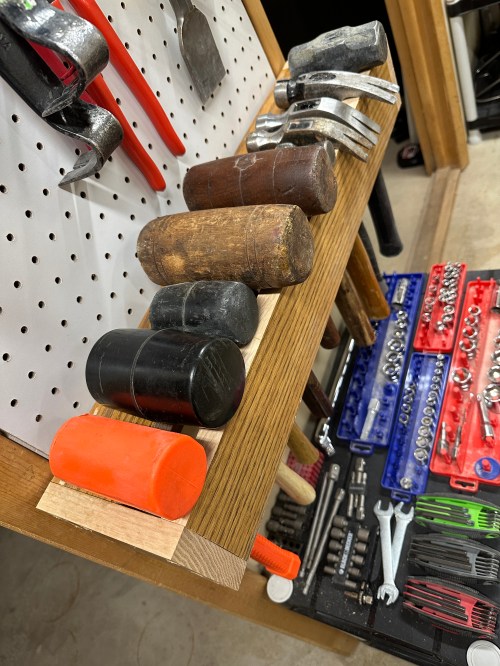
The main problem was the hammers. They’d become crowded and it was a pain to pull one out when it was second or third in line. I moved all of the other tools up on the wall and lined up my hammers on the assembly table.
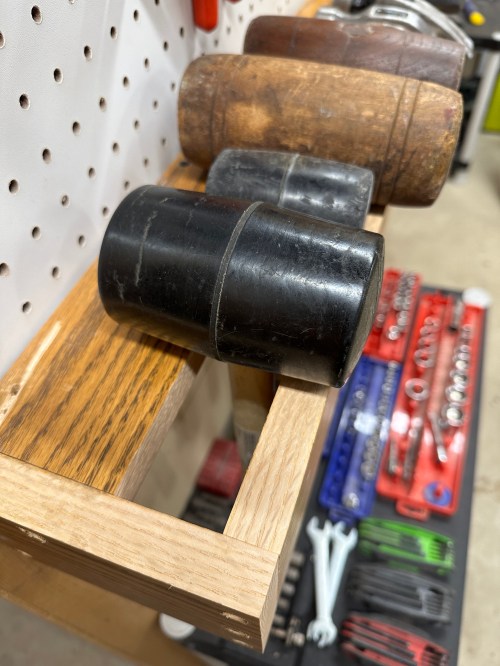
After taking measurements, I cut up oak pieces from my old kitchen light box. This storage shelf came together pretty quick and has room for even more hammers. Now I can quickly grab any hammer without disturbing the others.
Here’s the updated wall.
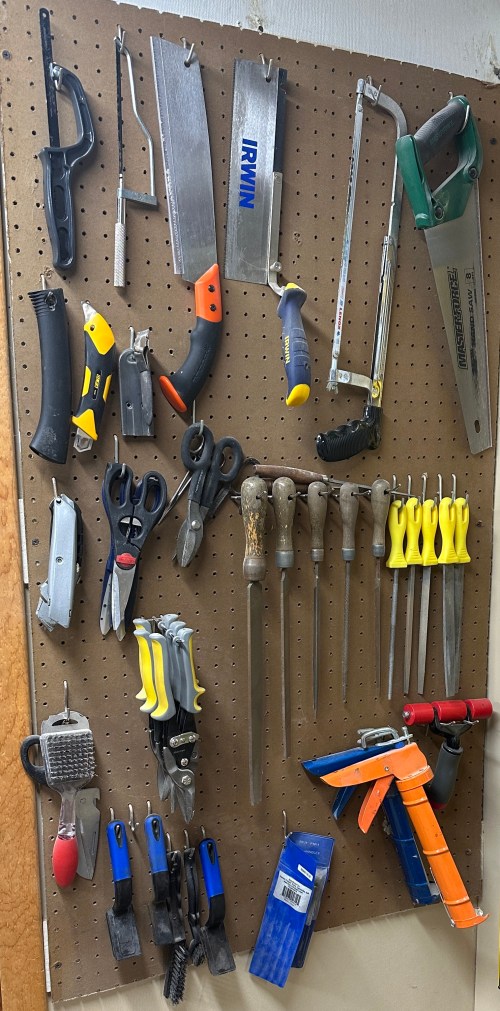
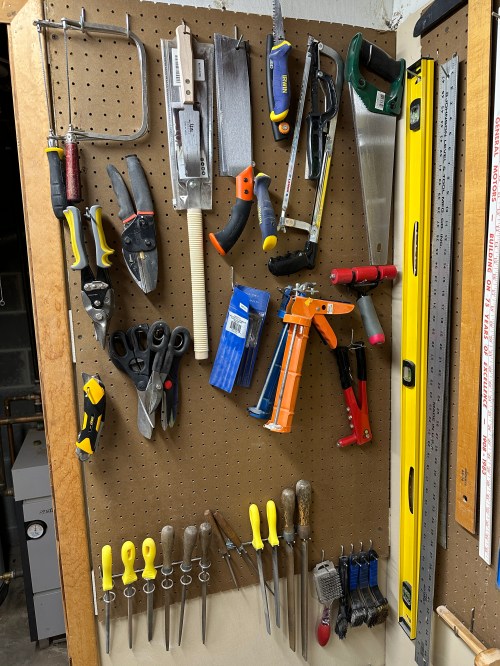
The next wall to the right was making poor use of space, especially since I don’t grab some of the saws very often. Take a look and see they were nearly occupying half of the wall. The files never worked well on those individual hooks either, which always pulled out of the wall.
By moving stuff around I was able to get several more saws, like my Japanese pull and coping, as well as other tools up on the wall.
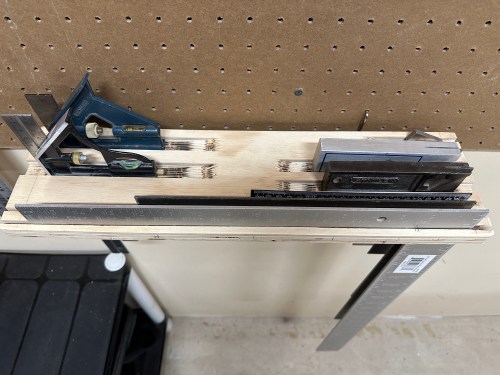
Over to the right again was tools used primarily for measuring and alignment. In February of 2018 I made a shelf for the squares, which has taken up way too much space. I really liked the grooves in that shelf, but the squares weren’t secure enough. Here’s how the wall looked before I touched it.
I reorganized everything else first and then made a new shelf that was longer so I could add slots in each groove to drop one of each square’s legs down.
Huge improvement and look how much extra space I have for more tools! I need to get myself a nice set of chisels.
Last up was the pegboard on my bench.
I’d been using four of the pegboard holders made for screwdrivers here and don’t care for them; the holes are too big and the spacing is too wide. All you need is scrap plywood with holes drilled in it, which allows you to run two deep and have plenty of expansion room. I also made a holder to store the wood carving set that had been unopened in a box buried on the bench for years.
So much better. Now I can tackle the reorganization of my shop closet.
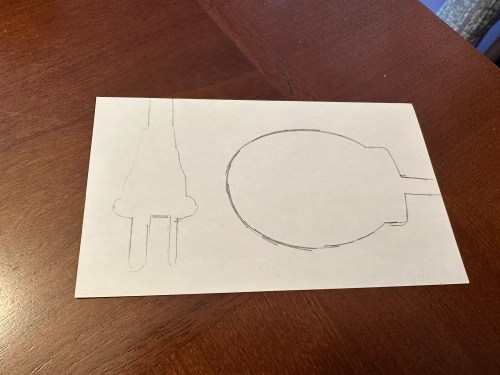
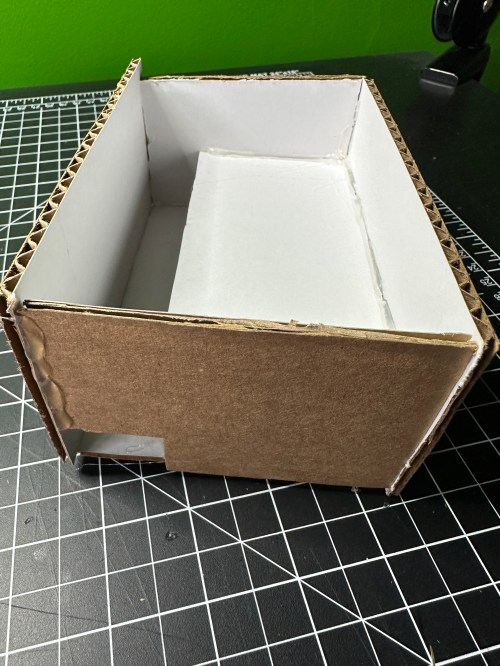
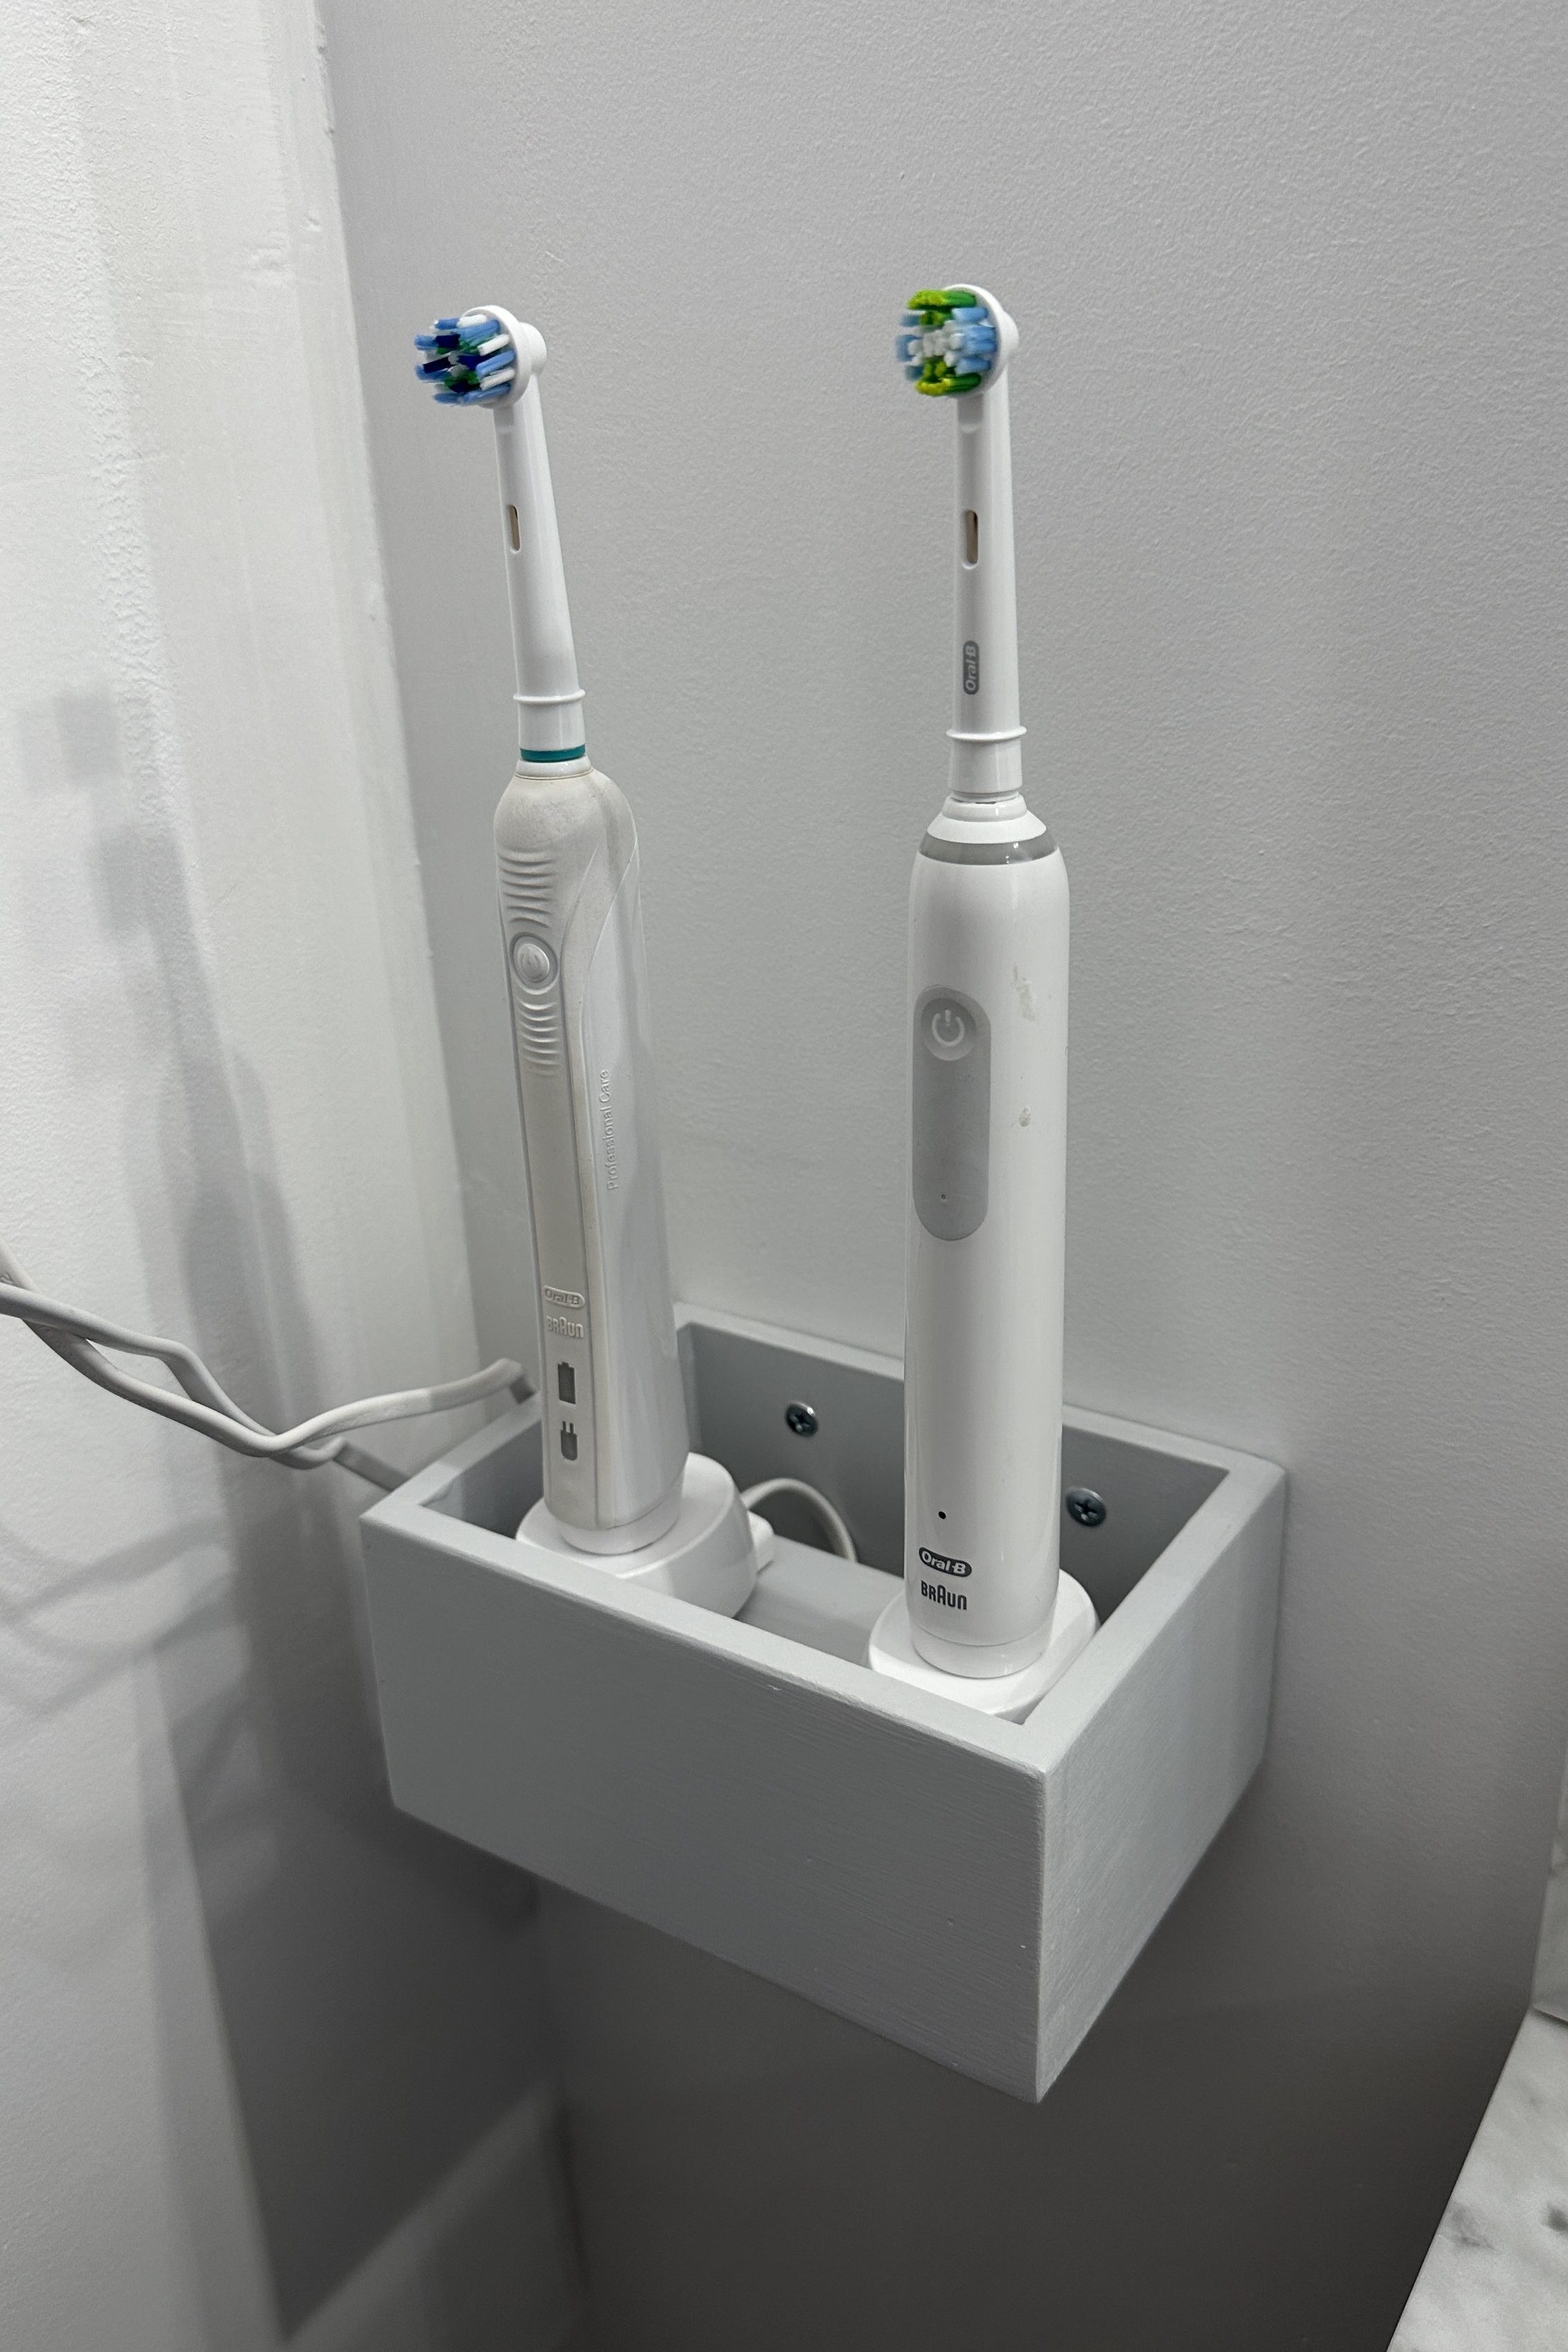
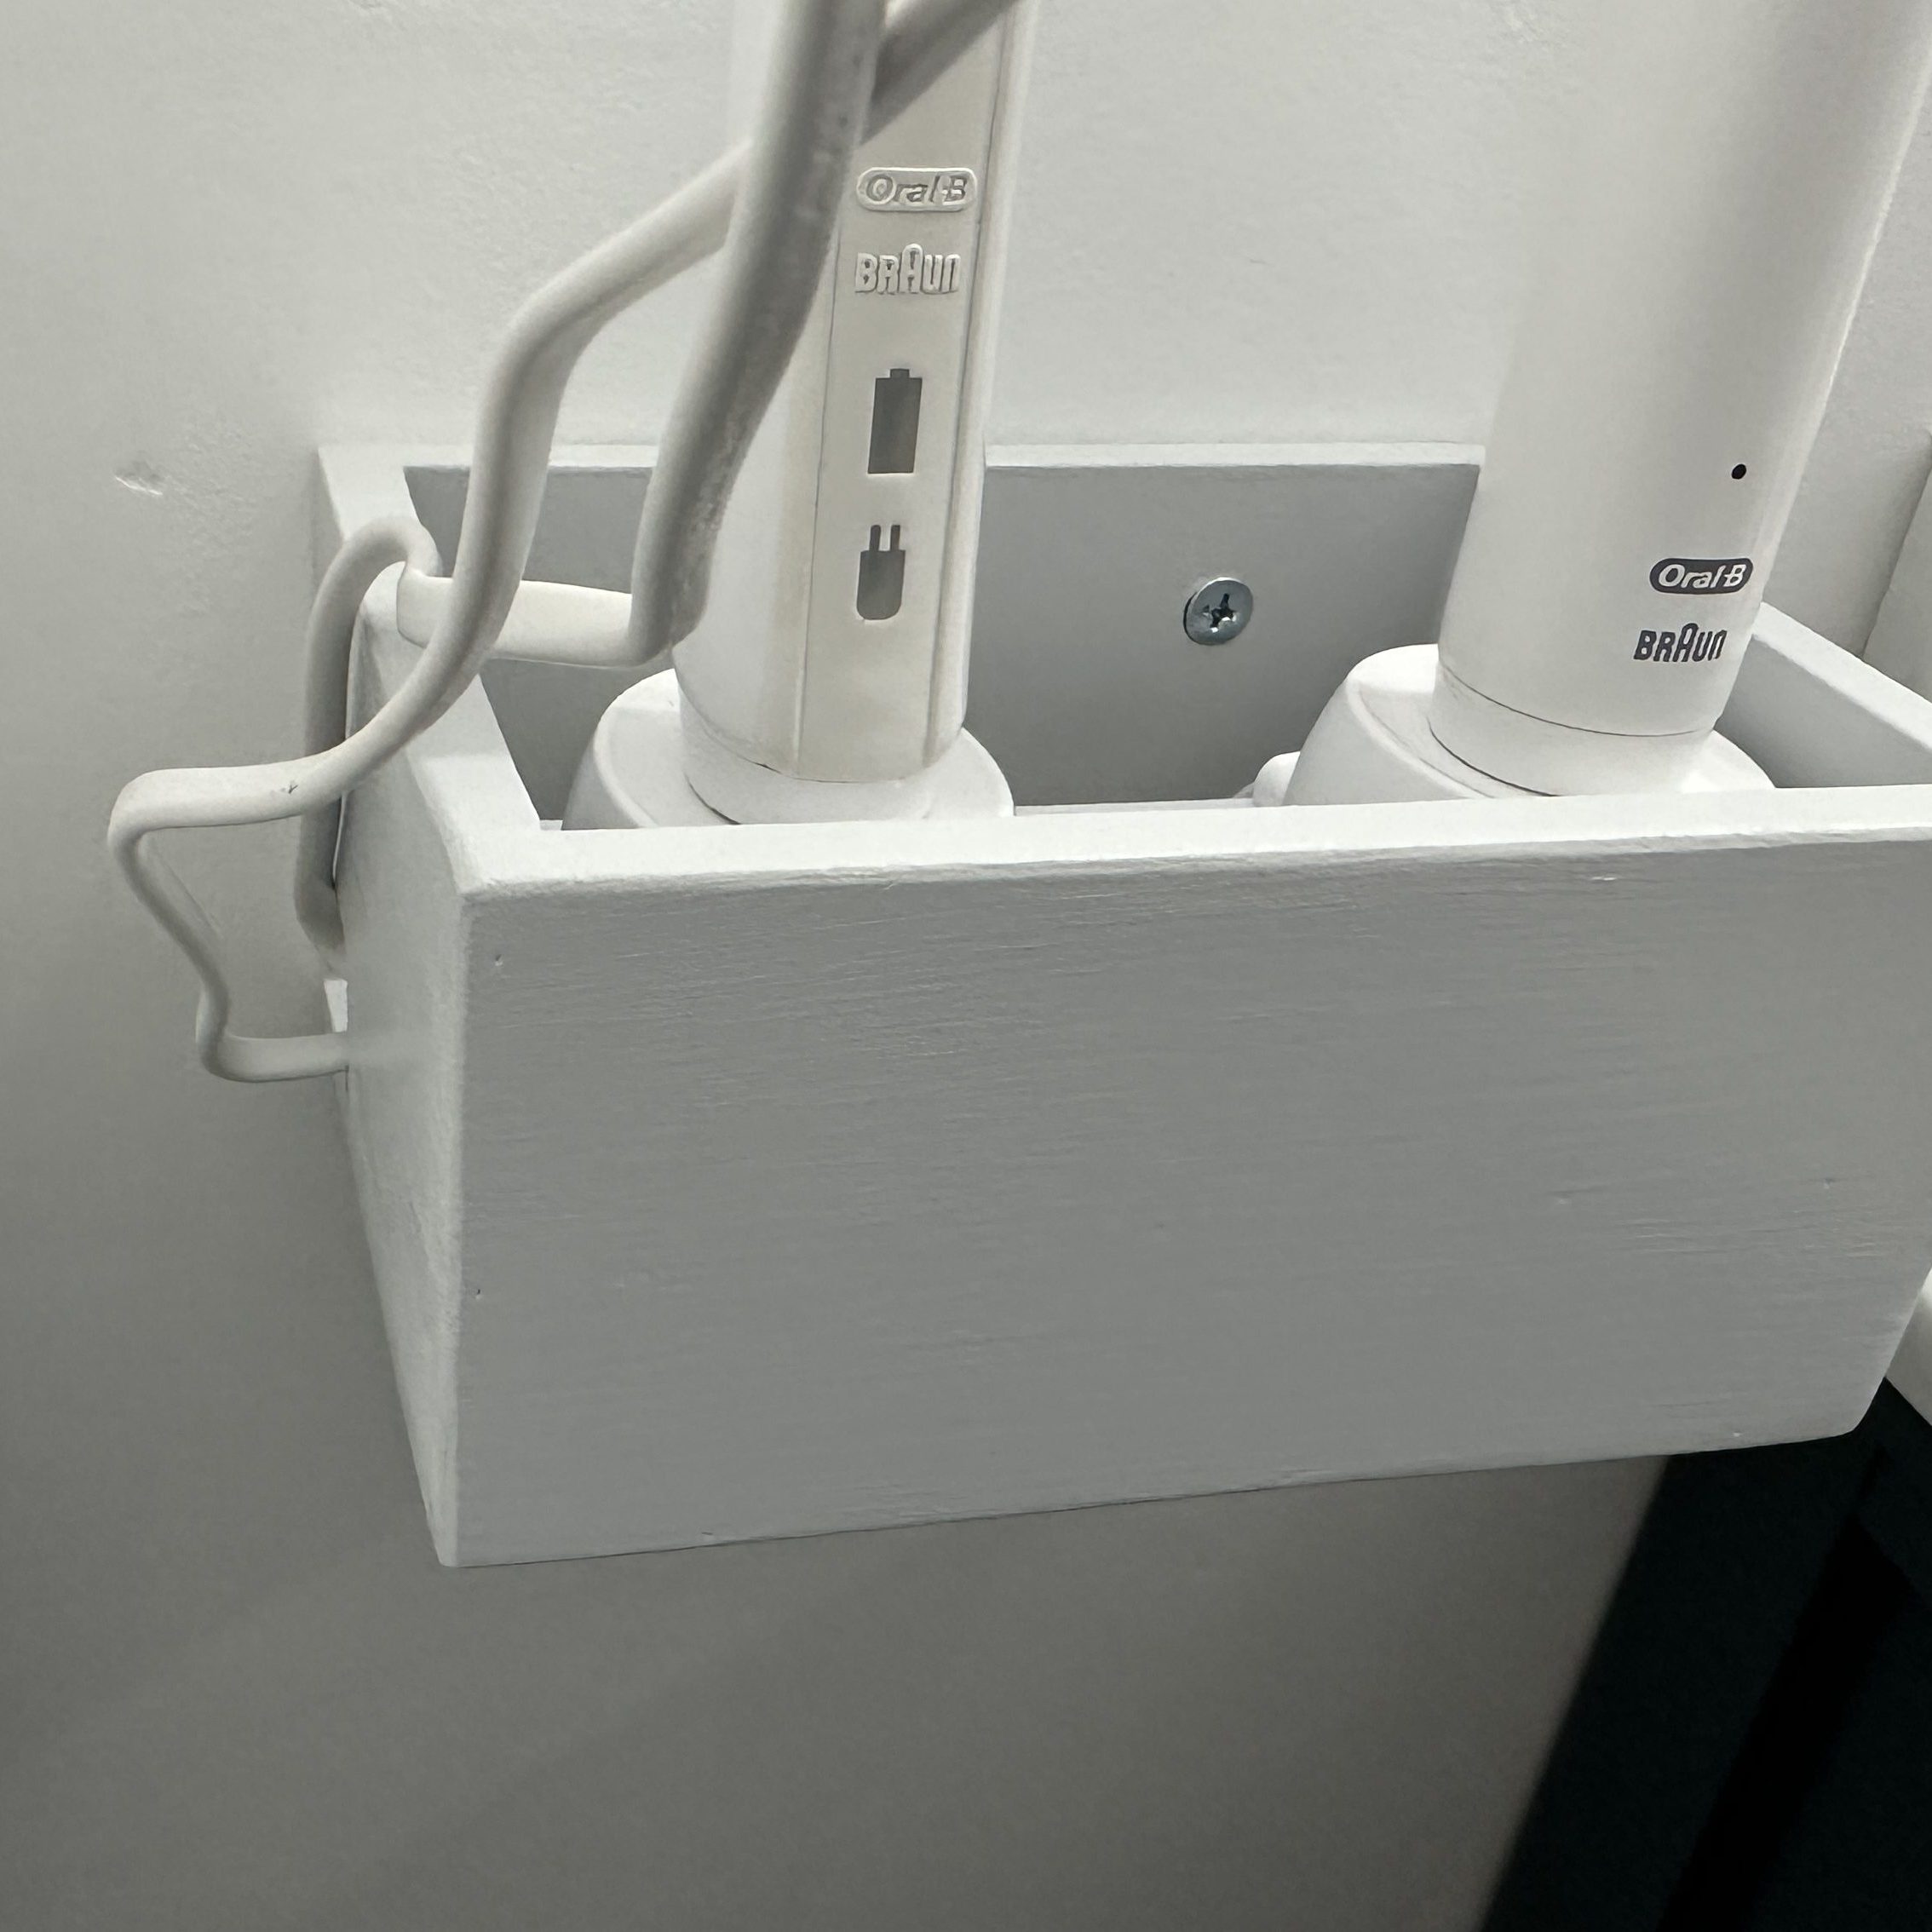
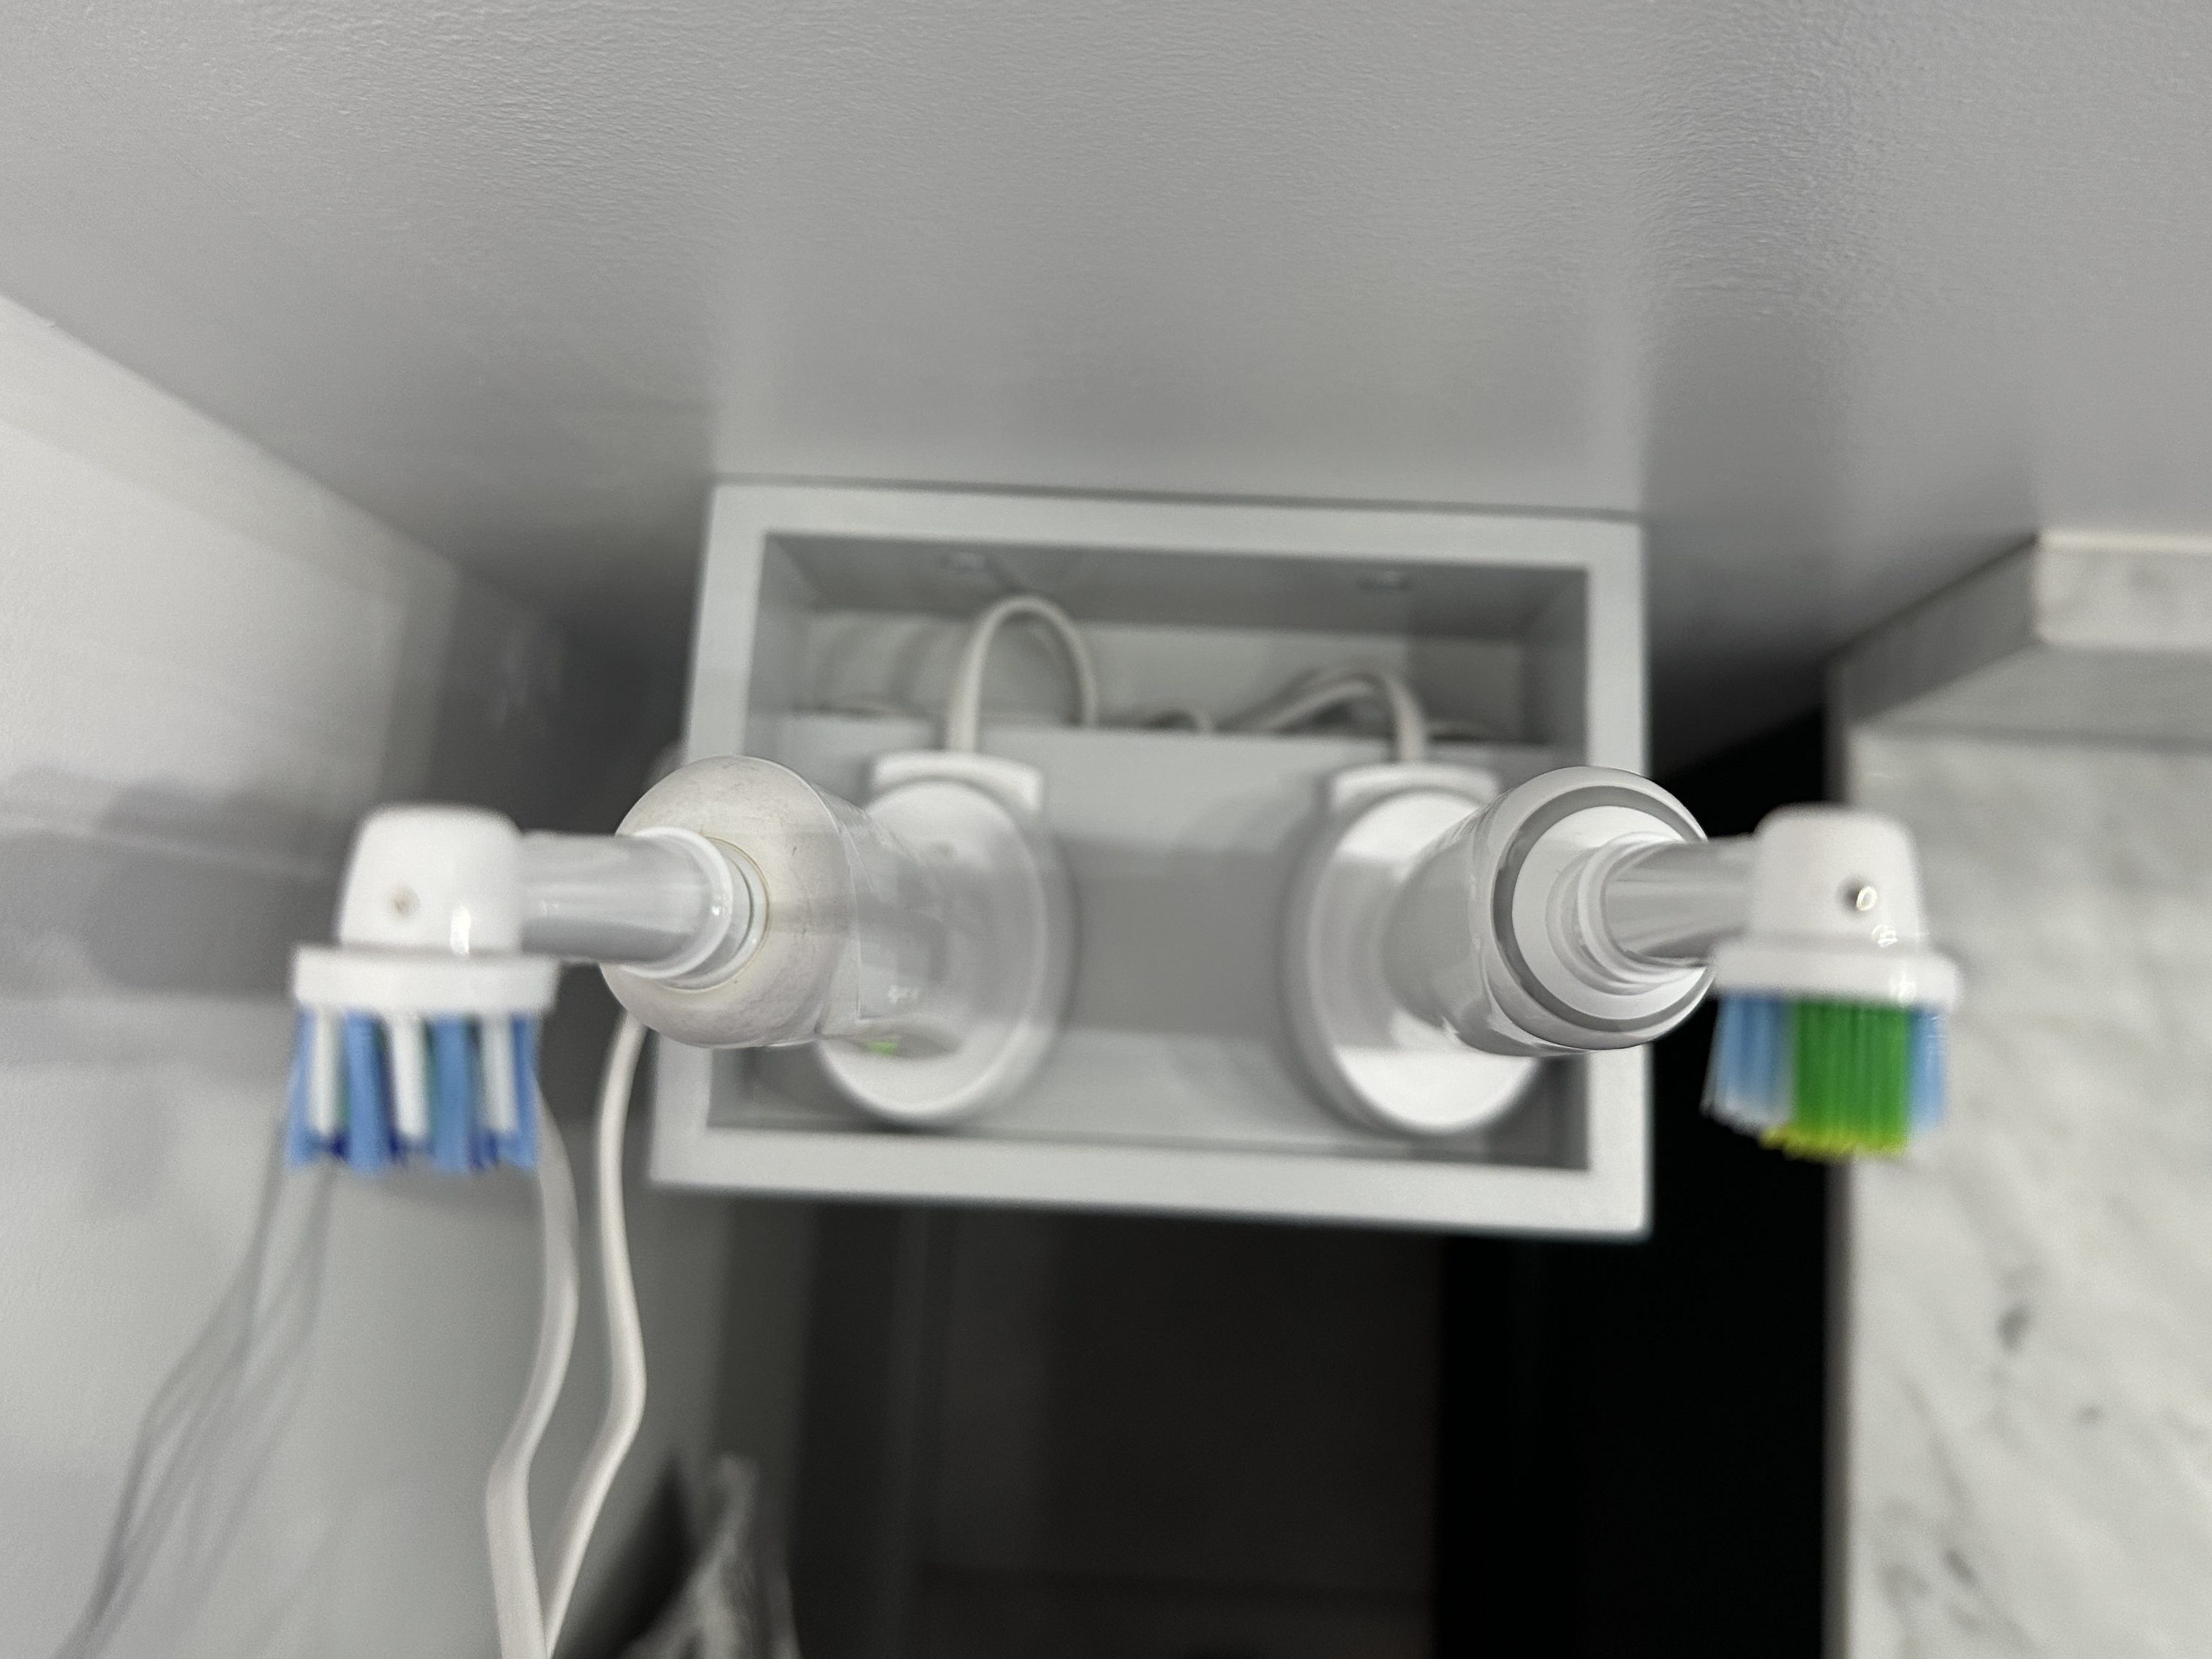
With the counter of our new vanity not extending to the wall where the outlet is, we wanted a dedicated spot for our electric toothbrushes. I outlined the base of one charger and then made a rough model with cardboard and hot glue.
After a successful test fit with the brushes, I moved over to wood and used all scraps since it was getting painted.
It was a simple build, a lot of fun, and definitely a functional one.
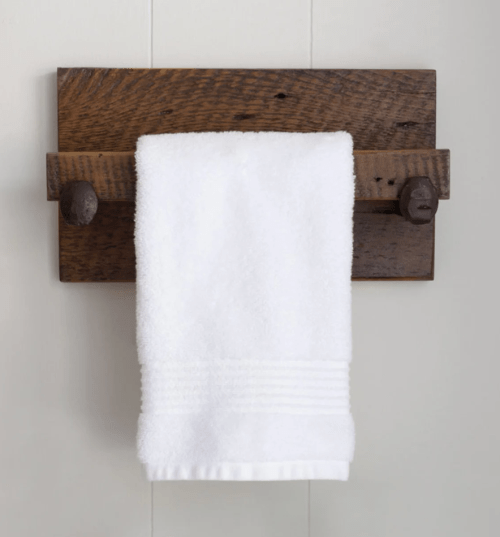
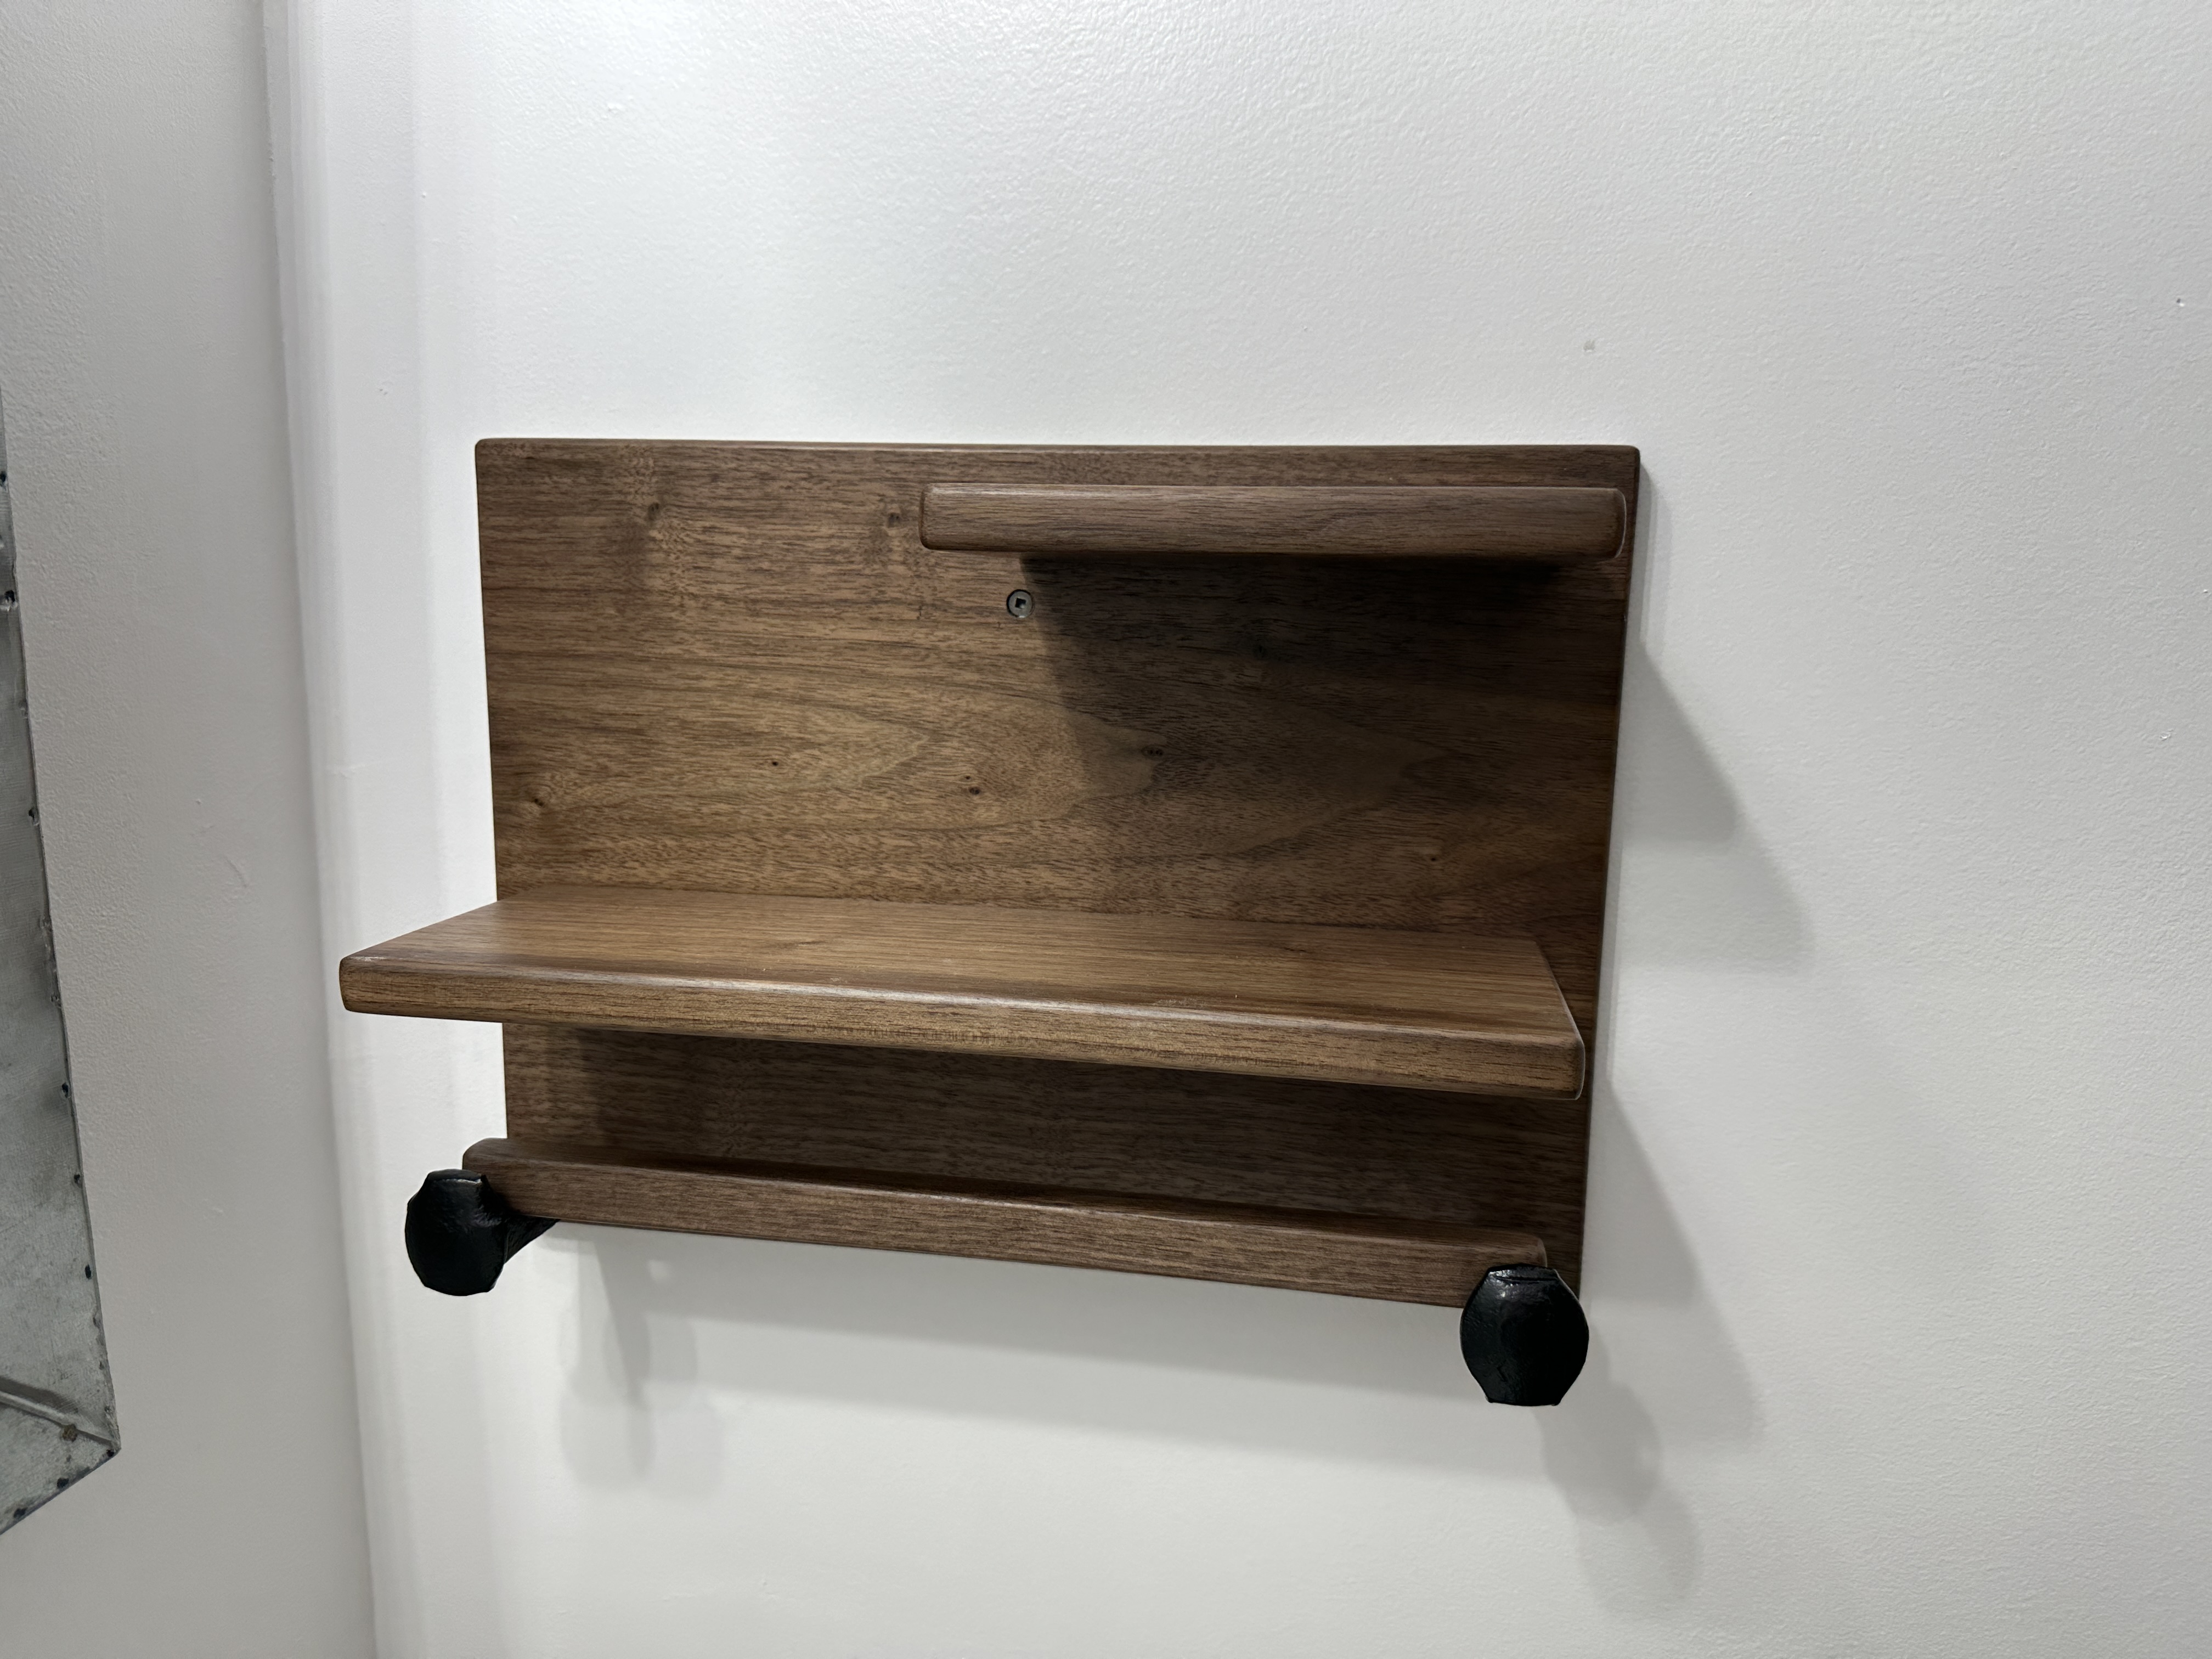
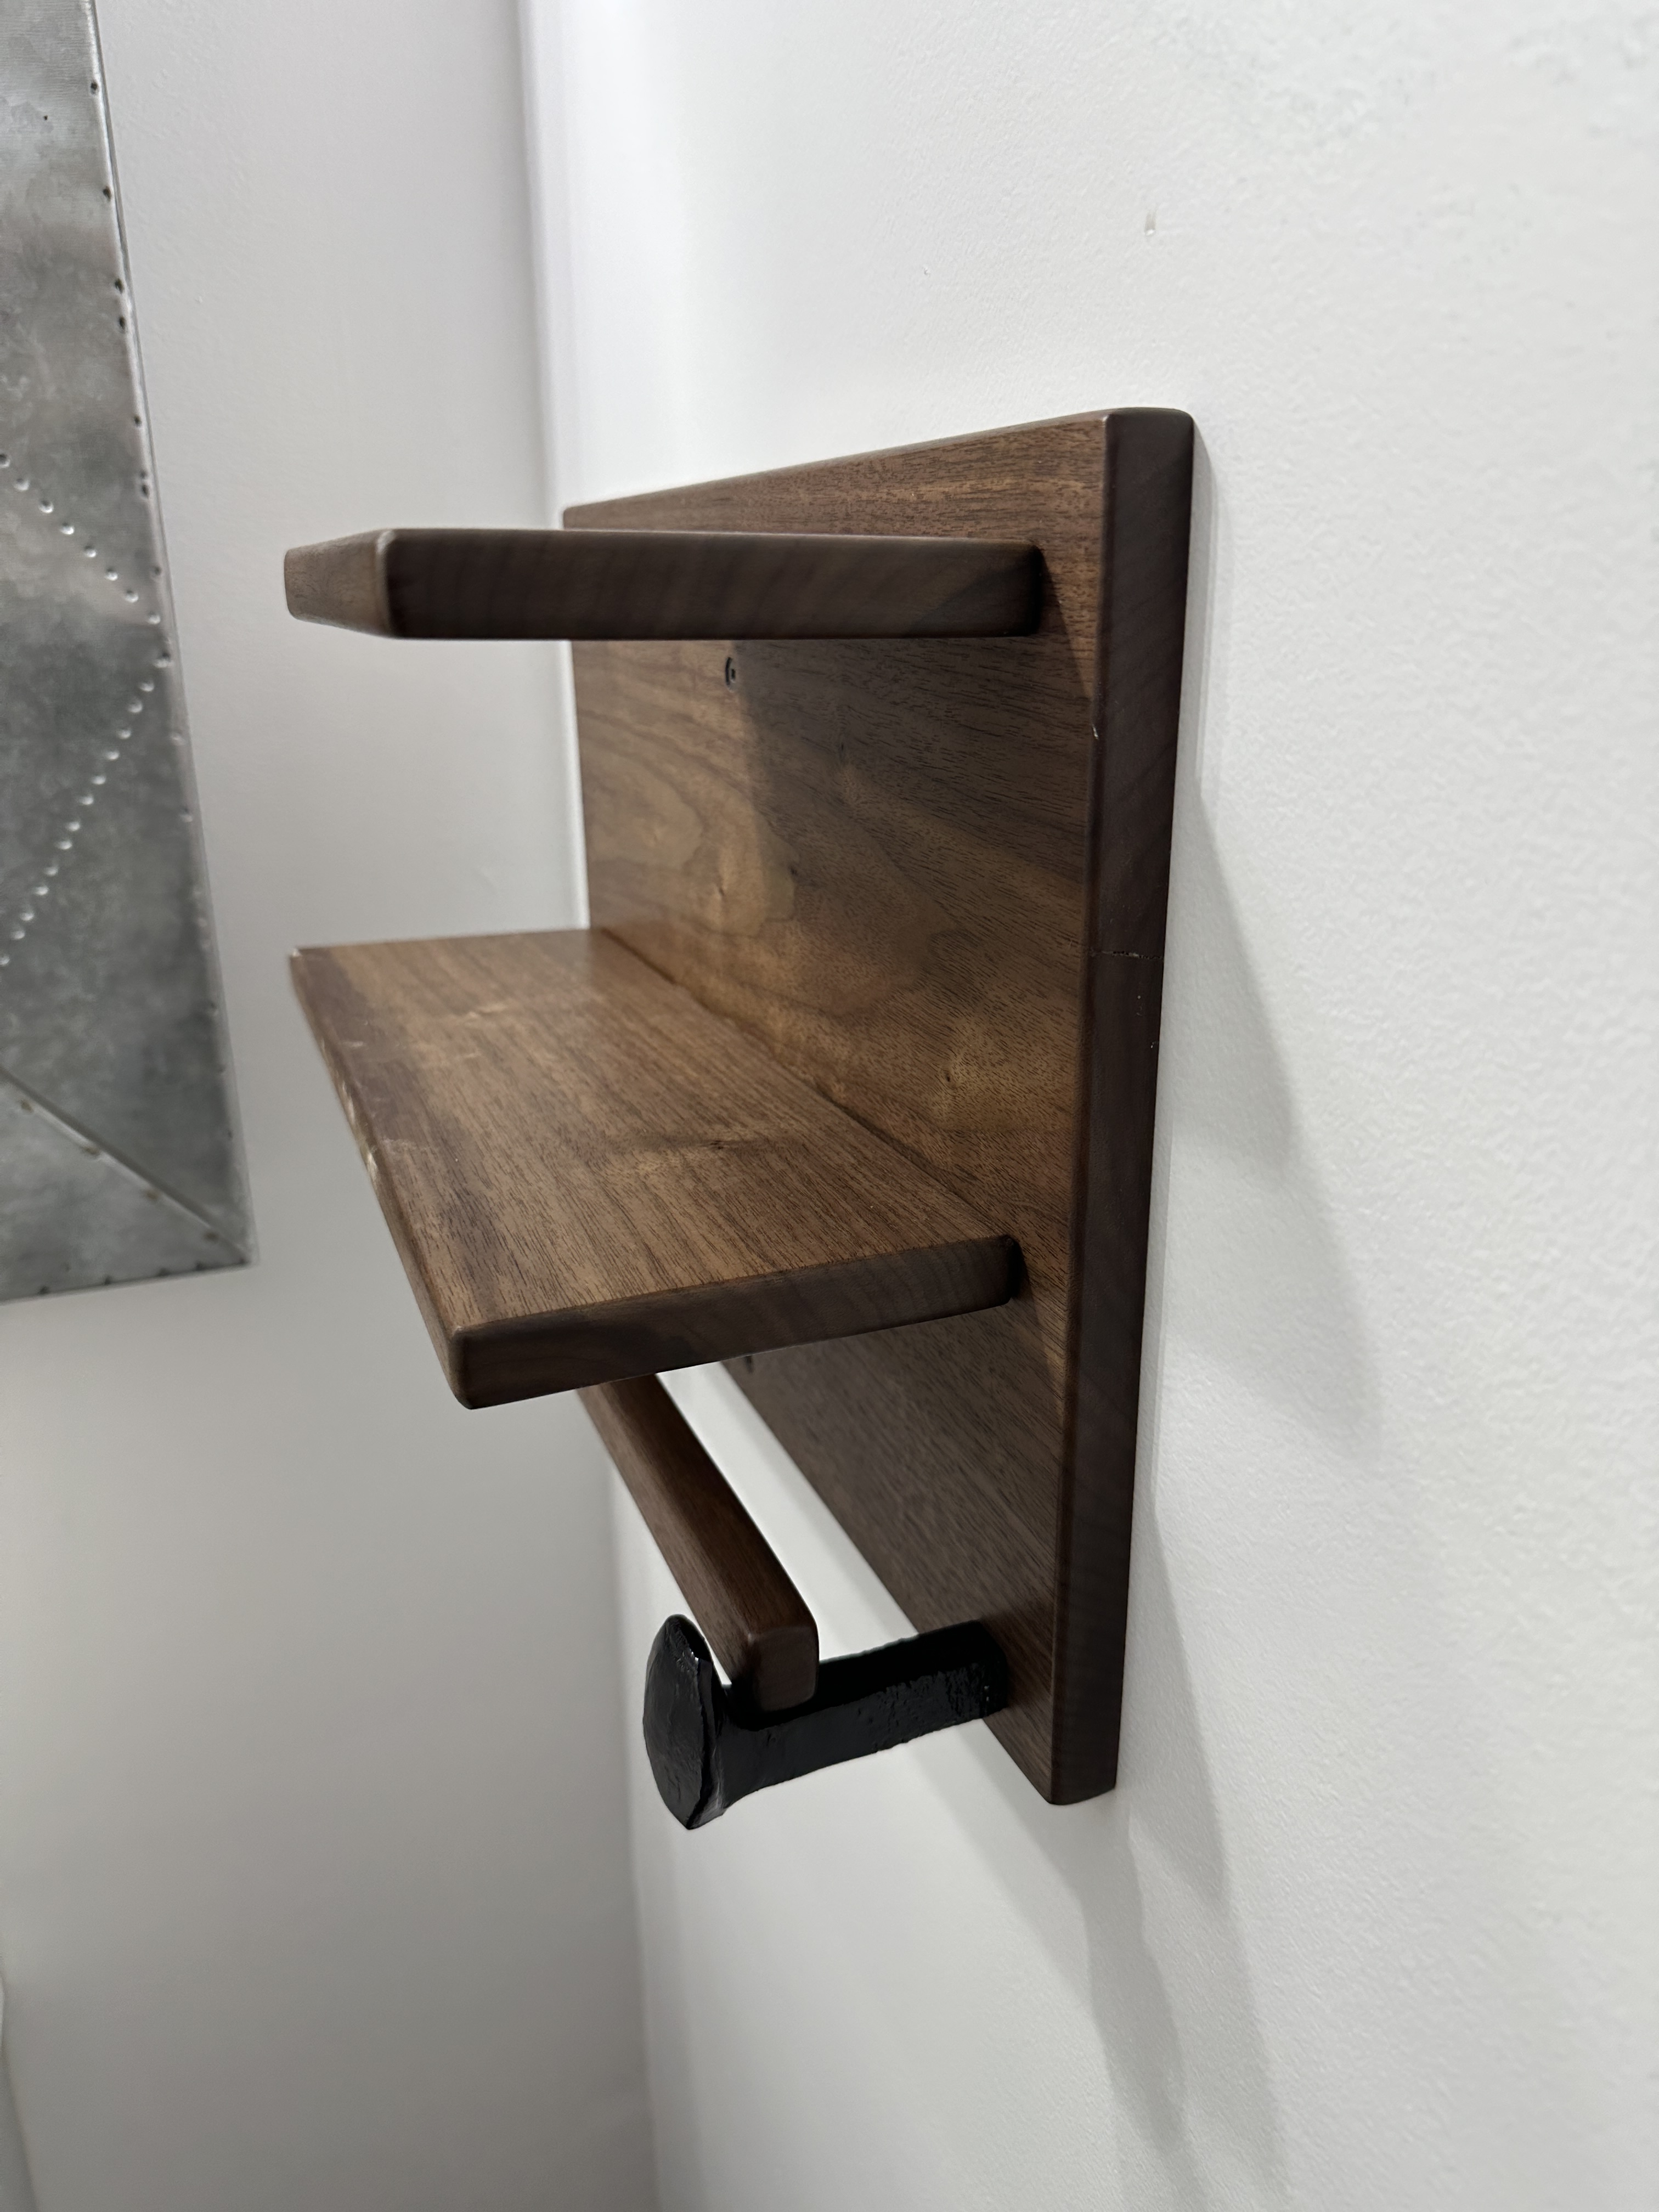
Last month we remodeled the small bathroom on our main floor and we’ve been living without some important things in the room, toilet paper and towel holders. The roll of TP has been sitting on the floor and a towel has been draped over the edge of the sink. Time to change that.
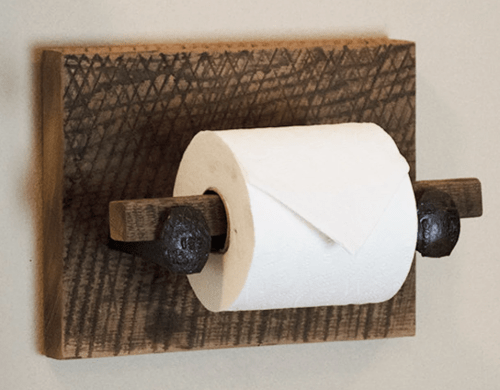
When I remodeled the living room, I bought some railroad spikes with the plan to incorporate them in to some designs. I didn’t use one. As we talked about ideas for the bathroom we thought it might be neat to use some of the spikes. Brandi found these examples on Pinterest for inspiration.
Of course I would make my own versions, especially since these cost $98 and $104 respectively! When I milled up the black walnut for the ladder, I did a second board to make these holders. To see the grain I had rubbed some water on the pieces.
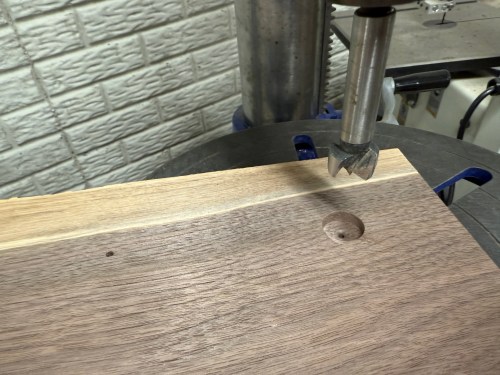
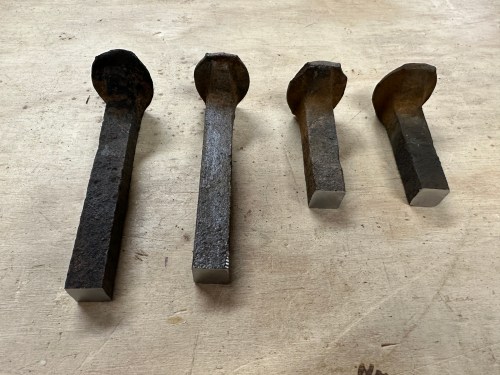
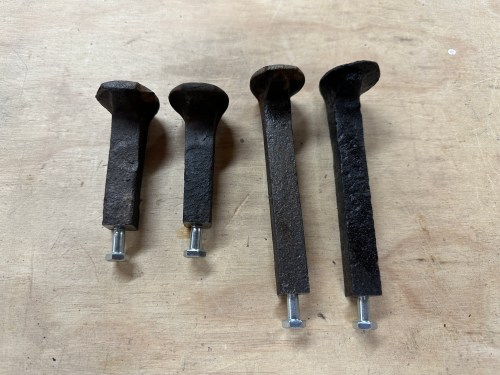
The big challenge was attaching the spikes to the wood. Since I like to learn new skills I wanted to see if I could bolt them together. I cut the spikes to length and sanded the ends square-ish. Then it was over to the drill press to put a 13/64 hole in each end. Things weren’t perfectly straight, but the spikes are far from straight anyway, so it was fine. I finally got to use the tap wrench I received for Christmas a few years ago, which was just big enough to fit a 1/4-20 tap. It worked and I was so excited!
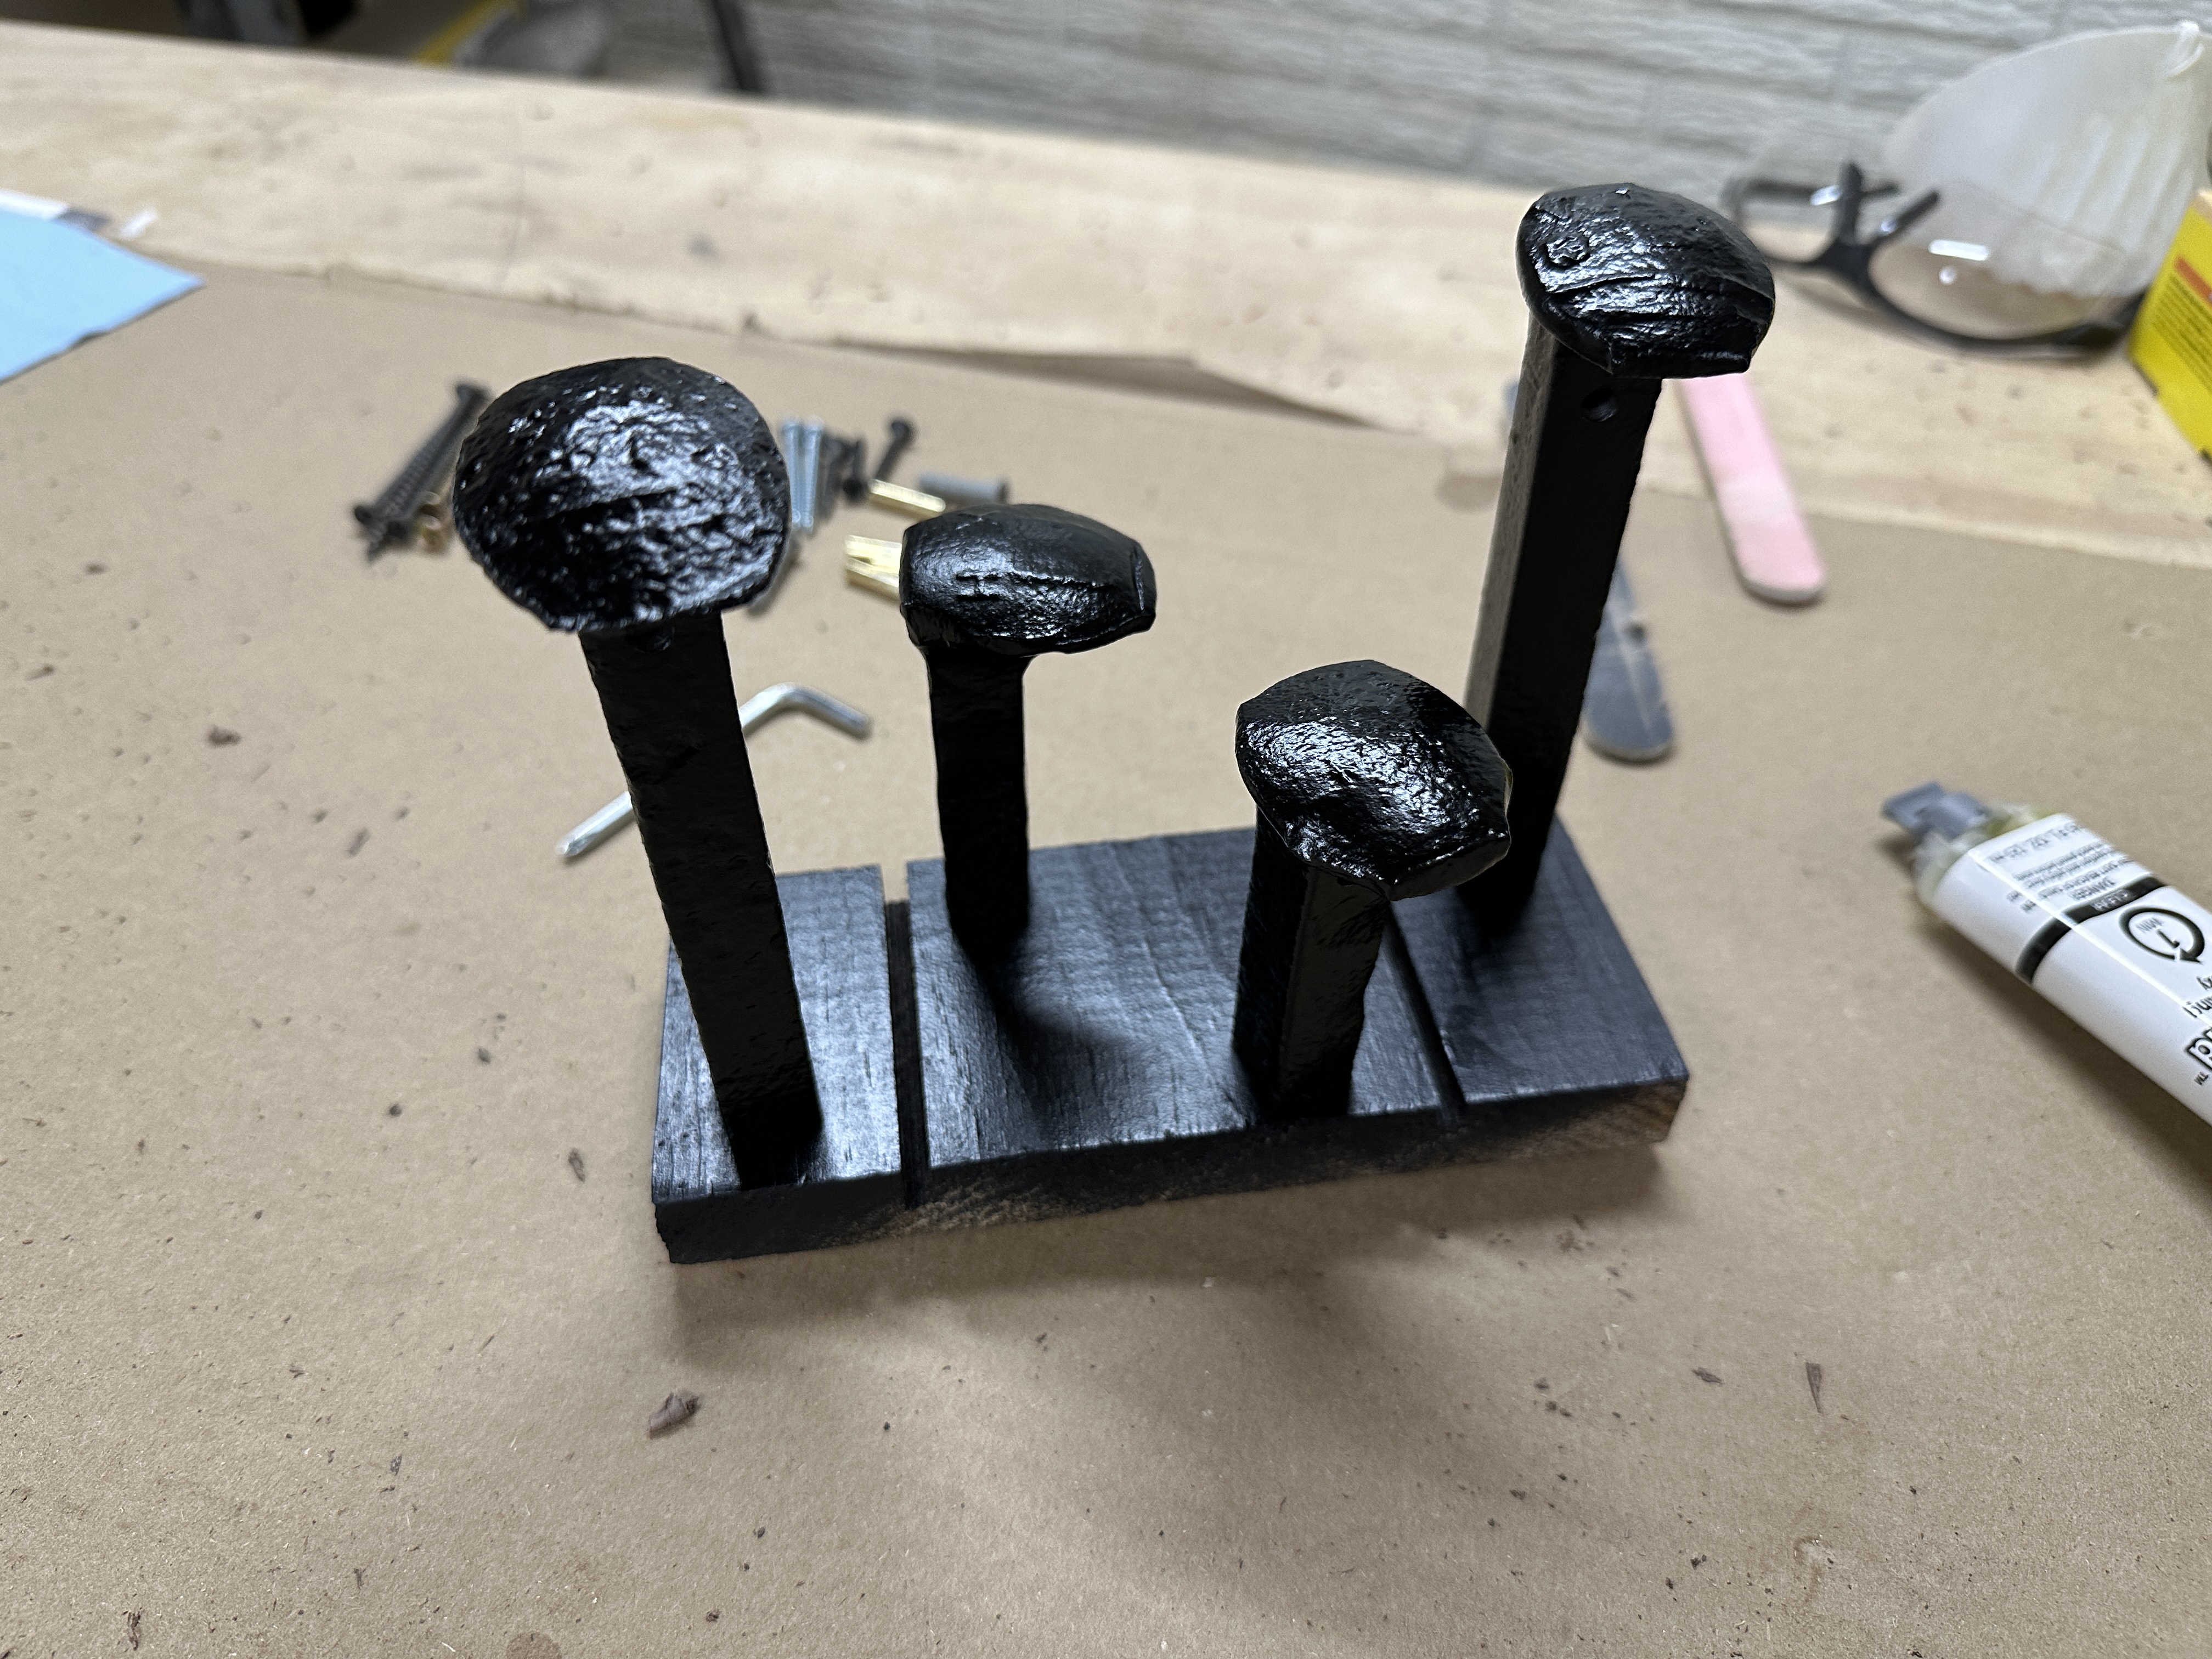
I used different bolts with washers in the final assembly but didn’t get a picture. After cleaning them up the spikes with a wire wheel on a bench grinder, I drilled some holes in a scrap piece of wood, mounted them, and spray painted them black.
I drilled a hole near the heads where I used epoxy to put in a pin which would keep the rail in place. I didn’t get a picture of this, but I do have one at the end of the post to show how the TP holder works. Meanwhile, I had cut all of my pieces of walnut, drilled holes for mounting and assembly, rounded the edges on my router table, and sanded through the grits.
To keep the finishing stage simple I sprayed on 4 coats of lacquer from a rattle can and applied a coat of Linseed Oil & Beeswax Polish.
I needed a few easy things to tackle over the weekend and since we’ll be losing a little bit of storage space (though gaining some new space) as part of the kitchen remodel, I wanted to make better use of wasted space in some areas.
First up was a small cabinet between the range and dishwasher where we store our baking sheets, cutting boards, and other similar size items. The top 1/3 or so of it was dead space, so I added a couple of shelves made from scrap wood.
Now we have a spot for aluminum foil, wax paper, plastic wrap, parchment paper, and ziplock bags. This freed up two entire drawers in the island.
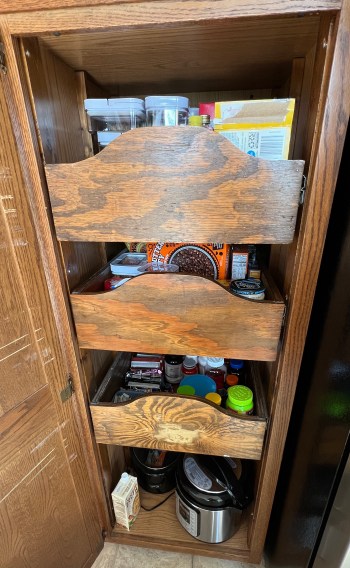
The second task has been on my ideas list for at least six months. The pantry cabinet in our kitchen had three large drawers, spaced way too far apart. There simply are not that many tall food items, at least not the stuff we buy.
With the cabinet being so tall it’s hard to get a feel for the space in this picture, but you can see the top drawer, with our tallest items, had quite a bit of wasted space above it. I decided to leave it where it was for flexibility and because it’s already hard to see what’s in there. I moved the second drawer up 2-1/4 inches and the third drawer up 7-1/8 inches.
Unfortunately it was too wide, so I had to take it apart and make it narrower. I decided to make it shorter as well to match the others. By chance it was already the same depth.
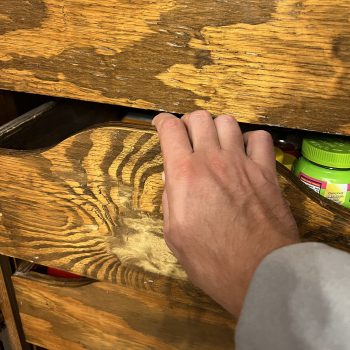
Something I wasn’t thinking about when I moved the drawers was the areas meant to be handles were now really close to the bottom of the drawer above, begging for smashed fingers and an F-bomb.
I always thought it was an odd design for a drawer pull to be honest. I made a template for the drawer fronts and cut the other drawers to match. I also used a roundover bit on those front edges.
I measured out the placement, installed the drawer slides, and slid in the “new” drawer. Who doesn’t love more storage space? Especially for food!
I’ll paint the drawer fronts when all of the cupboards get painted. A third bonus improvement was a quick fix for this utensils drawer, which has been busted for years. I’m surprised it hadn’t fallen apart completely.
I cut a piece of wood for the corner, added glue and brad nails, and called it good.
All fairly quick and easy projects that improved our kitchen organization.
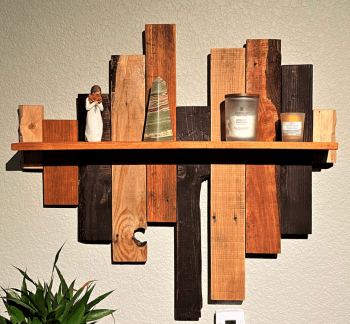
When I first had the idea to do pallet wood walls in the living room, I wanted to create some type of art piece for the wall opposite the TV. I stumbled across this shelf on Etsy when searching for pallet wood art.
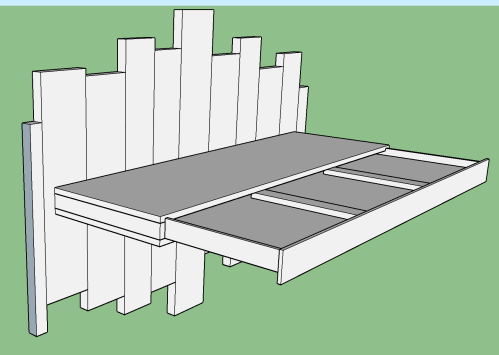
After getting rid of my old recliner and lamp (as part of the living room updates) I quickly realized a light was needed for the new loveseat. I thought it would be cool to integrate a light in to my shelf and as a bonus it would be hidden. It would be a fun challenge to work on. Here are the last models I had mocked up in SketchUp before starting on the build.
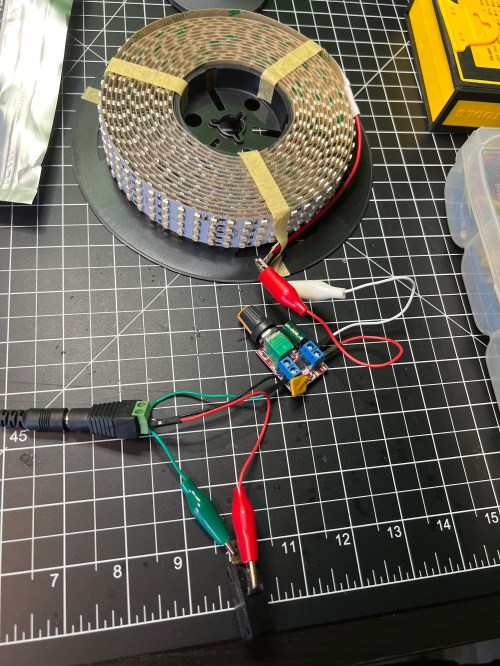
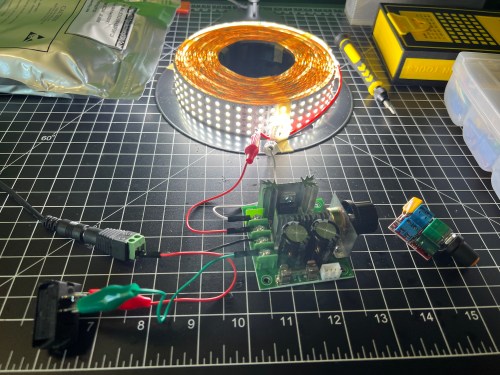
This initial testing was done using a very simple limit switch, but those are only rated for very low currents and would quickly burn up with the requirements of the LEDs. It took some searching, but I finally found a limit switch that said it could handle 10 Amps of DC. The big controller board for the dimmer and this much bigger limit switch introduced some new challenges to my build.
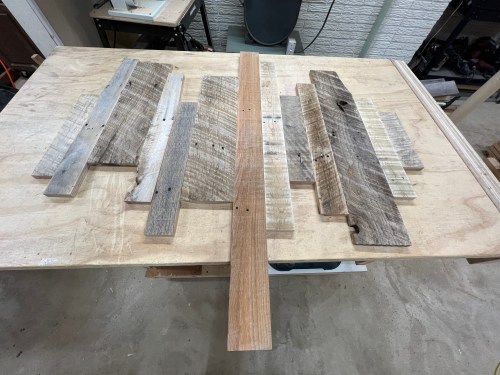
We picked through the wood leftover from the walls to find an assortment of pieces to use for the backer.
I played around with the arrangement, shortened the length of some boards, and ran everything through the planer to get an even thickness. Then I stained five of the boards and glued the pieces together in several steps.
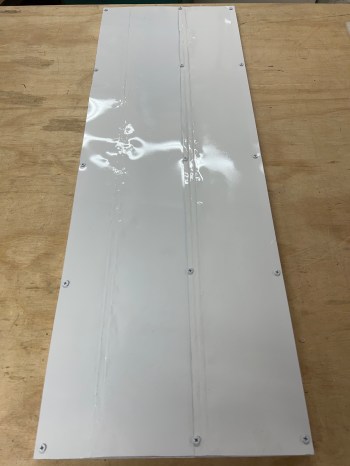
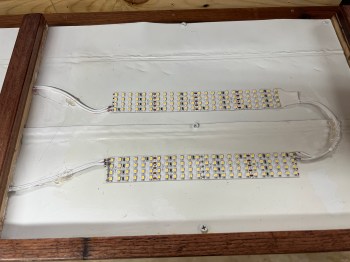
To make the pull-out part of the shelf I started with a piece of plywood. I cut up scrap sheet metal I’d saved from the drop ceiling light fixtures I removed from my shop several years ago. This would be used behind the LEDs so any excessive heat they produced wouldn’t burn in to the plywood or create a fire hazard. I screwed the metal to the plywood and used some white spray paint on it.
I cut scraps of wood for sides and a divider. Then I cut some slots through them, using the table saw, where the light covers would slide in. I also made a face for this piece, leaving it oversized for now. I attached the sides and front face with glue and pocket hole screws from what will be the top side.
I bought two 10-inch full extension drawer slides and attached them to the top. I filled the pocket holes with plugs and wood filler. Sanding would be done later.
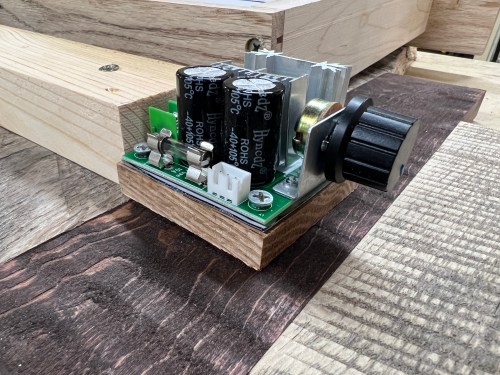
Perhaps the most nerve-wracking step of the project was cutting and positioning a scrap piece of 2×4 to the backer boards. This will hold everything together and allow me to attach the surrounding pieces of the shelf. Thankfully I remembered to cut one end short before glueing and screwing (from both sides) it in place. This is where the dimmer knob and board went. I cut a scrap piece of wood (later replaced with thinner plywood) to prop it up a bit so the knob would be easier to handle.
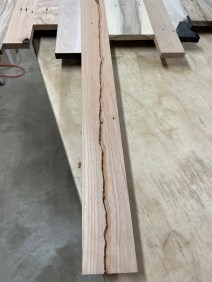
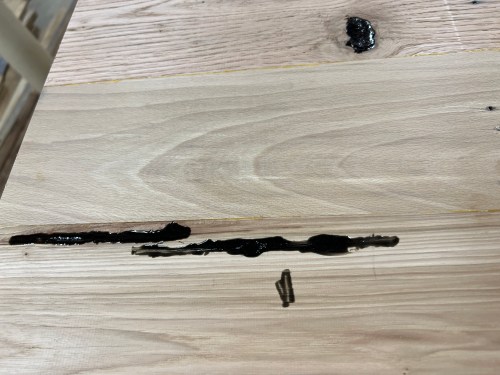
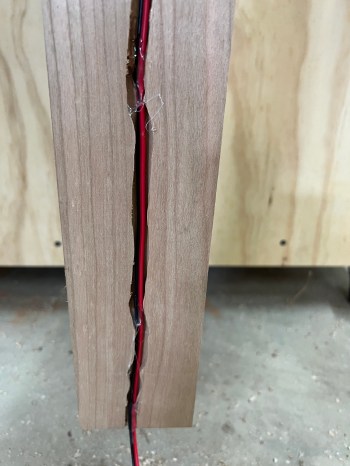
I put a straight bit in my trim router and cut a channel down the back of the longest backer board. This will be where the power cable runs down and behind the loveseat. It’ll never be seen, so I wasn’t concerned with how it looks.
Next I milled up some boards and glued them to make the top and bottom of the shelf. I tinted clear epoxy with black paint and filled in some holes. I also milled and cut a couple of pieces for the sides of the shelf.
I trimmed all of those to the sizes I’d need. Then I cut rabbets in the sides so the edges of the top and bottom wouldn’t be seen and there would be more support. To fit properly around the dimmer switch I had to notch out some areas and drill a hole for the knob shaft.
I was able to do a dry fit and then had to make a bunch of adjustments to make everything fit better. After a shitload of sanding I stained one coat of Red Mahogany.
The next morning I was able to glue and pin nail the bottom and left side to the backer. The top and right will be screwed in place in case I need to take things apart to troubleshoot or replace the electronics.
After giving the stain several days I masked off the dimmer board and used my paint sprayer to apply four coats of water-based poly.
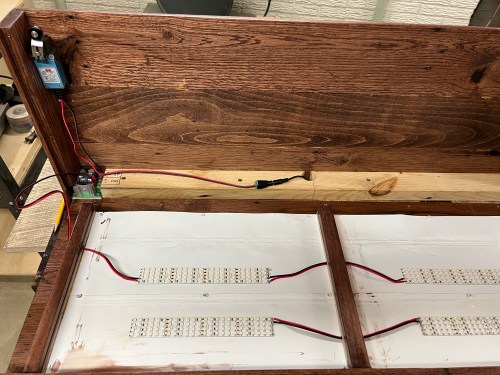
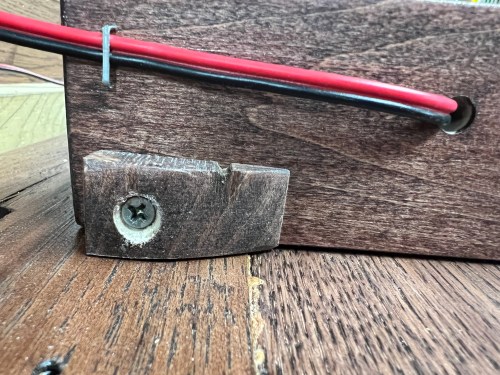
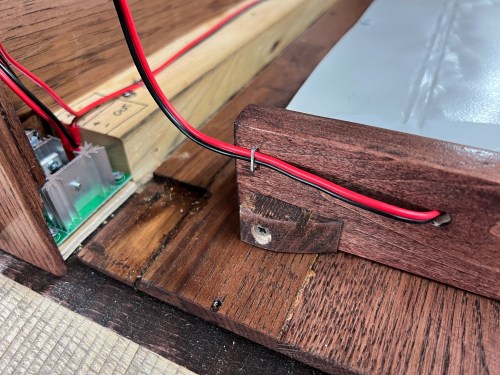
The next day I put in the LEDs and switch, wiring everything up. I had to make one more piece of wood that would trigger the switch when the “drawer” was pulled out.
I painted the wires white. A bit of hot glue was used to keep them in place and provide strain relief. I also used hot glue down the back side to hold the wire in the groove.
The final step was to figure out where to cut in keyhole slots.
This turned out to be a bad idea. The shelf was just too heavy. So I drilled all the way through the cross beam and drove two long lag screws through and in to the studs.
Here’s a night comparison which shows how bright the LEDs can be.
This video shows everything in action.
This project ended up being a lot more work than I expected. I’m really happy with the results though and we now have a one-of-a-kind piece in our living room.
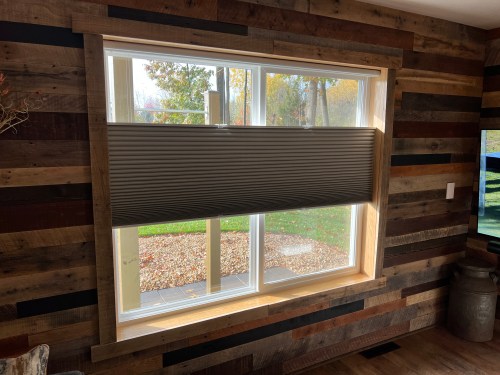
We got a blackout top down bottom up shade made from SelectBlinds for the window, which came in over the weekend. They’re really easy to install. Now the living room is complete and I can focus on the kitchen remodel.
We bought an old milk can at an antique mall for the corner of the room too.
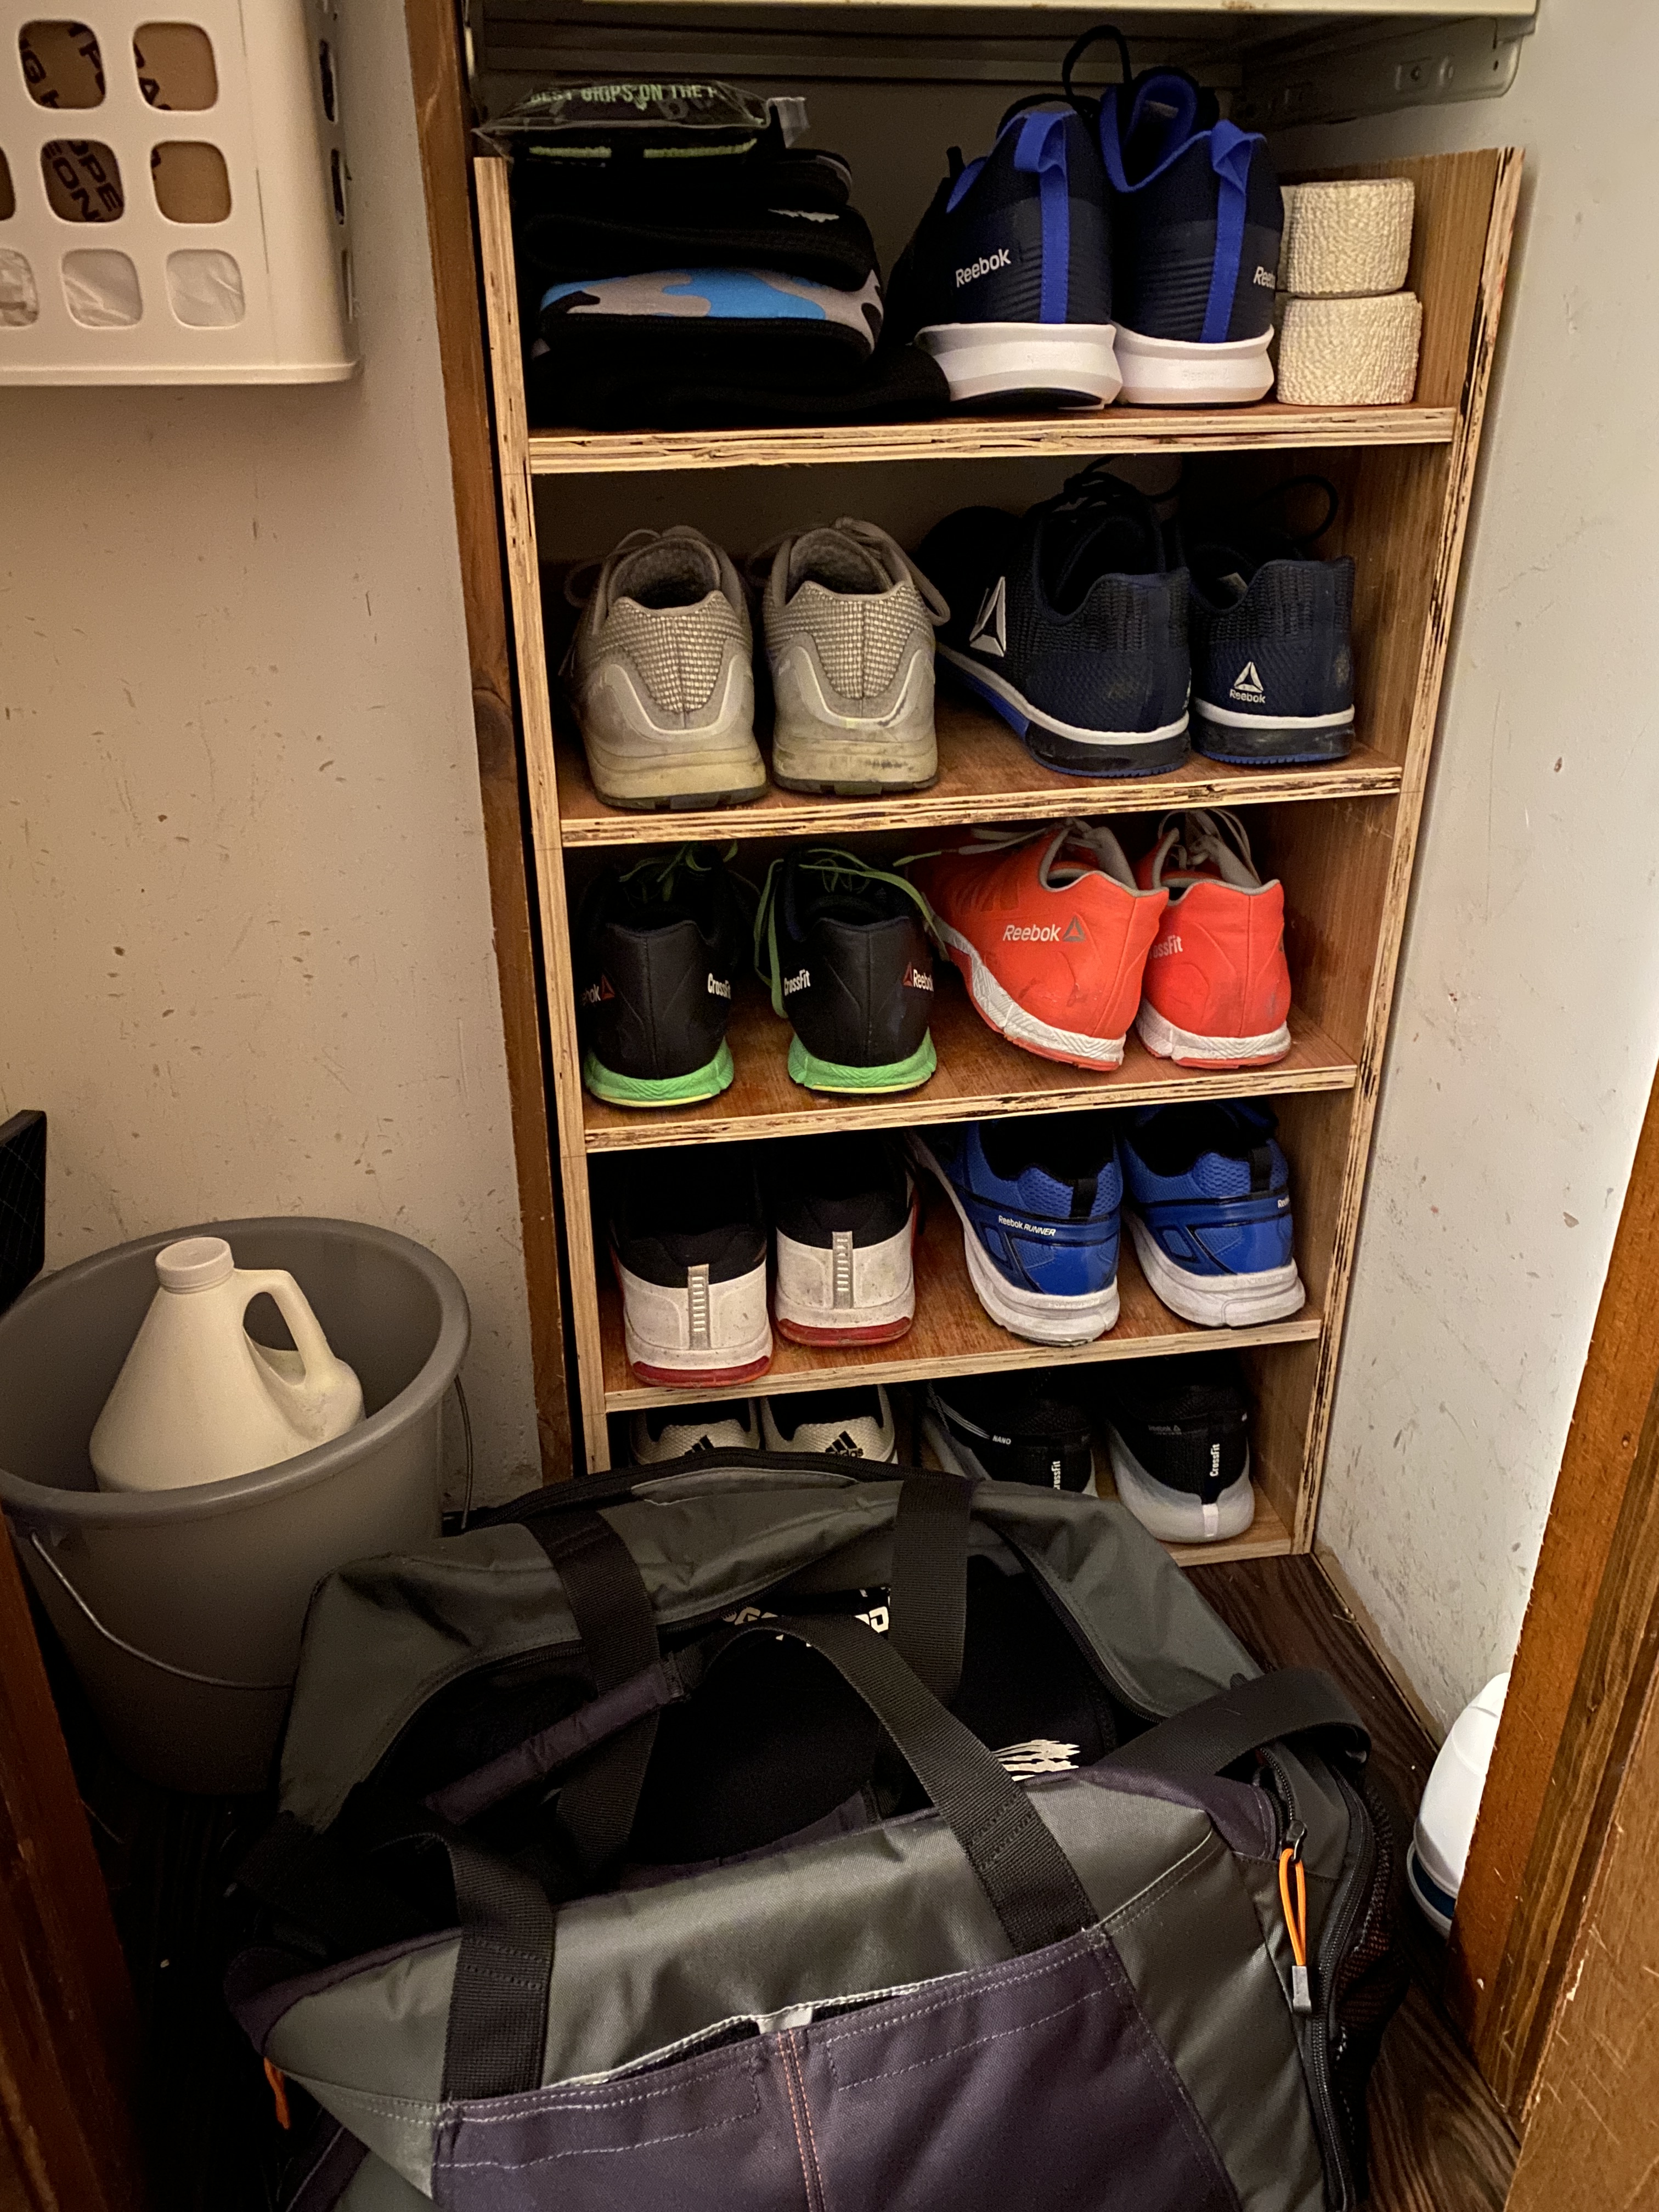
A couple of years ago I put this cheap shoe rack in my broom closet by the door out to the garage. It was out of the way and a quick place to grab my bag and shoes when I headed to the gym.
The rack obviously didn’t fit the space, I couldn’t see the shoes, and it was hard to grab a pair if they were not on the outside. This had been bugging me for years.
Today I set out to make something simple to fit the space. Since it’s a broom closet and I didn’t care what it looked like, I used beat up plywood. Turned out great and works exactly as I had hoped.