Time to finish this table. While part 1 and part 2 were quite involved, the rest was all about drawers. I needed to make use of the rest of the space inside the table.
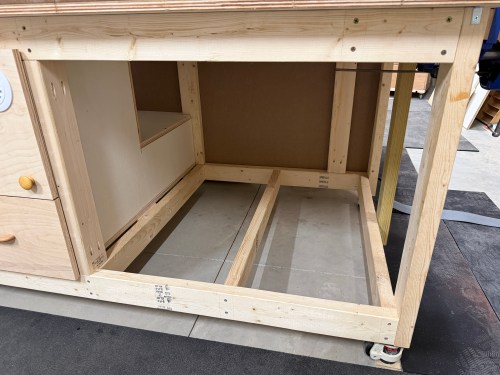
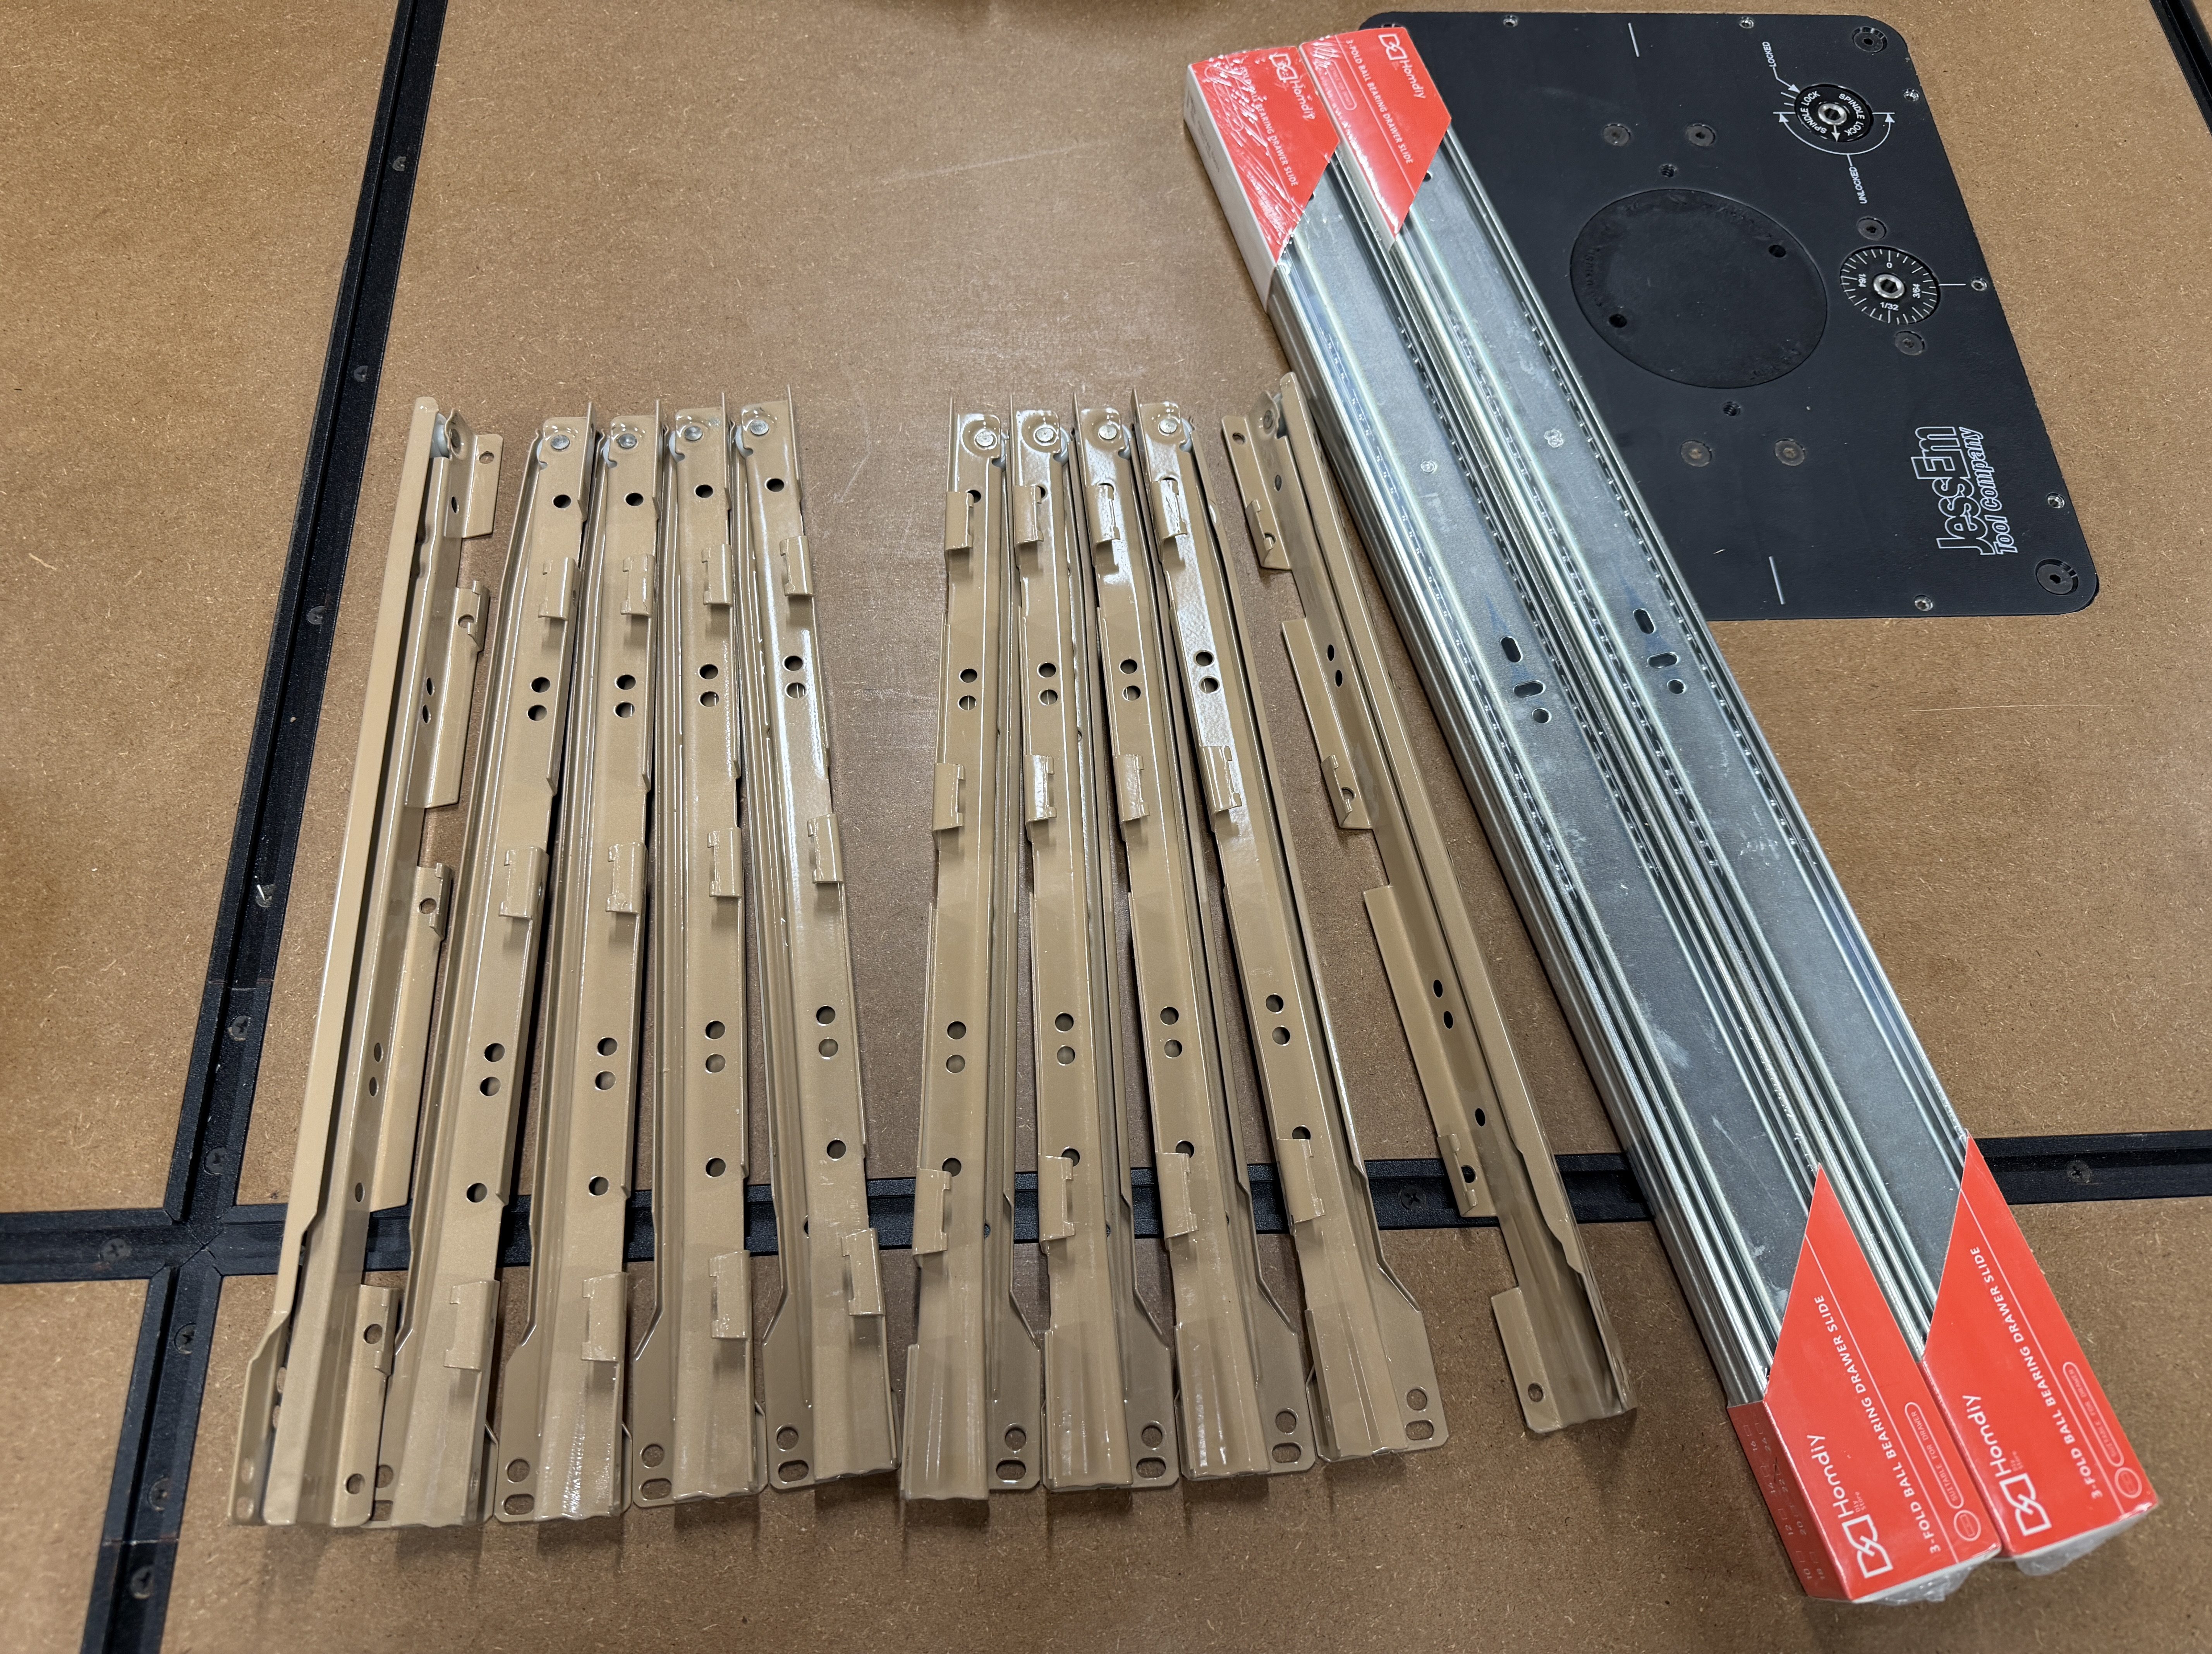
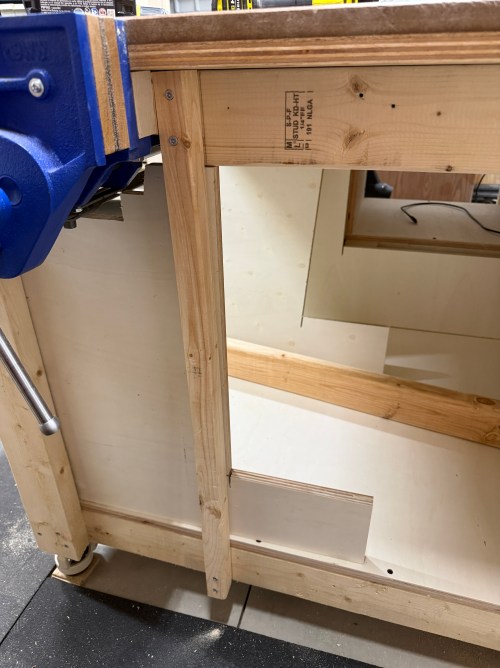
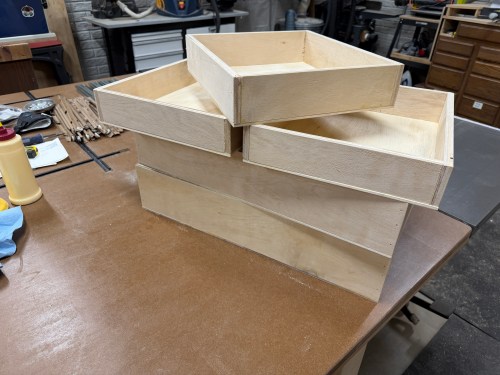
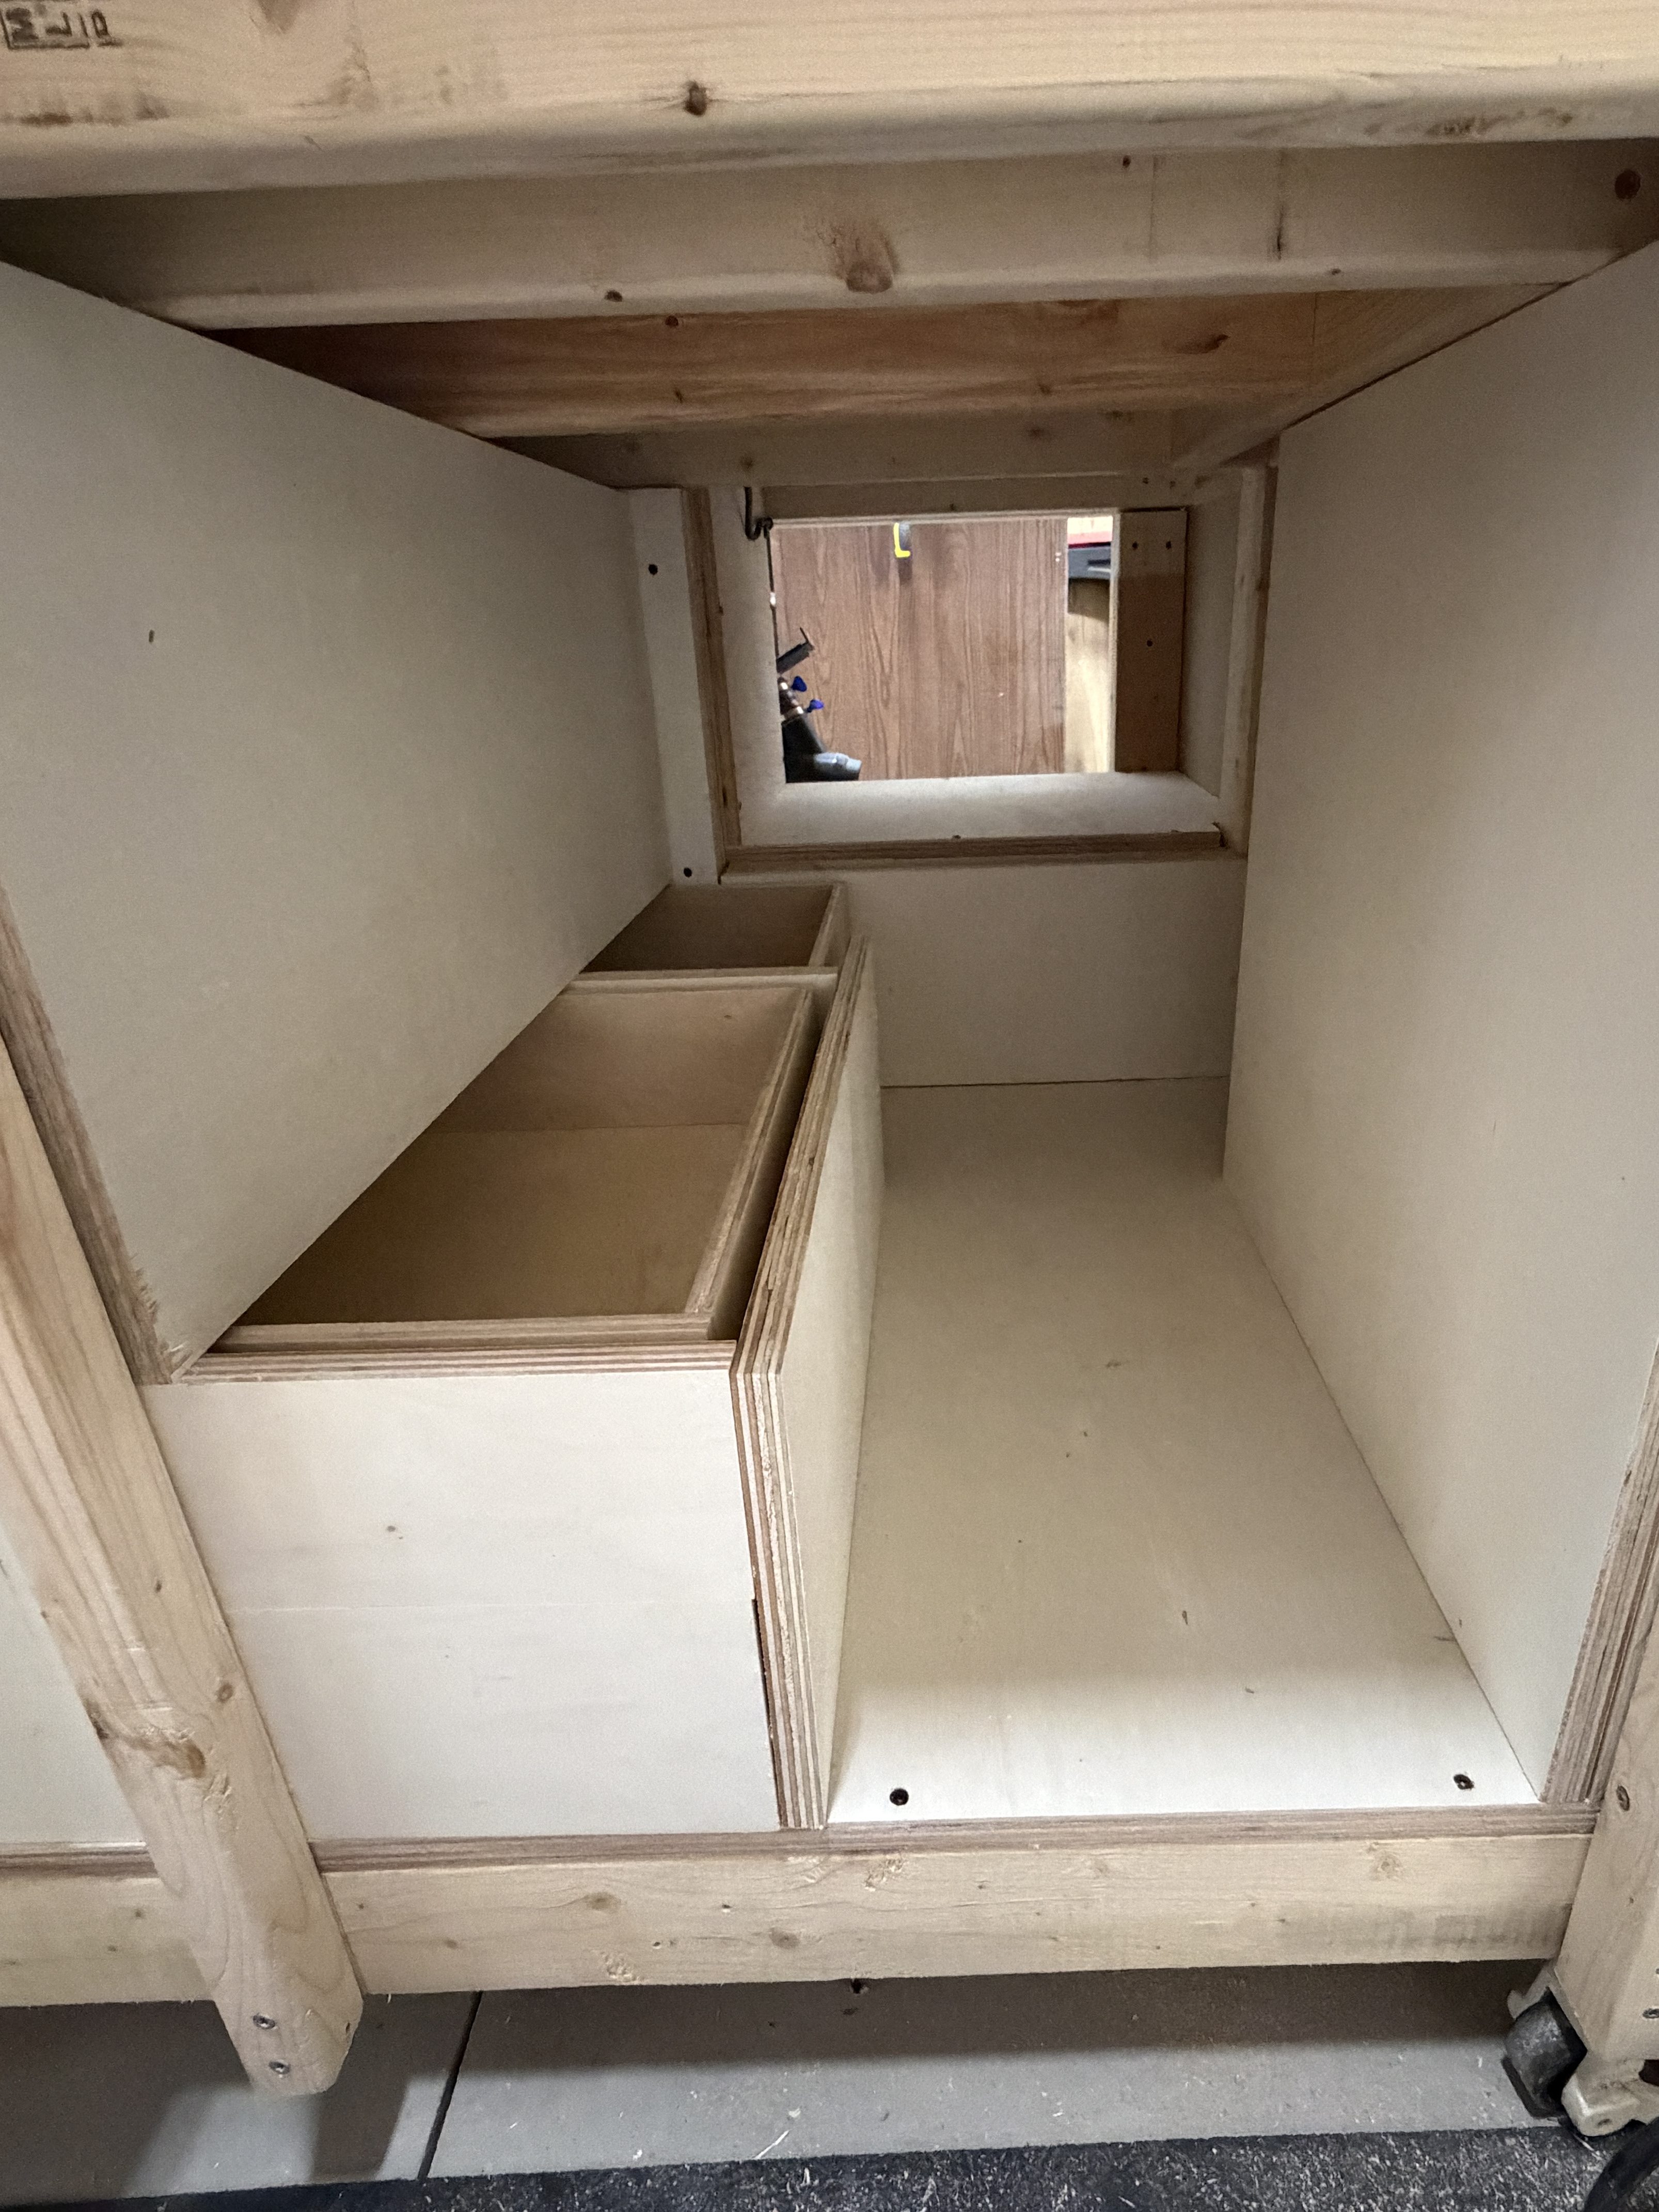
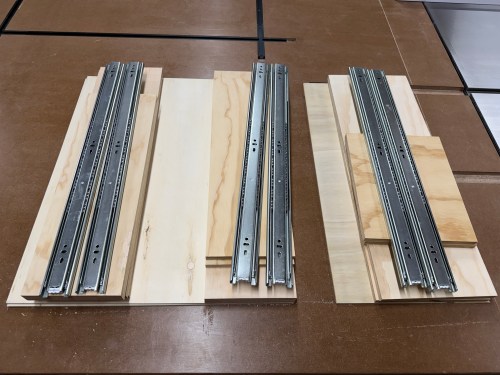
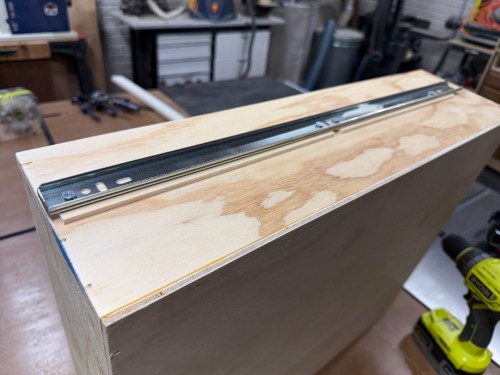
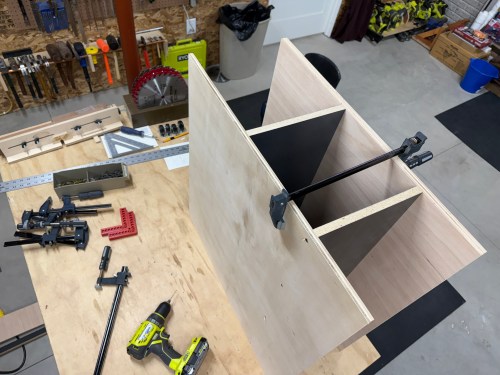
First, I got to work on a cabinet next to the router station, on the front of the table. I wanted to use five sets of cheap drawer slides I salvaged from an old dresser. I had enough room for four deeper drawers, using 22″ slides. I took measurements and sketched out a plan. I had to design around the vice, which hung down below the frame of the table.
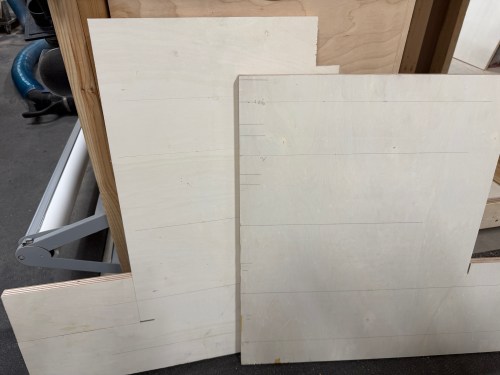
I cut a full bottom panel and some 2x4s for extra bracing. I wanted to make good use of space and have the most room for drawers on the right side of the table, so the vertical supports were made in the odd L shape again. The one on the left was cut to match up with the one from the router station.
In the middle, I needed something up top to connect to, so I cut a piece of 2×4 and would secure it in place after determining the exact width of the left drawer column. The vertical on the right needed some cut away around the vice.
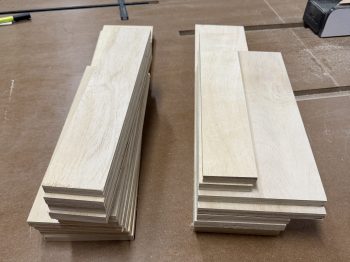
Then I was able to cut all of the drawer sides, with two different depths for the different types of slides I was using. Or so I thought.
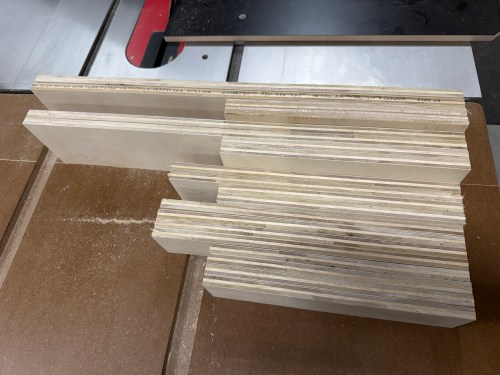
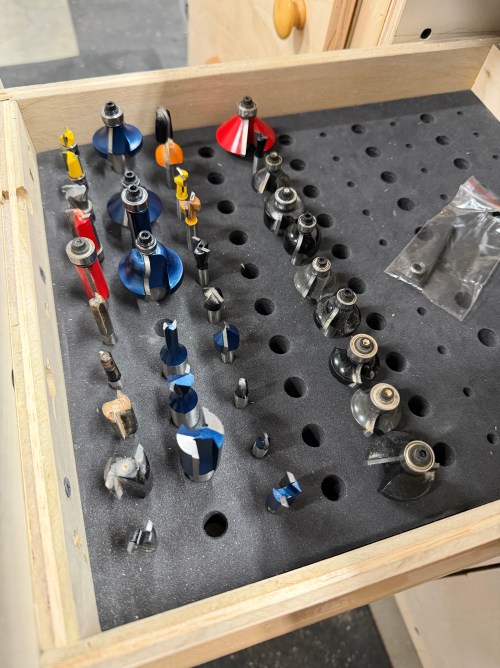
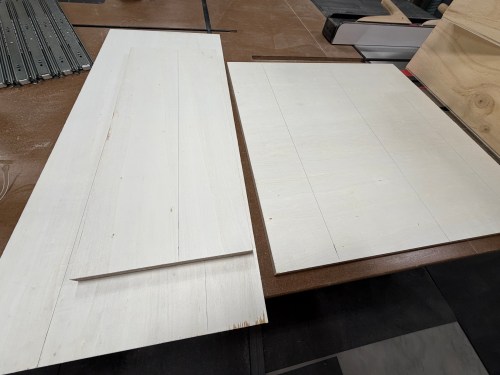
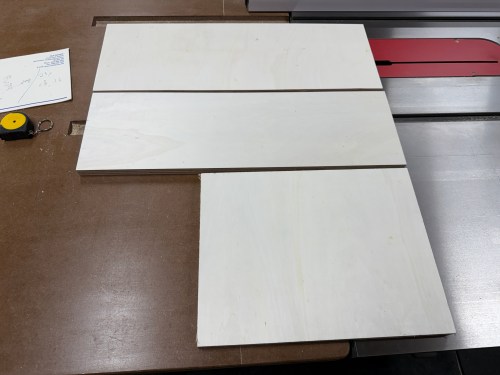
As I was going over some of my notes I realized I didn’t cut the back part of the middle and right verticals tall enough. To fix the mistake, I glued and pocket screwed on some patch pieces. I also had to recut longer sides for two drawers. From there I figured out the width of the left drawers based on the foam router bit storage tray I was using. Then I cut the fronts, backs, and bottoms for the five left drawers.
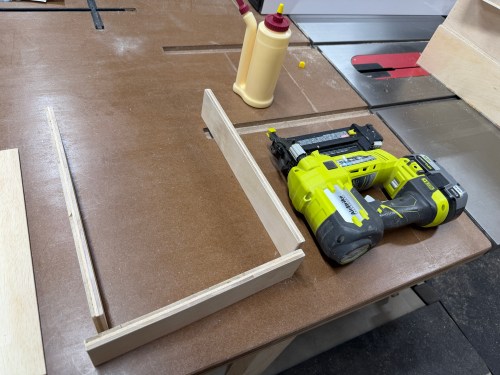
Assembly was quick with glue and brad nails.
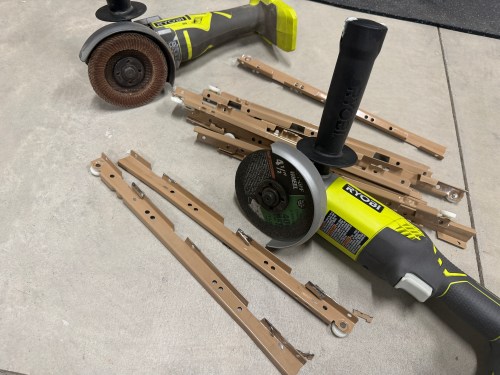
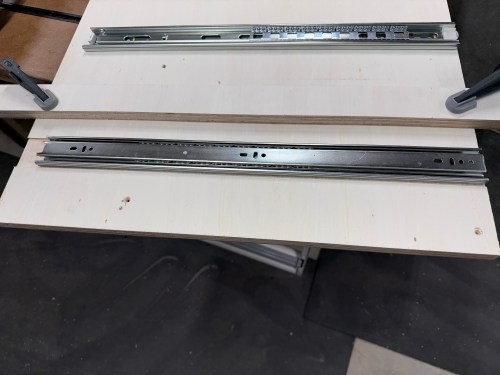
I modified the old drawer slides with an angle grinder to remove tabs that were in the way for my use case.
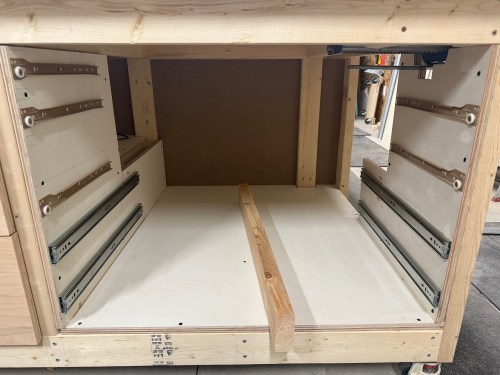
I mounted the slides to the verticals for both columns of drawers. Then I was able to secure the left and right verticals to the table frame, attach slides to the left drawers, and put them in to guide the placement of the middle vertical. It got screwed in, along with the upper 2×4.
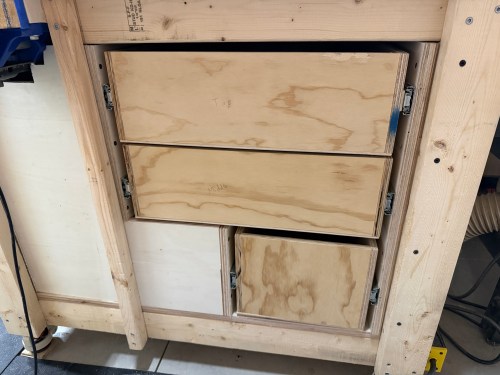
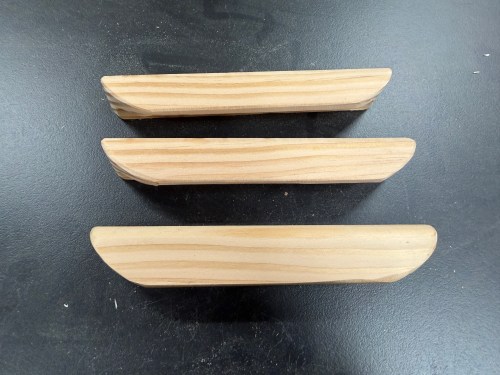
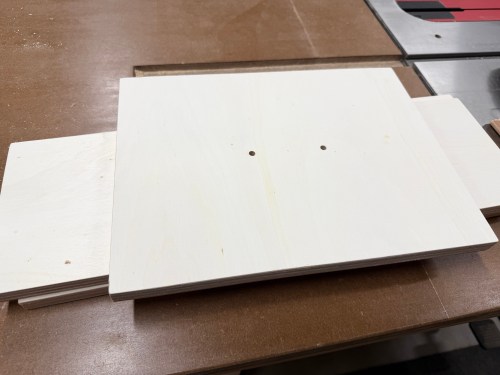
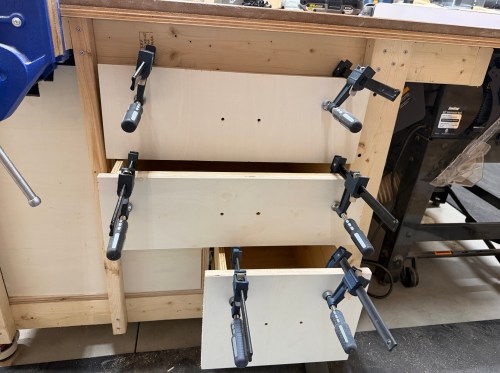
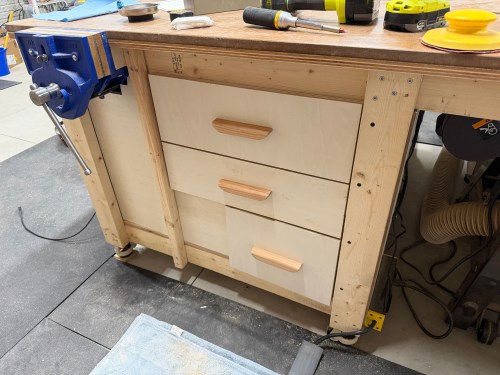
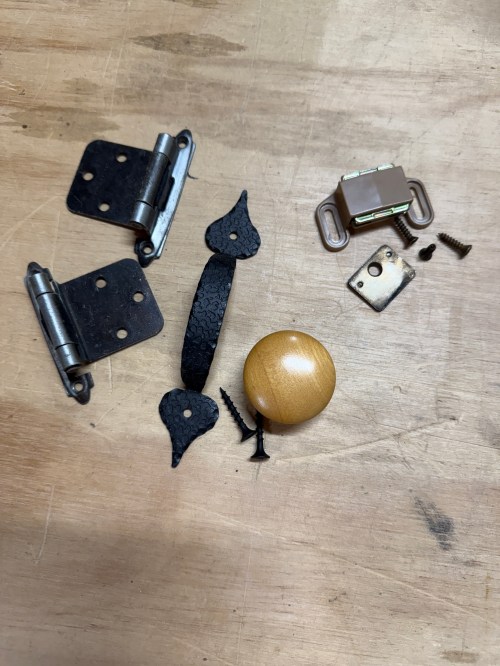
With the left column of drawers in, I figured out how wide the remaining parts needed to be for the right column of drawers and got them done. Then it was time for some drawer fronts and a false front, since the vice prevented a drawer from being installed there. This gave me a place for a recessed power strip with USB. I didn’t have enough matching handles, so I used two different styles I’ve bought at estate sales.
I filled in a few drawers.
I will never combine different drawer slides in a cabinet like this again. It was a major pain in the ass and too much to keep track of with the different mounting methods, widths, depths, and clearances. I had to adjust the placement of the old slides many times and alter some drawers. Wasn’t worth it.
The drawers for the right side of the table was much of the same and went together a lot faster. The table frame is slightly out of square, so the bottom drawer was a touch too tight and the top too loose. I had to route a recess on one and add some spacer material on the other. The handles were cut out of a test piece from the nightstands I made.
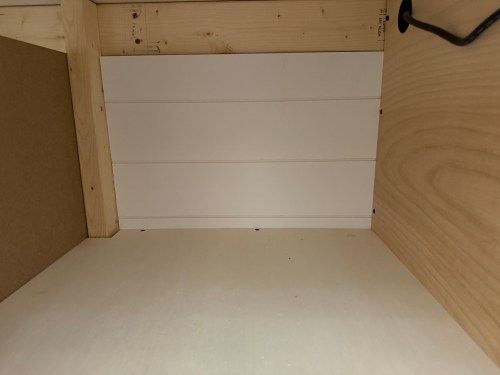
I cut a piece of shiplap paneling and closed off the back of the shelf. This leaves a little unused area in the middle back of the table. If I took out the drawers I could hide something back there. Shhh!
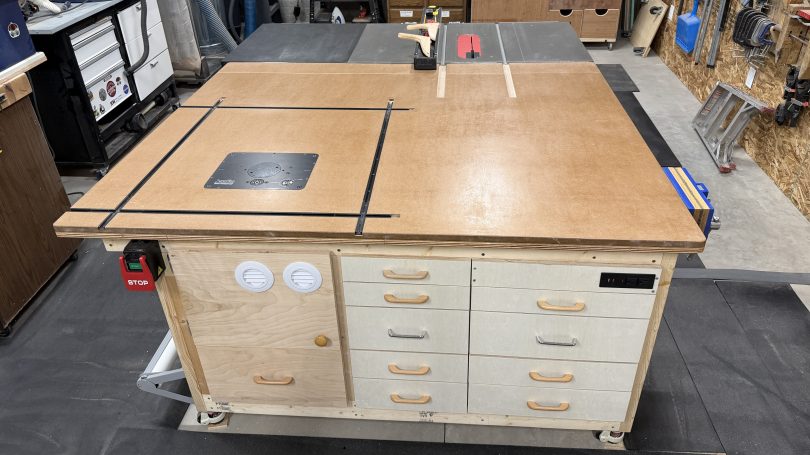
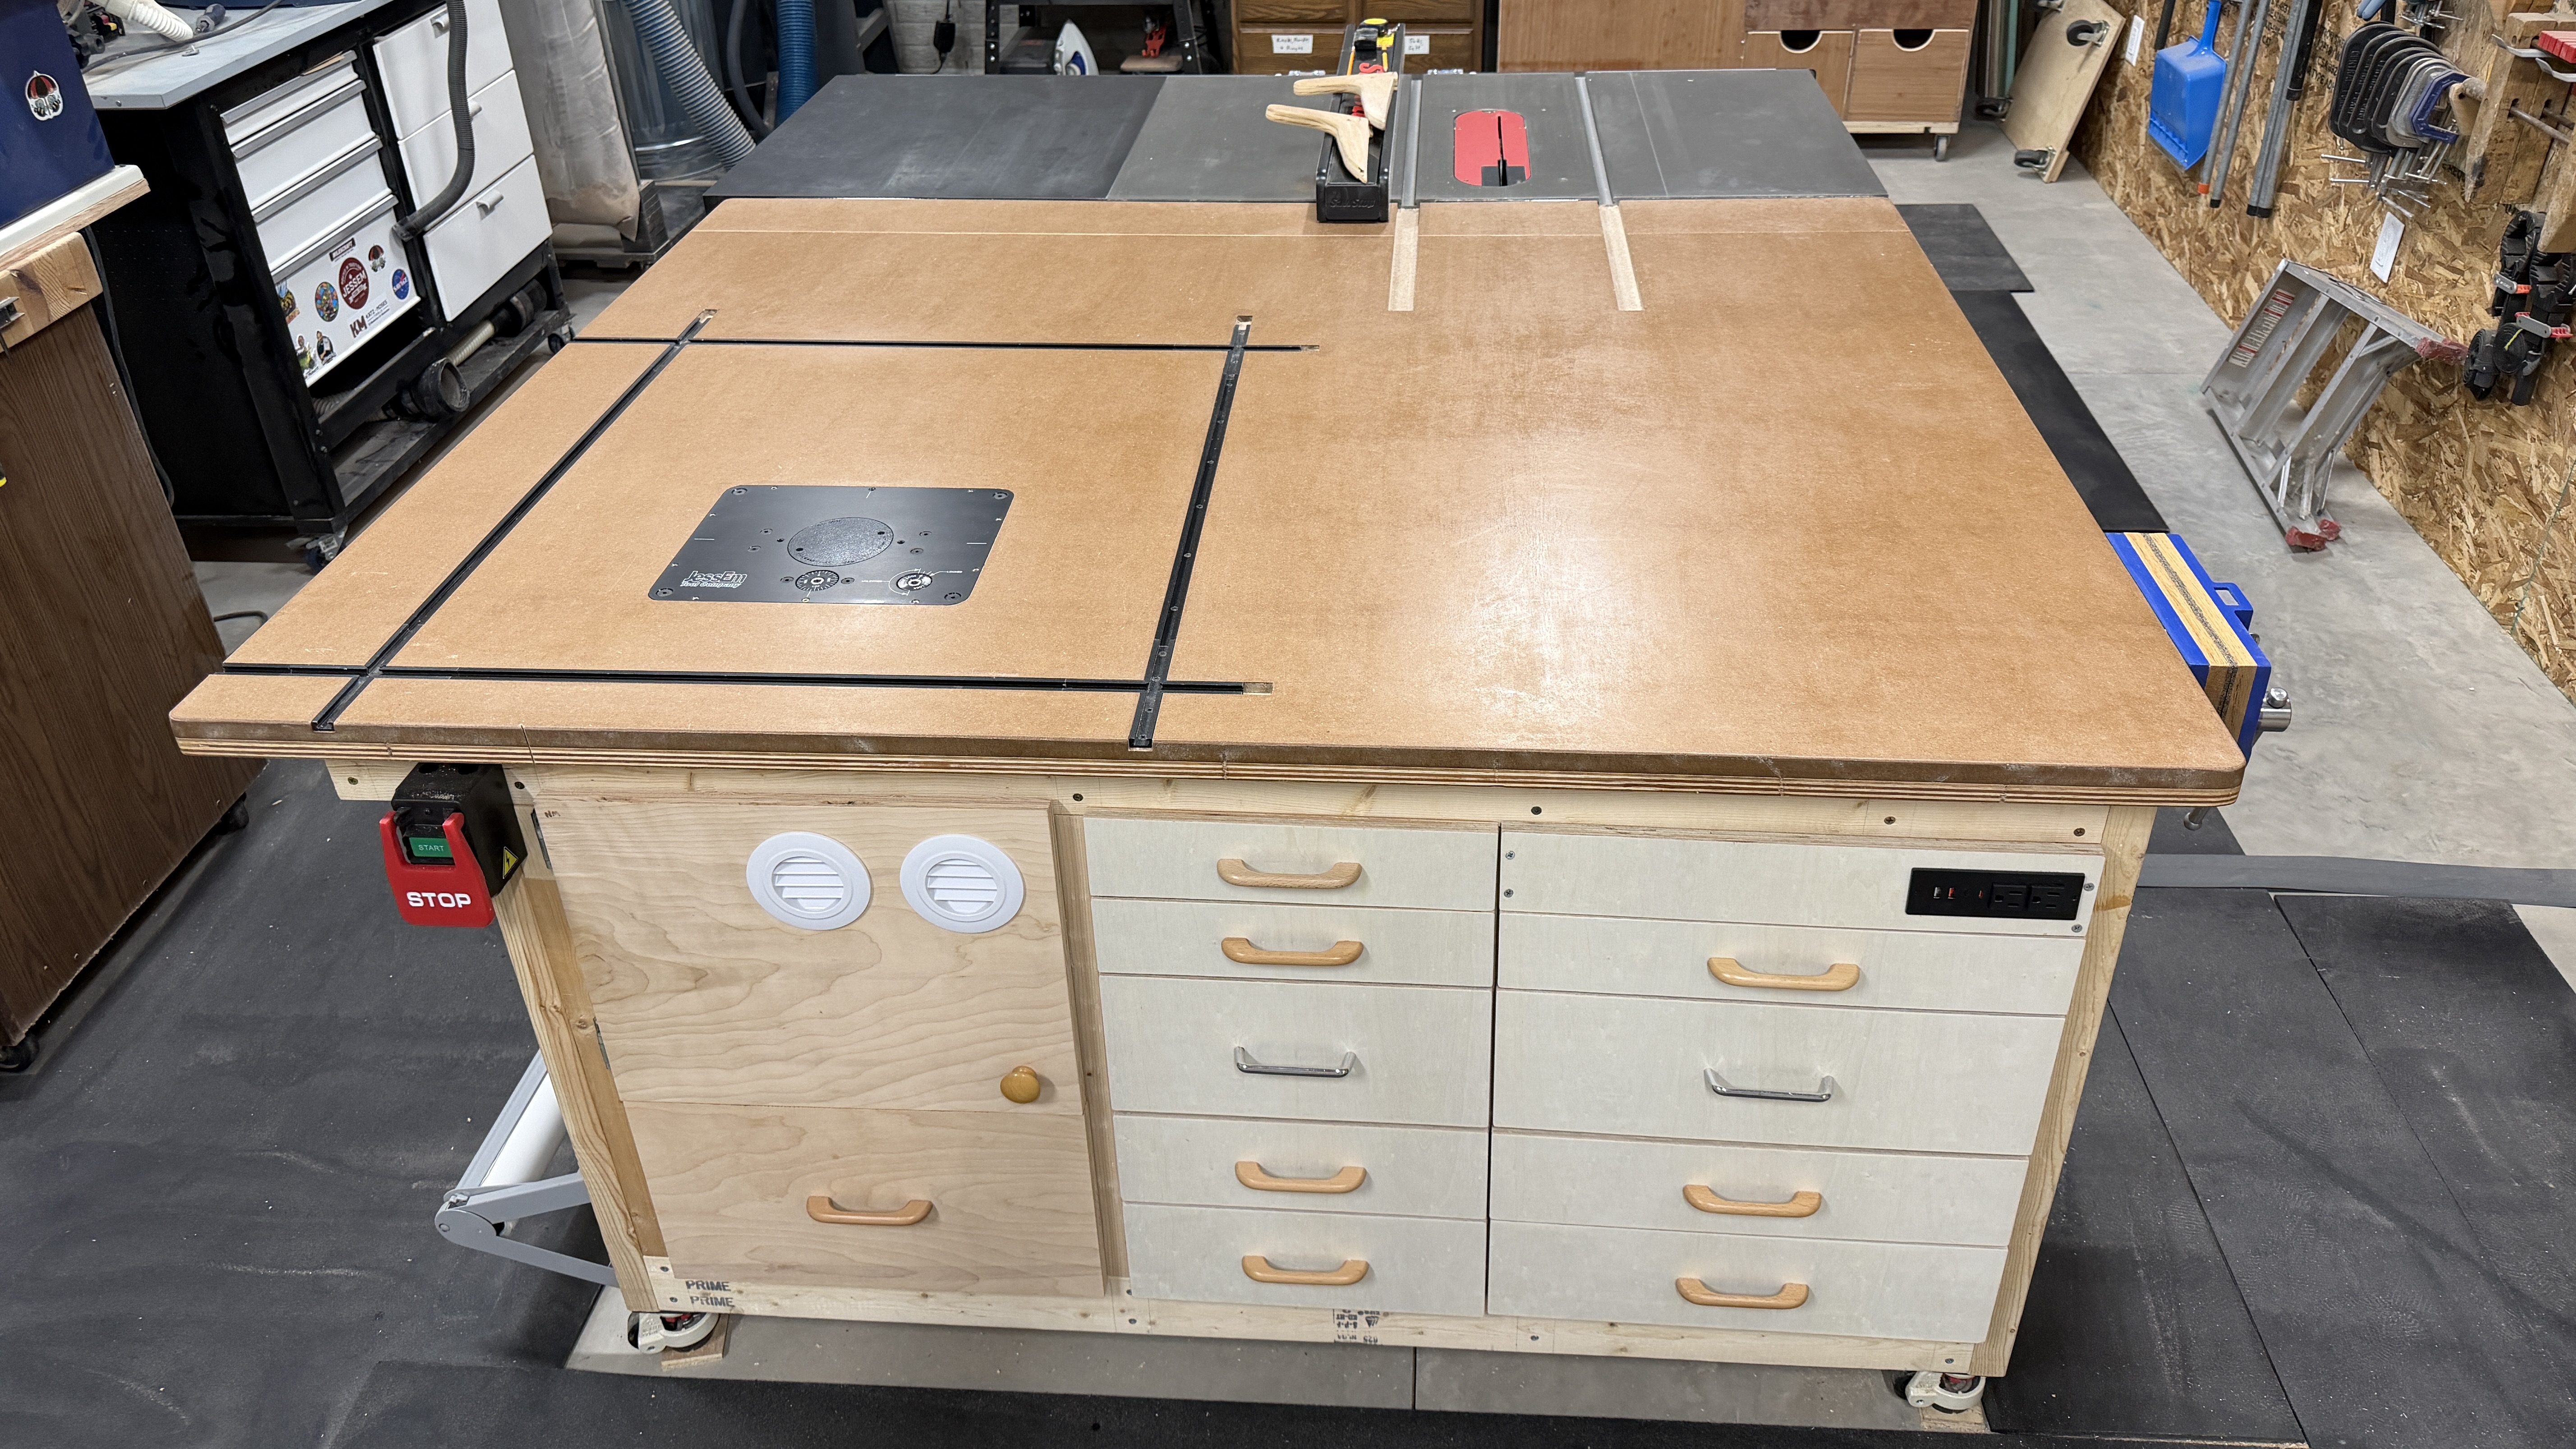
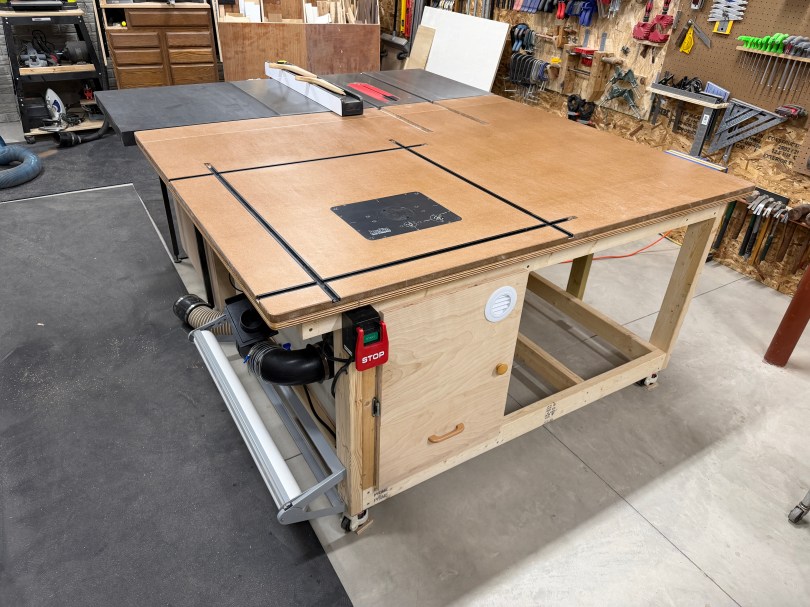
The saw outfeed and the huge work area are already amazing to have. This is really going to improve my processes in the shop. Here are some final photos.
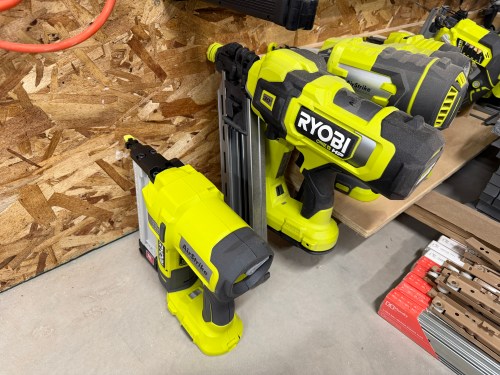
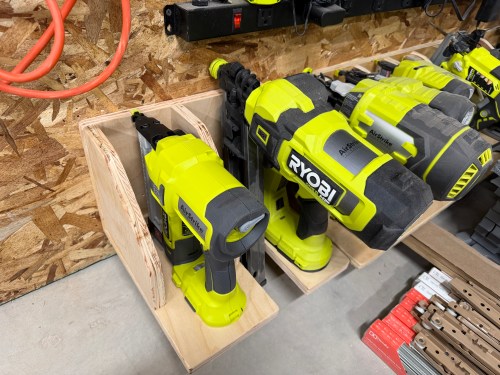
Quick build this weekend to expand my Ryobi tool storage wall (which moved to the new workshop) with spots for the framing nailer I got last year to build the shop wall and a narrow crown stapler I recently bought on sale.
As I’m writing this and seeing the pictures, I butt jointed the back and bottom incorrectly, which is why it’s too tall and not deep enough to match up with the old spots. Oh well!
It’s great to be back in the shop again and getting it more organized.
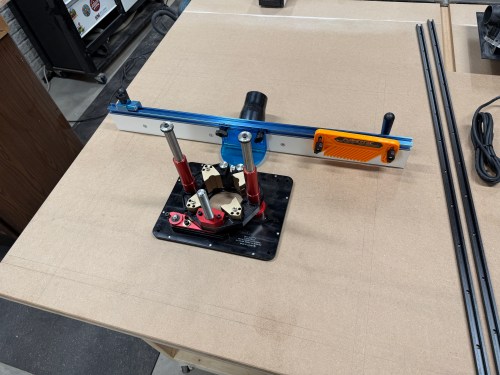
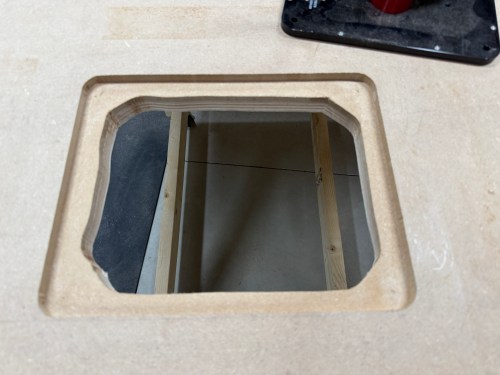
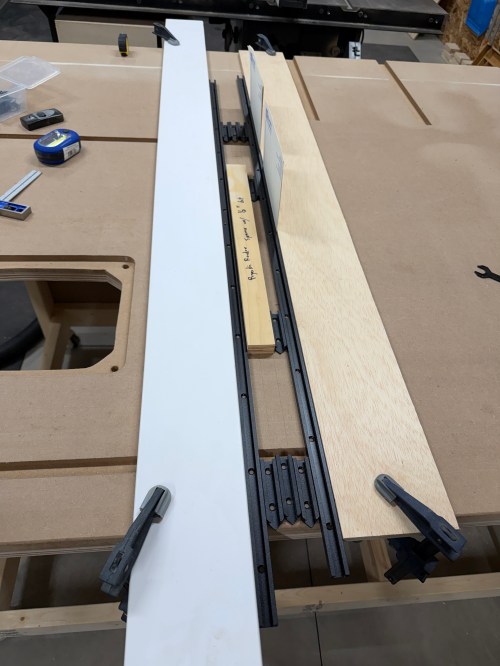
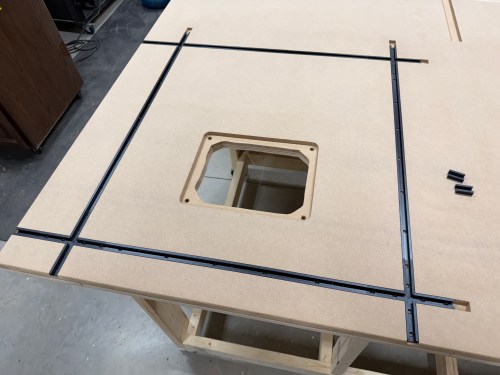
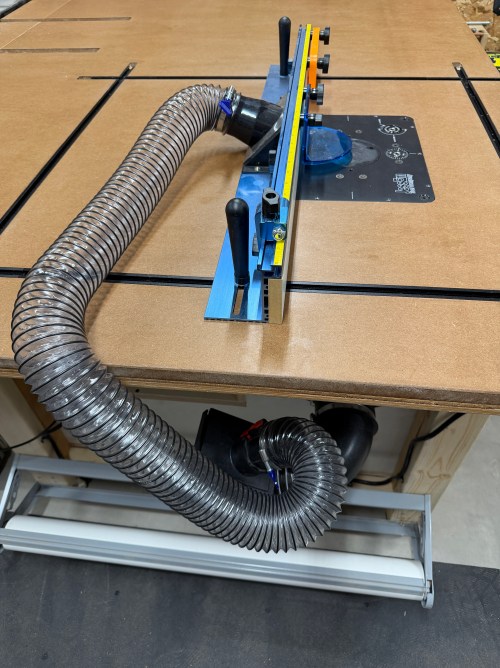
First, I had to figure out exactly where to install everything. I placed the fence and lift (upside down) on the table to get a feel for it. Then I outlined the lift and drew in the T-tracks.
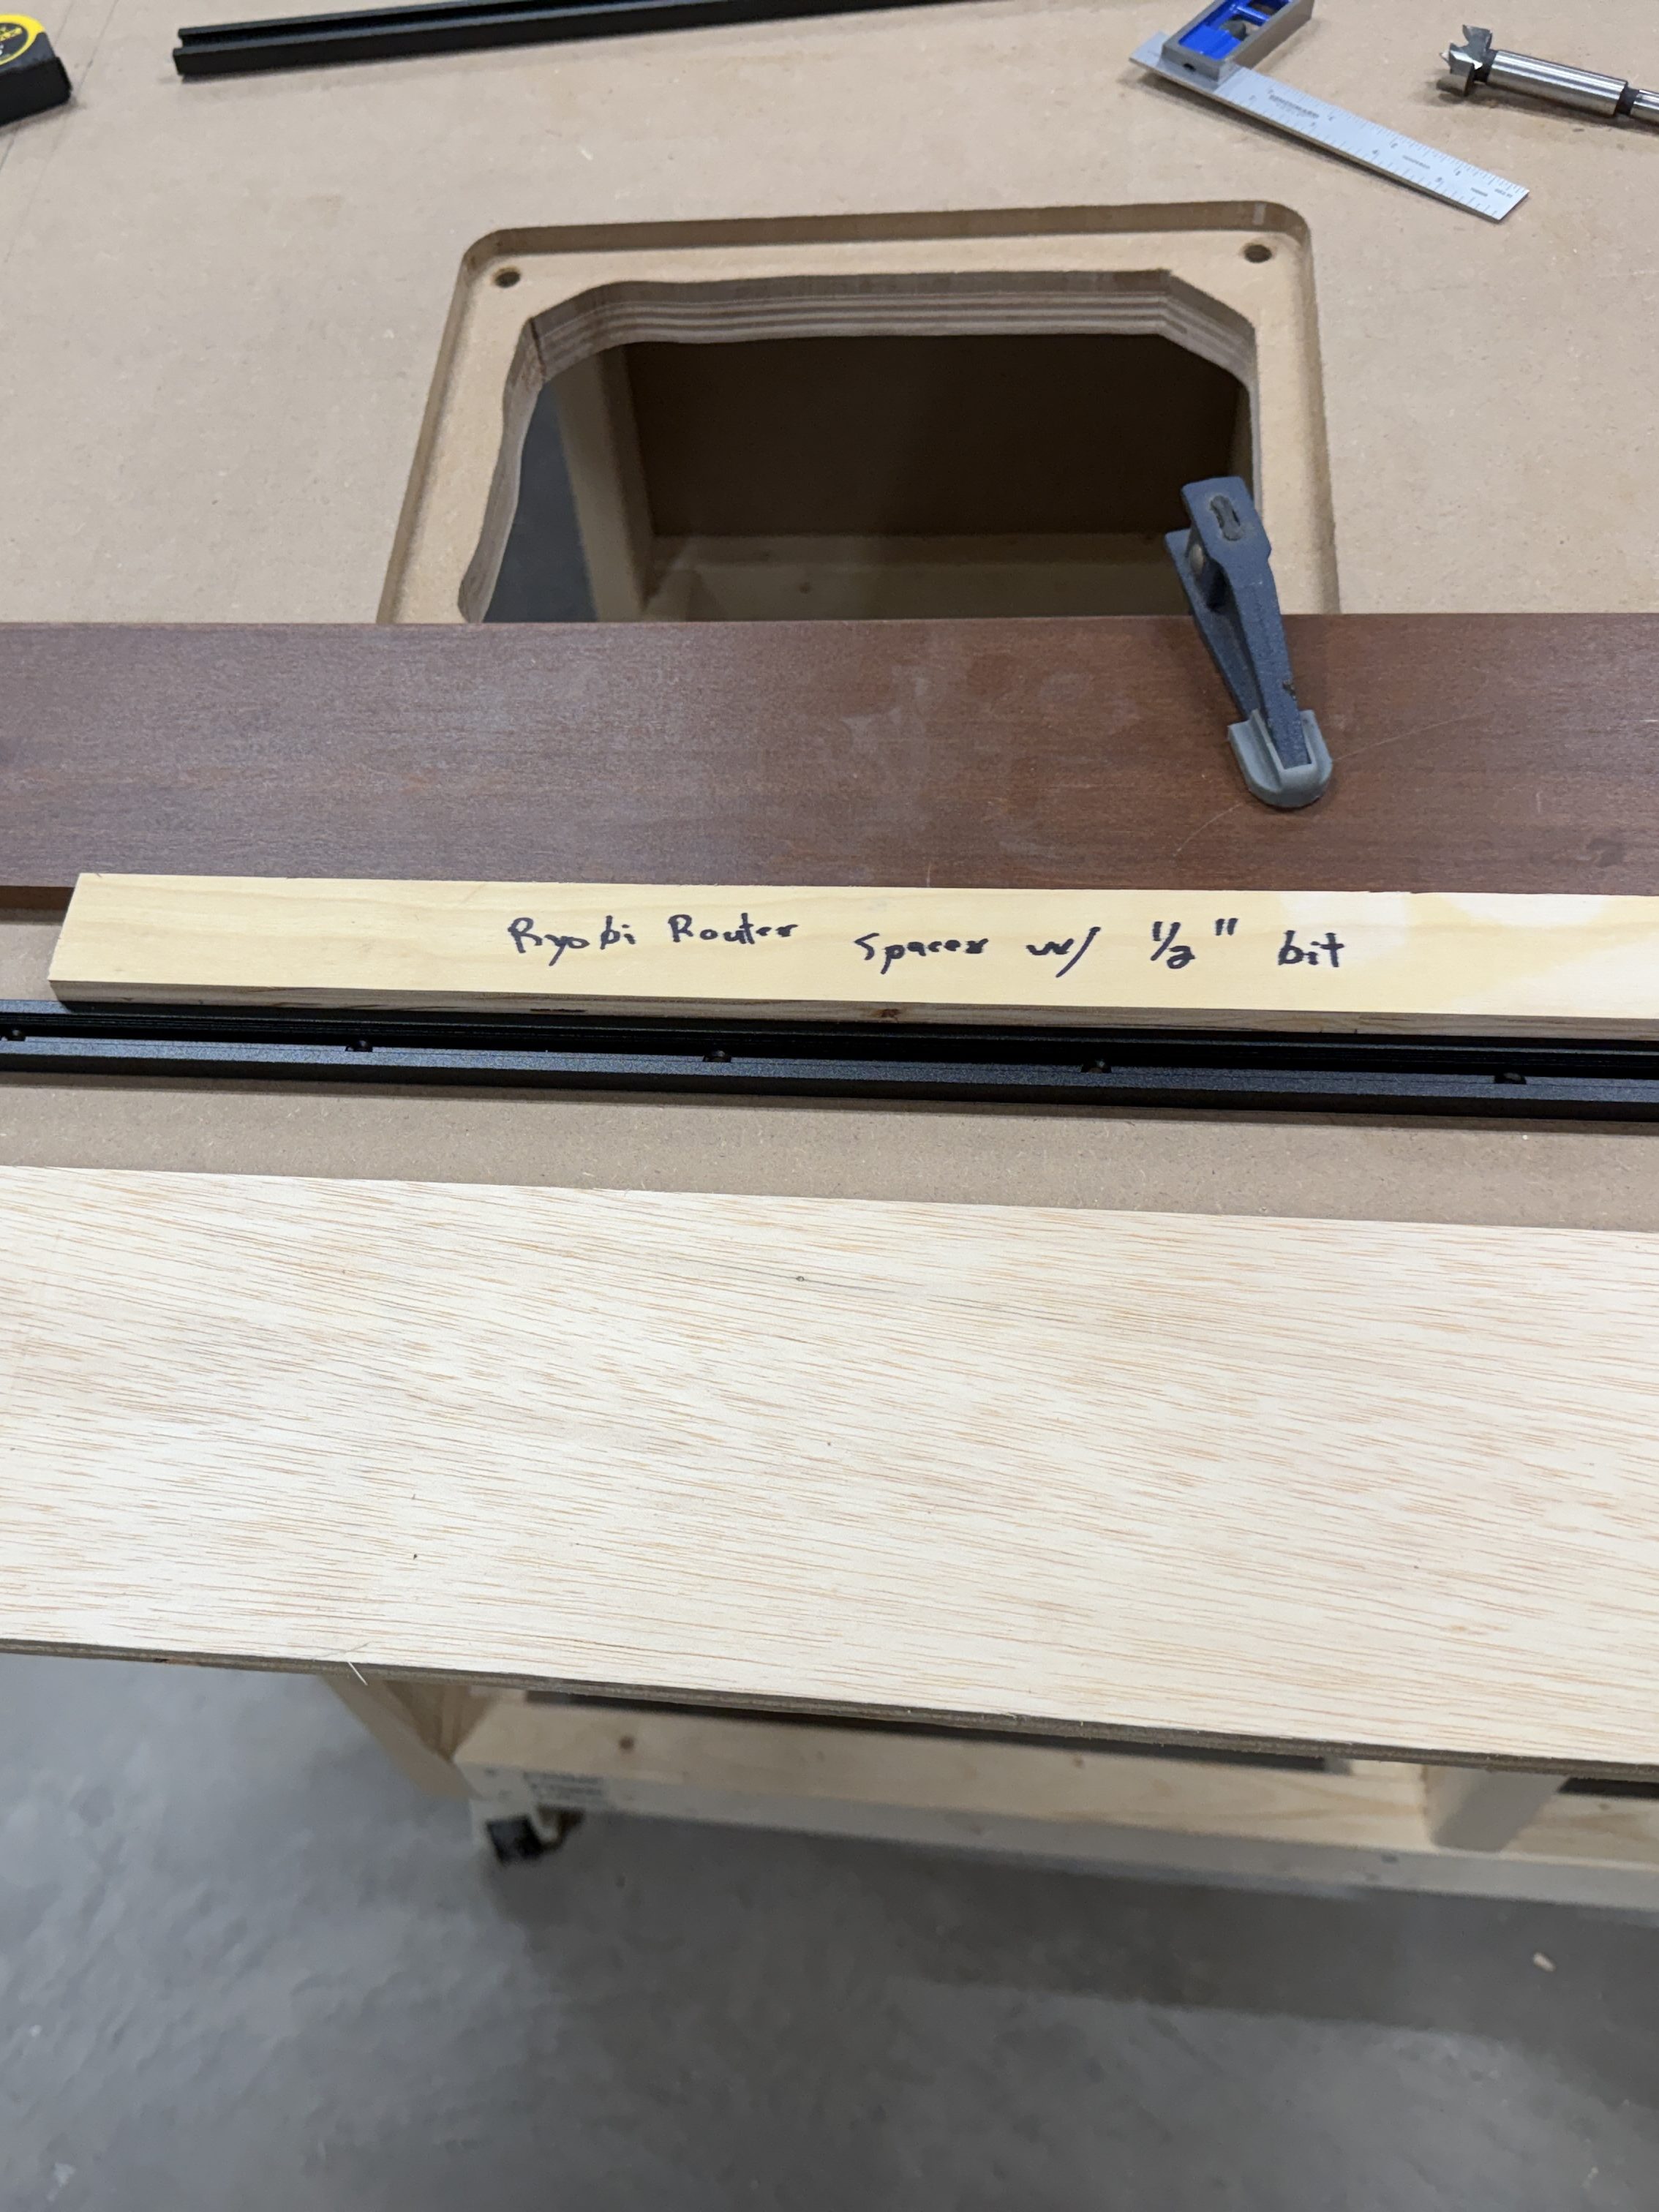
I cut a spacer equal to the distance from my router base to a 3/8″ straight bit. Then I used double-sided tape to secure the border pieces. I removed the material in two passes and cut out the middle with a jig saw. The radius on the corners was much larger than the router bit, so I free-handed those up to the pencil marks.
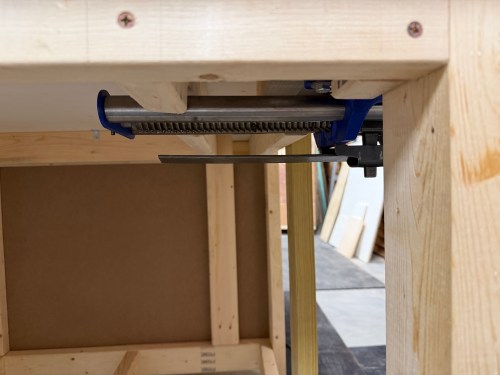
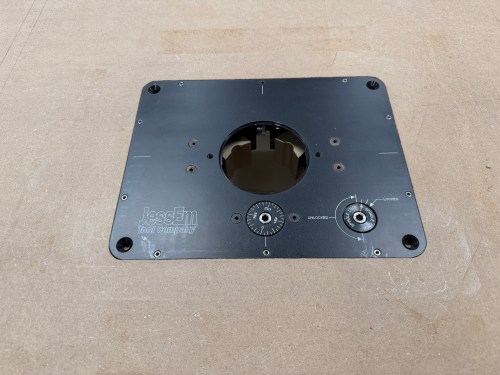
I installed threaded inserts for the four bolts that secure the lift. Yet my centering was off, so it didn’t work out. I removed the inserts and drilled through to use longer bolts with a washer and nut under the table. I had to drill a recess in the bottom because I couldn’t find long enough bolts.
Setting up to route the first T-track took a long time, like when I did the miter slot extensions. I got faster with each one, as I figured out a process and all of the spacing. That same spacer came in handy, as well as pieces of the T-tracks. I measured and cut all of the T-tracks.
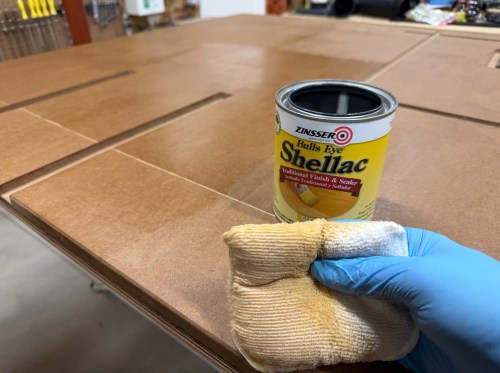
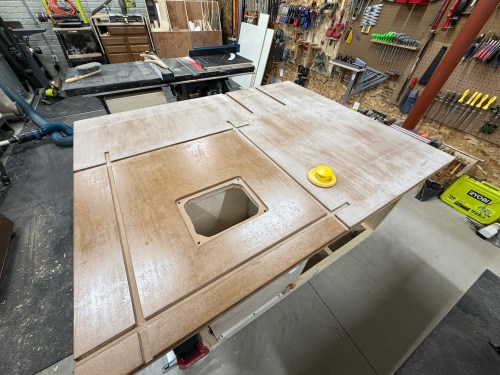
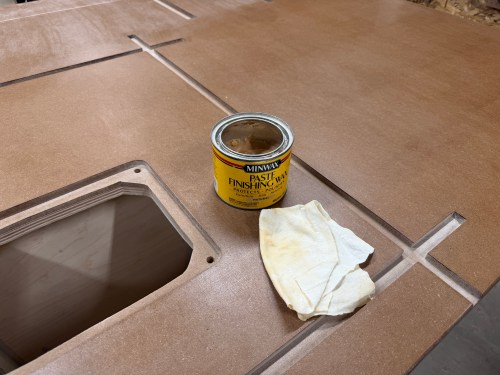
I sanded the top and edges with 80 grit using my random orbital sander .Then I applied four coats of Zinsser Bulls Eye Shellac. A day later I did a light hand sanding with 220 grit and applied paste wax.
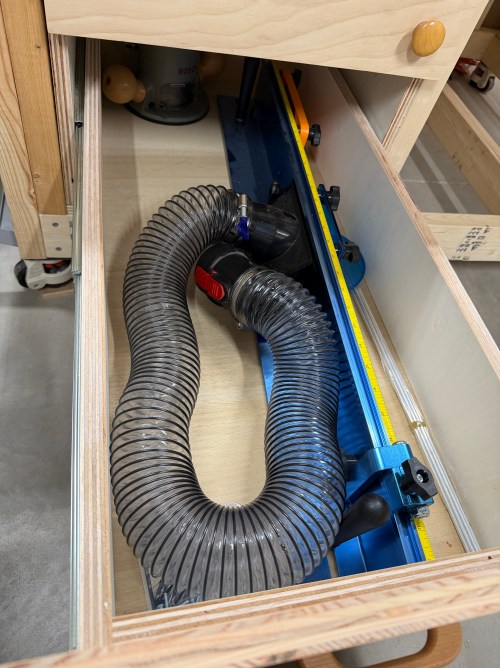
A good router table needs dust collection and here are the parts I used for mine:
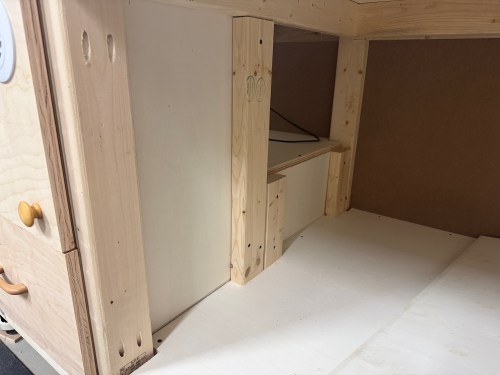
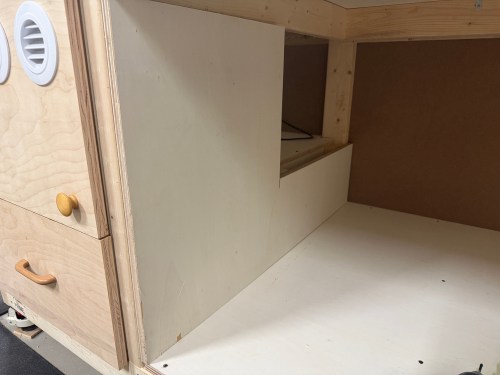
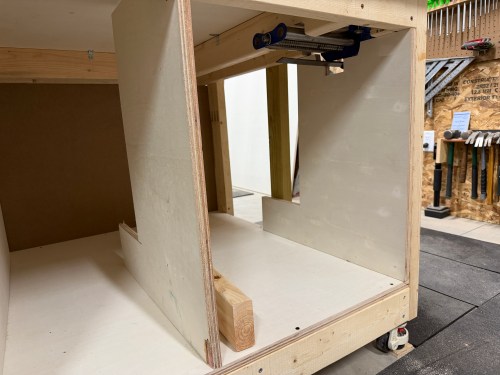
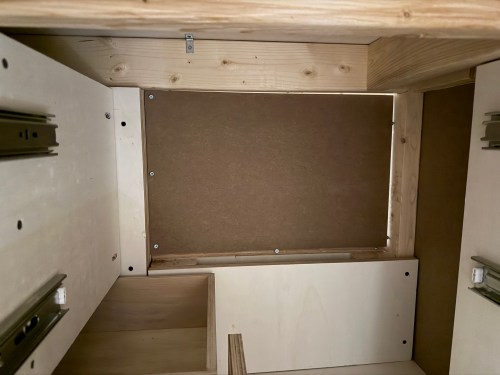
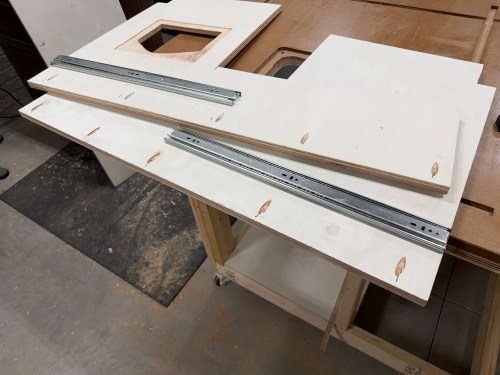
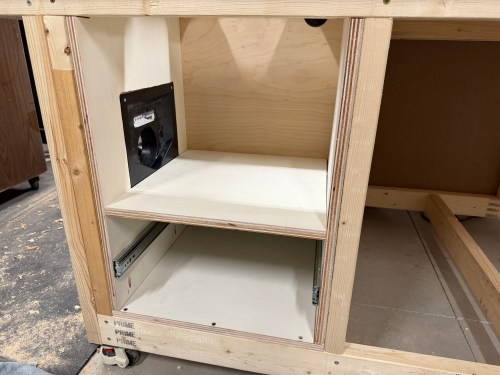
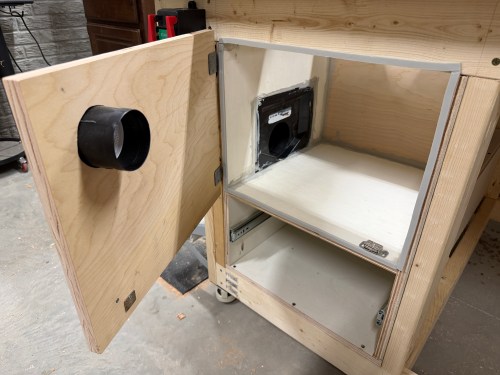
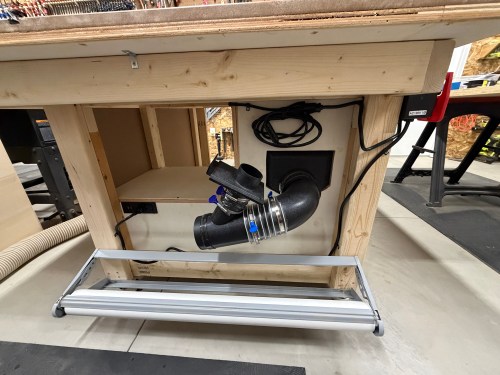
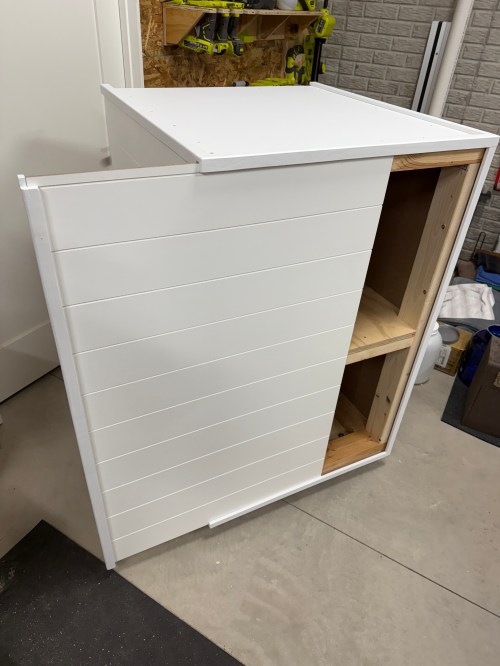
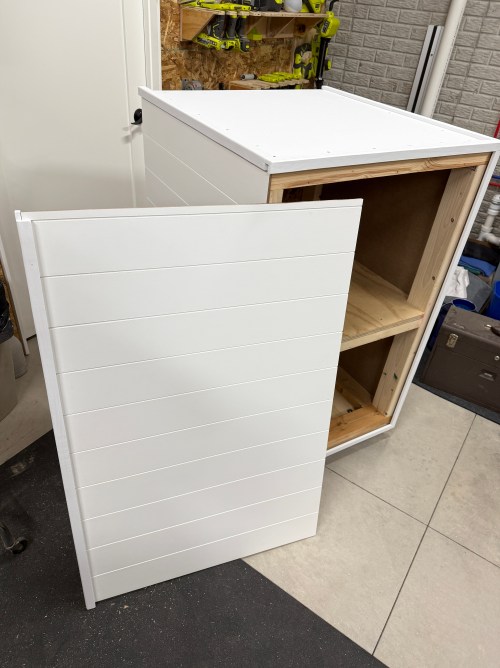
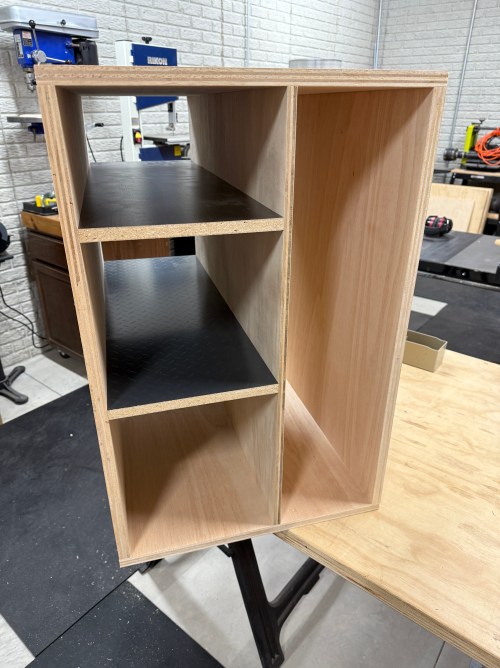
I had to build a cabinet to enclose the router lift, plus a drawer underneath. Due to the table’s frame and a need for the left side, I sketched out a plan. I was making a big version of the L-shaped Tetris piece.
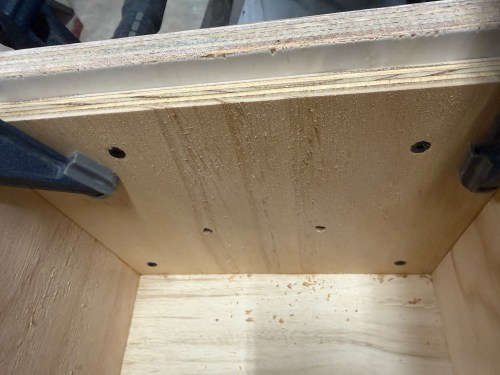
The assembly had to be done inside the frame, due to the cabinet nesting up through the frame. After getting plywood to size, I cut various holes, attached 22″ drawer slides, routed a recess for the dust hood, and drilled pocket holes. It all screwed together quickly.
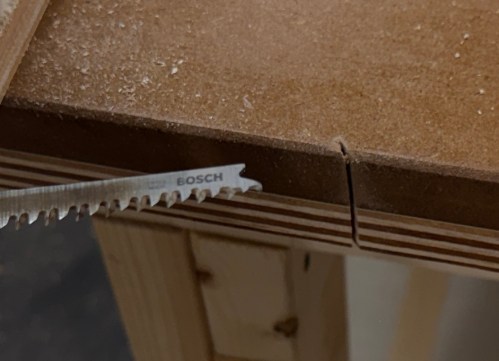
Of course, when using the jig saw, I accidentally cut in to the new table top! I’m the only one who does this, right?
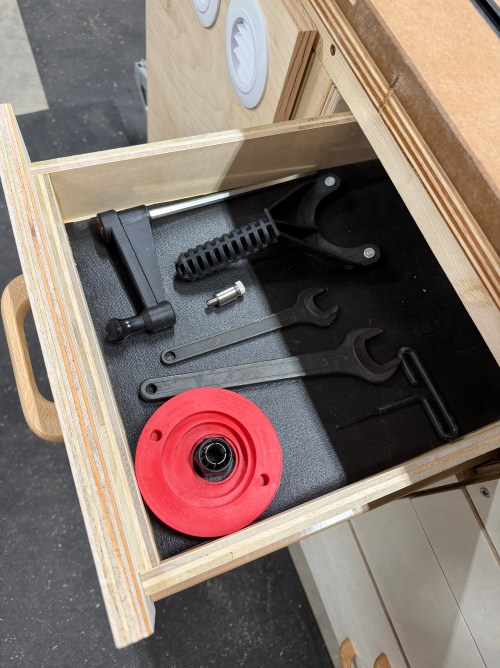
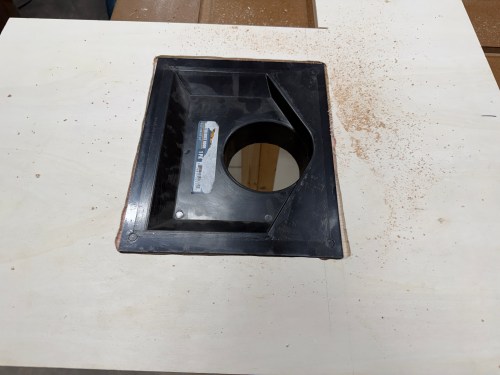
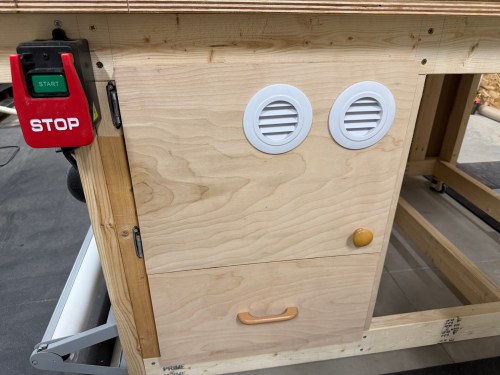
I caulked everywhere inside the dust box. Then I cut a door, mounted hinges, added a magnet close, and used weather stripping to seal it. The door got a hole with a vent cover to supply fresh air to the router and dust collection system. After some use I’ll see if I need to add a second vent. I mounted the lift, leveled it to the table, and bolted it in. The lift doesn’t came with a blank insert, so I bought one from an Etsy store.
Update: I did end up adding a second vent.
I cut all the pieces for the drawer, cut a rabbet where the bottom would slide in, and drilled pocket holes. Then I glued and screwed it together. Attached a drawer face and mounted a handle.
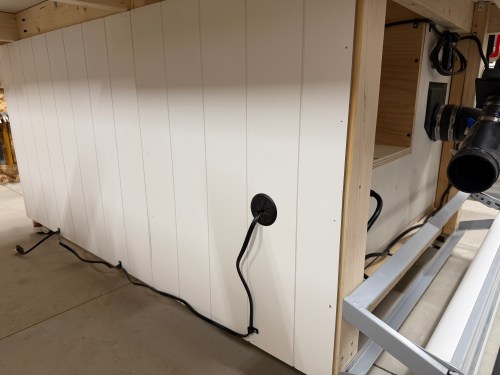
Along the left side of the table, I installed my paper roll dispenser. A 90° and then a Y-fitting connect to the dust hood. A 2.5″ blast gate is attached to the other side of the Y, for a hose up to the fence. The power cord went through a 2″ Desk Grommet on the back side. I screwed a POWERTEC Paddle Switch to the front. These switches makes it quick and easy to turn off the machine with my knee. I put in a recessed power strip with USB ports. Then I clipped in the wires and mounted a heavy duty surge protector power strip. This allows me to plug in the table saw as well.
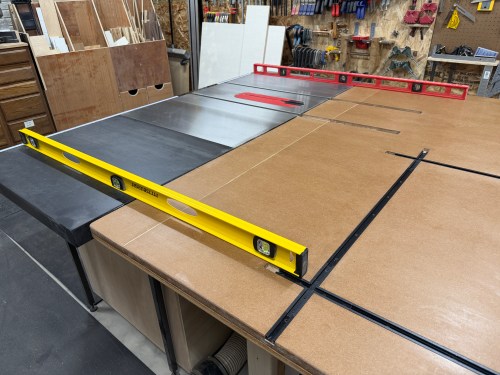
The final thing was to lower the castor feet to raise the table up to the saw.
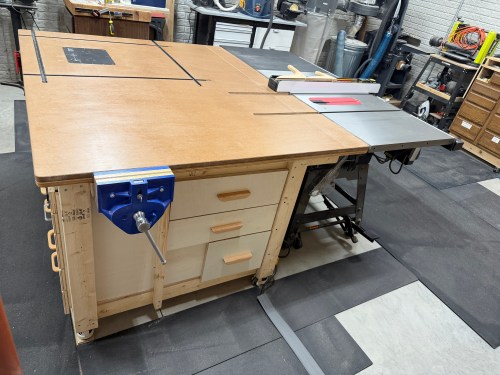
It’s so nice to have a large table table in the shop and I’m excited for the router, where it’s easy to use and always ready. Here are some more pictures.
There are the other accessories I bought for the router station, some of which can also be used at the table saw:
Part of our plan for the house included Cat6 Ethernet ports all over so I can wire in as many devices as possible and keep Wi-Fi for devices that need it. My original plan for the network rack was to build a cabinet on the wall, but the space between the hot water heater and the wall is pretty tight.
I decided to build a cart instead, especially since there is enough slack on the Ethernet cables that’ll allow me to pull the cart out and turn it to get at the sides of the rack. When we moved I took apart my old work table, which left me with three plywood panels and pieces of 2×4 glued to them. I thought they would make a good top, bottom, and shelf for this cart and I was tired of moving them around the shop.
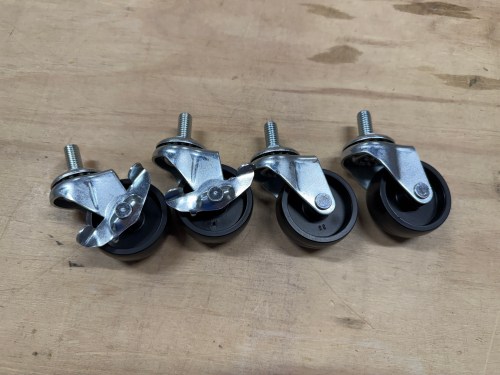
I pulled out castors, washers and nuts.
Then drilled recesses and holes in the base so I could attach the castors right away.
I cut notches out of the middle panel and squared up the edges on all of the panels.
I cut 2x4s for the vertical supports, assembled the frame, and put OSB on the back. I learned my lesson with the old work table and didn’t use any glue here since I’m treating this as a shop project and would like to have the option of taking it all apart if/when I want to change the design.
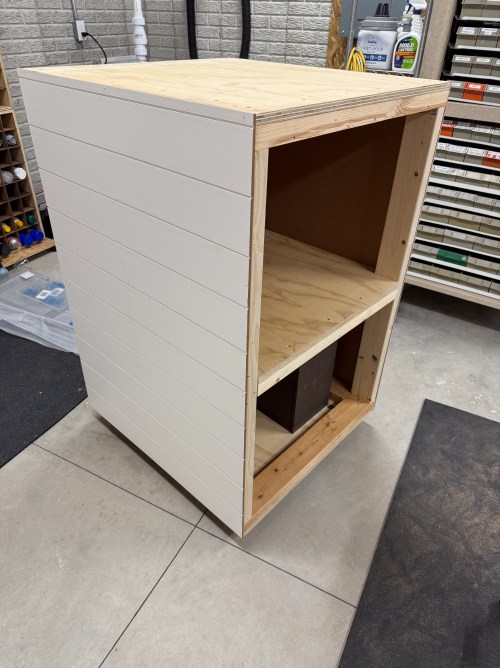
To blend the cart in to the wall, I cut and attached shiplap panels.
I made corner trim from 2x4s and painted it.
I didn’t want to make doors, so I had the idea to make a hidden siding door. I was going to have it slide up out of the top. Thankfully my wife suggested it slide to the side, which is much better.
I made a hole in the back for the power cable and a hole in the top to line up with the bottom of my network rack.
Then I screwed the rack down, wheeled it in place, and loaded it up.
Now I can start wiring up the Ethernet and configuring all of the network hardware.
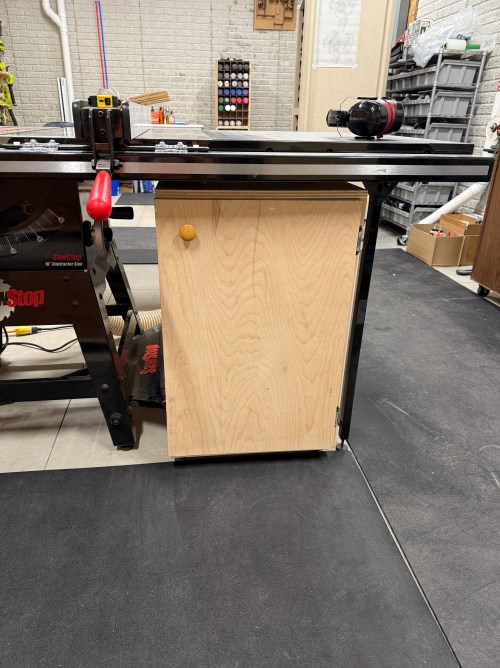
There was a big open space under the right wing of my new SawStop and it was the perfect spot for a cabinet to organize the table saw accessories.
I pulled out a sheet of plywood that got roughed up during the move. Went through a few iterations of how to size the cabinet and where to cut the pieces from.
Assembly went pretty quick, only using screws in case I ever want to make adjustments. It’s not going to hold much weight, so no need for glue.
I dug through my hardware to find hinges, handles, and a magnet catch. Since I should rarely move this thing, I attached a set of non-swivel castors, which only added 2″ of height.
When I went to slide it under the saw I had a moment of panic because it didn’t fit! I hadn’t accounted for the triangle-shaped brackets attaching the legs to the saw wing. I ended up removing the castors from the SawStop’s mobile base and the cabinet slid in. If I ever need to move the saw, it only takes a few minutes to put the wheels back on.
In the lower right, you can see the saw blade holder I recently made. I added old handles to make it easier to grab.
This cabinet was quick to make and makes great use of what would be dead space. Time to start building an outfeed table!
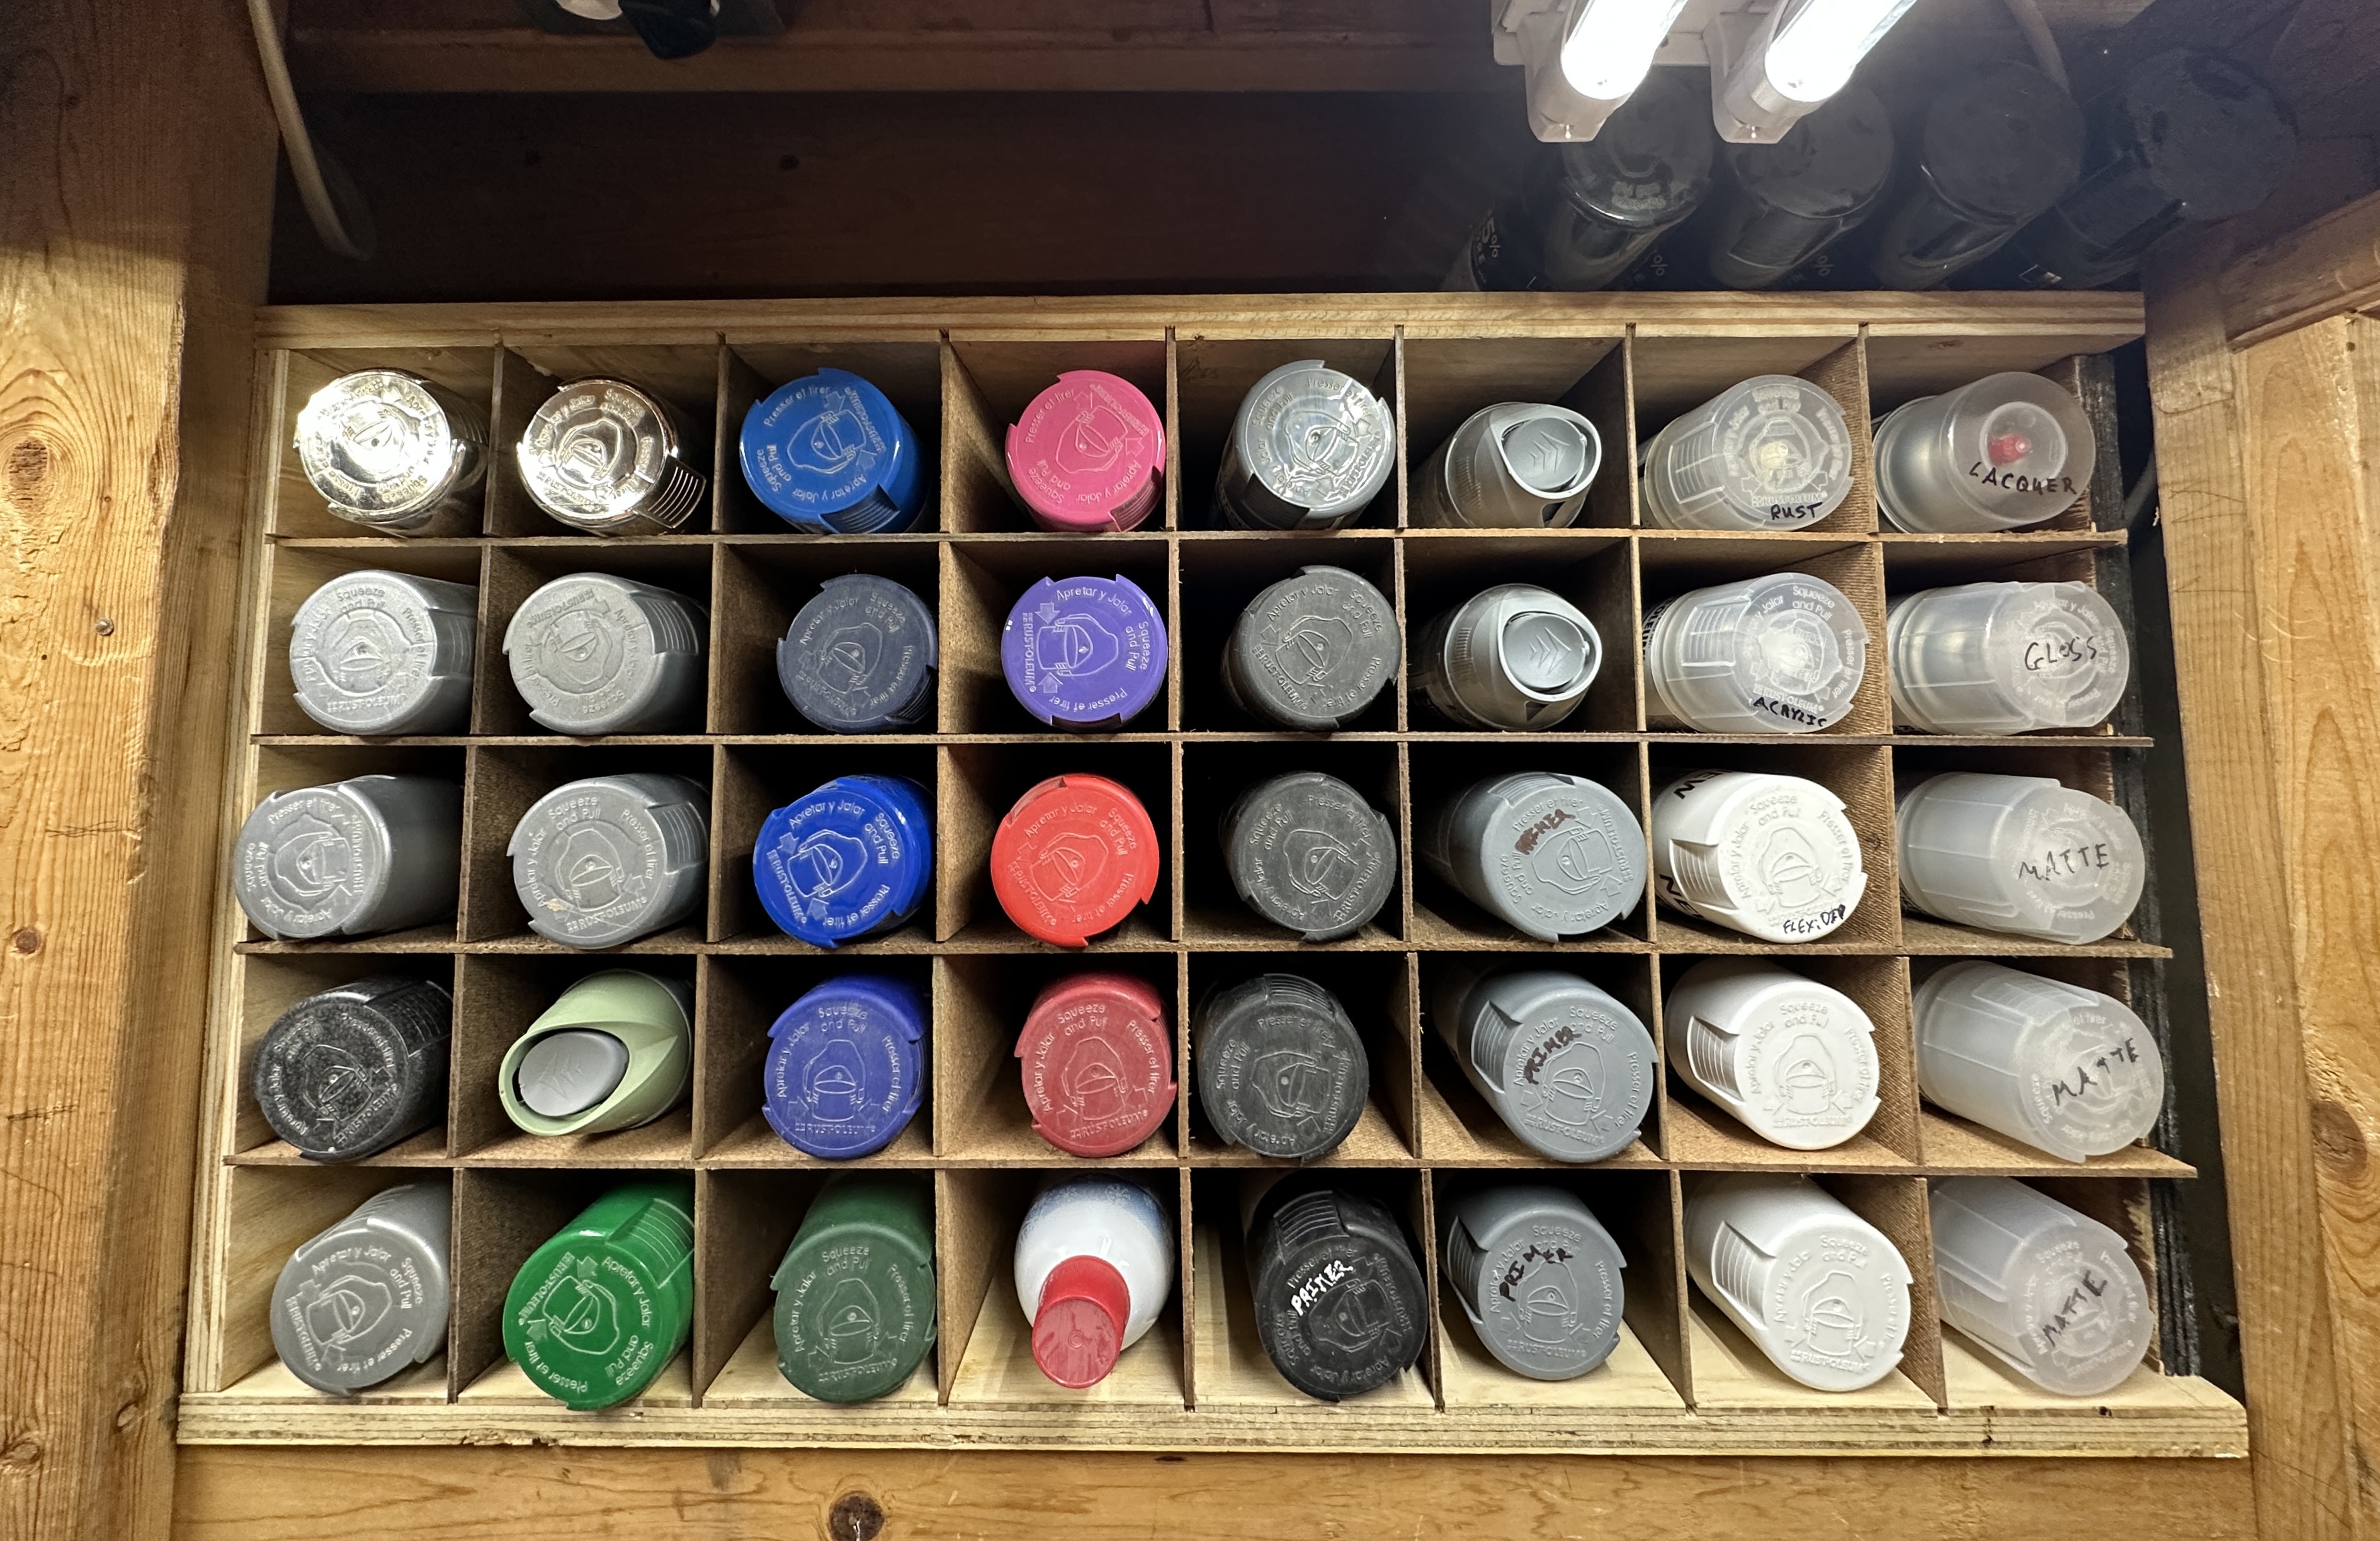
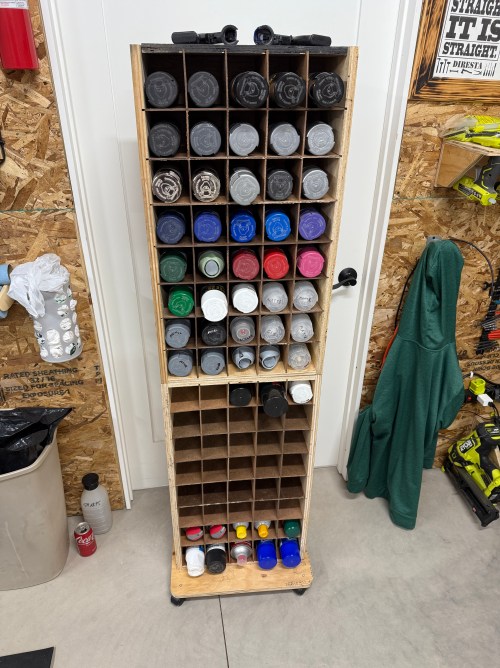
It was built to slide in a shelf at the old house. I was able to get it out and moved to the new house. The 16″ depth was wasted space though. Look at how deep the cans were when laying with the back on the ground (those higher ones are actually a tall can on top of a standard can).
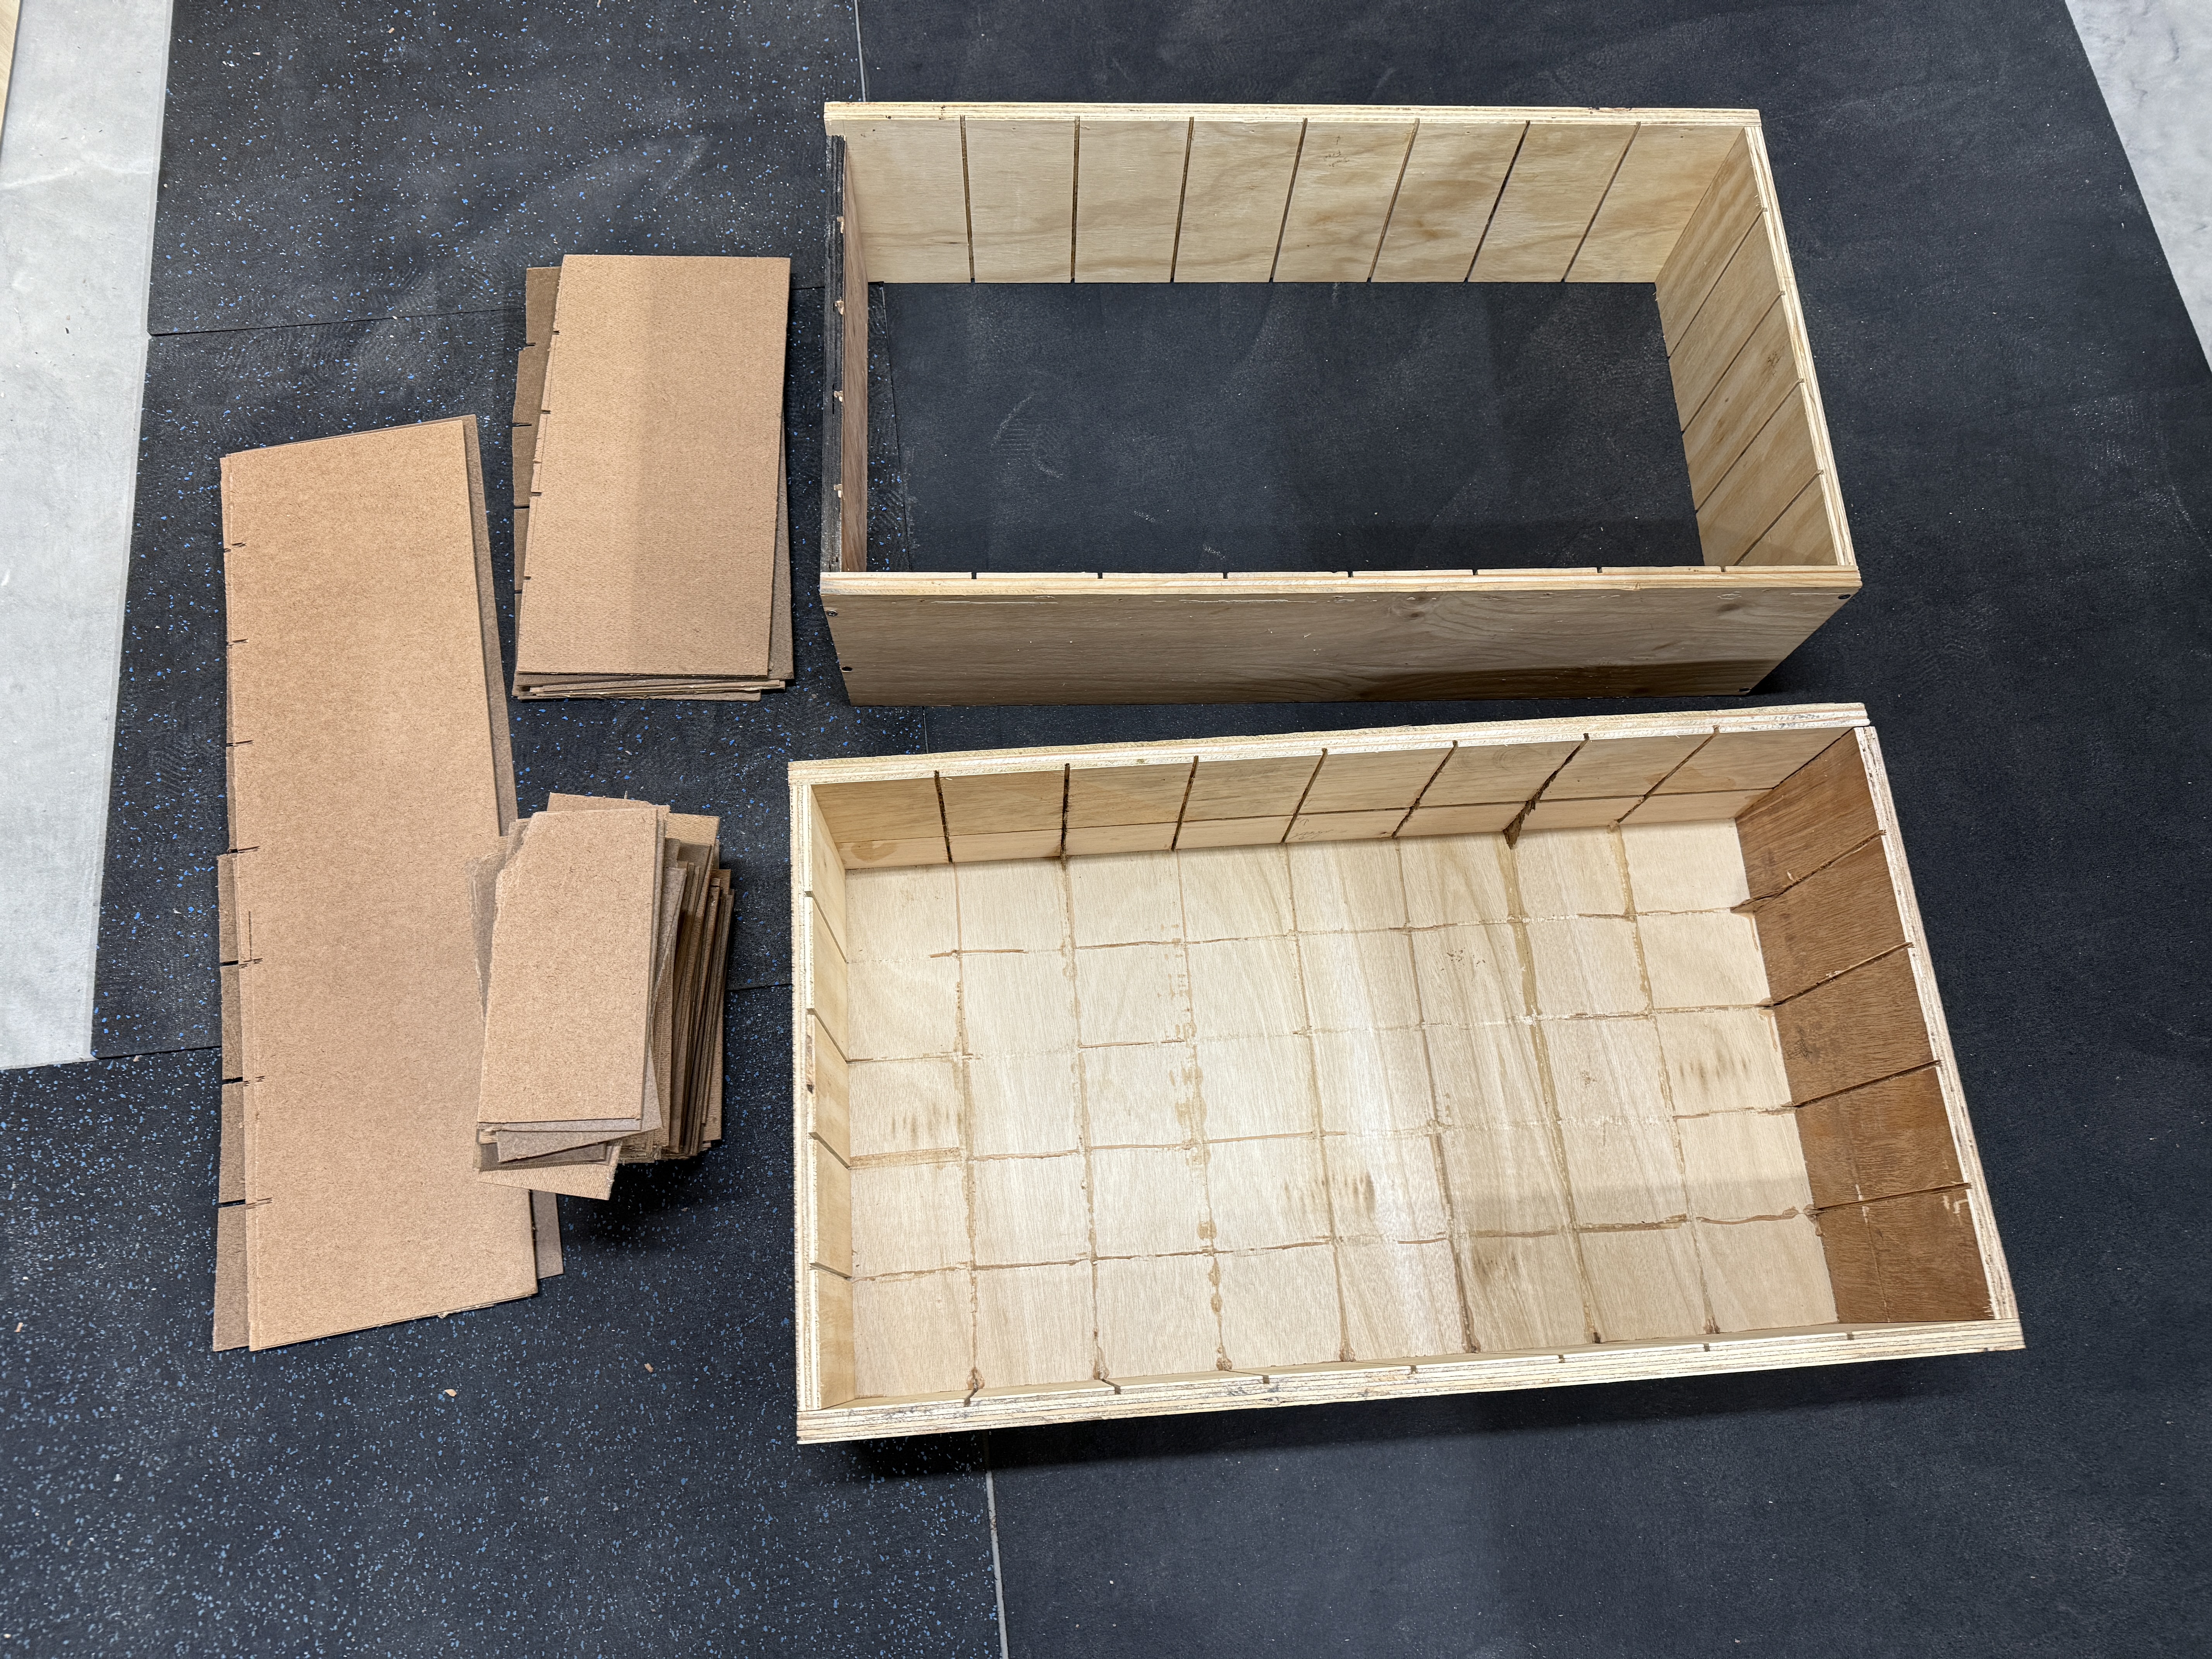
It turns out, a great size for spray cans is about eight inches, so I split it down the middle and wrestled out all of the dividers, which were partially glued in place.
Stack ’em, screw ’em together, and nail a back on the new half.
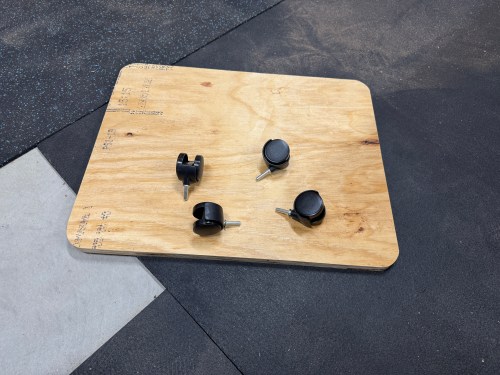
It was very tippy, so I rounded the corners on a larger piece of plywood to make a more stable base and pulled out office chair casters. The casters wouldn’t be great for any heavy shop furniture, so this was the perfect project to use them.
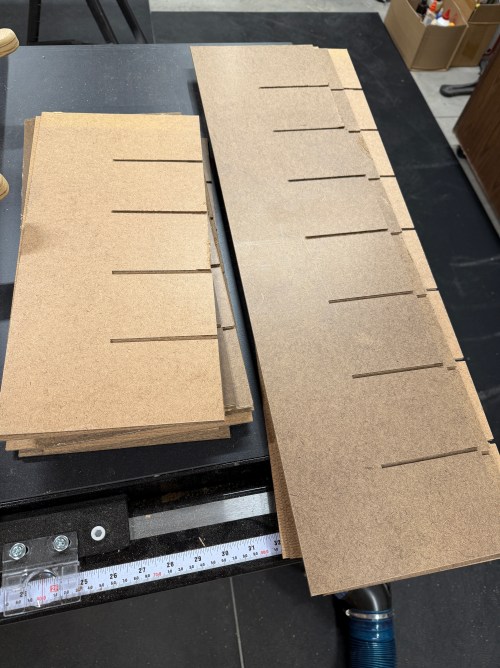
Cutting more dividers and then redoing all of the slots was the worst part of this project. It took well over 250 cuts on the table saw.
A handful of the new hardboard pieces were too long and needed to be trimmed. Other than that, the assembly went much smoother than I expected, with a little persuasion from a dead blow hammer. I have no idea why I used glue on that first iteration. Maybe it was needed with the deeper box, but this one is very stable without a drop of glue.
This is another great upgrade to the shop. After adding all of my spray paint, lubricants, spray adhesives, and other oddball cans there is plenty of room for more.
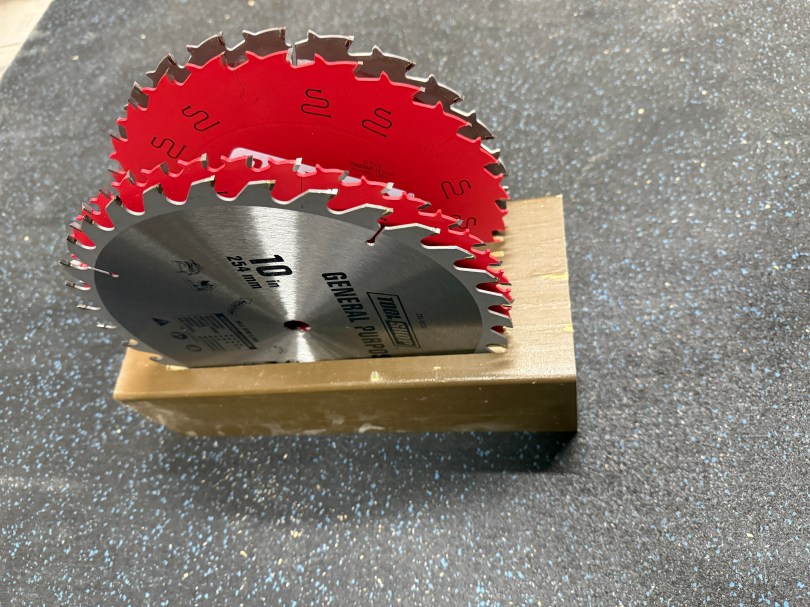
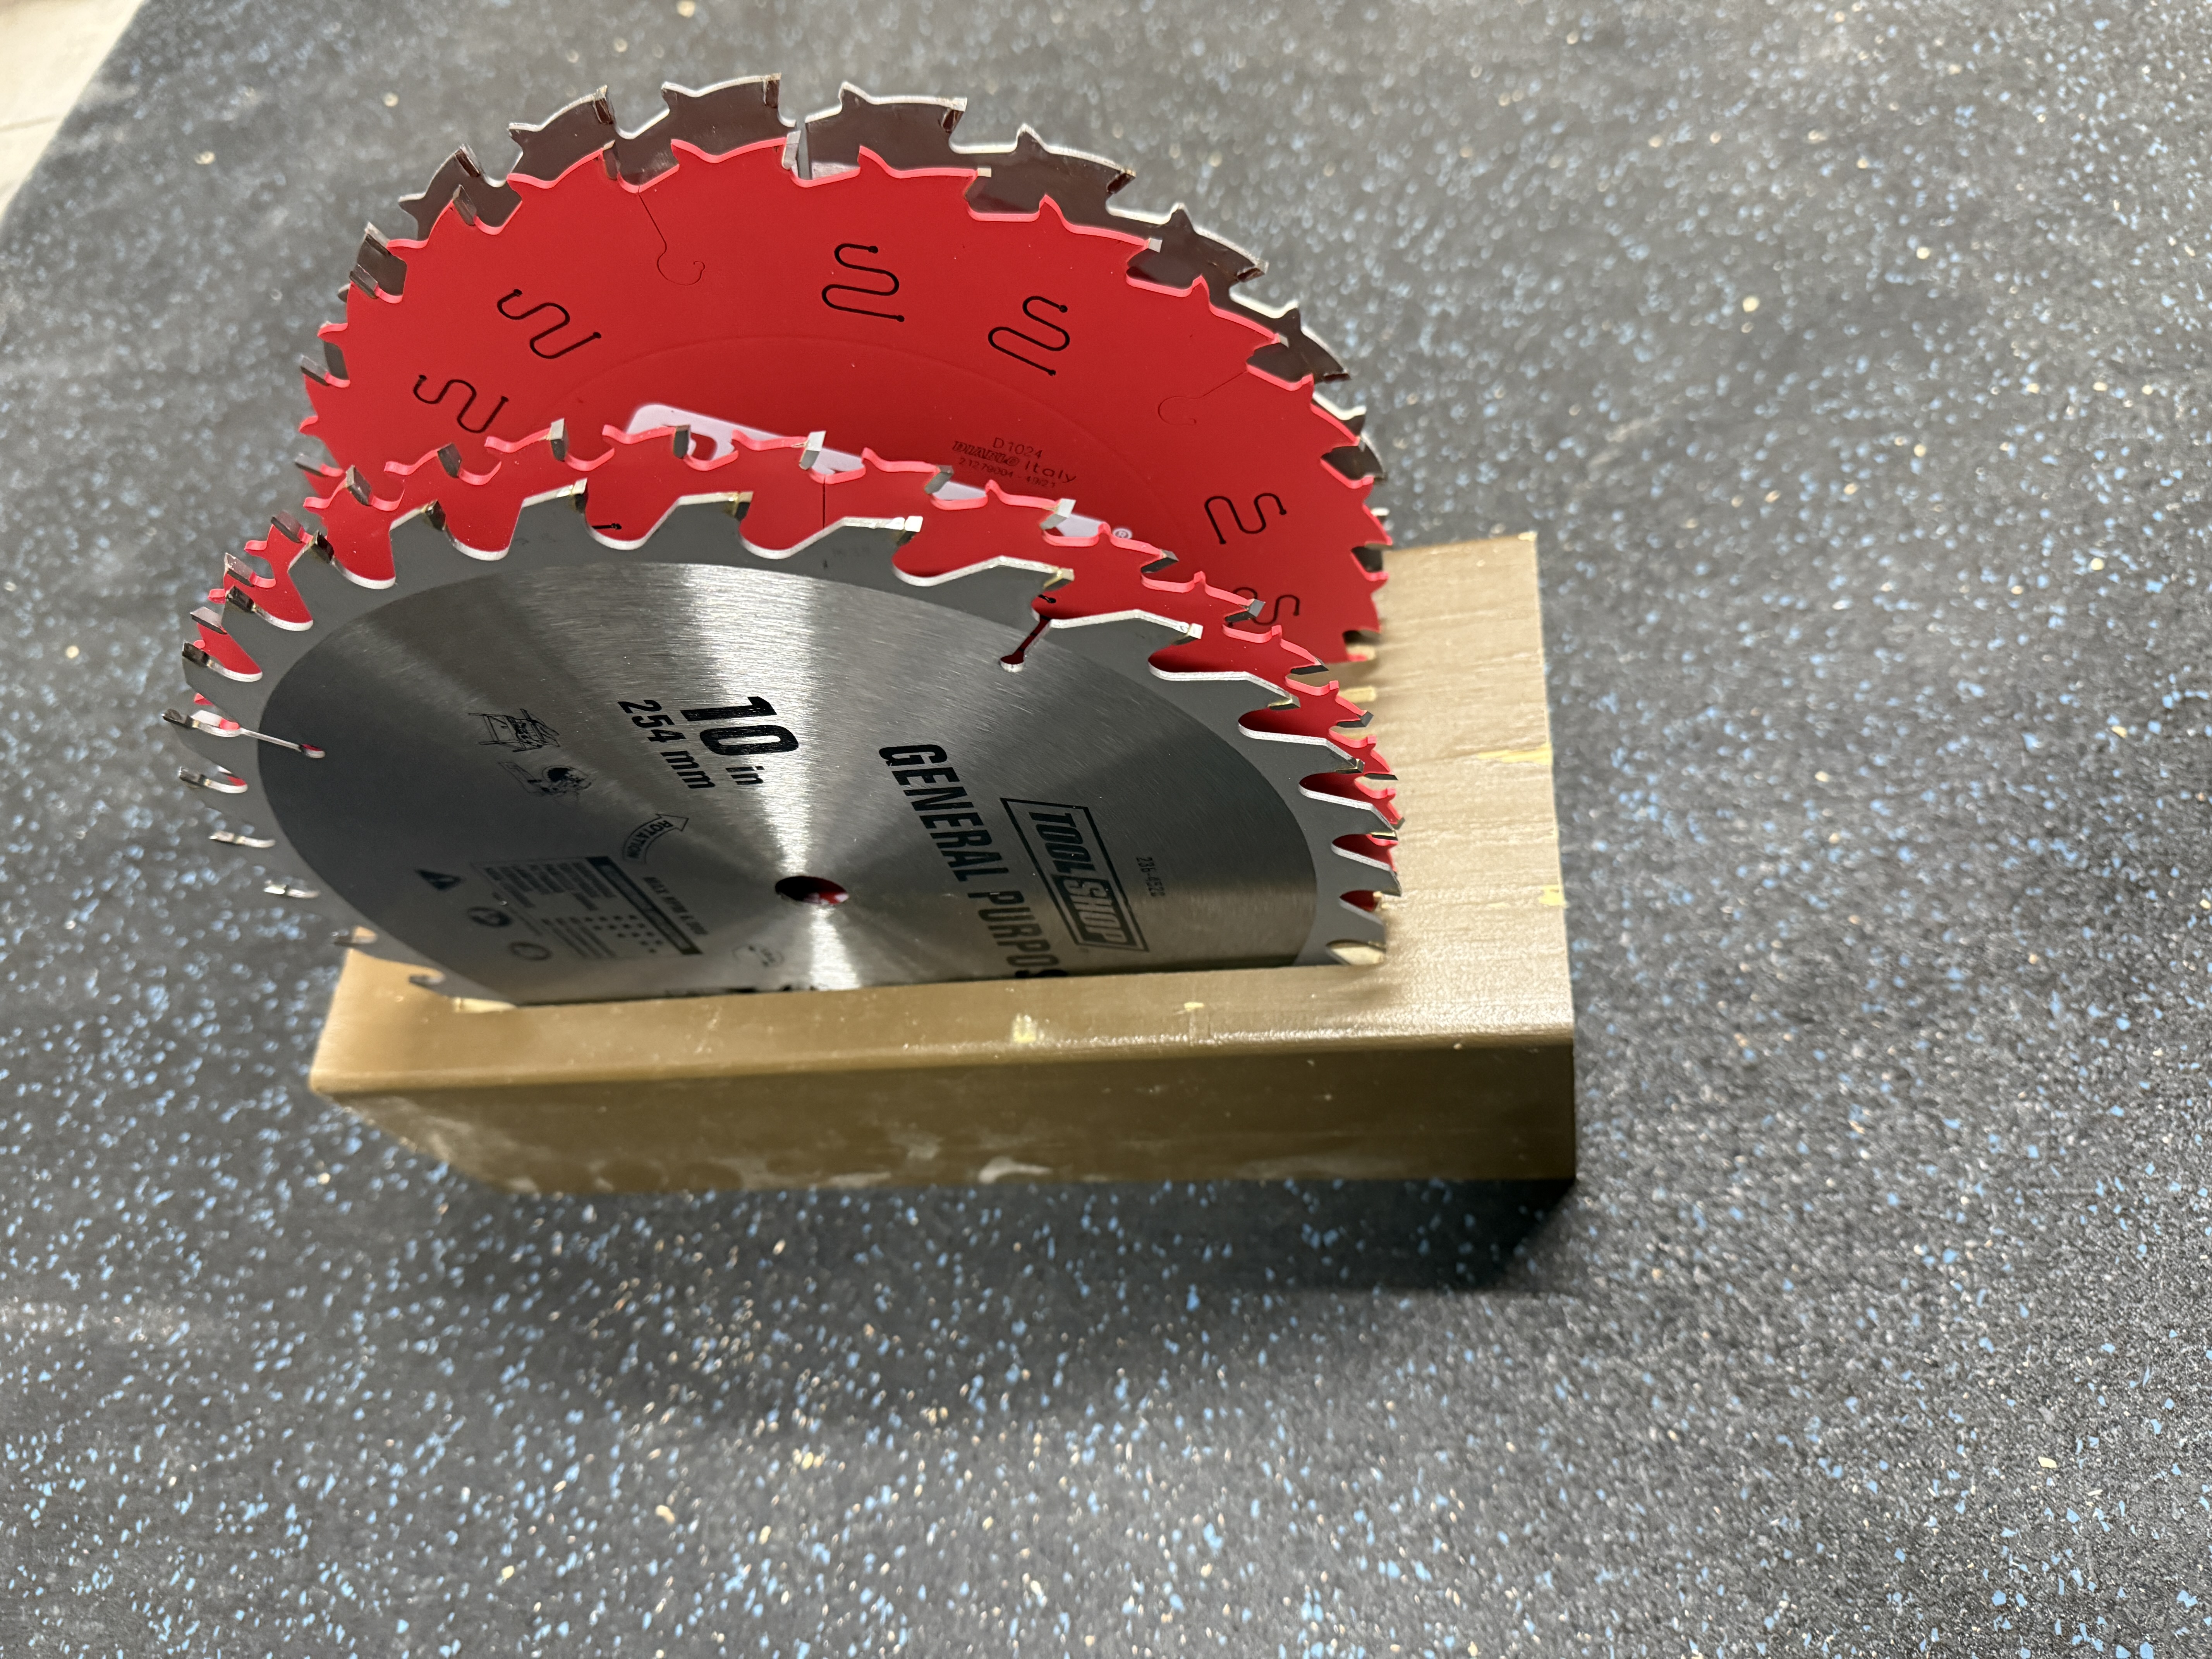
Before I make the outfeed table for my table saw I figured I would work on things to organize everything for the saw. There is a big open space under the right wing, so I’ll be making a cabinet to hold the sled, jigs, blades, and accessories. I had an idea for a saw blade holder, so I took a chunk off an old 6×6″ post, cut some slots, and trimmed the height and length.
I’ll give the holder some sanding around the edges, but otherwise this is done. It’s nice when a build goes according to plan, especially a quick shop project.
First up was upgrading the power cords on my table saw and jointer to be longer and beefier. I chopped a couple of 15 foot lengths off an old extension cord my Dad gave me years ago, which I still haven’t used. After wiring them in to the switch I installed a new plug on the end.
I also replaced the metal castors I had originally put on the table saw cart because they were horrible. The new ones roll real smooth.
I needed spots for more clamps and had empty space in the clamp storage area. I’ve wanted to redo that area anyway.
I got creative, using a couple pieces of copper pipe saved from the old shower and some old microwave mounting rods.
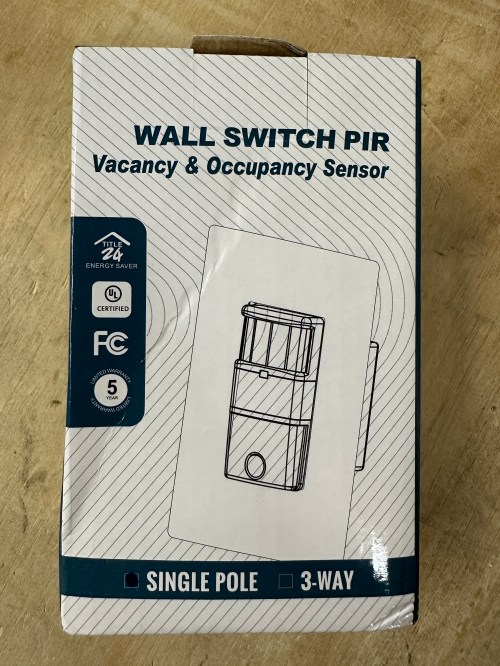
The shop closet is in need of a lot of love. The lighting has always bugged me and it was a good place to start so I’d be able to see when tackling the rest of the room. The pull string and single bulb had to go.
After wiring, I mounted the lights to a scrap of plywood and that to the joists. I had to add an outlet because my router and other network equipment are in here and they had been plugged in to the light fixture. There was an open ground, so I opened up the light in the adjacent furnace room and connected the ground wires.
What a difference!
It’s very bright in the closet now and the motion sensing works great. I thought about wiring half of the outlet to the switch so I could mount LED strips under each shelf that would turn on with motion as well. Maybe a later project if I think it’s needed. After I reorganize and get everything accessible at the front of shelves I think it’ll be fine though.
The other part of the closet that really annoyed me was the spray paints because I could only see the front cans and had to move things out of the way to get to back rows. It was hard to know exactly what I had.
I cut out the shelf and cross supports above the cans and removed the sheet of plywood that was the can shelf. This allowed me to gain extra height and assemble an entire unit to drop in place. I cut rabbets in the surrounding plywood box and used interweaving hardboard to create the internal compartments.
Talk about a stressful glue-up! With space for 40 cans, it still wasn’t enough storage, but I have a lot of duplicates that’ll eventually get used up.
The rest of the closet is still a mess and an accumulation of junk. It needs a cleaning and complete reorganization, so I don’t have any plans to build anything. If plans change or anything seems useful, I’ll be sure to share.
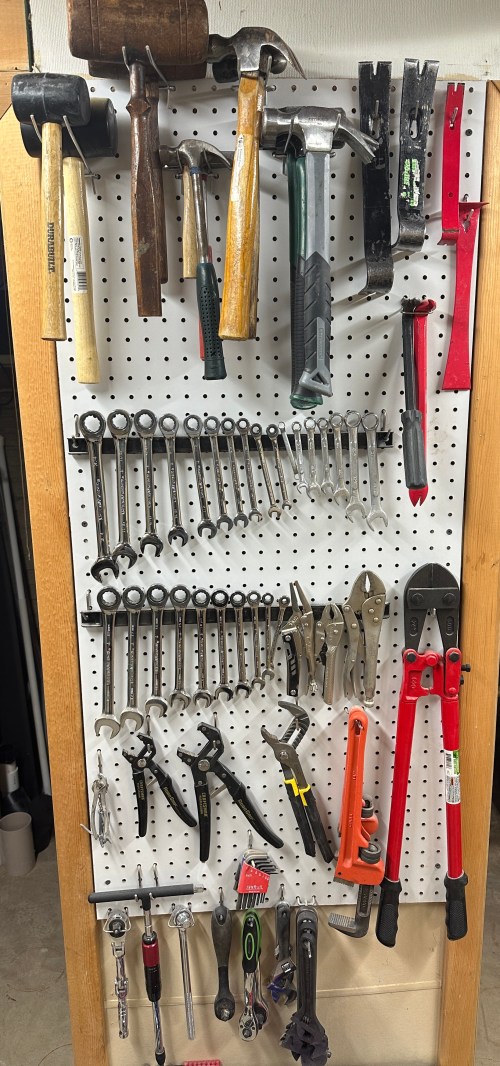
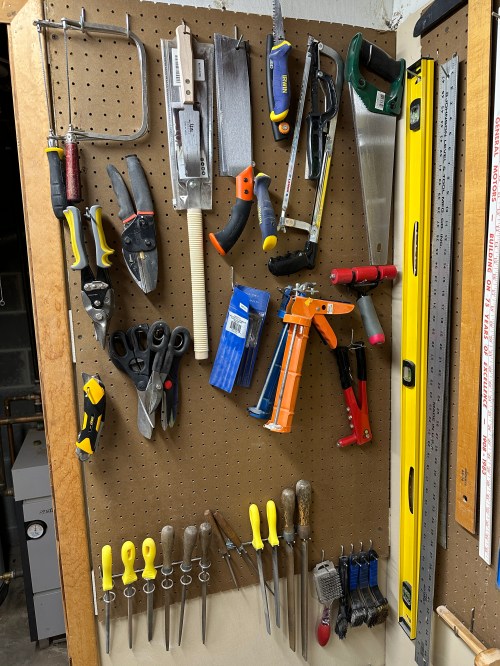
I’ve had a bunch of pegboards in my shop for over five years, and I’ve figured out what works and what doesn’t. I love that a lot of my tools are in direct view and can quickly be accessed. I didn’t love a few areas that I go to frequently though. The first wall I wanted to tackle looked like this.
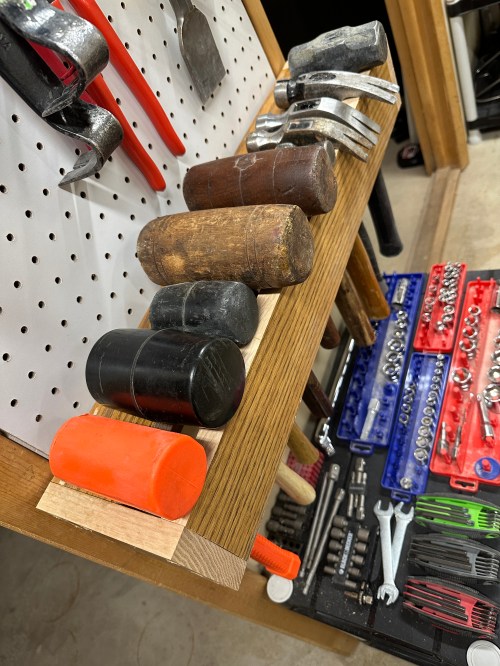
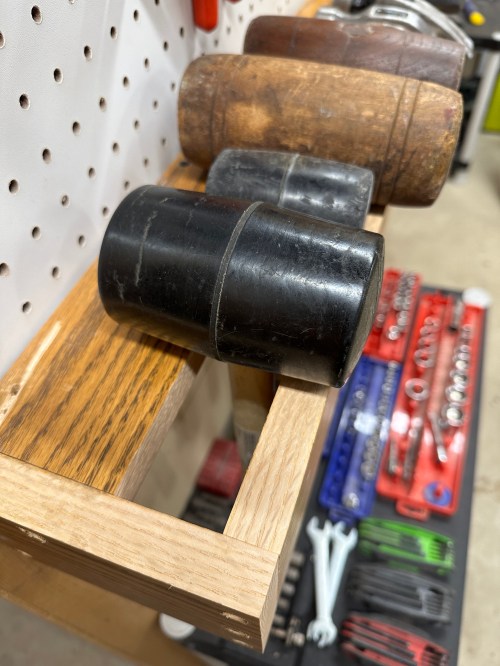
The main problem was the hammers. They’d become crowded and it was a pain to pull one out when it was second or third in line. I moved all of the other tools up on the wall and lined up my hammers on the assembly table.
After taking measurements, I cut up oak pieces from my old kitchen light box. This storage shelf came together pretty quick and has room for even more hammers. Now I can quickly grab any hammer without disturbing the others.
Here’s the updated wall.
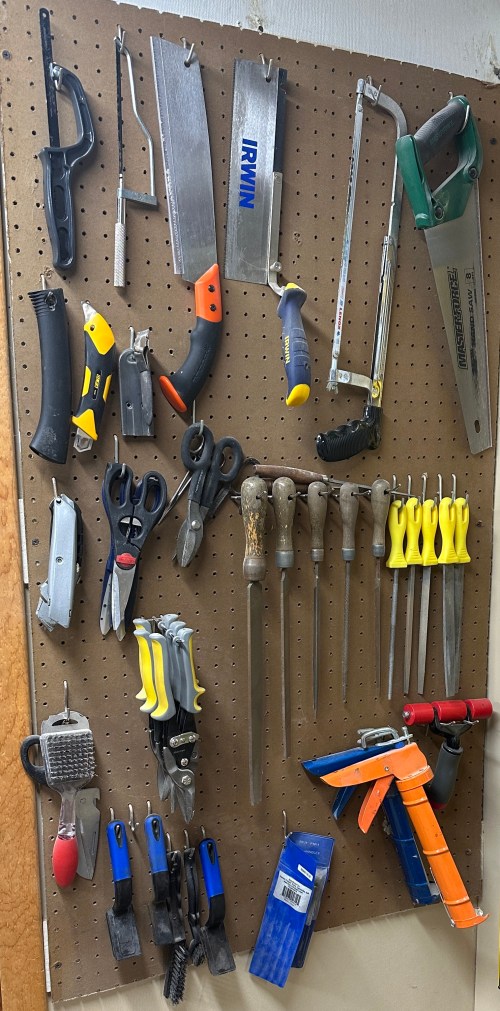
The next wall to the right was making poor use of space, especially since I don’t grab some of the saws very often. Take a look and see they were nearly occupying half of the wall. The files never worked well on those individual hooks either, which always pulled out of the wall.
By moving stuff around I was able to get several more saws, like my Japanese pull and coping, as well as other tools up on the wall.
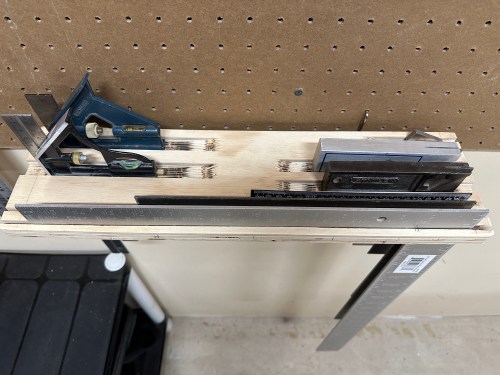
Over to the right again was tools used primarily for measuring and alignment. In February of 2018 I made a shelf for the squares, which has taken up way too much space. I really liked the grooves in that shelf, but the squares weren’t secure enough. Here’s how the wall looked before I touched it.
I reorganized everything else first and then made a new shelf that was longer so I could add slots in each groove to drop one of each square’s legs down.
Huge improvement and look how much extra space I have for more tools! I need to get myself a nice set of chisels.
Last up was the pegboard on my bench.
I’d been using four of the pegboard holders made for screwdrivers here and don’t care for them; the holes are too big and the spacing is too wide. All you need is scrap plywood with holes drilled in it, which allows you to run two deep and have plenty of expansion room. I also made a holder to store the wood carving set that had been unopened in a box buried on the bench for years.
So much better. Now I can tackle the reorganization of my shop closet.
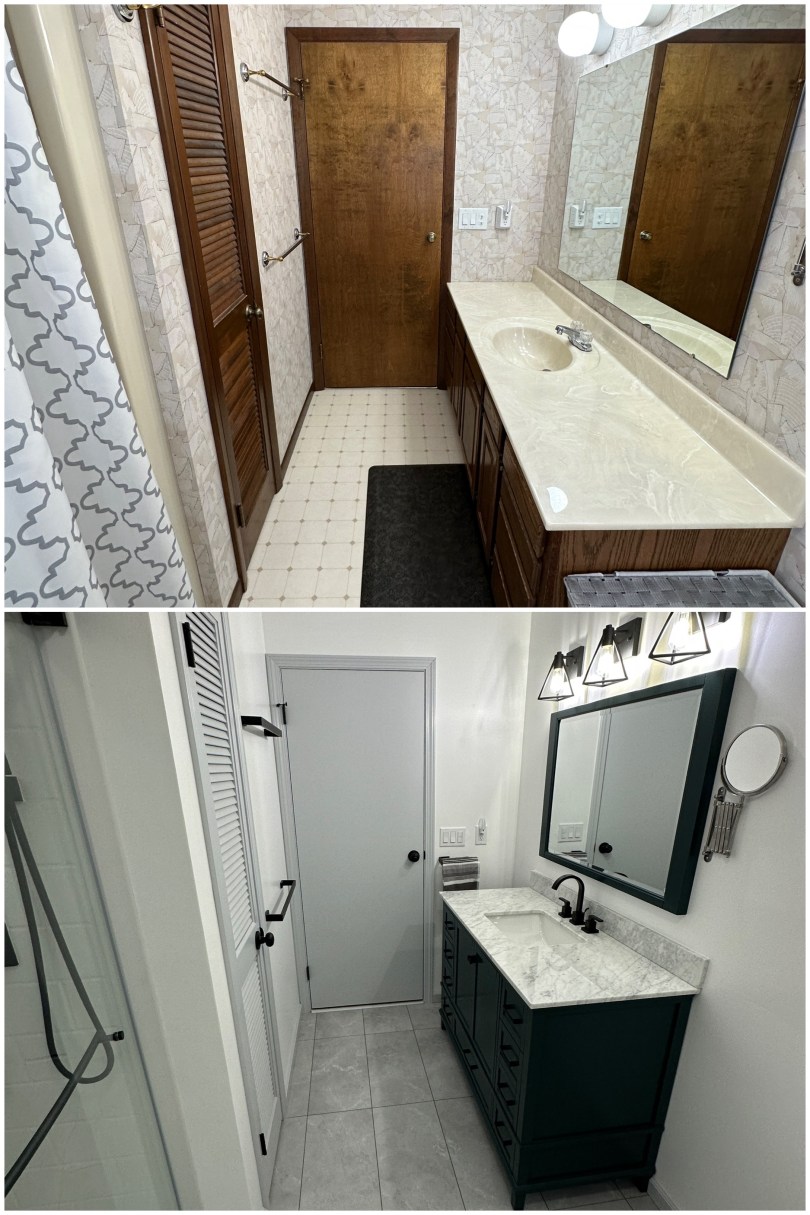
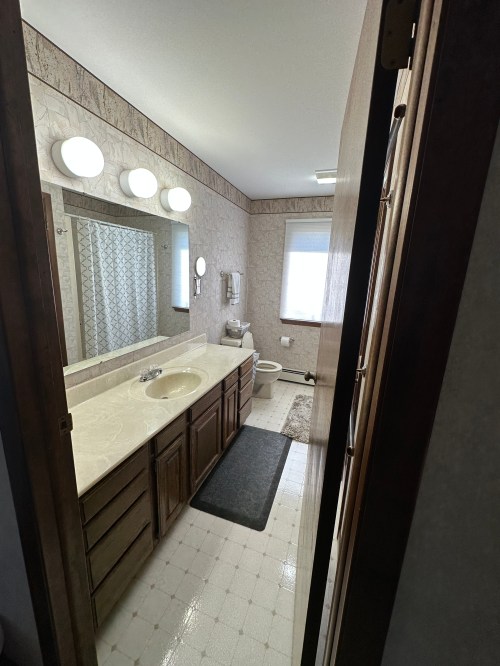
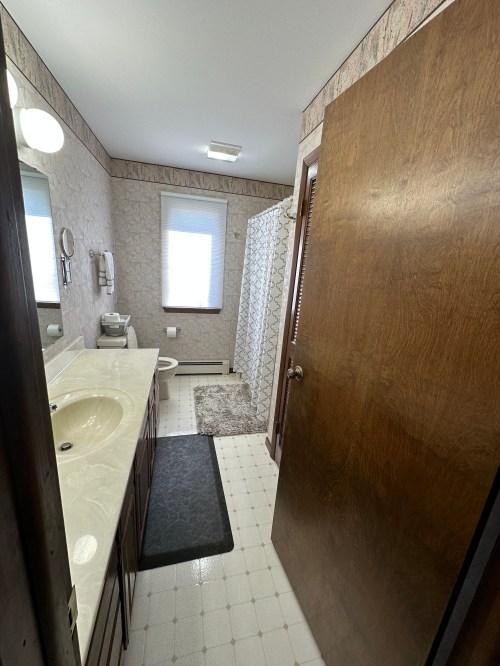
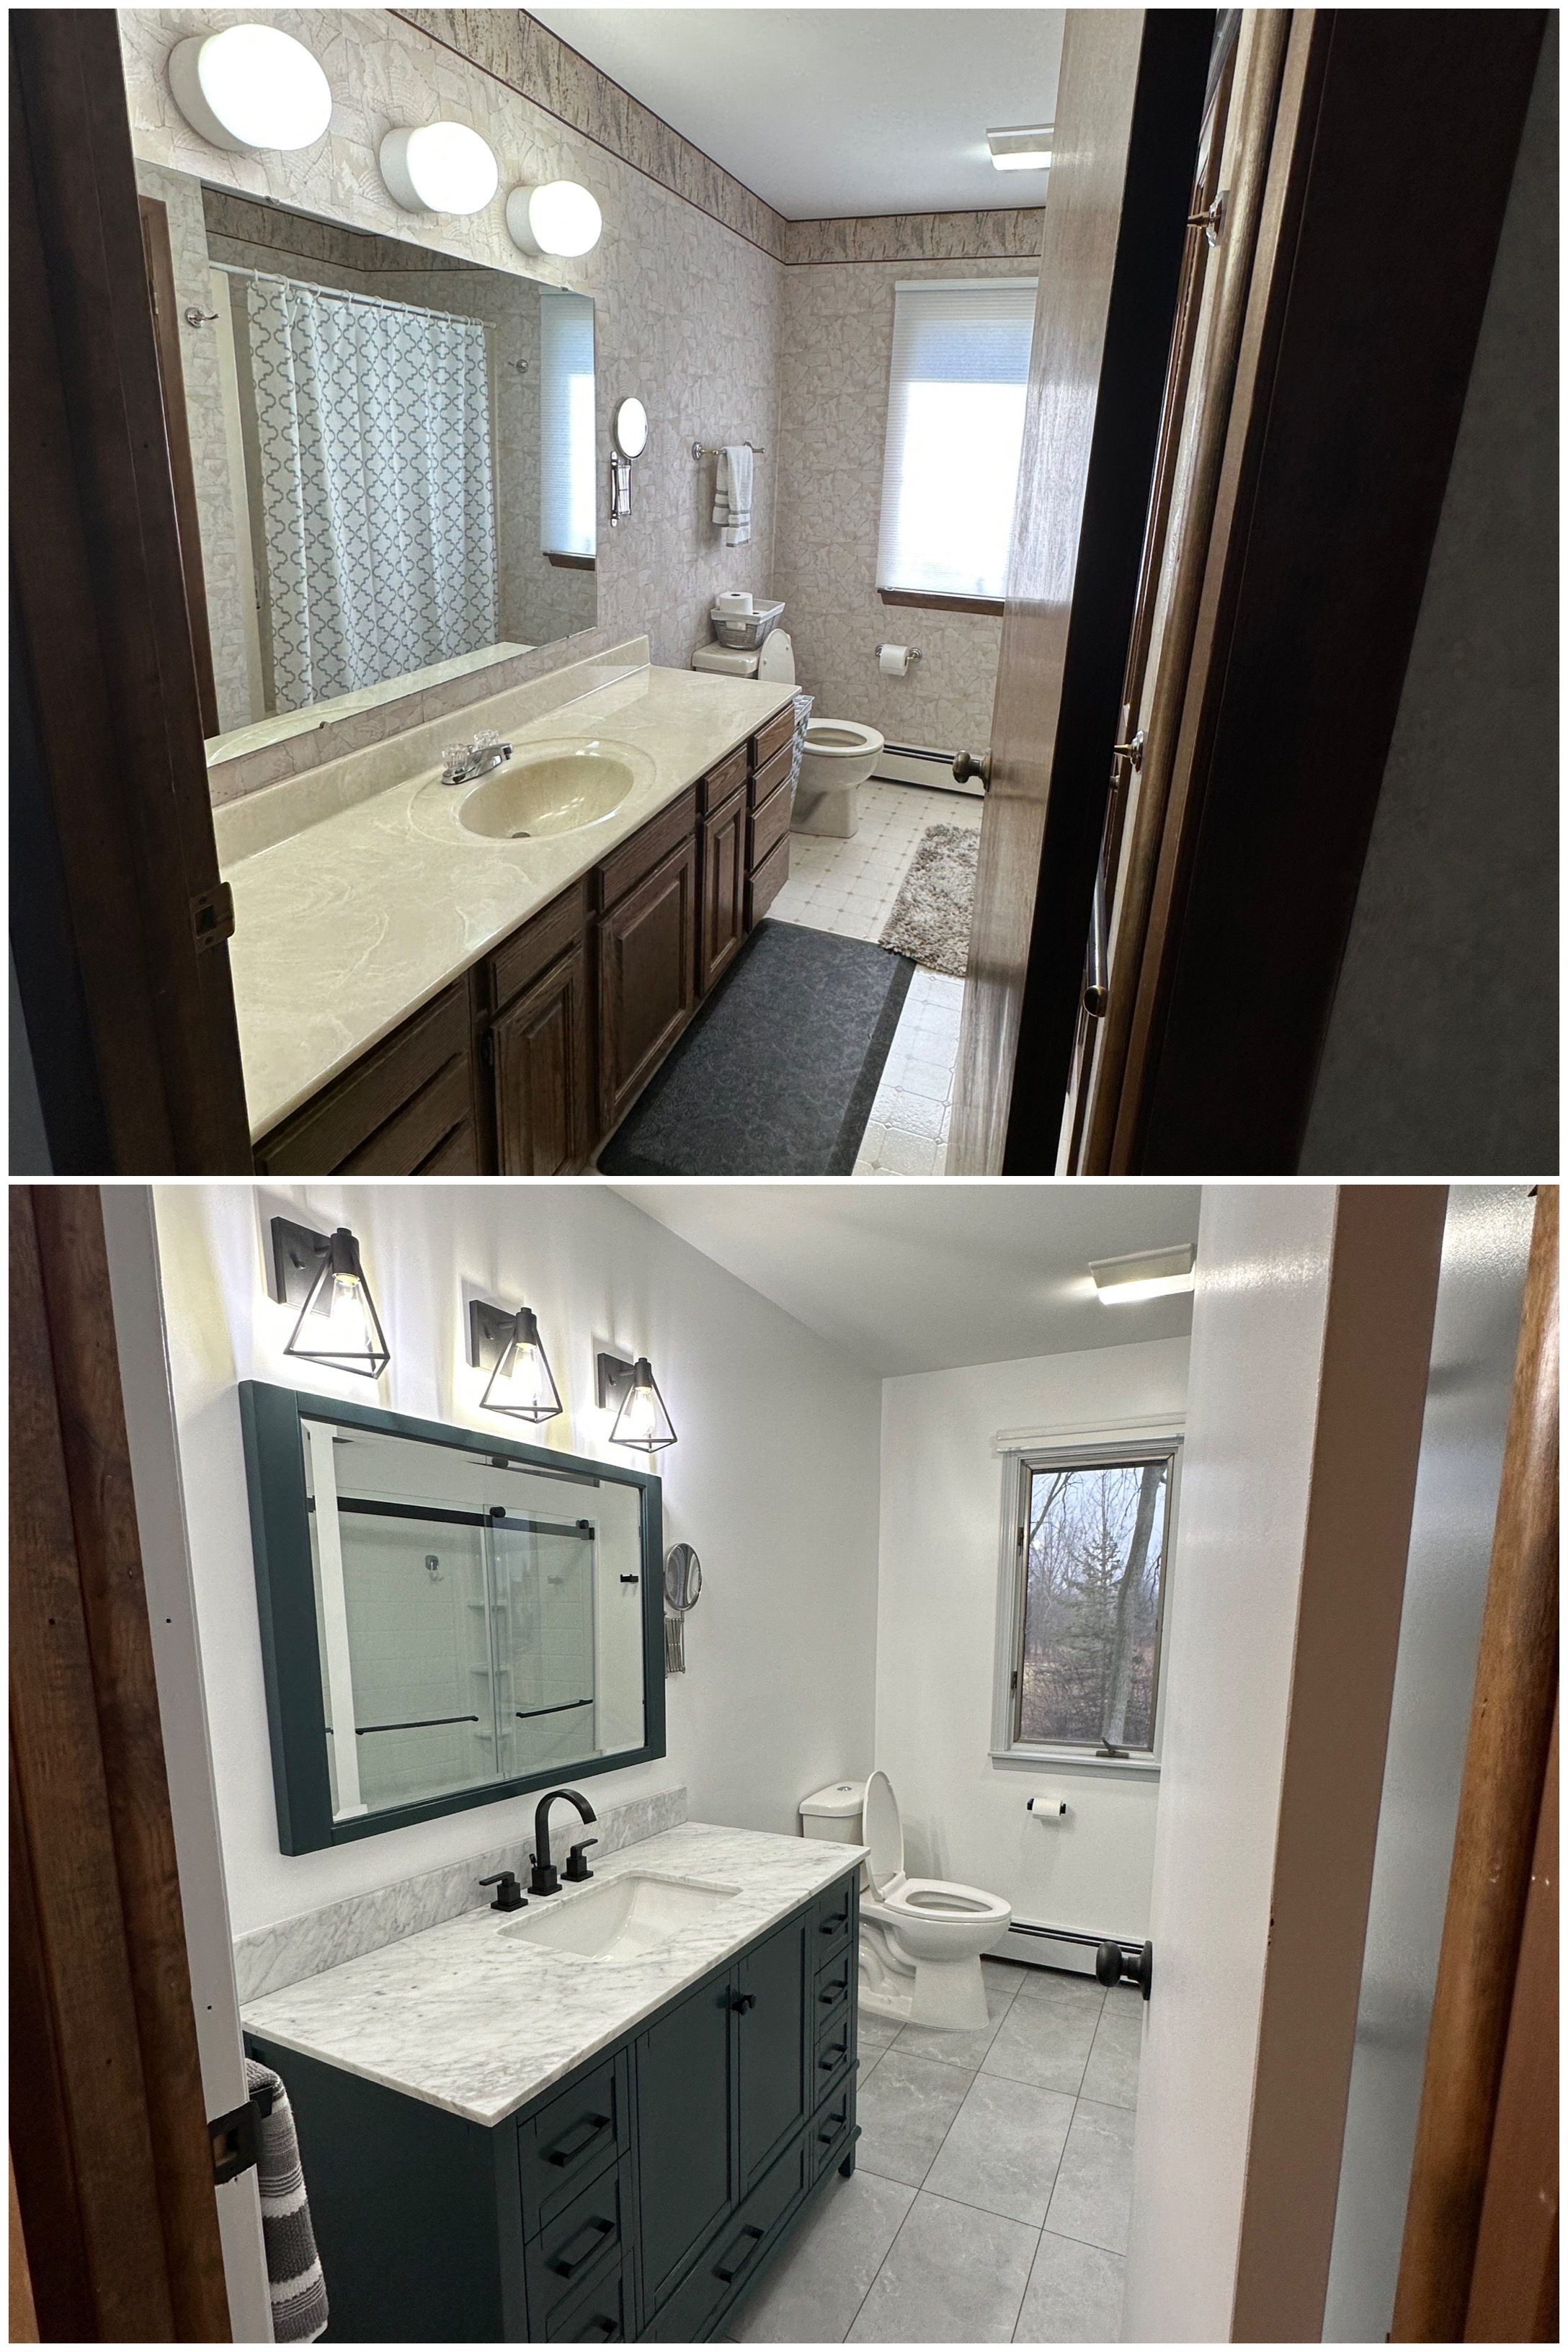
I’ve done a lot of home remodeling over the last three years and the guest bathroom was the final area needing an overhaul. Here are the standard before pictures.
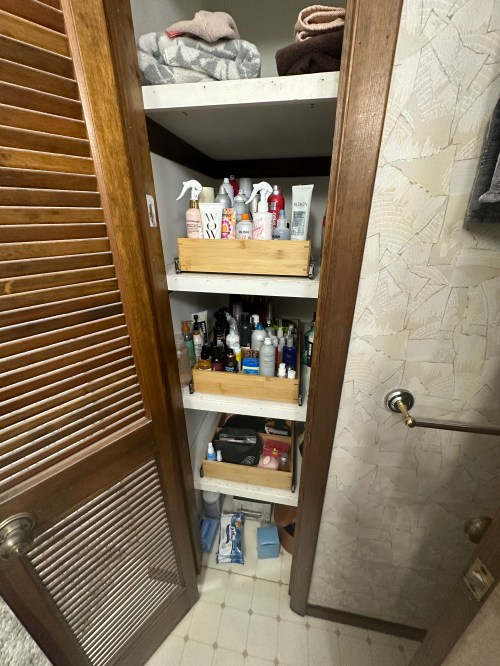
This is Brandi’s main bathroom, so I had wanted to improve the shelving situation in the closet for over a year. A smaller vanity was going in, so storage space would be lost. With three feet of depth in the closet there was a lot of wasted area and room for improvement. I bought three pull out drawers (Amazon). The closet shelves are made from particle board, so instead of using the included screws for attachment I picked up bolts, washers, and nuts.
After an hour install and some organizing it was a huge improvement. We even have room on the top shelf for spare towels now.
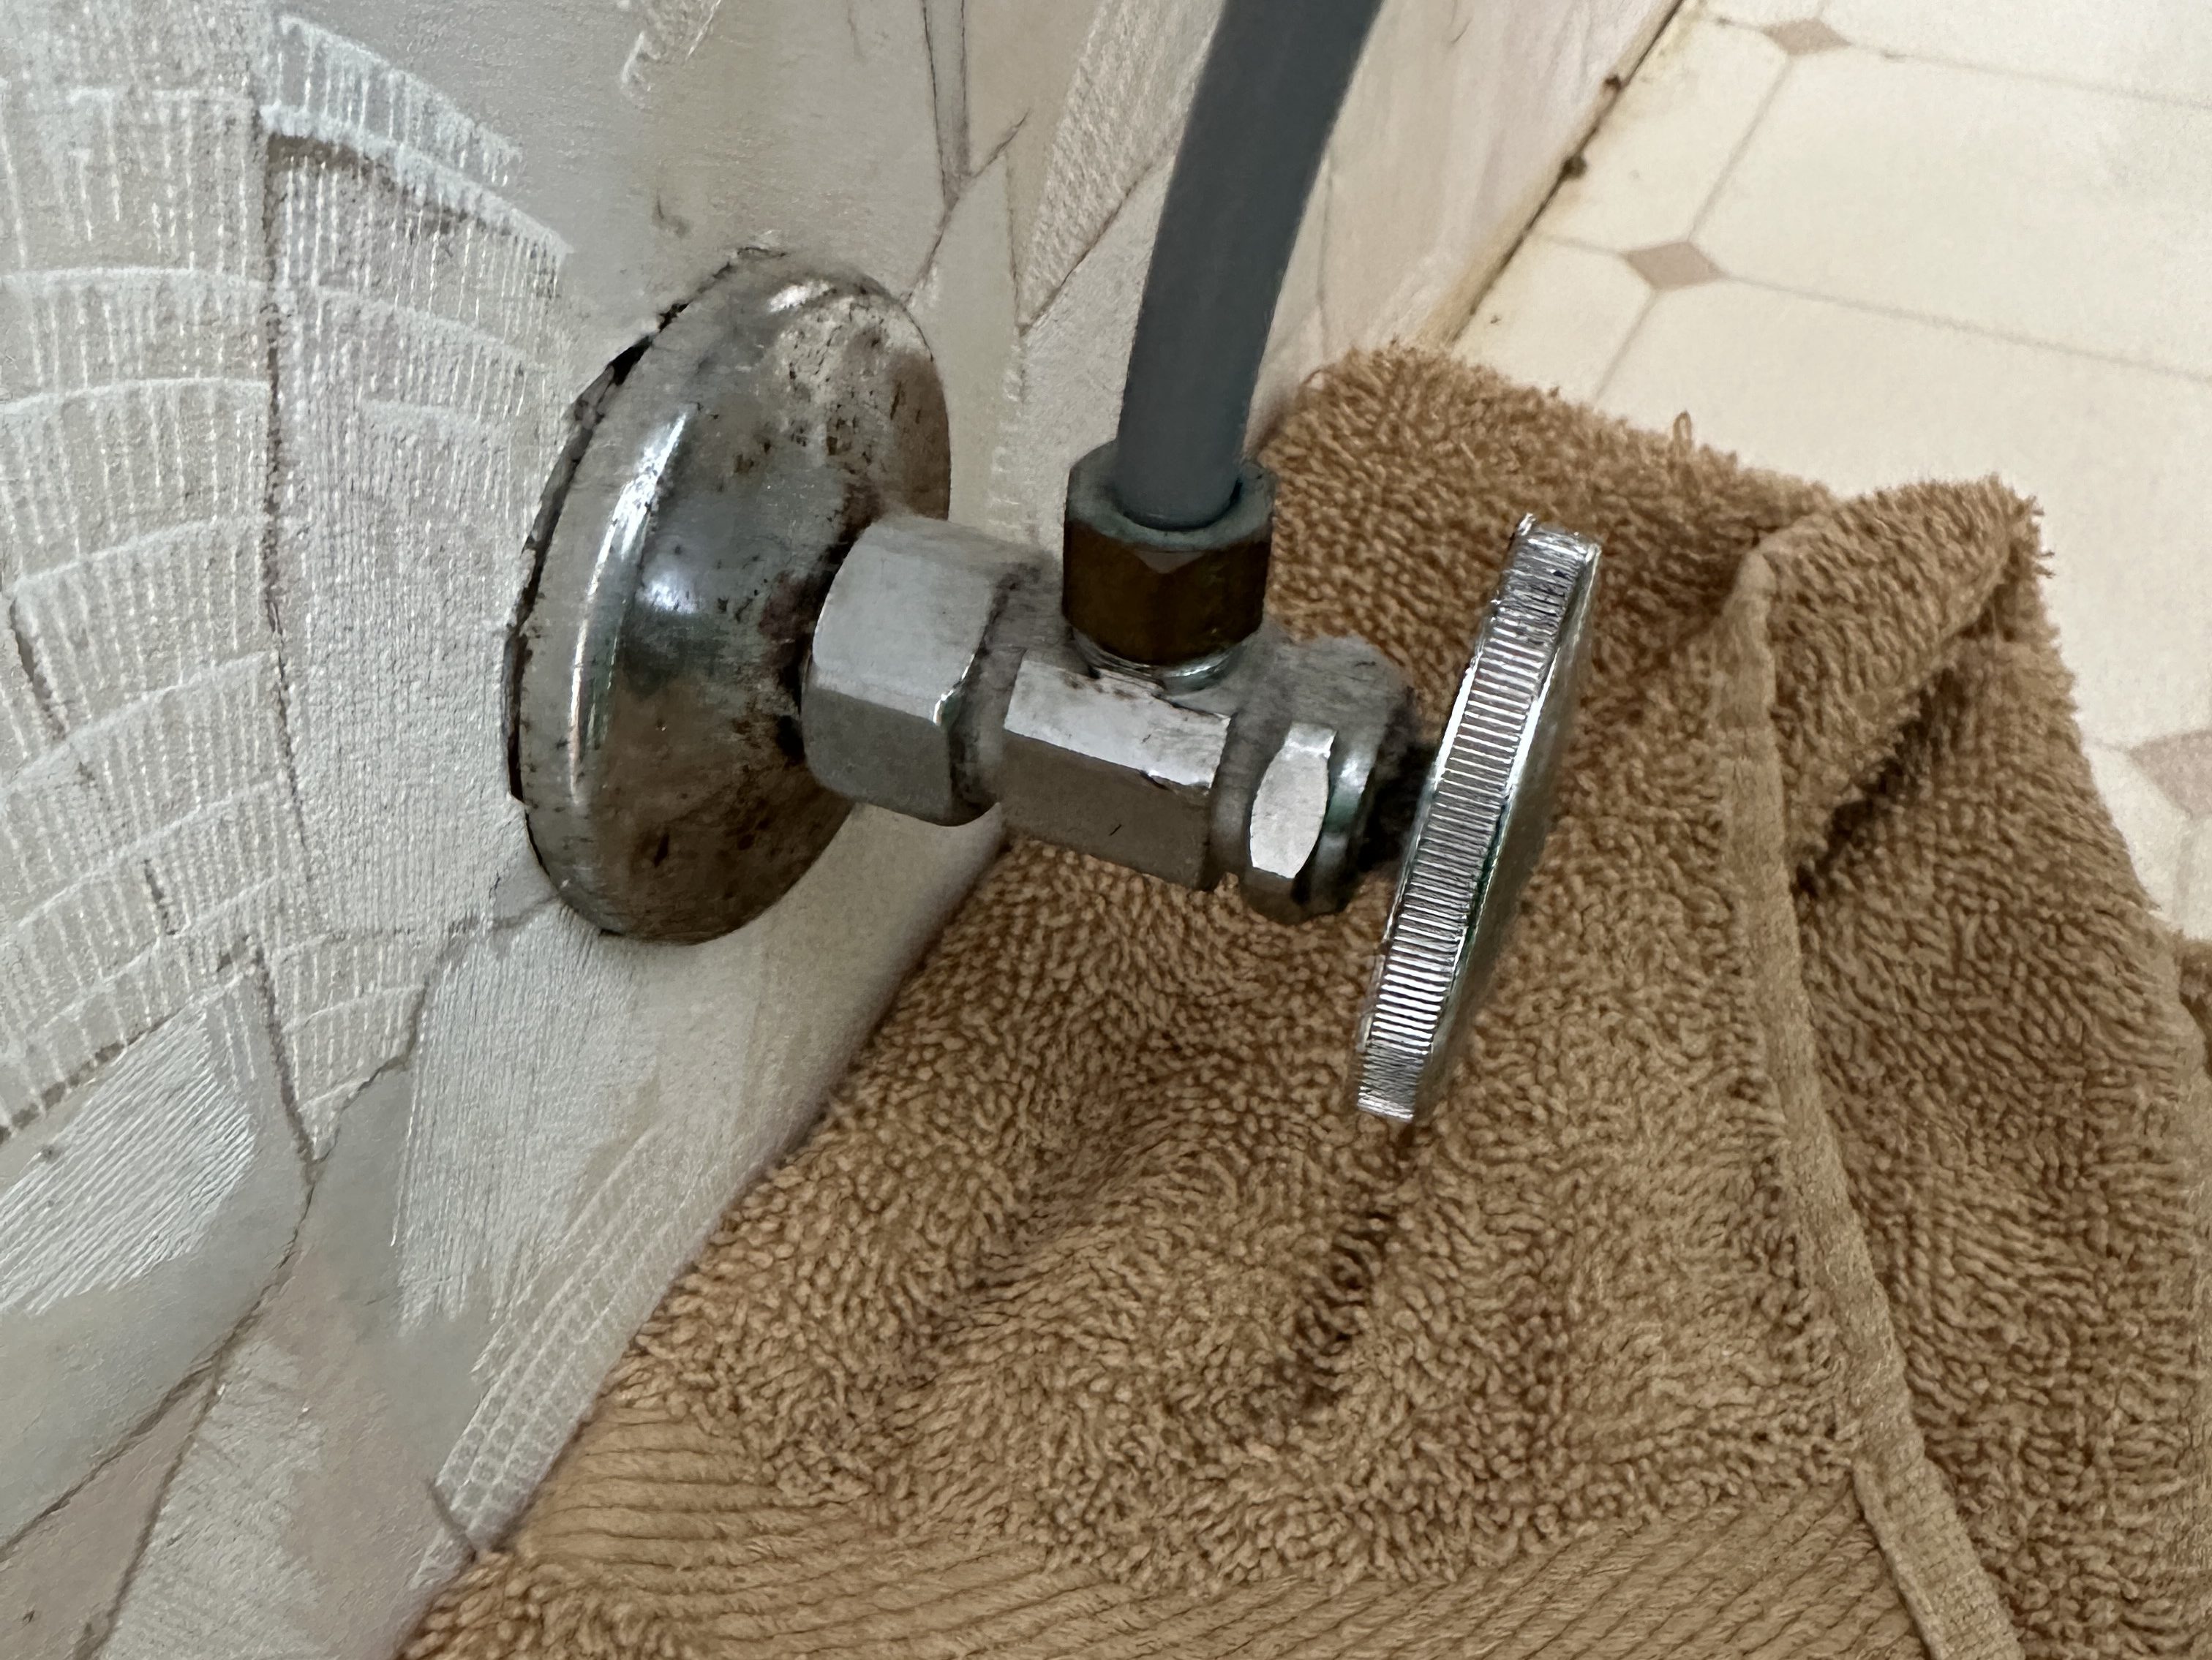
Just like the other bathroom, there weren’t shut-off valves on the sink’s water lines, so I installed some. Next up was taking down trim and everything on the walls so the fun job of removing wallpaper could be done; it was more trouble than it had been anywhere else in the house. Had to pull out the vanity, lights, mirror, and toilet to complete the job. Of course the toilet valve wasn’t completing turning off, so I put a new valve in there as well. Scrubbing and washing the walls was an exhausting step of this project and we were glad when it was done!
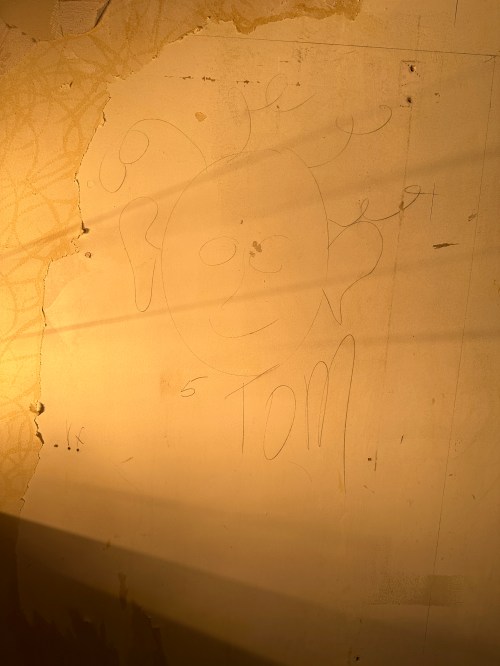
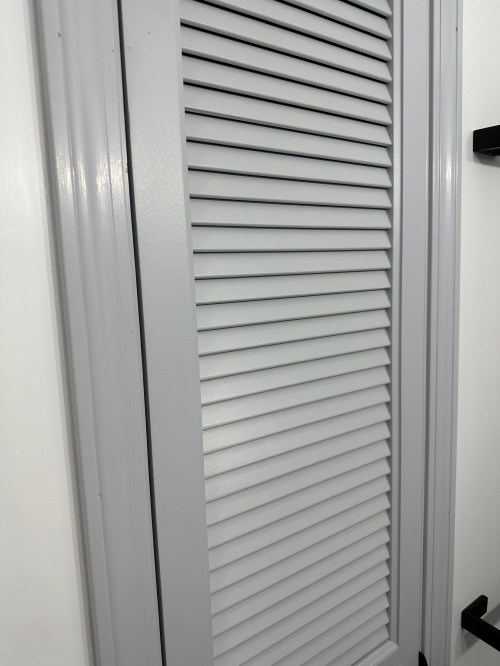
The walls under the wallpaper were in rough shape and needed a lot of patch work. I brushed some primer on the areas where the drywall paper was torn off. It was a good time to freshen up the ceiling before installing anything new in the room, so I gave it a quick coat of paint. We did primer and paint on the register and trim around the window and two doors. Since the closet door was slatted I needed to use my paint sprayer. I used plastic sheeting to make a temporary spray booth in the basement.
Dad came down to help for a couple of days. We removed some drywall and chopped up the shower for removal with a reciprocating saw. It went very smooth, thanks to having watched Removing A Fiberglass Bath And Surround and following exactly what he did.
With the water to the house turned off, we cut the lines, made an access hole through the closet, and installed shut-off valves. It felt good to turn water to the house back on with the valves working as they should.
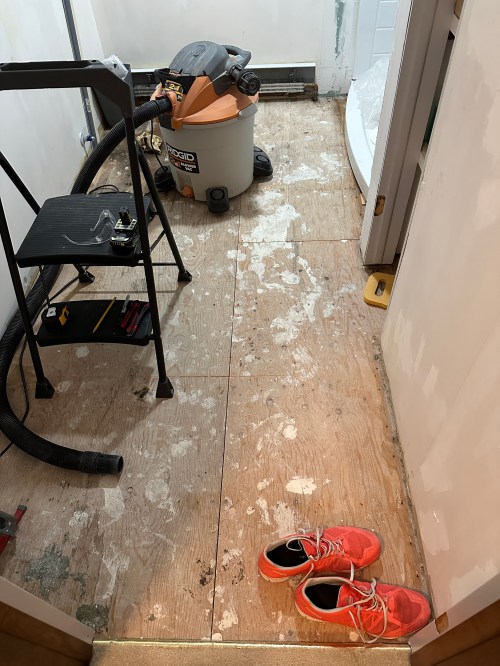
We brought in the shower pan for a test and it fit like a glove! We quickly decided we should pull flooring so the subfloor under the shower was closer to the level under the old vanity. It was a pain in the ass because there was linoleum with a layer of luan (attached with far too many staples) over an even older layer of linoleum. After digging through my rack of plywood I found some that was the correct thickness to bring the shower subfloor up with the rest of the room.
We started working on the drain, which needed to move over a bit from the old one. We bought parts to construct our own P-trap. There was still a lot of trimming PVC pieces, but we ended up with something that worked. Here’s what we had to work with and the cut-out piece of circle is where we had to get to.
Then it was on to all of the plumbing for the water lines. This was a bit of a challenge, because the shower fixture instructions were weak on details. I picked up a lot of tips for working with PEX from How To Convert Old Copper To New Pex | Tub And Shower Plumbing. After temporarily installing a couple of caps, a pressure test showed a leak-free system.
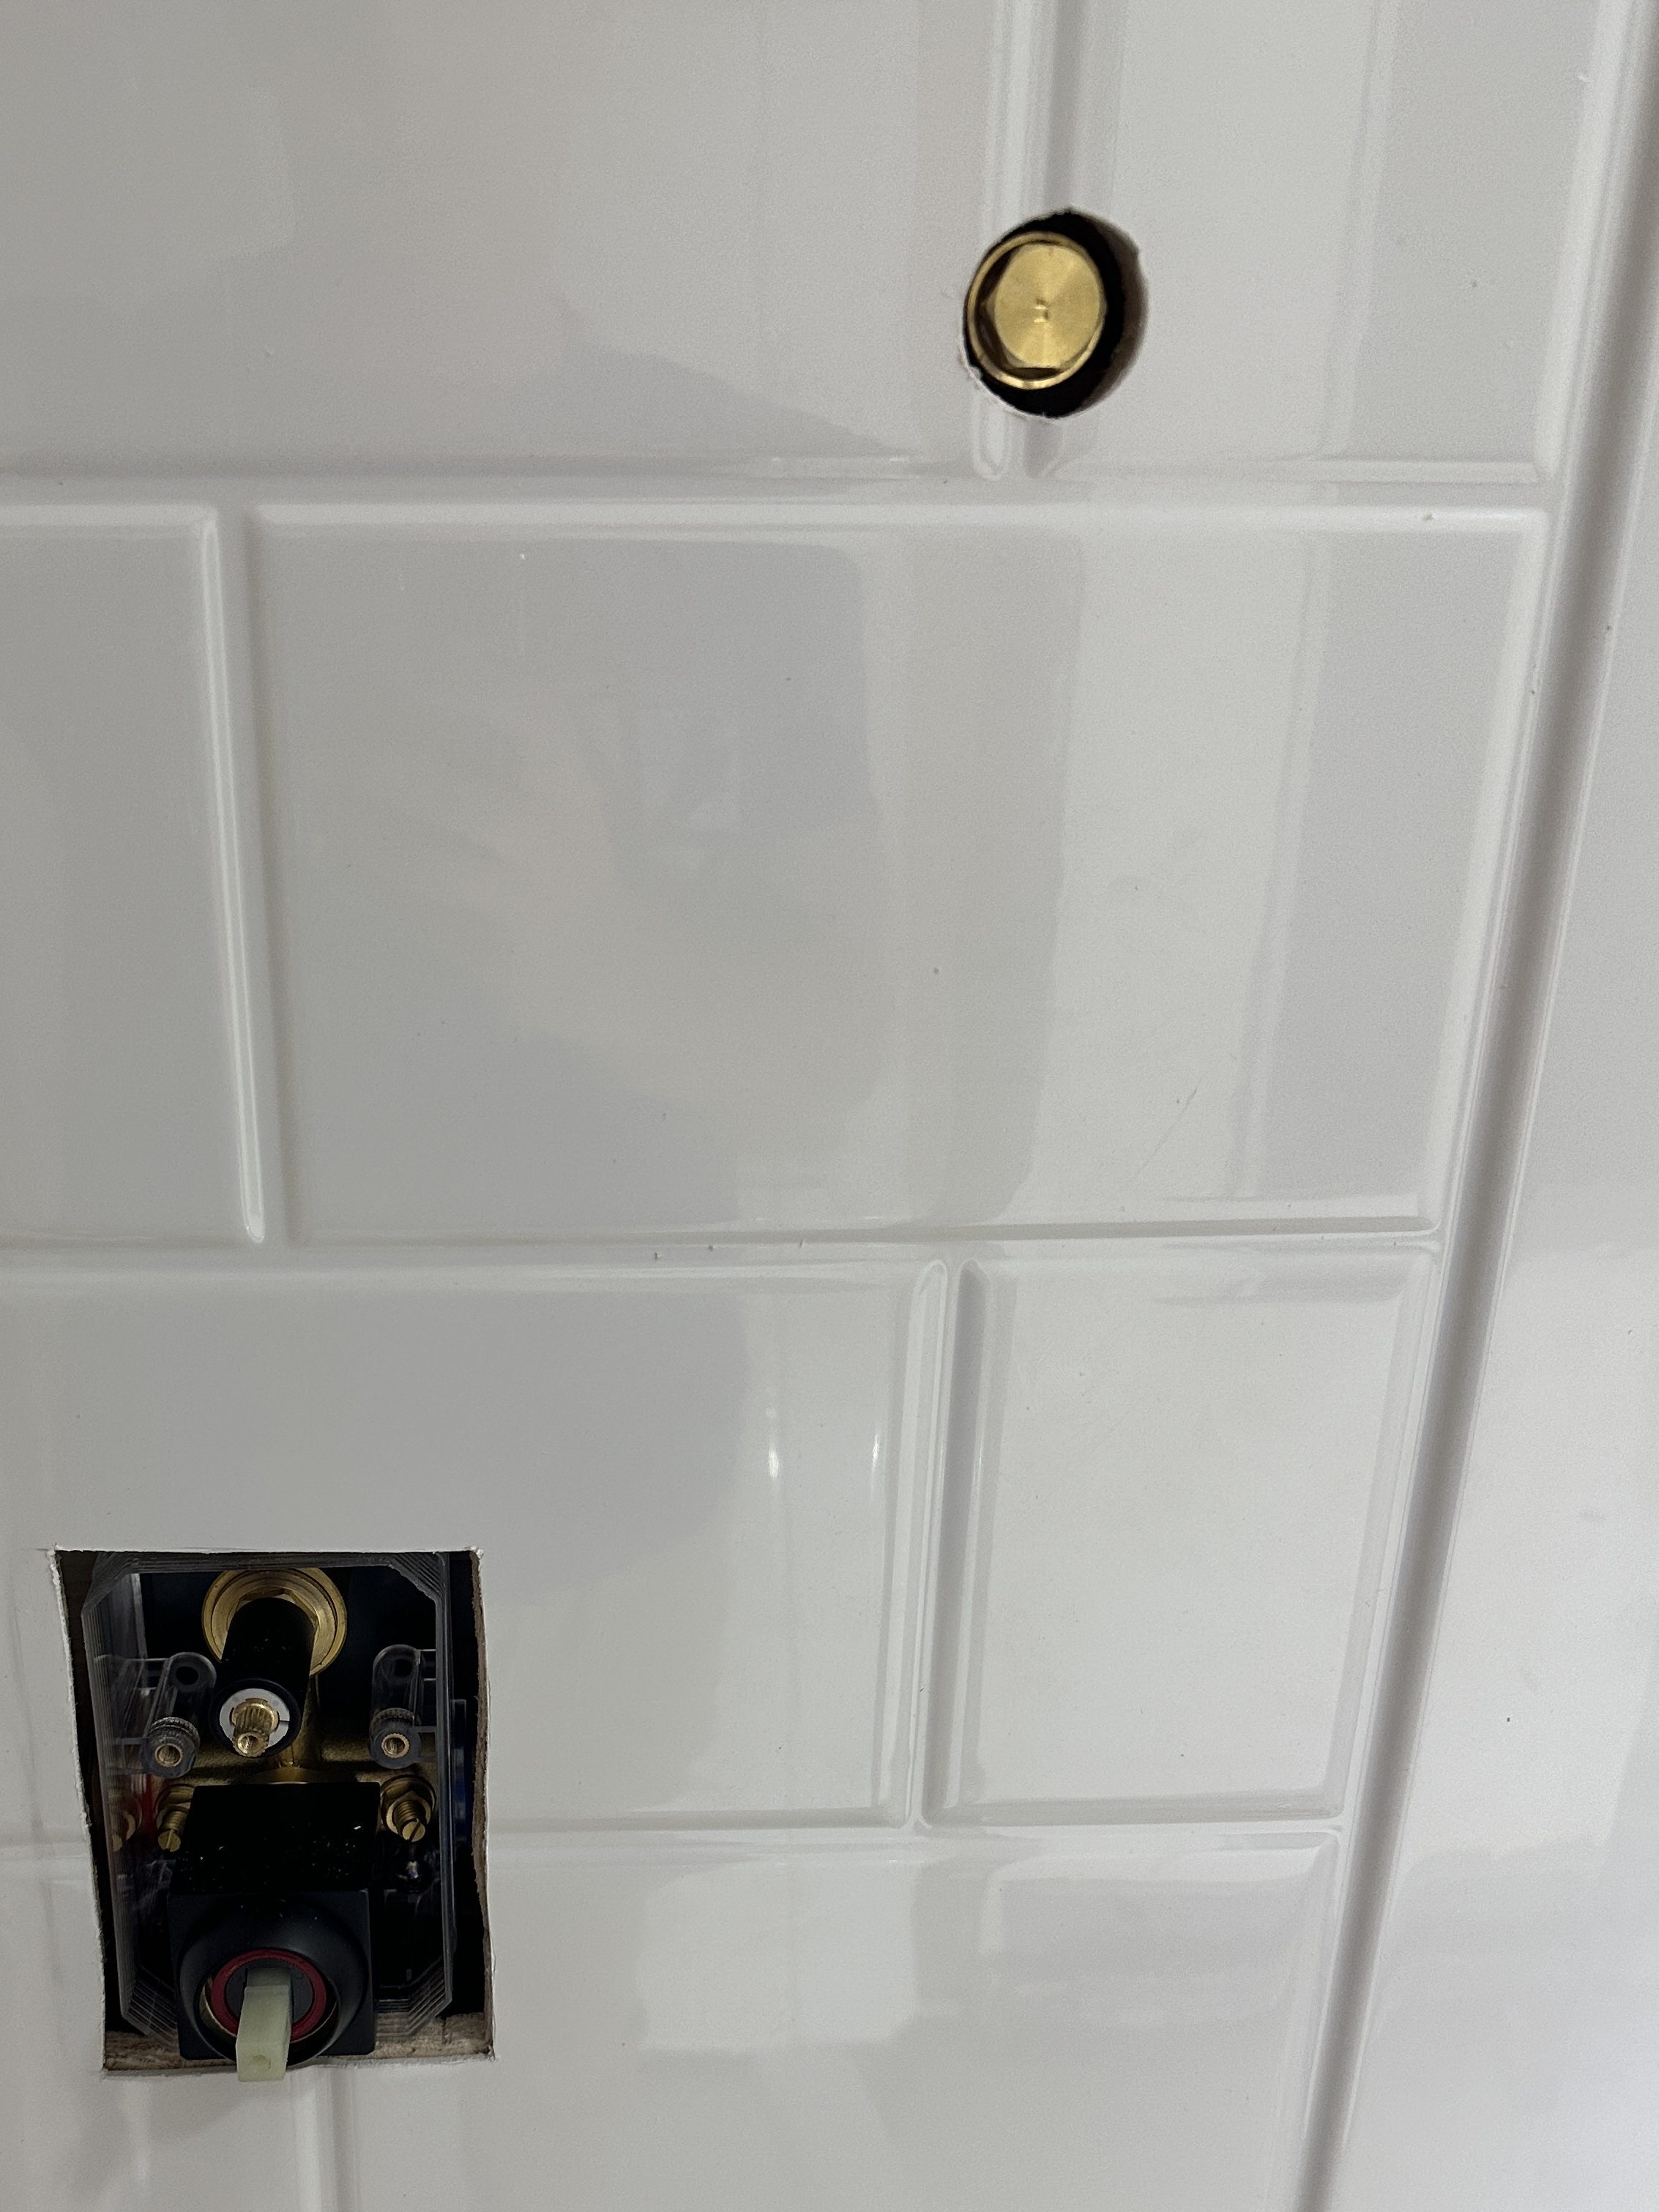
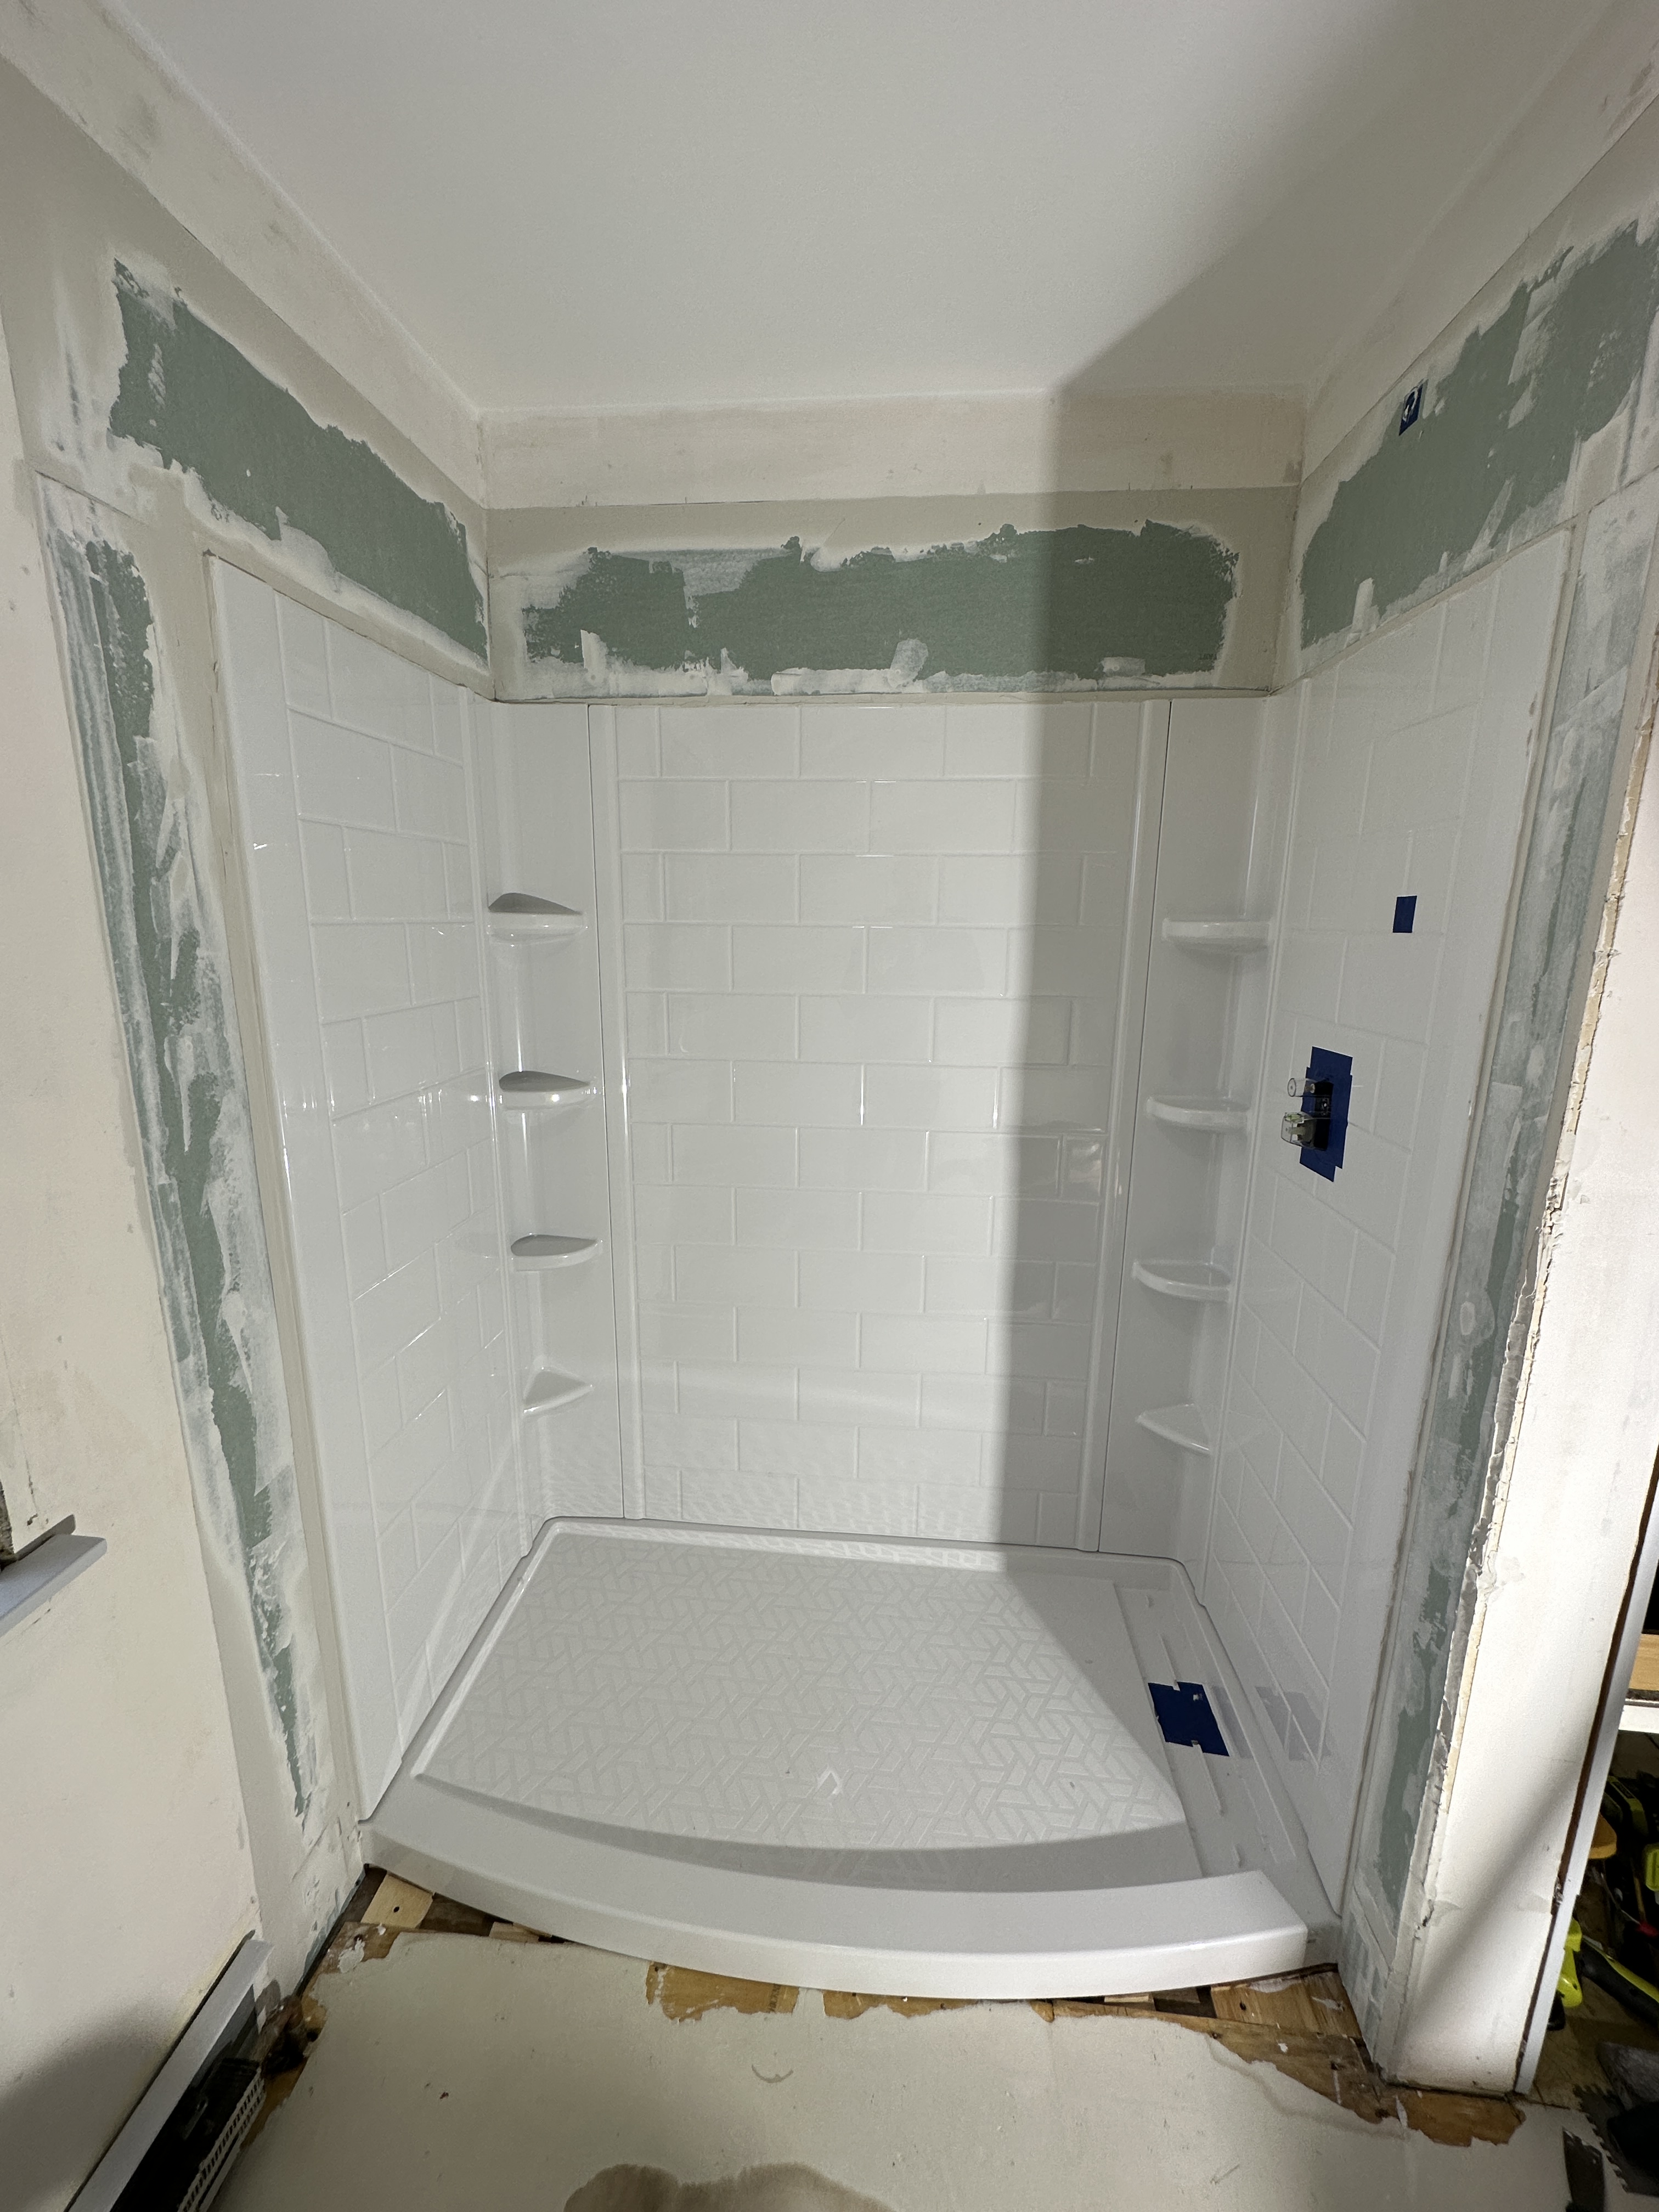
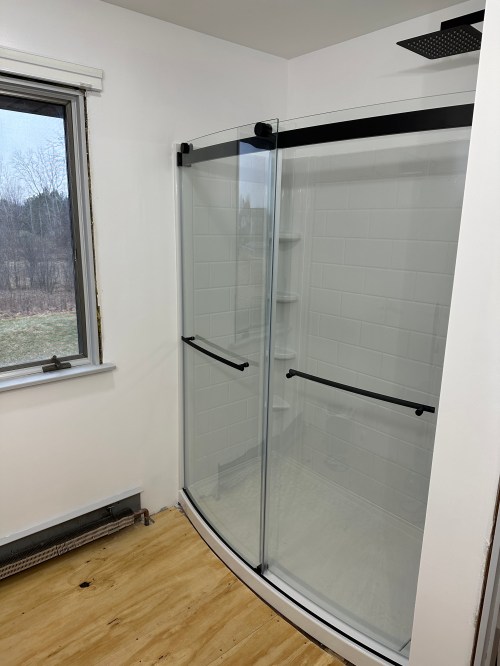
After that it was finalizing the shower pan and getting the walls up. Cutting holes through the shower wall was nerve-racking!
I had to shim out the left wall which wasn’t plumb. Then it was time to dry fit the shower walls and get them attached. I got a nice tight fit on the back. I figured there was no way I would use all eight recommended tubes of the adhesive, but I did. Not sure how I would have completed that step without the Ryobi Caulk & Adhesive Gun, which worked awesome.
I cut pieces of 1/2″ greenboard and screwed them to the walls. We taped plastic over the window, closet, and door.
Then it was time for a lot of drywall work. This was after the first coat of mud.
Over 24 hours later the thickest parts of the mud still weren’t dry. Up to this point, the project had been full of mistakes and having to do a few things multiple times before getting them right. I really thought things might move along after getting that first coat of mudding done. Boy was I wrong!
Since I couldn’t do anything with the drywall yet, I made runs to the home stores for all of the trim and a new subfloor. The lowest layer of linoleum had that paper backing on it, which you can see in pictures above. I wanted it gone in order to have a more level surface for the new plank flooring. I actually spent about 30 minutes trying to remove some of the paper before I decided to do a new layer of subfloor over the top. That plan changed before I even picked up the new plywood though because a third layer would have given me different problems to deal with around the doors, toilet, and register. It took me forever to remove that layer of subfloor, and probably would have been a lot less work to get the paper off. Here are pictures when I got down to the single subfloor layer, my measurements, and with the new plywood (before being screwed down).
Taping the seams and the second and third applications of drywall mud were much harder than it looked on YouTube. I picked up a steel mud pan, which made things much easier and I was finally getting the hang of it with my fourth (because I’m a newb) and final coat. Then it was primer and two coats of paint, which went smooth. I brought the new subfloor back in and screwed it down.
At some point I took a piece of scrap plywood and made a door for the shut-off valve access. I used white gaffer’s tape over the edges of the wall so the cut drywall wouldn’t keep crumbling and making a mess. It got primer and paint when the brush was out for other things.
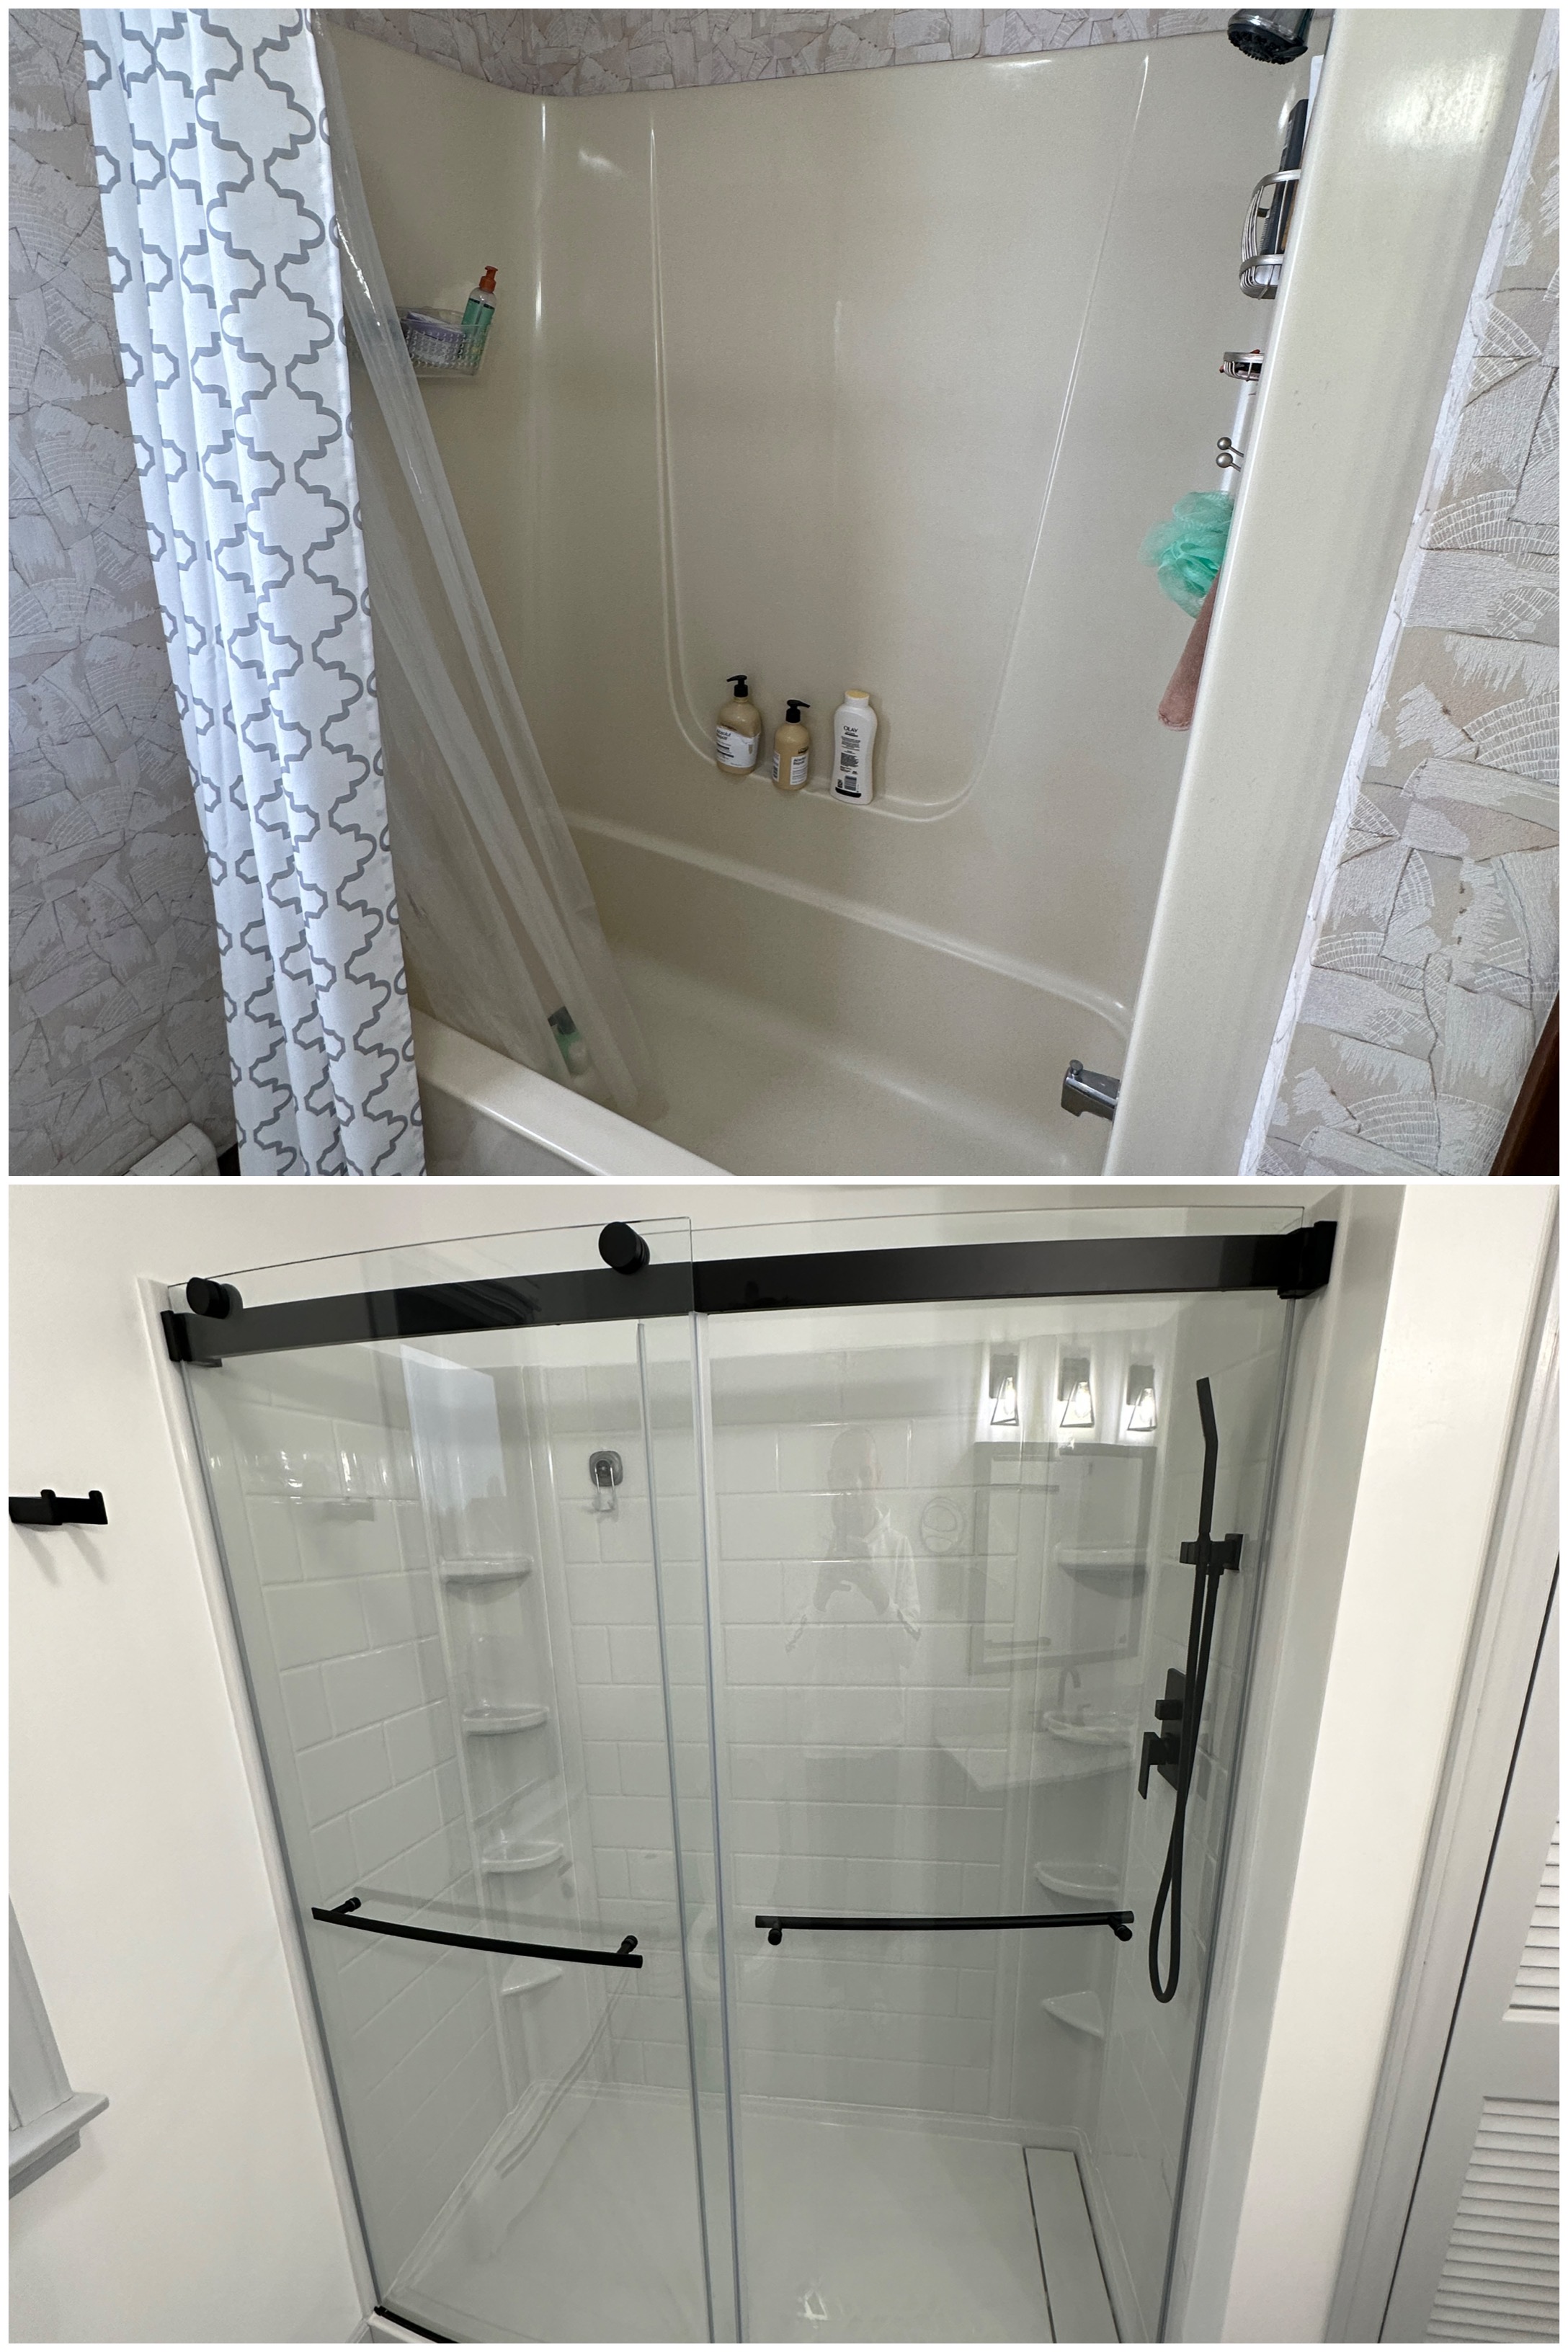
After painting the room it was time to install the shower doors and fixtures. I caulked everything as well.
Unfortunately the doors have a major flaw and the top rail sags a lot from the weight of the glass. This means it’s impossible to properly align the doors. I got it the best I could so they roll smooth and hopefully don’t leak. I called American Standard and found out they’ve redesigned the mounting brackets because of this problem. They’re sending me a set as soon as they get them in stock. 🤞
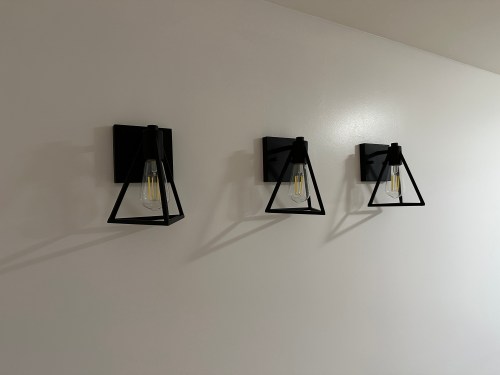
Lighting was a quick job. I also replaced an old outlet with a GFCI.
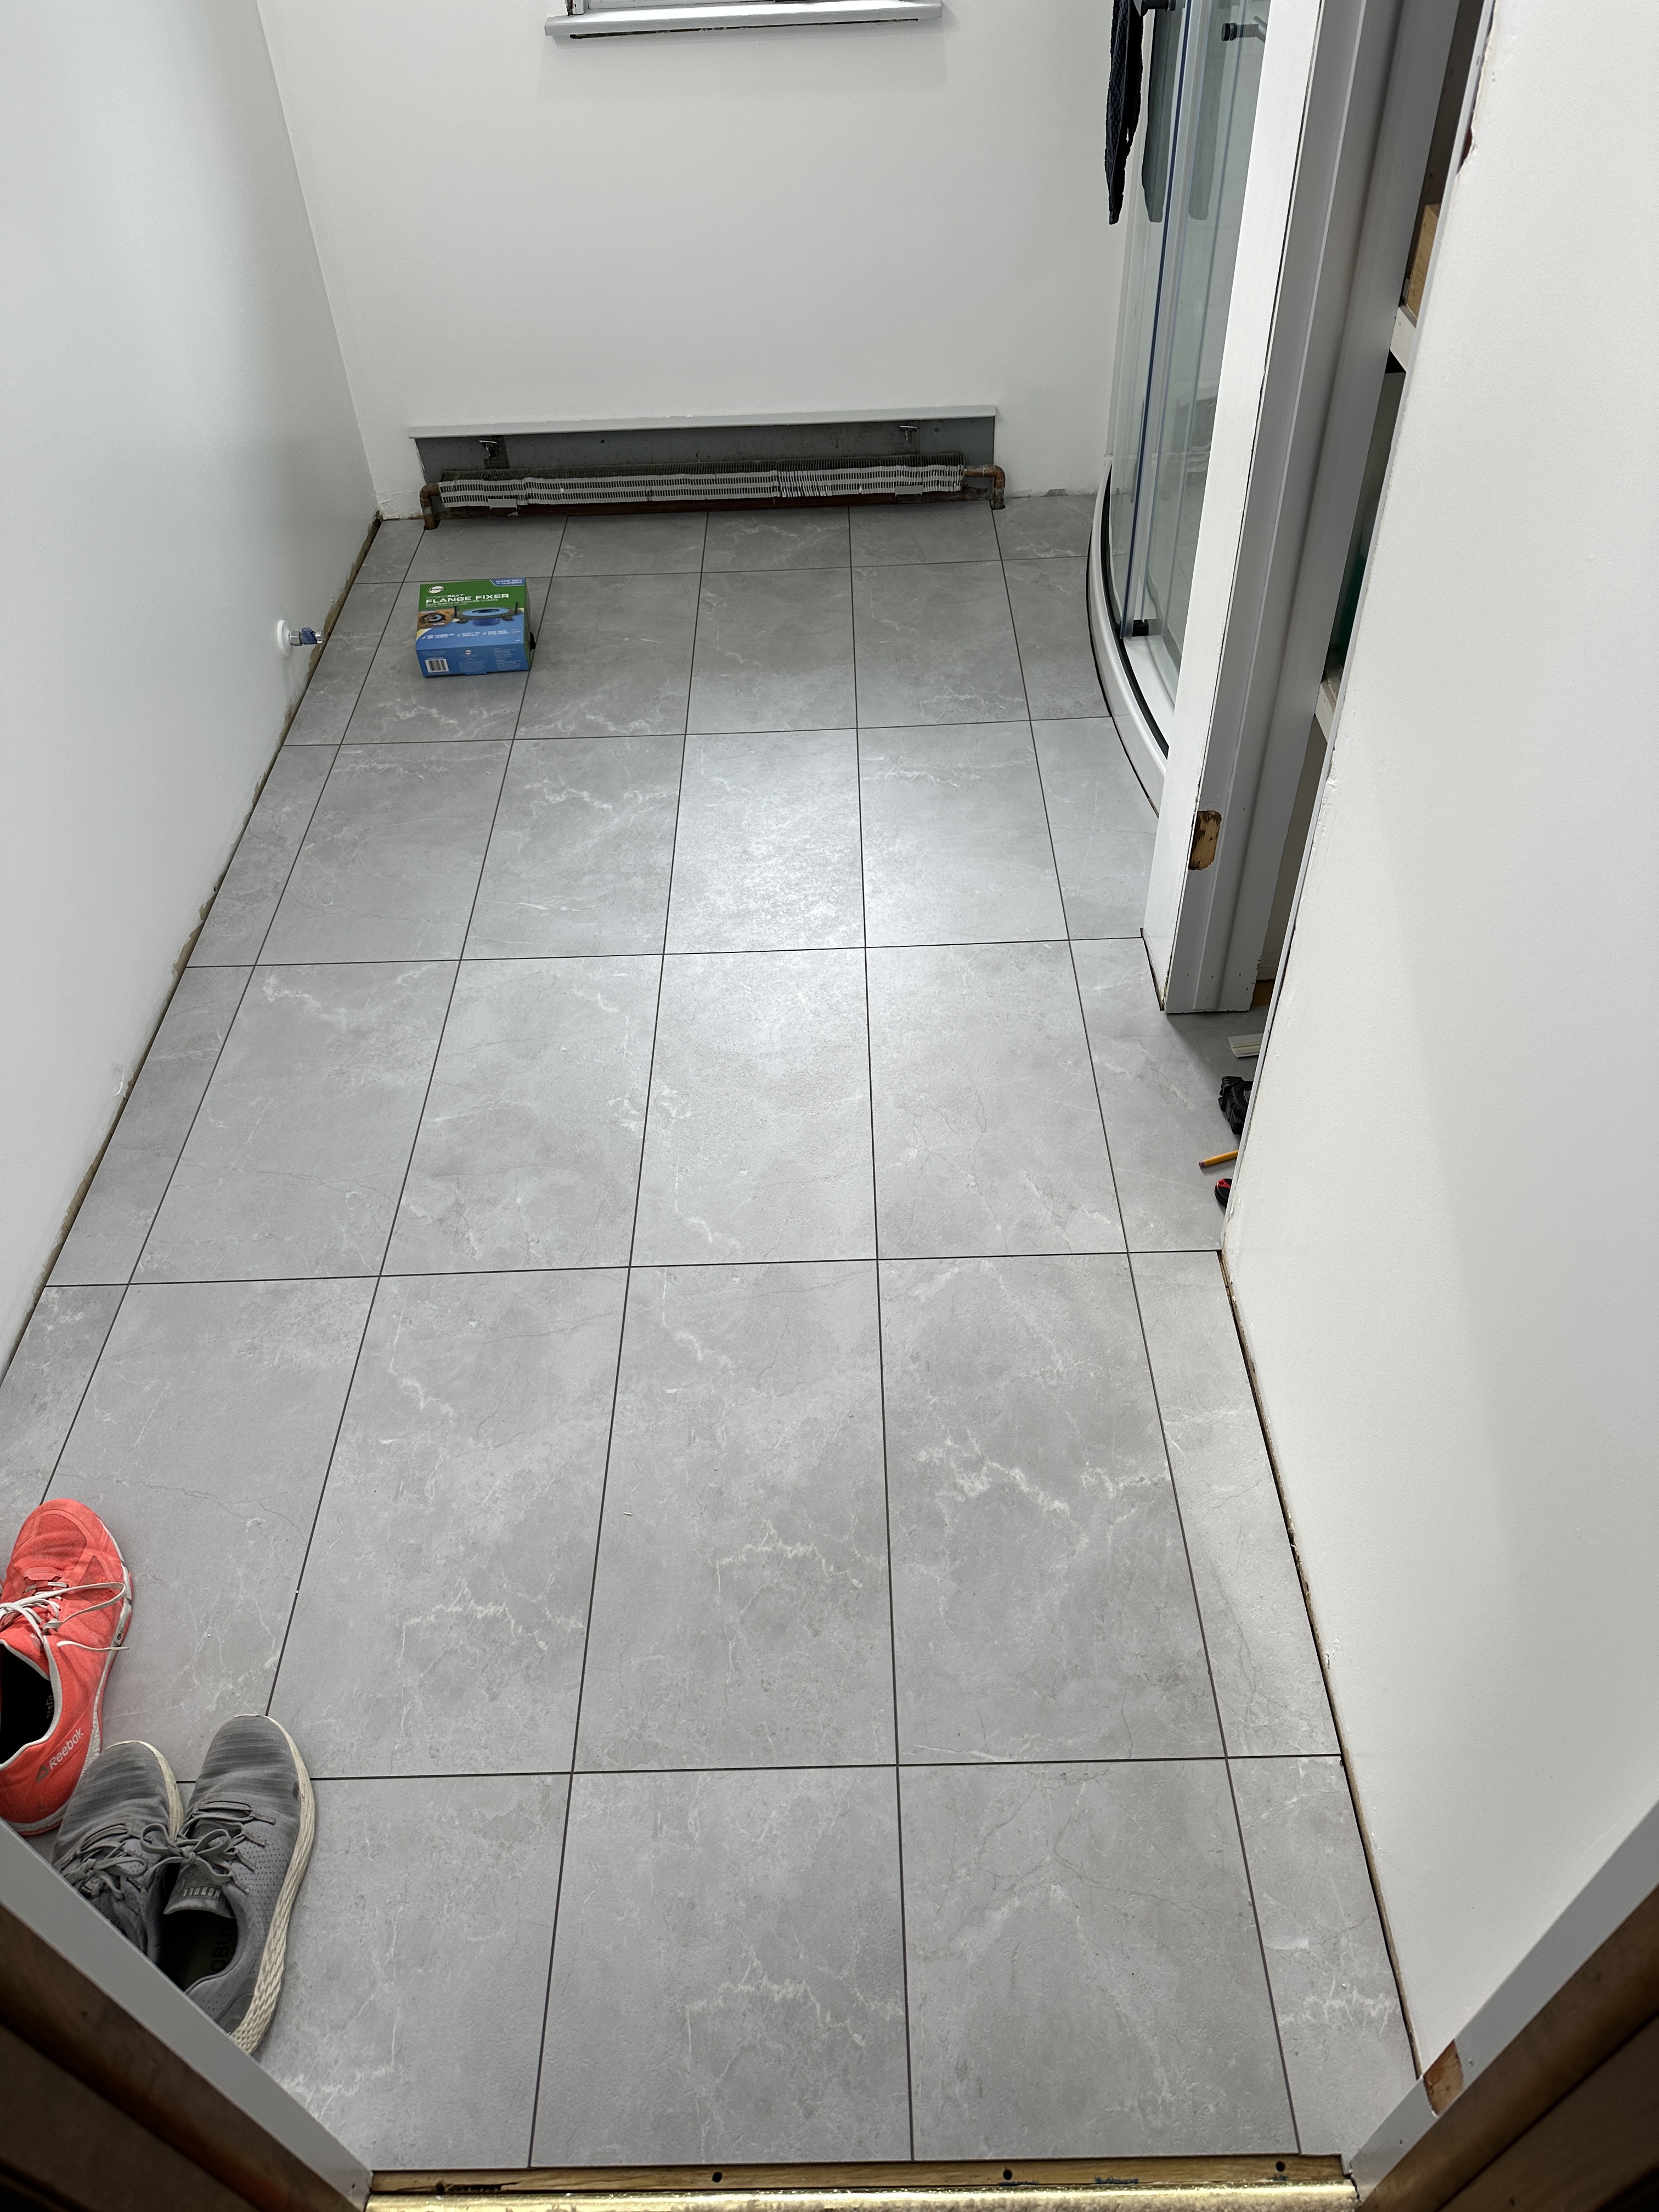
I went with a waterproof vinyl plank flooring that looks like tiles. I’ve done quite a few floors now, so this was easy.
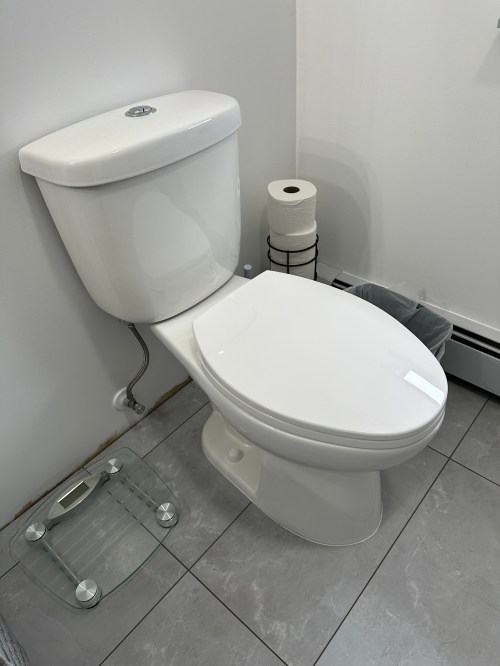
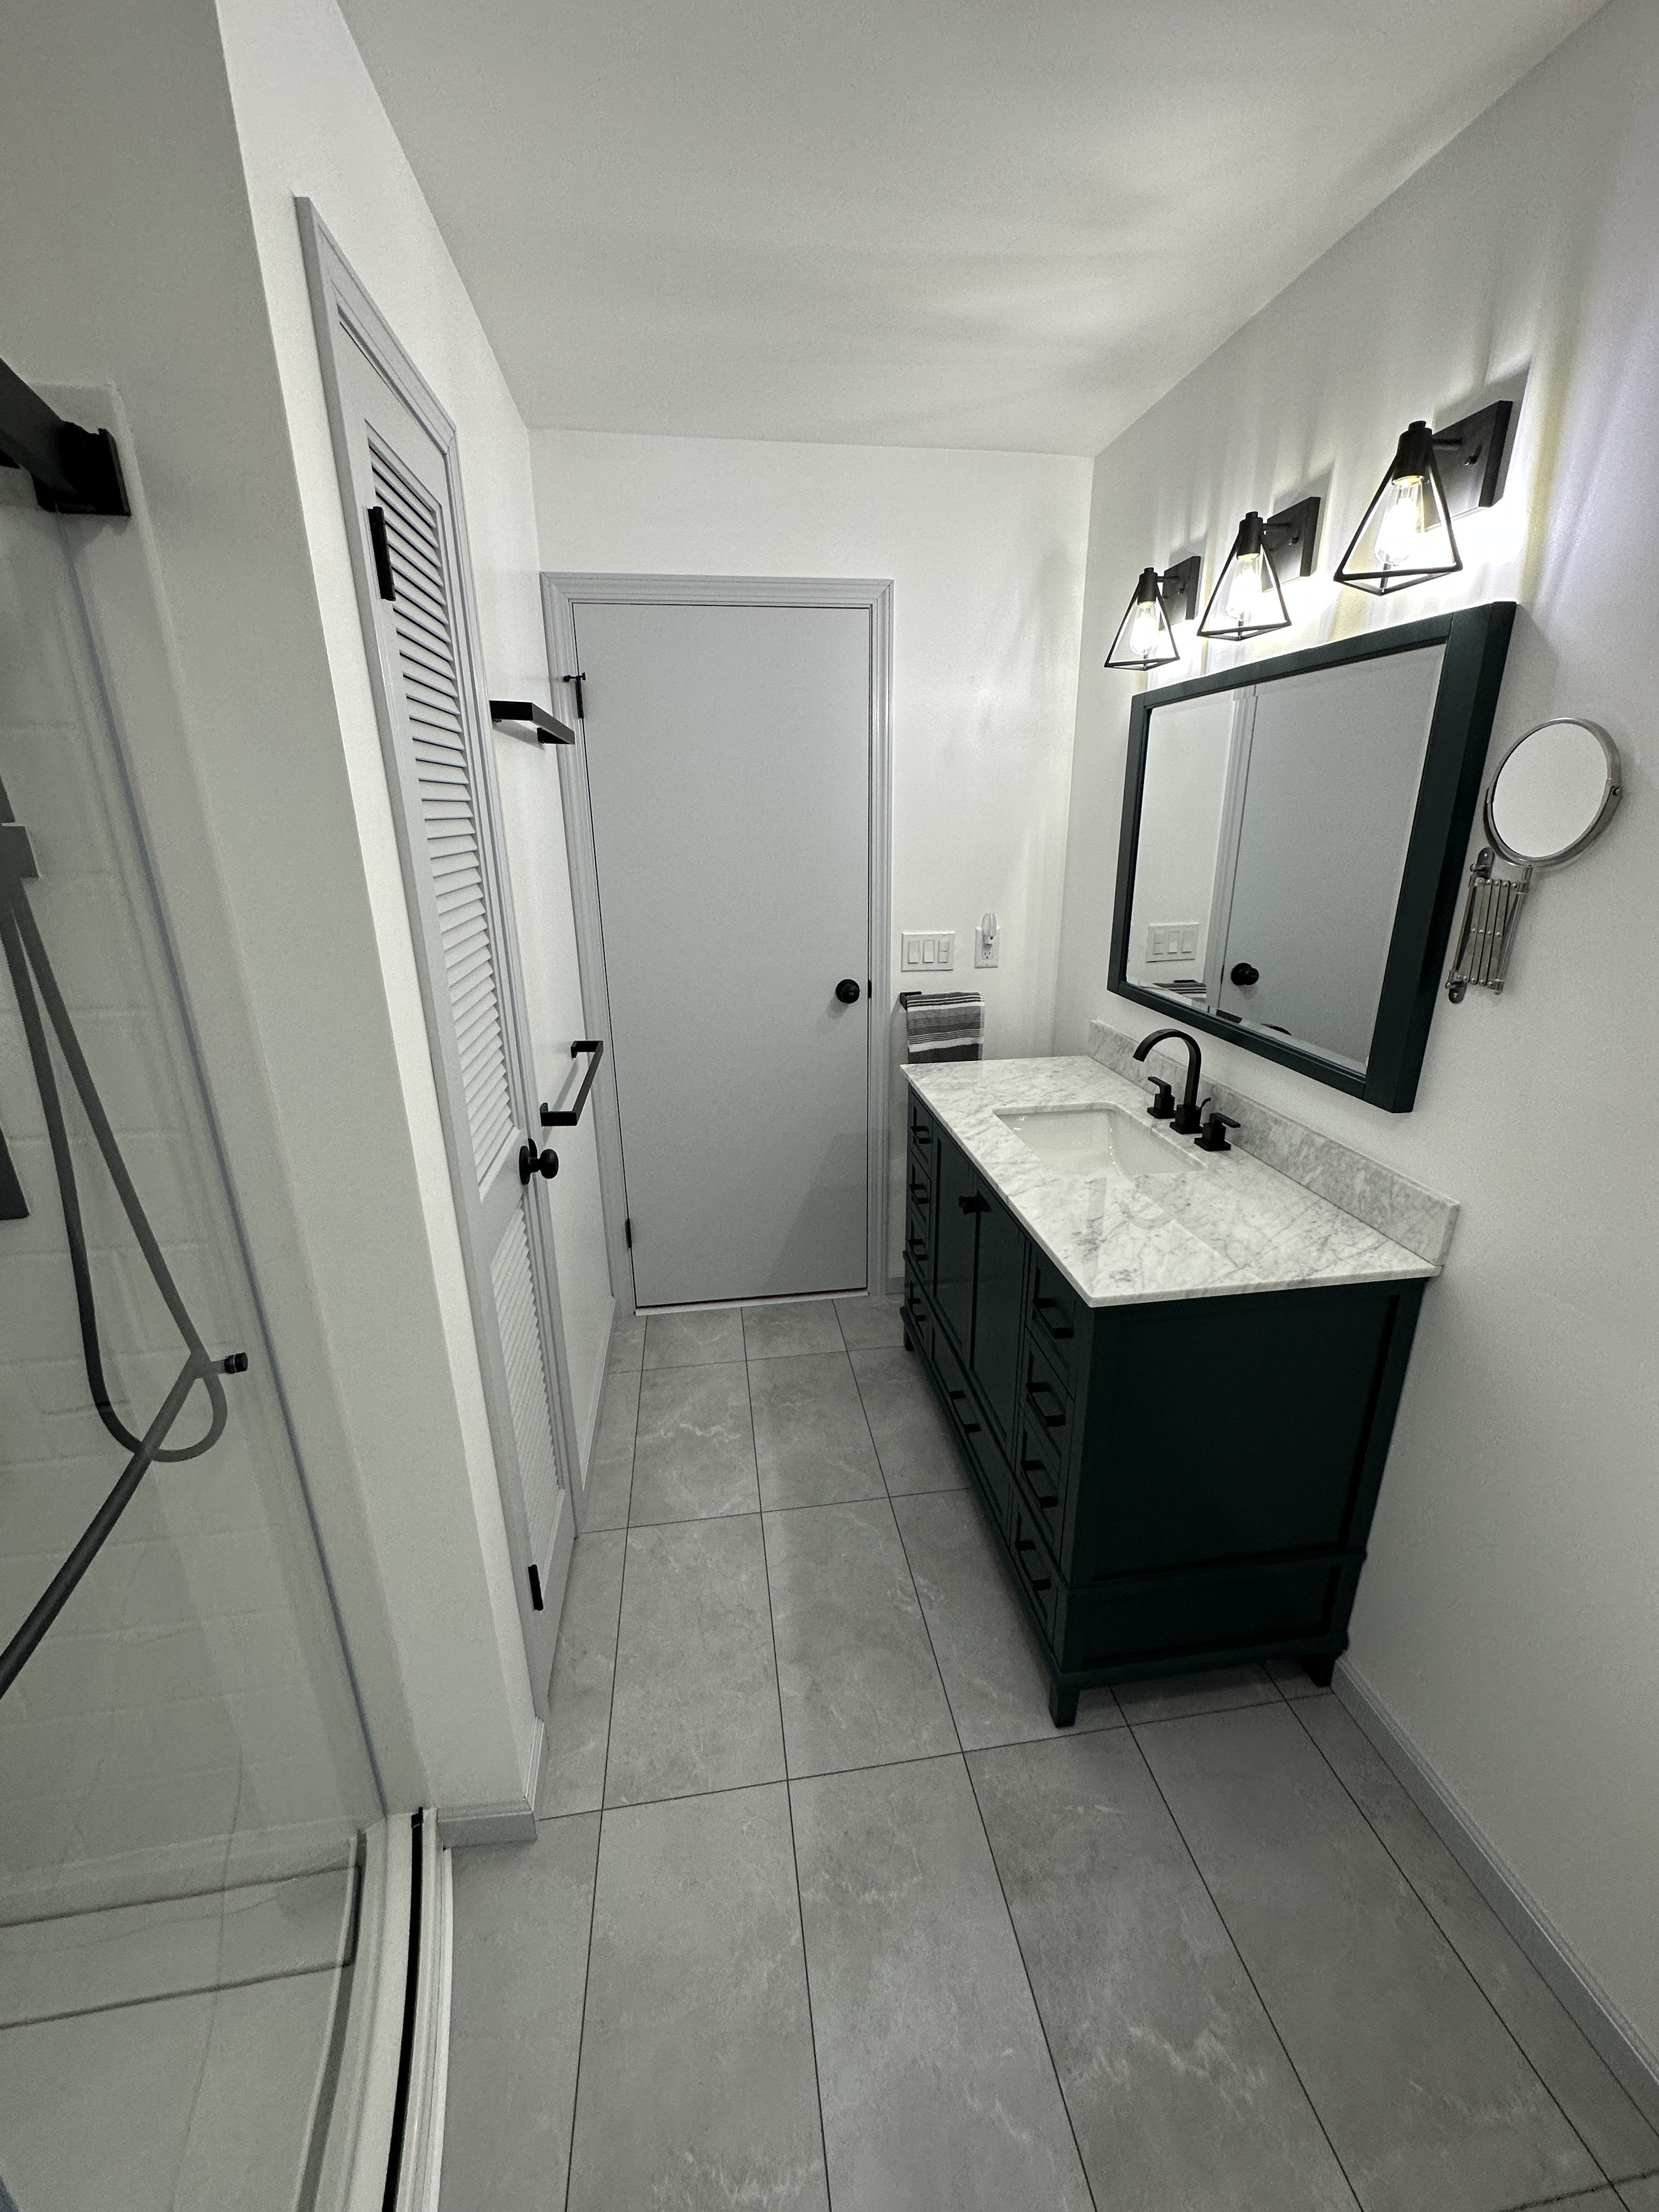
Vanity and toilet went in. Mirror was hung. Doors went up.
I put up accessories and did all of the trim work, which needed three coats of paint, even after primer.
Here’s the final result.
Quite a transformation in just over three weeks! Check out the before and after comparisons.
This bathroom is so nice now! I was hoping Brandi got used to my bathroom after using it for a few weeks and would want to stay there. No such luck.
There have been a lot of home remodeling projects over the last few years and I’m finally done. They were all needed, but I’m glad they’re over. Time for some fun little projects I’ve had on the back-burner for too long.