
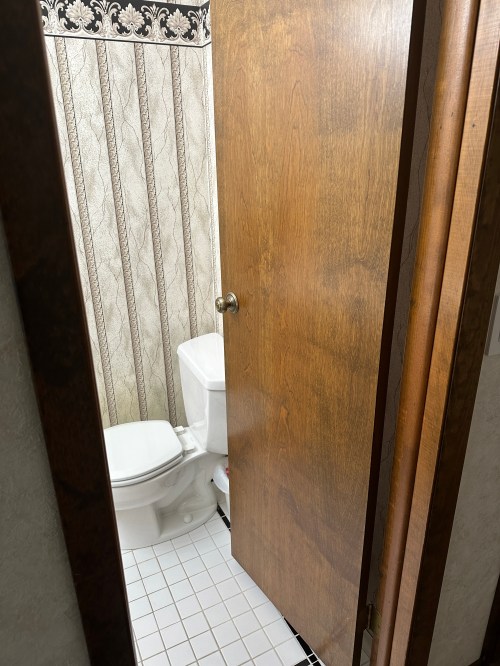
After the kitchen project I needed a break. With fall arriving it was time to dive back in to something and the small bathroom was next on our list. It’s the last room on the main floor to get a facelift. Look at that lovely style!


Over the course of a weekend we:
- Took the door off its hinges
- Pulled all of the trim
- Removed the towel and toilet paper holders
- Moved out the toilet
- Tossed the vanity in the trash
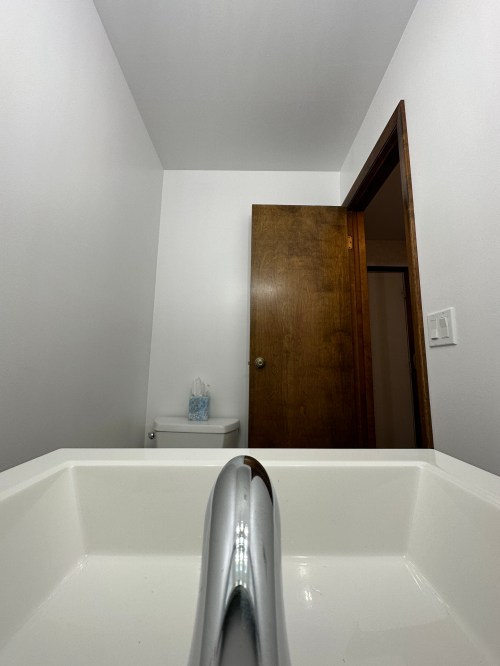
- Installed shut-off valves on the sink’s water lines
- Took down the mirror
- Pulled up the tile floor, mortar, and a layer of subfloor
- Removed wallpaper
- Tossed the light fixture in the trash
The flooring and wallpaper made for a very long and exhausting Sunday.


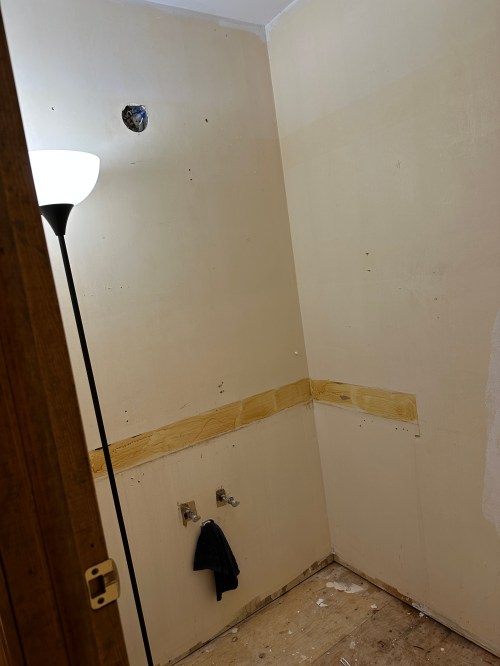
It was nice to have a blank slate. We scrubbed the walls to try and remove any remaining wallpaper glue, which took about an hour and a half. Then I worked on repairing drywall. The old toilet paper holder was inset, so I had a pretty large fix there. In the above picture you can see all the glue left on the wall from the backslash. Sanding glue never really works, so I took a blade to cut around the area. Then I used a putty knife to take off some of the drywall paper. After that I sanded a bit, applied primer, and then several rounds of drywall with sanding in between. I learned this technique in the kitchen when some pretty large areas of drywall paper peeled off. Works great!
We primed the walls. While painting Brandi had a good idea to do the ceiling, which made it much easier not having to cut-in. We painted two coats. I cut 3/4″ plywood for the subfloor.

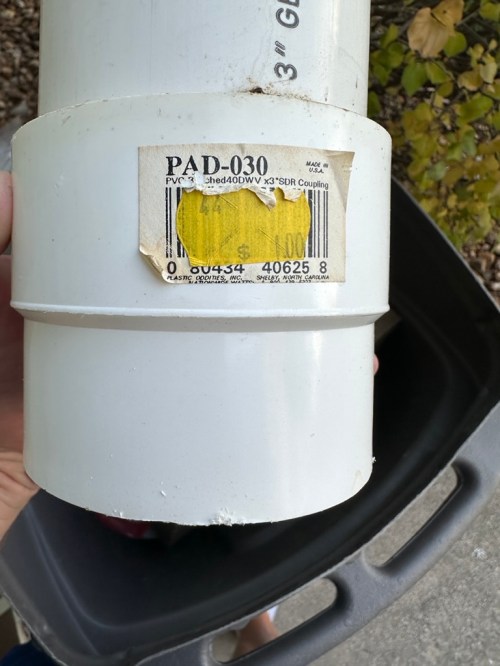
The toilet flange was sticking up above the old floor and while removing the tile and mortar I must have jostled an old leak in the drain pipe, which I figured would happen. I tested by pouring some water down it was definitely dripping. Good time to fix both issues while the floor was gone. After buying some PVC parts I got home and realized the lower piping was 3″ thin wall (Schedule 30) PVC. Of course that’s a different outside diameter than standard 3″ Schedule 40 PVC and needs a special coupler. Nobody carries that part anymore so it’s a special order. They do carry a 3″ Schedule 30 to 4″ Schedule 40 coupler though, so I got one, a length of 4″ pipe, and a 4″ toilet flange. Check out the old $1.00 price tag on the coupler I cut out!

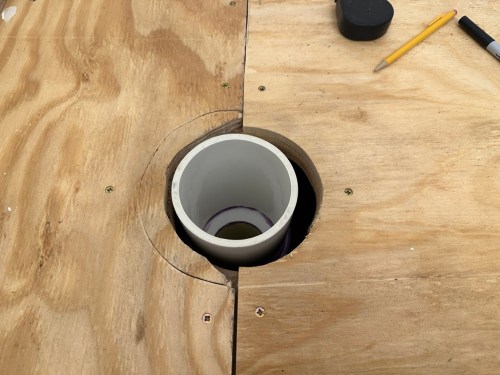

Things went pretty smooth from there. I wired in the new light (Menards) and ordered brighter LED bulbs (Amazon). I installed the same Sam’s Club flooring I had used in the living room, kitchen, and hallways. Then I was able to attach the toilet flange over the top of the floor as it should be. We installed the vanity and sink (Home Depot), hooked up the new faucet, and reinstalled the toilet. After only 8 days we were happy to have a functional bathroom again. It was two exhausting weekends though!
Over the next several days I picked away at the remaining items:
- New switches and outlet
- Peel & stick backsplash tiles (Menards) with caulk around the edges
- Refreshed the stain on the door trim and nailed it up
- New prefinished floor trim
- Hung the mirror
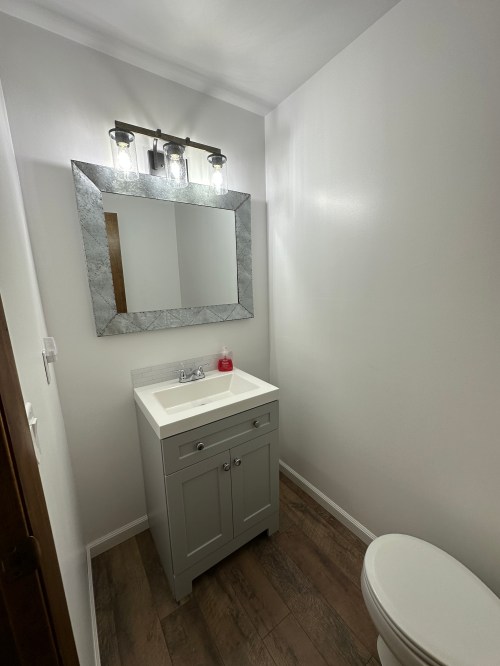


So much cleaner and no longer cramped. I’m going to make towel and TP holders with shelves in a couple of weeks.

[…] month we remodeled the small bathroom on our main floor and we’ve been living without some important things in the room, toilet […]
LikeLike
[…] Bathroom Remodel […]
LikeLike
[…] like the other bathroom, there weren’t shut-off valves on the sink’s water lines, so I installed some. Next up […]
LikeLike