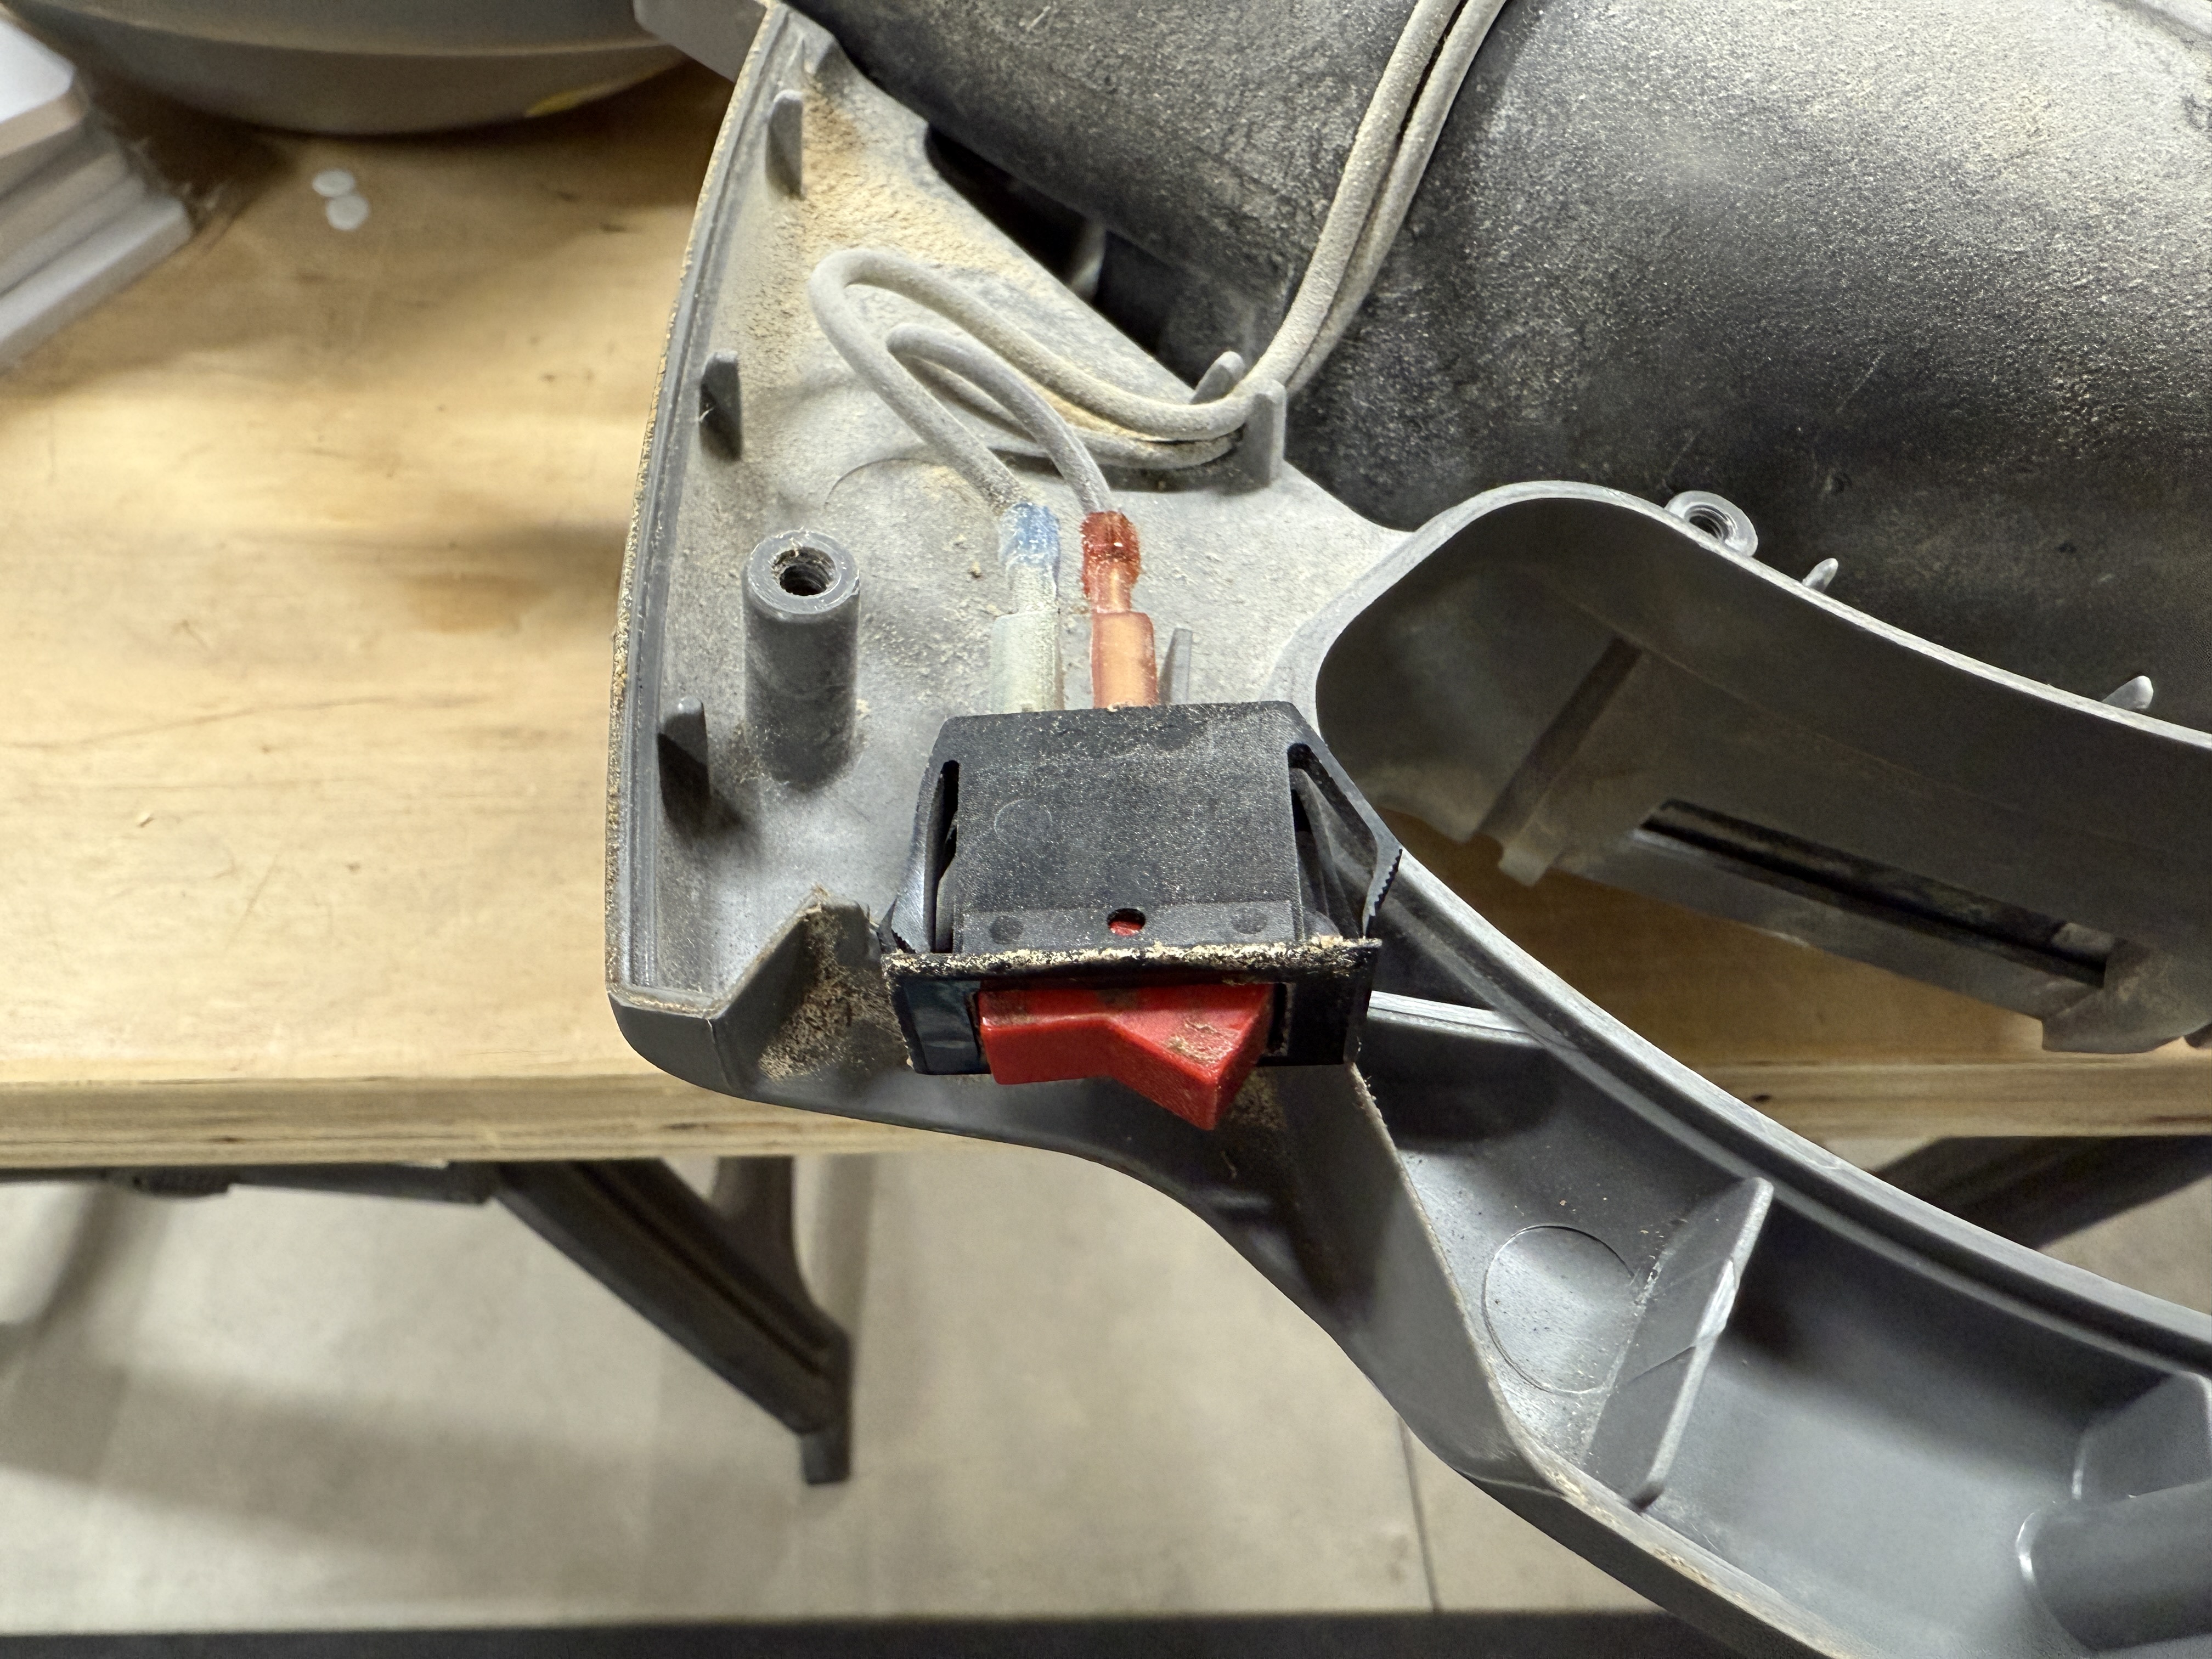
I’ve had this Rigid shop vacuum, from Home Depot, for about 20 years.
At some point in the last year, the switch started having issues. The vacuum would only turn on if the switch was actually pressed in, instead of toggled. I’ve never seen that happen, but I’m guessing it was from the accumulation of dirt and dust getting inside the switch body. Then the switch wouldn’t even push in, so the vacuum wouldn’t run.
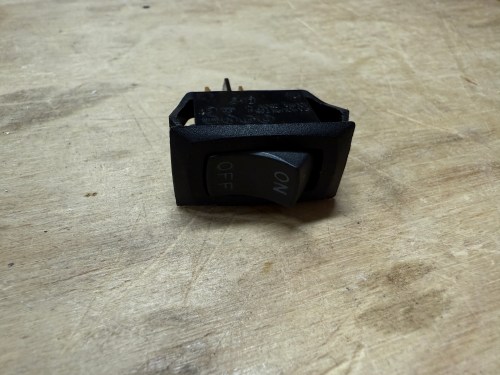
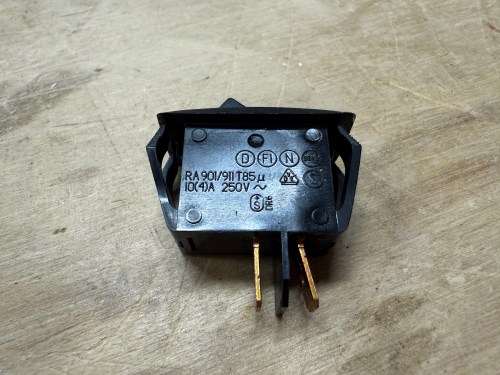
I figured it would be an easy switch replacement, so I removed a bunch of screws to take off the cover. Sure enough, the switch had two wires clipped on to it, and was held in place by the case.
I had a perfect replacement, salvaged from some device I don’t remember, in my collection of electronics parts.
It fit like a glove and the vacuum turned on as if it was brand new. I screwed the case back together and called it done.
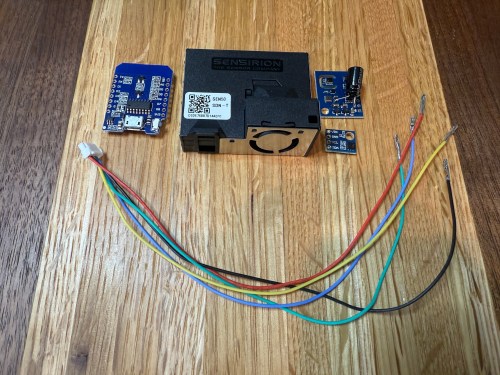
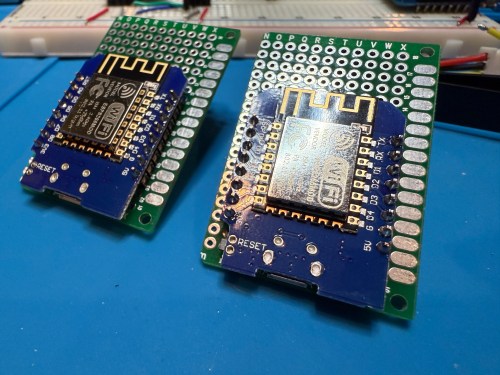
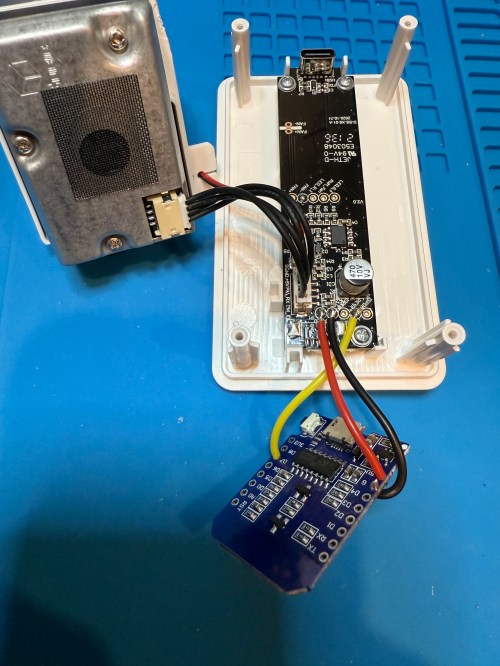
The upgraded IKEA air quality monitors I did work great, but the LED indication isn’t great for a bedroom and the fan noise was annoying in my office. So I wanted to create a couple of my own devices for those locations. I used:
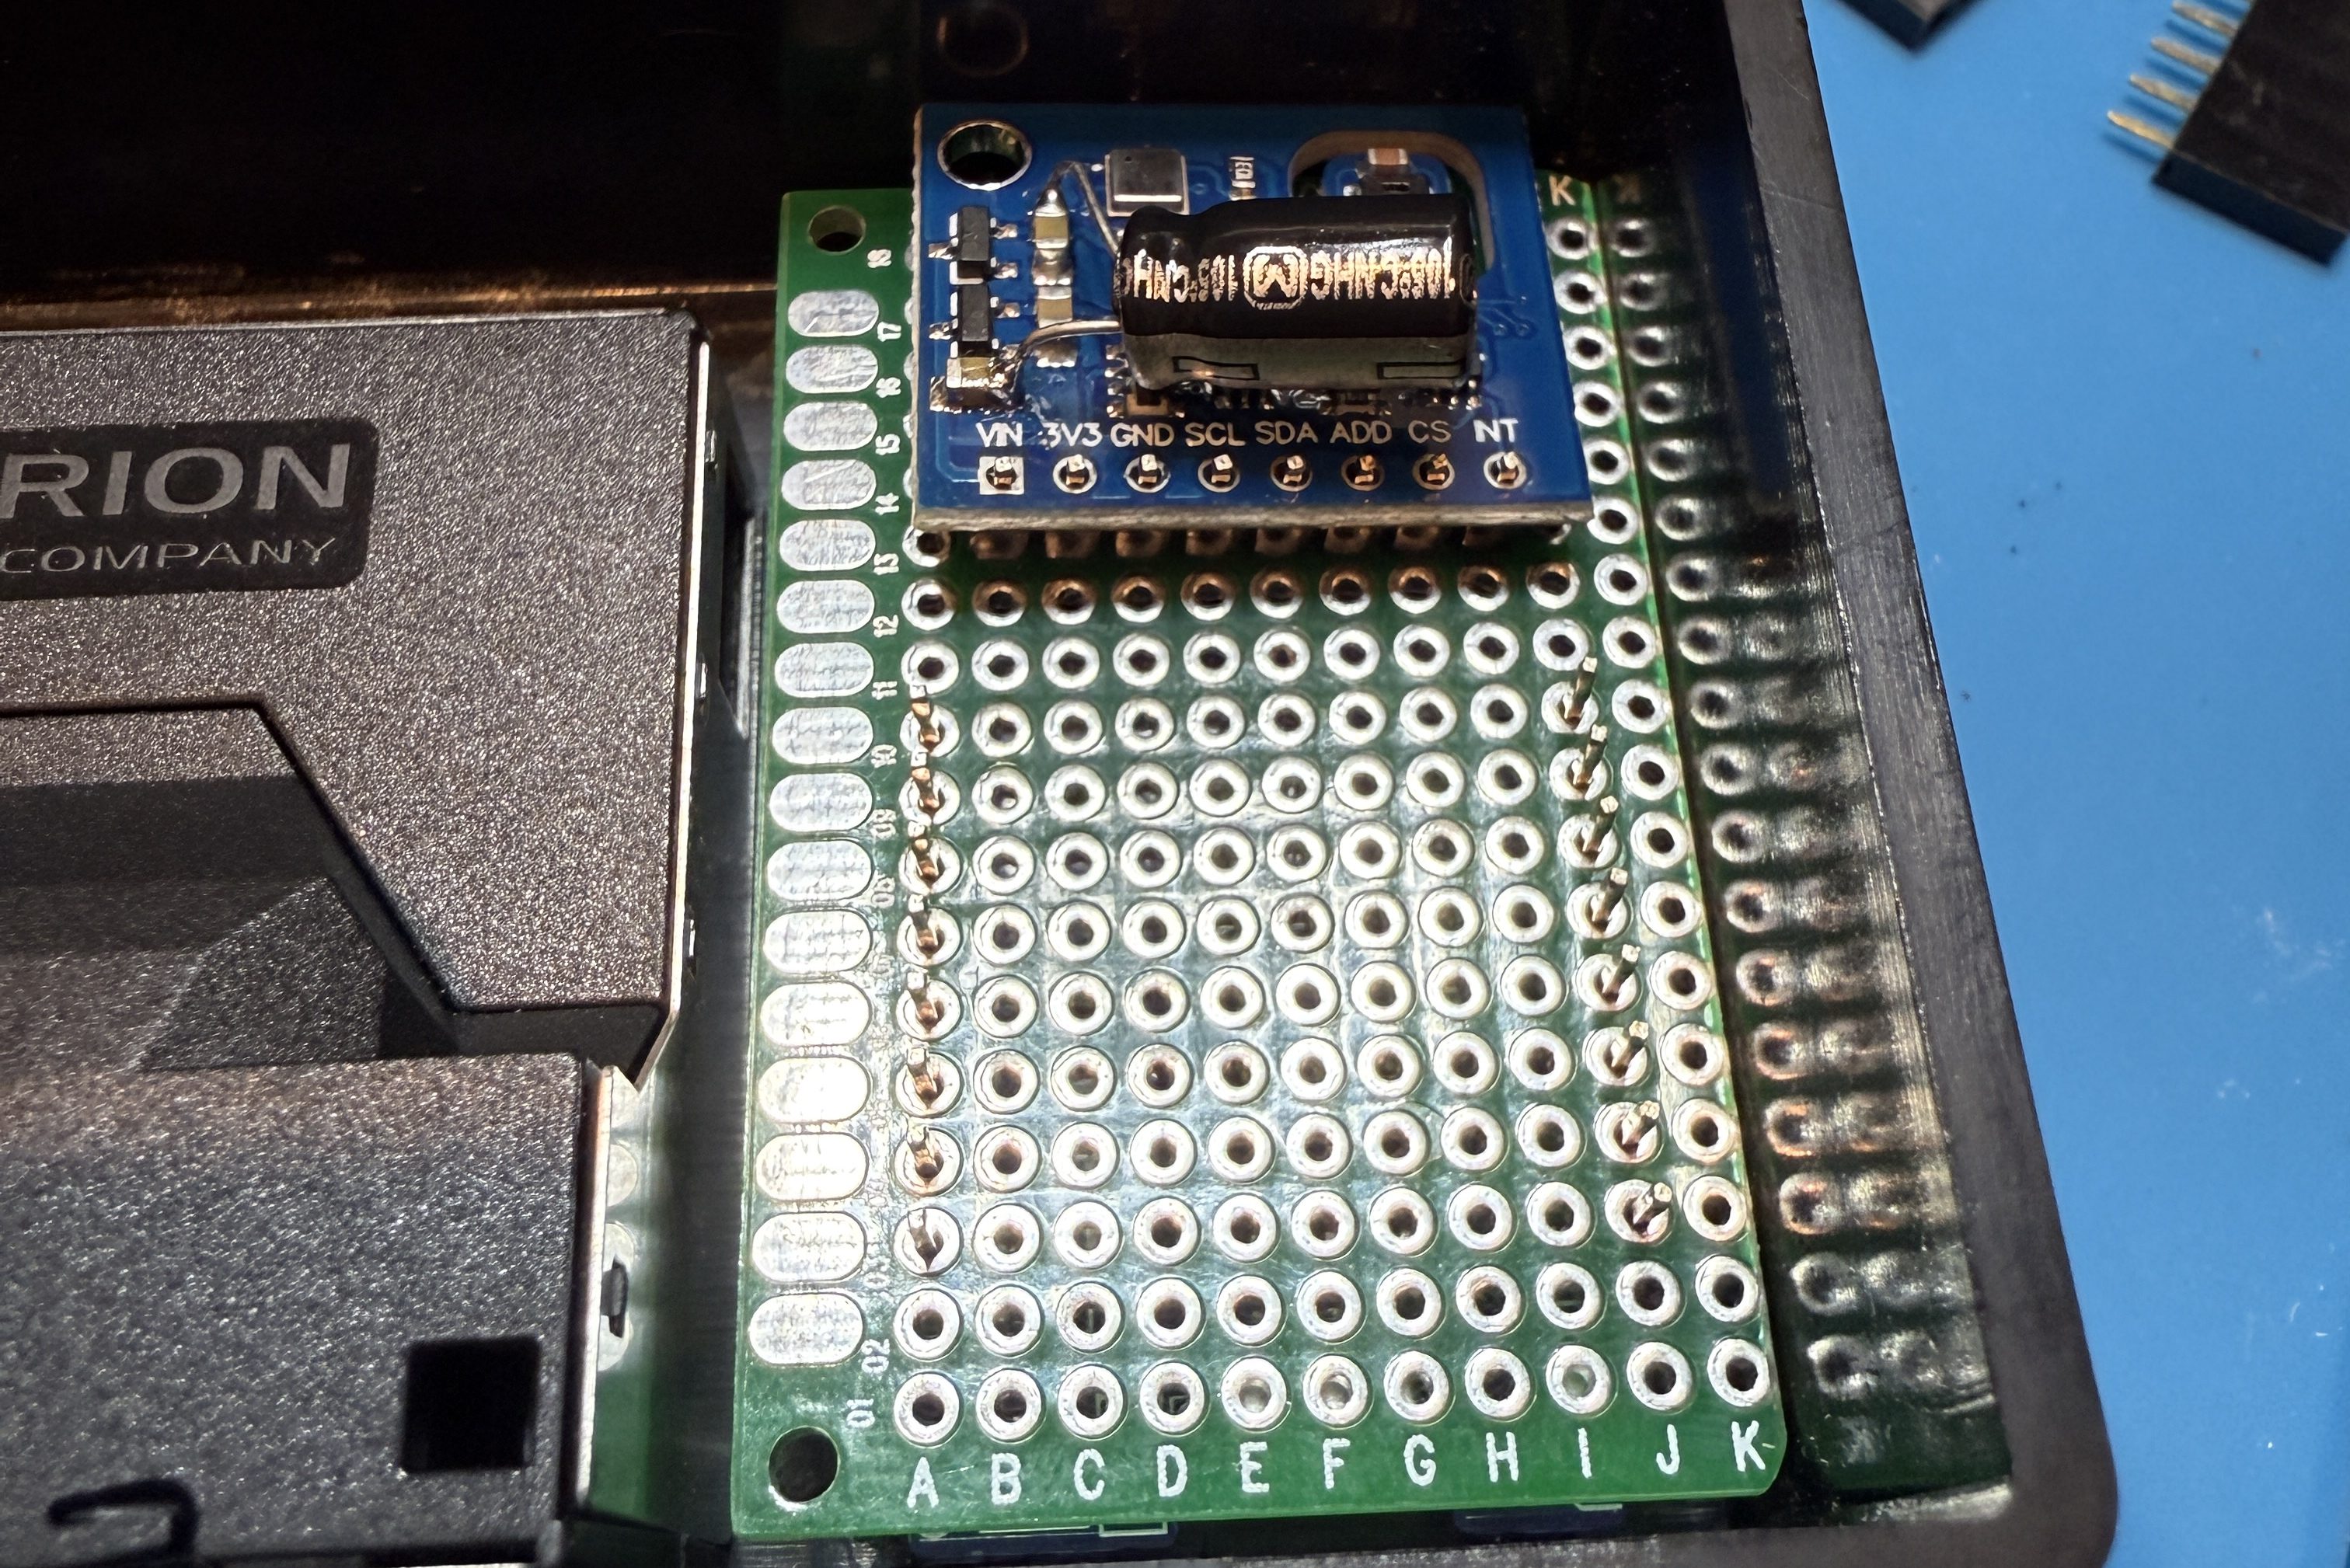
The SEN50 is a big upgrade over the PM sensors used in the IKEA devices and I used the Si7021 in place of the BME280 I had used because I think they’re a bit better. I soldered 47µF electrolytic capacitors from a big kit I’ve had (similar on Amazon) to the ENS150 modules to improve their power.
Then I attached 5 of the crimped wires to a 6P JST connector, which is what the SEN50 modules require. I’m note sure why buying the actual cable for these SEN50s are so expensive, but I got the entire JST kit for cheaper than a couple of the special cables.
All three sensors communicate with the microcontroller over I²C, so a breadboard test was easy to wire up. The SEN50 does require 5 volts instead of 3.3, so I’m glad I checked.
The ESPHome YAML code is very similar to the code used for the modified IKEA air quality monitors.
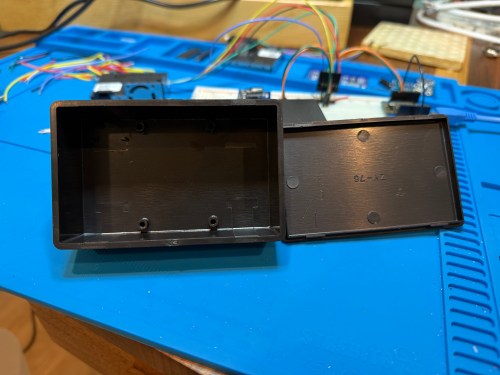
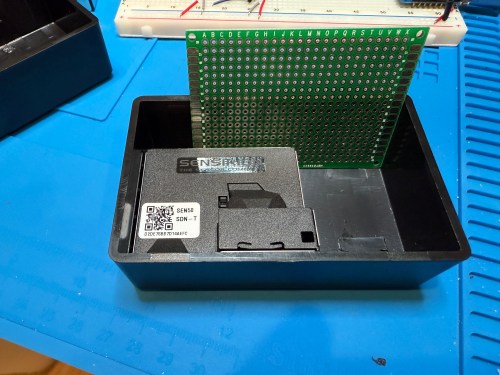
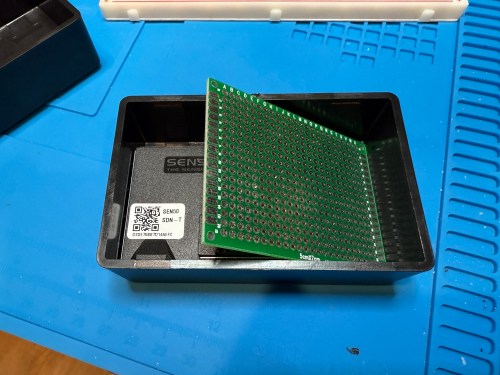
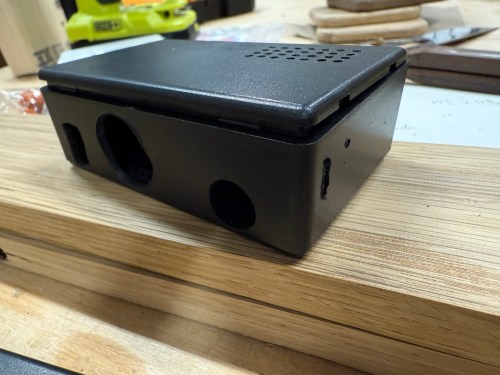
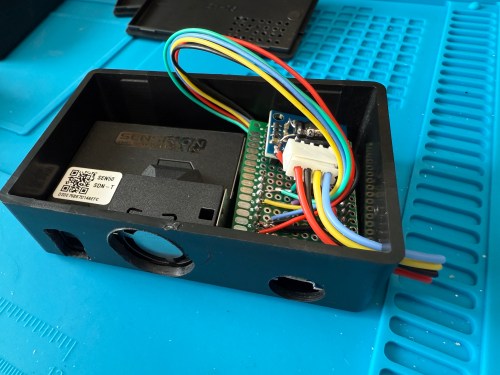
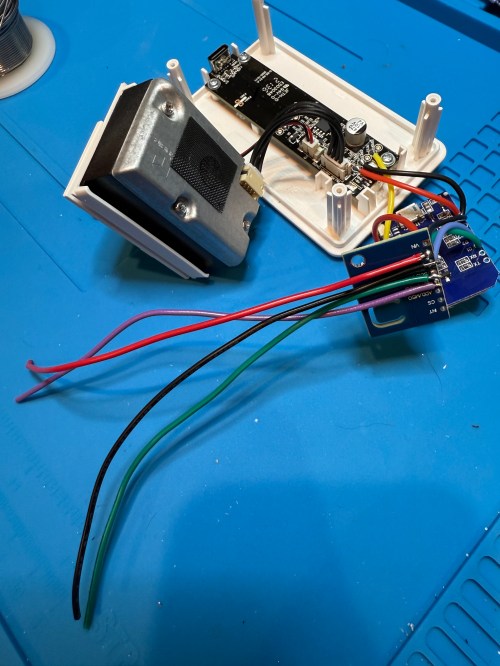
The project boxes had some standoffs on the bottom, which I snipped off and then sanded with a rotary tool. I pulled out my box of proto boards and found a size almost exactly double what I needed, so I cut out a sliver and ended up with a piece for each box. I also cut vent holes for the SEN50 sensors.
In order to get everything to fit I decided to put the microcontroller on the bottom of the board. After mocking things up I did all of the soldering. I was hoping to be able to mount everything with connectors so it could easily be taken apart, but there wasn’t enough room and I didn’t want bigger boxes.
I did some continuity testing along the way and everything worked when I connected power. With the boards ready I cut more access and ventilation holes in the boxes.
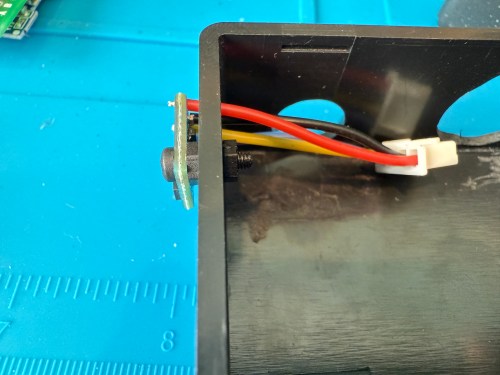
I soldered the Si7021 on to its wires outside of the enclosure so it wouldn’t be exposed to unnecessary heat and used hot gun to secure everything.
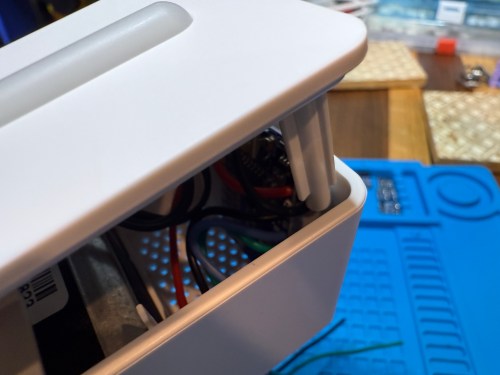
I’m really happy with how these turned out. Here’s a view of the office data on my Home Assistant dashboard.
This was definitely a project where I wished I had a 3D printer to design custom boxes. Some day, when I’m caught up on my project list and can give it proper attention. I know if I get one now I’ll spend a ton of time with it and neglect other projects in my pipeline.
IKEA recently discontinued Vindriktning, their older air quality monitor.
Inside the device, they put a cubic PM1006K particle sensor. I bought three for $16.95 each last year, because I’d seen people hack them by adding sensors and a Wi-Fi microcontroller to send all of the data to Home Assistant. For my modding I bought:
The YouTube video linked above is a great guide to follow. I didn’t connect wires to the fan or the light sensor since I had no use for them. I also didn’t stack my sensors because I wanted the BME280 to be outside of the enclosure, where it would be less affected by the heat produced by the ENS160 and D1.
Even with the sensor outside of the case, the BME280 still reads high, because it heats itself up. I actually tested different lengths of wires and placements of the sensor before realizing I was still going to have to adjust the data. An ESPHome filter made the adjustment easy, which I did individually for each unit after comparing to a mobile Ecobee thermostat sensor. This is the code from the unit for my shop.
Here is how I’m displaying the data on one of my Home Assistant dashboards.
As I was working on this project I knew I wanted a couple more air quality monitors around the house, which will be finished soon.
Update: I’ve had to make a small update by adding a 47uF capacitor to each ENS160 board, because they have power issues, causing the reading to stop for periods of time. My boards matched up with the right ones in the picture at that link. Here’s a picture of another ENS160 I modified, since it was a tight squeeze to made the modification on the devices I posted about here with everything already wired up. I also realized I was powering these through the 3V3 pin instead of VIN, so I fixed that.
I’ve also improved the display of the data on my dashboard by using mini-graph-card.
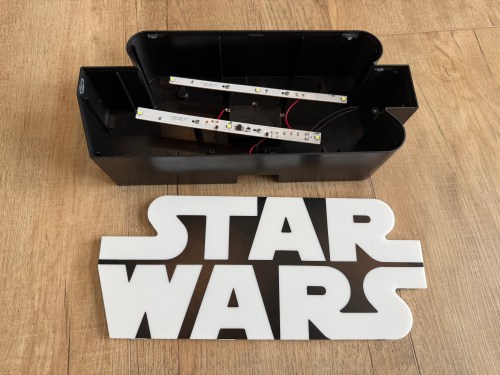
Several years ago I bought this sign from T.J.Maxx.
When I plugged it in, I was disappointed. By default it was off with a button on the side to toggle between bright, dim, and off.
I put the sign in a display cabinet with all of the LEGO and I had wanted it to automatically turn on with the rest of the LEDs in the cabinet. I never got to it, so it sat on the shelf for years. Fast forward to setting up home automations at the new house and it was time to fix the problem. The only screw on the back was for opening a battery compartment, so I figured the front had to be snapped in. With a little careful persuasion I gained entry.
I figured the electronics were pretty basic and I was right. The quick fix was to connect the sides of the button/switch.
That worked, but I noticed how flimsy all the wiring was. I replaced the wires going from the USB connector to the board, which had been causing some flickering when bumped.
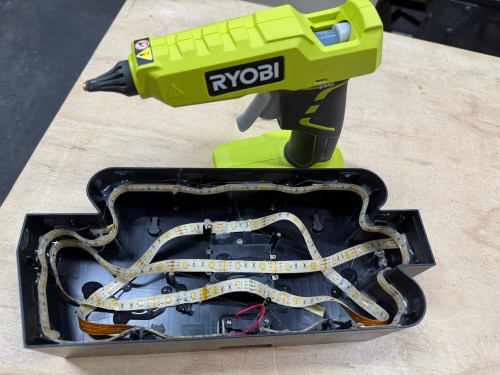
I was sad at the lack of LEDs though. I could do better, with minimal effort. I took out the circuit boards and found an old five volt LED strip.
With the help of some double-sided tape, I wrapped the strip throughout the case and then also used hot glue.
In order to automate the processes of getting the golf sim ready to play and shutting it all down when finished I needed to create a remote control device. I’m using Home Assistant (HA) to run my home smart system (more posts to come), but two things involved with the golf sim aren’t connected to the network:
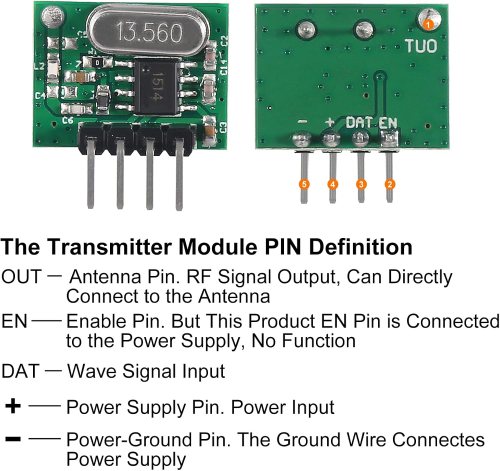
The projector has an infrared (IR) remote and the light has a radio frequency (RF) remote. I’ve done somethings with IR and still had a stash of IR LEDs (for transmitting) and receivers. I’ve never attempted any RF stuff, so I ordered a 5 pack of 433mhz wireless RF transmitter and receiver pairs.
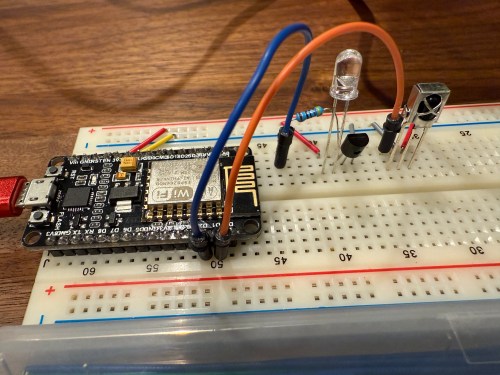
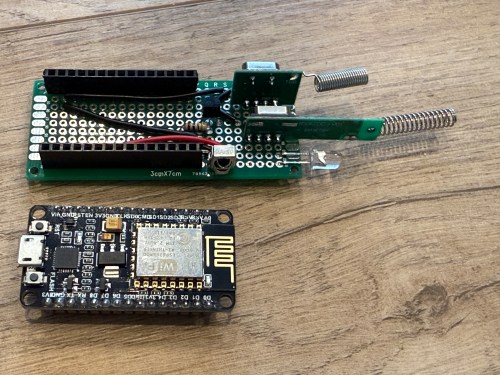
Since I’m using HA, I let ESPHome handle all of the main programming. All I had to do was wire everything properly and get the configuration correct. I made use of an old ESP8266 NodeMCU microcontroller and worked on the IR aspect of the project first.
When I took the picture I was using a 470Ω resistor, which I eventually switched to 100Ω, to increase the strength of the IR signal. The transistor is a PN2222A. Here’s the ESPHome configuration:
I used the receiver to intercept the codes sent by the projector’s actual remote when pressing the Power, Input, and OK buttons. Then I created some buttons.
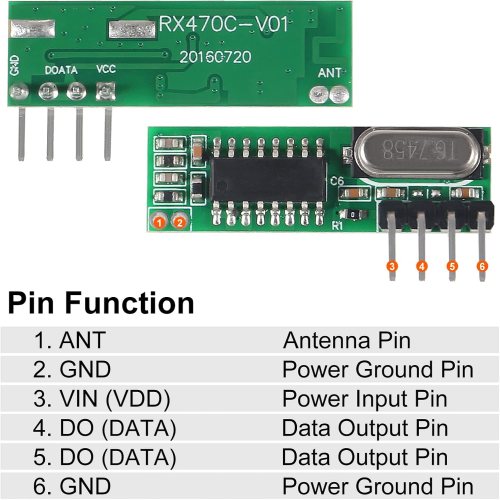
It all went very smooth. Next I connected the circuits for the RF components, which was straightforward. Here are the pinouts from the Amazon product page.
I soldered on the antennas (smaller one to the transmitter) and connected everything on the breadboard.
By using examples from the documentation I was able to intercept RF codes.
When I tried to recreate those codes through the transmitter the results weren’t matching up and the spotlight wasn’t responding. It took some trial and error to configure the various parameters of the receiver. Here’s the end result, with the combined configuration for IR and RF.
After using the remote_receiver instances to get the button press codes I needed, I commented out that section of the code. If I ever need to add more functionality to my remote, I can enable the receivers at that point. Here are the button codes for the spotlight.
Then I was able to use both sets of buttons in scripts, which can feed to Alexa for voice commands.
Once everything was tested I wired and soldered a more permanent circuitboard. I included a folded dollar bill for scale.
I was planning to mount it in the ceiling, but the IR was having trouble, because the projector’s receiver faces the ground. Mounting it to the side of the PC cart worked great.
This was a lot of fun!
Update: Less than a week later I’ve already modified it, by adding a DHT22, which reports temperature and humidity. Might as well use that empty D7 pin on the microcontroller.
While setting up my network, I was struggling to print between my VLANs. I have an HP DeskJet 4155e and these network details:
Default VLAN, where computers and phones are
IoT VLAN, for smart home devices, printers, etc.
Default is allowed to communicate with devices on IoT
IoT is denied from communicating with devices on Default (ACL Deny rule)
I was finally able to get printing to work from MacOS, iOS, and Windows.
Here are the steps that worked for me:
Give the printer a static IP address
Enable IGMP Snooping on both VLANs
Add an mDNS rule for the Printers service from IoT to Default
Add an IP-Port Profile Group for the printer’s IP address and port 631
Add a switch ACL rule permitting that new profile group over TCP to the Default network
I’d found a lot of resources saying to permit various TCP (80, 161, 8289, 9100) or UDP (161, 427, 5353) ports and none of them worked. The key was when I Googled “what port does ipps._tcp.local use” and found TCP port 631.
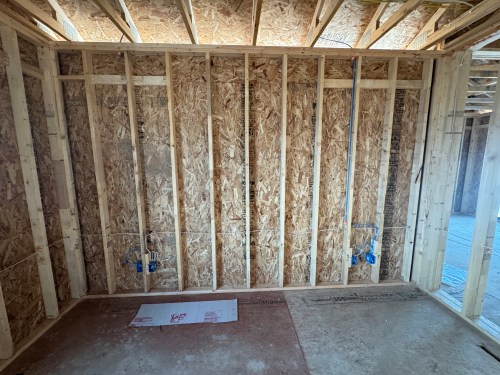
A big part of the planning for our house included Ethernet wiring because I want to hardwire every device I can, saving the Wi-Fi for devices that require it. It’s much easier and cheaper to get everything wired during the build, instead of adding later. I went through several iterations of the plan and in the end I had the electricians do 42 runs of Cat6:
4 jacks in the office
2 jacks in the office closet
2 jacks in the pocket office
2 jacks in the guest bedroom
4 jacks behind the TV
2 jacks in the living room
2 jacks in the dining room
2 jacks in the pantry
2 jacks in the laundry room
4 jacks in the walk in closet
6 jacks in the master bedroom
10 wires to 5 exterior camera locations (1 extra at each location)
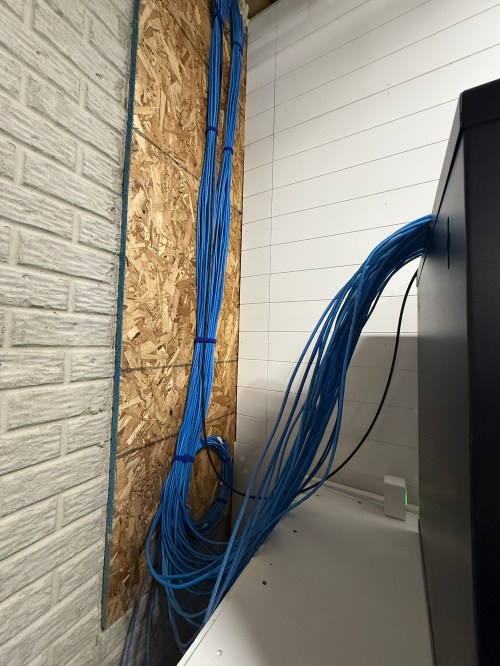
They run it all up through the ceiling. I’m guessing that is to keep it away from most of the electrical. Here’s the master bedroom nightstand wiring as an example.
Then all of the cables comes over and down a wall between the laundry room and garage.
Ending at a single location in the basement.
We built a wall (part 1 & 2) and since we moved in back in August I’d had the cable modem and old eero router sitting on top of the network rack filled with new equipment.
Throughout the house, I put port covers on the unused jacks. Here’s how a wall plate looks with one port open and one covered. The covers will help protect the internals and keep dust out.
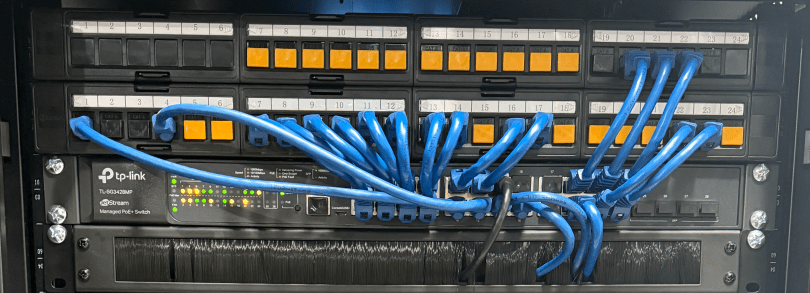
What did I buy for my network? A LOT! Here’s all of the stuff for the rack, cables, and tools.
When it came to the actual networking equipment I took a good look at the stuff from Ubiquiti/UniFi. It’s top of the line, which is reflected by the price tag. I decided to go with TP-Link instead, saving a lot of money.
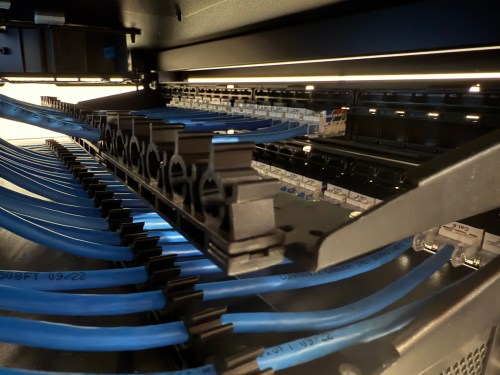
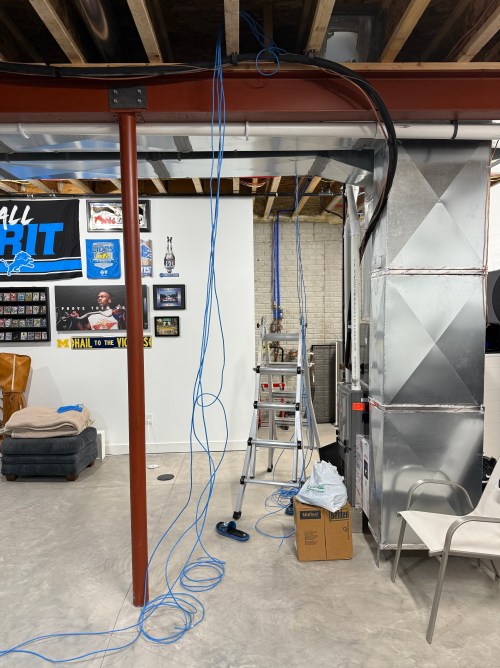
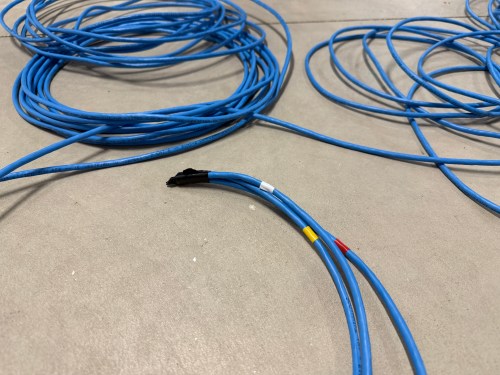
Before I started wiring everything through the rack, I cleaned up the cables.
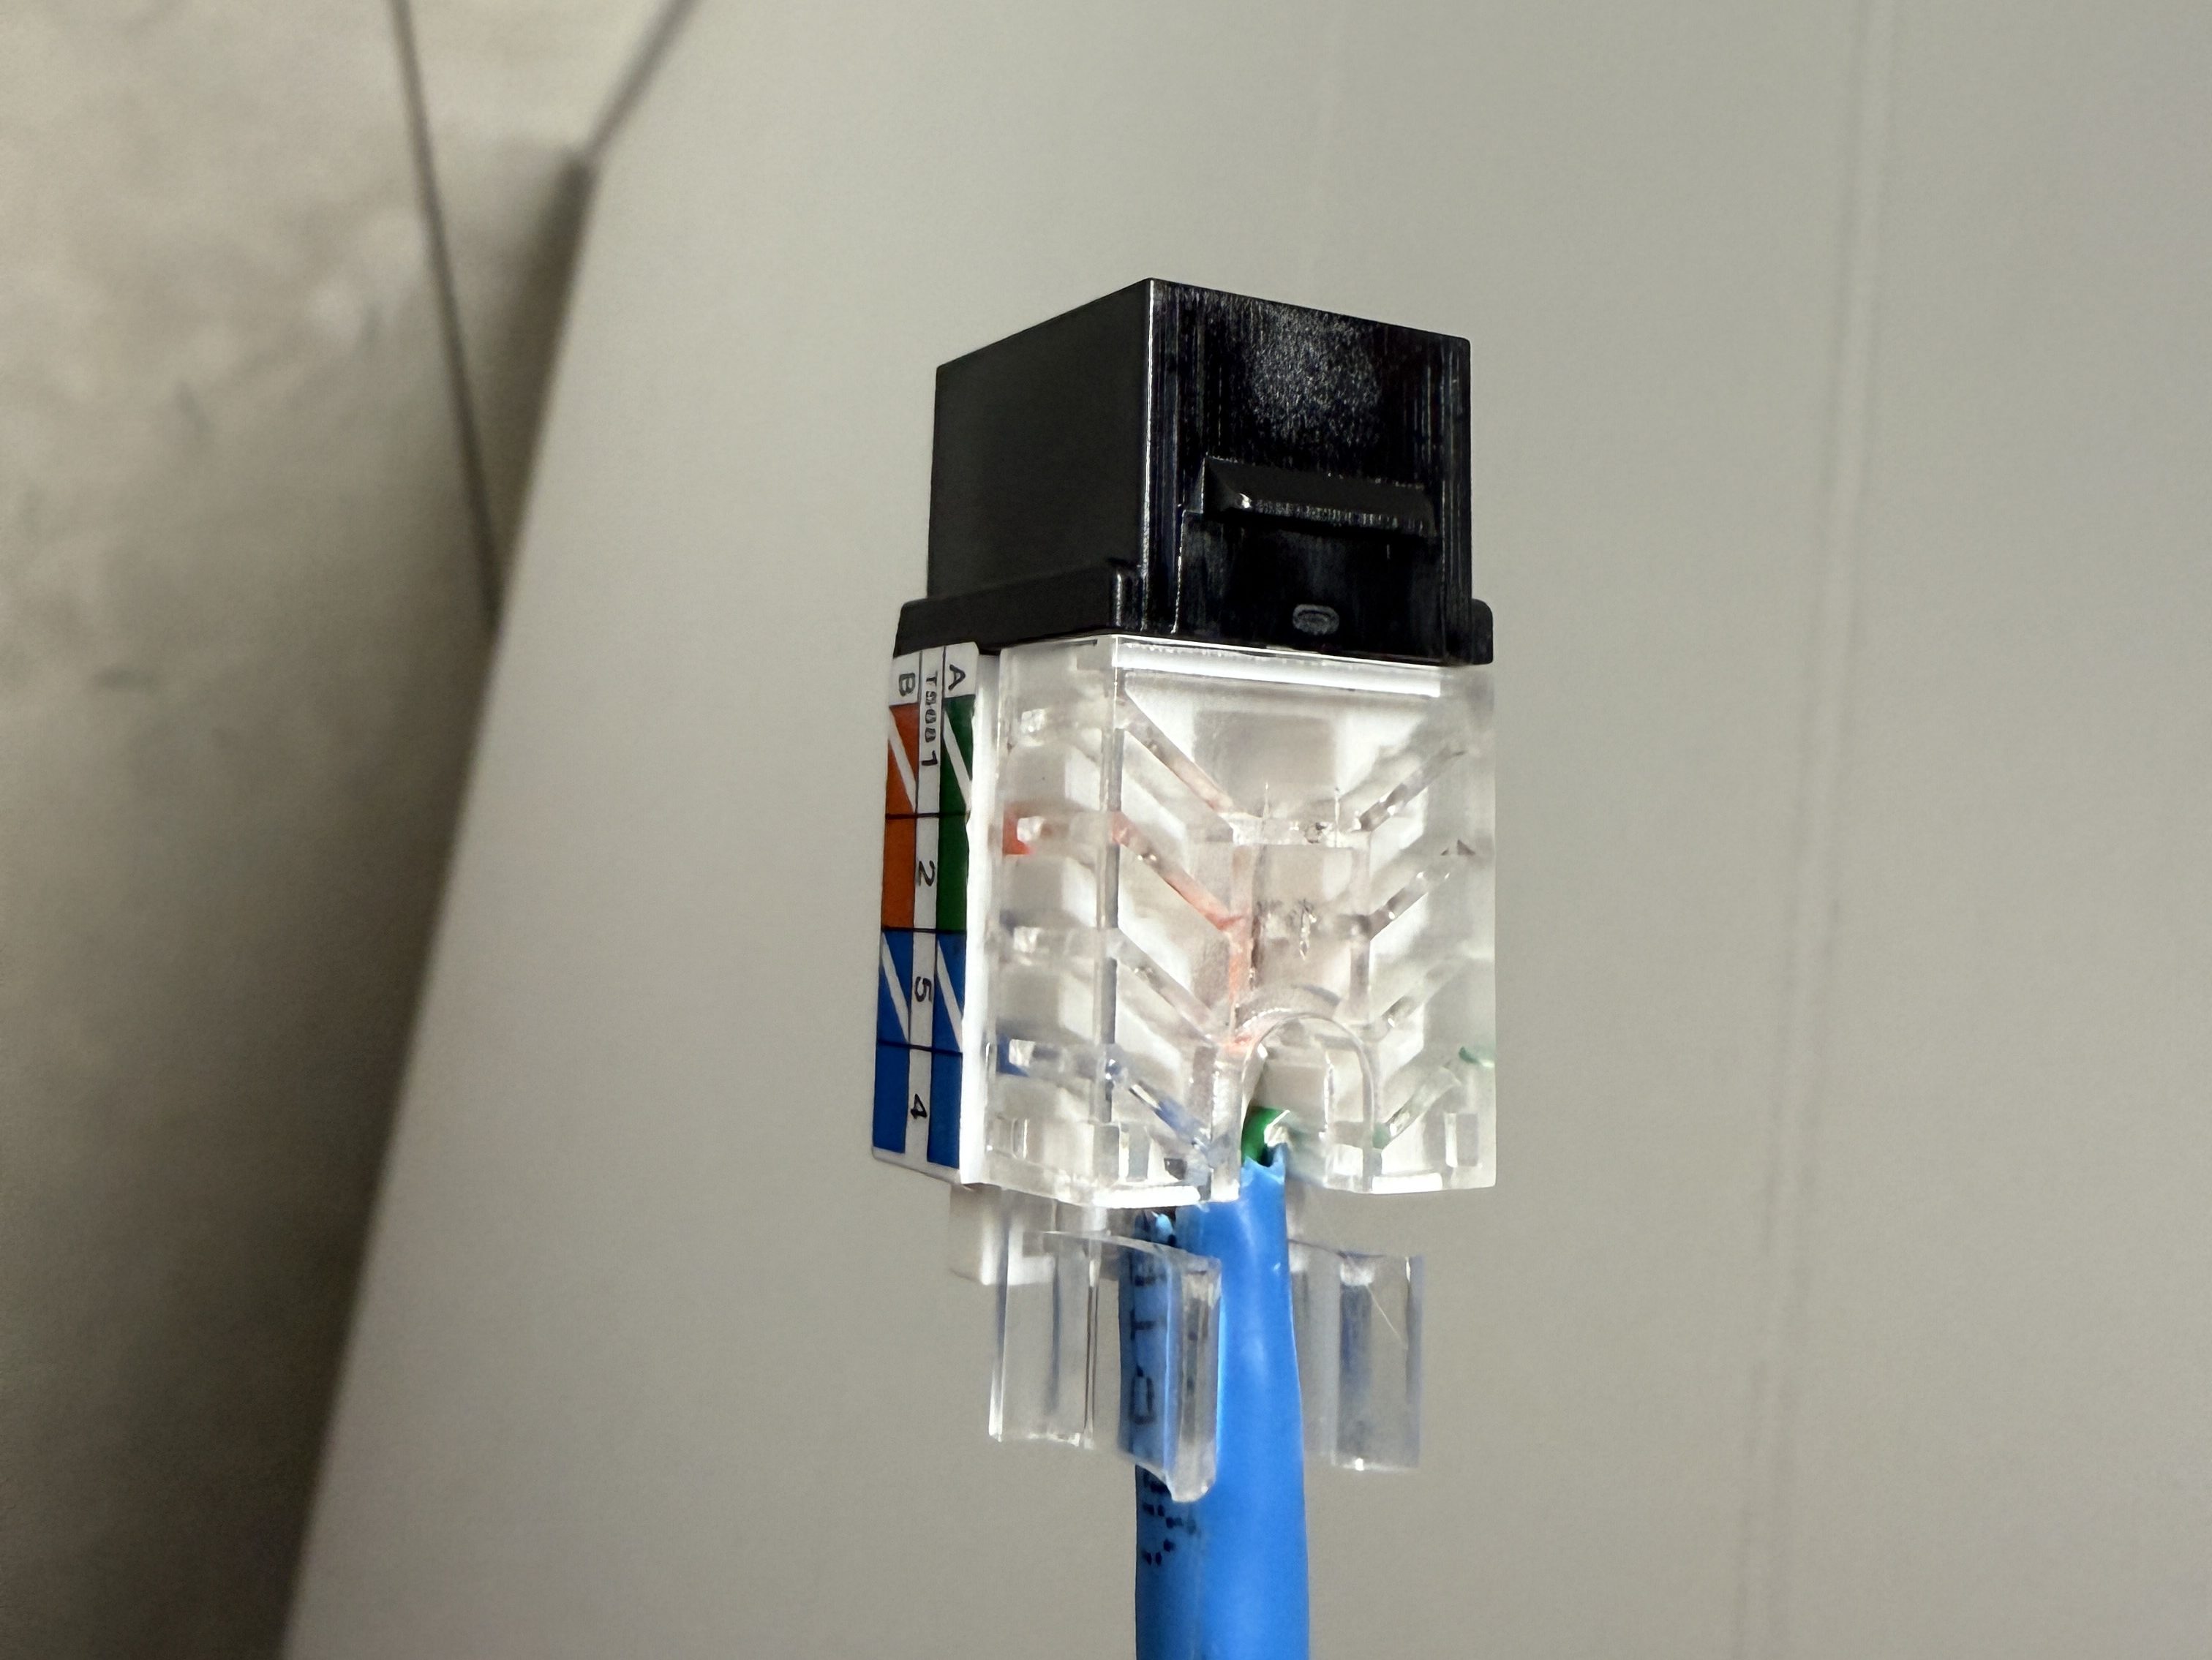
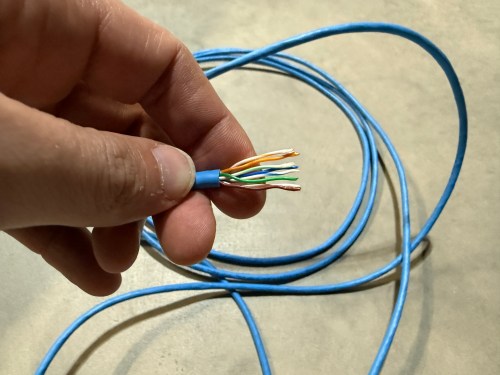
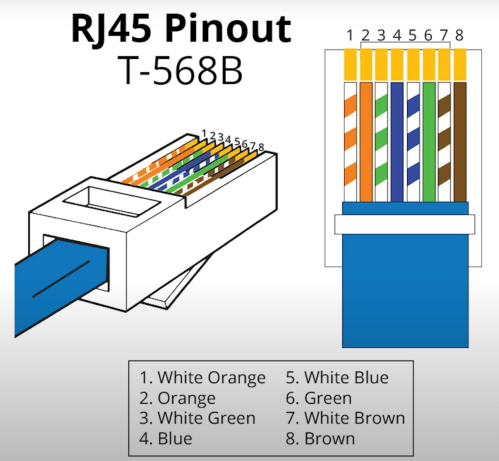
The electricians had done all of the wall jacks throughout the house with the newer T-568B wiring standard, so I followed suit. I learned how to wire the keystone jacks and insert them in to the patch panels.
I’d never done anything like this and it was so much fun. By the end, I was pretty quick with each keystone jack. I highly recommend the Everest 45° ones and the tool for it. The basement needed some Ethernet ports for the golf sim, so I ran four new cables from the rack. I installed a couple of electrical boxes in the ceiling and wired jacks there.
I also needed a custom length Ethernet cable to run from the ceiling jack down to the gaming PC. I’d tried putting RJ45 jacks on the end of an Ethernet cable or two a long time ago and remember it being almost impossible. After watching a quick YouTube video (even though I don’t have pass through connectors), I was able to put both ends on my new cable without a problem and it passed the test.
Then I was able to use patch cables to connect ports on the patch panel to the switch as well as hook up the cable modem, Pi-hole Raspberry Pi, and TP-Link equipment. There’s also a Dell Micro in there, which I’ll cover in a later post about smart home.
When I tried to access the Omada controller I couldn’t bring up the web interface with Chrome on my Mac. After trying a bunch of stuff I checked from my iPhone and it worked. I tried Safari on my Mac which also worked. It turned out I had always prevented Chrome from accessing my local network. I flipped the switch in System Settings and the interface loaded.
At another point I accidentally disabled all of the ports on the switch. The UI splits the switch ports across three pages, and on page two I had clicked the button to select all, unselected a port, and disabled the nine other ports. I quickly realized it disabled 27 of the 28 ports. I was so pissed! Every other UI I’ve ever used will only select the items in view when you click the Select All button, but not the Omada Controller software. In order to get back in I had to access the switch via the USB console, reset the switch to factory settings, and start over.
I’m running four VLANs, named Default, Guest, IoT, and nIoT. IoT is for my Internet of Things (smart home) devices that need to access the Internet and the “n” in nIoT stands for “not” since I don’t want them to access the Internet. The Default and IoT networks are set to get their DNS from my Pi-hole server, which blocks ads and other malicious domains.
Each VLAN has a matching wireless network. The Guest Wi-Fi is set as a guest network, which automatically prevents any device from accessing another. The wireless networks for IoT and nIoT are only set to use the 2.4 GHz band since most of the devices will not work on 5 GHz.
I added mDNS rules for Printers and AirPlay devices from the IoT network to the Default network.
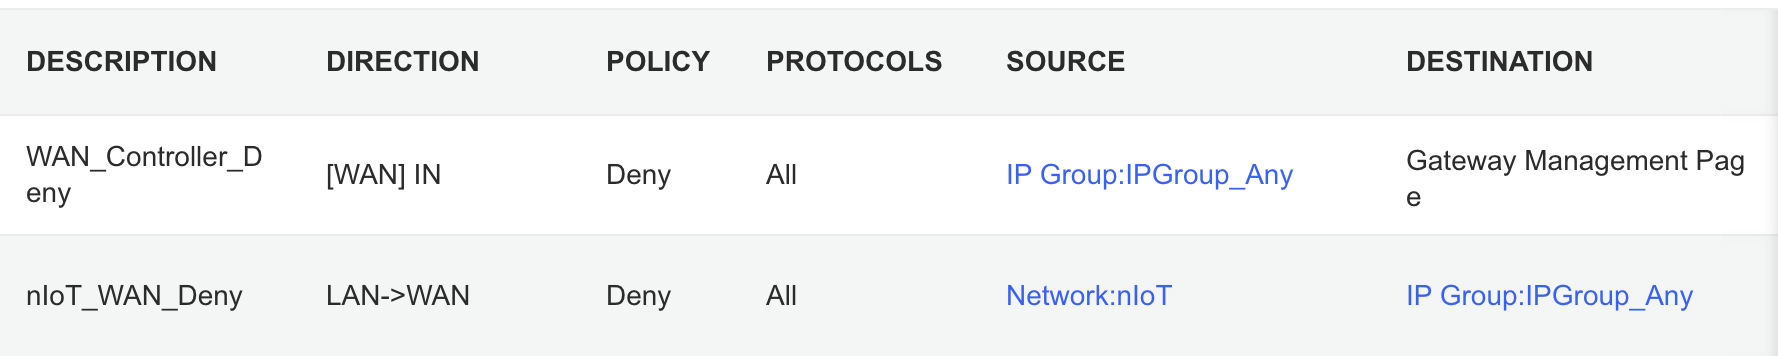
It took me awhile to figure out the ACL rules. I have two for the Gateway. The first prevents any outside IP from accessing my network management page and the second prevents the nIoT network from accessing the Internet.
I ended up with six rules for the switch, since the default behavior of the Omada stuff is to permit everything. With my Pi-hole server on the IoT network I had to allow it’s IP to access anything on the Default network (this should probably be limited to specific ports). I had to allow some ports from the camera IPs to access the Default network and I had to allow some ports from my Home Assistant server to access the Default network. I may find out I need to adjust those ACLs, but more on those smart home aspects in a future post. Then the IoT and nIoT networks are denied from accessing Default and a bi-directional rule prevents the Guest network from accessing any other network.
Seems to be running pretty well. I have some smart home stuff on the network, but haven’t connected any of the light switches yet and have a lot of Home Assistant configuration to do. Originally I didn’t have an access point in the basement, but after a few days realized it was necessary and added one. Here’s a view of the network topology, automatically generated by the Omada controller.
If you upload a floor plan and place walls, the software can even run a wireless coverage simulation. The house has great signal and the yard should get good connections as well.
Power over Ethernet is pretty sweet. It’s so nice not needing power cables for the 10 devices with PoE support.
Time to finish setting up my server and smart home devices. Watch for an upcoming post with all of the details.
Our stairs are up against the foundation, giving us a big wall facing the rest of the basement. We figured we might as well turn it in to a collage and we have a pretty good start.
My favorites are:
The display case with a lot of my Barry Sanders football card collection.
The golf bag is an old Ram one we bought with clubs from an estate sale. Brandi cleaned it up and it makes a good display piece.
Coors Light was my beer of choice through college and my 20s.
Do I really need to say anything about Mountain Dew?
GO LIONS!
It’ll be cool to keep filling up the wall and then wrap it around the corner to the door and bathroom wall. We definitely need to pick up something Michigan and put up some personal photos.
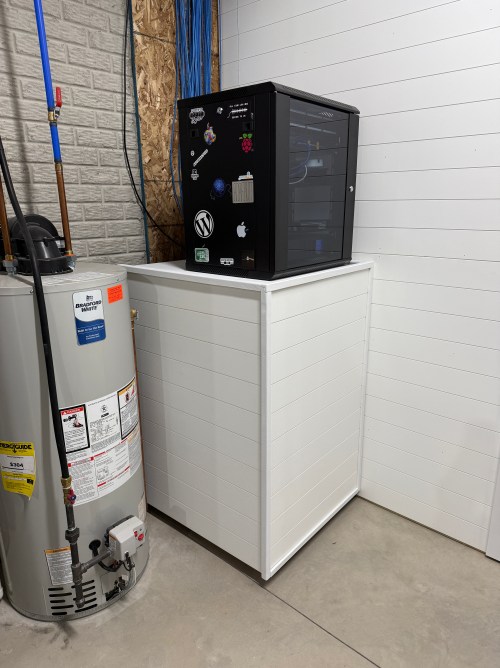
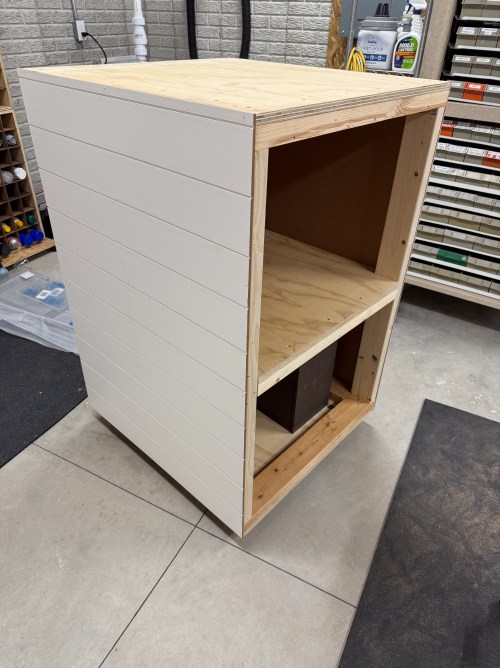
Part of our plan for the house included Cat6 Ethernet ports all over so I can wire in as many devices as possible and keep Wi-Fi for devices that need it. My original plan for the network rack was to build a cabinet on the wall, but the space between the hot water heater and the wall is pretty tight.
I decided to build a cart instead, especially since there is enough slack on the Ethernet cables that’ll allow me to pull the cart out and turn it to get at the sides of the rack. When we moved I took apart my old work table, which left me with three plywood panels and pieces of 2×4 glued to them. I thought they would make a good top, bottom, and shelf for this cart and I was tired of moving them around the shop.
I pulled out castors, washers and nuts.
Then drilled recesses and holes in the base so I could attach the castors right away.
I cut notches out of the middle panel and squared up the edges on all of the panels.
I cut 2x4s for the vertical supports, assembled the frame, and put OSB on the back. I learned my lesson with the old work table and didn’t use any glue here since I’m treating this as a shop project and would like to have the option of taking it all apart if/when I want to change the design.
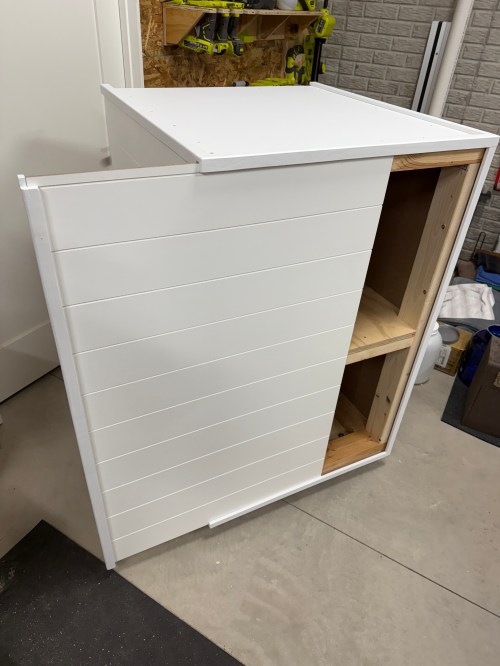
To blend the cart in to the wall, I cut and attached shiplap panels.
I made corner trim from 2x4s and painted it.
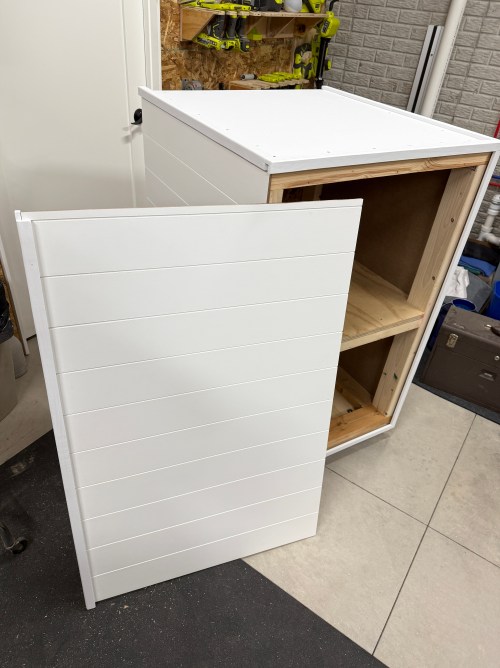
I didn’t want to make doors, so I had the idea to make a hidden siding door. I was going to have it slide up out of the top. Thankfully my wife suggested it slide to the side, which is much better.
I made a hole in the back for the power cable and a hole in the top to line up with the bottom of my network rack.
Then I screwed the rack down, wheeled it in place, and loaded it up.
Now I can start wiring up the Ethernet and configuring all of the network hardware.
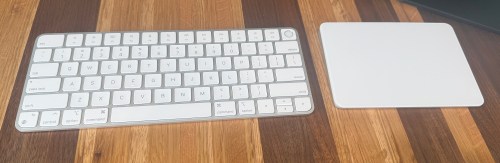
When I was building the PC for the golf sim, I had a temporary table in my office and I was turning my chair from my desk to the table and back while I installed and configured Windows. Each time I went from the mouse on the PC to the Apple Magic Trackpad I wanted the mouse again. I’ve been using the trackpad for about a year, since I built the desk.
Prior to this desk, I actually had the MacBook Air right in front of me and used its keyboard and trackpad. The trackpad on a MacBook is actually much better than this “magic” one. It really struggles with drag and drops, releasing the click action before I’m done. Maybe it’s user error, but I’d been struggling with that aspect since day one.
I ordered another mouse that same day.
This situation got me thinking. I know I’d been struggling with at least one aspect of the Magic Trackpad, yet I didn’t do anything about it. It took using the mouse to realize there’s a lot of performance to be gained.
Life is too short to struggle with the tools and processes we use. Is there anything else at work I’m struggling with? Maybe I could write more scripts to automate things I do frequently. How can I improve my woodshop processes?