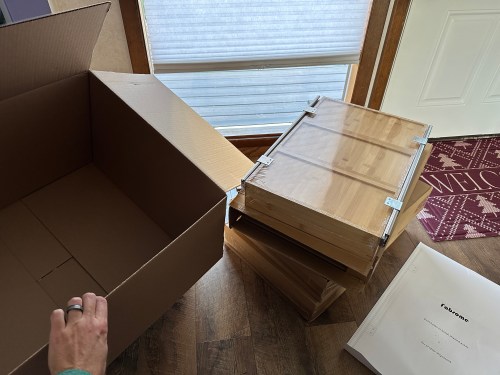
An article or ad popped up for this gutter downspout improvement while I was doomscrolling on either Facebook or Instagram and it caught my attention. I’d never even heard of hinges for gutter downspouts, but I quickly I ordered a 4 pack from Amazon. I painted them black to match and the install took about a half hour.
Now when I’m mowing the lawn I can quickly kick up the extension, mow the area, and immediately pull it back down. No more stopping the mower to remove the extension and I don’t have to worry about remembering to put it back on.
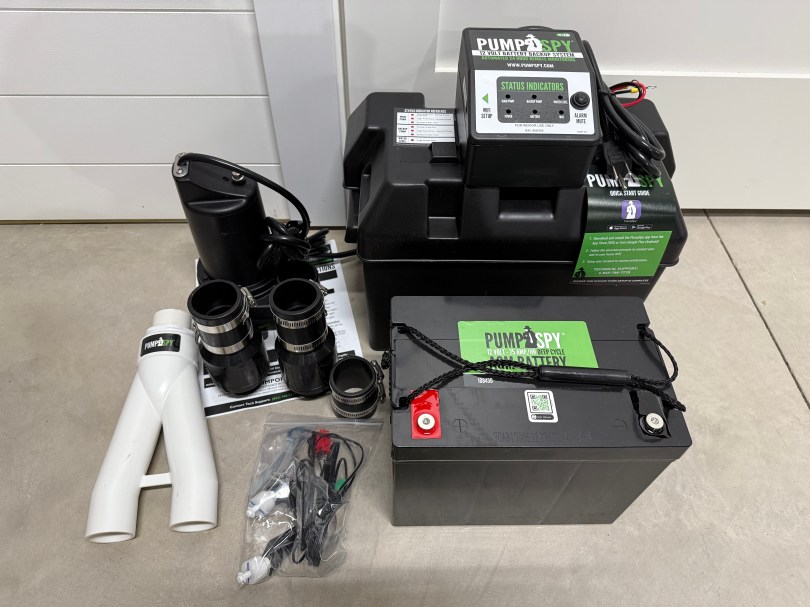
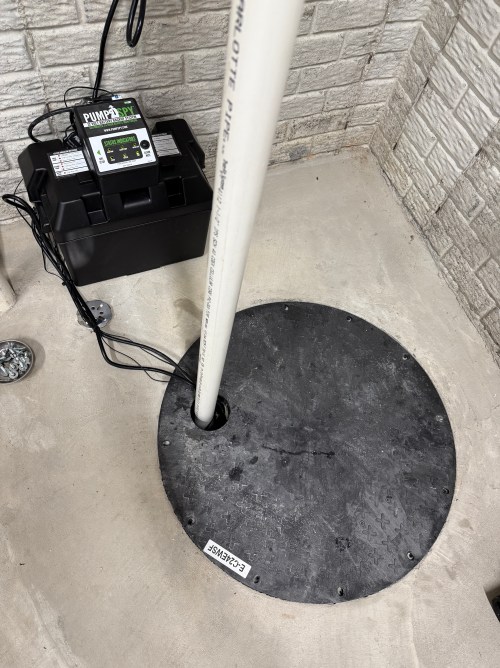
You never know when a long power outage or a malfunction of the float or sump pump is going to result in basement water damage. So it’s a good idea to have some type of backup or early alarm system. Our home builder tried to sell us a proprietary system that costs almost $3,000 and has a yearly $100 subscription fee. The system is only sold to this particular builder, which seemed sketchy, and doesn’t have any API access to the data.
I found PumpSpy, which is a Kalamazoo, Michigan company, because people have been able to integrate the data in to Home Assistant. I bought The Installation Bundle, which costs $667.
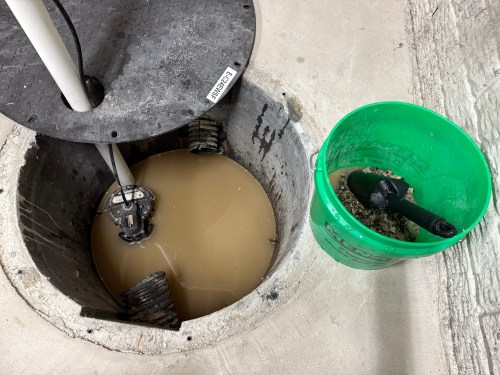
I took off our cover and cleaned out some of the debris.
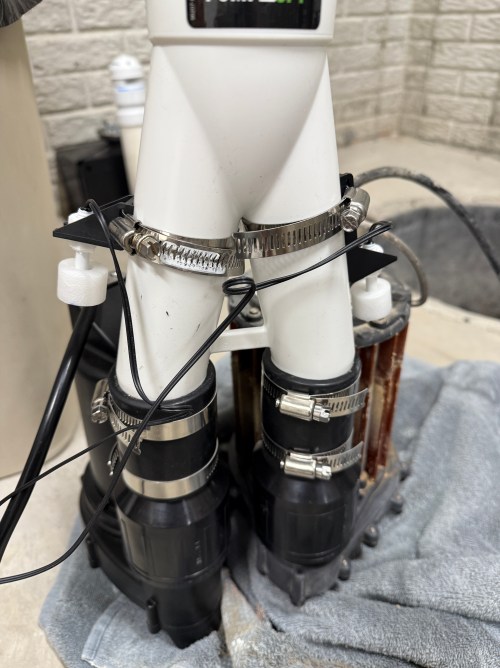
I had to make a minor adjustment to the setup, by splitting the two floats for the backup pump to use separate pipe clamps. With many floats integrated in to the primary sump pump now, it seems like this should be a standard step.
Everything else was smooth sailing by following their installation video and included instructions.
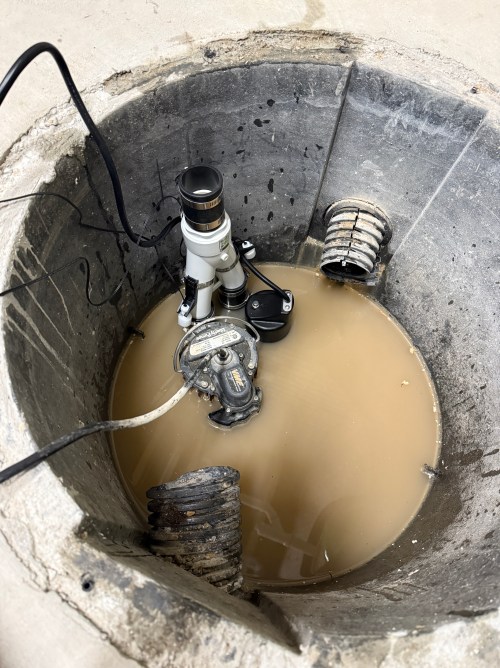
I connected the system to WiFi and setup their iOS app.
I think the entire install took me just over two hours. I love the piece of mind knowing we have a backup system in place.
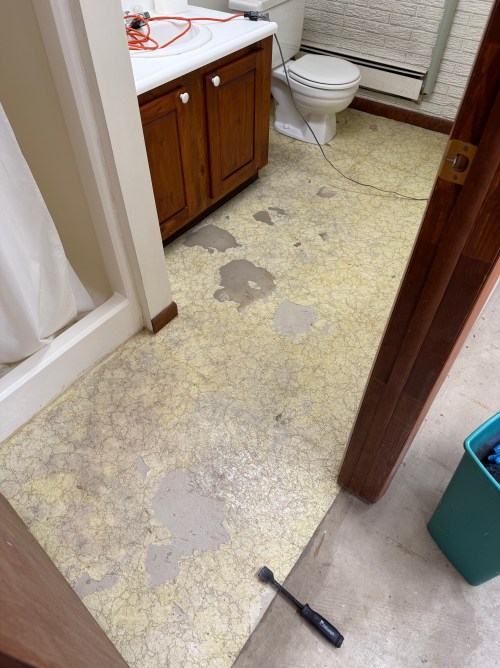
The basement toilet developed a water drip at the old house last week, with a bunch of water on the floor and in to the laundry room. The water line was one of the older ones, made from bent pipe and the drip was coming from the connector to the toilet tank. Fun!
I guess I didn’t take a picture after I got the linoleum removed. I took the toilet off and left a bunch of fans running overnight in both rooms. I started just after 7am, with several trips back home, and finally got out of there around 8pm. I had picked up a couple boxes of peel and stick tiles at Home Depot as well as all new toilet parts. It cost about $120.
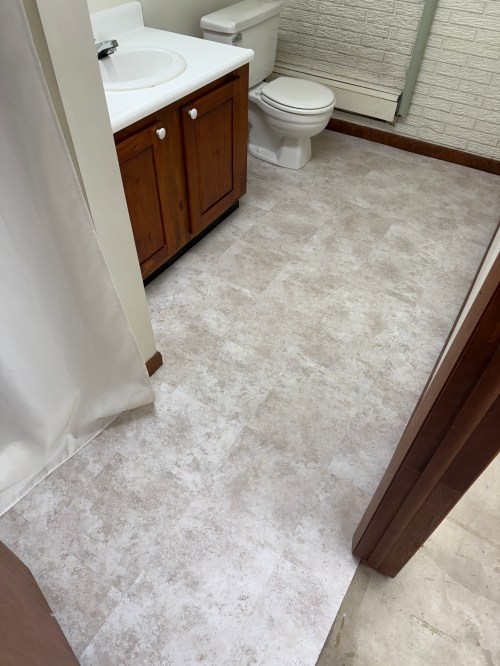
Was back to the house around 7am for day two. Except for a couple quick errands and lunch, I worked nonstop putting in the new floor, reinstalling trim (plus a new toe kick), and putting the toilet back in. I finally left just after 4pm. Thankfully Brandi made several runs to get some tools I needed at our new house and pick up lunch.
The extra cost of the tiles at Home Depot was worth it because they’re much better quality than the ones from Family Dollar. For a rough basement bathroom, the floor is a nice upgrade and looks good.
My entire body was wrecked from crawling around on the cement floor for two days. We need the house to sell before there are any other surprise projects.
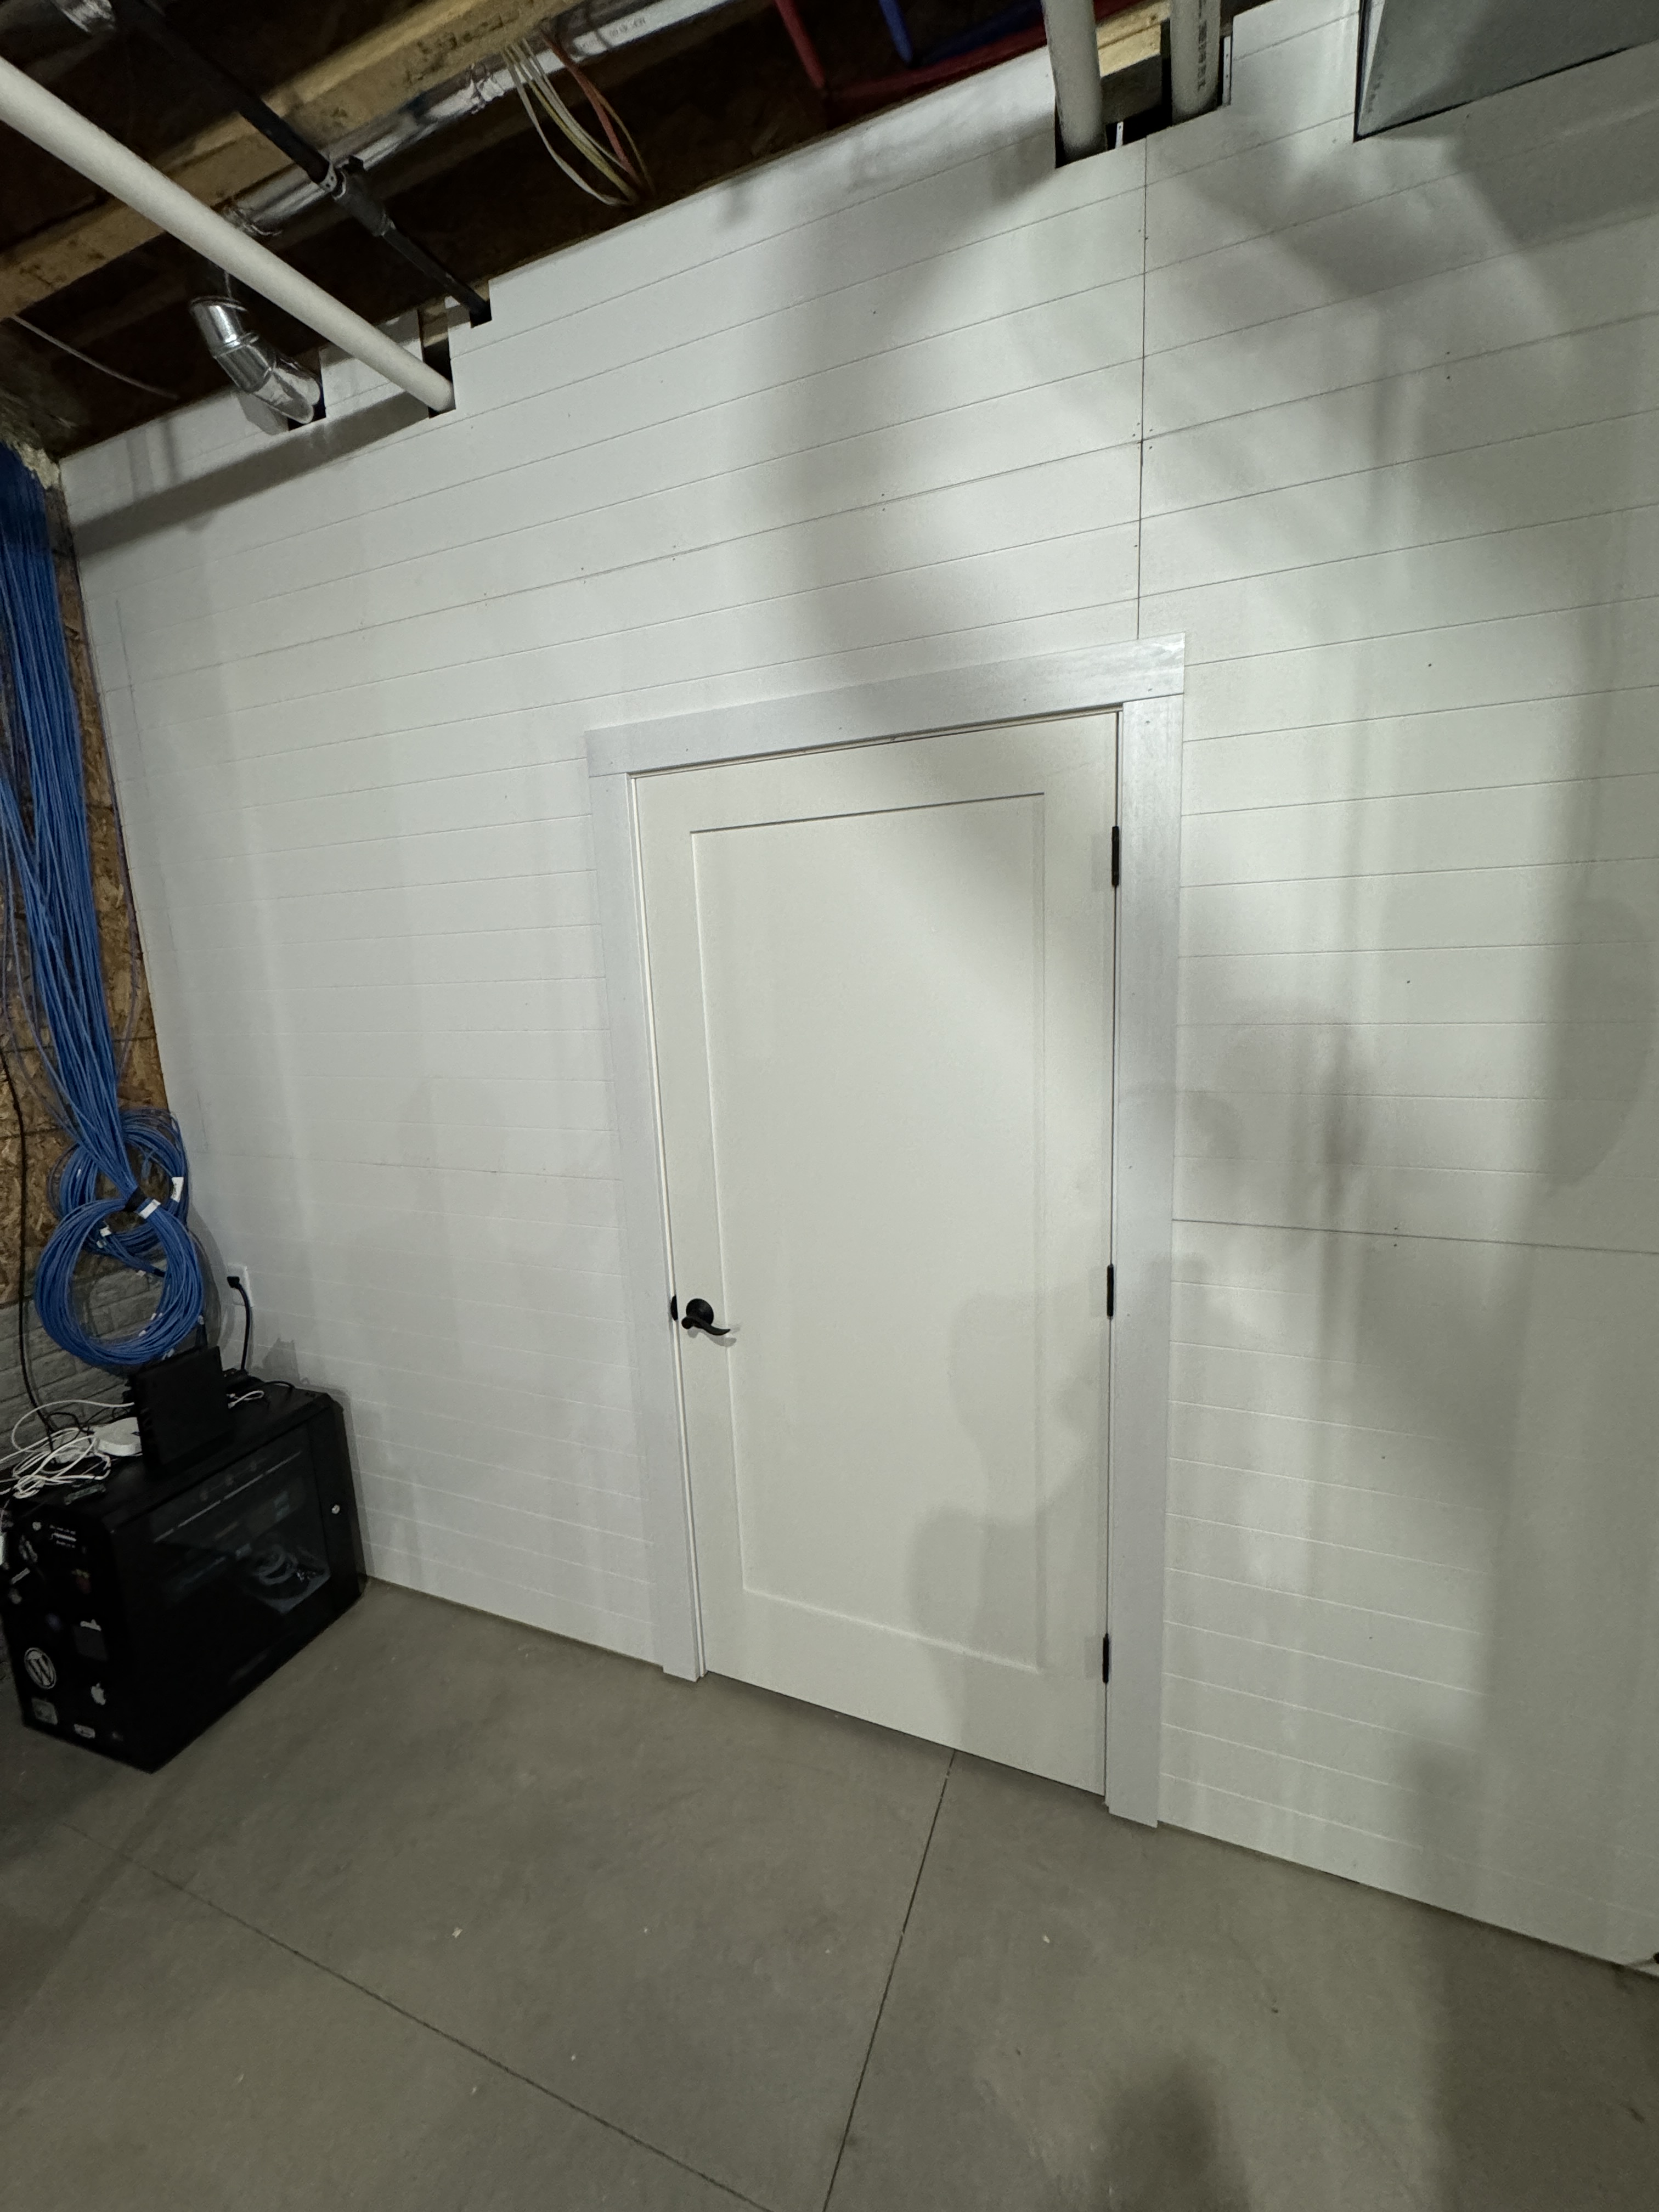
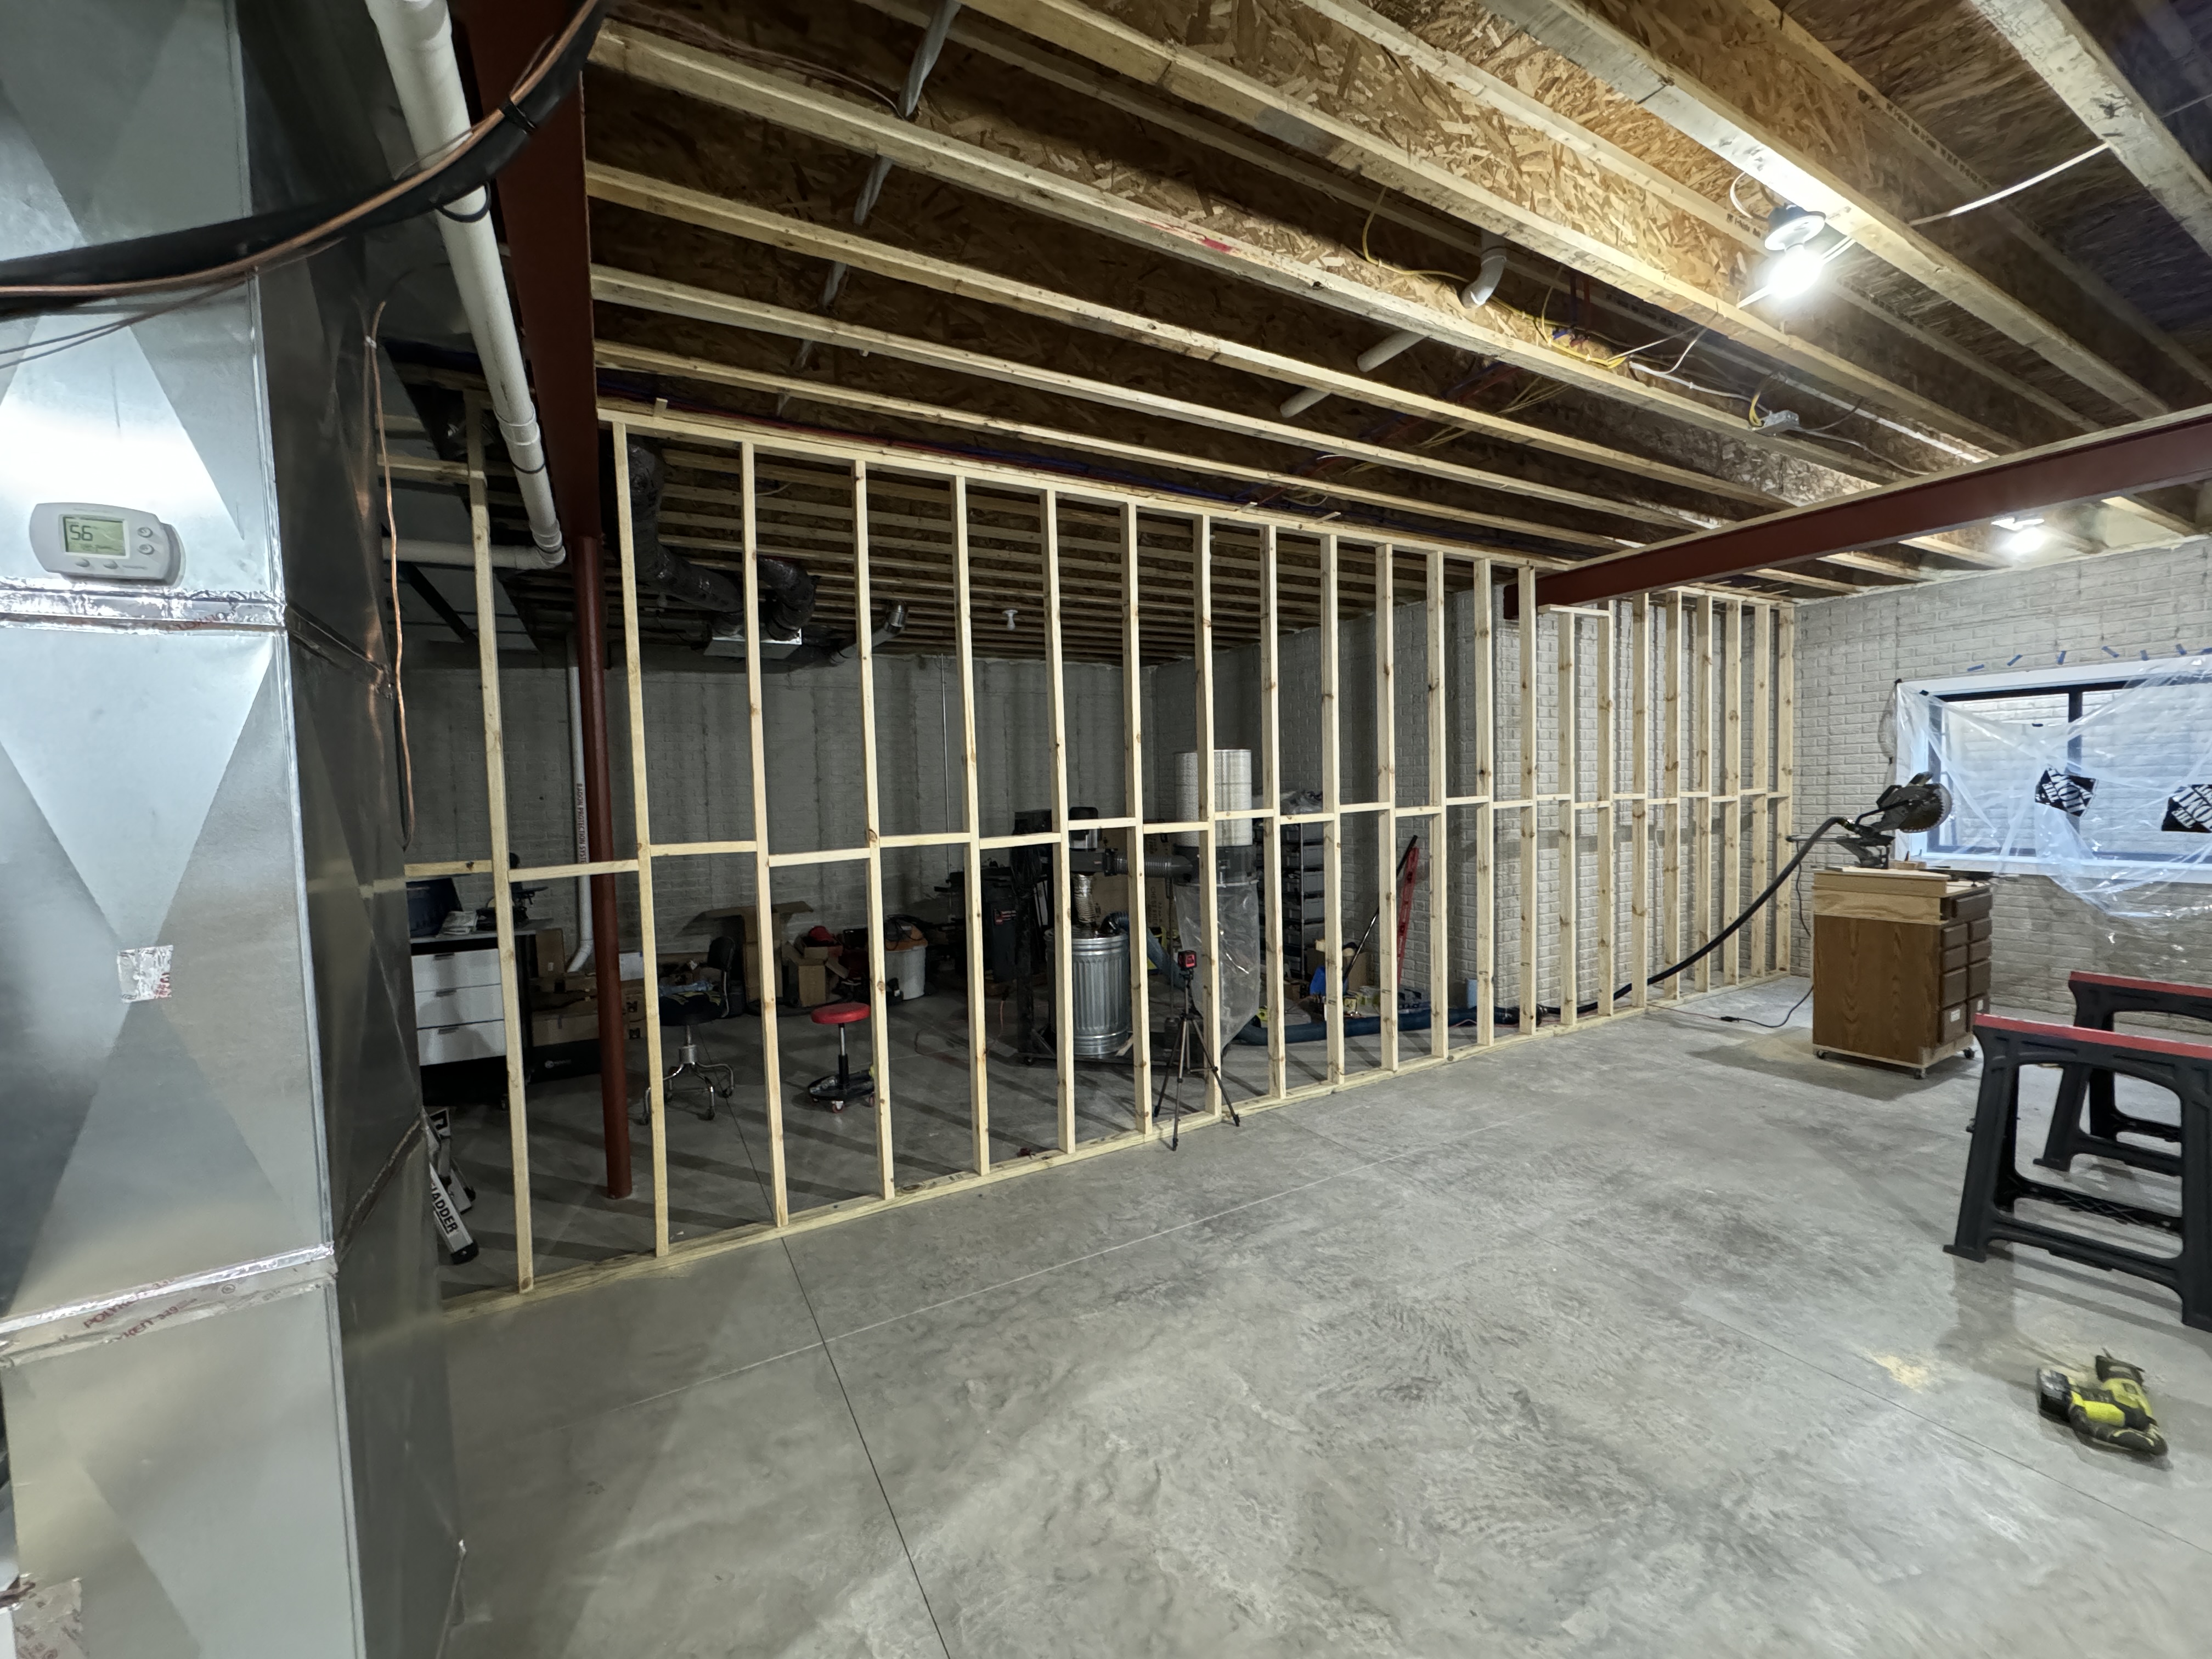
A week after moving in, Dad came down and we built a wall in the basement to close off the workshop and keep sawdust contained. I eventually finished the rest of the show side of the wall and added trim to the door.
The Cat6 cables and networking rack are a project I hope to tackle over the holidays.
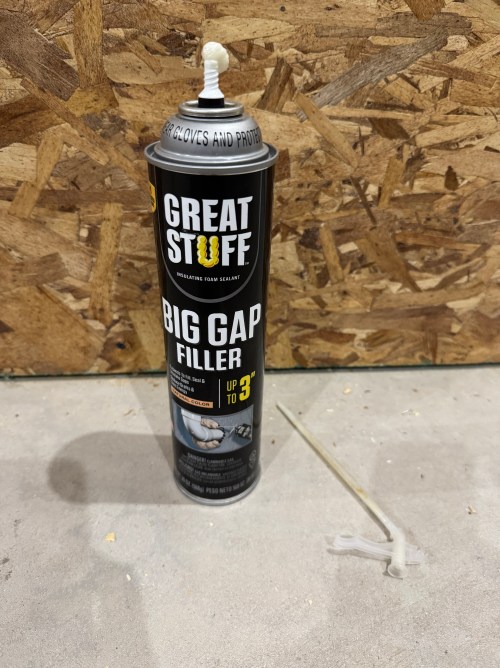
In order to keep as much dust as possible in the shop, I bought a can of spray foam to fill gaps around pipes, ducts, and beams. Since I hade some large gaps, I had to do two applications. I used wider painter’s tape to hold the foam back (picture below was taken during round two).
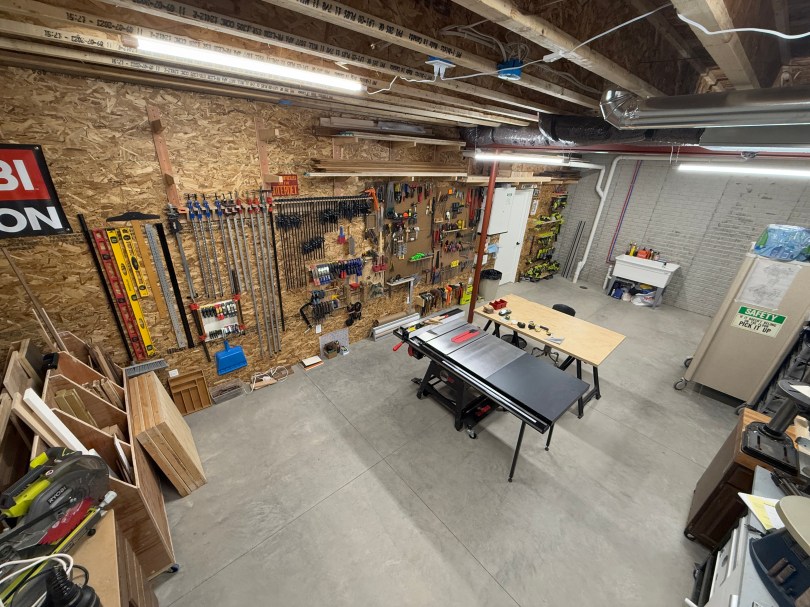
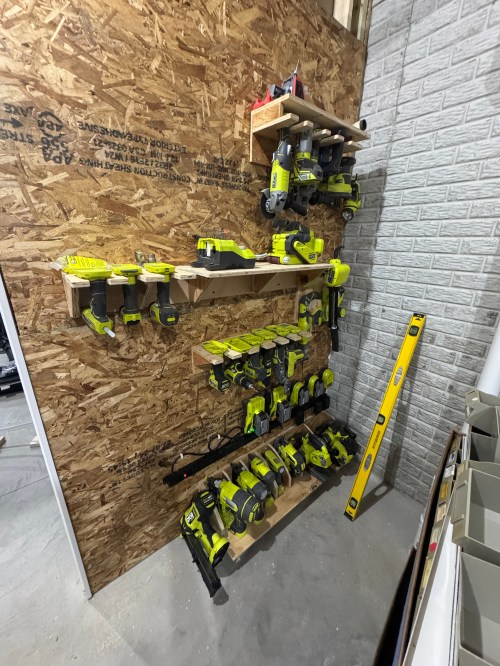
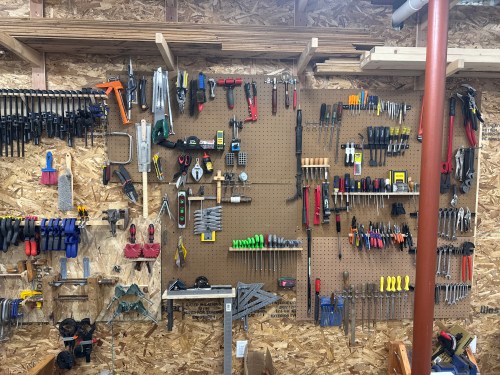
Then I wired all of the shop outlets and put up OSB for my wall material. It was a cheap option at about $15 a sheet, while allowing me to screw lighter things anywhere. The first things to go on the wall were all of my Ryobi storage, since the tools had been scattered across the floor for weeks. I absolutely love the 10 foot foundation, which allowed me to put wood storage high and out of the way.
I put up my clamp racks and emptied a lot of boxes to organize my tool wall. The Allen key holder was a quick side project.
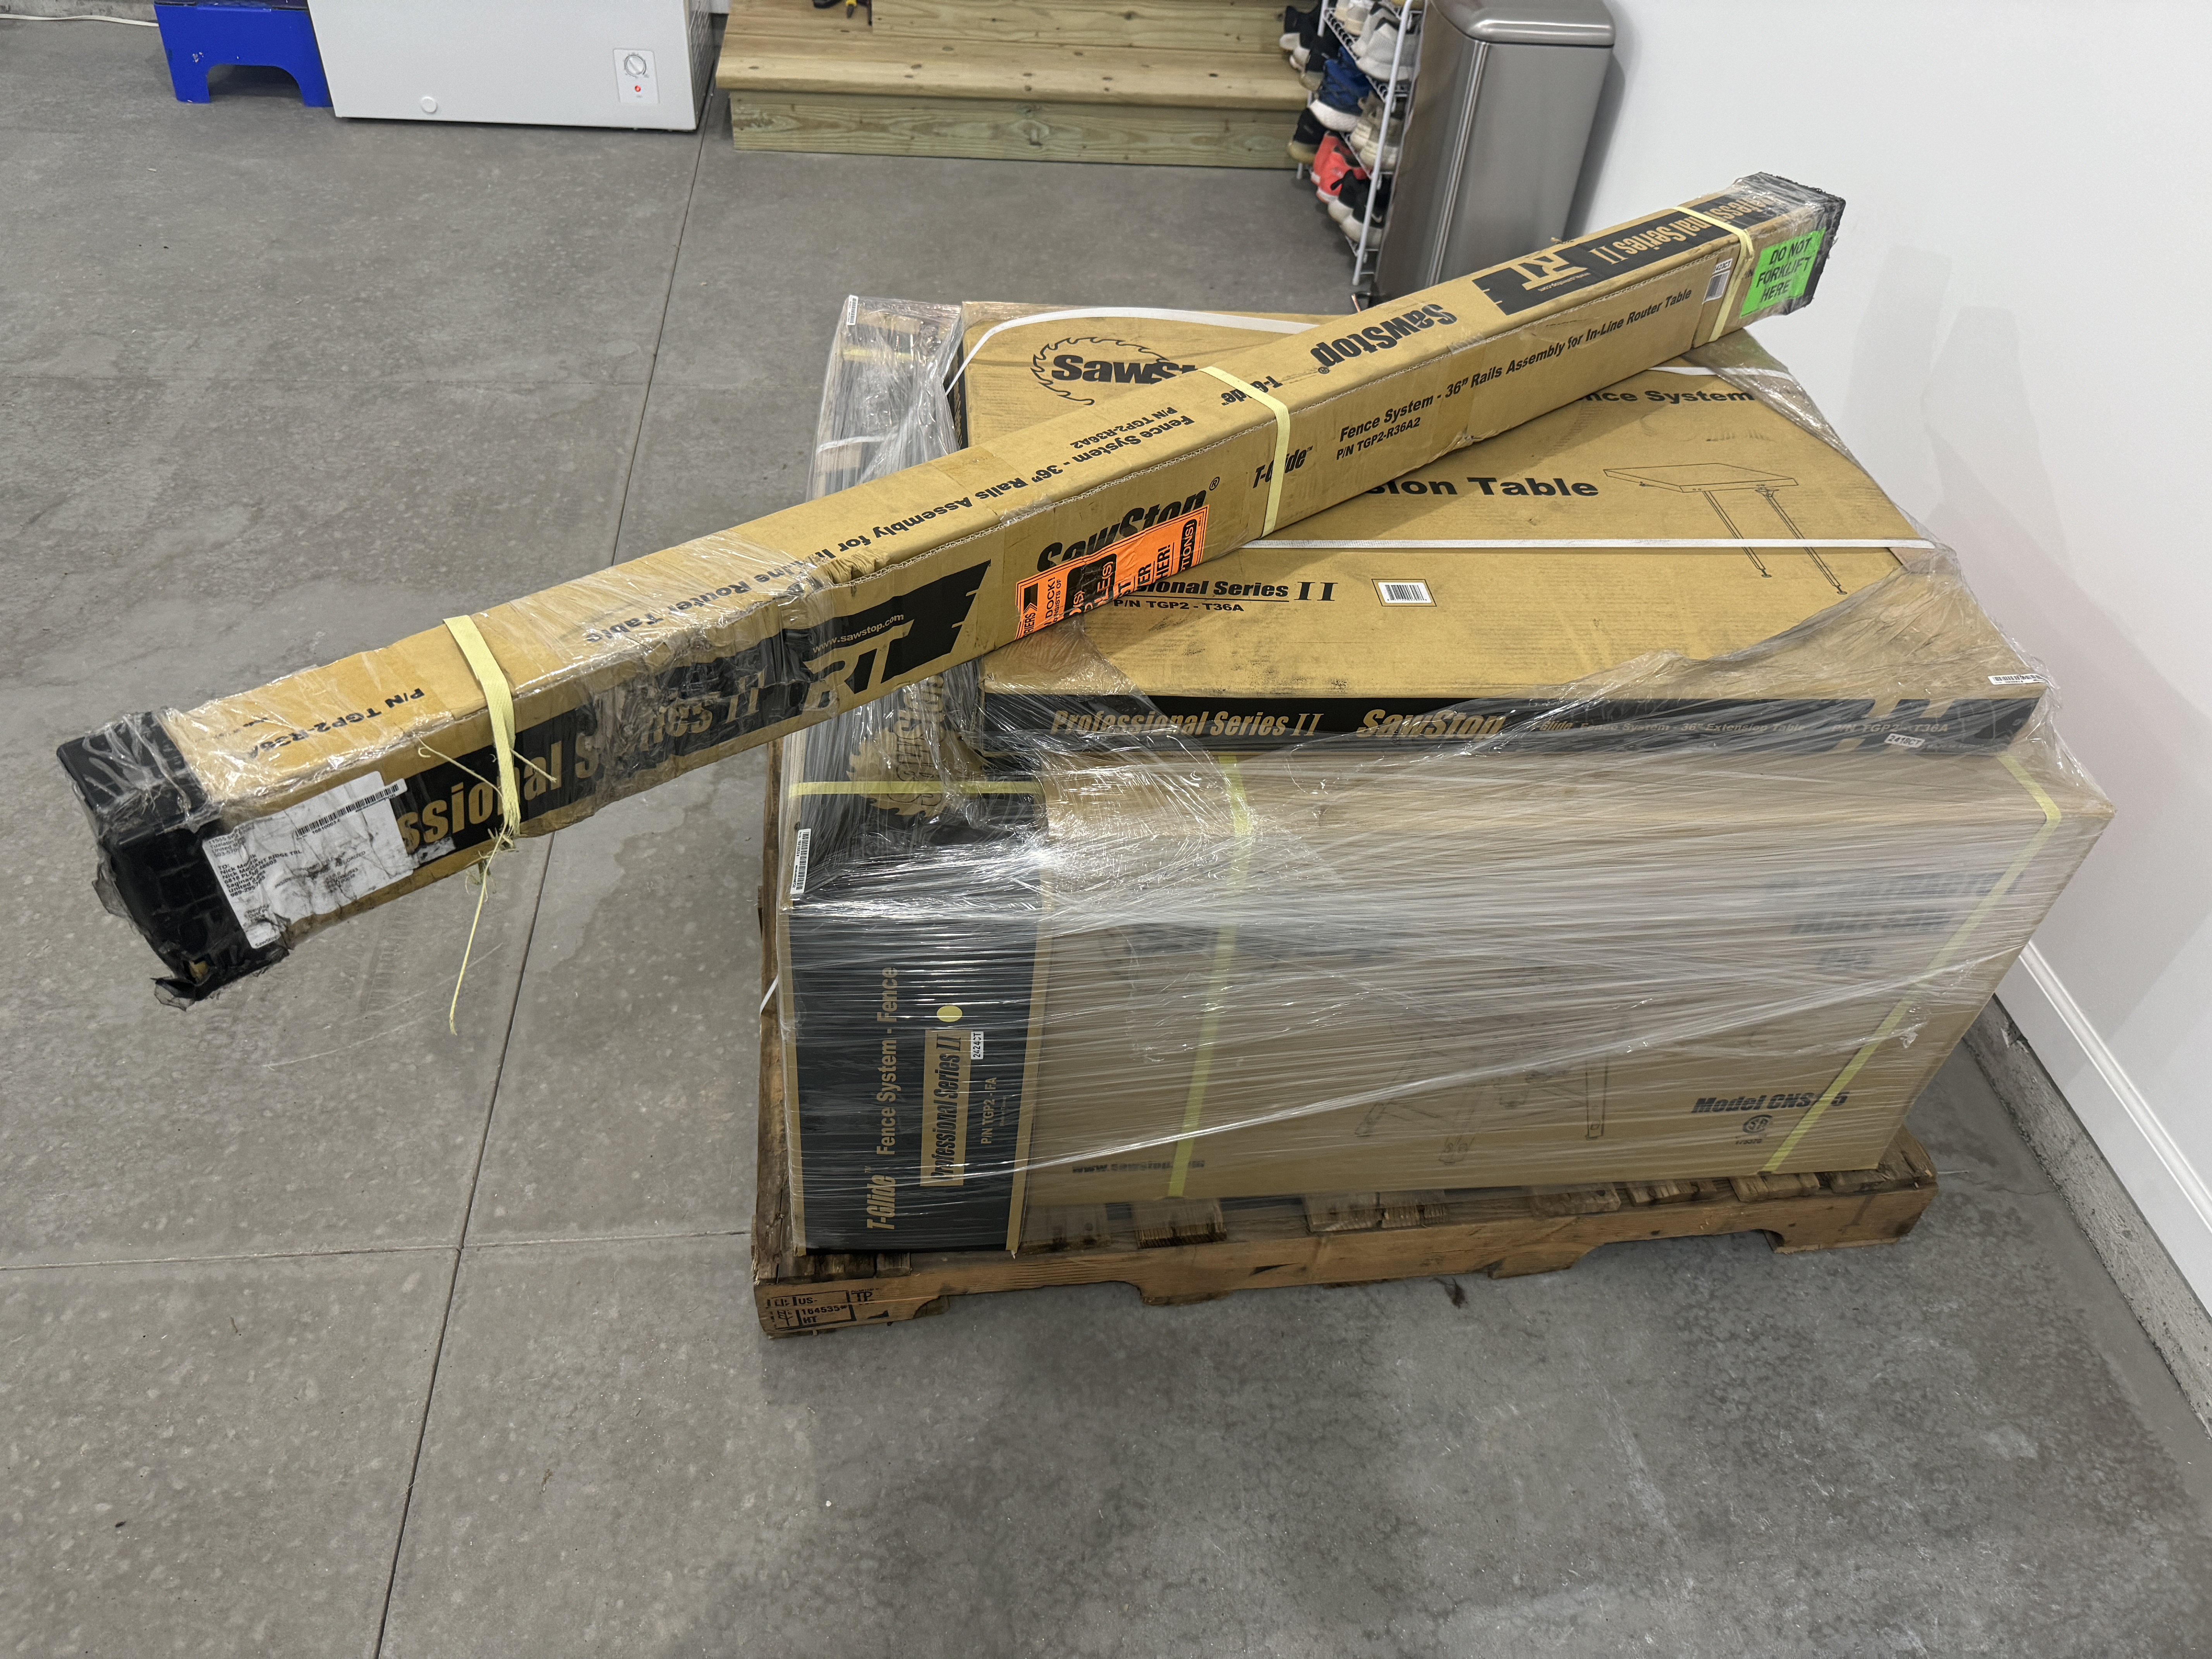
I had wanted a SawStop for years and the move seemed like good excuse to sell my old Craftsman table saw instead of hauling it to a new basement. I bought SawStop’s Contractor Saw with the 36” T-Glide Fence Assembly, Mobile Base, and Cast Iron Wings. She’s a beauty, a joy to use, and the safety features can’t be beat.
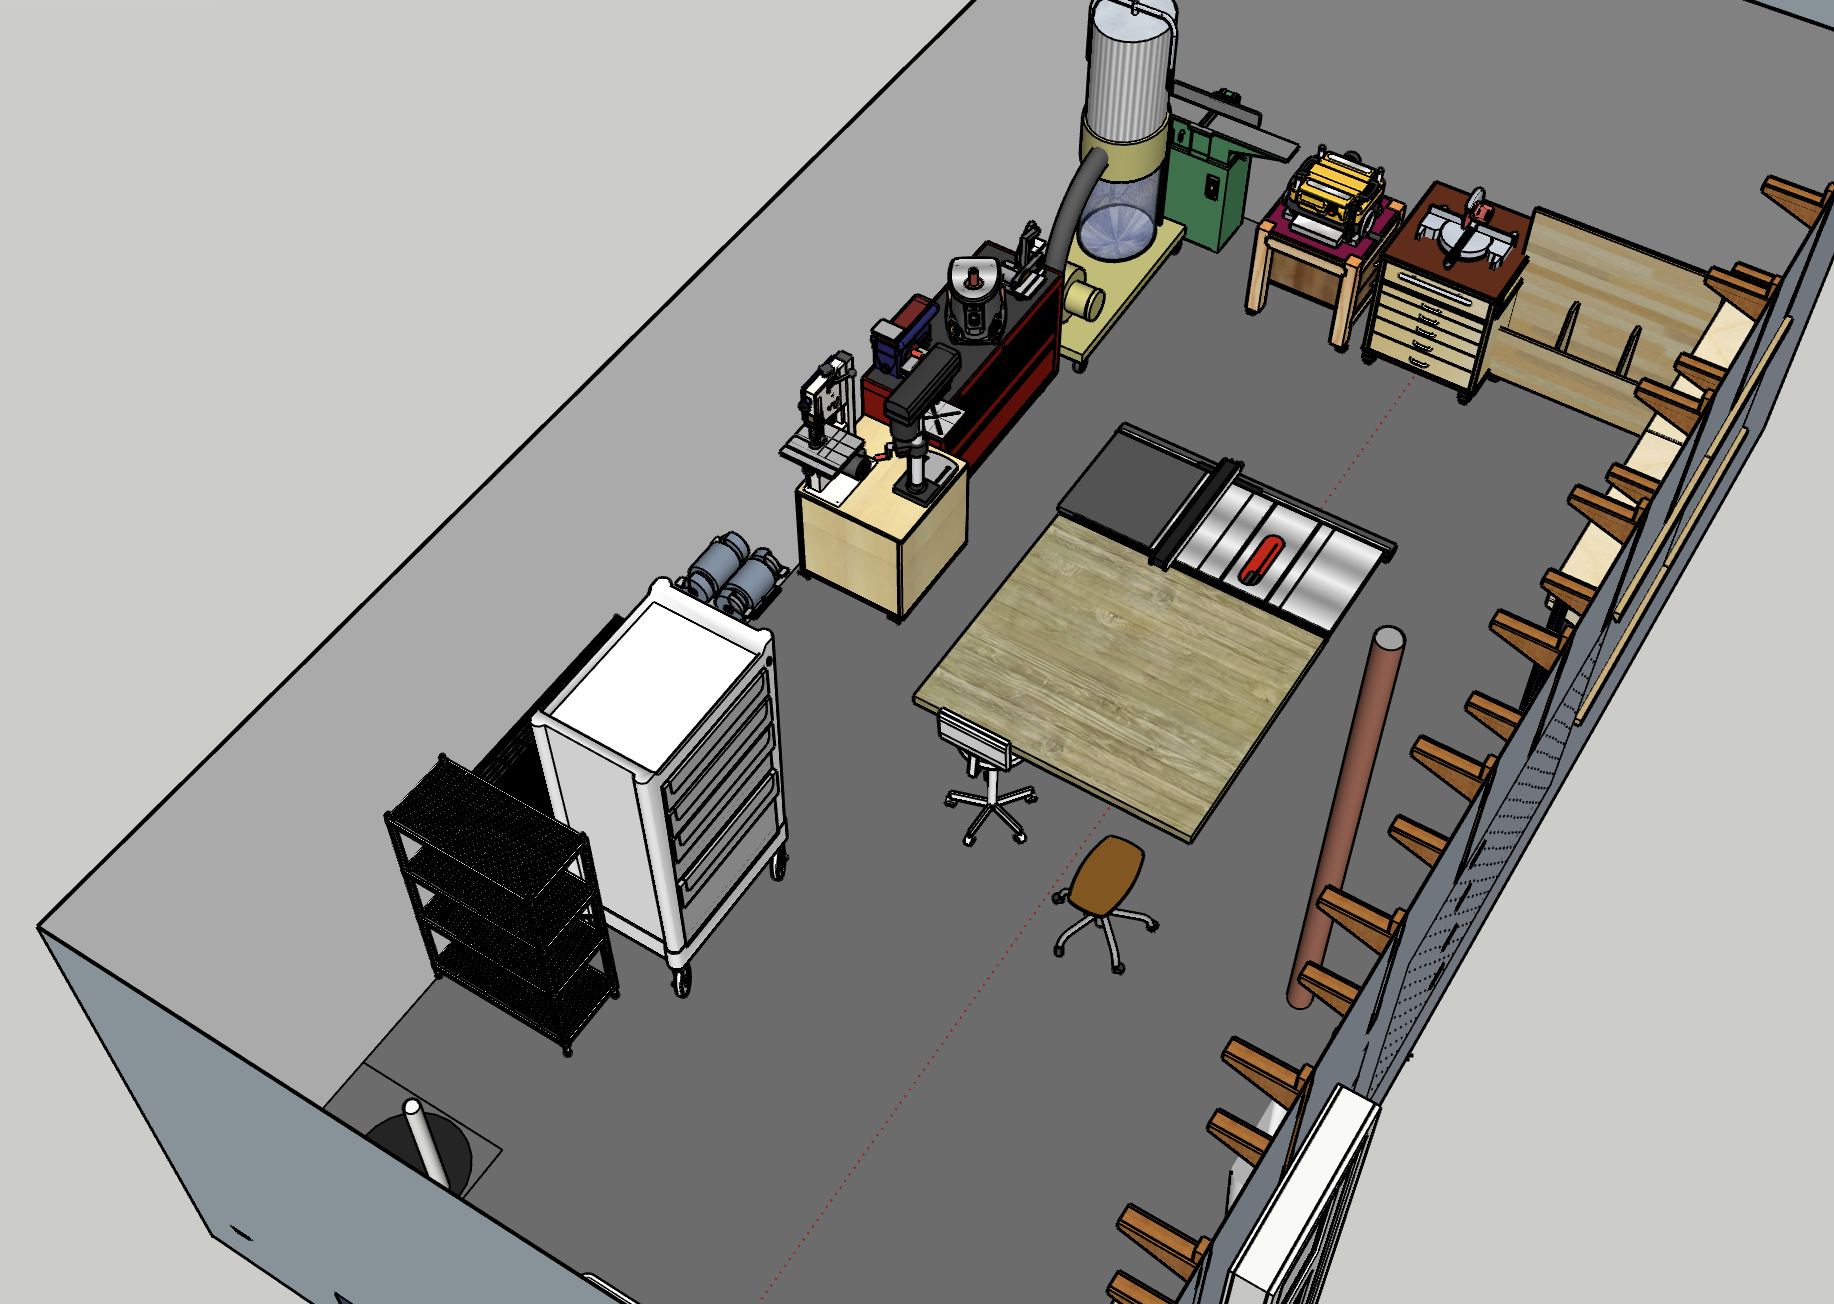
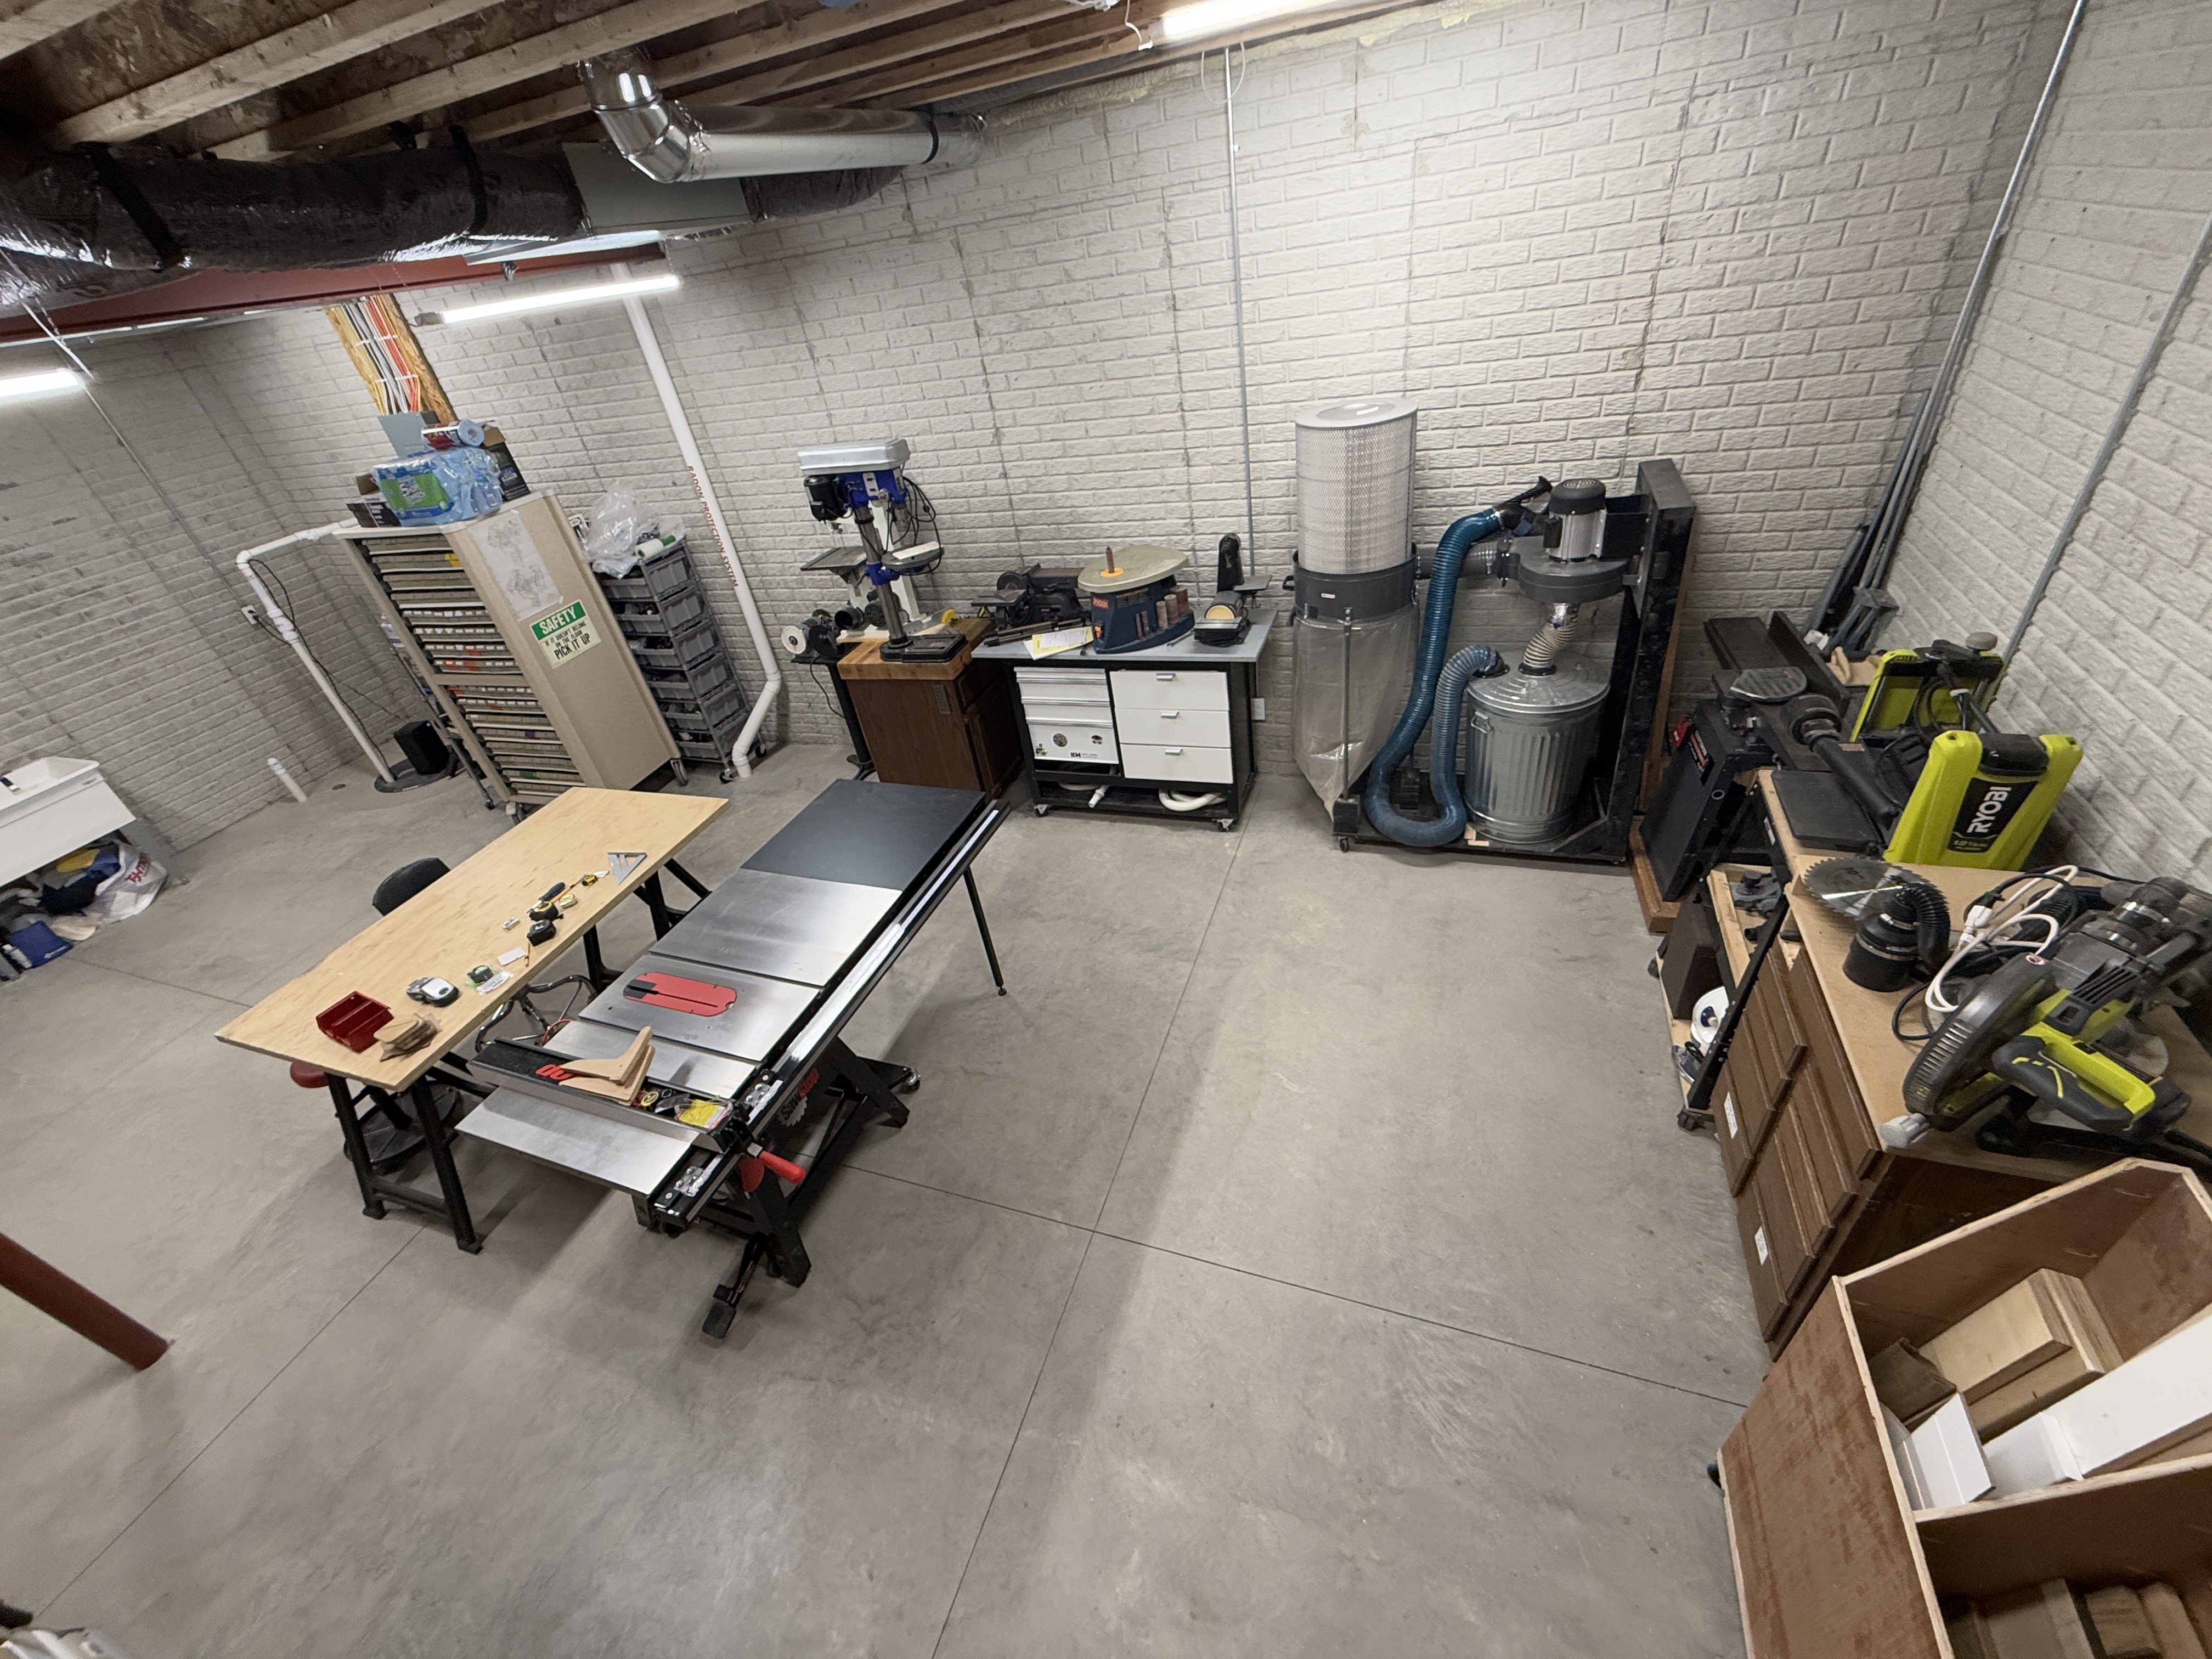
I had a general idea of the layout I was going for in the shop, but in order to get a feel for the space, I measured all of my carts and tools so I could model in SketchUp. I started with the structure, items on the main wall, and things that can’t be moved, like pipes and the shop sink.
Then I needed all of the tool and storage carts. I imported a lot of the items from SketchUp’s 3D Warehouse and scaled everything to the correct size.
Eventually I got to a comfortable arrangement in the model and could physically put things in place. Over the course of several weeks I made a lot of adjustments. I even moved my band saw over to the drill press cart so I could repurpose it’s cart for my planer. I think I ended with a very good first iteration. Here are comparisons of the model and the actual room.
I can start making things again! One of the first builds is going to be an outfeed/assembly table for the table saw. It’ll have some neat features and storage. In the models I made a table top of about the correct size and in real life you see my old table top, which is too small and low, on saw horses.
It’s been a busy few weeks packing and moving to the new house. Actually, it’s been a busy year! Building a 40 foot wall before being fully unpacked is a great idea, right? My dad was up for it, so of course I was. I’d never build a wall before, so framing was a fun challenge. This new project meant buying a couple of new tools, which I always love.
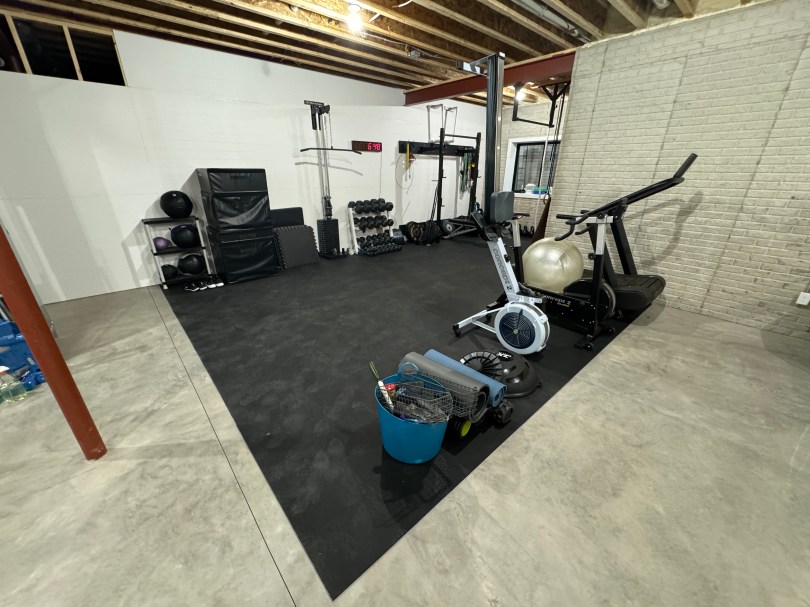
We’re very excited about this new gym area inside the house. No more garage gym for us, which was brutal in the Michigan summers and winters. There is still some organizing to do as we figure out how we use space. The wall isn’t actually finished yet either.
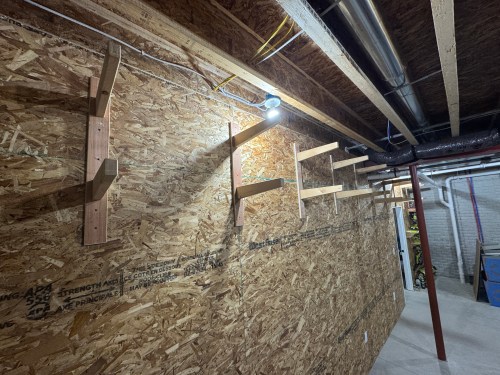
After I finish paneling this area I can get started on the other side of the wall. I picked up 1/2″ OSB for the shop’s wall material, to make it easy to screw small items in anywhere I want. You can’t beat $16 a sheet. Check out this cool storage space for sheet goods I gained by having the wall follow the floor joist.
I’m excited to get this mess of a shop organized, especially with all of my wood and large clamps at the other side of the basement for temporary storage. It’s going to be awesome.
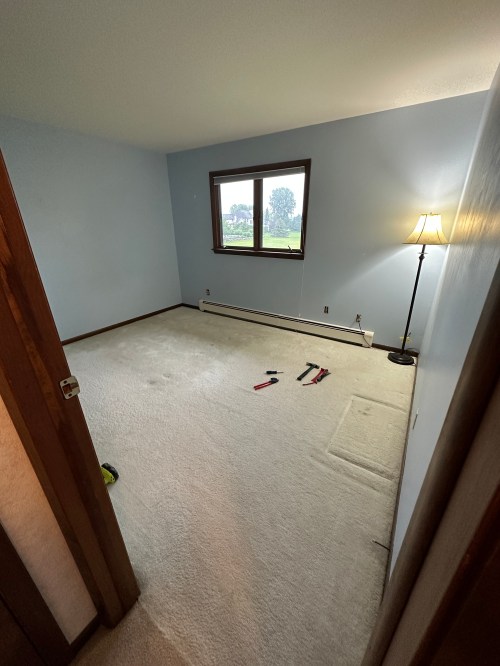
We had the idea to convert one of the spare bedrooms in to a closet for Brandi. Here’s what the room looked like after clearing it out.
After pulling out the carpet (and maybe painting?), we decided to design and build (not ourselves!) a house. Very exciting and we’ve been working through the process for a few months now.
So plans changed for the room. We painted the walls and inside of the closet with a white to brighten things up. Here you can see a bit of how dirty it looked in the closet.
We painted some shelving (the actual shelves are missing here) in the corner of the closet instead of installing new stuff. Here’s a look after paint.
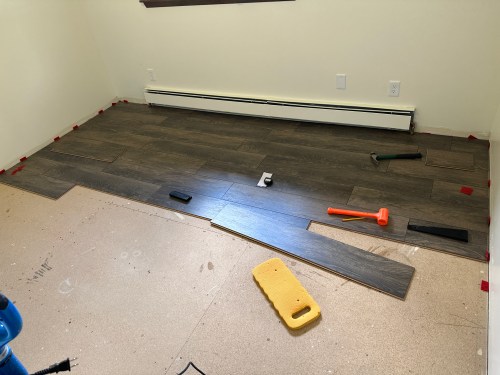
With the upcoming move we bought cheaper flooring from Menards instead of getting the stuff we’ve used from Sam’s Club. The cheaper stuff is definitely harder to work with and I did the room by myself in about 6-7 hours.
The room didn’t have any ceiling lighting, which I’ll never understand. So I installed a ceiling fan and rewired the switch, which previously controlled an outlet.
I cleaned up and restained the trim instead of buying new stuff. There wasn’t any trim in the closet, so I bought white PVC trim for simplicity. I still need to get some quarter round for the room since a few flooring edges show.
I don’t like the floor style, but the next owner’s can worry about it. This was cheap and did the job. If we hadn’t already tore out the carpet, we would have left the room alone, saving a bunch of time and money.
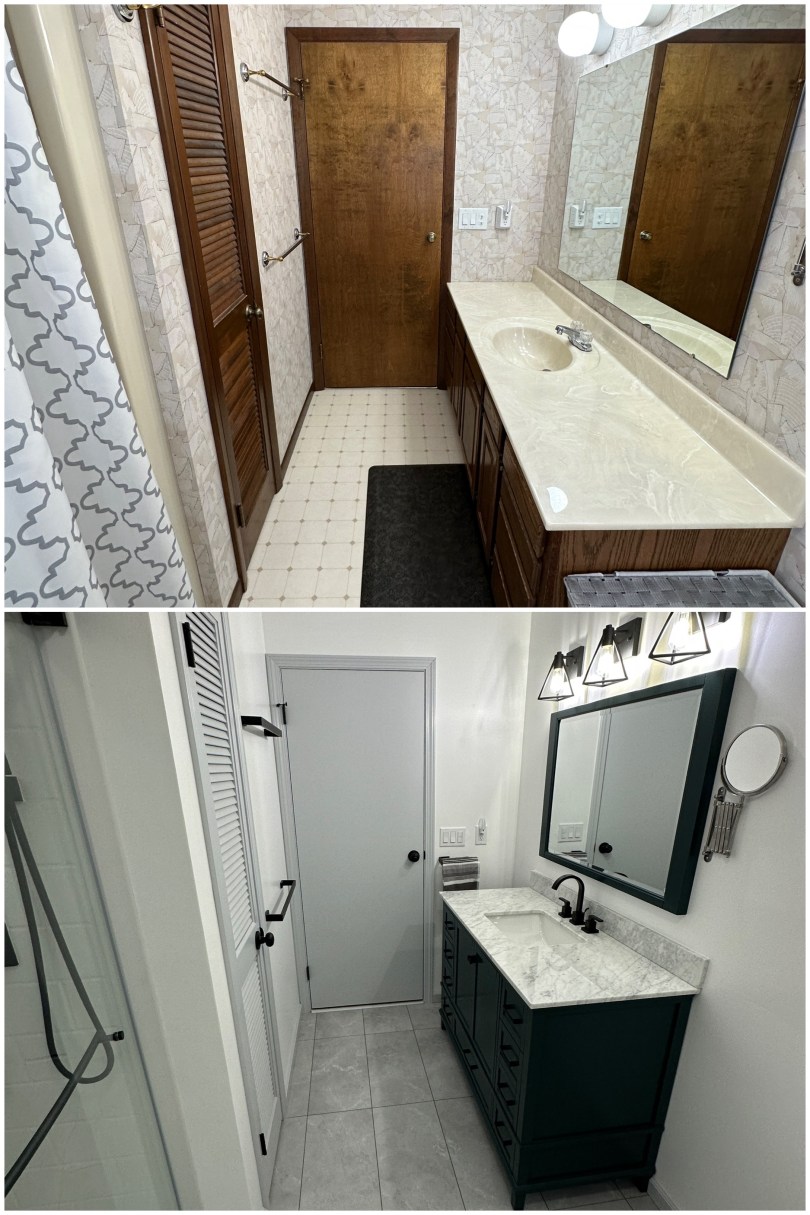
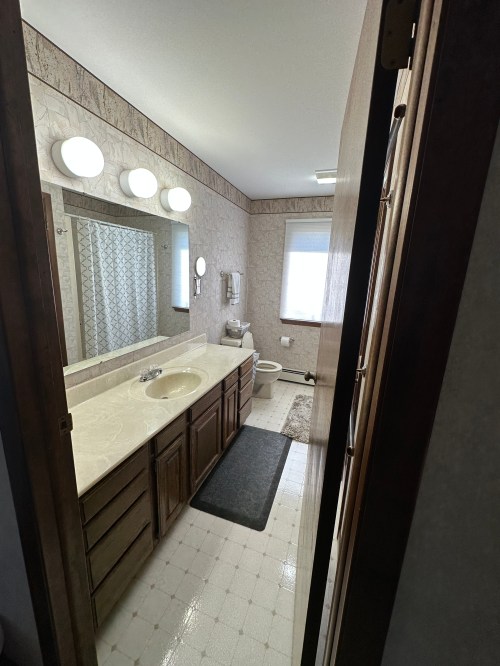
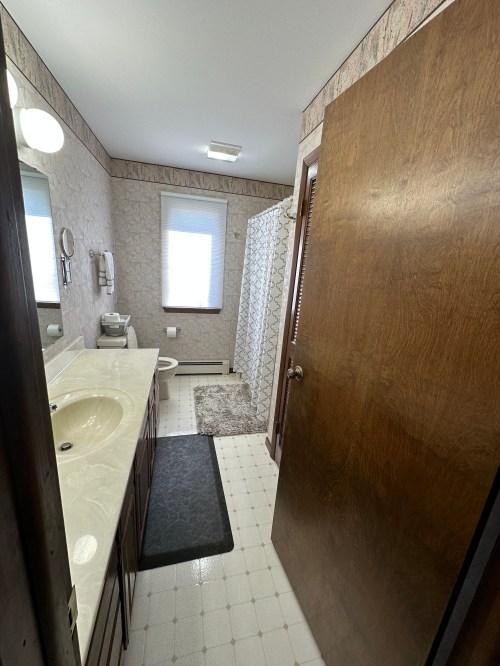
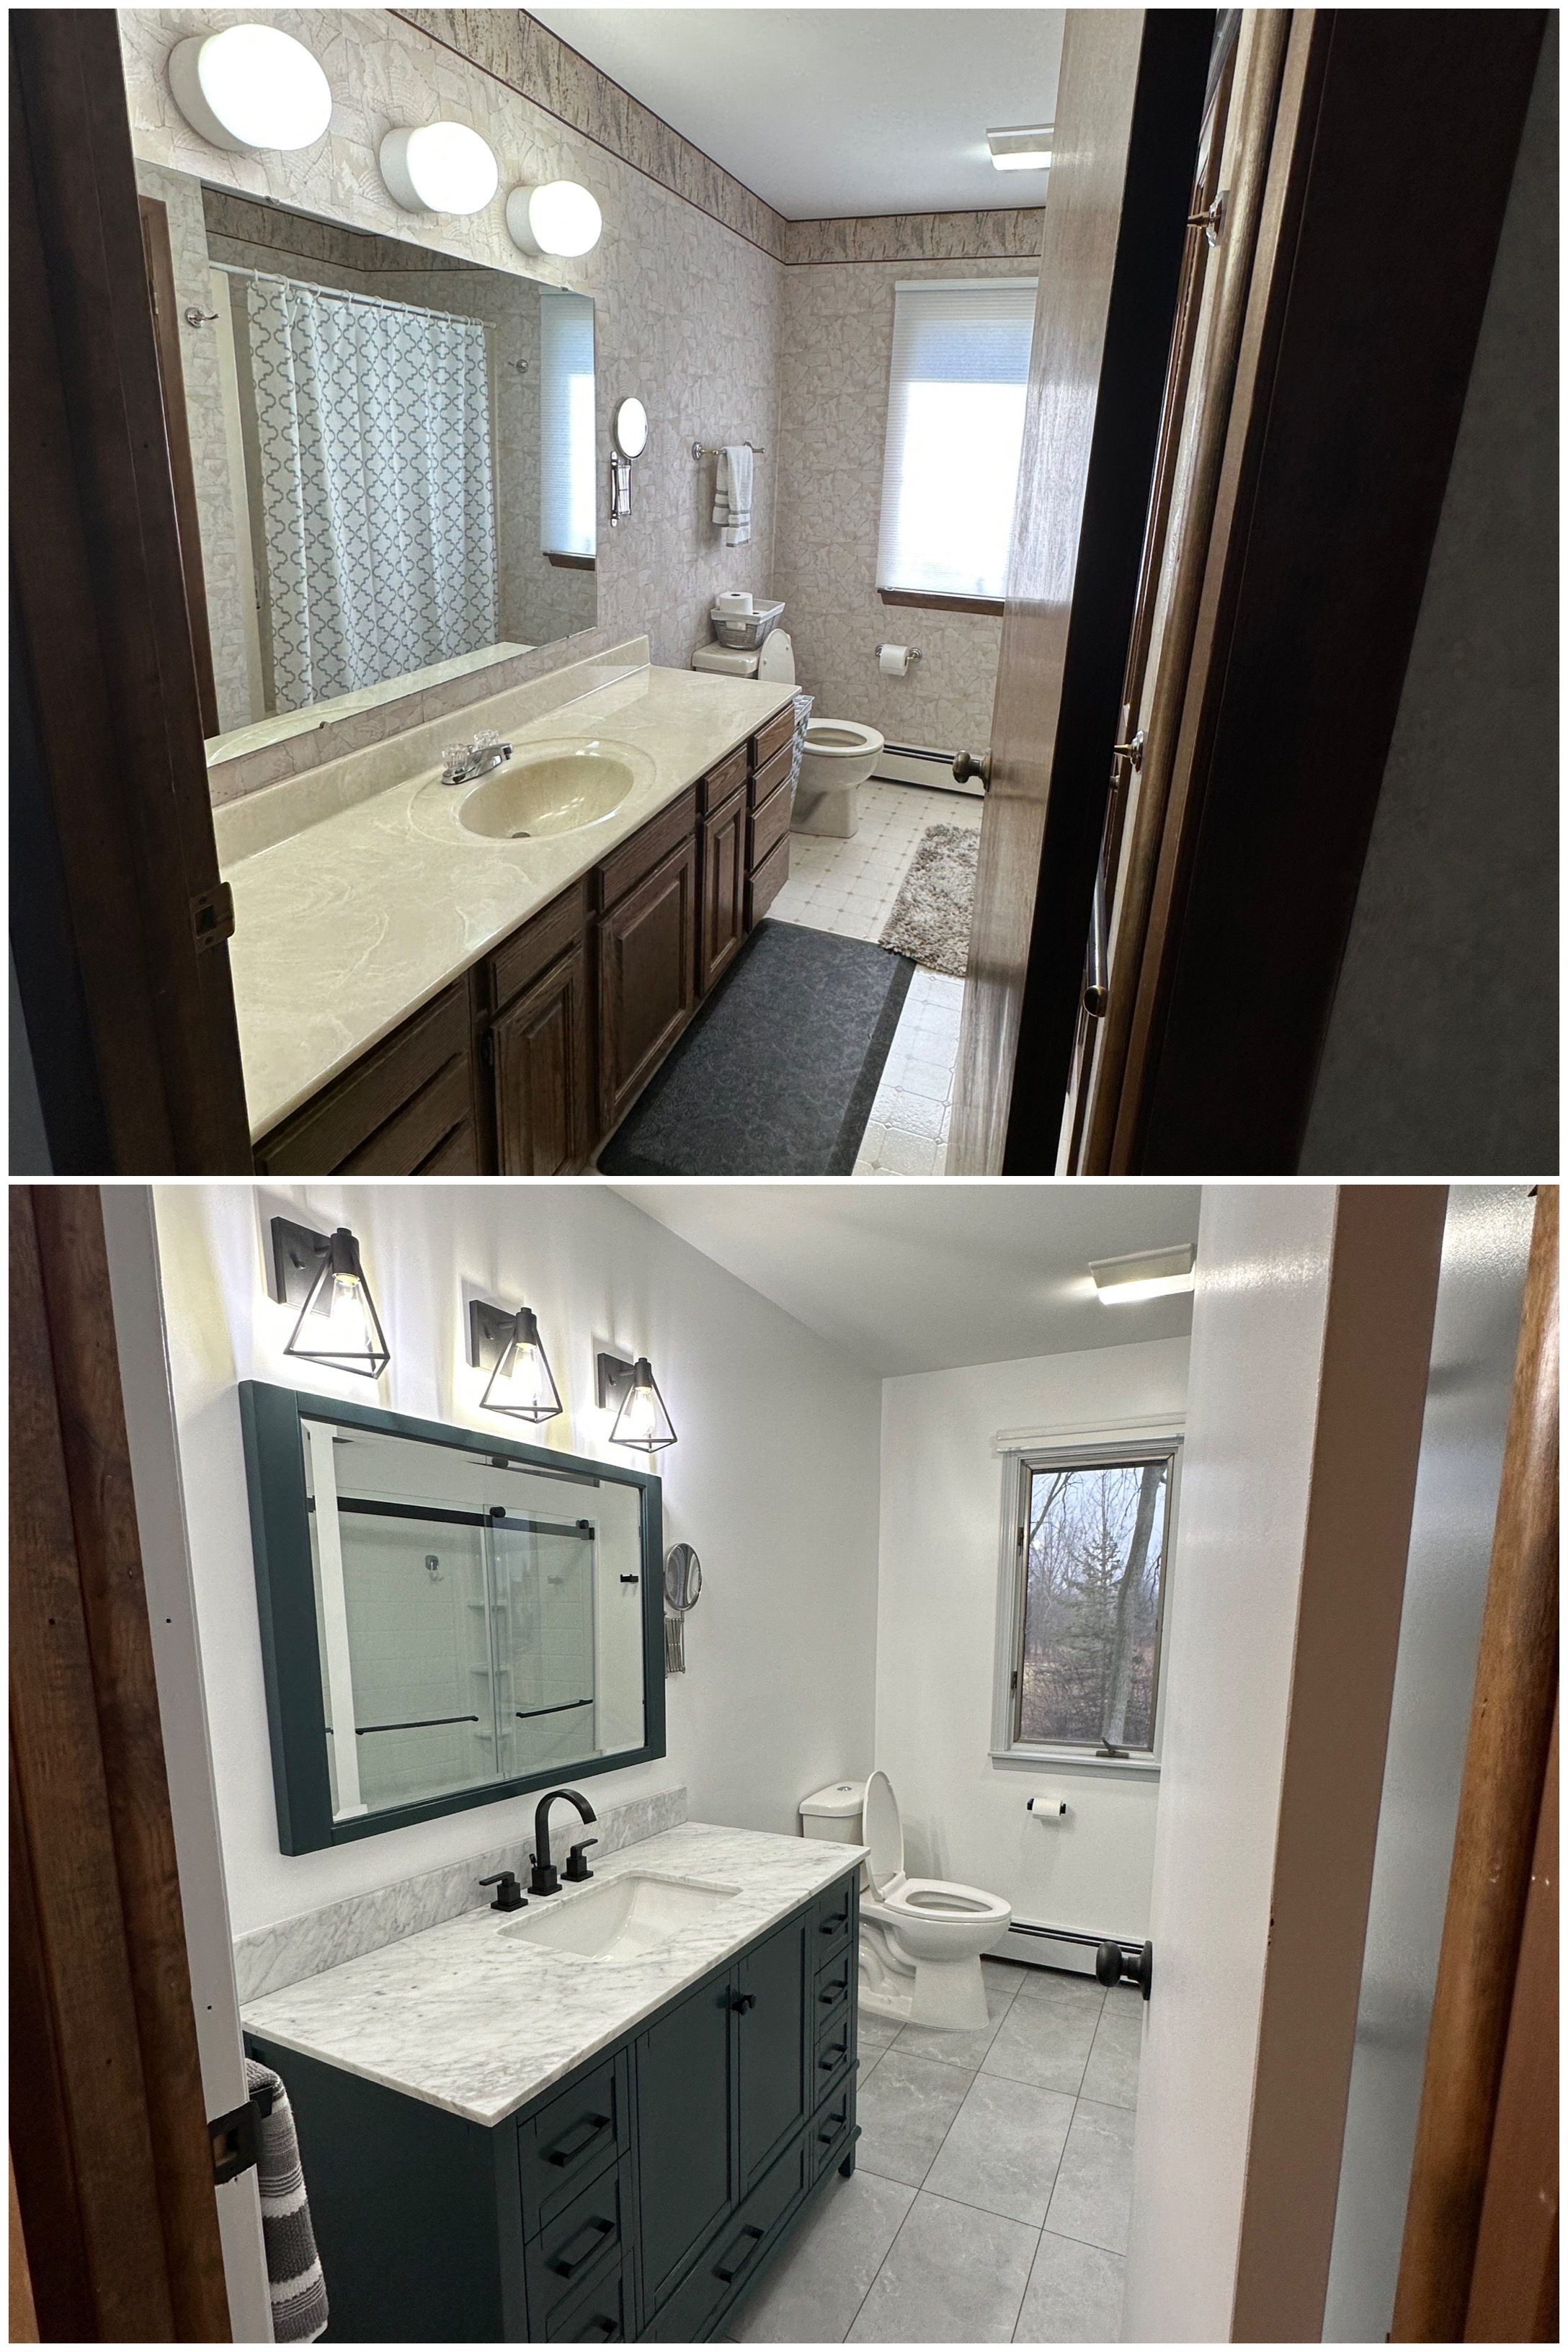
I’ve done a lot of home remodeling over the last three years and the guest bathroom was the final area needing an overhaul. Here are the standard before pictures.
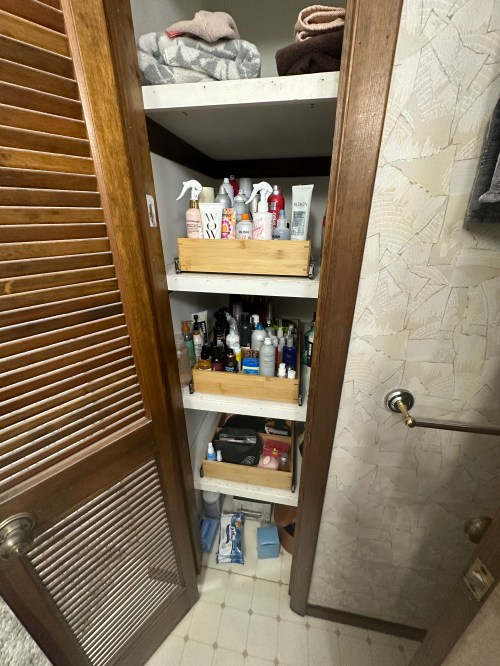
This is Brandi’s main bathroom, so I had wanted to improve the shelving situation in the closet for over a year. A smaller vanity was going in, so storage space would be lost. With three feet of depth in the closet there was a lot of wasted area and room for improvement. I bought three pull out drawers (Amazon). The closet shelves are made from particle board, so instead of using the included screws for attachment I picked up bolts, washers, and nuts.
After an hour install and some organizing it was a huge improvement. We even have room on the top shelf for spare towels now.
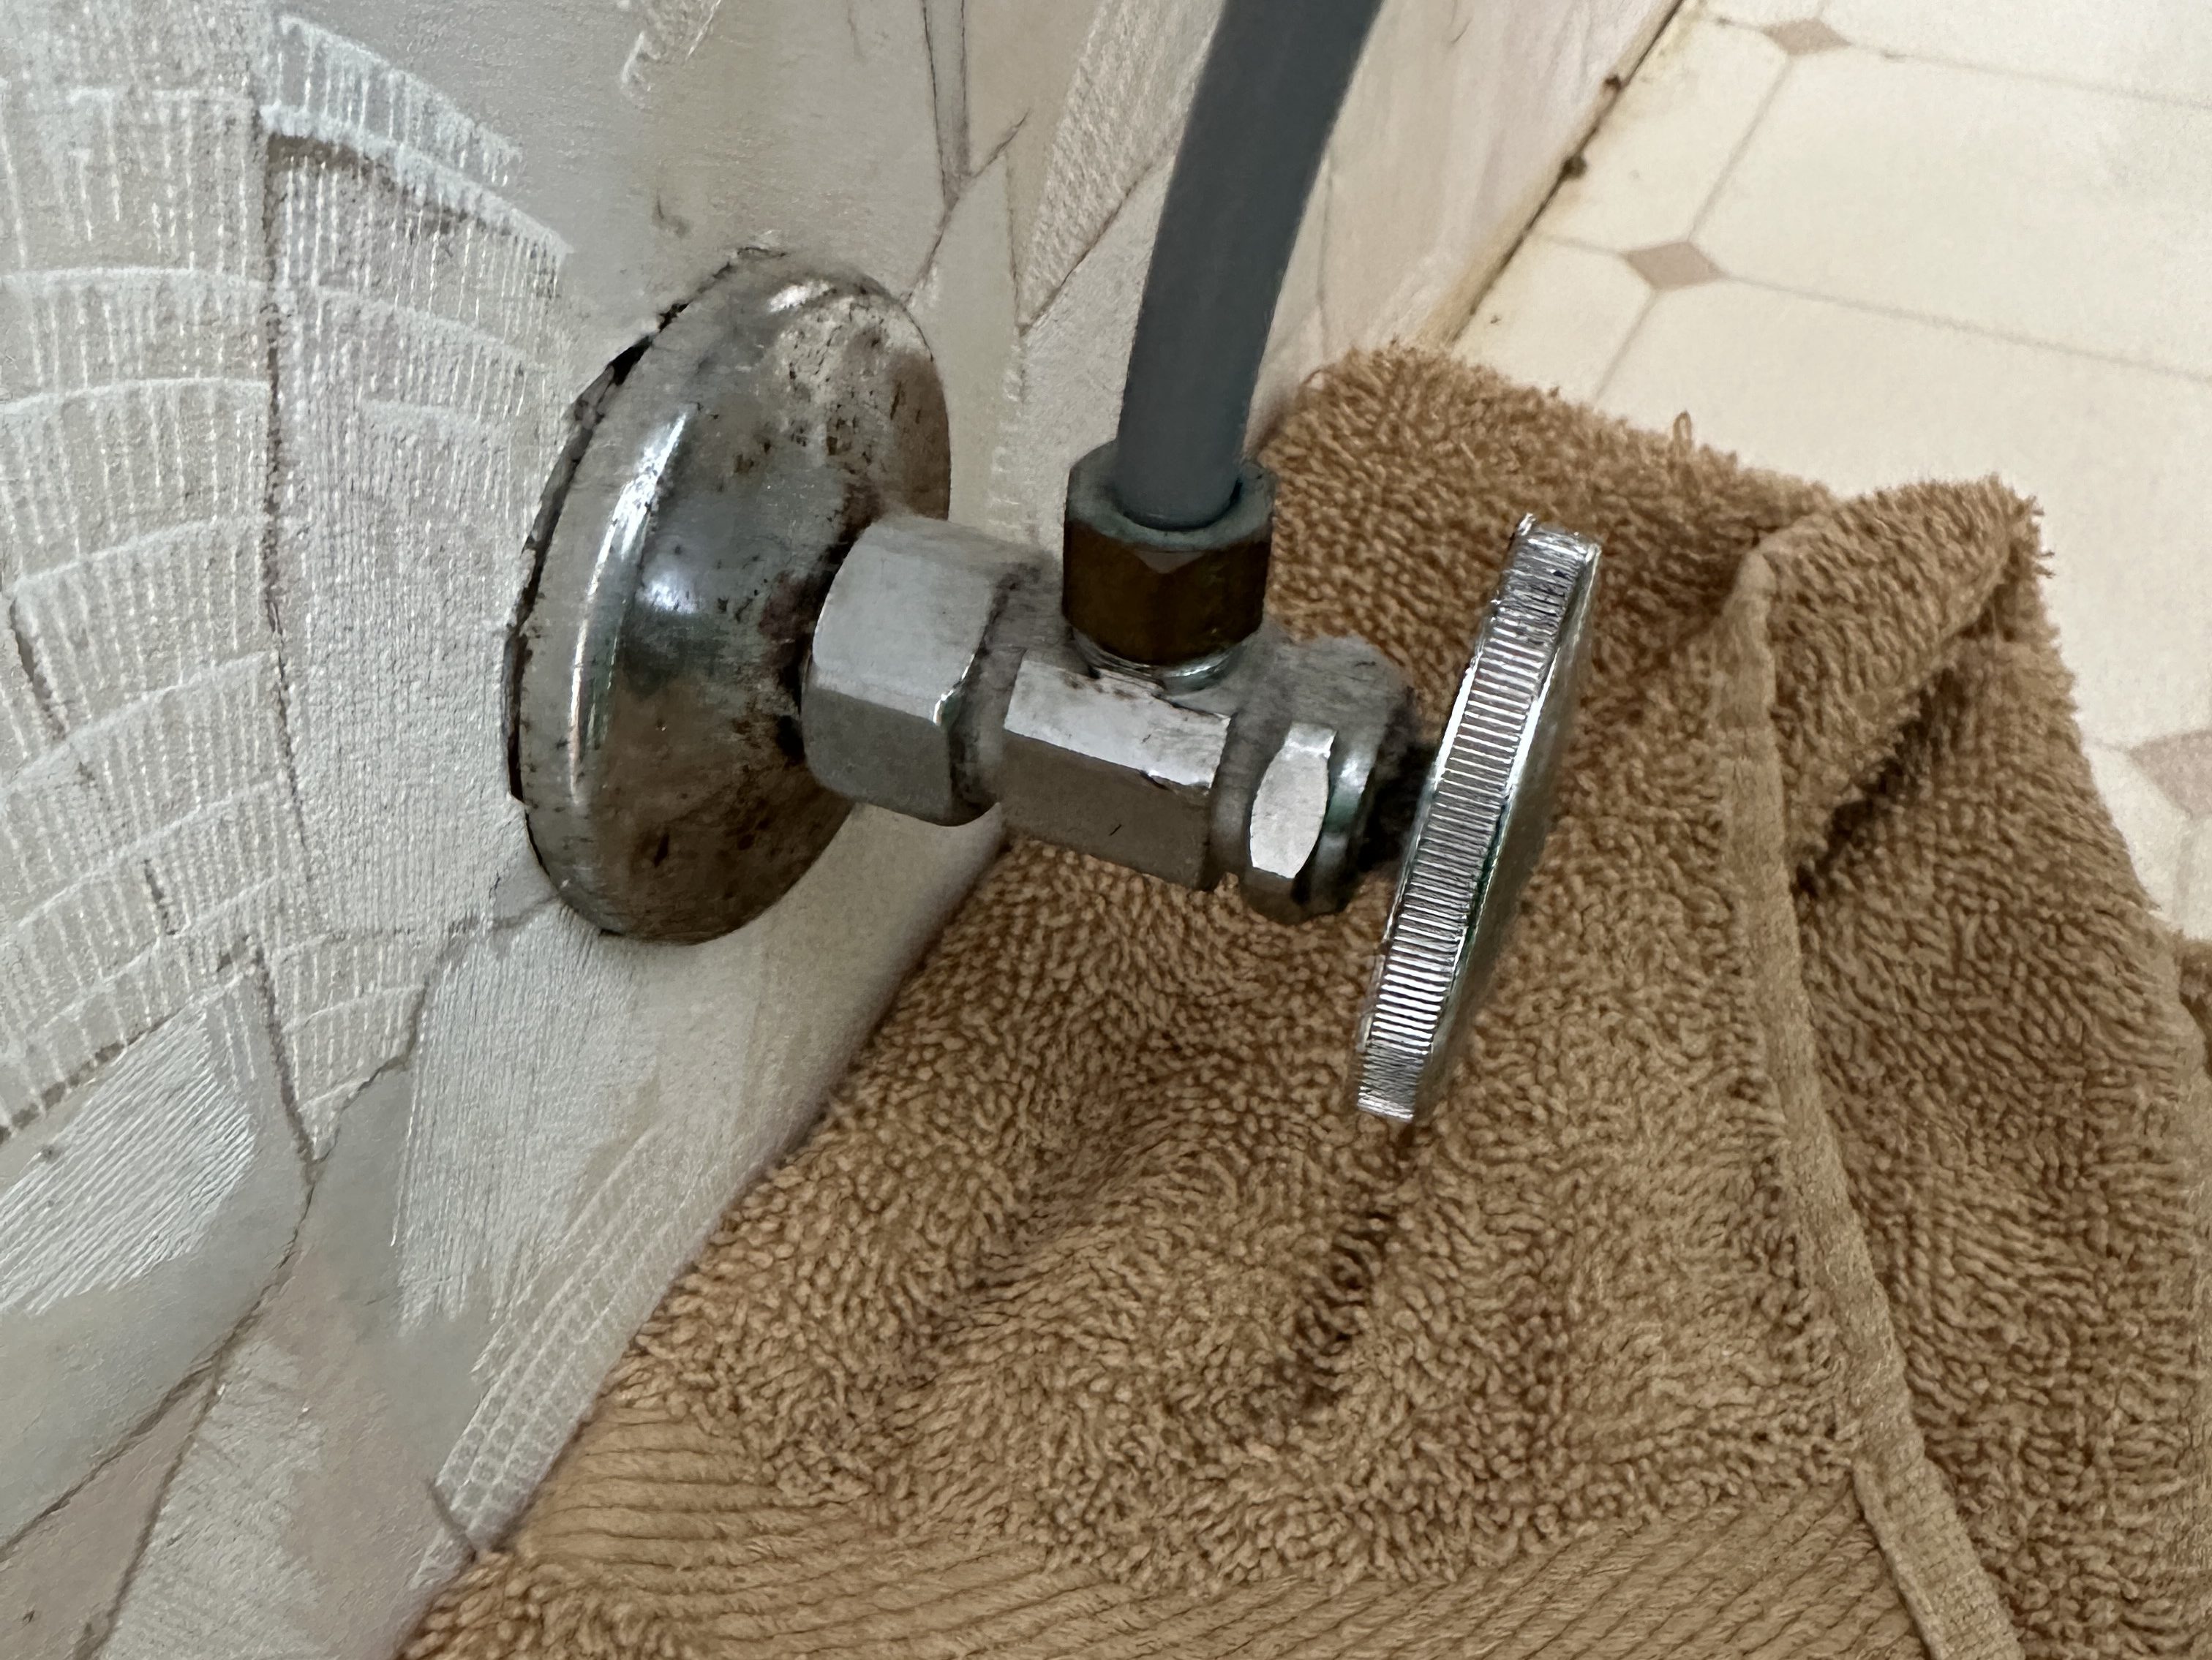
Just like the other bathroom, there weren’t shut-off valves on the sink’s water lines, so I installed some. Next up was taking down trim and everything on the walls so the fun job of removing wallpaper could be done; it was more trouble than it had been anywhere else in the house. Had to pull out the vanity, lights, mirror, and toilet to complete the job. Of course the toilet valve wasn’t completing turning off, so I put a new valve in there as well. Scrubbing and washing the walls was an exhausting step of this project and we were glad when it was done!
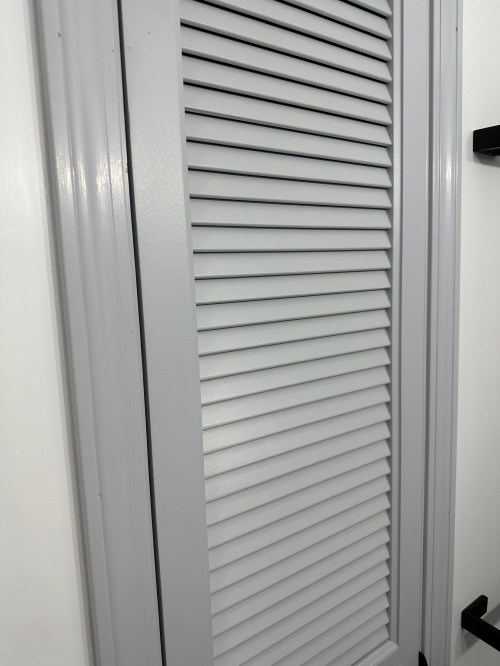
The walls under the wallpaper were in rough shape and needed a lot of patch work. I brushed some primer on the areas where the drywall paper was torn off. It was a good time to freshen up the ceiling before installing anything new in the room, so I gave it a quick coat of paint. We did primer and paint on the register and trim around the window and two doors. Since the closet door was slatted I needed to use my paint sprayer. I used plastic sheeting to make a temporary spray booth in the basement.
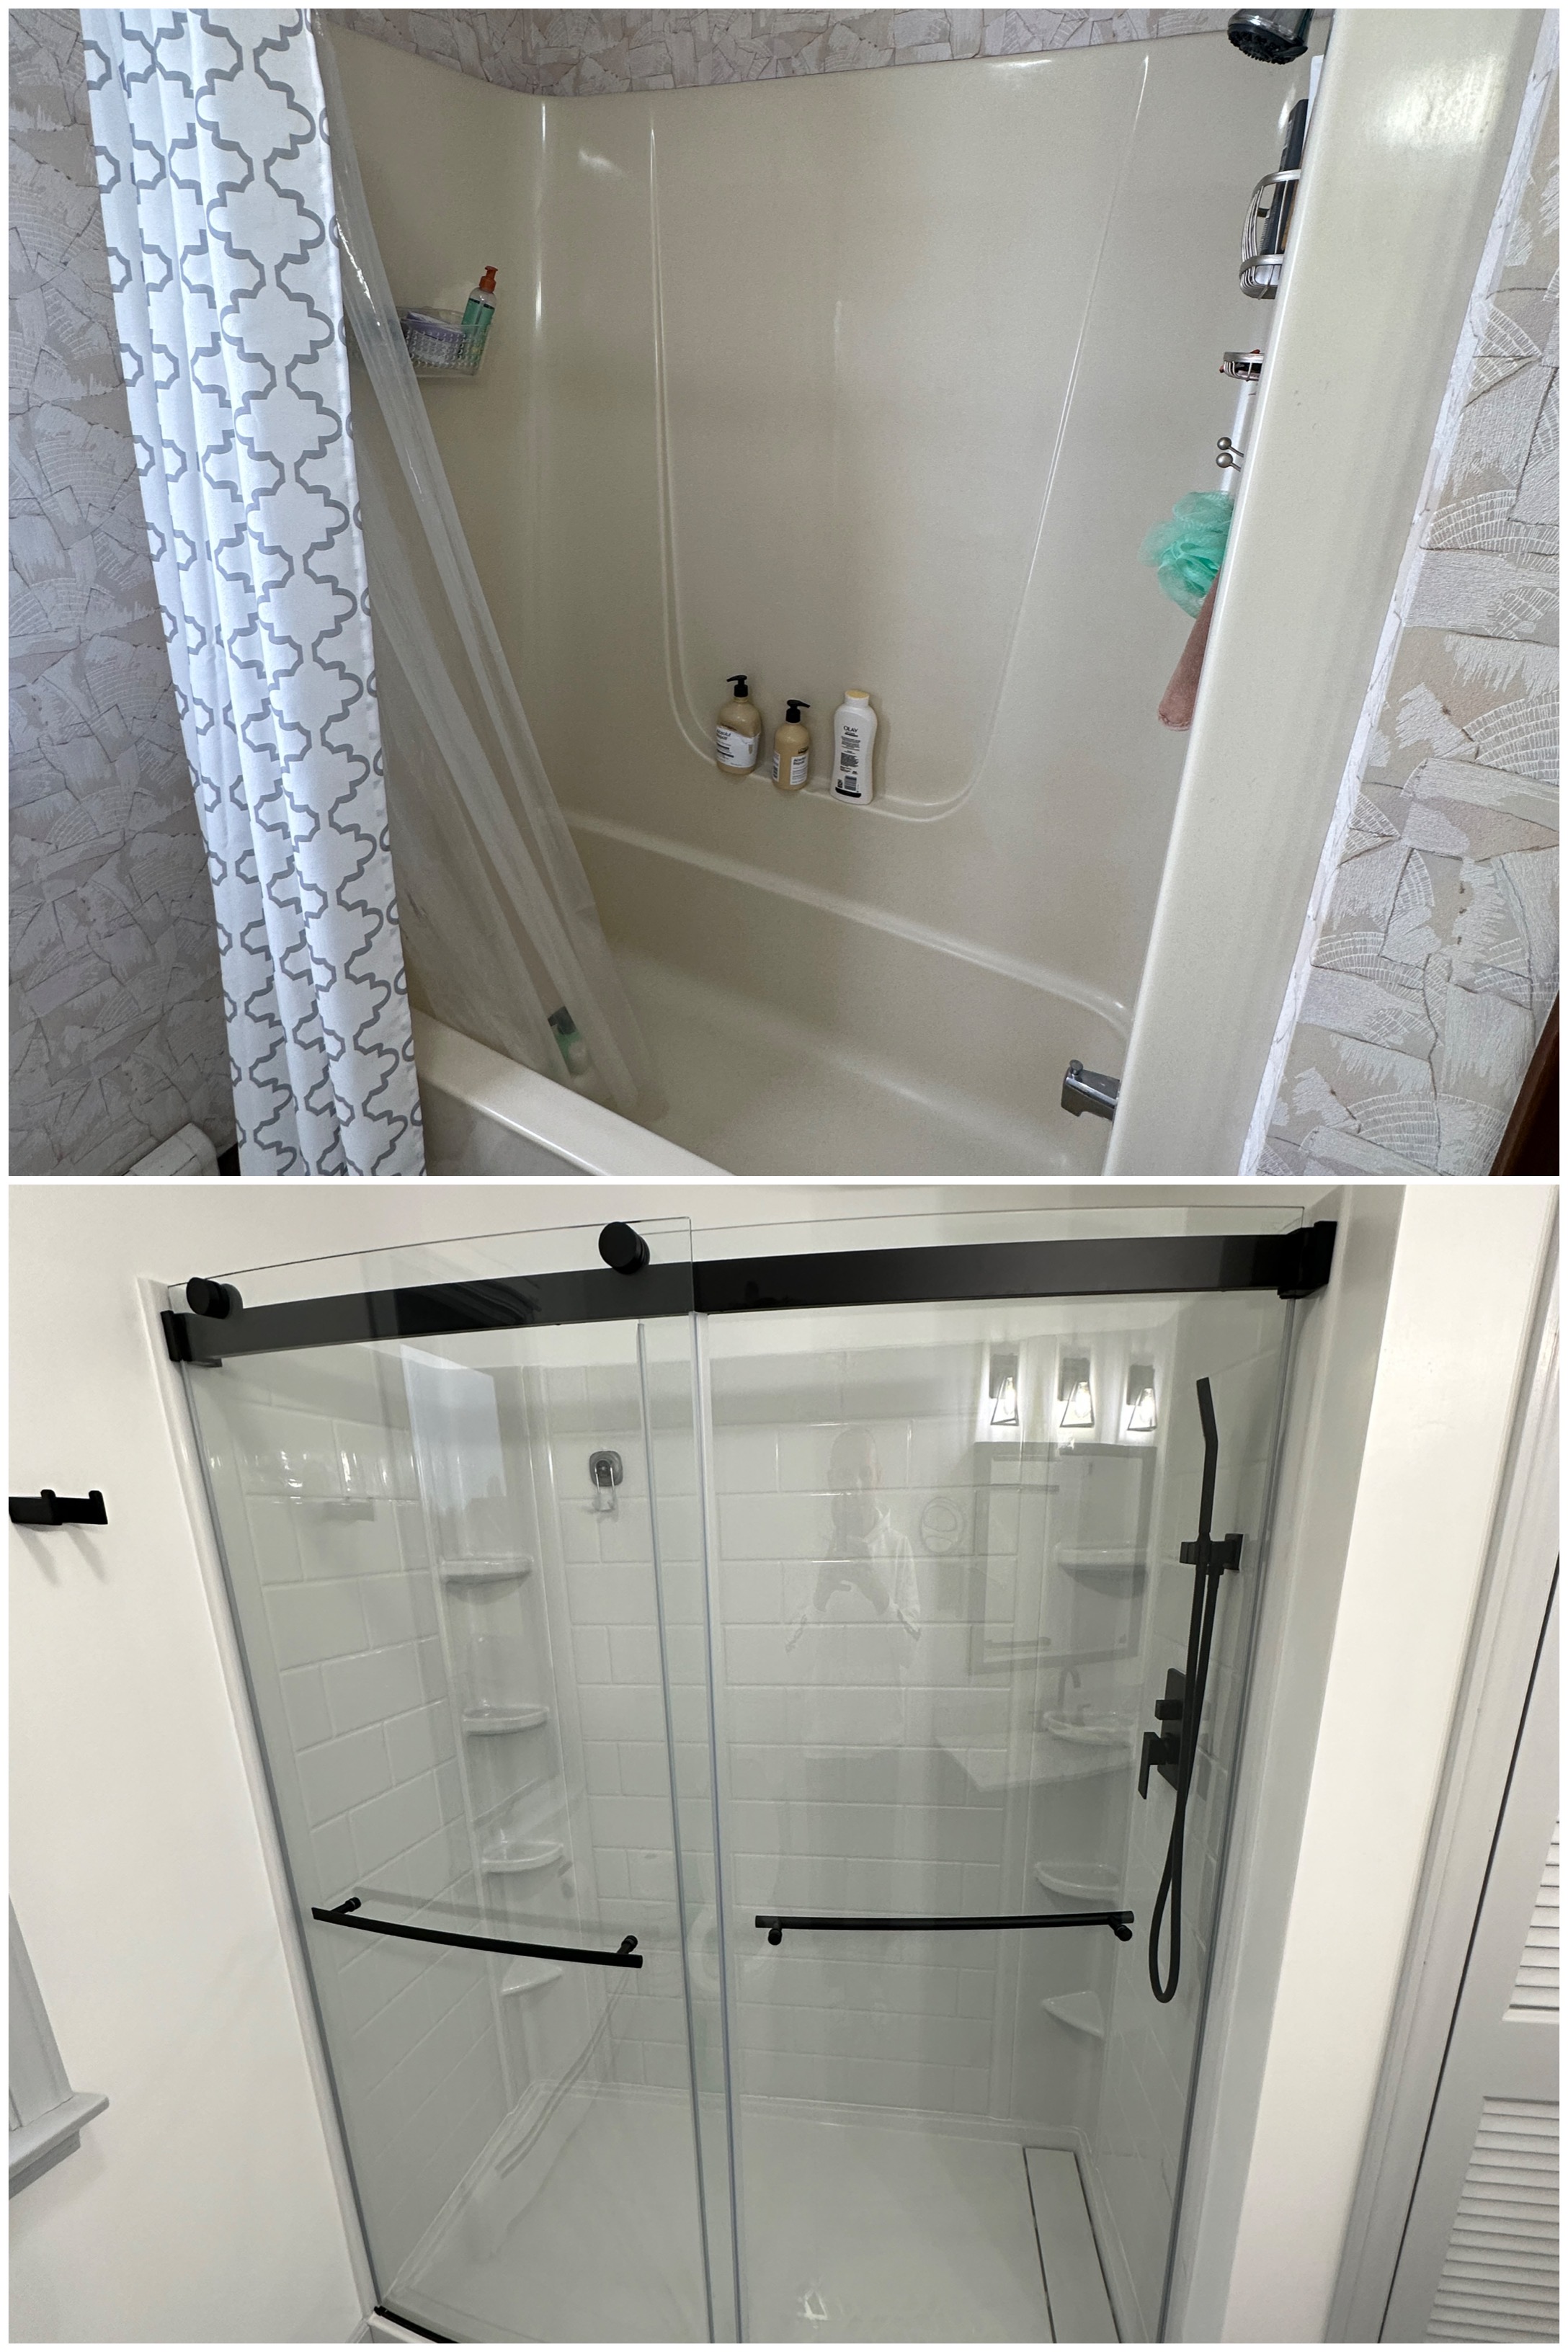
Dad came down to help for a couple of days. We removed some drywall and chopped up the shower for removal with a reciprocating saw. It went very smooth, thanks to having watched Removing A Fiberglass Bath And Surround and following exactly what he did.
With the water to the house turned off, we cut the lines, made an access hole through the closet, and installed shut-off valves. It felt good to turn water to the house back on with the valves working as they should.
We brought in the shower pan for a test and it fit like a glove! We quickly decided we should pull flooring so the subfloor under the shower was closer to the level under the old vanity. It was a pain in the ass because there was linoleum with a layer of luan (attached with far too many staples) over an even older layer of linoleum. After digging through my rack of plywood I found some that was the correct thickness to bring the shower subfloor up with the rest of the room.
We started working on the drain, which needed to move over a bit from the old one. We bought parts to construct our own P-trap. There was still a lot of trimming PVC pieces, but we ended up with something that worked. Here’s what we had to work with and the cut-out piece of circle is where we had to get to.
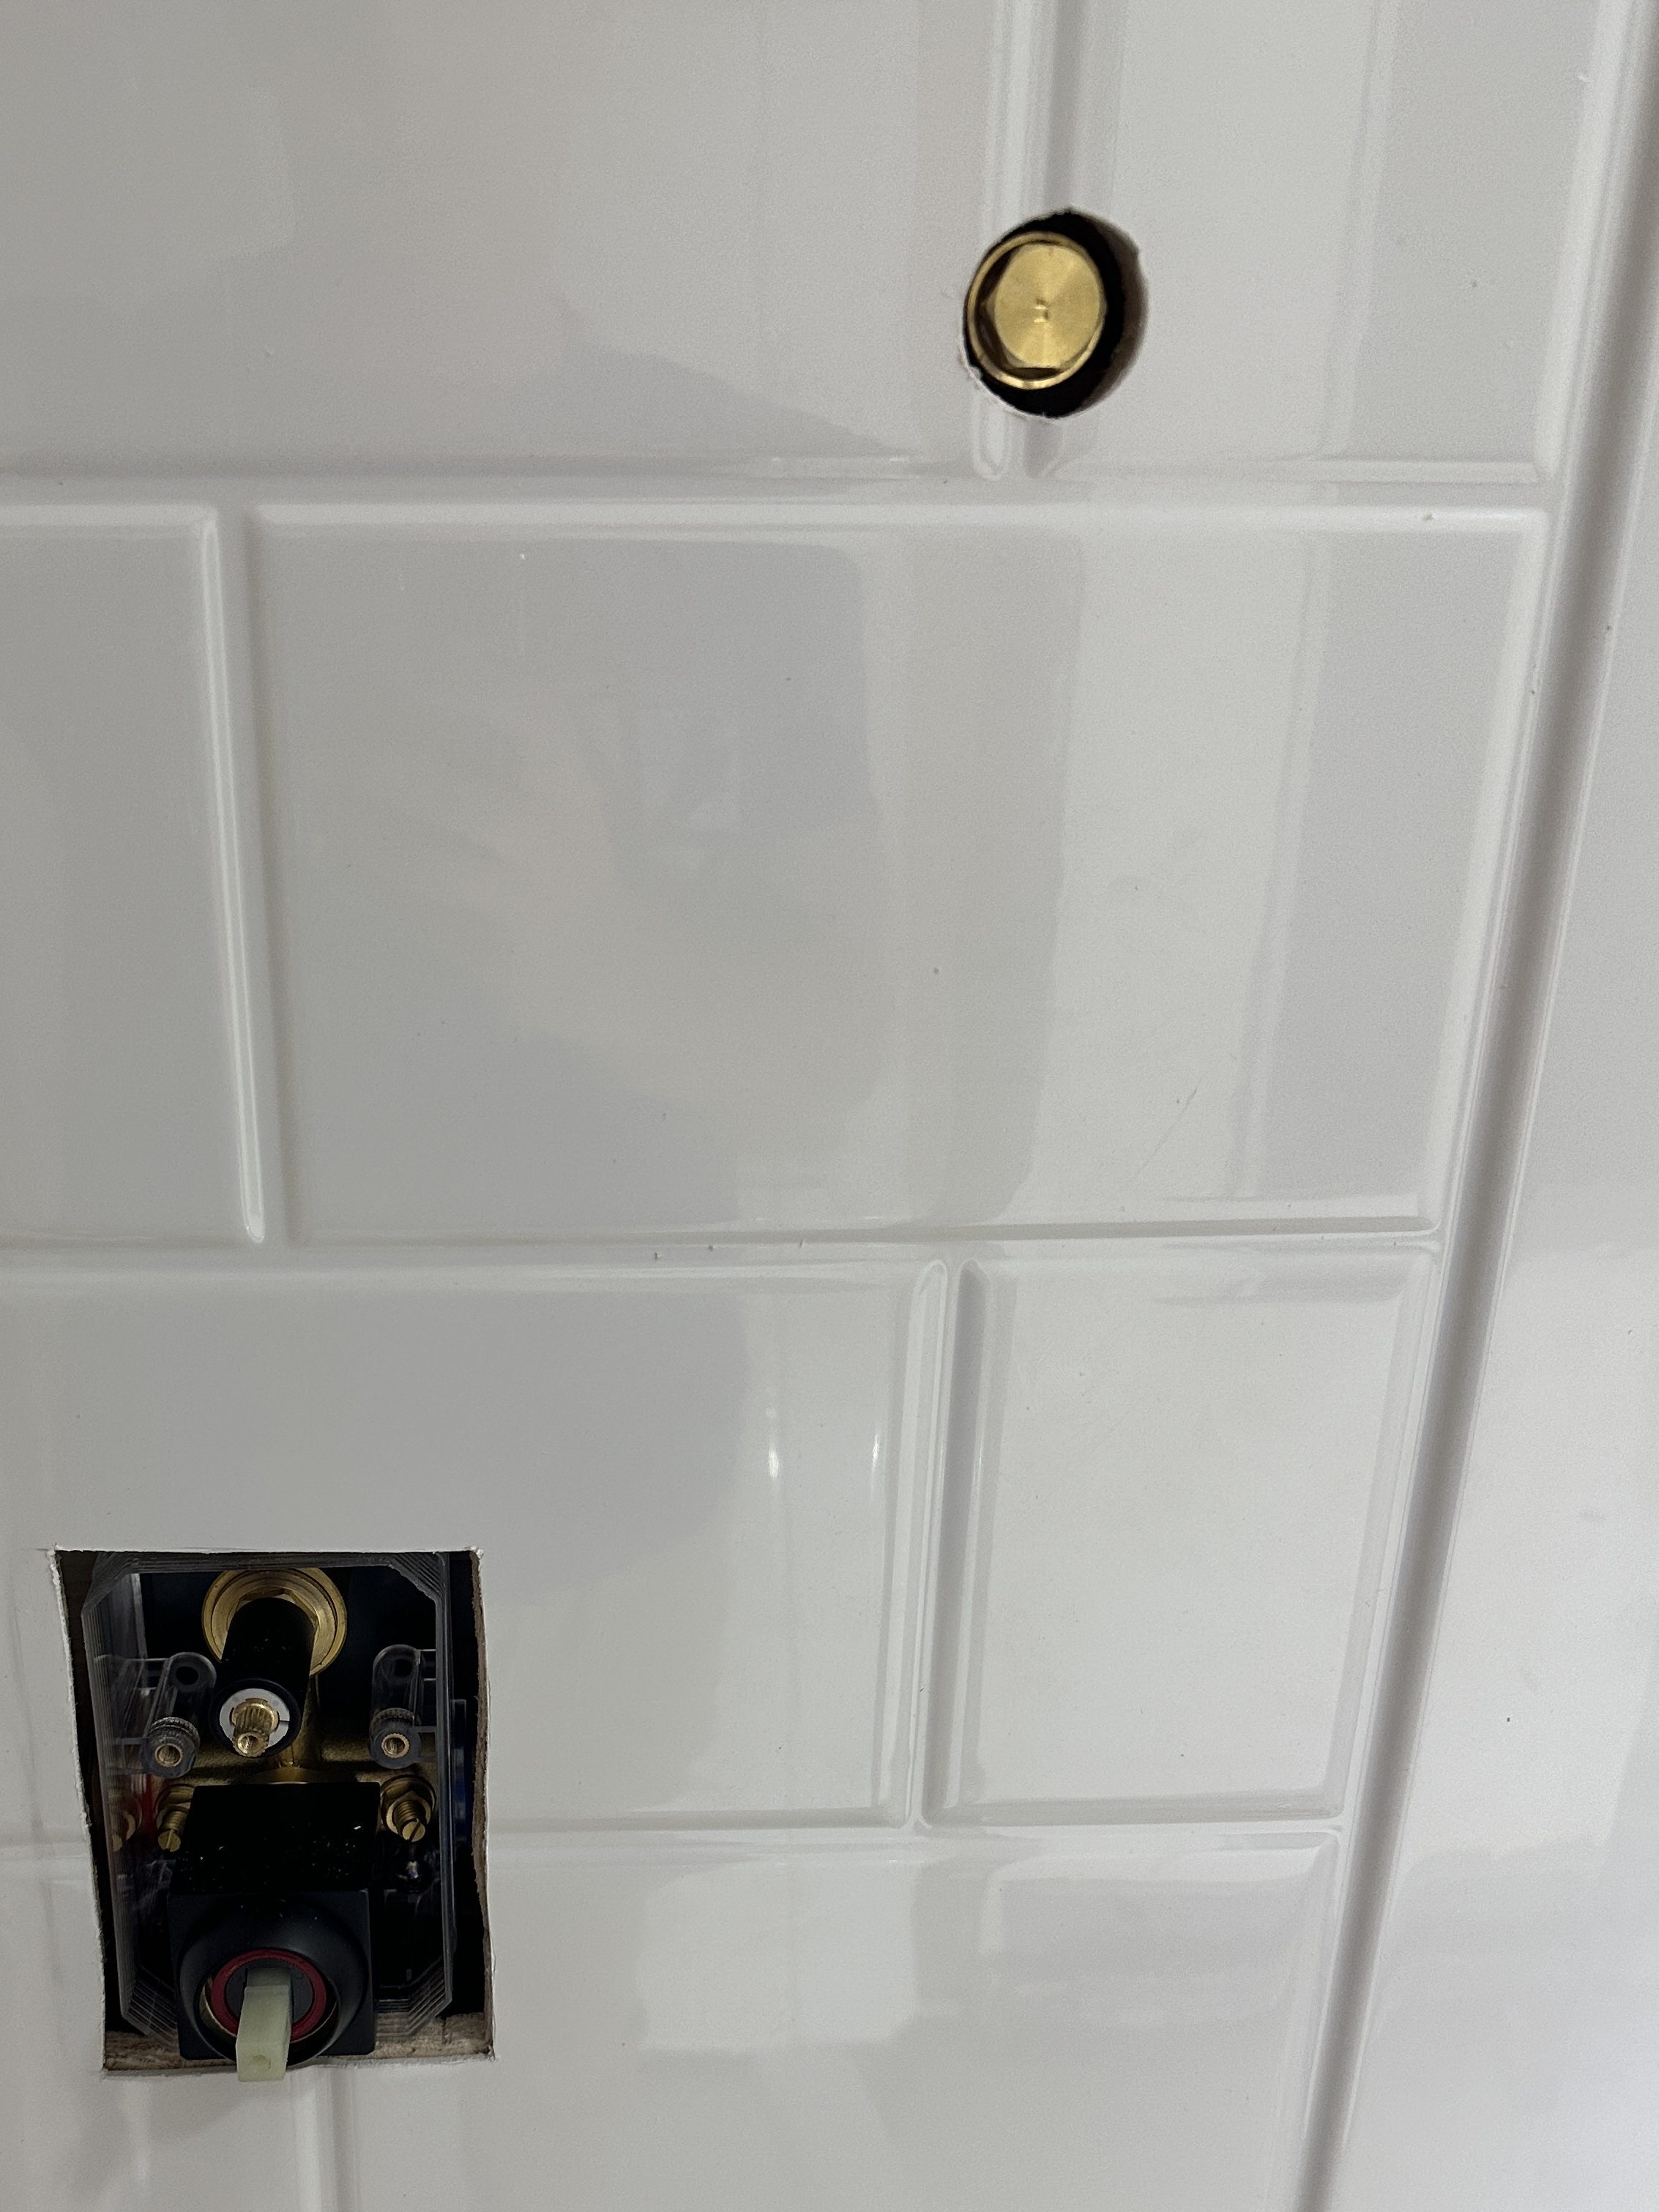
Then it was on to all of the plumbing for the water lines. This was a bit of a challenge, because the shower fixture instructions were weak on details. I picked up a lot of tips for working with PEX from How To Convert Old Copper To New Pex | Tub And Shower Plumbing. After temporarily installing a couple of caps, a pressure test showed a leak-free system.
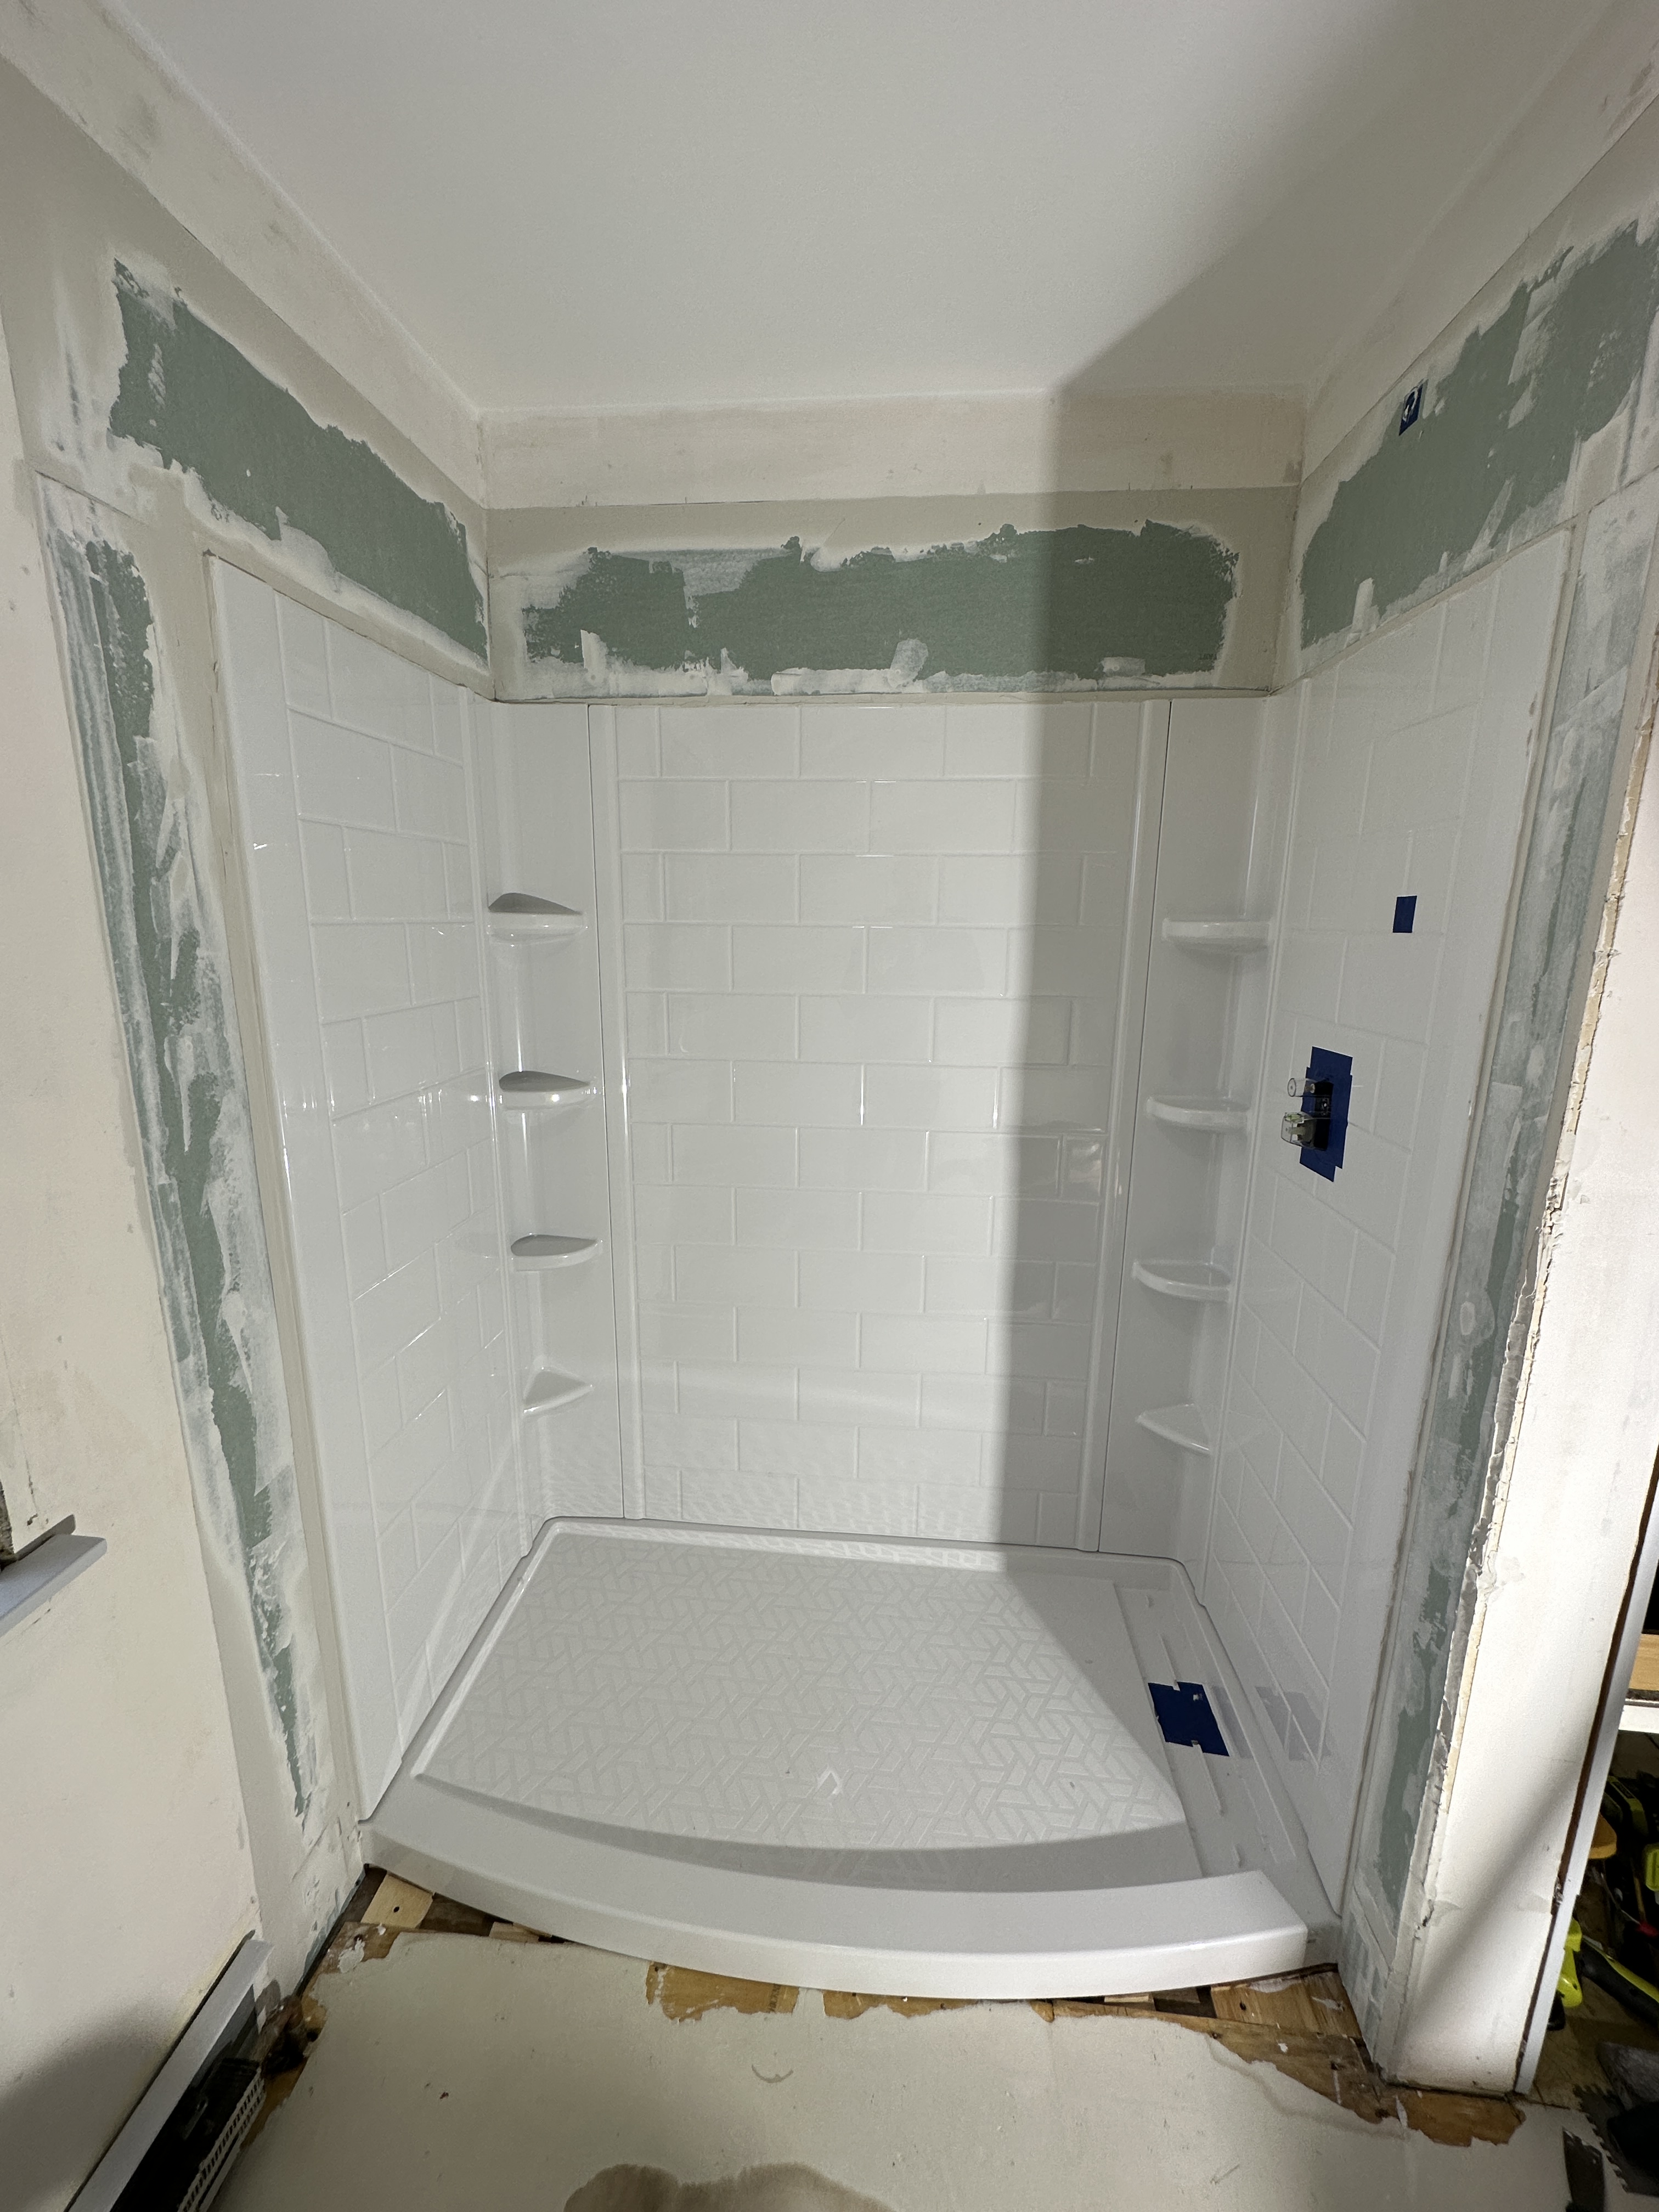
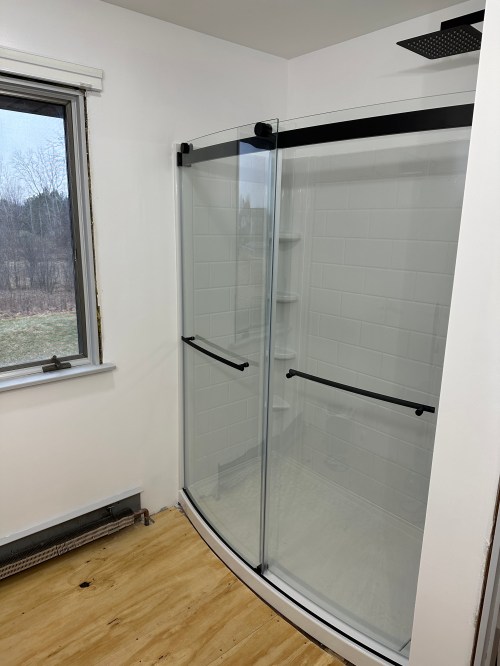
After that it was finalizing the shower pan and getting the walls up. Cutting holes through the shower wall was nerve-racking!
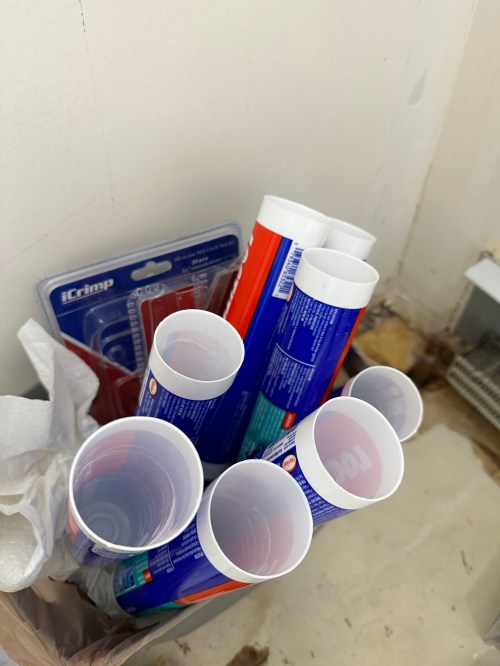
I had to shim out the left wall which wasn’t plumb. Then it was time to dry fit the shower walls and get them attached. I got a nice tight fit on the back. I figured there was no way I would use all eight recommended tubes of the adhesive, but I did. Not sure how I would have completed that step without the Ryobi Caulk & Adhesive Gun, which worked awesome.
I cut pieces of 1/2″ greenboard and screwed them to the walls. We taped plastic over the window, closet, and door.
Then it was time for a lot of drywall work. This was after the first coat of mud.
Over 24 hours later the thickest parts of the mud still weren’t dry. Up to this point, the project had been full of mistakes and having to do a few things multiple times before getting them right. I really thought things might move along after getting that first coat of mudding done. Boy was I wrong!
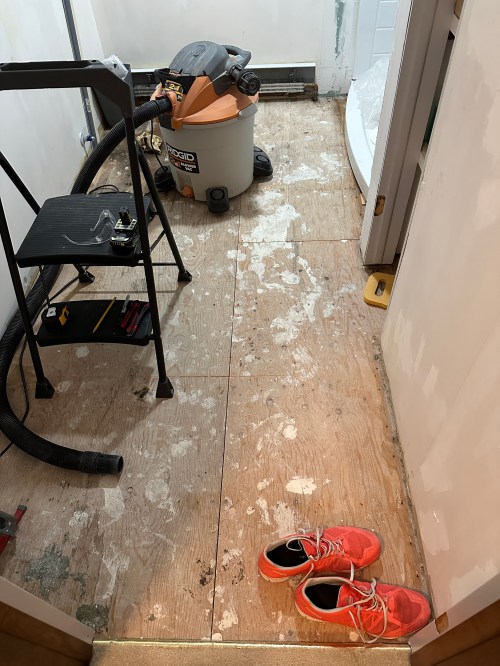
Since I couldn’t do anything with the drywall yet, I made runs to the home stores for all of the trim and a new subfloor. The lowest layer of linoleum had that paper backing on it, which you can see in pictures above. I wanted it gone in order to have a more level surface for the new plank flooring. I actually spent about 30 minutes trying to remove some of the paper before I decided to do a new layer of subfloor over the top. That plan changed before I even picked up the new plywood though because a third layer would have given me different problems to deal with around the doors, toilet, and register. It took me forever to remove that layer of subfloor, and probably would have been a lot less work to get the paper off. Here are pictures when I got down to the single subfloor layer, my measurements, and with the new plywood (before being screwed down).
Taping the seams and the second and third applications of drywall mud were much harder than it looked on YouTube. I picked up a steel mud pan, which made things much easier and I was finally getting the hang of it with my fourth (because I’m a newb) and final coat. Then it was primer and two coats of paint, which went smooth. I brought the new subfloor back in and screwed it down.
At some point I took a piece of scrap plywood and made a door for the shut-off valve access. I used white gaffer’s tape over the edges of the wall so the cut drywall wouldn’t keep crumbling and making a mess. It got primer and paint when the brush was out for other things.
After painting the room it was time to install the shower doors and fixtures. I caulked everything as well.
Unfortunately the doors have a major flaw and the top rail sags a lot from the weight of the glass. This means it’s impossible to properly align the doors. I got it the best I could so they roll smooth and hopefully don’t leak. I called American Standard and found out they’ve redesigned the mounting brackets because of this problem. They’re sending me a set as soon as they get them in stock. 🤞
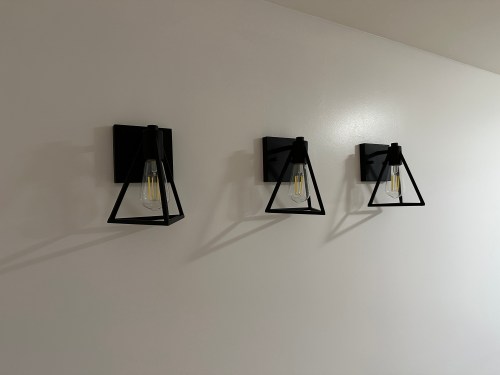
Lighting was a quick job. I also replaced an old outlet with a GFCI.
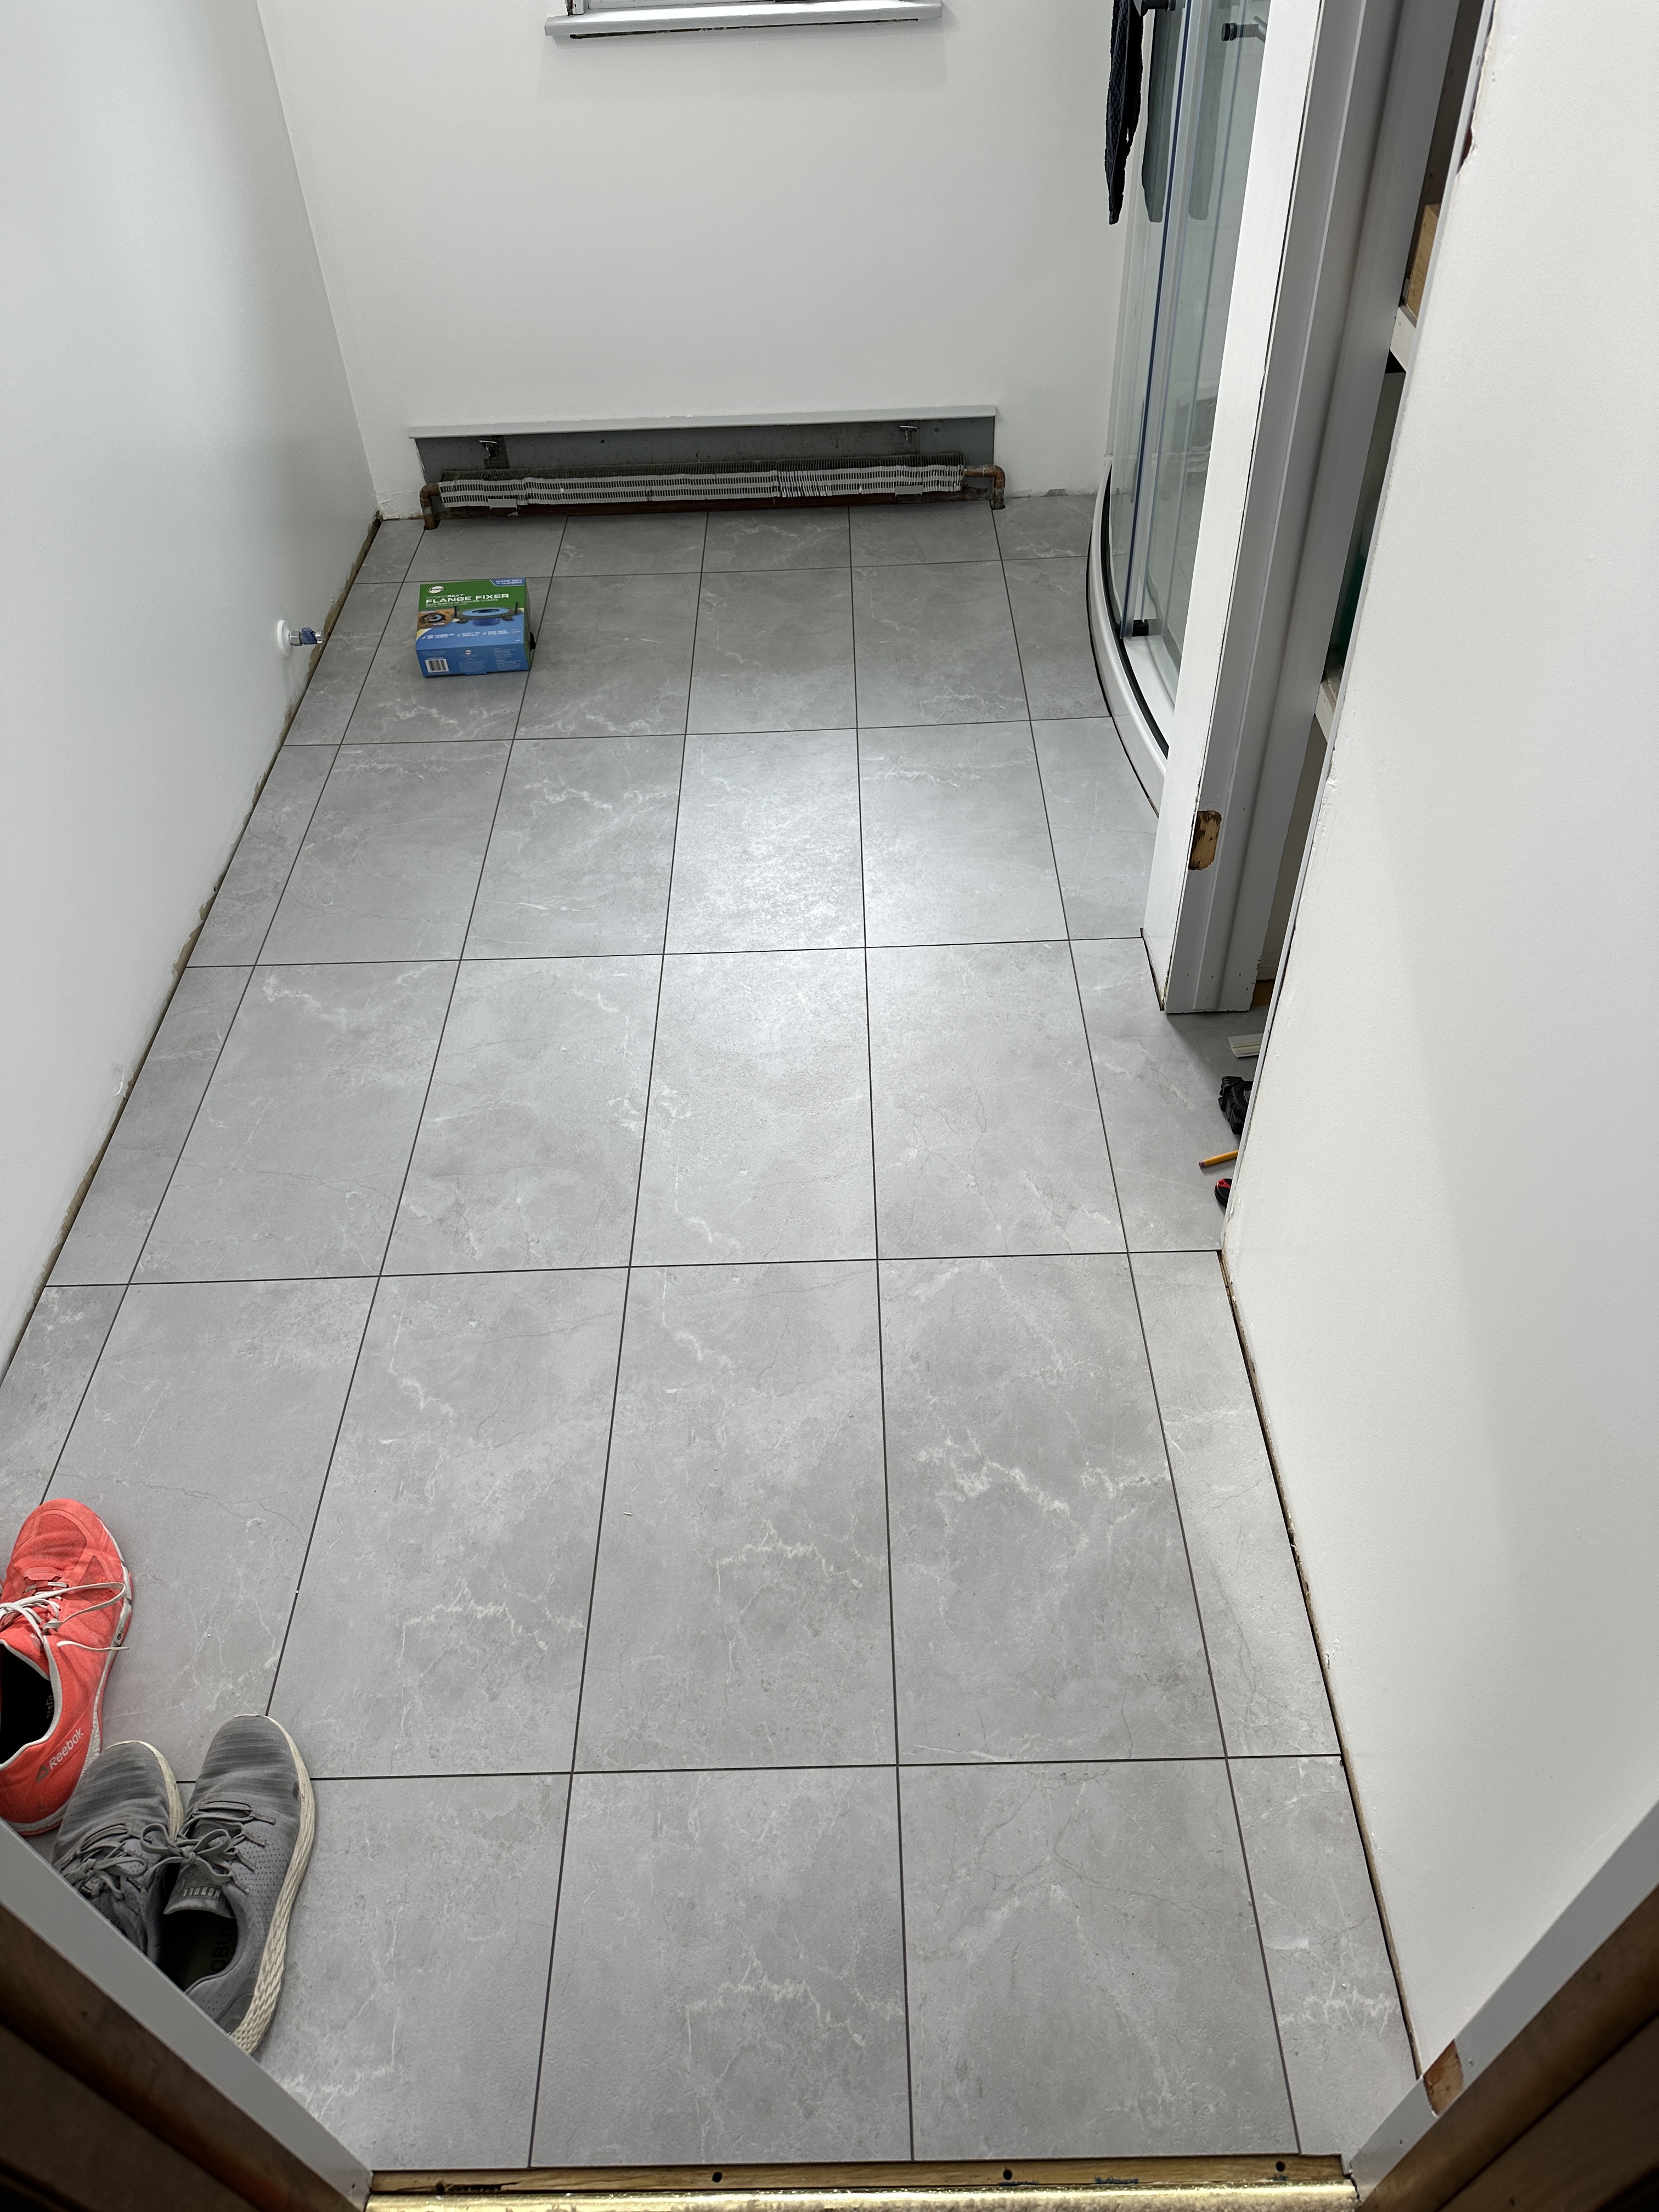
I went with a waterproof vinyl plank flooring that looks like tiles. I’ve done quite a few floors now, so this was easy.
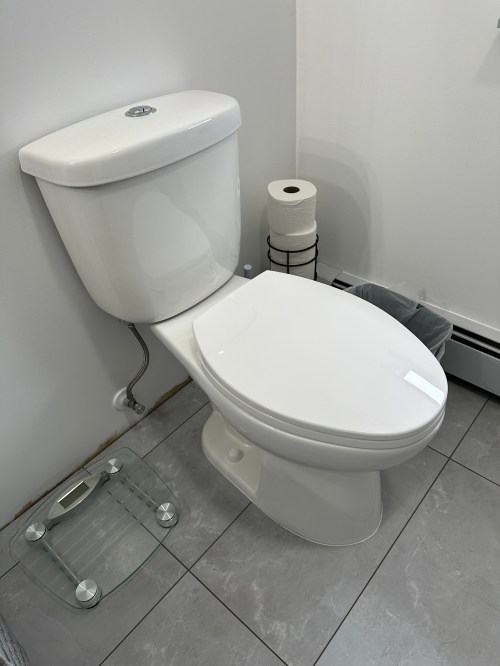
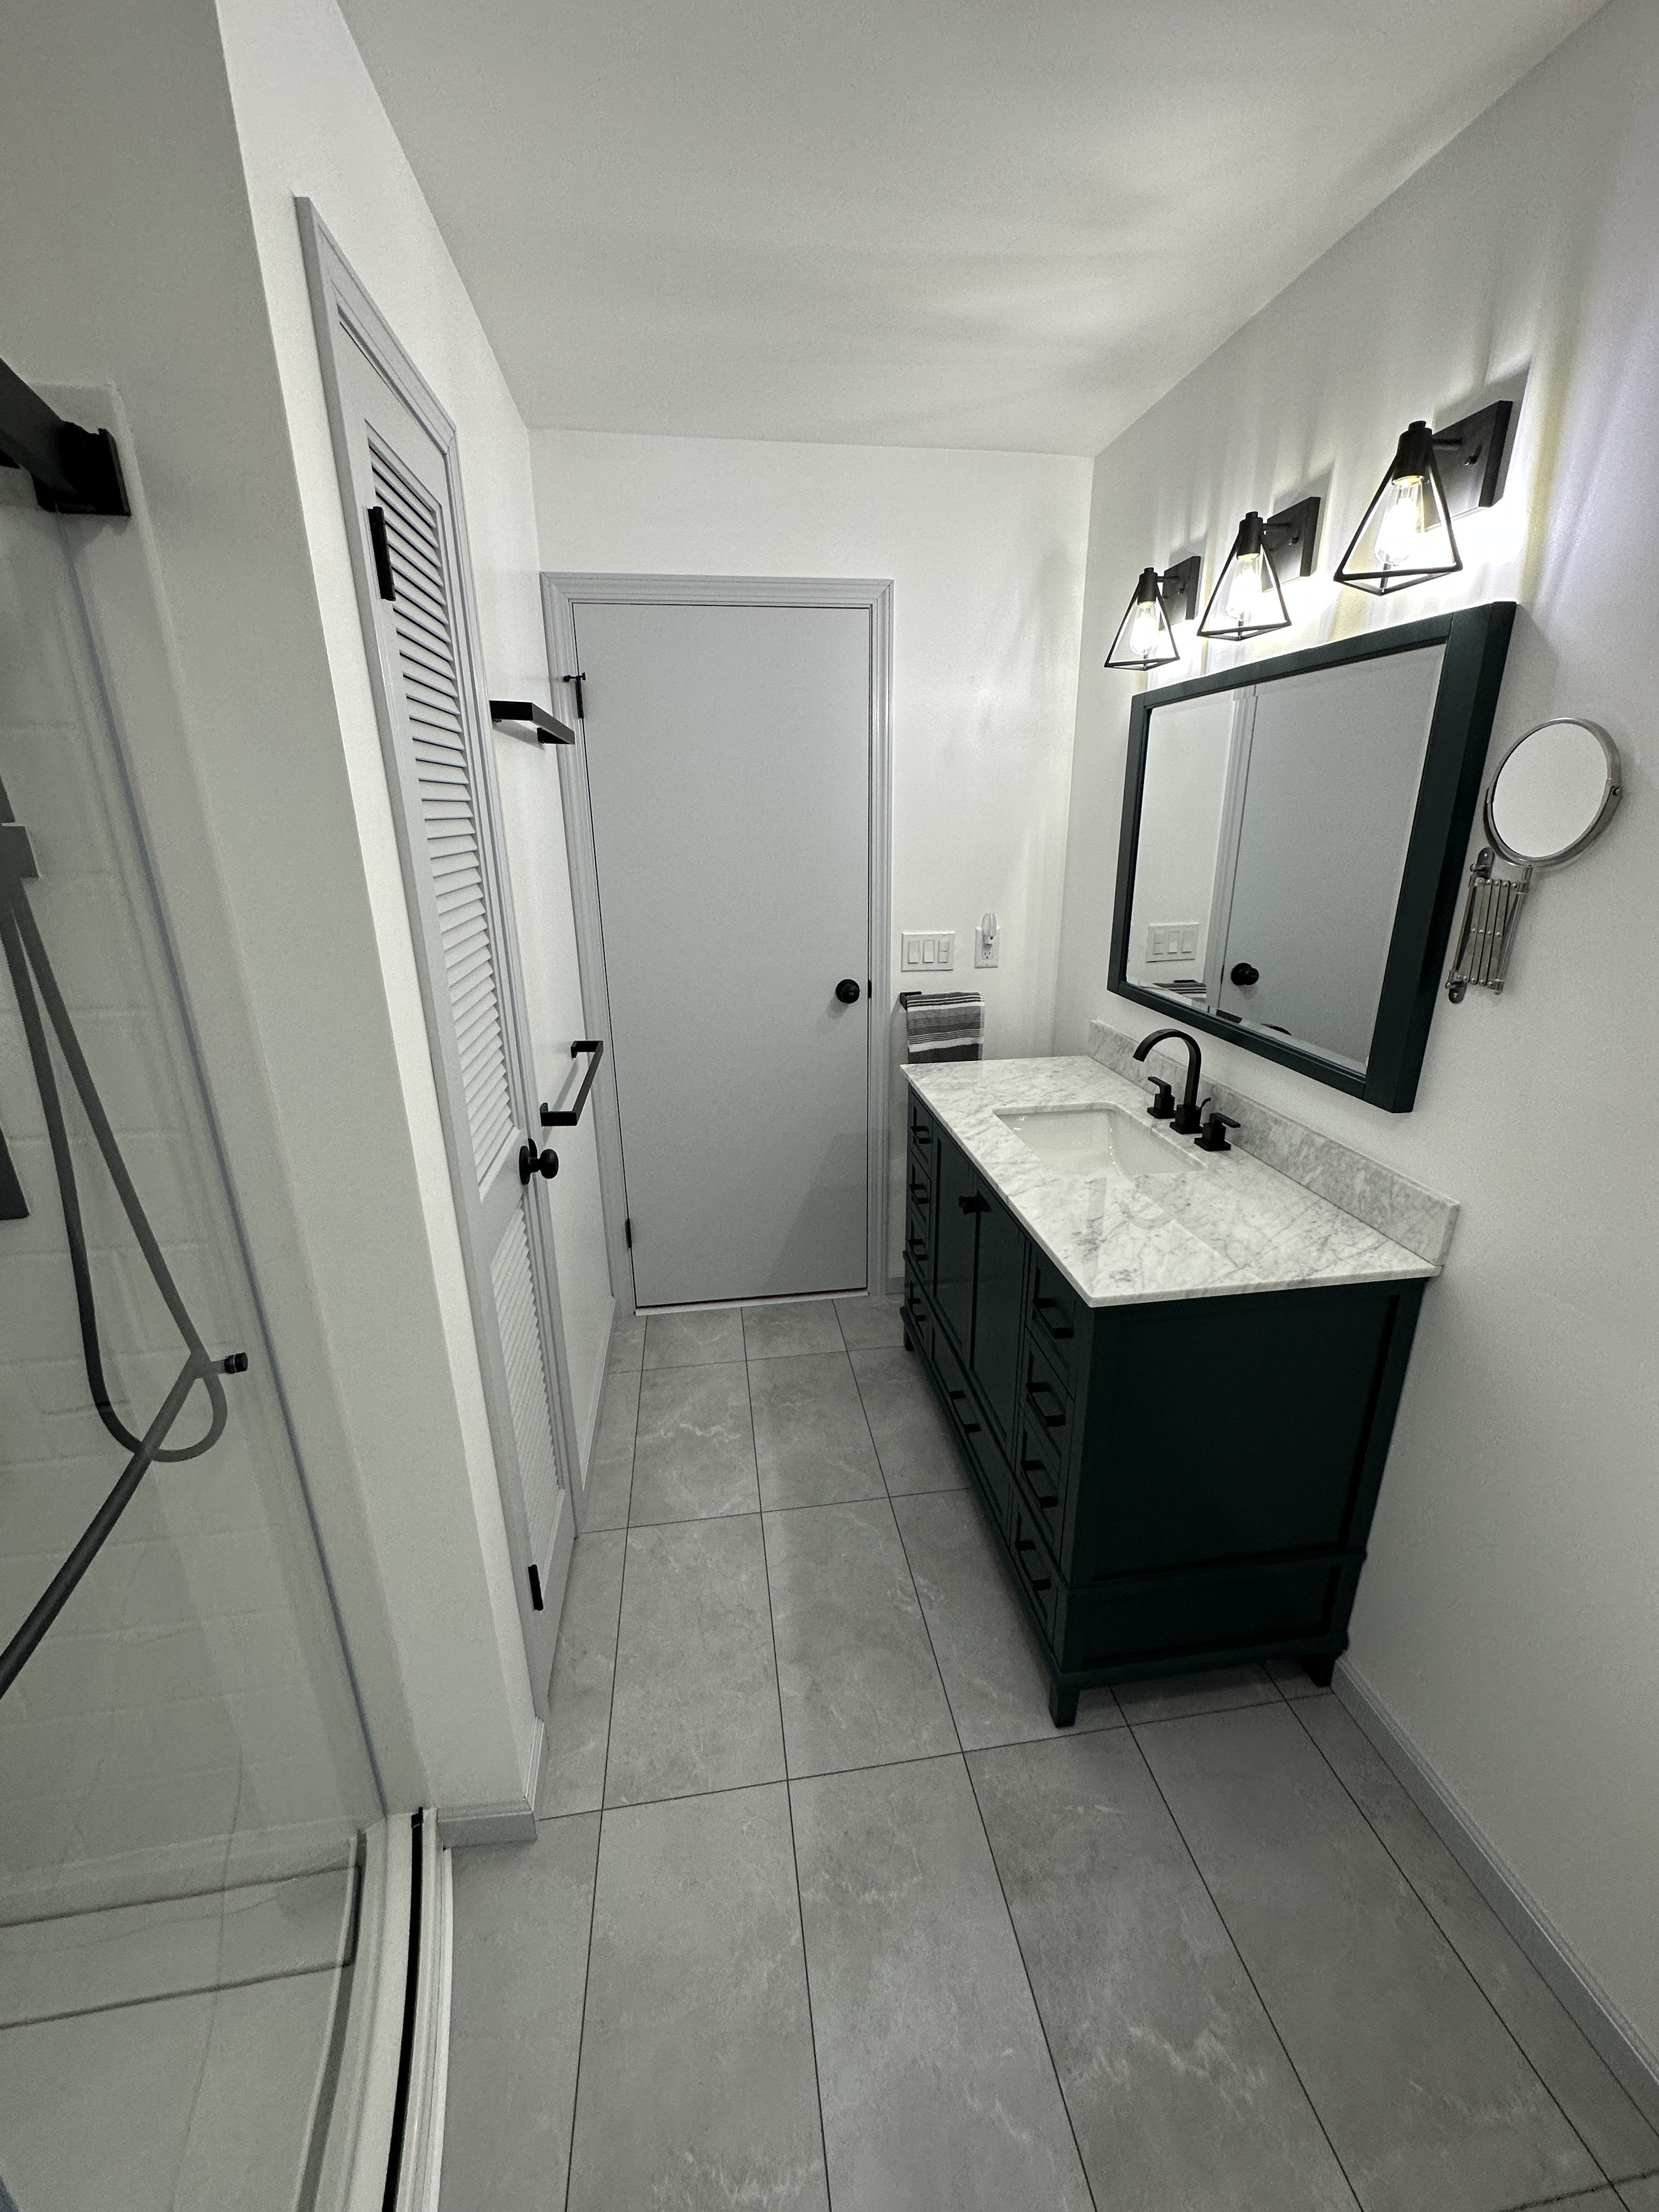
Vanity and toilet went in. Mirror was hung. Doors went up.
I put up accessories and did all of the trim work, which needed three coats of paint, even after primer.
Here’s the final result.
Quite a transformation in just over three weeks! Check out the before and after comparisons.
This bathroom is so nice now! I was hoping Brandi got used to my bathroom after using it for a few weeks and would want to stay there. No such luck.
There have been a lot of home remodeling projects over the last few years and I’m finally done. They were all needed, but I’m glad they’re over. Time for some fun little projects I’ve had on the back-burner for too long.
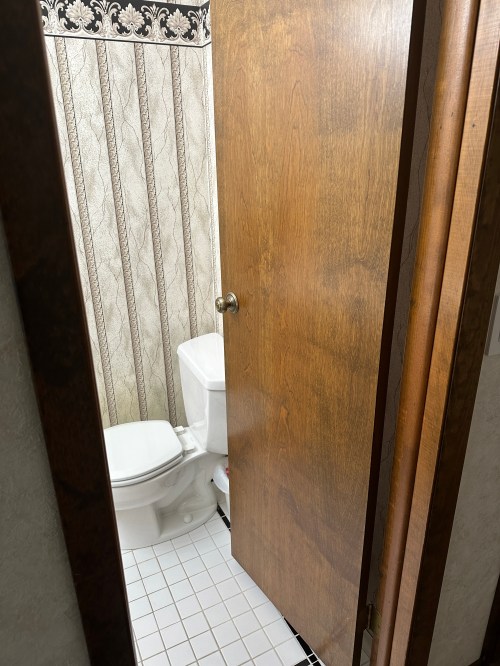
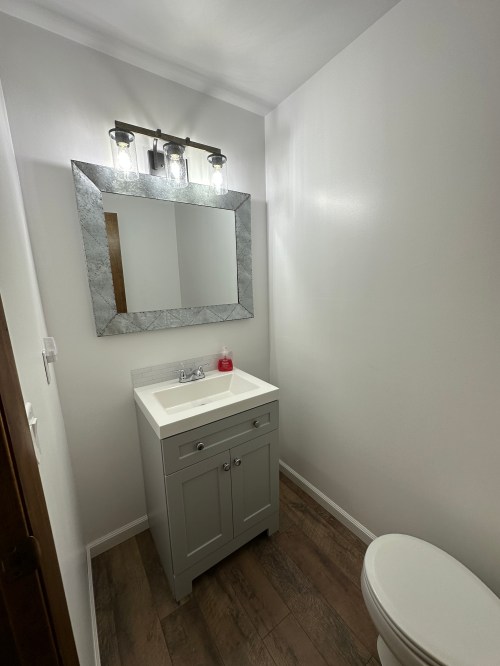
After the kitchen project I needed a break. With fall arriving it was time to dive back in to something and the small bathroom was next on our list. It’s the last room on the main floor to get a facelift. Look at that lovely style!
Over the course of a weekend we:
Took the door off its hinges
Pulled all of the trim
Removed the towel and toilet paper holders
Moved out the toilet
Tossed the vanity in the trash
Installed shut-off valves on the sink’s water lines
Took down the mirror
Pulled up the tile floor, mortar, and a layer of subfloor
Removed wallpaper
Tossed the light fixture in the trash
The flooring and wallpaper made for a very long and exhausting Sunday.
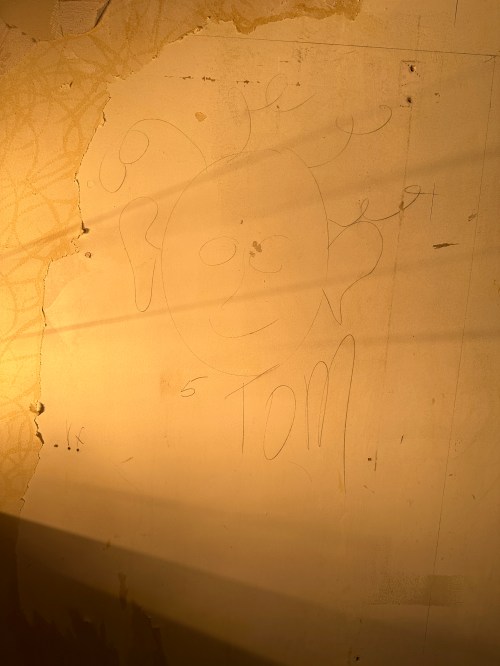
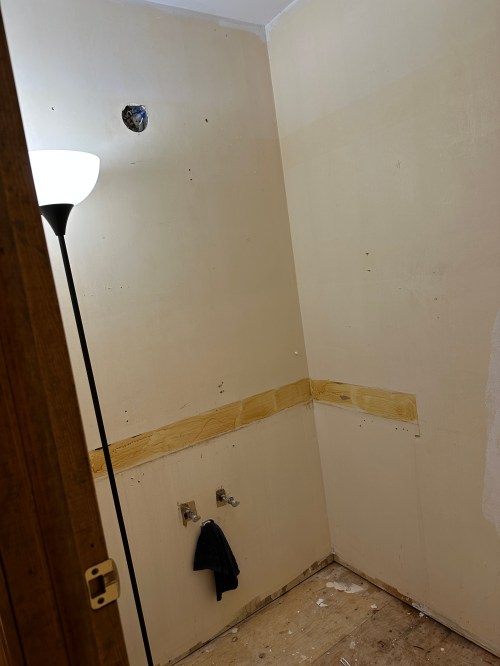
It was nice to have a blank slate. We scrubbed the walls to try and remove any remaining wallpaper glue, which took about an hour and a half. Then I worked on repairing drywall. The old toilet paper holder was inset, so I had a pretty large fix there. In the above picture you can see all the glue left on the wall from the backslash. Sanding glue never really works, so I took a blade to cut around the area. Then I used a putty knife to take off some of the drywall paper. After that I sanded a bit, applied primer, and then several rounds of drywall with sanding in between. I learned this technique in the kitchen when some pretty large areas of drywall paper peeled off. Works great!
We primed the walls. While painting Brandi had a good idea to do the ceiling, which made it much easier not having to cut-in. We painted two coats. I cut 3/4″ plywood for the subfloor.
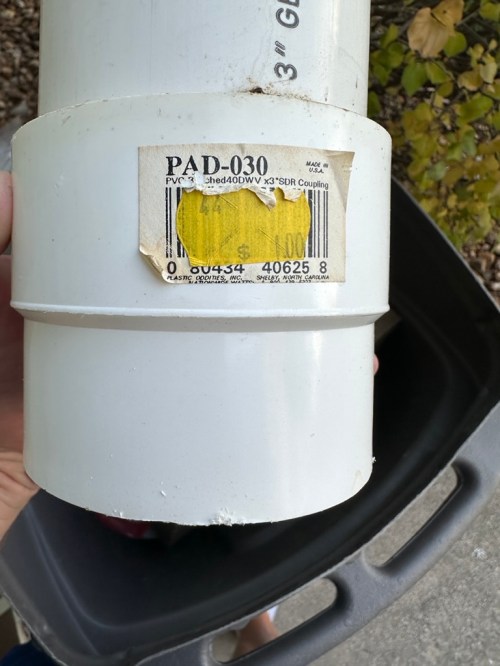
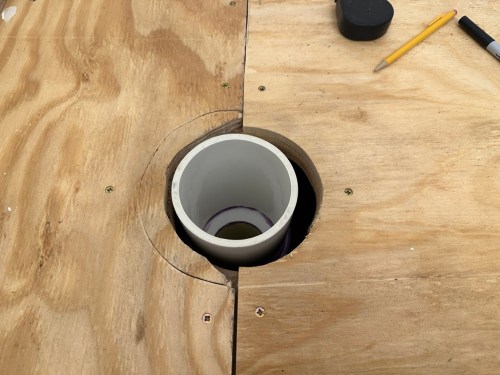
The toilet flange was sticking up above the old floor and while removing the tile and mortar I must have jostled an old leak in the drain pipe, which I figured would happen. I tested by pouring some water down it was definitely dripping. Good time to fix both issues while the floor was gone. After buying some PVC parts I got home and realized the lower piping was 3″ thin wall (Schedule 30) PVC. Of course that’s a different outside diameter than standard 3″ Schedule 40 PVC and needs a special coupler. Nobody carries that part anymore so it’s a special order. They do carry a 3″ Schedule 30 to 4″ Schedule 40 coupler though, so I got one, a length of 4″ pipe, and a 4″ toilet flange. Check out the old $1.00 price tag on the coupler I cut out!
Things went pretty smooth from there. I wired in the new light (Menards) and ordered brighter LED bulbs (Amazon). I installed the same Sam’s Club flooring I had used in the living room, kitchen, and hallways. Then I was able to attach the toilet flange over the top of the floor as it should be. We installed the vanity and sink (Home Depot), hooked up the new faucet, and reinstalled the toilet. After only 8 days we were happy to have a functional bathroom again. It was two exhausting weekends though!
Over the next several days I picked away at the remaining items:
New switches and outlet
Peel & stick backsplash tiles (Menards) with caulk around the edges
Refreshed the stain on the door trim and nailed it up
New prefinished floor trim
Hung the mirror
So much cleaner and no longer cramped. I’m going to make towel and TP holders with shelves in a couple of weeks.
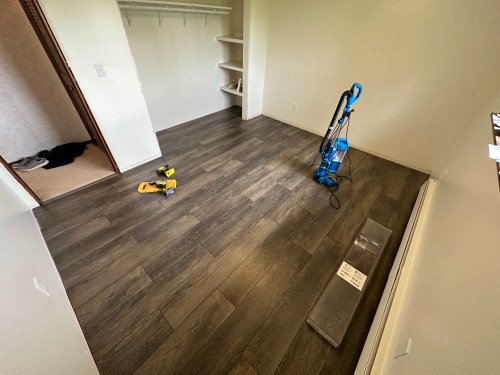
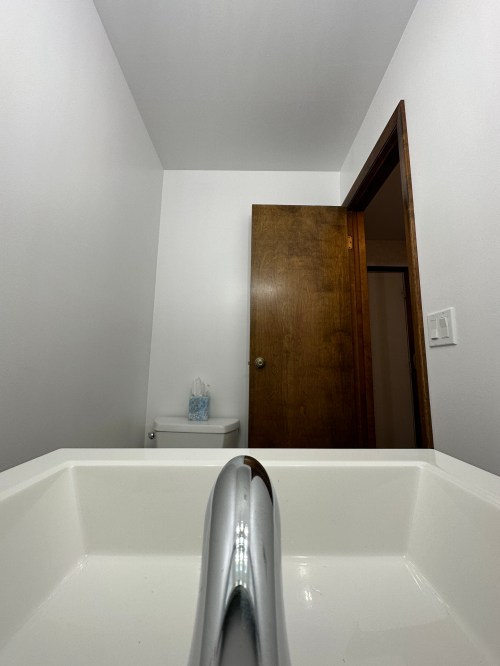
A few weeks ago I noticed a wet spot on the ceiling below my bathroom toilet. It turned out that I was able to lift the toilet right off the floor because the bolts didn’t have any washers! The wax ring was almost nonexistent as well, which must have been causing a slow drip. It could have been much worse. So I figured I might as well tear up original linoleum and the cheap stick on tiles I put down five years ago. Here’s how those layers looked.
With the trim removed and old flooring pulled out, I noticed the subfloor was pretty rotted from old leaks of some kind. Also check out the old wallpaper I found under the trim!
I removed a layer of subfloor and replaced it with new plywood. Recently when cleaning out a closet I found nearly a full box of flooring Dad and I installed in the kitchen back in 2013. The whole master bathroom and closet need a major remodel so I figured I might as well use this to buy time. After a bit of maths I thought I had exactly enough for this little area. I couldn’t afford to make any cutting or measuring mistakes and it worked out. I cleaned and refreshed stain on the trim and gave the register fresh coats of primer and white paint.
I also bought a LED light strip that can be toggled between activation manually by a button or automatically by motion. It’s the perfect solution for trips in the middle of the night.
The range we put in last year tripped the breaker whenever we ran the quick boil burner and oven together. I checked the manual and the unit runs best off a 50 amp breaker, so I finally got around to replacing the 40 amp one along with 6 gauge wire to replace the 8 gauge.