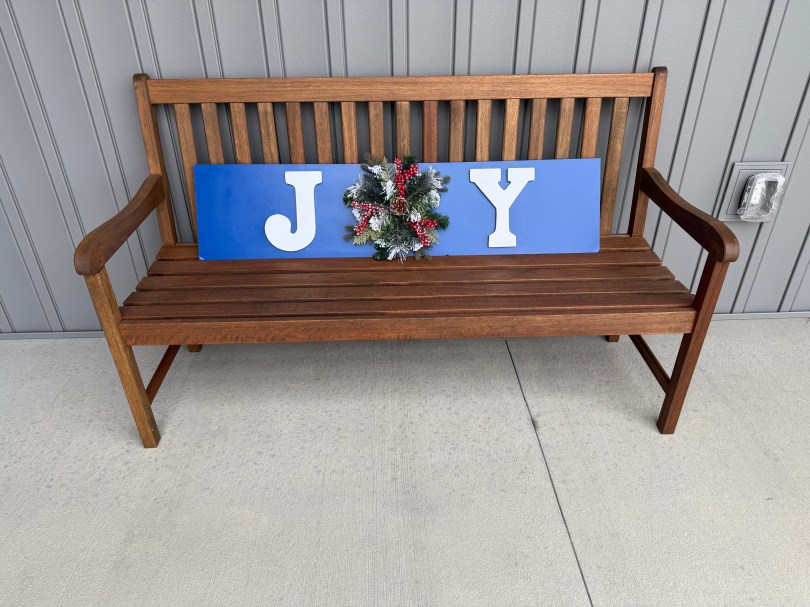
Making this sign was Brandi’s project, so my involvement was as supervisor and giving tips. It was all her idea.
She wanted to get double use out of one of her signs from another holiday, so started by painting the back blue. Then attached an eye hook along the top for hanging the small wreath and glued on letters she bought at Michaels.
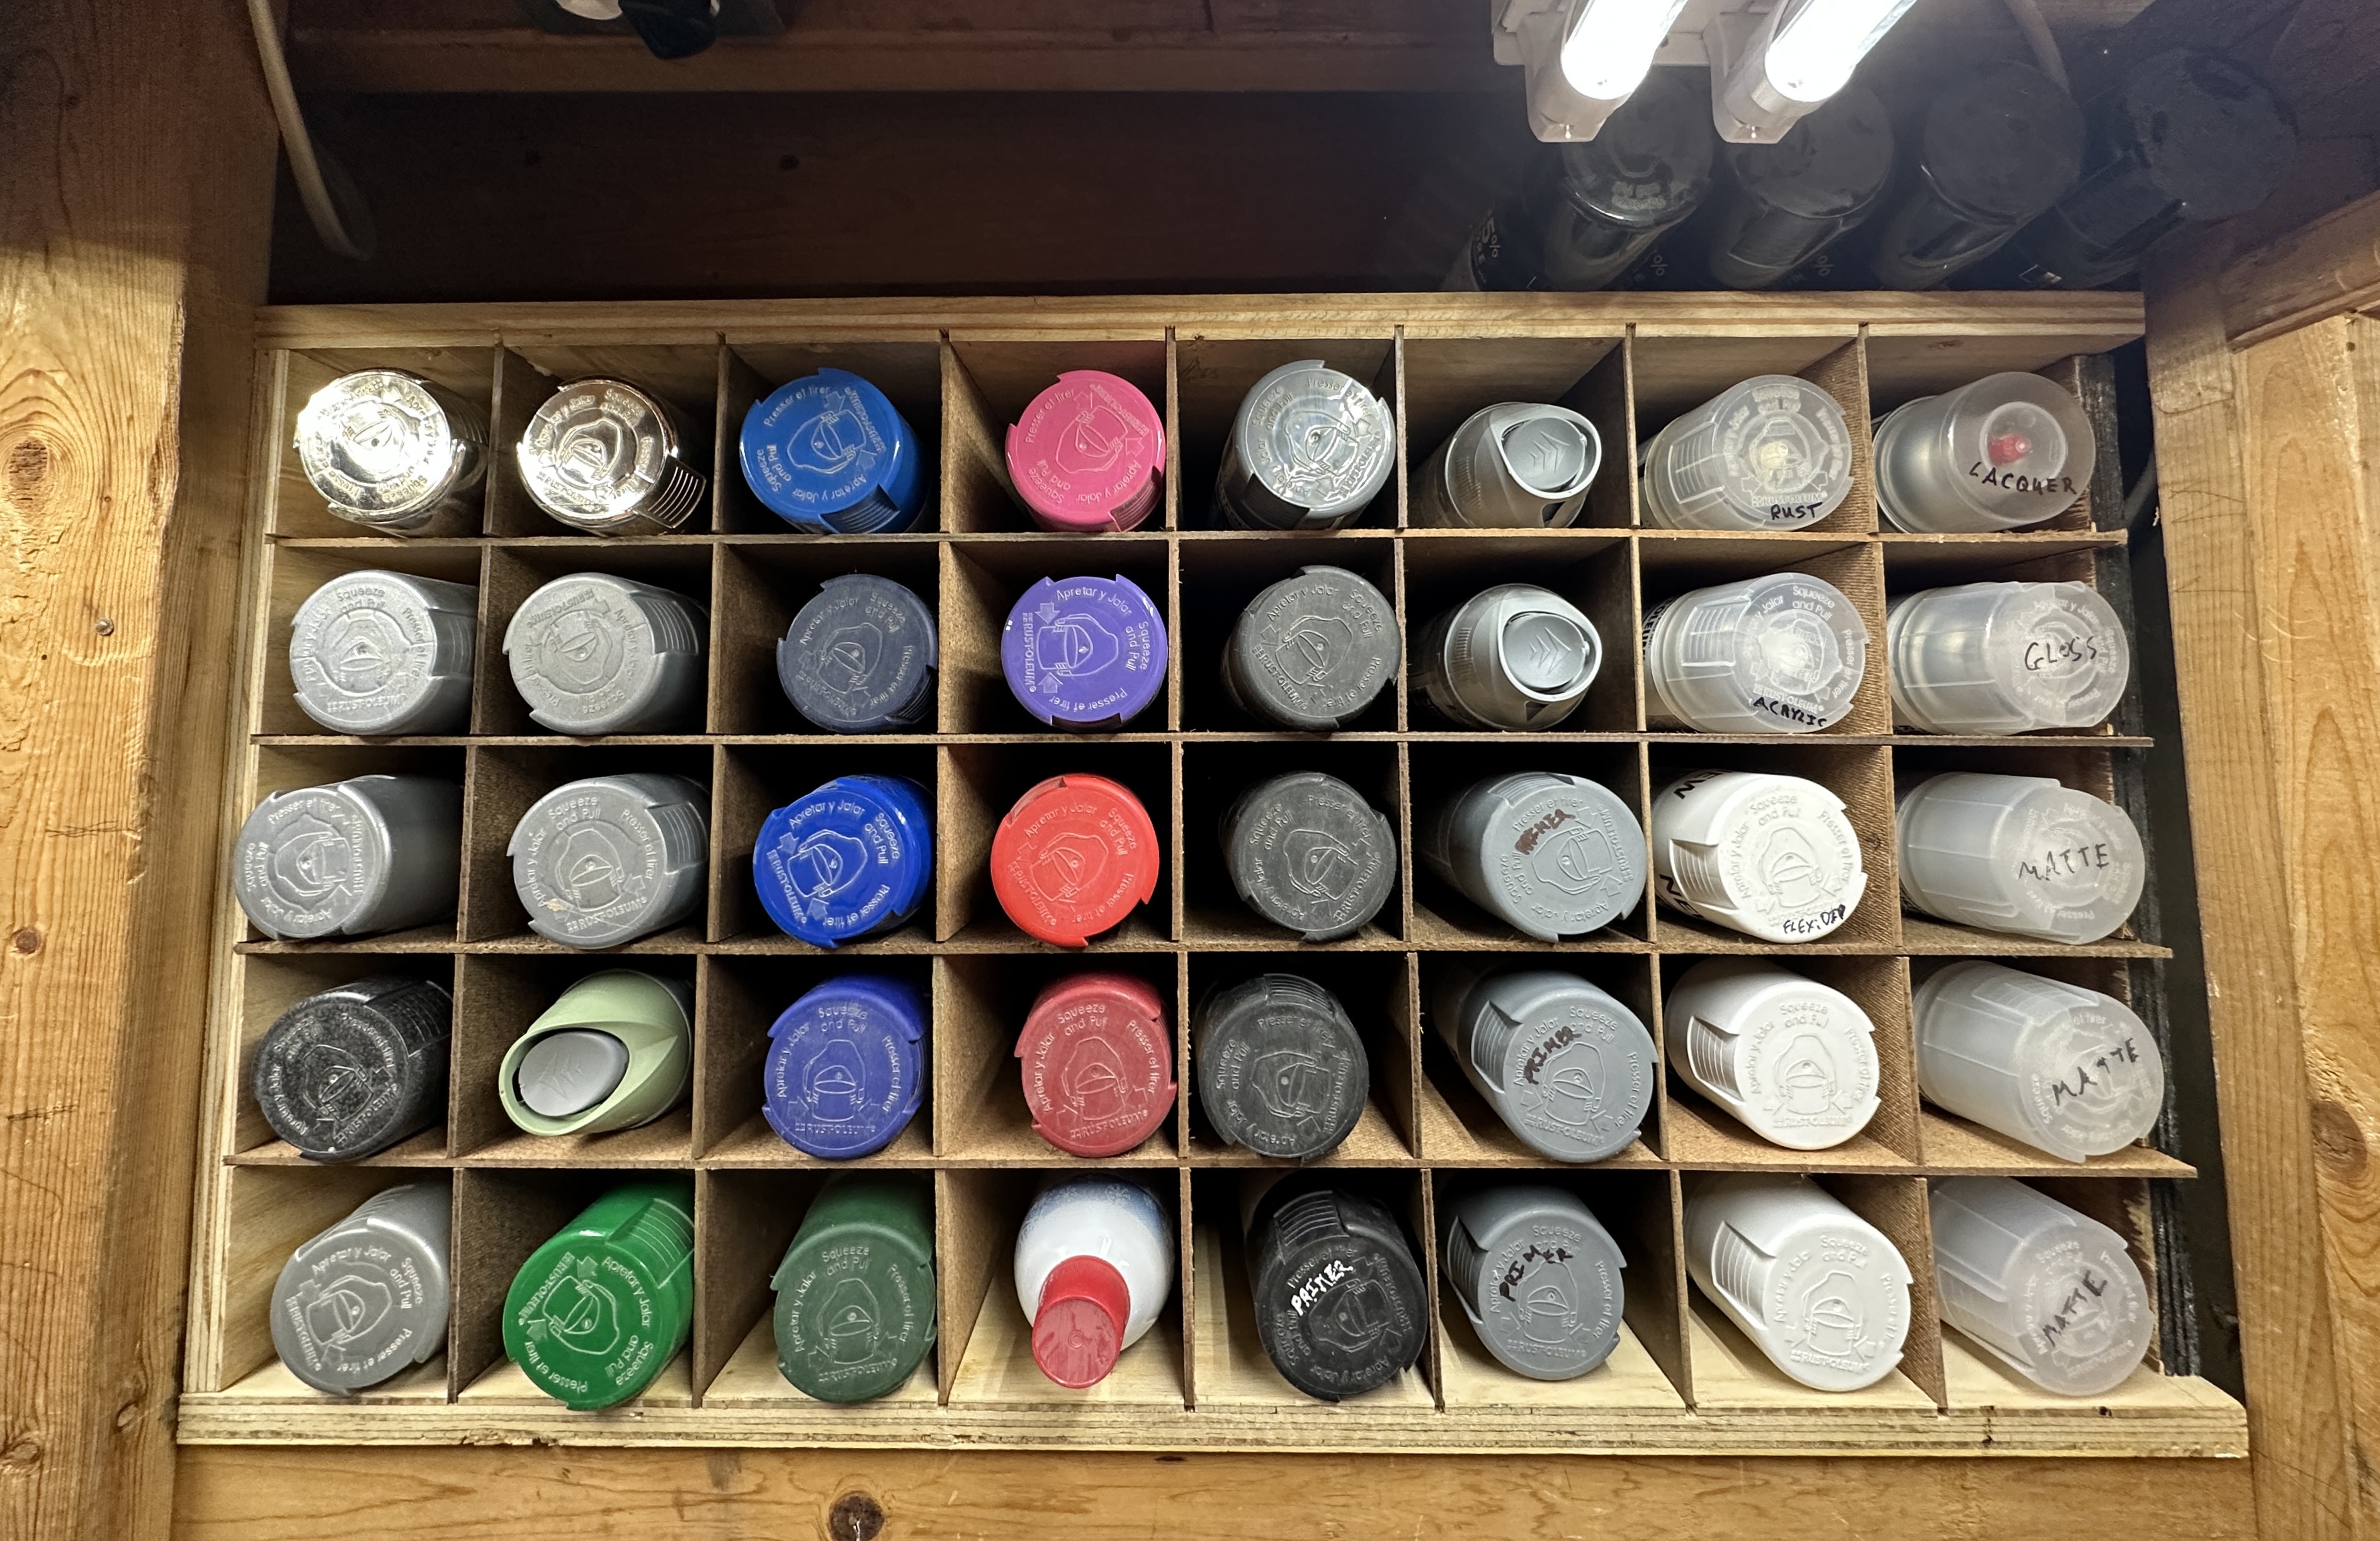
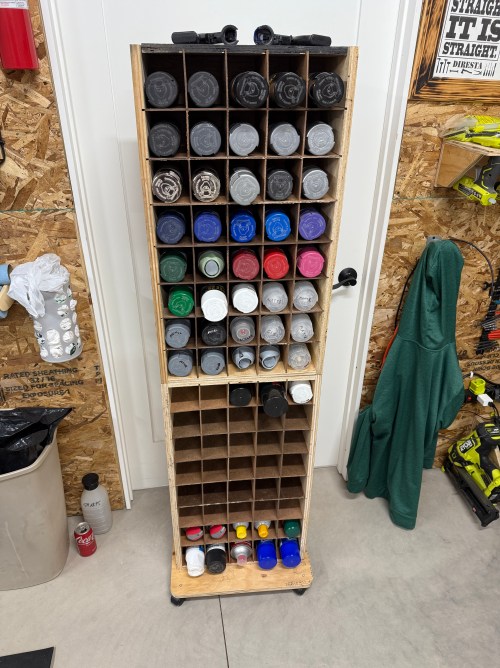
It was built to slide in a shelf at the old house. I was able to get it out and moved to the new house. The 16″ depth was wasted space though. Look at how deep the cans were when laying with the back on the ground (those higher ones are actually a tall can on top of a standard can).
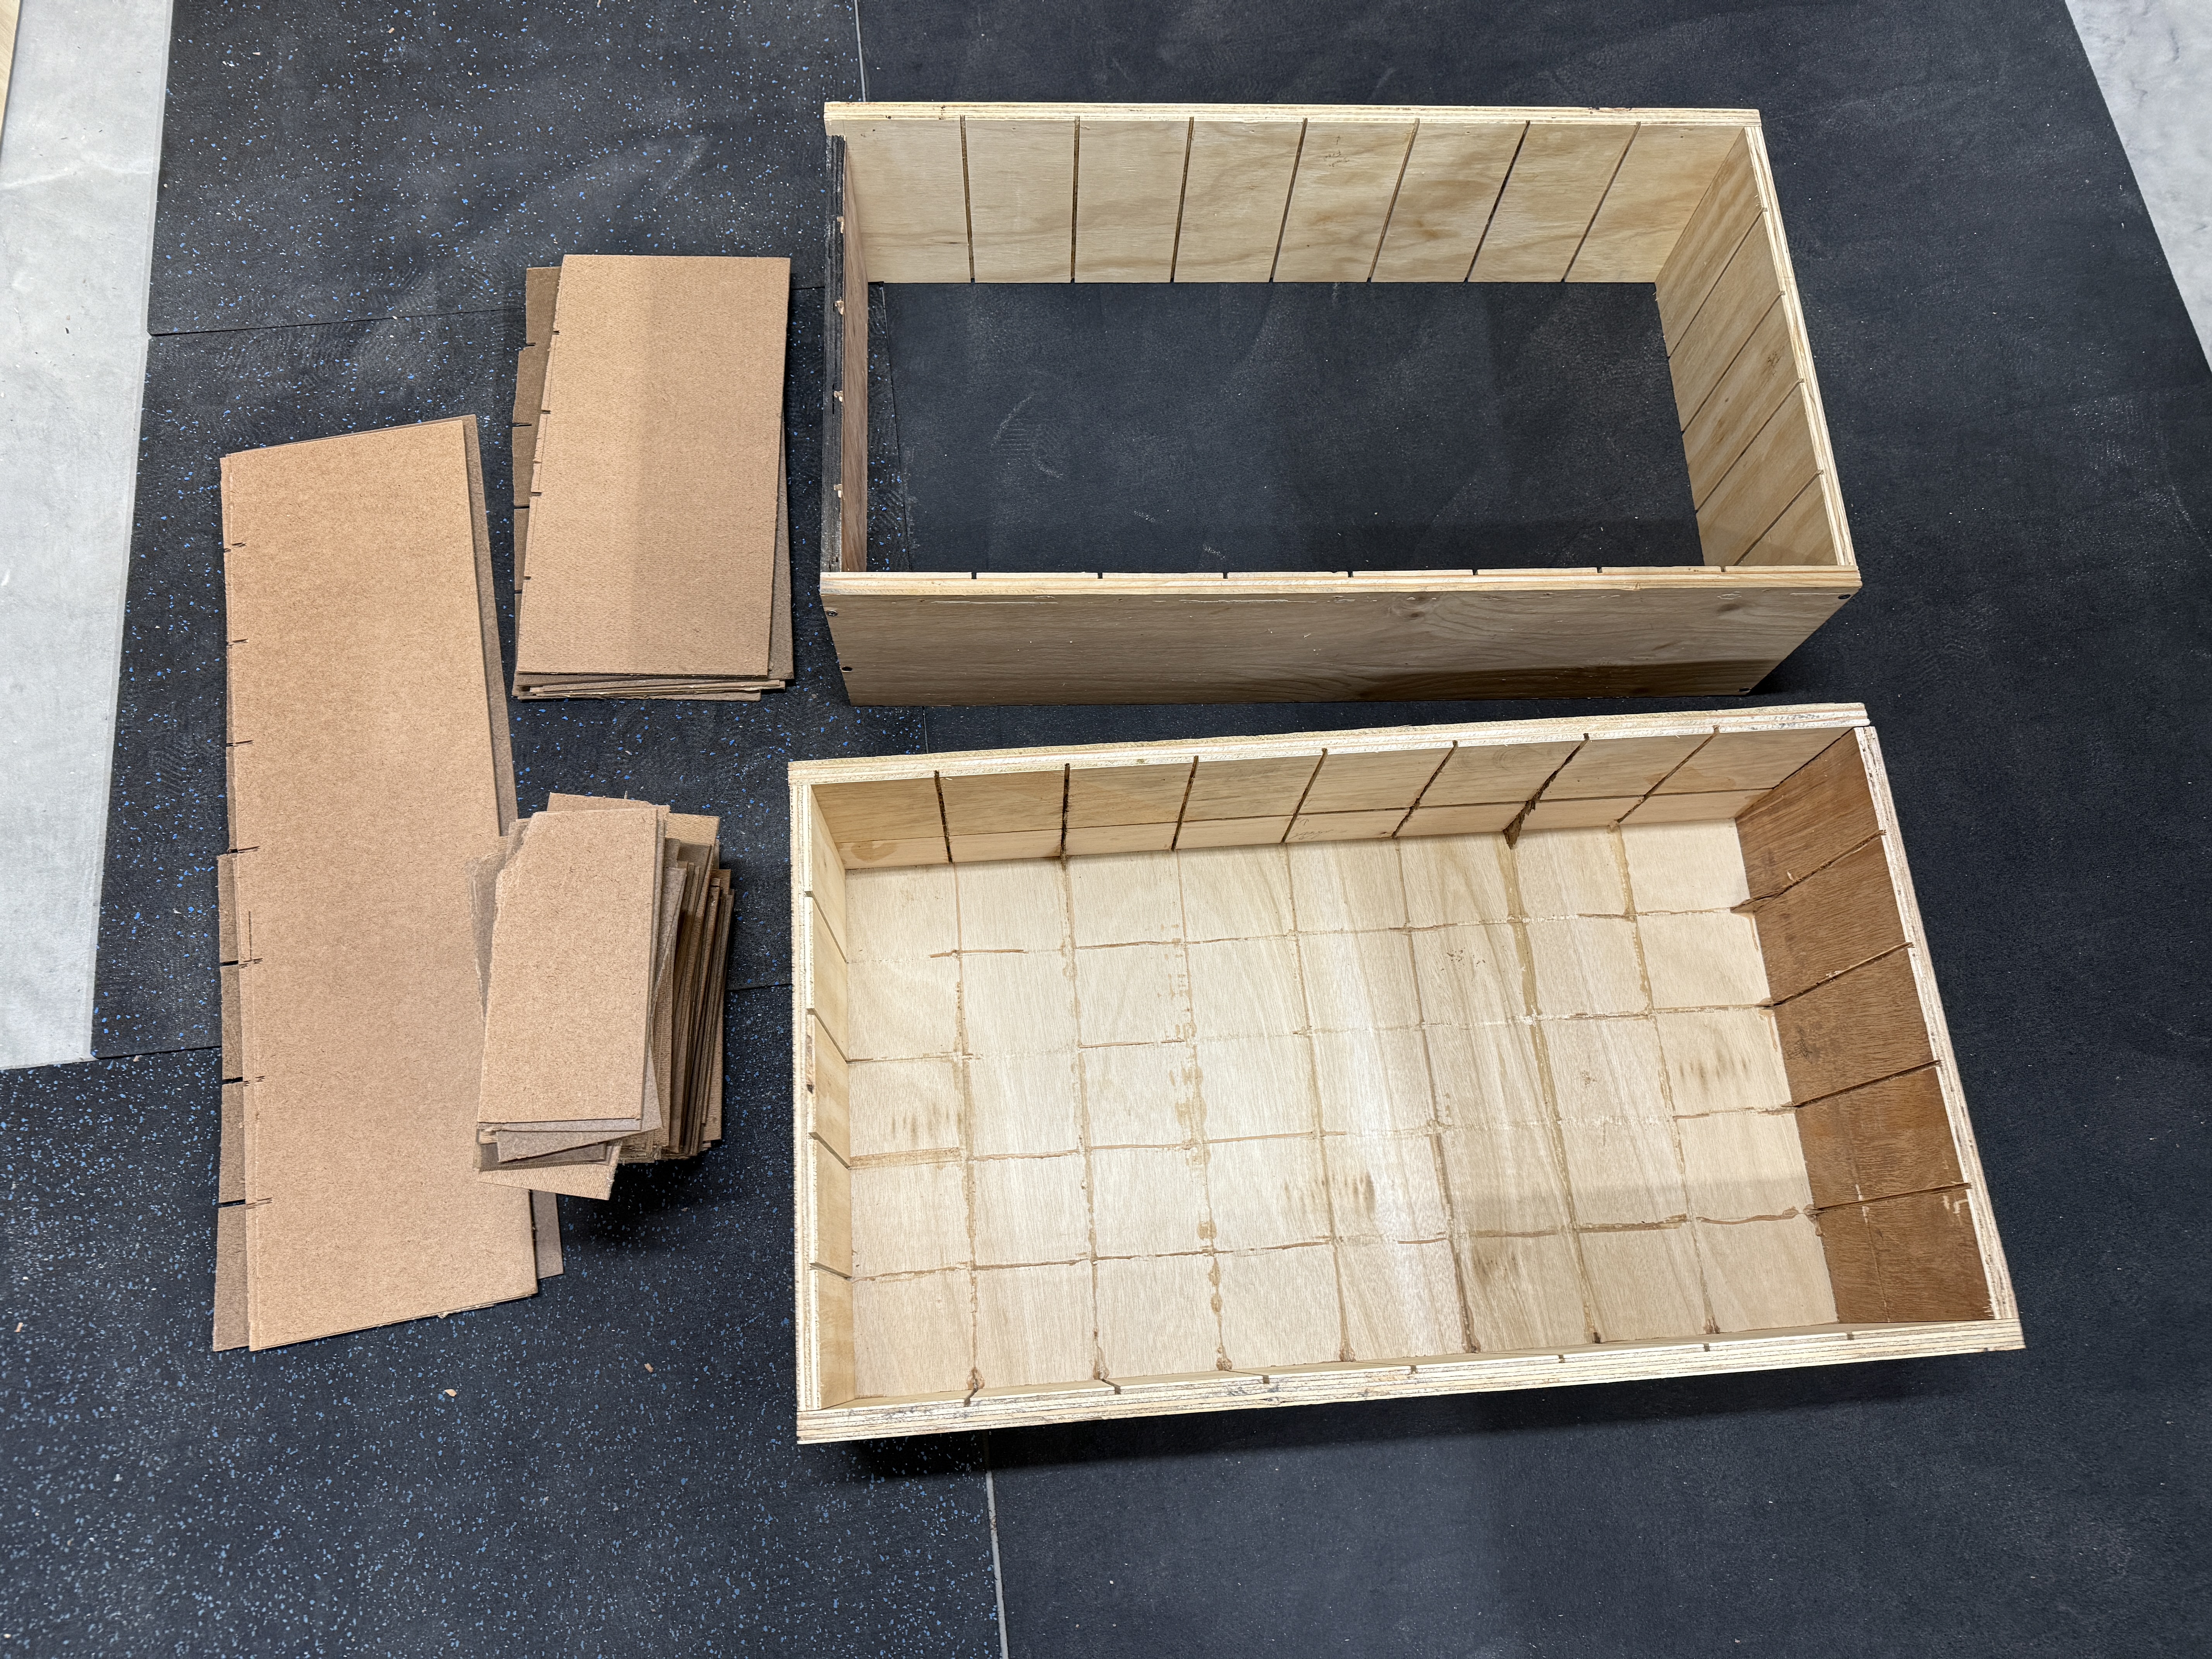
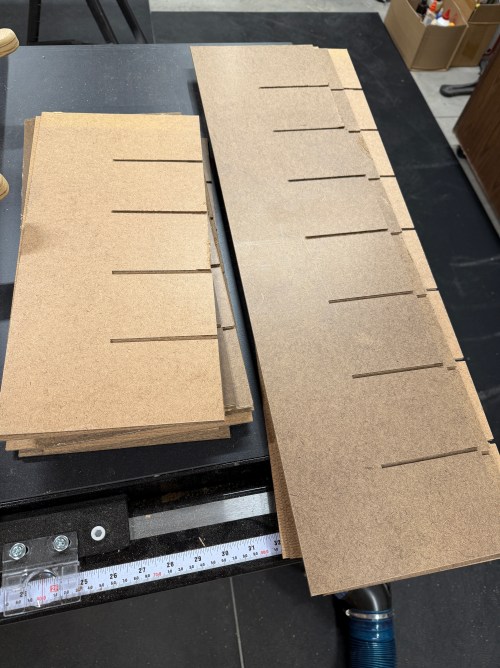
It turns out, a great size for spray cans is about eight inches, so I split it down the middle and wrestled out all of the dividers, which were partially glued in place.
Stack ’em, screw ’em together, and nail a back on the new half.
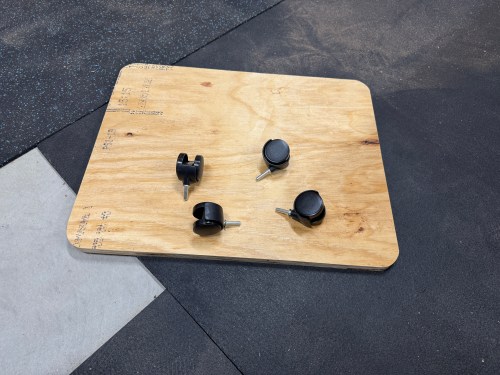
It was very tippy, so I rounded the corners on a larger piece of plywood to make a more stable base and pulled out office chair casters. The casters wouldn’t be great for any heavy shop furniture, so this was the perfect project to use them.
Cutting more dividers and then redoing all of the slots was the worst part of this project. It took well over 250 cuts on the table saw.
A handful of the new hardboard pieces were too long and needed to be trimmed. Other than that, the assembly went much smoother than I expected, with a little persuasion from a dead blow hammer. I have no idea why I used glue on that first iteration. Maybe it was needed with the deeper box, but this one is very stable without a drop of glue.
This is another great upgrade to the shop. After adding all of my spray paint, lubricants, spray adhesives, and other oddball cans there is plenty of room for more.
First up was upgrading the power cords on my table saw and jointer to be longer and beefier. I chopped a couple of 15 foot lengths off an old extension cord my Dad gave me years ago, which I still haven’t used. After wiring them in to the switch I installed a new plug on the end.
I also replaced the metal castors I had originally put on the table saw cart because they were horrible. The new ones roll real smooth.
I needed spots for more clamps and had empty space in the clamp storage area. I’ve wanted to redo that area anyway.
I got creative, using a couple pieces of copper pipe saved from the old shower and some old microwave mounting rods.
The shop closet is in need of a lot of love. The lighting has always bugged me and it was a good place to start so I’d be able to see when tackling the rest of the room. The pull string and single bulb had to go.
After wiring, I mounted the lights to a scrap of plywood and that to the joists. I had to add an outlet because my router and other network equipment are in here and they had been plugged in to the light fixture. There was an open ground, so I opened up the light in the adjacent furnace room and connected the ground wires.
What a difference!
It’s very bright in the closet now and the motion sensing works great. I thought about wiring half of the outlet to the switch so I could mount LED strips under each shelf that would turn on with motion as well. Maybe a later project if I think it’s needed. After I reorganize and get everything accessible at the front of shelves I think it’ll be fine though.
The other part of the closet that really annoyed me was the spray paints because I could only see the front cans and had to move things out of the way to get to back rows. It was hard to know exactly what I had.
I cut out the shelf and cross supports above the cans and removed the sheet of plywood that was the can shelf. This allowed me to gain extra height and assemble an entire unit to drop in place. I cut rabbets in the surrounding plywood box and used interweaving hardboard to create the internal compartments.
Talk about a stressful glue-up! With space for 40 cans, it still wasn’t enough storage, but I have a lot of duplicates that’ll eventually get used up.
The rest of the closet is still a mess and an accumulation of junk. It needs a cleaning and complete reorganization, so I don’t have any plans to build anything. If plans change or anything seems useful, I’ll be sure to share.