Part 1 covered the devices I’m using for home automation. It’s been over a year and there have been some changes. I added a Leviton switch and got rid of the Wink hub.
This post will be about the software that brings things together, making it easy for me to manage and allows the devices to “talk” to each other. Maybe it’s a good thing it’s taken me almost a year to write this part 2 because there have been some dramatic improvements to how everything runs. I was using homebridge for a period of time, but found I never really used HomeKit/Siri. Home Assistant has been updating a new HomeKit component, so I’ll have to give it a try.
I’ve talked about Home Assistant in a lot of posts; it’s the software running on the Raspberry Pi 3 Model B to handle everything. It’s very powerful software and has been a lot of fun for me to configure everything. Being on a Linux box and having to configure everything through YAML files makes it a tough entry for the average homeowner though. It’s improved a lot in the year I’ve been using it with better documentation and some UI configuration tools, so it’ll be interesting to watch for the next 12 months.
Being Open Source was a big draw of HA for me. Open Sourcecraft has a good article about the creator. The project operates on an aggressive schedule you don’t see much; every 2 weeks a new version oh Home Assistant is released. These aren’t small updates either. Each update fixes a ton of bugs and adds support for new devices.
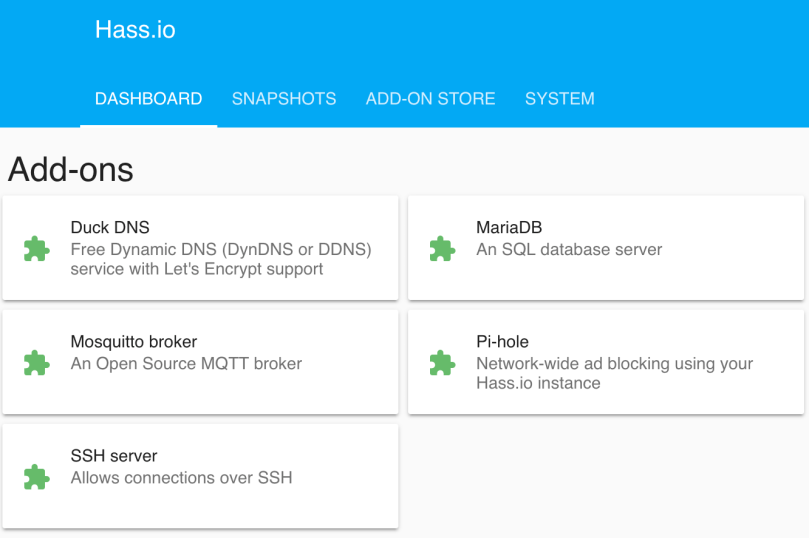
I did install HA using Hass.io, which simplifies the process and makes it easy to do upgrades and install add-ons. Here are the add-ons I’m using.
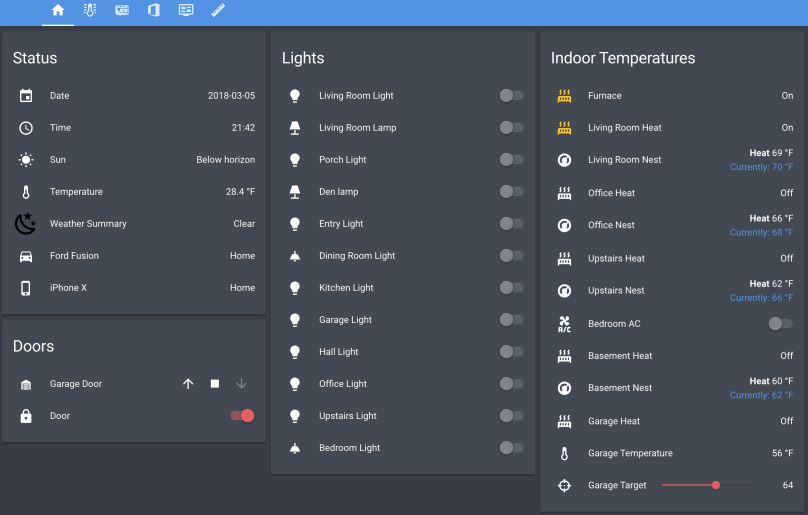
In addition to running Home Assistant, I wrote a couple of small services I run on Pis. The first is the temperature sensor/monitor I use in my garage. I’ve improved it a lot in the last year. The second service is home-assistant-pi, which reports a bunch of data about each Raspberry Pi on my network back to Home Assistant, which you’ll see in the screenshot below.
The beauty of Home Assistant is you can set everything up the way you want. Your limitation is your imagination and your comfort level with configuration files and code. I took a bunch of screenshots of my setup.


I keep all of my configuration (except the secrets file) in a GitHub repo in case I mess something up. I’ve learned a lot by looking at other examples, so my repo is public as well. Maybe my config will help out someone else. The repo is home-assistant-config. If you have any questions about anything you see in this post or in my configuration, let me know.
In the final post of this series, I’ll explain the cool part of this whole thing, the actual automations. I need to go through my ideas list and implement all of them though.
