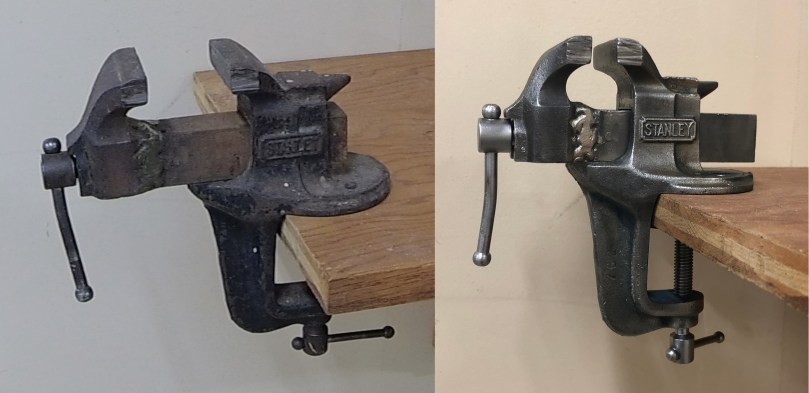
This Stanley vise caught my eye at an estate sale last year. I think I paid $3 for it. The jaw snapped at some point and someone did a rough weld job to put it back together. The other side reads 743 – 2 IN.
I finally got around to cleaning it up. Most of the work was done with brass wire wheels on the bench grinder and drill. Then a little hand wire brushing and sandpaper to get the corners.
Do you think I should paint it? I kind of like the bare metal look.
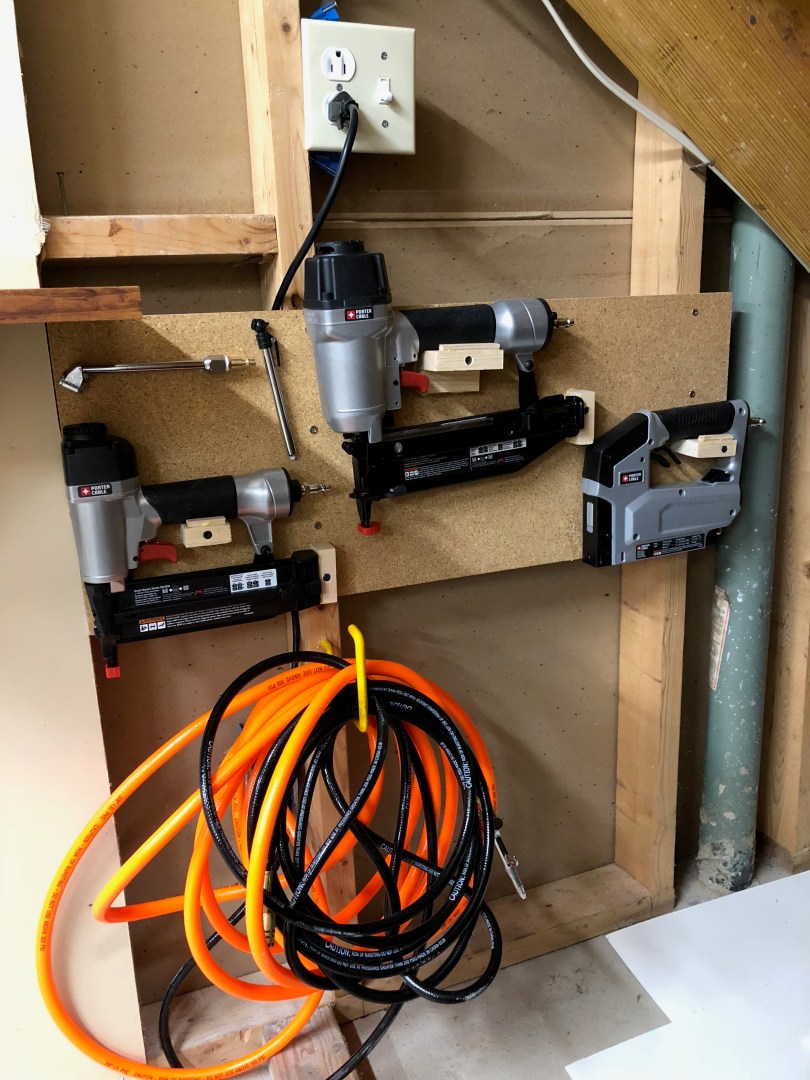
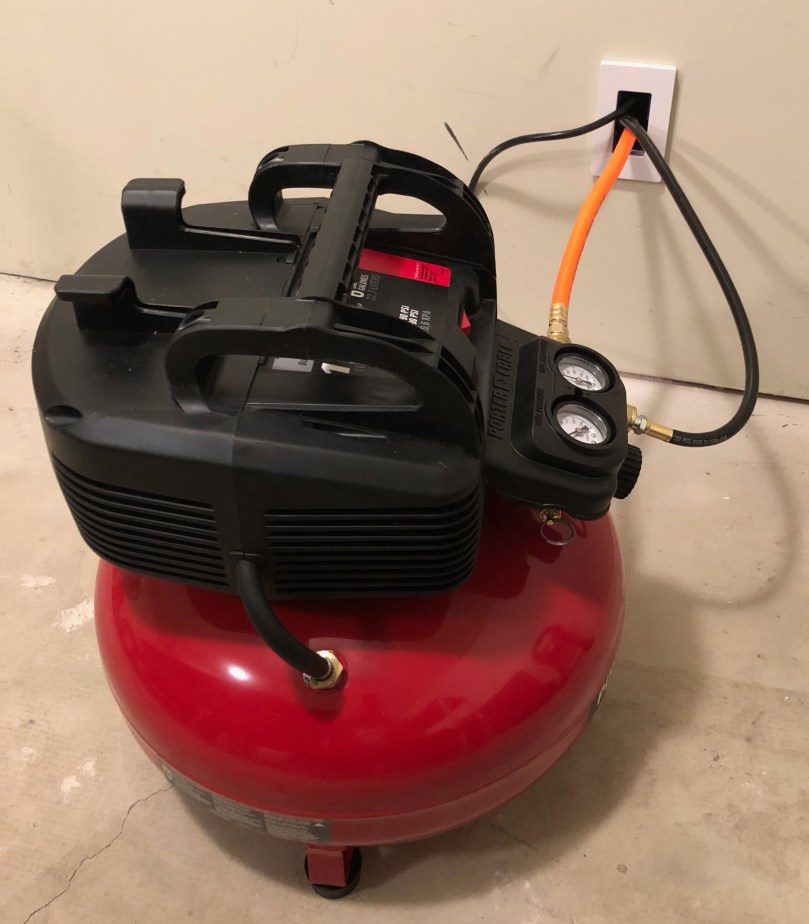
I’d been thinking about getting a better cordless brad nailer because the old Craftsman one I have is useless. I discovered Craftsman makes a much better one in the C3 line, but it runs about $130. I kept looking around and found Home Depot selling a Porter-Cable combo kit with:
6 Gallon 150 PSI Air Compressor
16-Gauge Nailer
18-Gauge Nailer
3/8″ Stapler
25′ Hose
It was down to $200 from $279! I bought it the next morning. I also stopped by Harbor Freight for their air tool accessory kit (gotta have a blow gun!) and a second 25′ hose.
I didn’t want the compressor in the shop because it’s very loud when it runs. So I cut a hole through the wall, put in an electrical box, and added a face plate so it doesn’t look too much like a hack job. If I ever move it I can swap out the place for a blank one.
Where it comes through on the other side is under my staircase, which is fairly central in the shop. Figured that would be a good place to store the tools.
I didn’t want to have to go to the other room to turn the compressor on/off. So I removed an old outlet that was on this wall, added a 2-gang electrical box, put in a new outlet, and wired a switch to control the bottom plug (top plug stays hot). Now I can always leave the compressor’s power switch turned on.
I bought a small set of digital calipers so instead of cutting a 3rd slot in the old block (each set slid in from the front) I made a new one with holes so each set goes in from the top and can’t fall out.
Back in early November I found this Delta TP305 planer for $100 on craigslist.
It was obvious the owner took care of his tools, he had just replaced the blades, and also had a set of new blades, so the price was a steal. It didn’t have any type of dust/chip collection though.
When Delta produced this planer, the dust collection attachment was an extra accessory. I decided to make my own because I don’t understand this design. Why would you want your hose hanging over the outfeed? Too much risk of the work piece getting jammed on the way out, which is extremely dangerous.
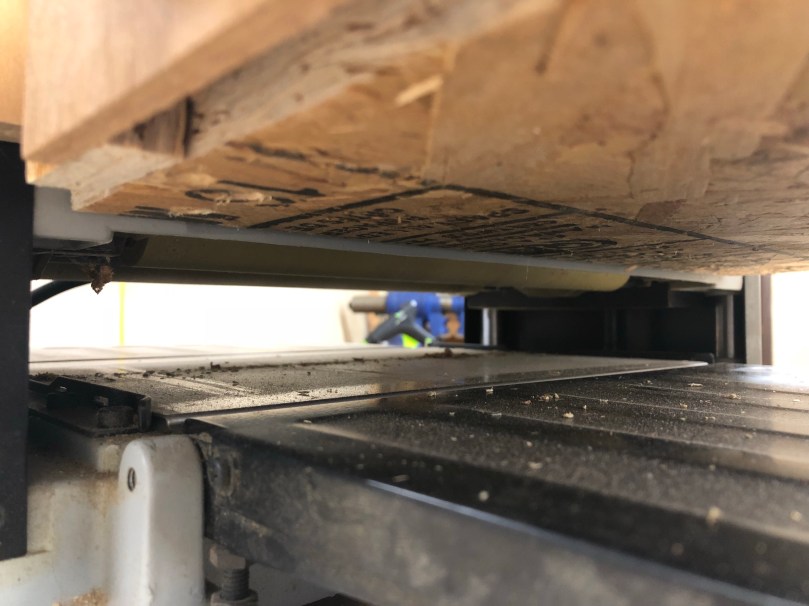
I found a neat idea on YouTube and went with a similar plan. Here is what the outfeed looks like normally.
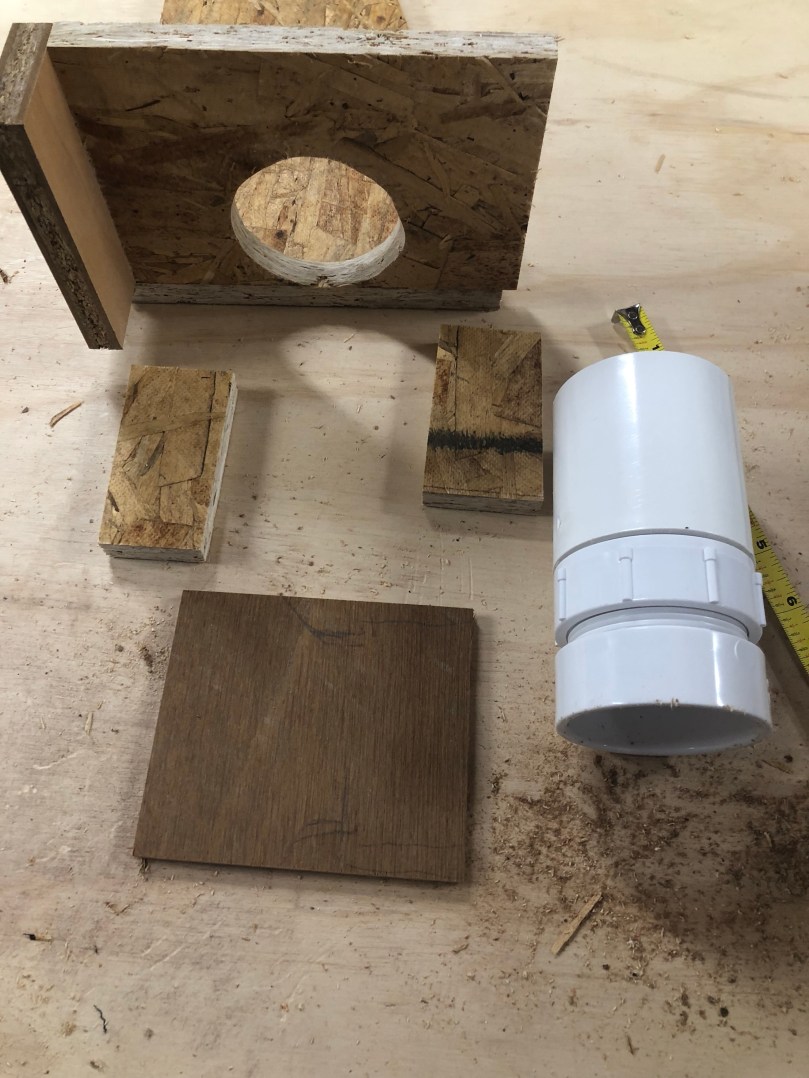
I first cut some pieces to make the sides and bottom of a box.
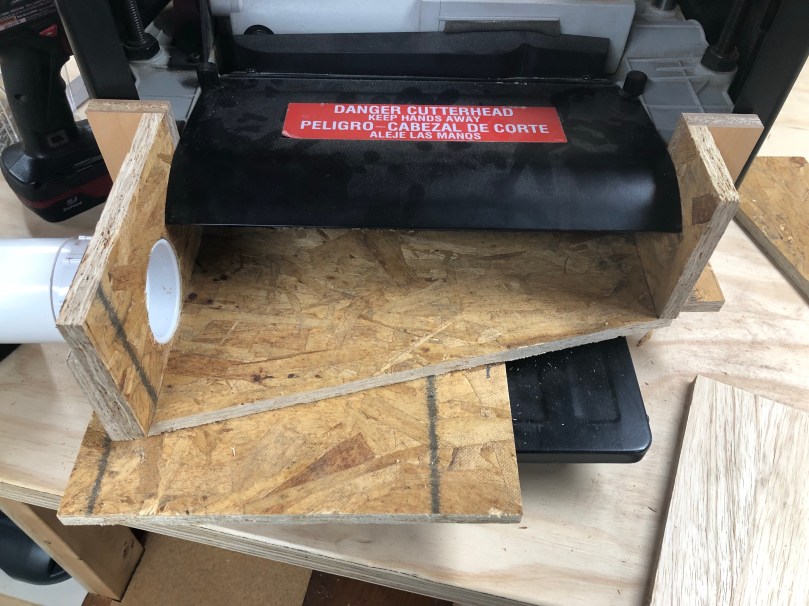
I screwed the right side together. Then I held it up against the planer to get the exact positioning before screwing in the left side. I wanted a snug fit.
I cut and sanded a hole in the side for some PVC parts.
Grabbed a few scraps that would be used to hold the PVC in place.
Cut a hole in the thin piece, boxed in the male PVC part, and screw it all together.
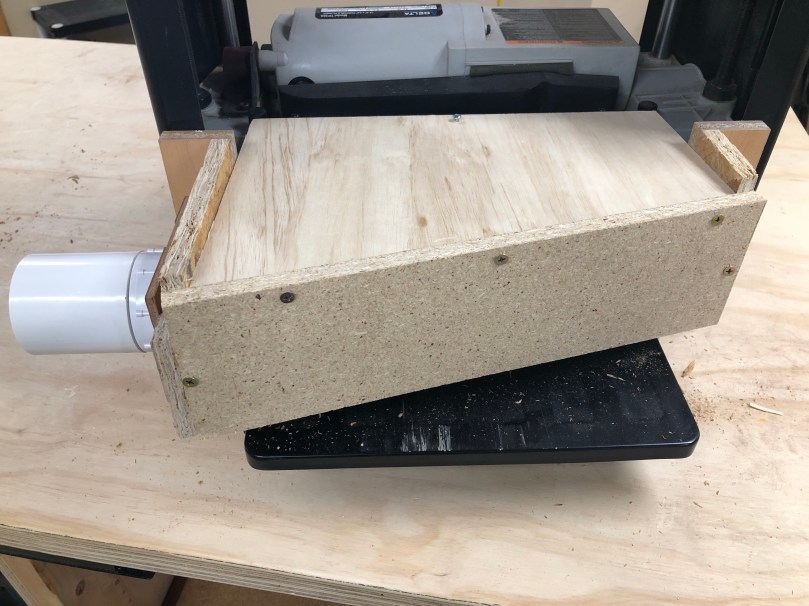
Then I put a spacer under my in-progress box and adjusted the planer’s height. It was important to use a spacer for these next steps because I don’t want the bottom of the box to have any chance of jamming up the wood coming out of the planer. I gave it about 1/8″ of breathing room.
I cut a piece for the top. Then while putting pressure on the edge that makes contact with the planer dust chute I screwed this piece to the sides. At this point I was able to remove the spacer because the tight fit was able to hold the box in place.
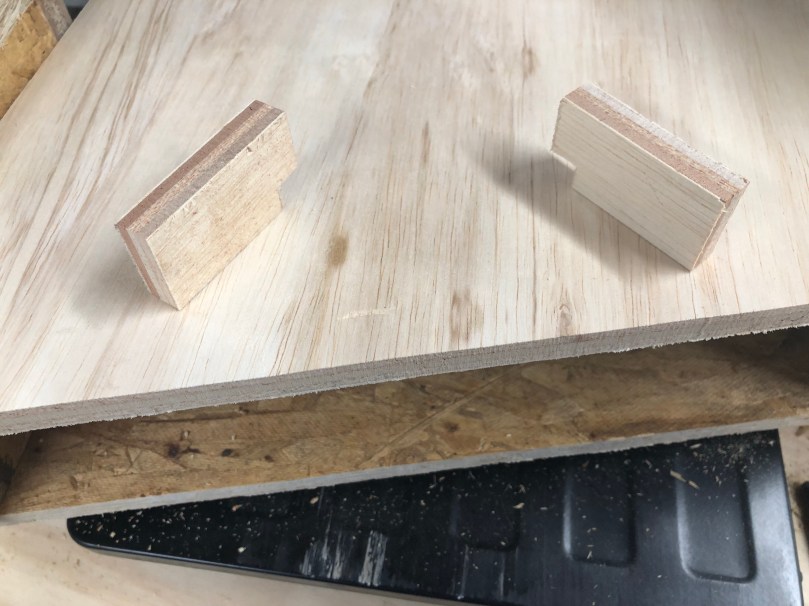
I wanted to prevent the box from sagging or shifting down during use though. So I cut two little pieces.
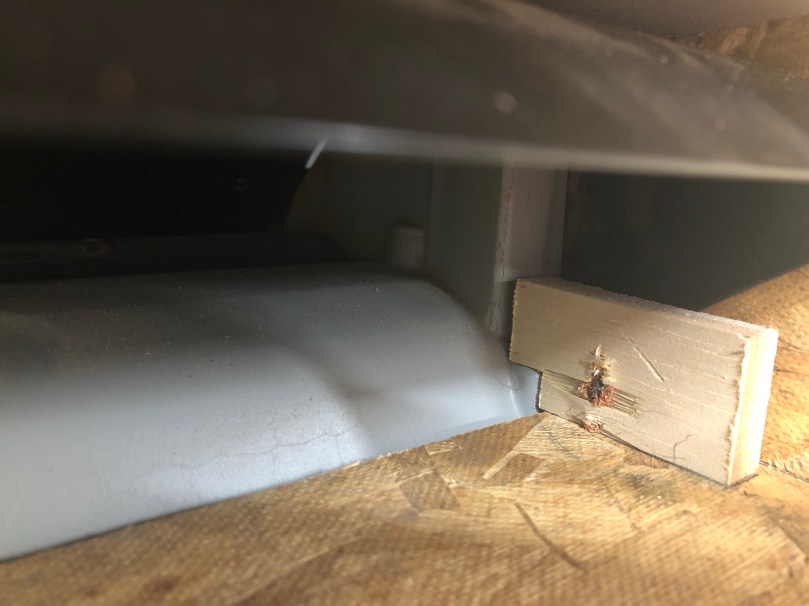
Screwed them in from the bottom on each side. Notice how the kind of grab on to some ledges of the planer. This is a simple way to prevent the bottom of the box from going any lower.
I drilled a hole in the top and through the metal chute. Combined with the tight fit and those blocks, now this thing can only shift up and away from the outfeed path.
The final step was to square up the back edges, cut a piece, and screw it in. There are no screws on the bottom of the back face because I used a scrap piece that wasn’t tall enough to have room for screws there. I did use some glue though.
Here you can see the clearance between the box and the outfeed I mentioned earlier.
Due to the materials I skipped using any wood glue except when I put the back face on. I did go back and hot glue all of the joints so it would be sealed for a better vacuum.
This was an easy build. The only modification to the planer was the screw hole and the whole unit can be removed by taking out that screw.
It took a few weeks after restoring the Craftsman Jointer (model 113.232240) to get going on a dust/chip collection upgrade, but now it’s done. It’s not going to win any beauty awards, but it’s functional and works awesome. Not bad for making it up as I went.
The previous owner had installed these two side panels and basically let everything fall to the bottom of the stand. Not sure how well it worked, but I knew I could do better.
I figured I could build some type of chute that would fit up between the motor and the bottom of the machine.
My first idea was to create some type of cardboard model that I could reference for building a real box. This was a terrible idea trying to work up under the machine and as soon as I took it out, it basically fell apart.
Then I had an idea to cut up this popcorn tin and build the dust chute out of it.
I’m still not sure how I managed to keep all my fingers or not even draw a single drop of blood; those edges get extremely jagged and sharp.
In the mean time I made a trip to Home Depot and found some PVC pieces that would work with my dust collection hose.
The tin pieces worked ok, but I wasn’t confident in the duct tape holding up, especially as a means of keeping it connected to the stand. It was not a wasted effort though because I ended up using the pieces as you’ll see in the video.
While working on this project, I realized I really enjoyed the engineering process and solving problems when I made a mistake. I didn’t include footage of the mistakes but there were some epic ones. At some point in the build I stopped checking the fit inside the stand, so when I put it in place I shouldn’t have been surprised that some of the lower parts were smacking into the motor. After fixing that problem, the box for the power switch was in the way, which is why I moved it to the other side of the stand. Finally I forgot the motor needed to be raised in order to get the belt back on and there was no room to spare. Luckily this last problem was the easiest to fix because the motor mount could be flipped over, getting me 3-4 inches of clearance. I picked a 6 inch longer belt at AutoZone.
I imagine you could build something similar for most jointers. If you come across this post and it helps you out, let me know.
Little squares are handy to have around the shop. I got a 2-1/2″ one for Christmas and have is used it a lot already. I don’t know how this one lasted until day three of an estate sale, but it was a great find for $1. Only took about ten minutes with a brass wire wheel on the grinder to clean it up.
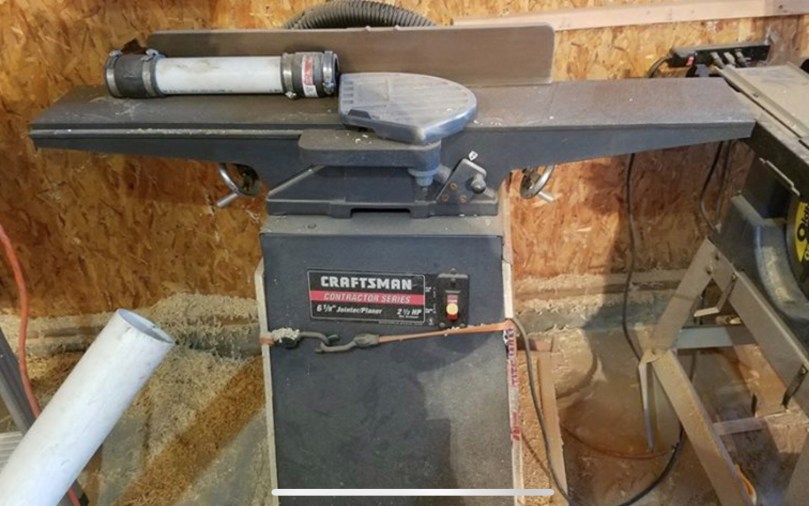
When I saw this Craftsman Jointer (model 113.232240) for $100 I couldn’t pass it up. Most jointers I’ve seen in the $100-150 range are shit.
The manual is dated 5/97, so it’s over 20 years old. My Internet searching suggests this model originally sold for around $600. The only original parts that appear to be missing are the side panels, blade gauge, and push block. I bought a couple of push blocks this summer at an estate sale, so I’m set there.
They don’t make many tools like this anymore. This thing is a beast of solid metal and weighs a ton. Here it is in my basement. It had some rust, but otherwise it was in good shape and the rolling base was built well.
I went at the table and fence with a razor blade, which easily removes most of the surface rust. I sprayed everything with WD-40, let it soak, and then did another pass with the razor blade. I love that feeling when you start to see some shine.
Then I cleaned up the stand and the base. The leveling feet in the stand were rusted and beat to shit, so I trashed them. Drilled holes in the base and properly attached it to the stand with bolts instead of tape like the previous owner.
I replaced the bolts on the belt guard which were rusted really bad. A little elbow grease and a brass brush cleaned up some of the rest on other bolts throughout the stand. I removed the screws for the switch and ran them over a brass wire wheel on the grinder. I also took apart a lot of the fence assembly one piece at a time and used the brass wire wheel to clean it all up.
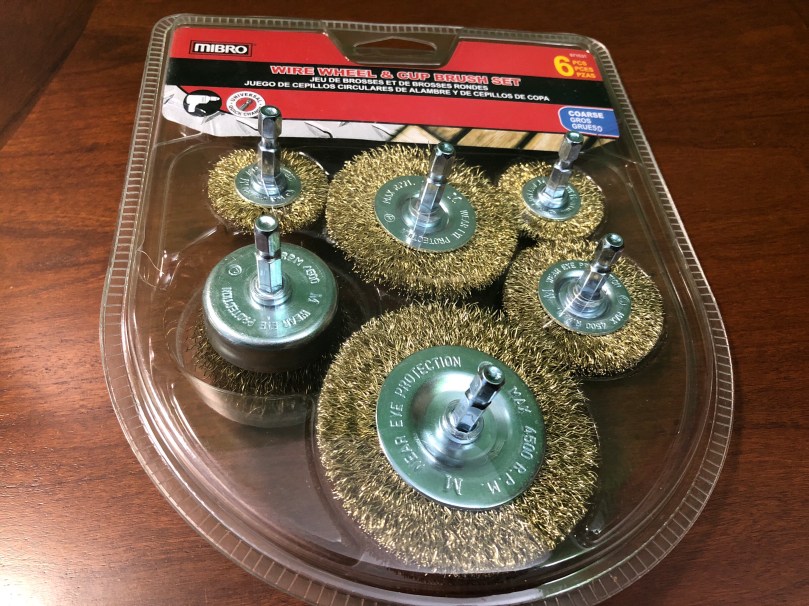
To continue cleaning the tables and fence I had to order a brass wire brush set for the drill. Everywhere in the area sells the steel wire set, which eats at the metal too much.
Look how much of a difference a few seconds makes.
I went over both tables and the fence with the brass brush and followed up with a polishing wheel. Then I put it all back together and applied a coat of paste finishing wax to those surfaces. Look at that shine! I love that you can see the reflection of the blade guard.
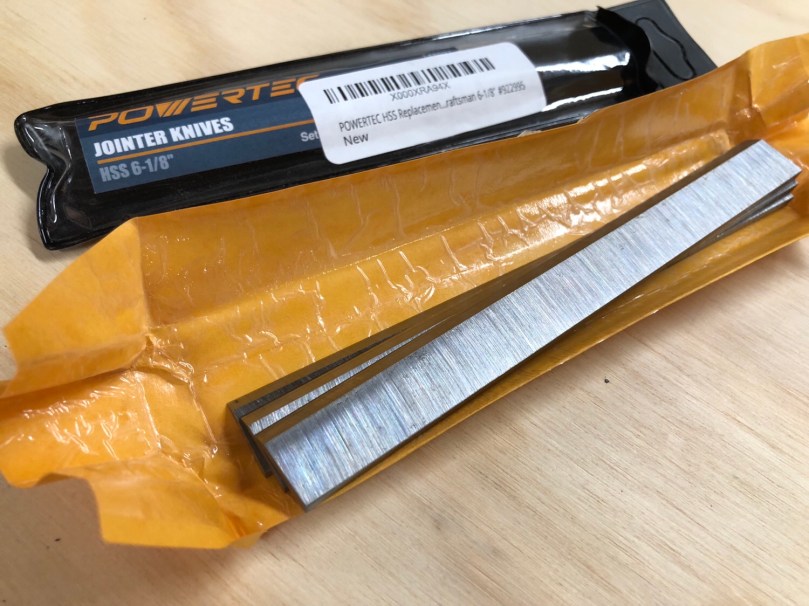
I could see a few nicks in the knives and they had some rust. I’d rather start with a fresh set, especially since they were only $17.
I’m going to add a dust/chip collection chute I can hook my hose up to, but that’ll be an upcoming project. Will wait until that’s completed to do final adjustments to the tables and knives since I’ll be removing the tool from the base several times.


 When Delta produced this planer, the dust collection attachment was an extra accessory. I decided to make my own because I don’t understand this design. Why would you want your hose hanging over the outfeed? Too much risk of the work piece getting jammed on the way out, which is extremely dangerous.