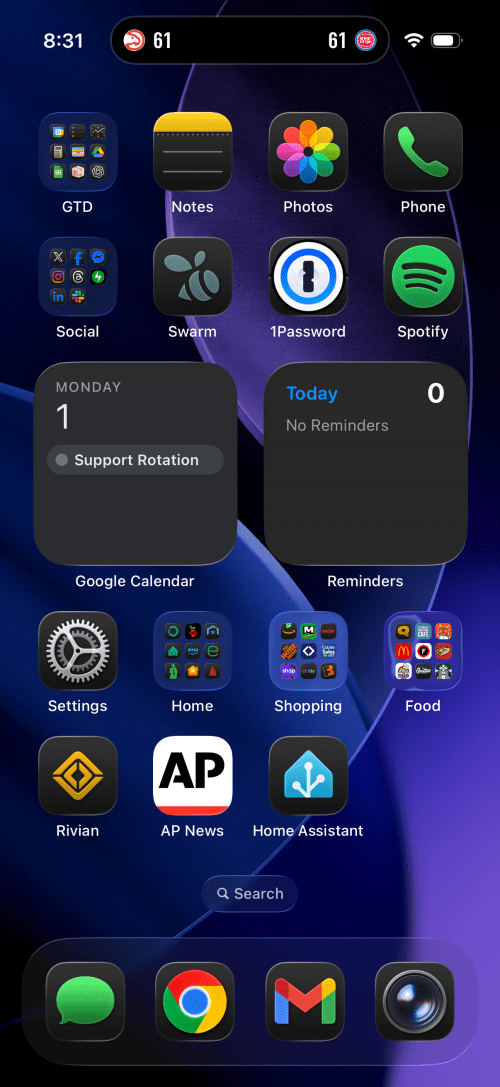
The biggest change I’ve customized it to always use the dark icons, even during the day. The Rivian, AP News, and Home Assistant apps all claim prominent spots on the first page and a few groups moved around.
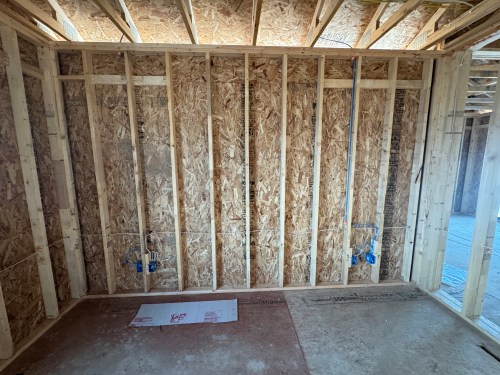
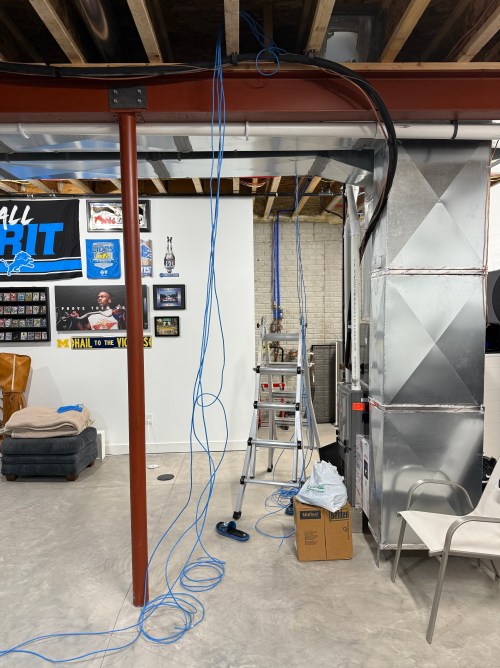
A big part of the planning for our house included Ethernet wiring because I want to hardwire every device I can, saving the Wi-Fi for devices that require it. It’s much easier and cheaper to get everything wired during the build, instead of adding later. I went through several iterations of the plan and in the end I had the electricians do 42 runs of Cat6:
4 jacks in the office
2 jacks in the office closet
2 jacks in the pocket office
2 jacks in the guest bedroom
4 jacks behind the TV
2 jacks in the living room
2 jacks in the dining room
2 jacks in the pantry
2 jacks in the laundry room
4 jacks in the walk in closet
6 jacks in the master bedroom
10 wires to 5 exterior camera locations (1 extra at each location)
They run it all up through the ceiling. I’m guessing that is to keep it away from most of the electrical. Here’s the master bedroom nightstand wiring as an example.
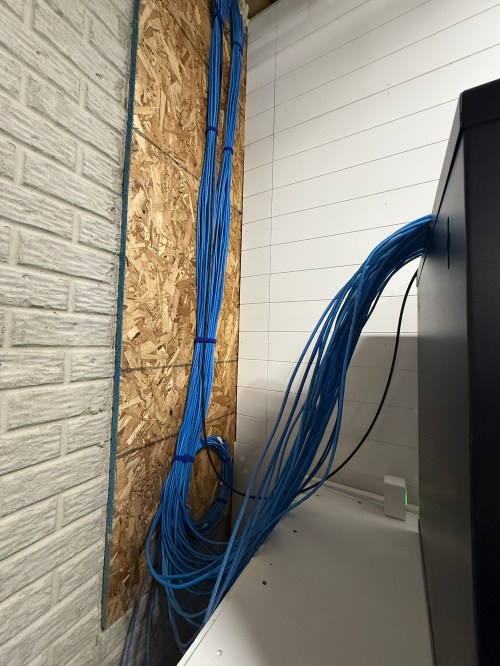
Then all of the cables comes over and down a wall between the laundry room and garage.
Ending at a single location in the basement.
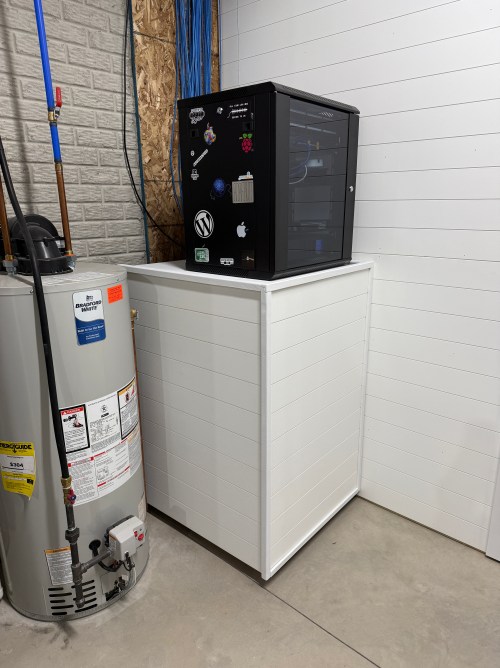
We built a wall (part 1 & 2) and since we moved in back in August I’d had the cable modem and old eero router sitting on top of the network rack filled with new equipment.
Throughout the house, I put port covers on the unused jacks. Here’s how a wall plate looks with one port open and one covered. The covers will help protect the internals and keep dust out.
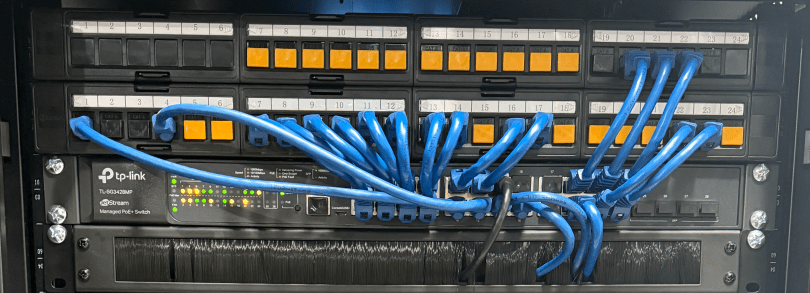
What did I buy for my network? A LOT! Here’s all of the stuff for the rack, cables, and tools.
When it came to the actual networking equipment I took a good look at the stuff from Ubiquiti/UniFi. It’s top of the line, which is reflected by the price tag. I decided to go with TP-Link instead, saving a lot of money.
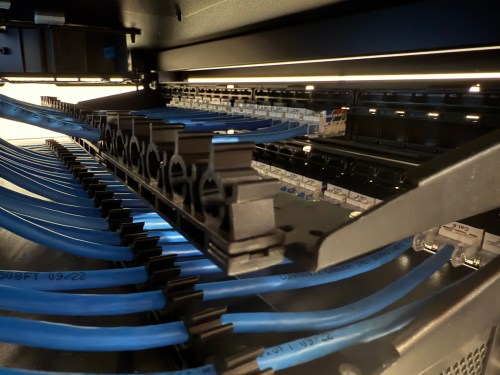
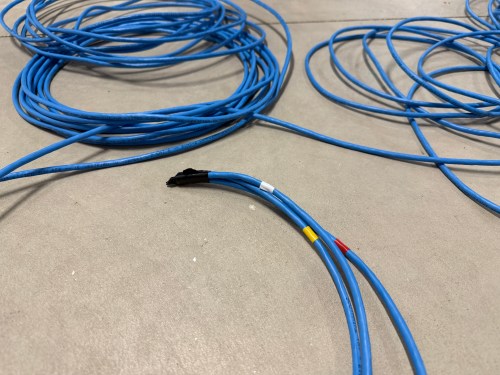
Before I started wiring everything through the rack, I cleaned up the cables.
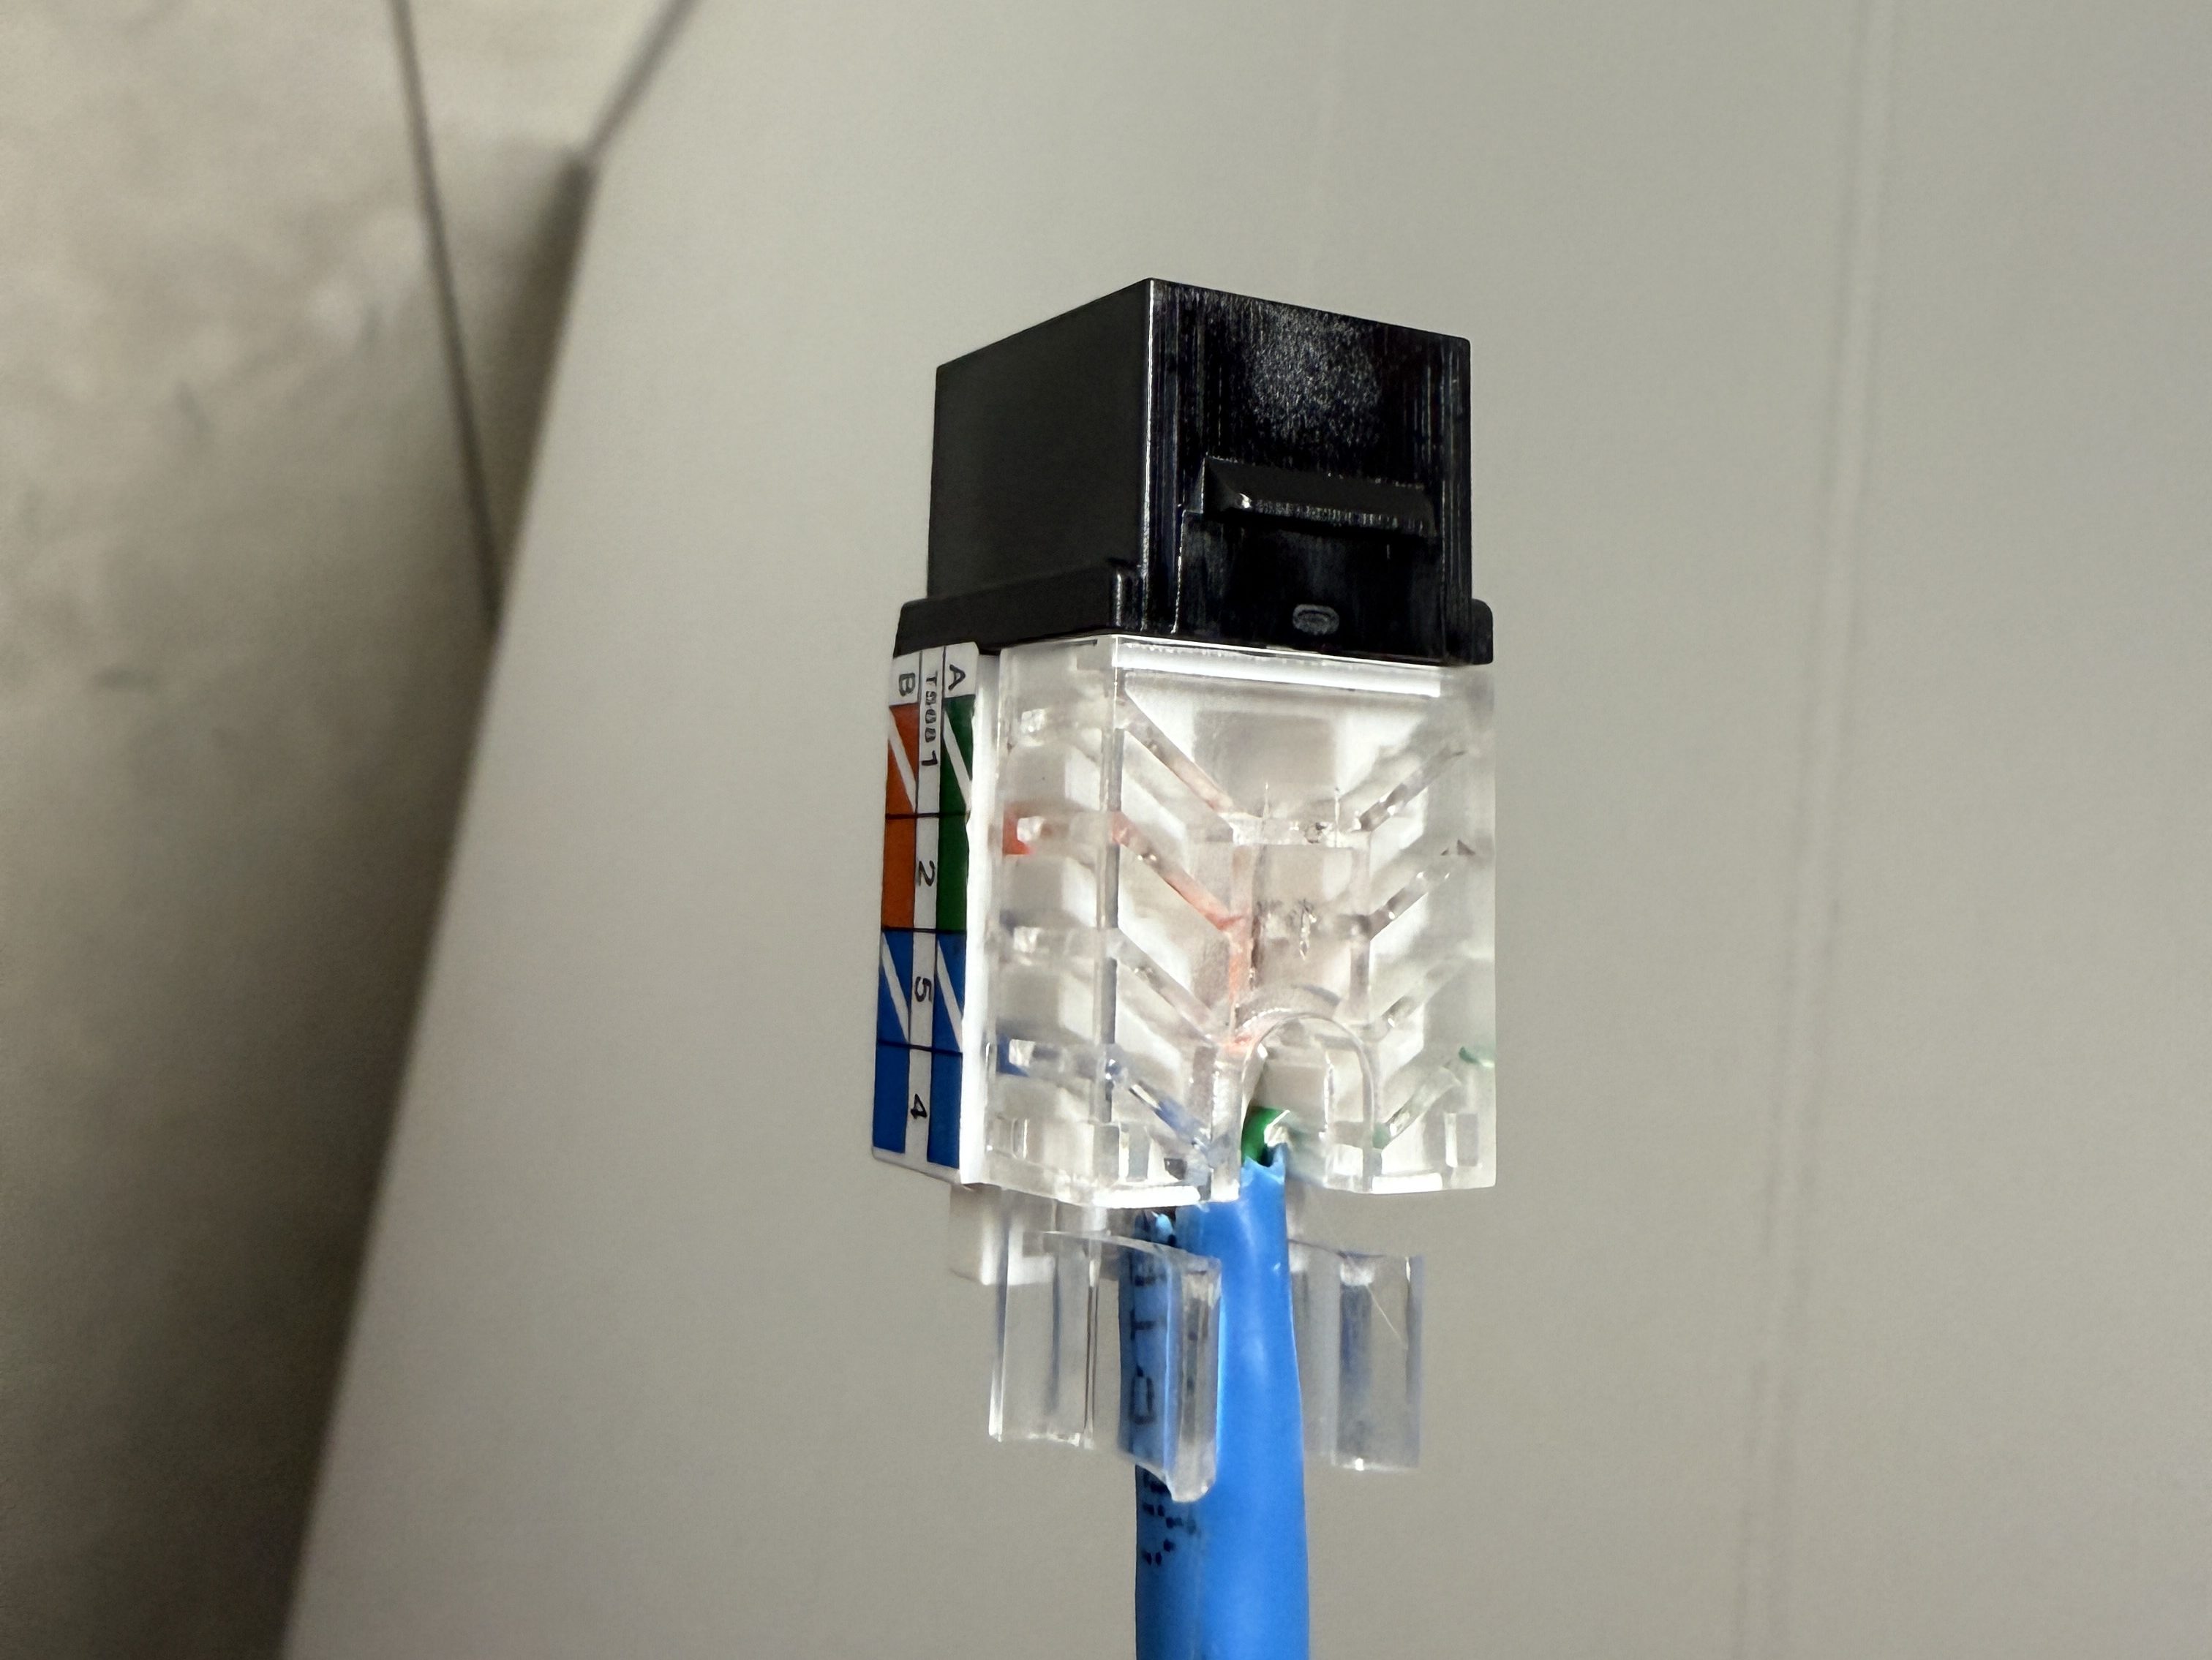
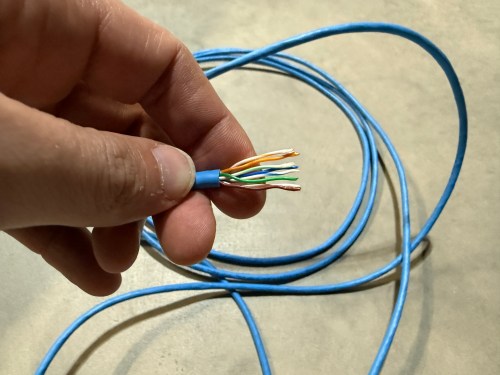
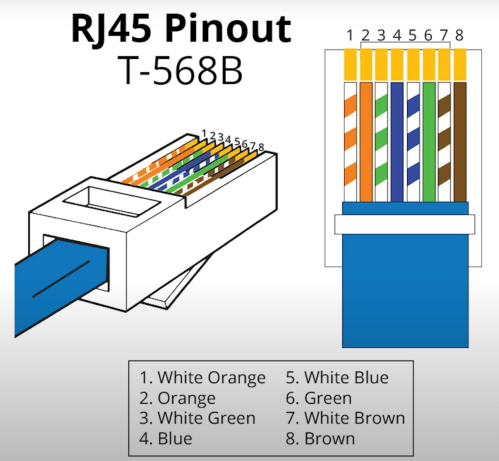
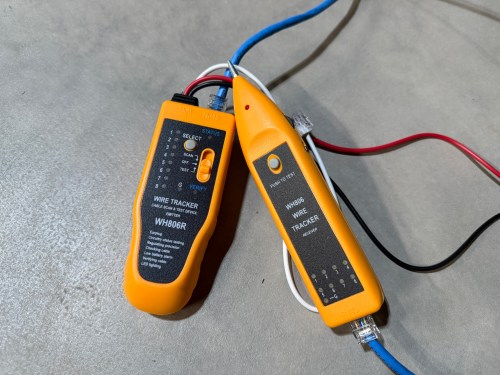
The electricians had done all of the wall jacks throughout the house with the newer T-568B wiring standard, so I followed suit. I learned how to wire the keystone jacks and insert them in to the patch panels.
I’d never done anything like this and it was so much fun. By the end, I was pretty quick with each keystone jack. I highly recommend the Everest 45° ones and the tool for it. The basement needed some Ethernet ports for the golf sim, so I ran four new cables from the rack. I installed a couple of electrical boxes in the ceiling and wired jacks there.
I also needed a custom length Ethernet cable to run from the ceiling jack down to the gaming PC. I’d tried putting RJ45 jacks on the end of an Ethernet cable or two a long time ago and remember it being almost impossible. After watching a quick YouTube video (even though I don’t have pass through connectors), I was able to put both ends on my new cable without a problem and it passed the test.
Then I was able to use patch cables to connect ports on the patch panel to the switch as well as hook up the cable modem, Pi-hole Raspberry Pi, and TP-Link equipment. There’s also a Dell Micro in there, which I’ll cover in a later post about smart home.
When I tried to access the Omada controller I couldn’t bring up the web interface with Chrome on my Mac. After trying a bunch of stuff I checked from my iPhone and it worked. I tried Safari on my Mac which also worked. It turned out I had always prevented Chrome from accessing my local network. I flipped the switch in System Settings and the interface loaded.
At another point I accidentally disabled all of the ports on the switch. The UI splits the switch ports across three pages, and on page two I had clicked the button to select all, unselected a port, and disabled the nine other ports. I quickly realized it disabled 27 of the 28 ports. I was so pissed! Every other UI I’ve ever used will only select the items in view when you click the Select All button, but not the Omada Controller software. In order to get back in I had to access the switch via the USB console, reset the switch to factory settings, and start over.
I’m running four VLANs, named Default, Guest, IoT, and nIoT. IoT is for my Internet of Things (smart home) devices that need to access the Internet and the “n” in nIoT stands for “not” since I don’t want them to access the Internet. The Default and IoT networks are set to get their DNS from my Pi-hole server, which blocks ads and other malicious domains.
Each VLAN has a matching wireless network. The Guest Wi-Fi is set as a guest network, which automatically prevents any device from accessing another. The wireless networks for IoT and nIoT are only set to use the 2.4 GHz band since most of the devices will not work on 5 GHz.
I added mDNS rules for Printers and AirPlay devices from the IoT network to the Default network.
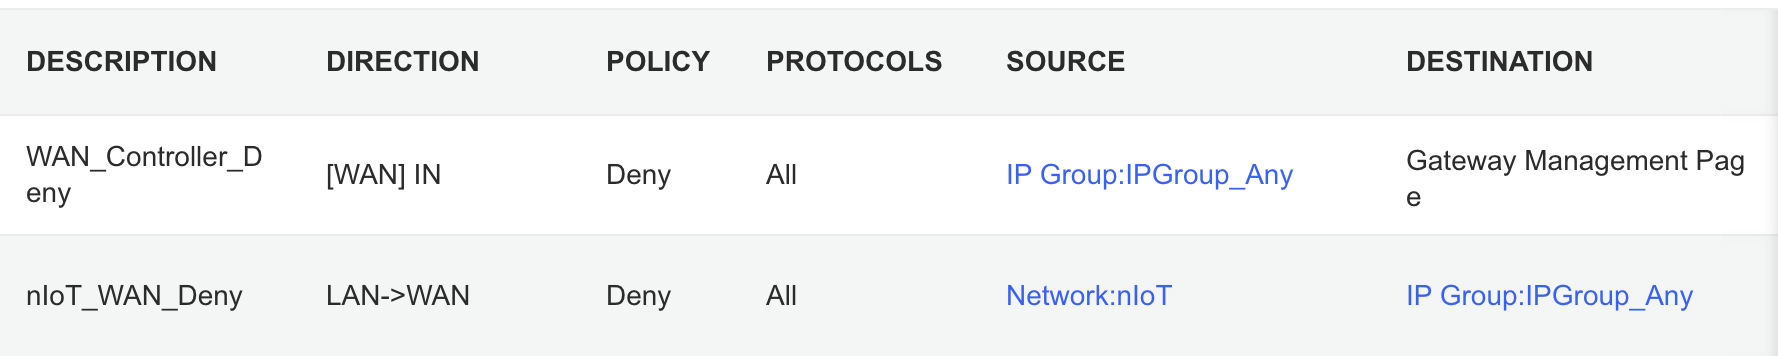
It took me awhile to figure out the ACL rules. I have two for the Gateway. The first prevents any outside IP from accessing my network management page and the second prevents the nIoT network from accessing the Internet.
I ended up with six rules for the switch, since the default behavior of the Omada stuff is to permit everything. With my Pi-hole server on the IoT network I had to allow it’s IP to access anything on the Default network (this should probably be limited to specific ports). I had to allow some ports from the camera IPs to access the Default network and I had to allow some ports from my Home Assistant server to access the Default network. I may find out I need to adjust those ACLs, but more on those smart home aspects in a future post. Then the IoT and nIoT networks are denied from accessing Default and a bi-directional rule prevents the Guest network from accessing any other network.
Seems to be running pretty well. I have some smart home stuff on the network, but haven’t connected any of the light switches yet and have a lot of Home Assistant configuration to do. Originally I didn’t have an access point in the basement, but after a few days realized it was necessary and added one. Here’s a view of the network topology, automatically generated by the Omada controller.
If you upload a floor plan and place walls, the software can even run a wireless coverage simulation. The house has great signal and the yard should get good connections as well.
Power over Ethernet is pretty sweet. It’s so nice not needing power cables for the 10 devices with PoE support.
Time to finish setting up my server and smart home devices. Watch for an upcoming post with all of the details.
Our stairs are up against the foundation, giving us a big wall facing the rest of the basement. We figured we might as well turn it in to a collage and we have a pretty good start.
My favorites are:
The display case with a lot of my Barry Sanders football card collection.
The golf bag is an old Ram one we bought with clubs from an estate sale. Brandi cleaned it up and it makes a good display piece.
Coors Light was my beer of choice through college and my 20s.
Do I really need to say anything about Mountain Dew?
GO LIONS!
It’ll be cool to keep filling up the wall and then wrap it around the corner to the door and bathroom wall. We definitely need to pick up something Michigan and put up some personal photos.
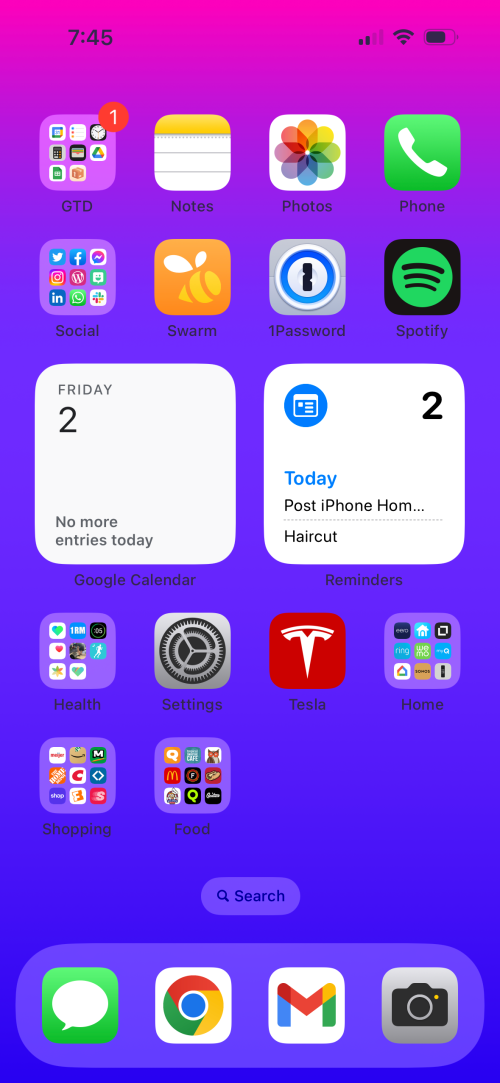
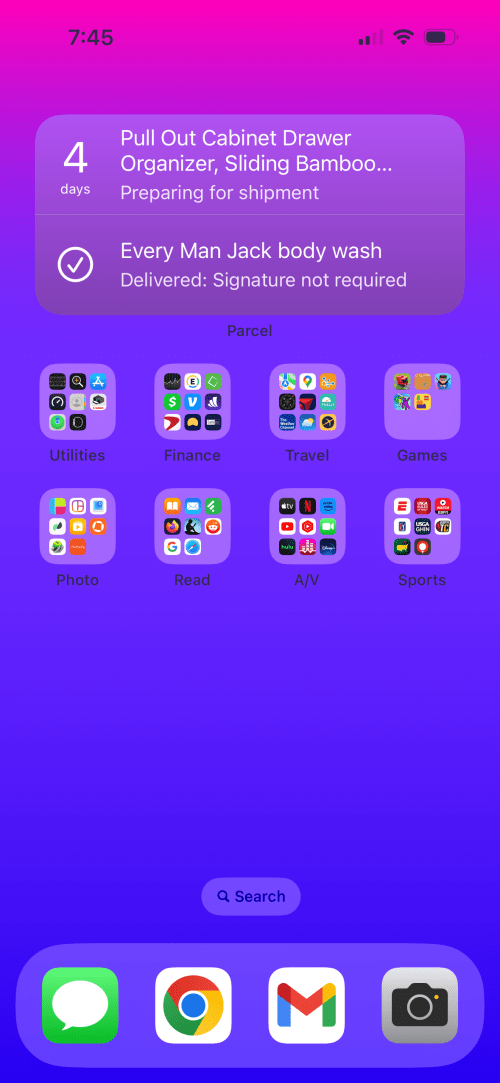
Not much different than last year and I think I’ve deleted more apps than acquired new ones. The Lions app has gotten a spot on the home screen. Is anyone triggered by the battery status?
This year I switched from Golfshot to a Shot Scope watch, but since it’s out of golf season, the app moved from the home screen in to the Sports group. I think the only other big change is the wallpaper.
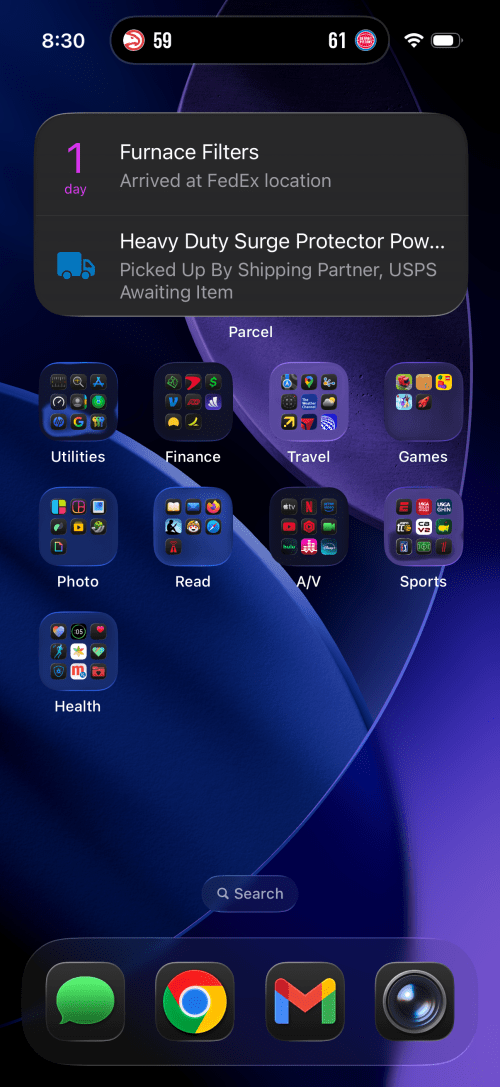
Not shown here, but during the golf season, the Golfshot app does move over to the bottom row on screen 1. The noticeable changes this year are:
New wallpaper.
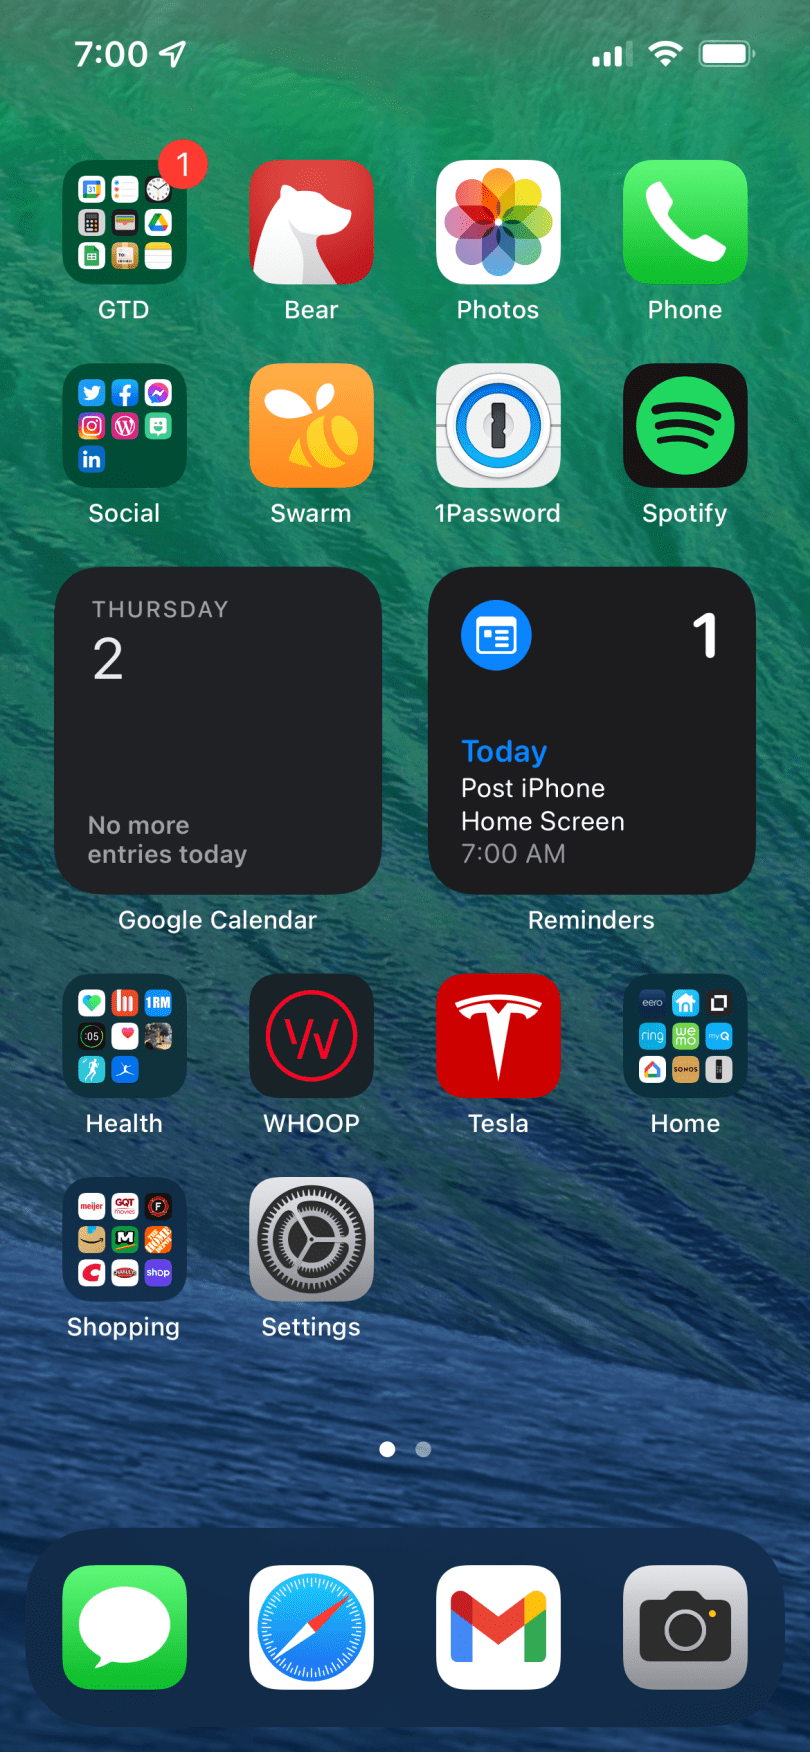
Switched from Bear to Apple Notes since Brandi and I share several notes to organize and plan. It was easier for me to stick to one app instead of swapping between the two for different use cases.
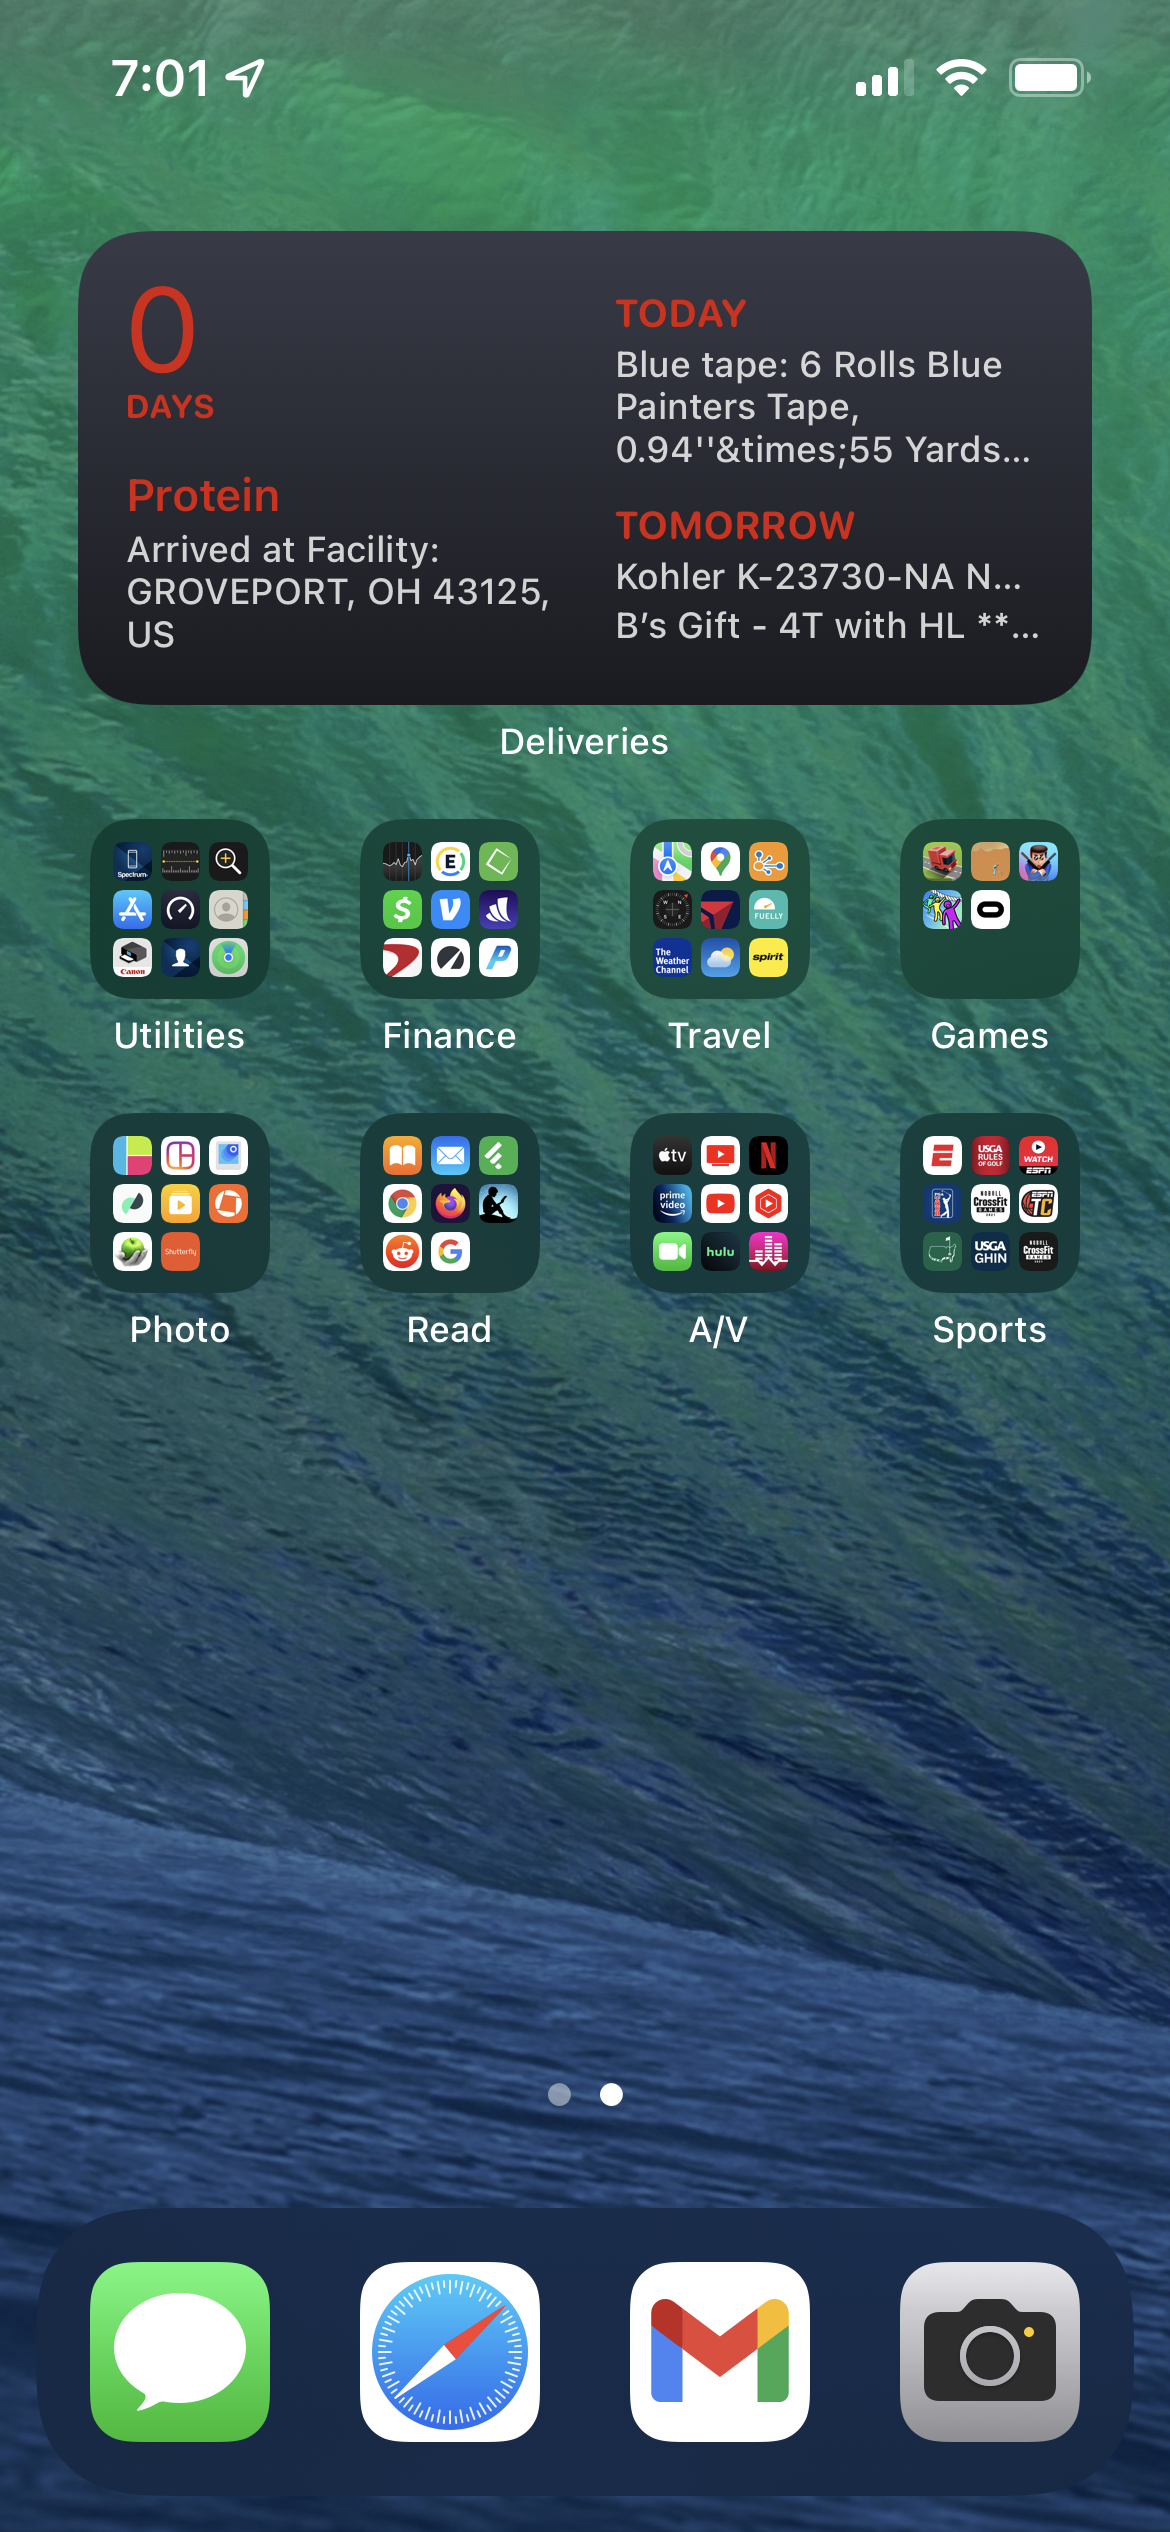
Changed from Deliveries to Parcel for package tracking.
Stopped wearing a WHOOP band, so I moved the Settings app there.
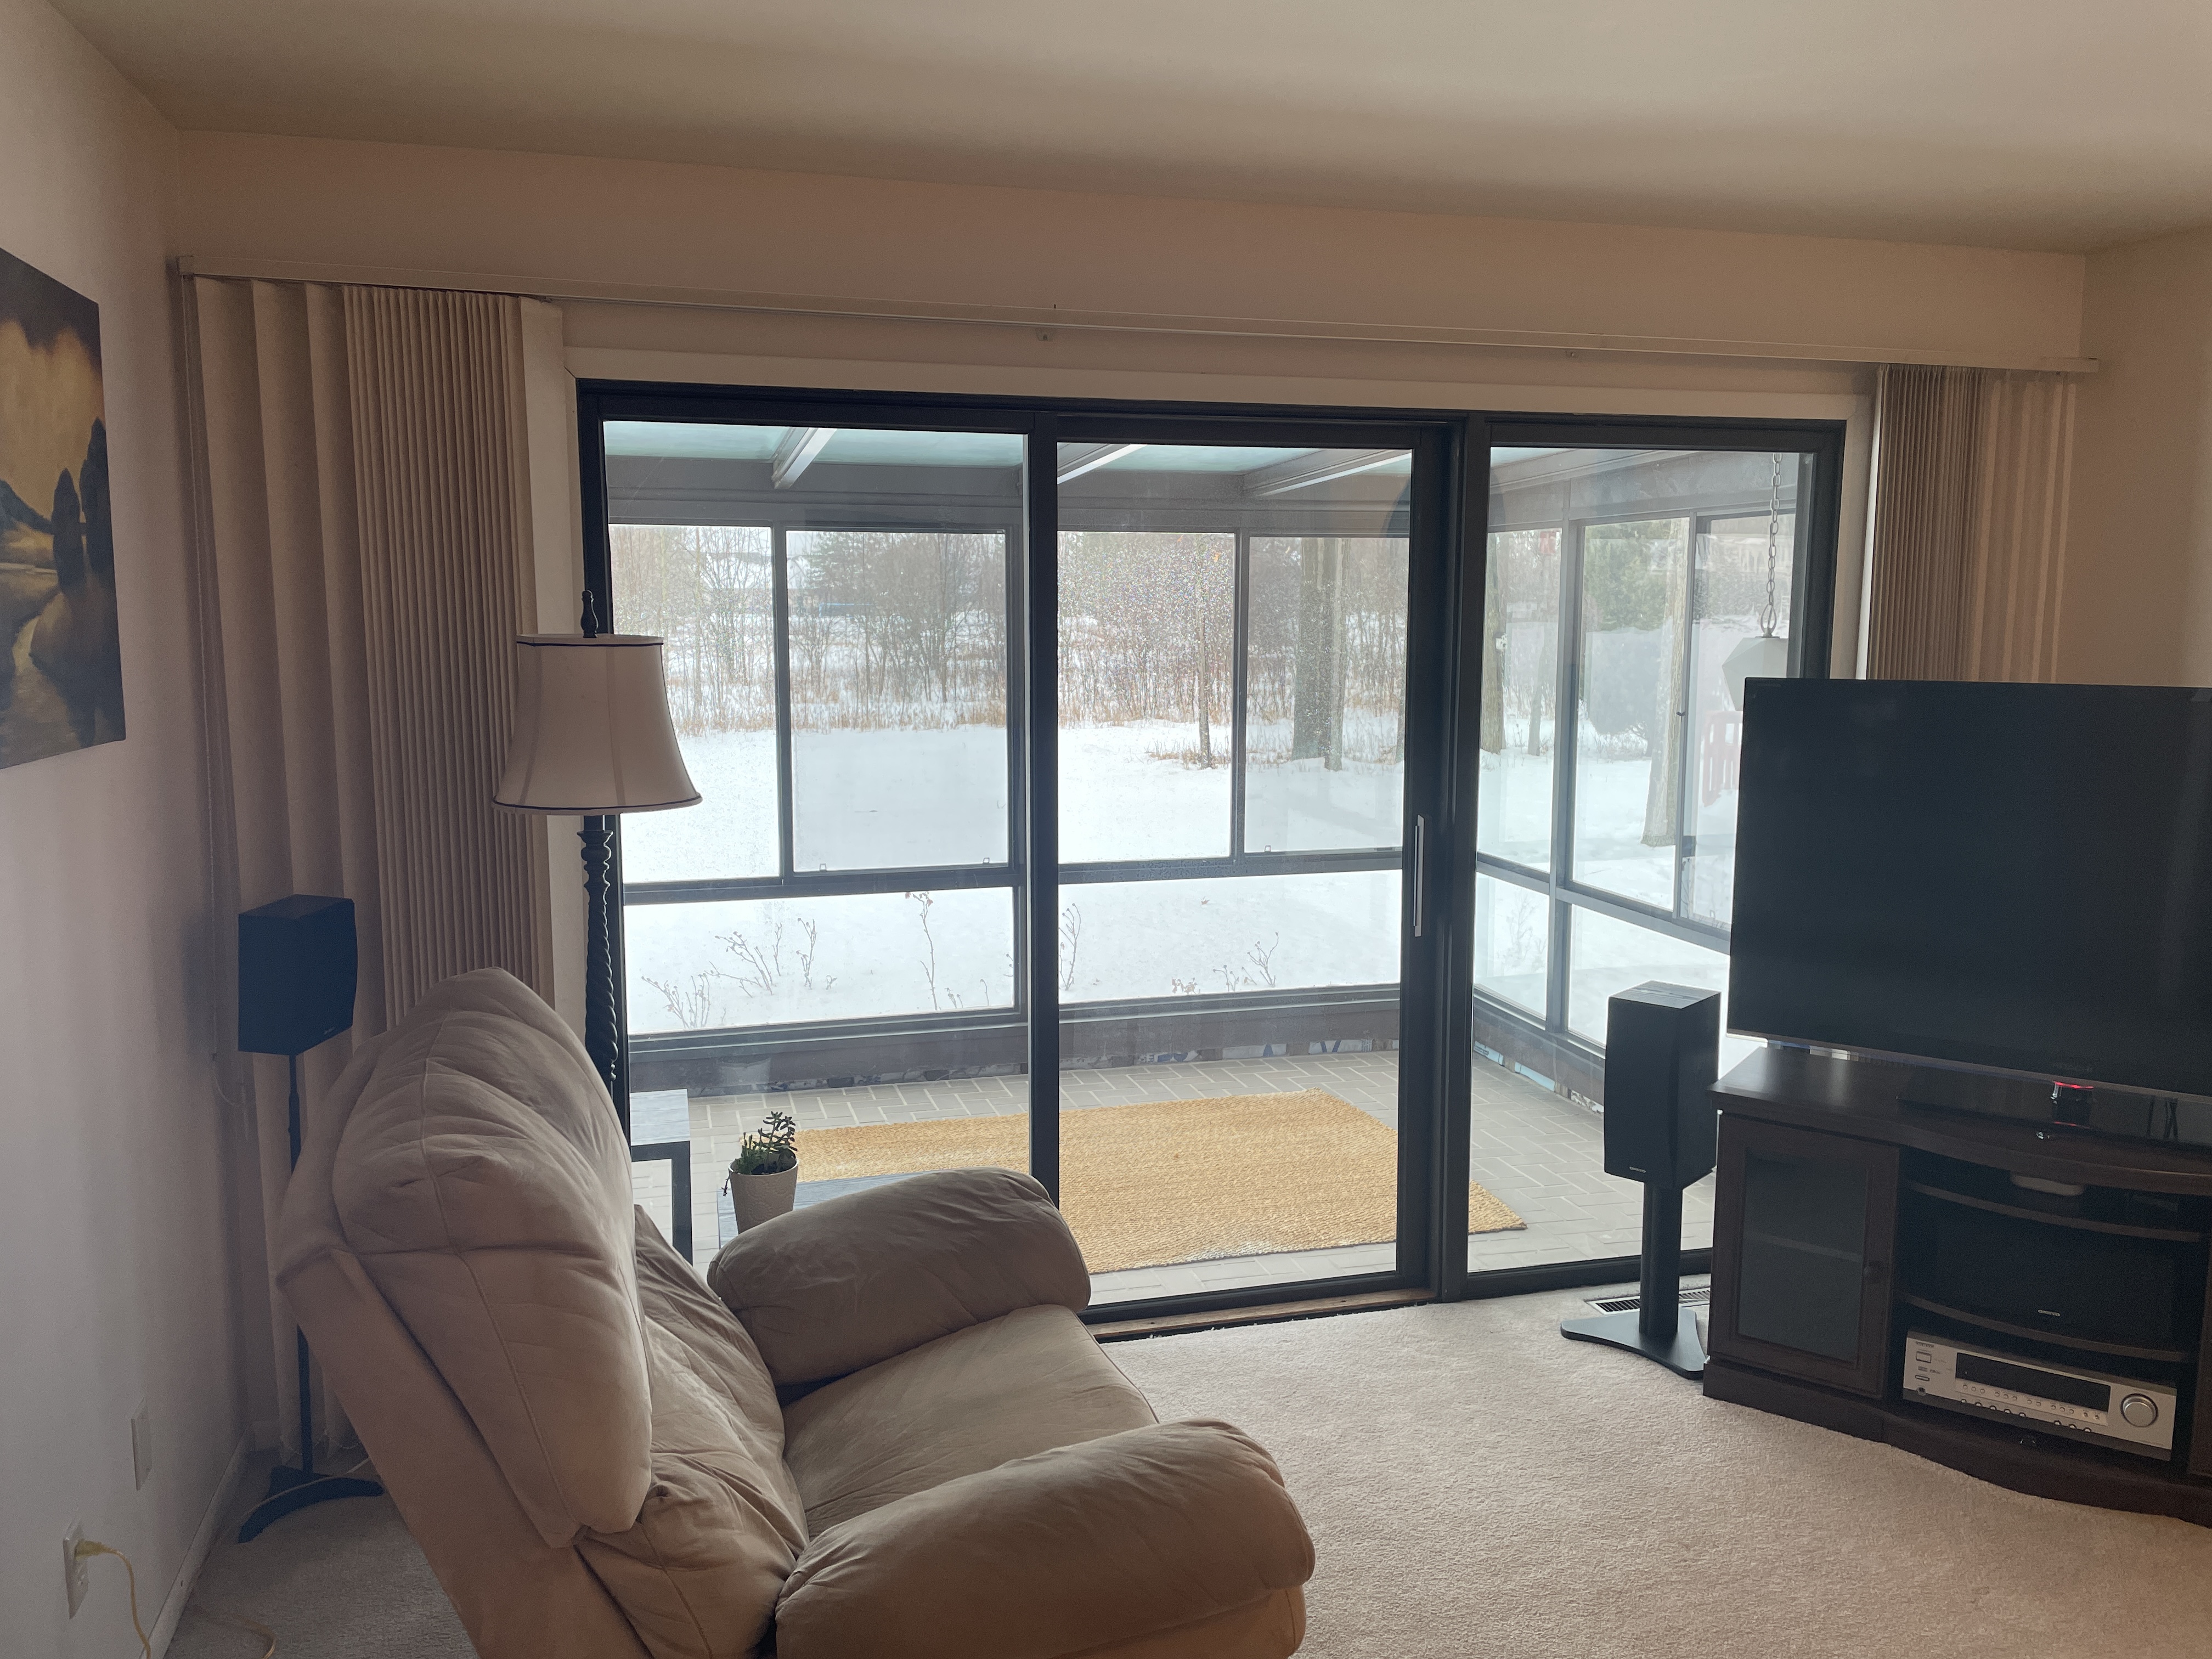
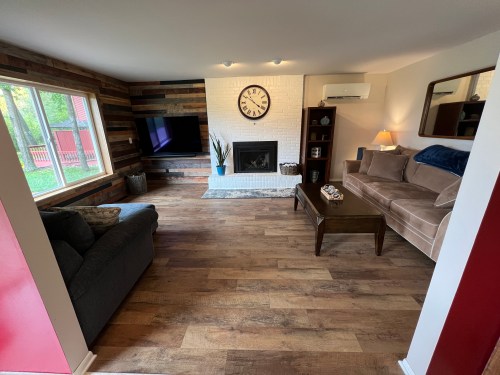
Last week I was finally able to finish the living room project, before going to Puerto Rico last week. My three month sabbatical started, which gave me a lot of time to work on it. This was the final big phase of a living room remodel. Here are the before and after pictures.
BeforeAfter
Actually that’s not a true before picture because there used to be an old A/C unit built in to the wall. Below is the only picture I could find, which shows the cover that was over it.
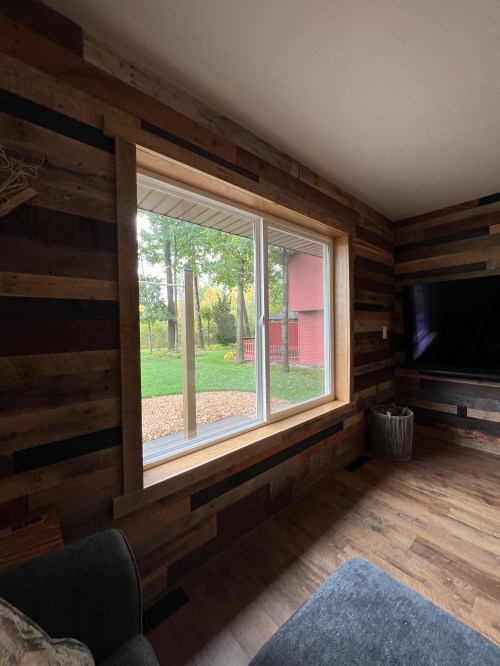
Last July or August my Dad and I removed the unit and patched up the wall. Then I had three Mitsubishi mini-splits installed around the house. In April, my Dad and brother came down for a weekend. We took out the sliding glass doors, removed the sunroom, and installed a 5×6’ window.
Bought a new loveseat, the Sonos Arc soundbar and Sonos Sub, and two IKEA bookshelf speakers (Sonos compatible). I’ve put several other speakers throughout the house as well and am really enjoying the Sonos system.
I found an awesome mirror on Facebook Marketplace, which had been in an old farmhouse for over 40 years. It’s in really good condition. The room was really starting to come together.
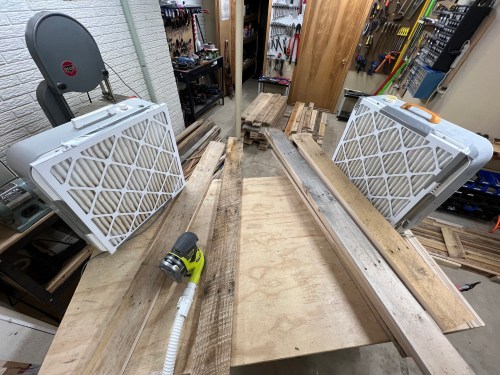
It was several months before I could spend more time finishing the room though, because I had to fix up the outside wall of the house and build the outdoor gym area. During the peaks of the pandemic last year, my Dad collected and processed a lot of awesome pallet wood, which he gave to me.
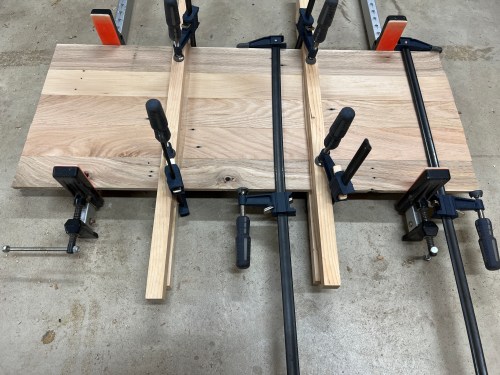
I sorted through it all to take out the really twisty stuff and to organize it in to wide and narrow boards. Then I jointed an edge of everything, cut the ends square, ripped to two common widths, and did a rough surface sanding. I wanted to bring out more of the wood’s character, while keeping it rough.
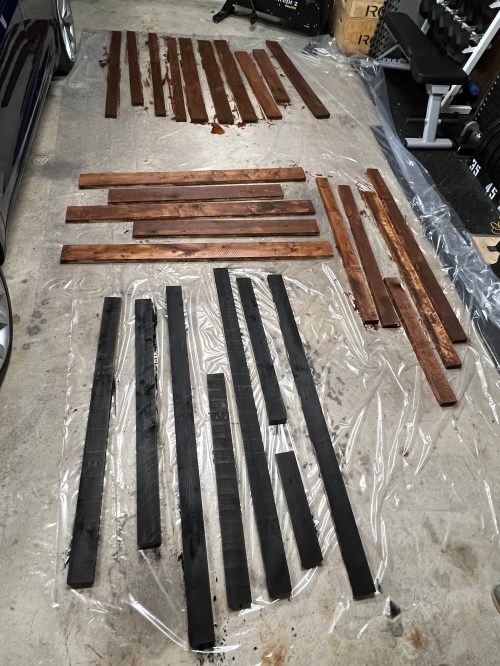
Brandi helped me pick out some stains and we stained about a third to a half of the wood.
After seeing how long it took to stain this stuff I bought the HomeRight Super Finish Max HVLP Paint Sprayer. I laid plastic out on the driveway and gave all of the wood three coats of water-based polyurethane on the face. It only took about 10 minutes per coat, which saved hours of time.
The next day I started at the top of a wall and tried to create a random-ish pattern as I used an 18 gauge nail gun to tack boards to the plywood walls.
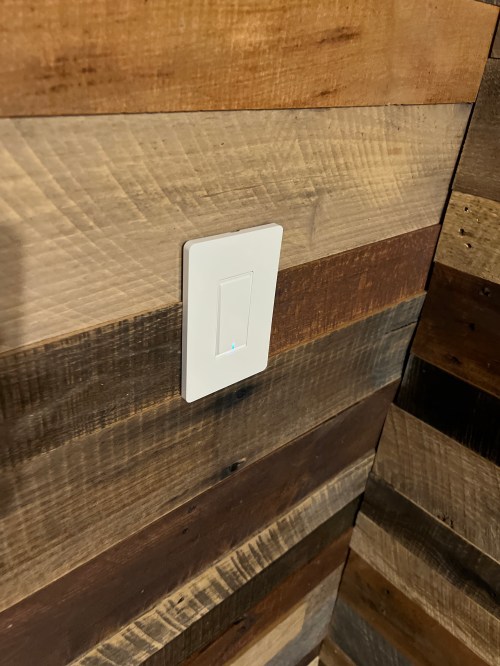
I continued the process for the second wall. Then I was able to finish the light switch and outlets. I bought a 65″ Sony A80CJ Series 4K OLED TV from Costco and hung it on the wall with a full-motion mount from Harbor Freight. The mount was easy to use and will allow us to keep the TV pointed directly at the loveseat, where we normally watch TV, or rotate it towards the couch when we have company over. The soundbar hangs under the TV with the Sanus WSSATM1-B2 extendable soundbar TV mount, which was also easy to use.
Now I was able to finish off the floor trim behind the loveseat. I also picked up some rustic looking quarter round for the pallet walls, which blends in well.
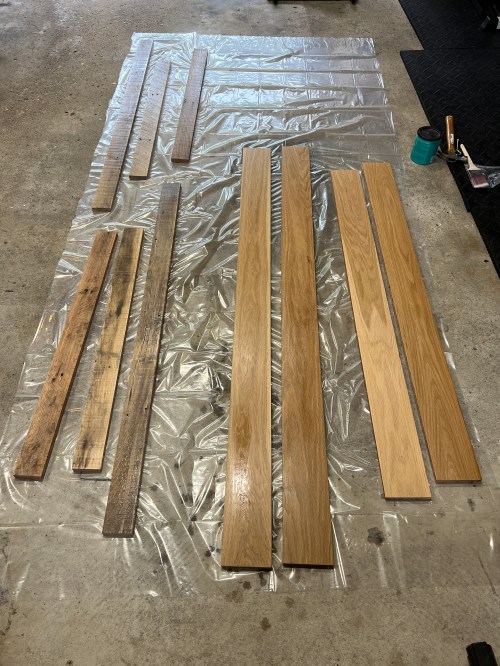
To frame in the window, I processed some old 5″ wide oak flooring and gave it three coats of the same water-based poly. For the trim, I used some of the leftover narrow pallet wood.
I really love how the room turned out!
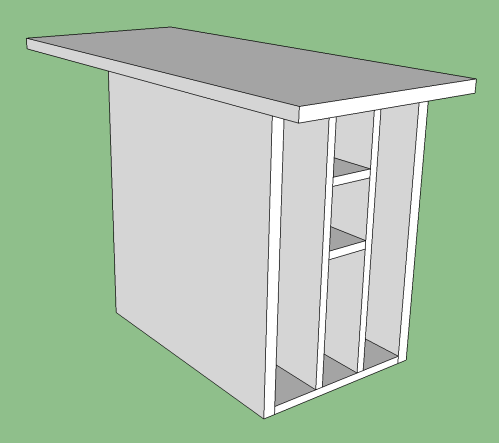
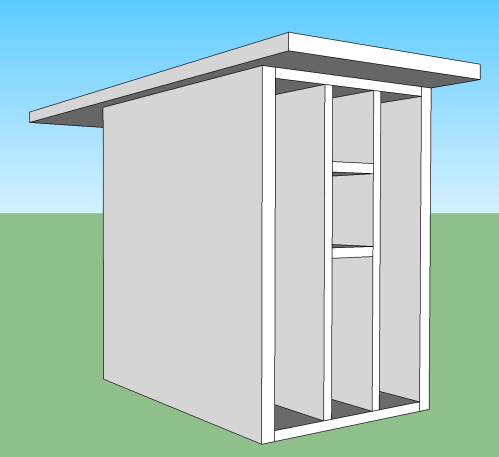
One other little touch was building a shelf/cubby/table next to the loveseat. I wanted a place to put the left channel speaker, store laptops, and set drinks or snacks. My original idea was to have a couple of horizontal slots for the laptops. I was discussing the space limitations of the area with Brandi and she had the idea to make vertical slots instead, which worked out really well. Here’s the SketchUp model.
For the top I processed more pallet wood, glued it together, sanded smooth, applied stain, and did three coats of wipe-on poly. For the cubby unit I used whatever scrap plywood I could make work and painted it black. I didn’t care much about the base since nobody will ever see it unless they’re really going up to inspect it.
I’m so glad to have this project finished and we’re loving the way it turned out. I do have one more thing I’m working on for the wall above the loveseat (done now!) and hope to finish this week or next. Then I’ll be spending the rest of my sabbatical to remodel the kitchen and dining room area.
I hadn’t started a fire in my living room in over a decade.
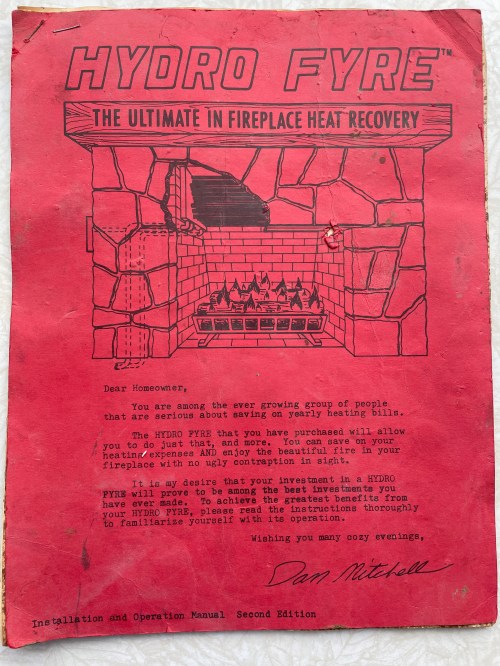
It wasn’t an ordinary wood burning fireplace though. My house has a boiler and the previous homeowners had installed a heat recovery system, called Hydro Fyre, which fed the heat from the fireplace back through the boiler and out to the rest of the house. It sounds good in theory, but with the number of pipes running over the top of the fire, it seems like it was a chimney fire waiting to happen. Look at how loaded with soot everything was!
Original documentation
Pipes above the fireplace
Pipes removed
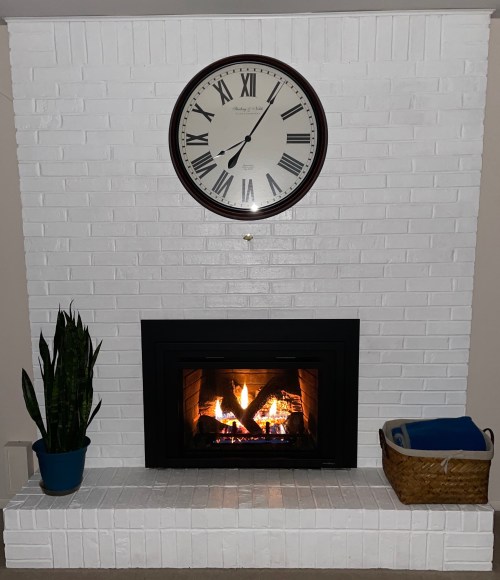
After they removed the old system and cleaned things out, a direct vent gas fireplace insert was installed. I got the Escape model with the black Firescreen front, made by Heat & Glo. The interior panels are a patented FireBrick technology, which produce up to 25% more radiant heat than a metal interior. Even on the lowest fan speed it really throws out the heat! A remote control makes it easy to change five flame heights, four fan speeds, and three levels of ember illumination. It’s a slick unit.
I love how it transformed the look of the entire room. Why did I wait so long to get this?
I’ll call this phase two of a living room remodel after getting Mitsubishi mini-splits last summer. Several more projects are planned whenever an item arrives, which is supposed to ship near the end of April.
The big change this year was moving Facebook and Twitter in to the Social group, creating an extra step, which has helped limit my usage. I think it’s time for a new wallpaper.