DIY Walnut & Oak Desk with Adjustable Base

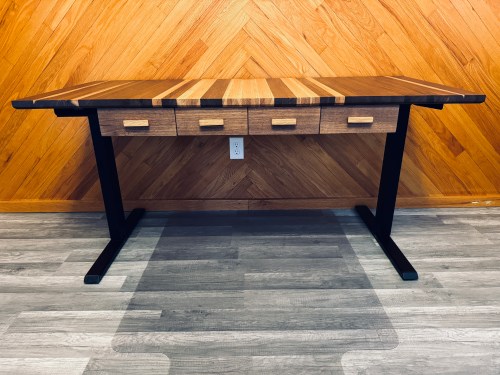
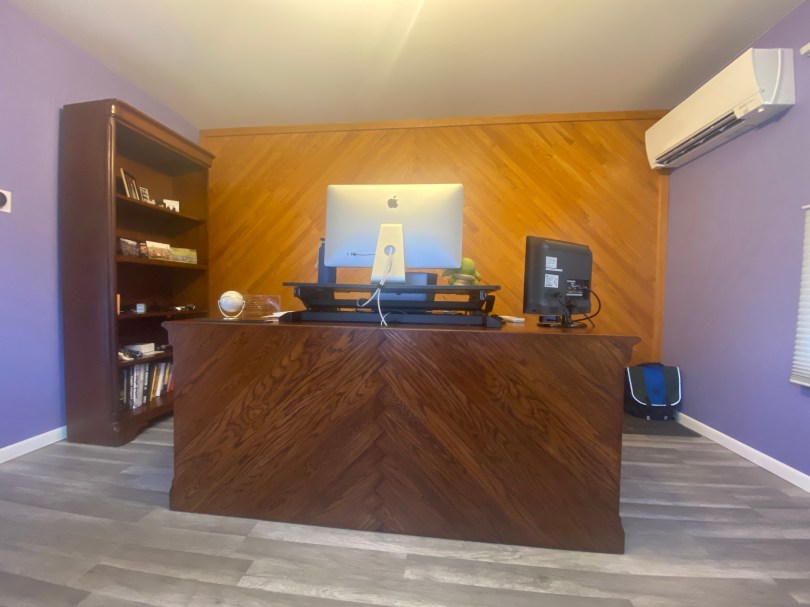
It was time for a new desk for my home office. I ordered this TOPSKY desk base on Amazon for $220.99.

Over the years, without success, I’ve tried to stand some while working. Hopefully a motorized adjustable base will encourage me to stand for certain tasks and even if I can do a couple of 20-30 minute sessions each day it’ll be a big help.

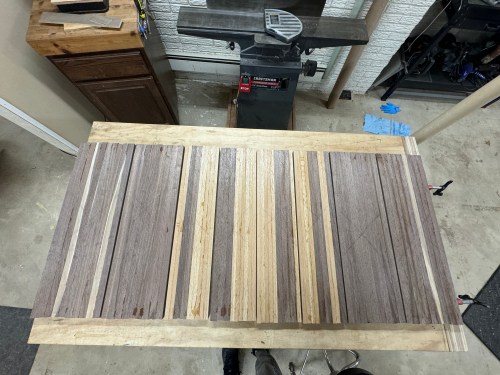
I got to work processing walnut boards and white oak flooring.

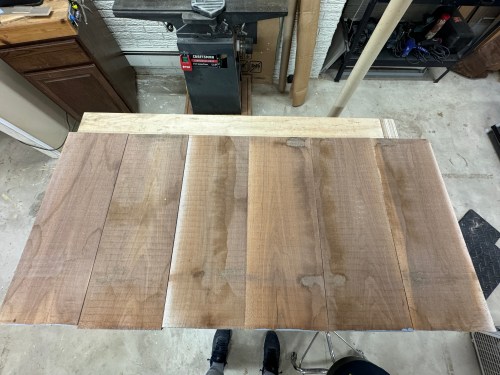
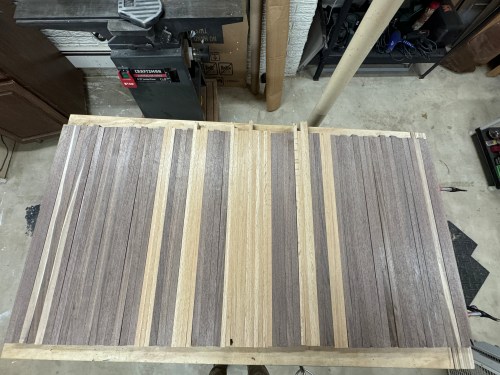
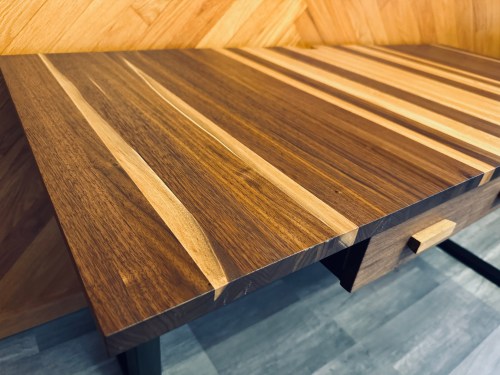
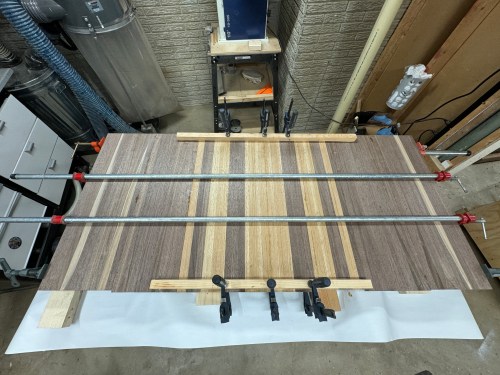
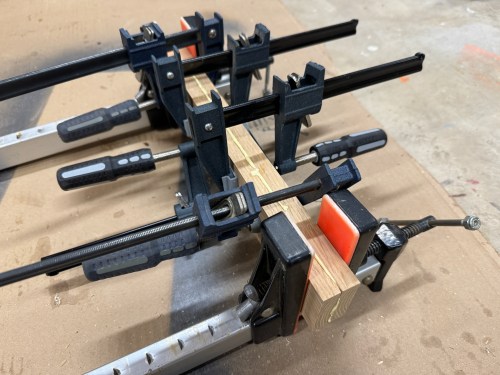
There was a lot of jointing, cross-cutting, ripping, planing, more ripping, and trimming. I’m excited to use that box of off-cuts to make an end grain cutting board or two! I felt like the key to this build was going to be the glue-ups. I started with sections of 9-10 pieces and ended up with eight of those.

I ran each section through the planer, with the help of some shimming for a couple, to flatten them. I made a temporary sled to square up the sides to the faces.

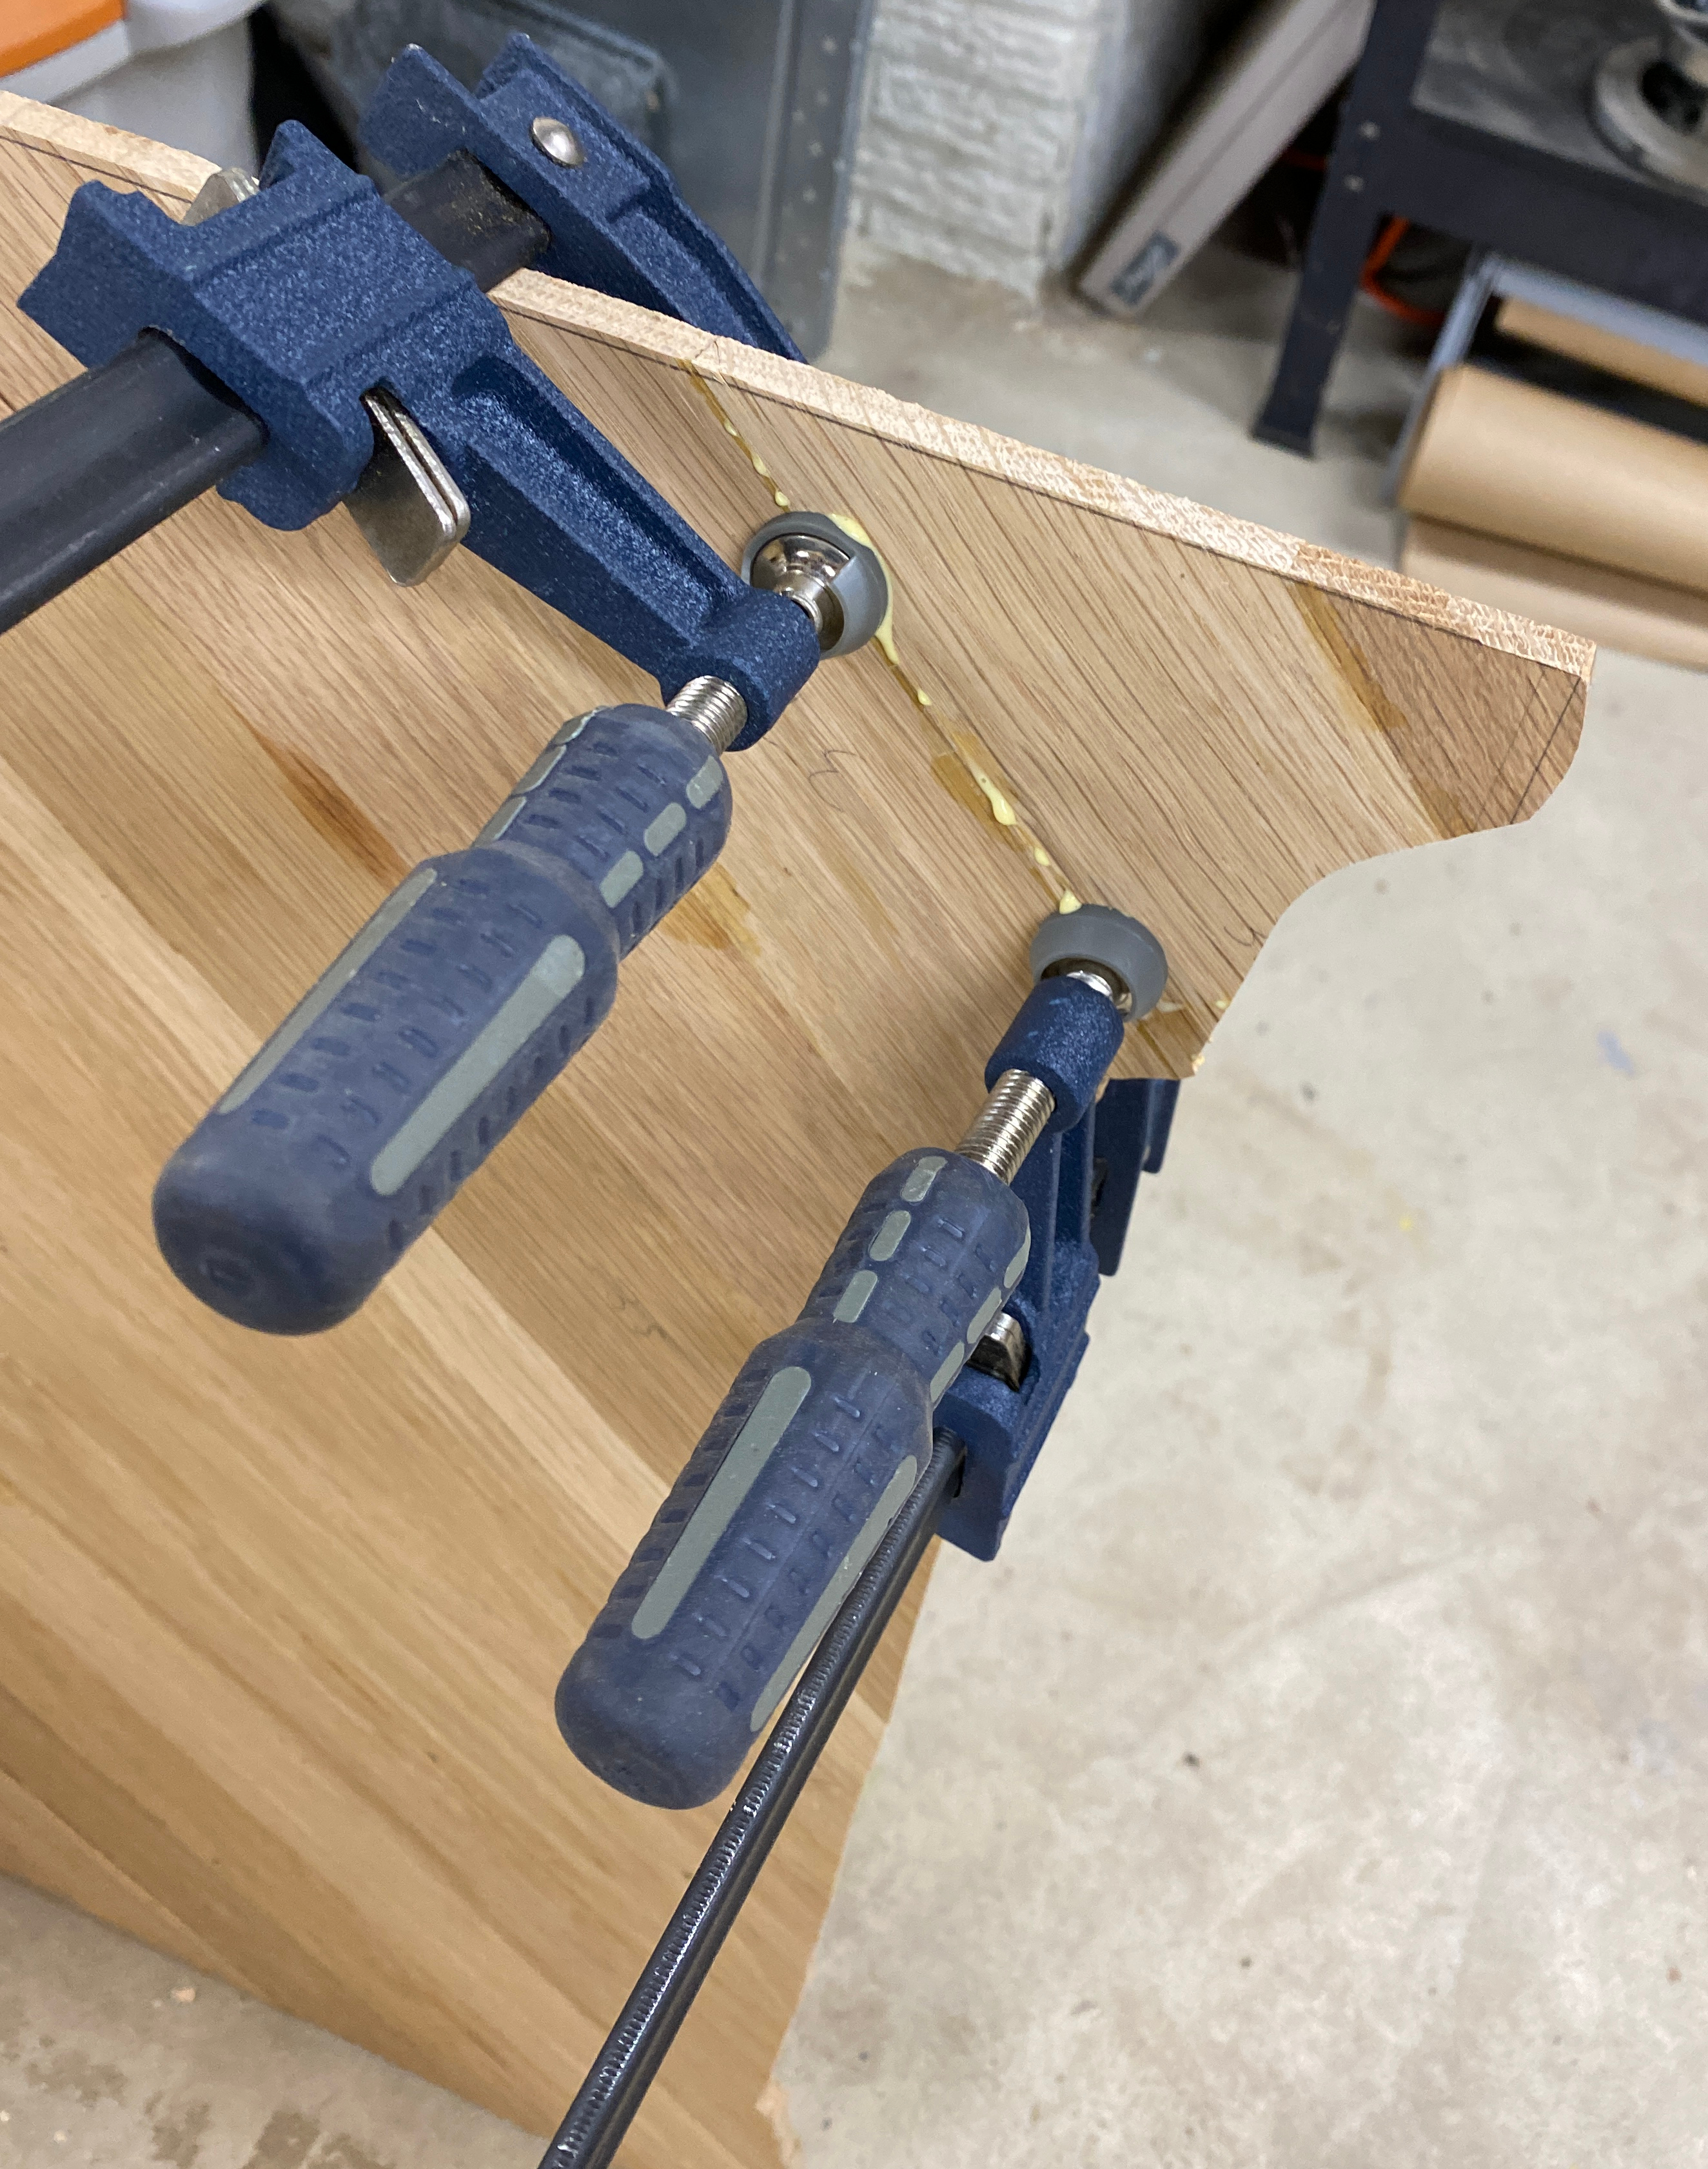
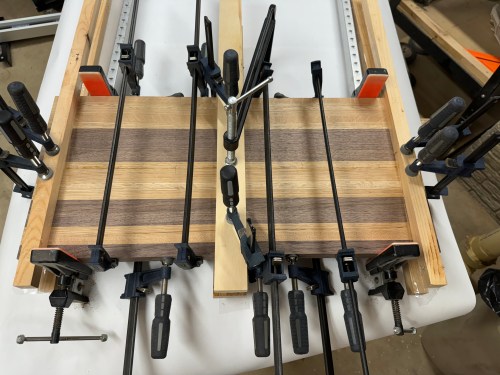
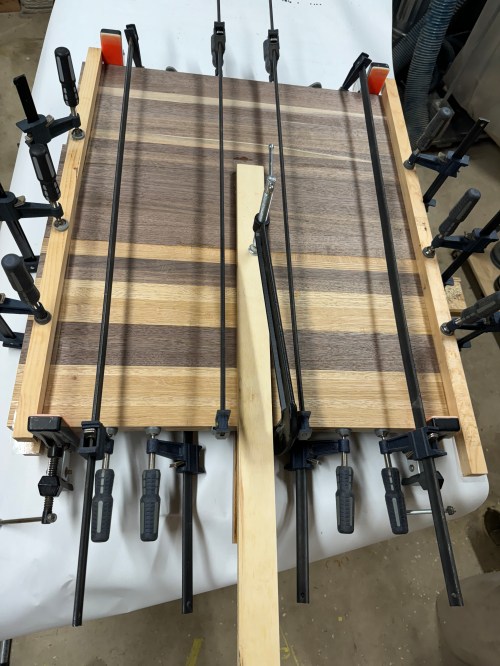
To help assemble the sections, I used a couple of biscuits on each glue joint.

I glued up two sections at a time, which gave me four bigger sections. Then I glued up two of those at a time and one final glue up.

I drilled and put in all of the bolt inserts, which will attach the top to the desk base.

I took three passes with the router to put a big chamfer along the bottom edge.

With a jigsaw, I rough cut out a spot in the back to pass cables through. Then I did some sanding to smooth it out and added a chamfer with the router. Here is it, viewed with the desk bottom facing up.

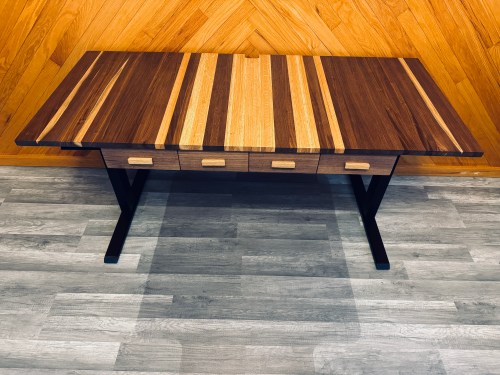
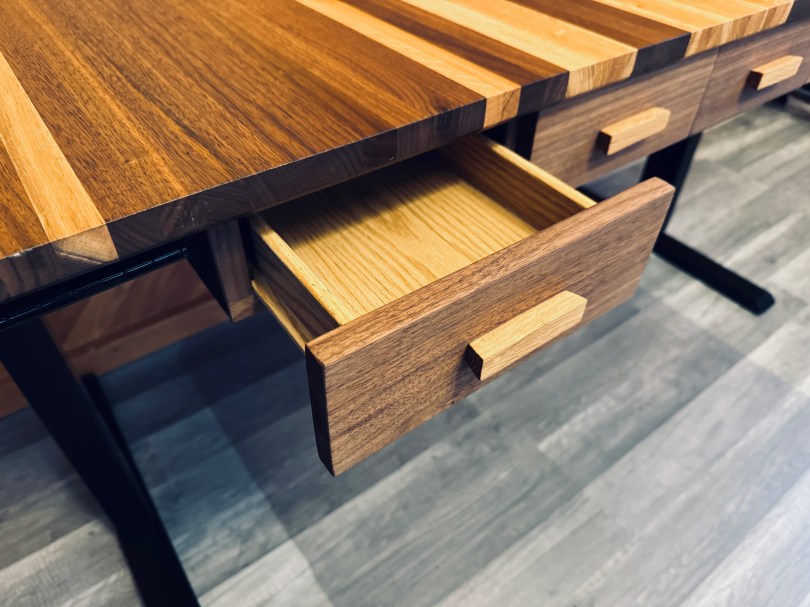
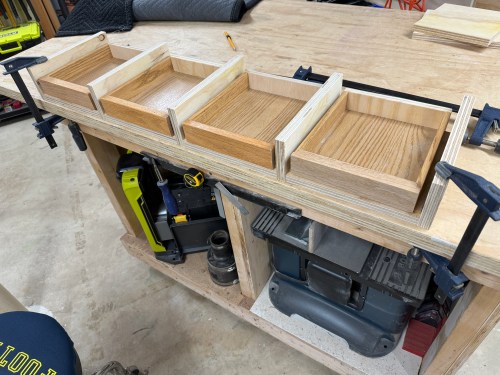
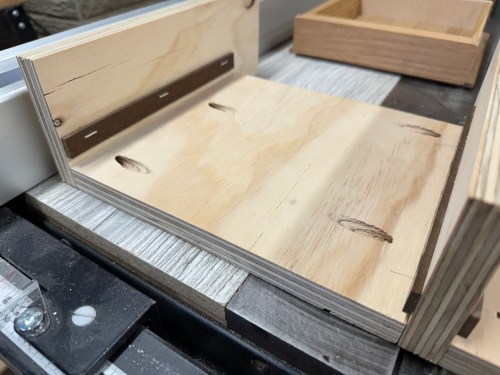
Due to the base’s cross support, there’s was limited depth for drawers, but there was width for them. I took some old kitchen cabinet drawers, chopped them in half, and closed them up with scrap plywood.

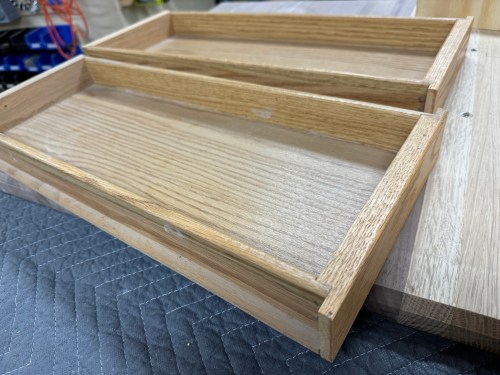
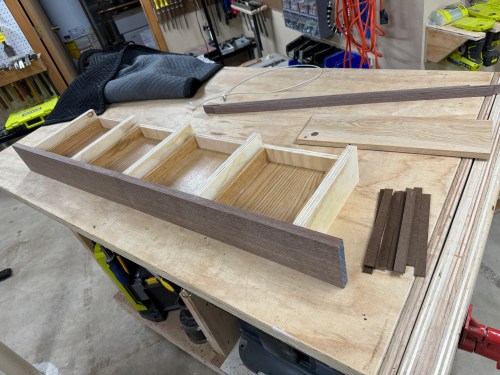
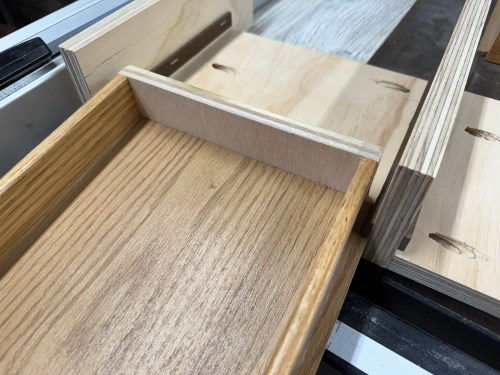
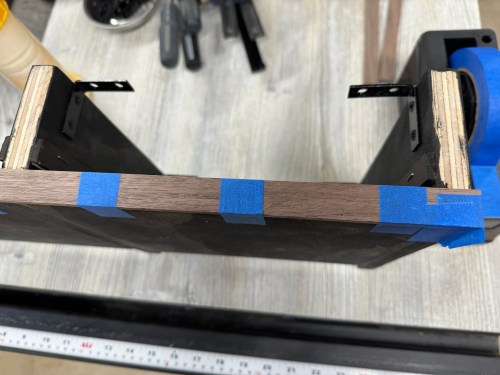
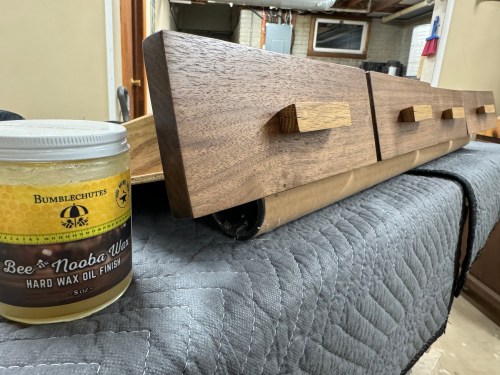
Then I worked on what I’m calling the drawer box even though it’s not a box. I also cut top rails from hardboard and oversized drawer faces from walnut. Grabbed strips of walnut for face-framing and glued together pieces of oak to make drawer pulls.

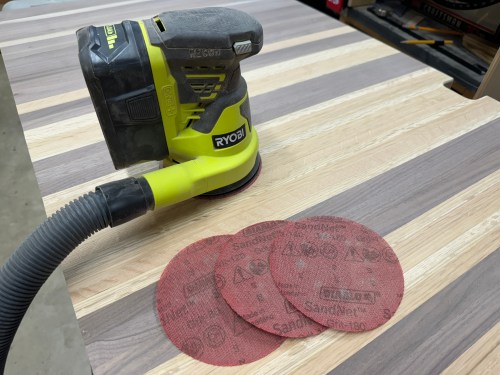
All the sanding! I went through 80, 120, 180, and 220 grits on the top and sides of the desk.

Time to put some finish on, which is always a favorite step to see how it’s really going to look. It was my first time trying out a hard wax oil and I used Bee Nooba Wax from Bumblechutes. It was very easy to apply and I’ll definitely be using it on future projects. I applied one coat to the bottom and three coats to the sides and top.

Then it was back to the drawers. I stained the “box” black and ended up having to trim some things to fit better around the rail of the desk base. I sized the drawer faces, made oak handles with 10° angles, assembled everything, and applied finish.

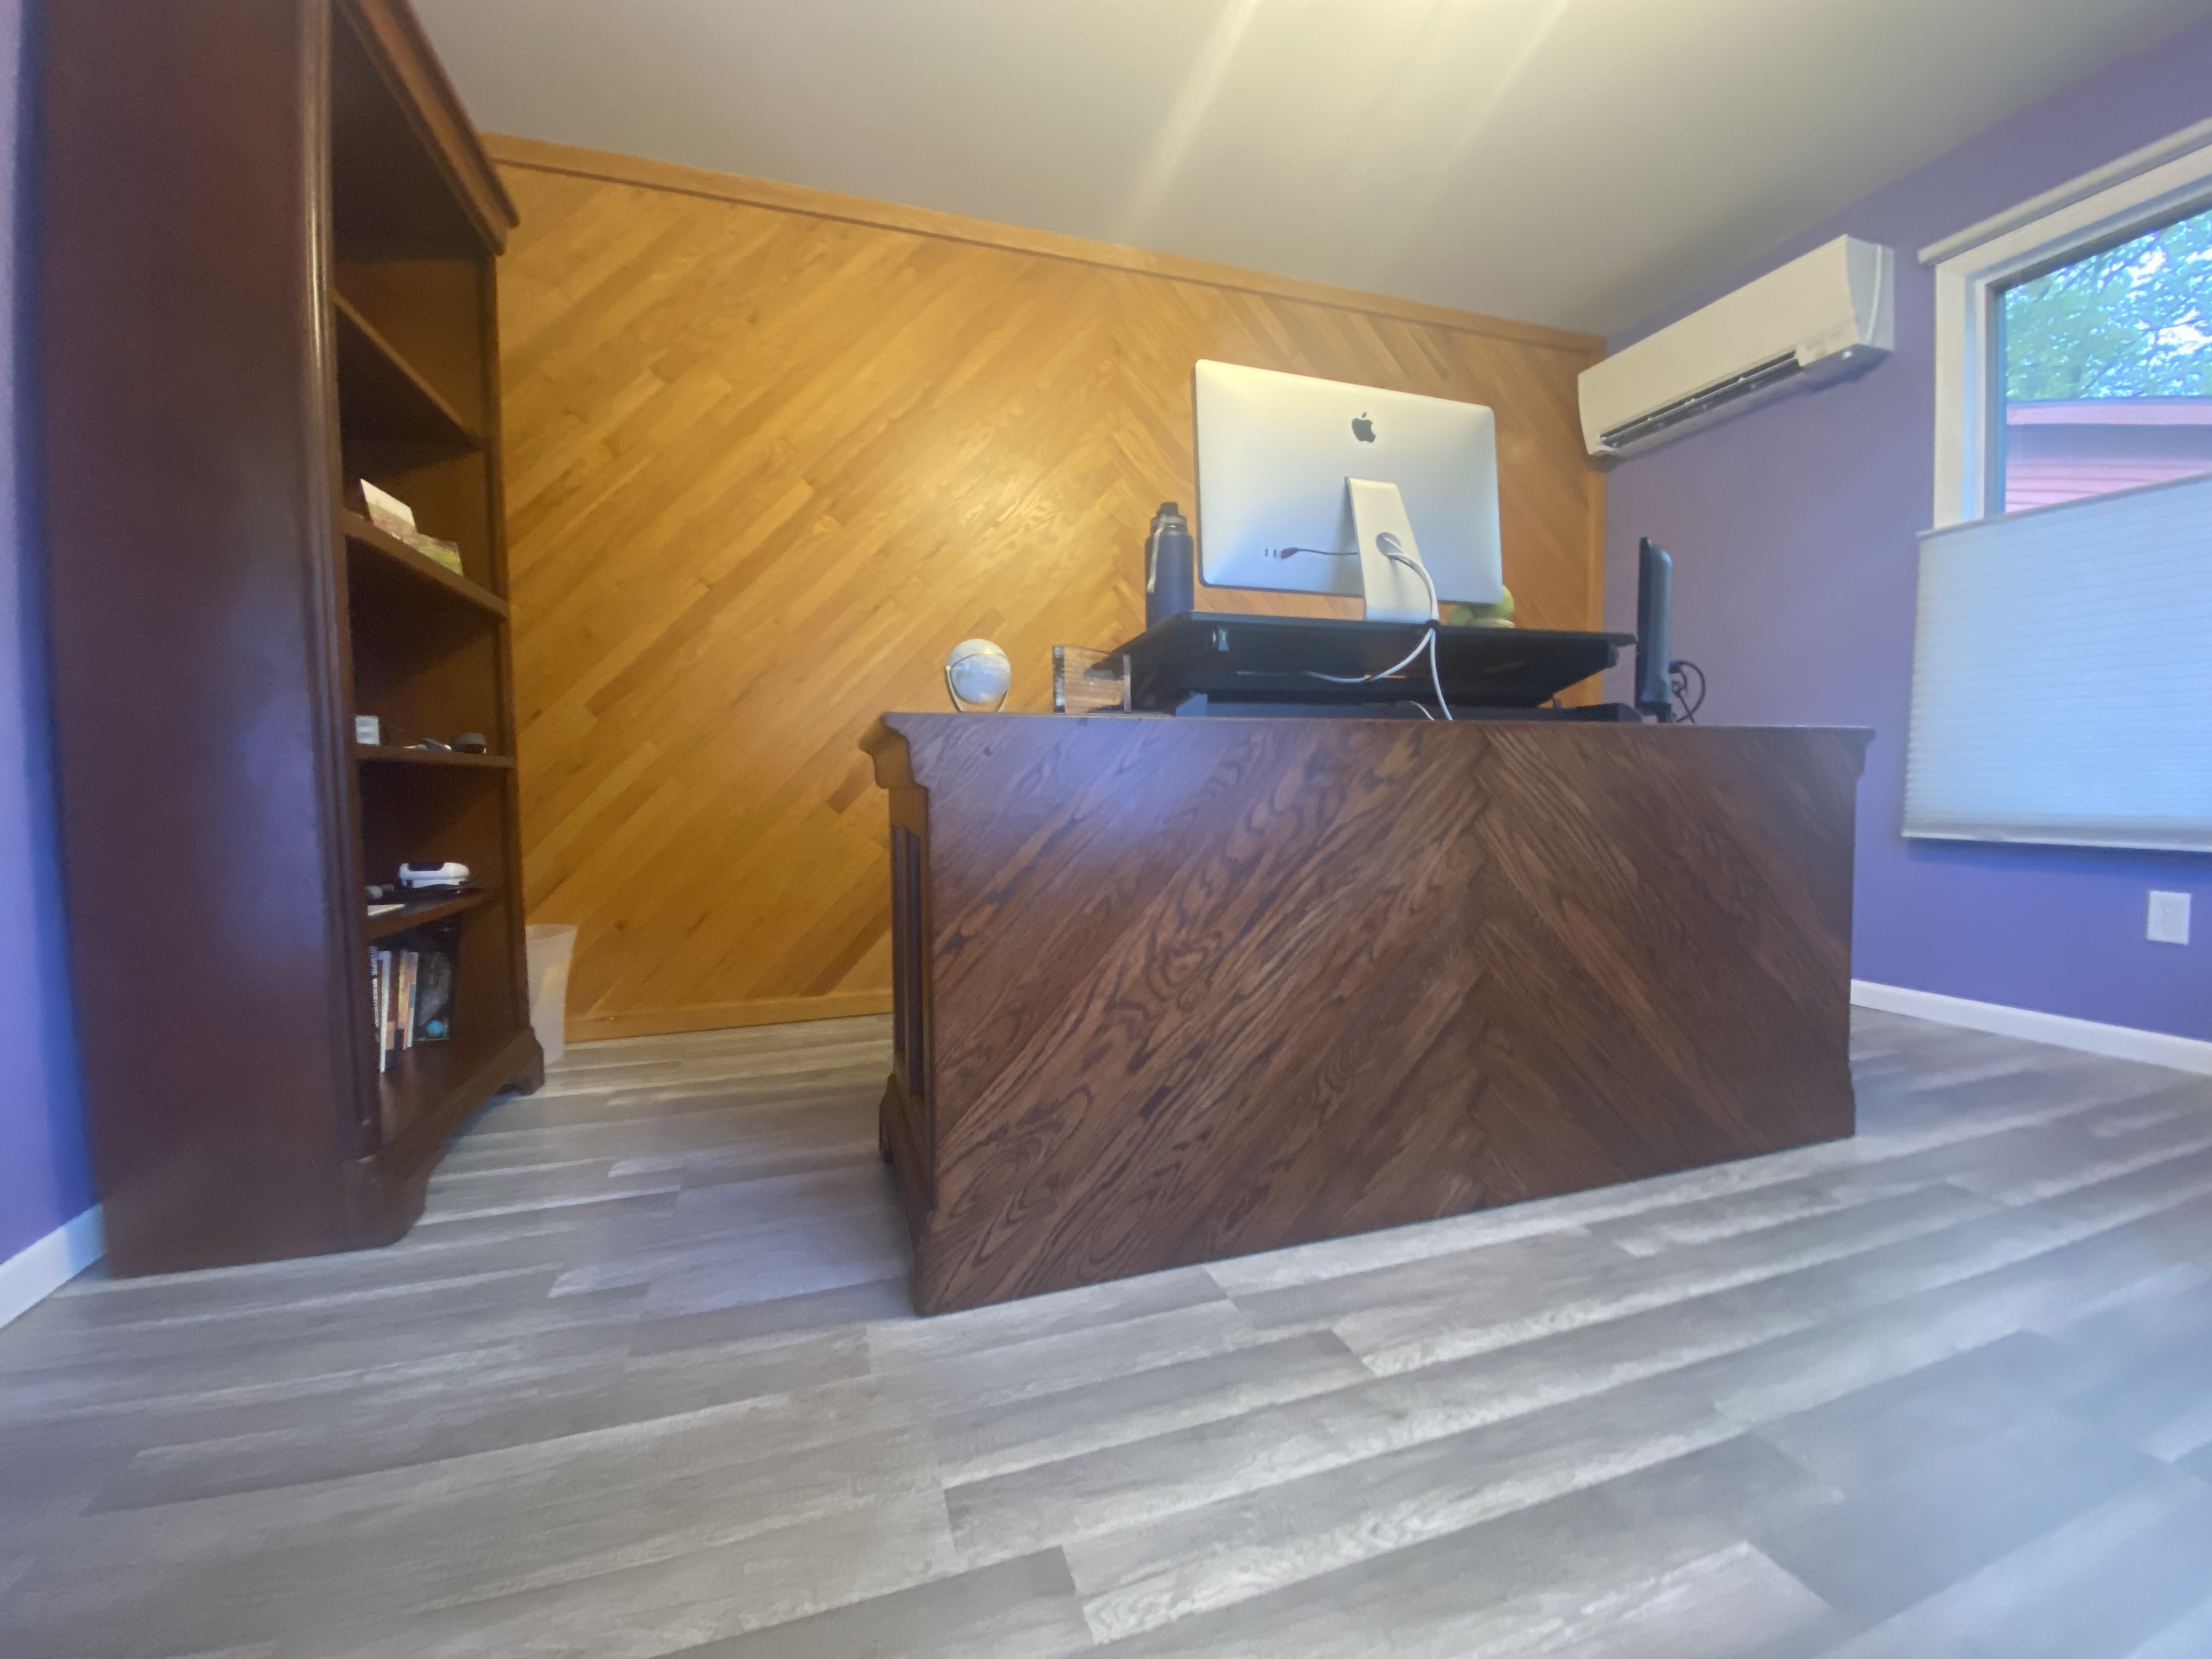
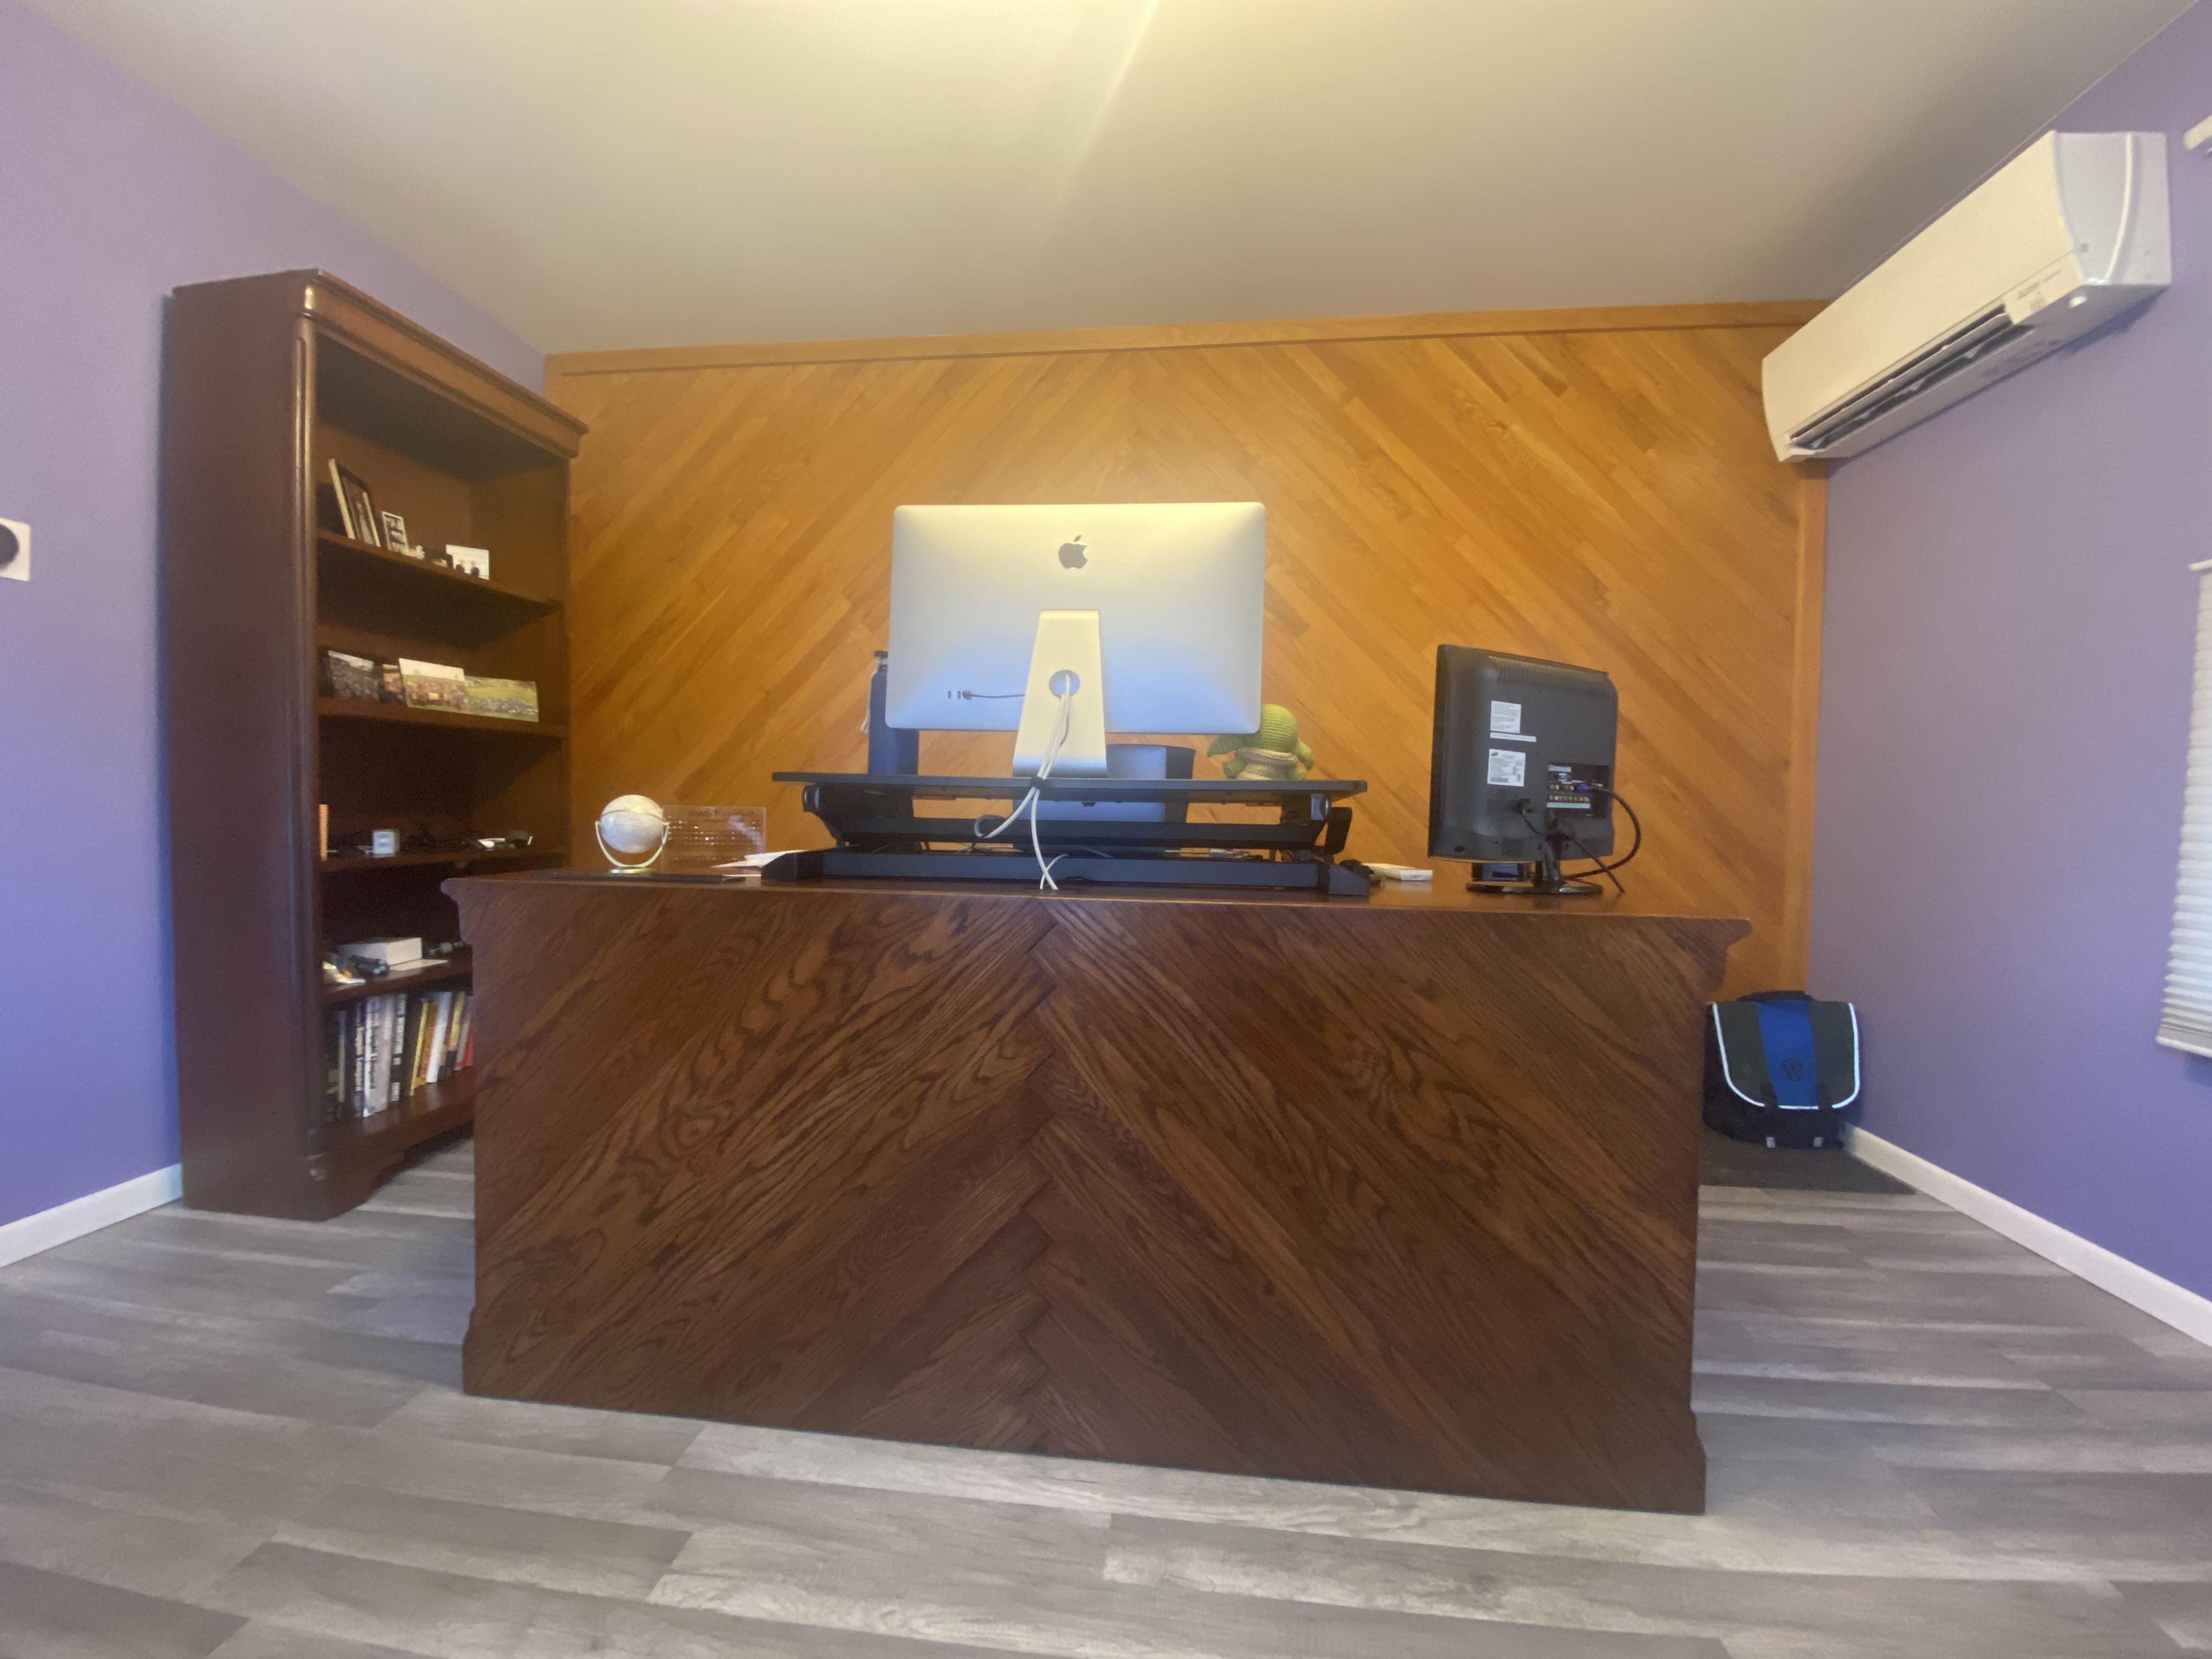
It turned out great! I can’t wait to see it in our new house later this year!

A New Hobby Desk and Organization

When I was doing the wiring for the cabinet LED lighting, I remembered how much I hated the tall desk for that kind of work.

I woke up the next day and decided to get a new desk. I wanted something similar and I basically found the little brother; it’s almost identical. The old one was 4″ deeper, which I think I’ll miss.

When I was desk shopping I saw these storage bins and they sparked ideas for decluttering the area.

I had to make a modification to the desk, because the adjustable shelf couldn’t be placed in the middle. After measuring everything about five times, I made two risers to get the shelf where I wanted. You wouldn’t even notice if I didn’t point them out.

I was in the zone and decided to tackle another problem. A couple of years ago I made an overhead camera rig out of a swing arm desk lamp. The mount it came with was someone else’s mod and one wrong bump knocked it off the desk. This is what it looked like.

I made a mount to match the profile of my new desk, which hooks up and over the metal bar. This isn’t going anywhere!

Back to those storage bins. My goal was to get the hobby tools out of sight, while making them easy to access. On the bookshelf they were always piled up and I had to get off the chair to reach them. All I needed was some cardboard (from the desk’s box) and hot glue.

The second bin didn’t get dividers because everything in there is pretty big and doesn’t need dedicated space. I can always update it later if necessary. In fact I probably don’t even need the cardboard liner, but it was already made. The small bookshelf, where my tools had been, moved inside the closet. I love the cleaner look the room has.

DIY Desk Backer

Here it is, the final project I had planned for my new home office.

The idea for this actually started a year ago, when I rotated my desk in the old office.

The back of my desk is obviously meant to be up against a wall, so it’s not a finished look with the particle board and the big access holes. At the time, I was thinking I could create some type of artsy piece for the back using reclaimed pallet wood. I didn’t have any motivation to make anything over the winter though.

Fast forward to this year and moving my office to a newly redone room across the hall. With better lighting, the back of the desk stuck out even more.

My idea came back to me and inspired part of the plant stand. I acquired a bunch of reclaimed oak flooring from the 50s to use for both projects. Hopefully the following pictures tell a little bit of the story about how the idea went from my brain, to a 3D model/plan, and came to life.

It was probably the most complicated build I’ve done. Really happy with how it turned out!

If you want the plans you can grab a SketchUp file on GitHub.

Fidget Cube

Last summer I saw this “toy” on Kickstarter and thought it looked neat. When I’m out to dinner I tend to fidget with something. Usually it ends up being the paper wrap you take off the napkin and silverware. I also like to grab something lying around my desk to keep my hands busy when I’m on a work audio or […]

A New Hobby

My recent Raspberry Pi project combined with more and more interest in home automation led me down a road I didn’t expect. I find some of the home automation products out there limiting. What if I could mess around and build some of my own devices?

I’ve been thinking about putting some type of temperature sensor in the garage for a while. I heat the garage up in the winter for workouts quite often and never know when it’s warm enough. I’d found my first project! I’d need another Raspberry Pi and at least a temperature sensor. I didn’t really know much about extending the functionality of a Pi, other than I’d need to do some soldering and learn a more about electronics, circuits, etc. Enter AdaFruit. It’s a very cool company with an awesome store and a ton of resources to learn.

Adafruit was founded in 2005 by MIT hacker & engineer, Limor “Ladyada” Fried. Her goal was to create the best place online for learning electronics and making the best designed products for makers of all ages and skill levels. Adafruit has grown to over 50+ employees in the heart of NYC with a 50,000+ sq ft. factory. Adafruit has expanded offerings to include tools, equipment and electronics that Limor personally selects, tests and approves before going in to the Adafruit store.

I saw Ladyada’s Electronics Toolkit in their store, which looked like a great way to get started. My favorite item is the “solder sucker” even though I may never use it. Such a cool name.

ladyadas-electronics-toolkit

Then I came across AdaBox.

AdaBox is a quarterly subscription service from Adafruit, centered around products from the Adafruit ecosystem. Each AdaBox will contain a curated set of Adafruit products that will help you get started with do-it-yourself electronics.

Introducing AdaBox!

The second box is shipping out to subscribers soon, but I was too late to jump on board. Lucky for me, they had some AdaBox001 – Welcome to the Feather Ecosystem still in stock, so I ordered one.

adabox-1-contents

It has a wide variety of components. Should help so that I don’t start randomly buying items. I’m hoping to get in on the third subscription, which opens up on the 19th and I will pick up AdaBox002 when it’s available in the store.

Once everything arrived, I started playing around on my kitchen table. I quickly realized it wasn’t the ideal place. I needed a workstation. When I get into something new, I tend to go all-in, which I believe helps me stick with it. So I set a plan to put a second desk in my office and bought more stuff:

I’m excited and really happy with how everything came together.

electronics-workstation.jpg

I found these organizers for about $4 each at Walmart. They work really well for storing all of the tiny pieces.

organizers.jpg

I haven’t built anything yet, but I’m learning a lot and enjoying the process. My list of project ideas is growing and will keep me busy for as long as I want. As a bonus, I now have a standing desk in my office where I can get actual work-work done when I need a break from sitting.

DIY Standing Desk

I spent about an hour this morning looking at various DIY standing desks online. After spending a total of $41.27, it took me less than a half hour to convert my desk into a standing station.

Supplies:

  • 2 Black Parsons End Tables from Walmart ($12.88 each)
  • 1 White shelf 10″x36″ at Home Depot ($5.69)
  • 2 White 10″ single track brackets at Home Depot ($1.76 each)
  • 1 White 46″ single track upright from Home Depot ($3.96)

I assembled the tables and then cut the track upright into 3 pieces. The 2 pieces I used were equal length and taken from opposite sides of the original piece so that I would have even tops when attached to the table legs. I drilled a couple of small holes in each table leg using the track uprights as my guide. Then I attached the uprights to the legs of one table using some screws I found in my garage. Set it all up and voila!

The thing I liked about using the tracks instead of angle shelf brackets is that I can adjust the height of the keyboard shelf if I need to. I’ll have to put something under the laptop to get it higher and may need to experiment with the height of my main monitor.

I’m really happy with how easy this was and how it turned out. When I need a break from standing it’ll be easy to disconnect the laptop and sit on my office chair or work in the other room. Maybe I’ll even get a high stool to use once in a while. Now we’ll see how my posture improves and if I can get my spine back into a more normal position.