
A couple of weeks ago I wrote the first post in this series about putting a golf sim in our basement, which focused on the PC. This post will focus on the environment.
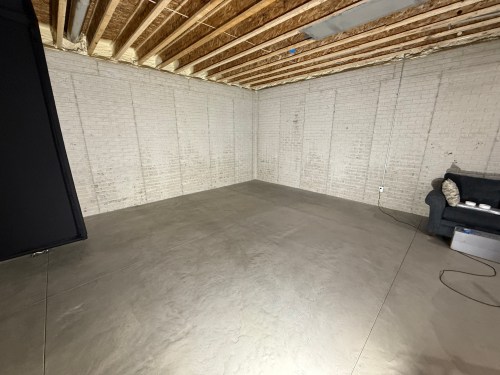
When we built our home, we did 10 foot basement walls, knowing we’d be putting in a golf sim. This gave us about 9’8″ from the concrete floor up to the joists, which is plenty of room for me to swing every club in my bag.
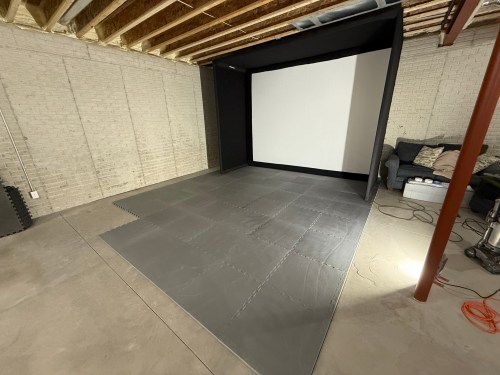
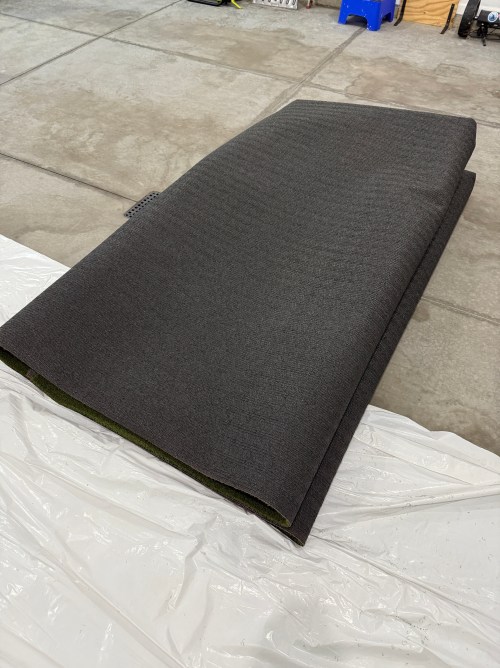
Back in April, during a Masters sale, I ordered the SIG12 Golf Simulator Enclosure and Side Barrier Netting from The Indoor Golf Shop. By following their setup video, it was very easy to put together. Later in the process, I used a hairdryer to smooth out the wrinkles and fold lines, though I’m not sure it helped much.

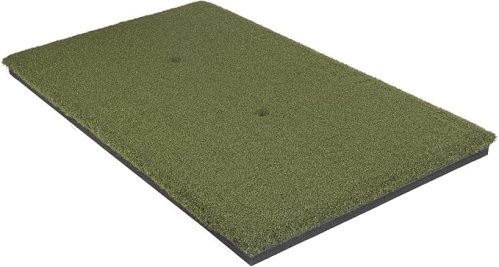
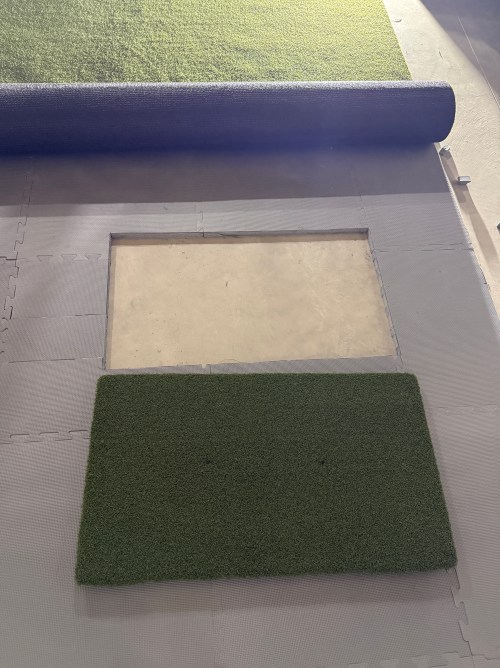
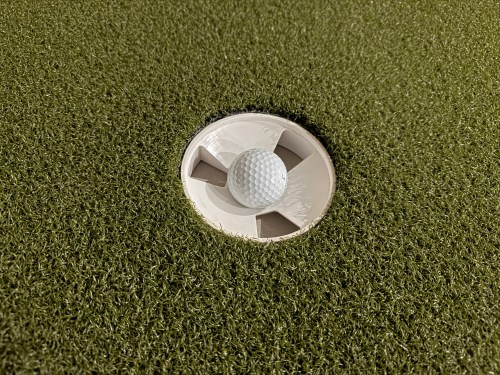
The next thing I got was the hitting strip, which is one of the most important aspects of a sim because you want it to hold up for a long time, while protecting your wrists. I bought The Original Country Club Elite based on the price and reviews. The strip is 20×36″ and just under 1-3/4″ thick.
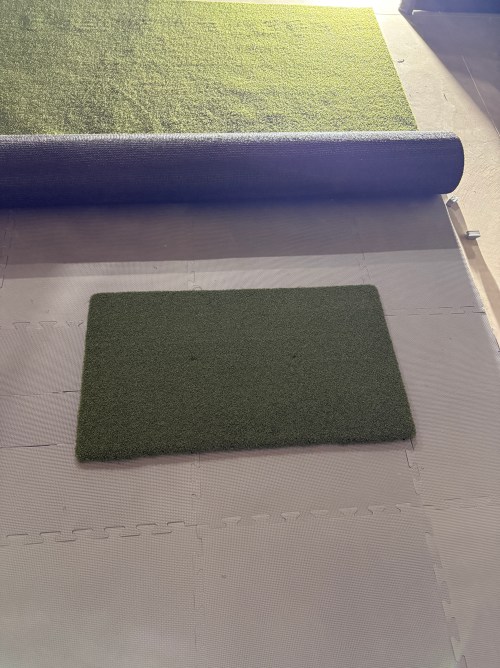
After knowing the thickness of the hitting mat, I could focus on the mats and turf to surround it. I did a lot of online searching and didn’t find many recommendations, which was surprising. A Reddit thread pointed me to the ProGrass ProPutt at Lowe’s and they ship a 8×8″ sample only $1!


It felt nice and from what I’d read, a face weight of 50 oz was good for this type of use. I took the sample over to Menards and compared it to their 44 oz.

The choice was clear, so I made an order at Lowe’s for a 13×15′ piece. To create the base and a cushion under the turf I ordered 1″ thick puzzle mats from Amazon.
Quickly after we put together the enclosure and got a feel for the space, we decided to rotate to the adjoining wall.
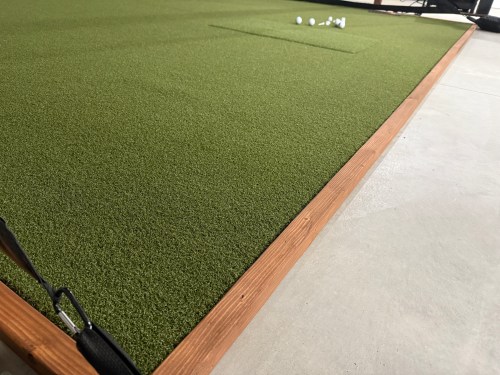
The turf finally arrived and I trimmed off the factory edges and cut the width to 13 feet. After hauling it to the basement I cut out the locations for the hitting strip and a couple of 1.5″ shallow putting cups. The cups were actually too tall, so I shortened them to 1-1/8″ on the table saw. Cutting the holes in the turf was nerve-wracking. Too tight and the turf bubbles around the thing you’re inserting. Cut too much of the turf, making it too loose, and you can’t go back. I bought a carpet knee kicker for stretching out the turf to remove the wrinkles and bubbles.


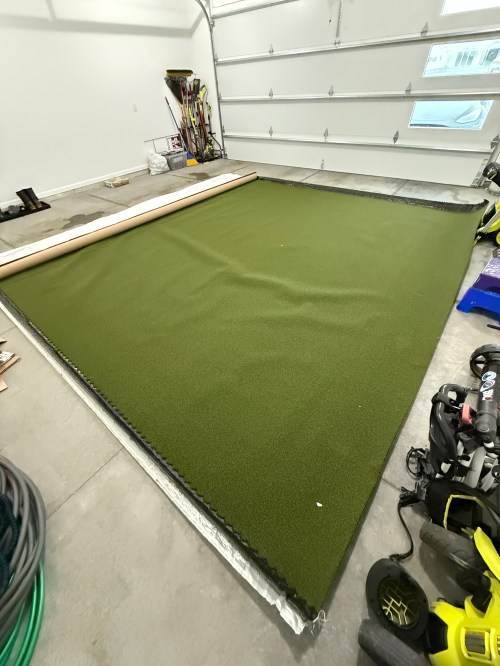


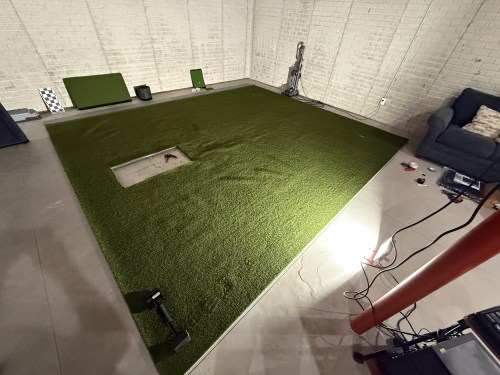


Brandi was a big help with the turf. I’ve never done any carpet work, so I’m amazed at the level of flatness we achieved. I’m pretty sure neither of us has a future career as a carpet installer though. I had some good carpet tape for the edges, that we ran out and the light duty stuff I picked up from Menards was useless, so I ended up buying more of the good carpet tape from Amazon.

I filled the sandbags and installed the side netting.


To help protect the ceiling from sky balls and prevent anything from going through the heating ducts, I screwed OSB over the duct and 2 layers of old puzzle mats. I also bought a 10×12′ mesh tarp from Harbor Freight and mounted it a couple of joists in front of the enclosure and draped it across and over the back.
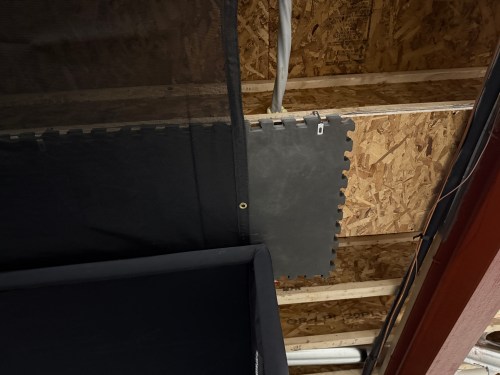

I’m curious to see how the tarp holds up, though hopefully it rarely gets hit by a golf ball. If it works, it was a cheap solution.
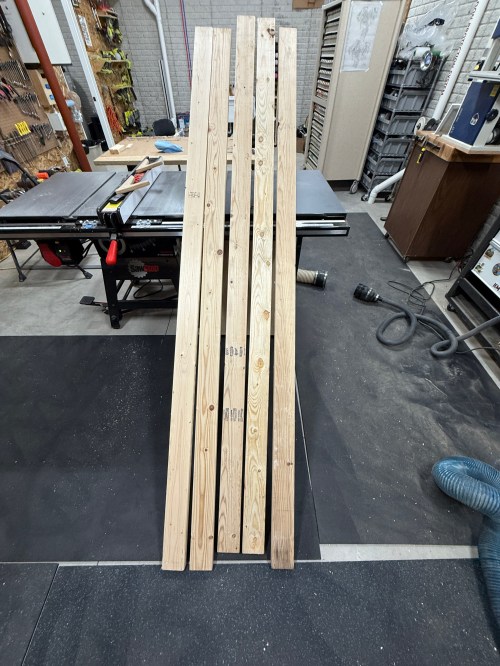
To protect the edges of the turf and hide the base mats, I built a border out of 2x4s ripped down the middle and stained it.


Everything I mentioned was $3,800 and brings the total to $5,650. The third post in this series covers the other electronics and everything else.

[…] a golf simulator in our basement. Part one covered the PC build and part two was all about the environment. This one will cover all of the other electronics and some things that didn’t fit […]
LikeLike
[…] second post in this series covers my sim environment and the third post covers the other electronics and everything […]
LikeLike
[…] Building a Basement Golf Simulator: The Environment […]
LikeLike
[…] The Environment […]
LikeLike