Our family always had fun playing our own version of Michigan Rummy (there is also a version called Tripoly) as kids. Then last year we played it almost every night on our family vacation, using a modified board. It gave me an idea to build a custom board for my Mom.

As soon as I saw this case with two decks of cards at an estate sale several months ago I knew it would be neat for the board. I think I paid $1. The copyright date is 1947!

I’ve been wanting to build something with pallet wood and thought it would give the board a neat look. You can get free pallets all over by looking on Facebook Marketplace or Craigslist.

With the help of my pallet buster and some brute force, I broke down the pallets.

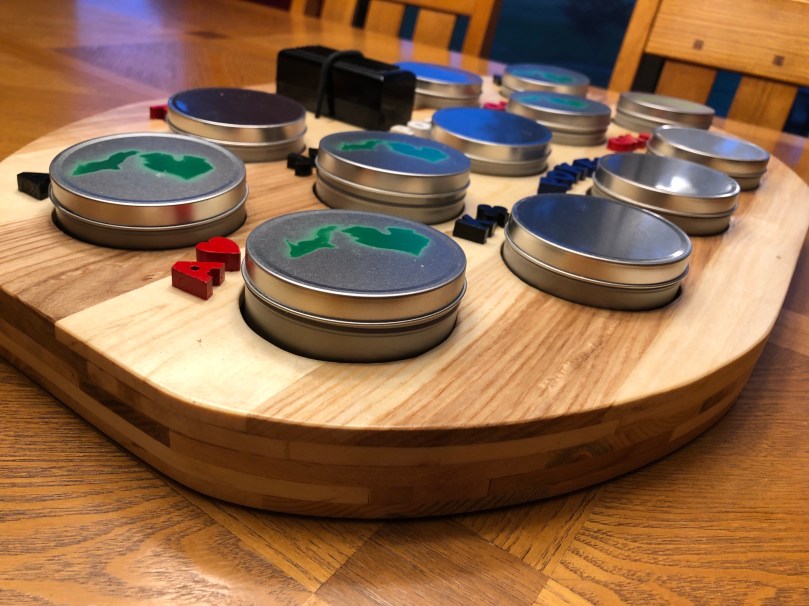
These containers with covers are from Menard’s, free after rebate. Another perfect piece for the project. I laid everything out to get a feel for the size.

After taking measurements, I mocked up a 3D model of the board’s top layer in SketchUp (download on GitHub). It would be about 24×16 inches.

I also printed out the text using Arial Black for the letters/numbers and Futura for the suit symbols.

I trimmed, planed, and jointed a bunch of boards.

Then glued up panels that would make the top and bottom of the board.

I measured and marked a bunch of lines and then placed everything where it would end up to get a better feel for the size and layout. I liked it.

I finished drawing in more details and did a rough cut of the outer shape with my band saw.

The scroll saw got heavy use cutting everything out. I also cleaned up the holes and edges with various sandering. You can see a couple of places where I started to carve in the text. It didn’t take long to scrap that plan though; it was going to take forever and some of the wood was really soft so I wasn’t happy with how it would turn out.

I decided to use raised letters that I’d glue on. After doing a bunch of work, I realized this would be much better because the containers would be up above the board, so it would have been hard to see the recessed lettering.
I used the band saw to cut all of the letters. More sanding to clean them up and then some spray paint.

I didn’t get any pictures of the next steps, which probably took the longest. I used a bunch of the cutoffs to build up an outer support ring as well as eight stacks in the middle to prevent something heavy from breaking the top or bottom panel. There was a lot of gluing, clamping, and band saw trimming. Finally I had enough layers and I was able to glue on the bottom panel.

After the glue dried I did a lot of sanding on every surface. I had tied in a piece of bungie cord earlier that would hold the card case in place. Then I drilled shallow holes so I could glue in (with epoxy) rare Earth magnets to hold the containers in place. I used CA glue to attach all of the lettering.

It was finally time for some finish. I used three coats of shellac (with light sanding after each coat) and a coat of wax polish. I spray painted the Michigan map on half of the containers and gave them two clear coats. The last thing was to stick some of those felt pad circles to the bottom and it was done. I really like how this turned out.
The layering you can see from the sides is a neat look.