Modding a Star Wars LED Sign

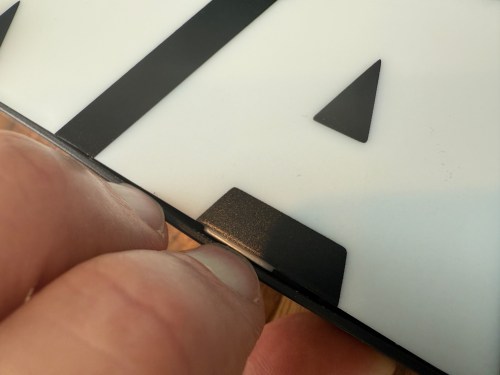
Several years ago I bought this sign from T.J.Maxx.

When I plugged it in, I was disappointed. By default it was off with a button on the side to toggle between bright, dim, and off.

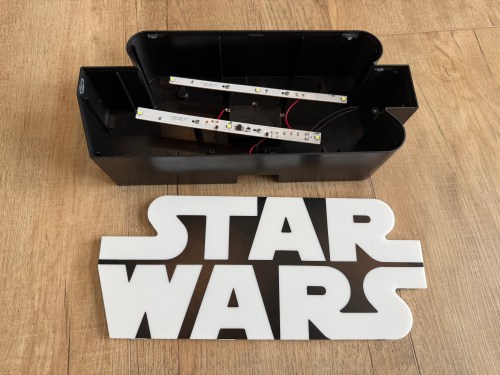
I put the sign in a display cabinet with all of the LEGO and I had wanted it to automatically turn on with the rest of the LEDs in the cabinet. I never got to it, so it sat on the shelf for years. Fast forward to setting up home automations at the new house and it was time to fix the problem. The only screw on the back was for opening a battery compartment, so I figured the front had to be snapped in. With a little careful persuasion I gained entry.

I figured the electronics were pretty basic and I was right. The quick fix was to connect the sides of the button/switch.

That worked, but I noticed how flimsy all the wiring was. I replaced the wires going from the USB connector to the board, which had been causing some flickering when bumped.

I was sad at the lack of LEDs though. I could do better, with minimal effort. I took out the circuit boards and found an old five volt LED strip.

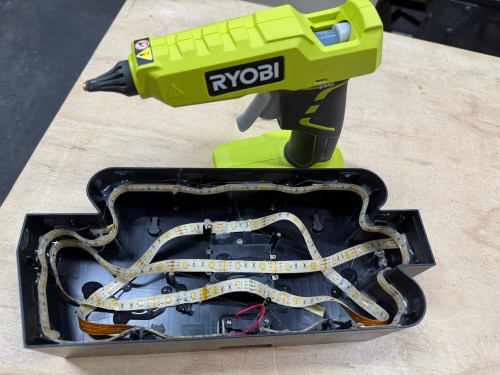
With the help of some double-sided tape, I wrapped the strip throughout the case and then also used hot glue.

Much better!

Sign of Joy

Making this sign was Brandi’s project, so my involvement was as supervisor and giving tips. It was all her idea.

She wanted to get double use out of one of her signs from another holiday, so started by painting the back blue. Then attached an eye hook along the top for hanging the small wreath and glued on letters she bought at Michaels.

Tulum

Last month, during an Automattic trip to Cancún, I took a guided tour of Tulum.

Tulum is the site of a pre-Columbian Mayan walled city which served as a major port for Coba, in the Mexican state of Quintana Roo. The ruins are situated on 12-meter-tall (39 ft) cliffs along the east coast of the Yucatán Peninsula on the Caribbean Sea. Tulum was one of the last cities built and inhabited by the Maya; it was at its height between the 13th and 15th centuries and managed to survive about 70 years after the Spanish began occupying Mexico. By the end of the 16th century, the site was abandoned. One of the best-preserved coastal Maya sites, Tulum is today a popular site for tourists.

Wikipedia

Pallet Wood Bedroom Art: It Was All a Dream

For years I’ve wanted something to hang above my bed. I always thought a large black and white photo would be cool, but never looked for something. A couple of weeks ago I got an idea to make an art piece, so I went through my wood rack and picked out some pallet wood.

I swapped out some pieces and then sanded off most of the dirt and rough edges.

Testing whitewash during the bathroom shelf project paid off on this one. I knew I wanted a backing of gray primer before applying white paint with the scraping method. I went real light with the gray.

Below are the pieces after the first coat of white.

I think I applied three coats to get the look I wanted. I used wood glue and pin nails to attach the horizontal pieces to the verticals.

My original plan was to have my 10-year-old niece write lowercase cursive letters that I’d paint on, but she couldn’t get the proportions right with big letters. I found this cool stencil at Michael’s for $8.

I did a bunch of measuring and used blue tape to map out the word placement.

Then I did a quick test with pencil on kraft paper to get a feel for the letter spacing.

I painted 3 different letter widths (A, I, and M) on a piece of cardboard and cut them out. This was the mask I used over the top of the stencil to prevent overspray.

Finally it was time for the nerve-wracking part of actually painting on the words. In order to limit the possibility of smearingn I did one letter, hit it with a blow dryer, and moved to a letter on the next row.

All that was left was to drive some screws in to the back, wrap wire between the screws, and hang it on the wall.

I love it.

A Mountain Dew Sign and Some History

Last week a Mountain Dew sign caught my eye while browsing. It had an odd character and a slogan that sounded familiar. I knew I had to get something like it for the walls in my shop. After some searching through FB Marketplace, eBay, Amazon, Etsy, and Google it didn’t take long to decide I wasn’t going to spend the kind of money it takes to get an original rusty Mountain Dew sign. I went back to the sign that sparked my interest and ordered it.

The colors, artwork, and being embossed are all quality. It’s a really fun sign that now lives on my shop wall.

This journey doesn’t stop there though. I thought the style of the art was familiar and it was. Back in 2015 I saw a different Mountain Dew sign while I was in Park City, Utah. I was pretty sure I’d heard/seen the slogan “It’ll tickle yore innards” as well and sure enough, it was used on a bottle of DEWshine I drank back in 2016. The same hillbilly character was appearing everywhere! His name is Willy, which makes a lot of sense when you learn Mountain Dew is actually slang for “moonshine.” (source) Here’s an early (original?) commercial.

Mountain Dew was invented in Knoxville, Tennessee, in 1946 when Barney and Ally Hartman, of the Hartman Beverage Corporation, first debuted their new soft drink at a Gatlinburg convention. The drink’s trademark became official in 1953. Originally, Mountain Dew’s flavor was lemon-lime similar to 7-Up or Sprite and it was created by the Hartman brothers primarily as a mixer for hard liquor. In fact, the name “Mountain Dew” came about because the brothers joked that when mixed with liquor, the drink resembled a fine Tennessee moonshine.

…it was not until 1960 when Tri-City’s manager, Bill Bridgforth, changed the flavor to the citrus-lemonade flavor we know today, that the drink began to soar. As Bridgforth put it, “it took off like a cat hit on the tail with a hammer.”

source: “It’ll Tickle Yore Innards!”: A (Hillbilly) History of Mountain Dew

I’m so glad they changed the flavor.

Ya-hooo! Mountain Dew!

If It Looks Straight It Is Straight

I bought this small poster from Jimmy DiResta’s shop, knowing it would be a good opportunity to make my first frame. When the poster is purposely printed crooked, there is no pressure to create a perfect frame and any build mistakes fit right in.

The wood is cut-offs from the sanding station drawer resizing. The plastic and backer board were cut from an old poster frame I had in a closet.

I experimented by using several router bits to make the frame profile and then burnt the wood with a torch to bring out the grain. I didn’t do any sanding and gave it three coats of spray lacquer.