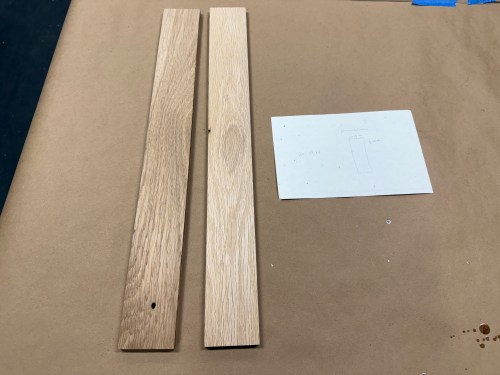
We have this old mirror you’d mount to the back of a bedroom door and it’s been propped up against the wall in our new gym. In order to mount it to the paneled wall, I needed to make brackets to span the studs. I grabbed some oak from my scrap cart.
I only ended up needing one of the pieces. Ripped a couple of 1″ wide strips and trimmed to 18″ long. I marked areas on the back side, and cut out with a router.
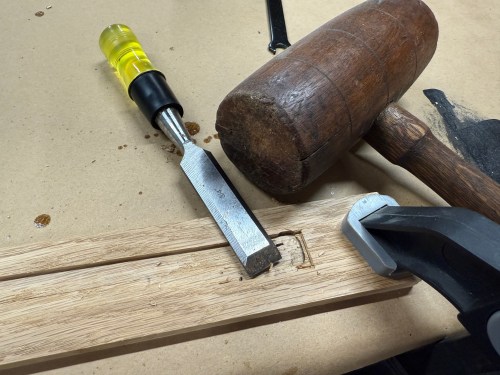
It was quick work to clean up the ends with a chisel.
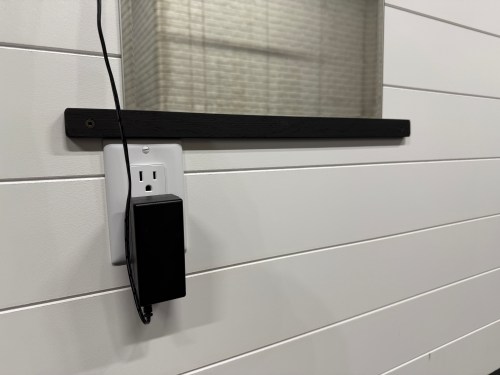
I gave the brackets two coats of black paint.
Really quick project and it cleans up the gym a little more.
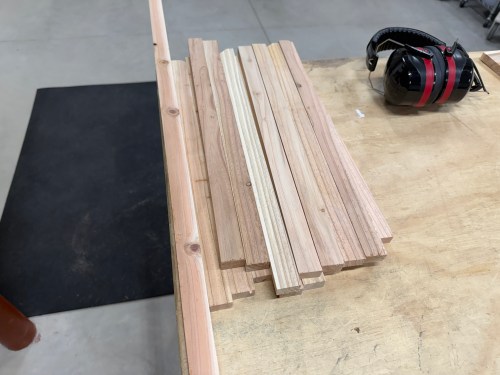
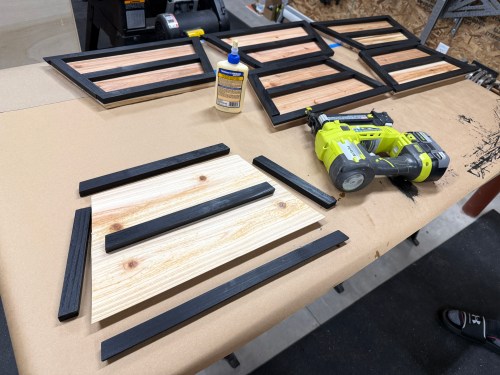
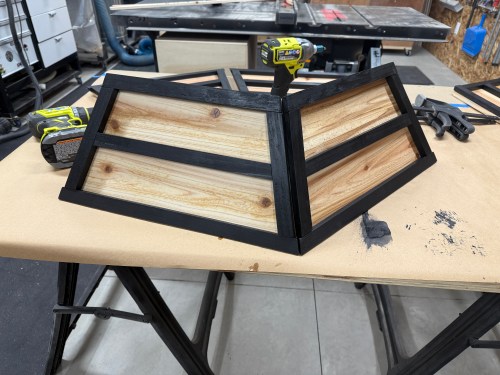
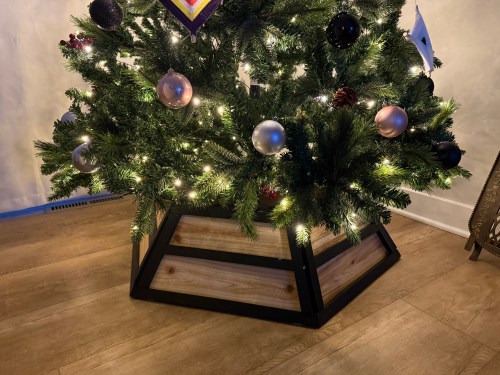
Several weeks ago Brandi mentioned seeing tree collars advertised a lot. I’d never even heard of them and then I saw a YouTube video showing how to make a hexagon one with fence pickets. Brandi thought it was cool and was game to help. I won’t go in to detail on the process because the detailed video is embedded below. Here are photos from our build.
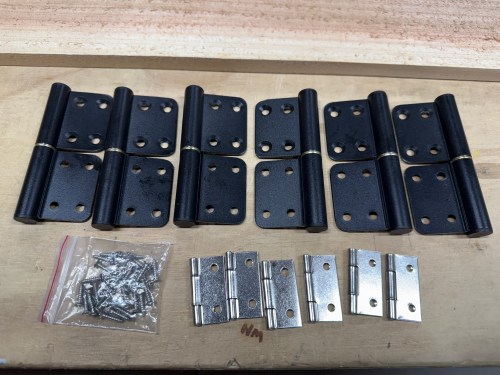
Getting the sizing right took some time and attaching the hinges was tricky because of the angles. I was surprised how well the lift off hinges separated and went back together.
This was a fun build and it’s much better than the store bought collars. Making a tree collar, however, will not be a yearly tradition for us like making an ornament. haha
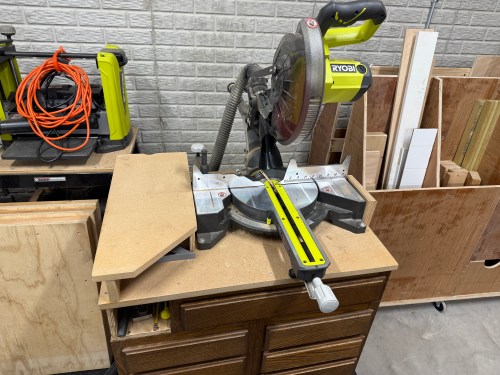
I’ve been wanting wings for my miter station since I got the Ryobi saw and built the cart. If I’m cutting anything with 20″ or so on the right side of the saw, the cutoff crashes to the ground after making my cut.
This weekend we’re building something that’ll require a lot of cuts on the miter saw, so it was a good time to tackle this project. I’ve actually had the brackets since this summer, so I could work on it when I got motivated.
Unfortunately I wasn’t thinking about such an upgrade when I built the cart, because neither side was flat.
I created some flat areas by attaching scraps.
The main objective of this project was to extend the horizontal space on both sides, which this does well.
When I don’t need the surfaces, the wings easily fold out of the way.
The brackets I bought are pretty poor, with a lot of play in them. Maybe it would be better if I used two on each wing. The wings are level with the saw top, which is key, but they move front to back quite a bit. If I want to attach a stop block of some kind I’ll have to stiffen up the wing in some way.
They work for now though. Maybe I’ll improve them down the road. On to the next project!
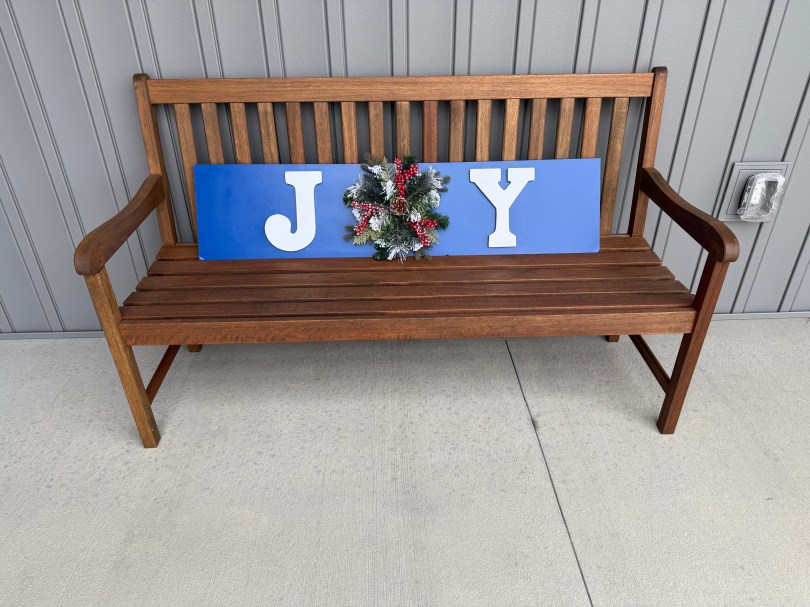
Making this sign was Brandi’s project, so my involvement was as supervisor and giving tips. It was all her idea.
She wanted to get double use out of one of her signs from another holiday, so started by painting the back blue. Then attached an eye hook along the top for hanging the small wreath and glued on letters she bought at Michaels.
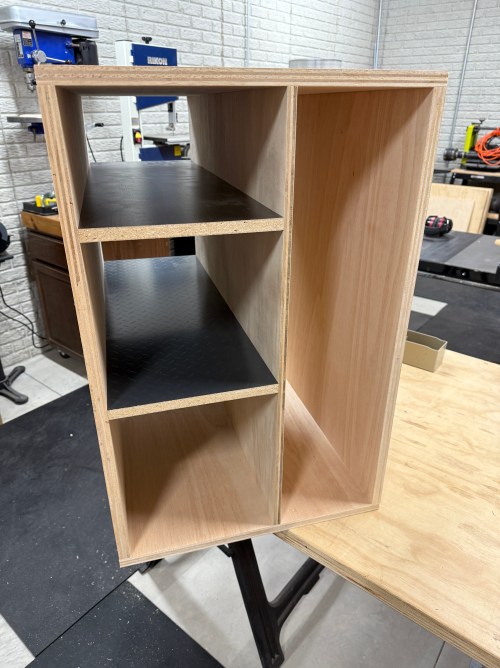
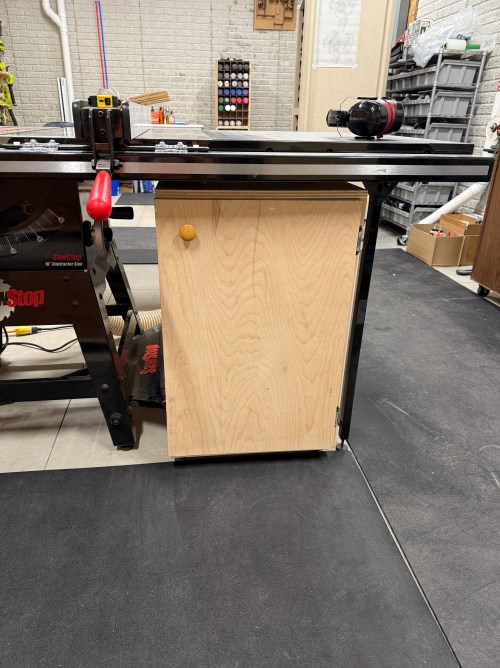
There was a big open space under the right wing of my new SawStop and it was the perfect spot for a cabinet to organize the table saw accessories.
I pulled out a sheet of plywood that got roughed up during the move. Went through a few iterations of how to size the cabinet and where to cut the pieces from.
Assembly went pretty quick, only using screws in case I ever want to make adjustments. It’s not going to hold much weight, so no need for glue.
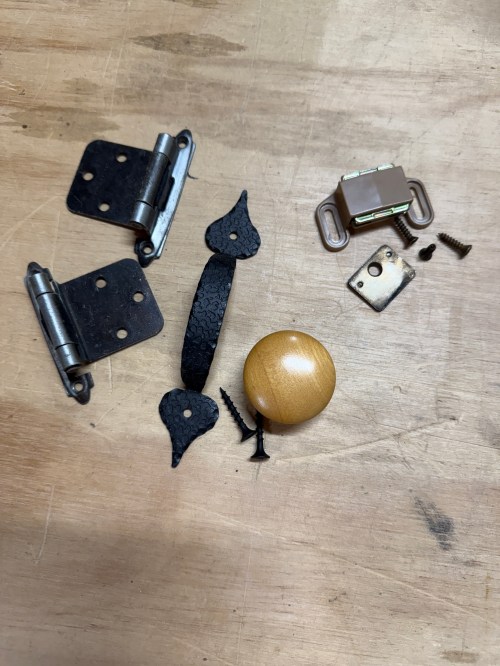
I dug through my hardware to find hinges, handles, and a magnet catch. Since I should rarely move this thing, I attached a set of non-swivel castors, which only added 2″ of height.
When I went to slide it under the saw I had a moment of panic because it didn’t fit! I hadn’t accounted for the triangle-shaped brackets attaching the legs to the saw wing. I ended up removing the castors from the SawStop’s mobile base and the cabinet slid in. If I ever need to move the saw, it only takes a few minutes to put the wheels back on.
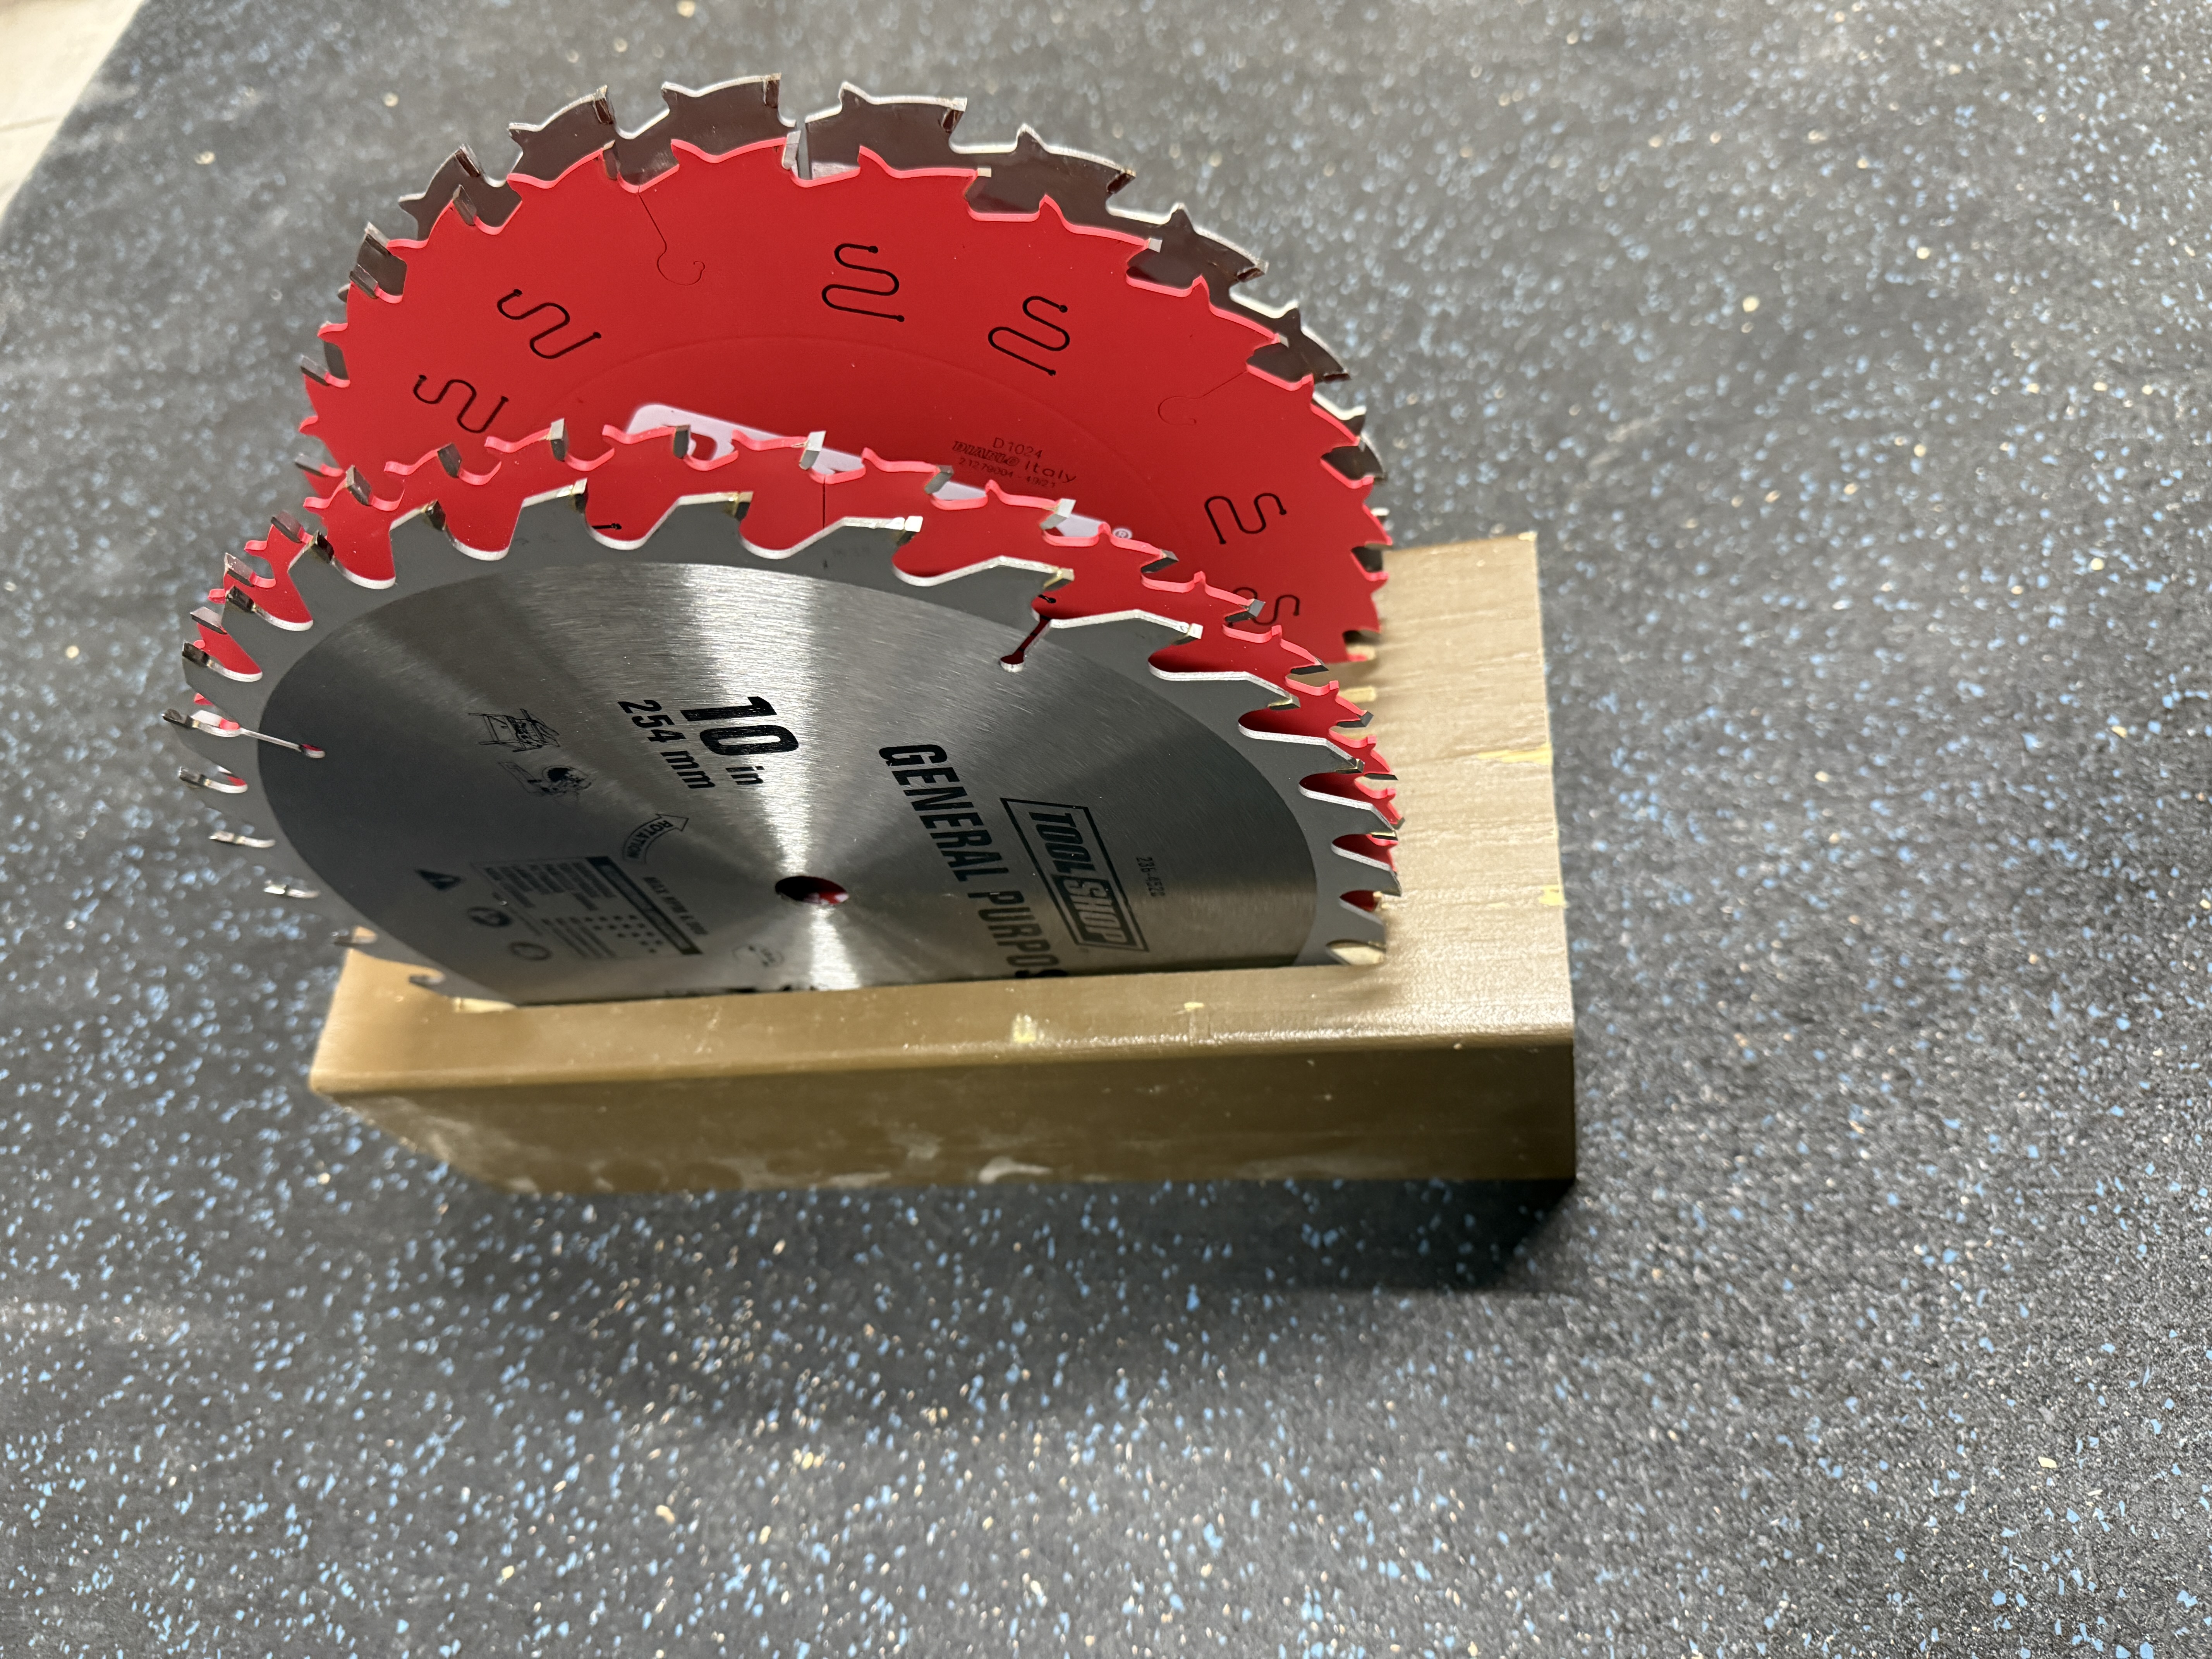
In the lower right, you can see the saw blade holder I recently made. I added old handles to make it easier to grab.
This cabinet was quick to make and makes great use of what would be dead space. Time to start building an outfeed table!
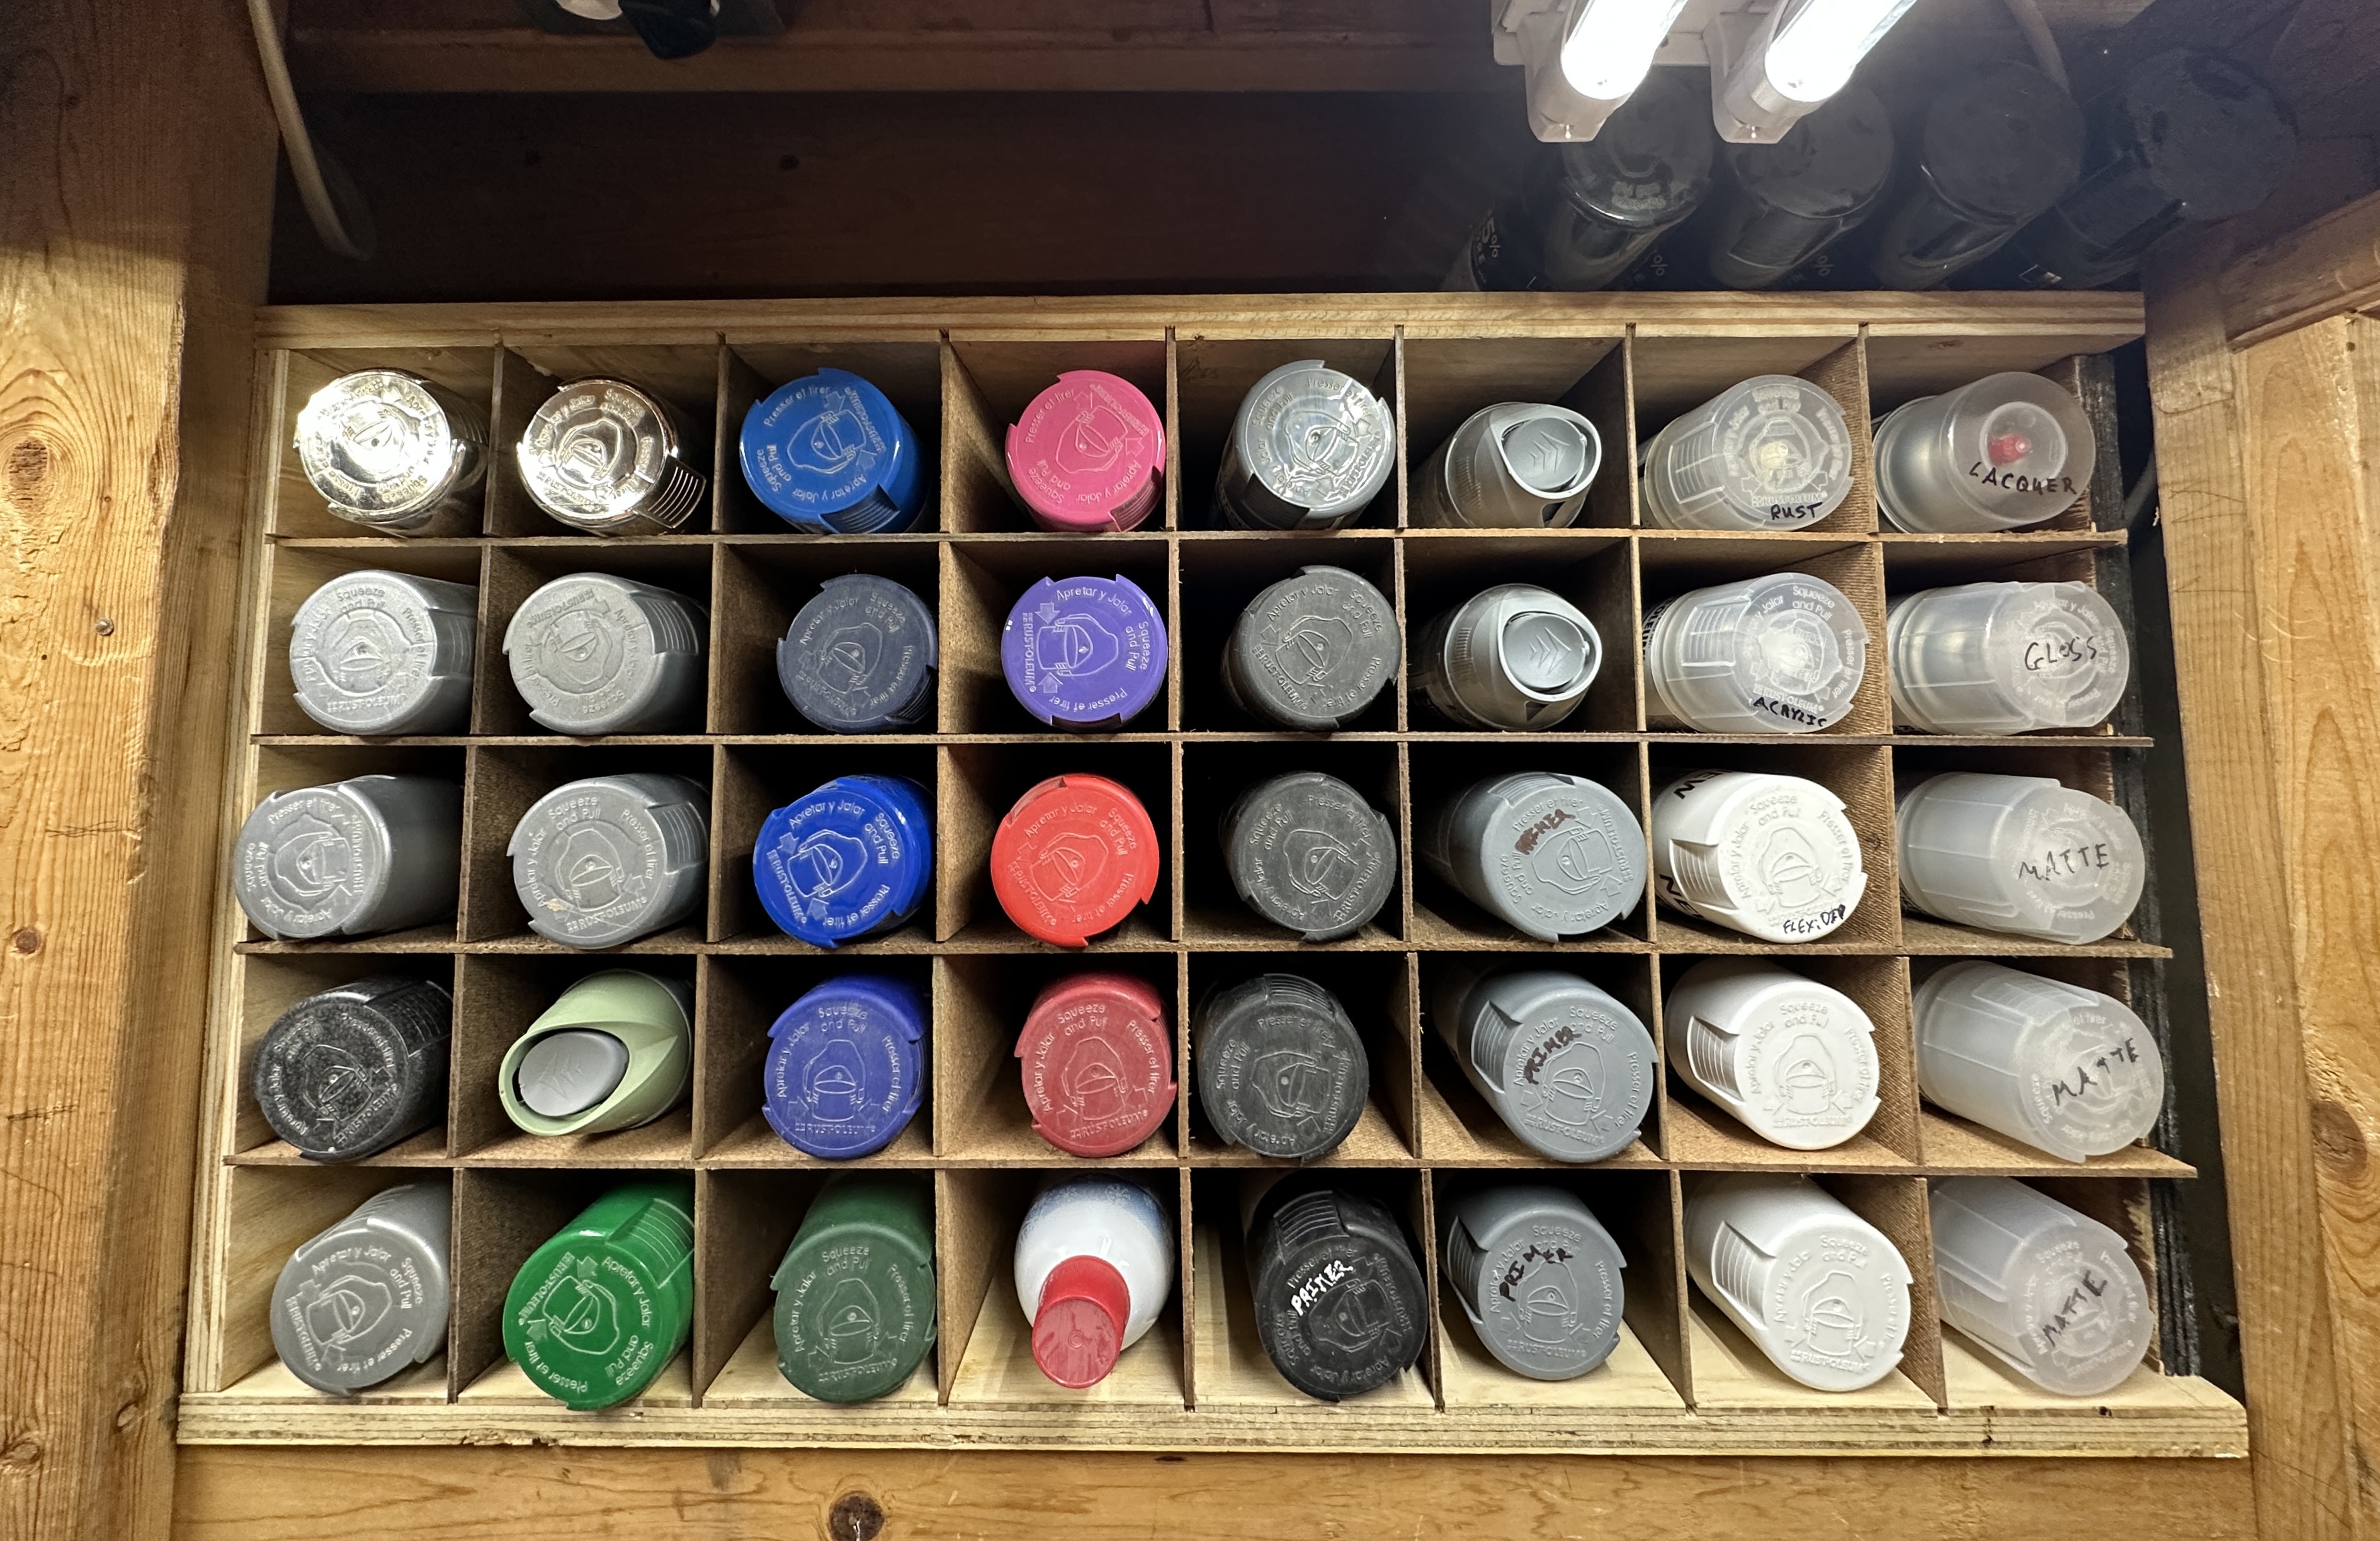
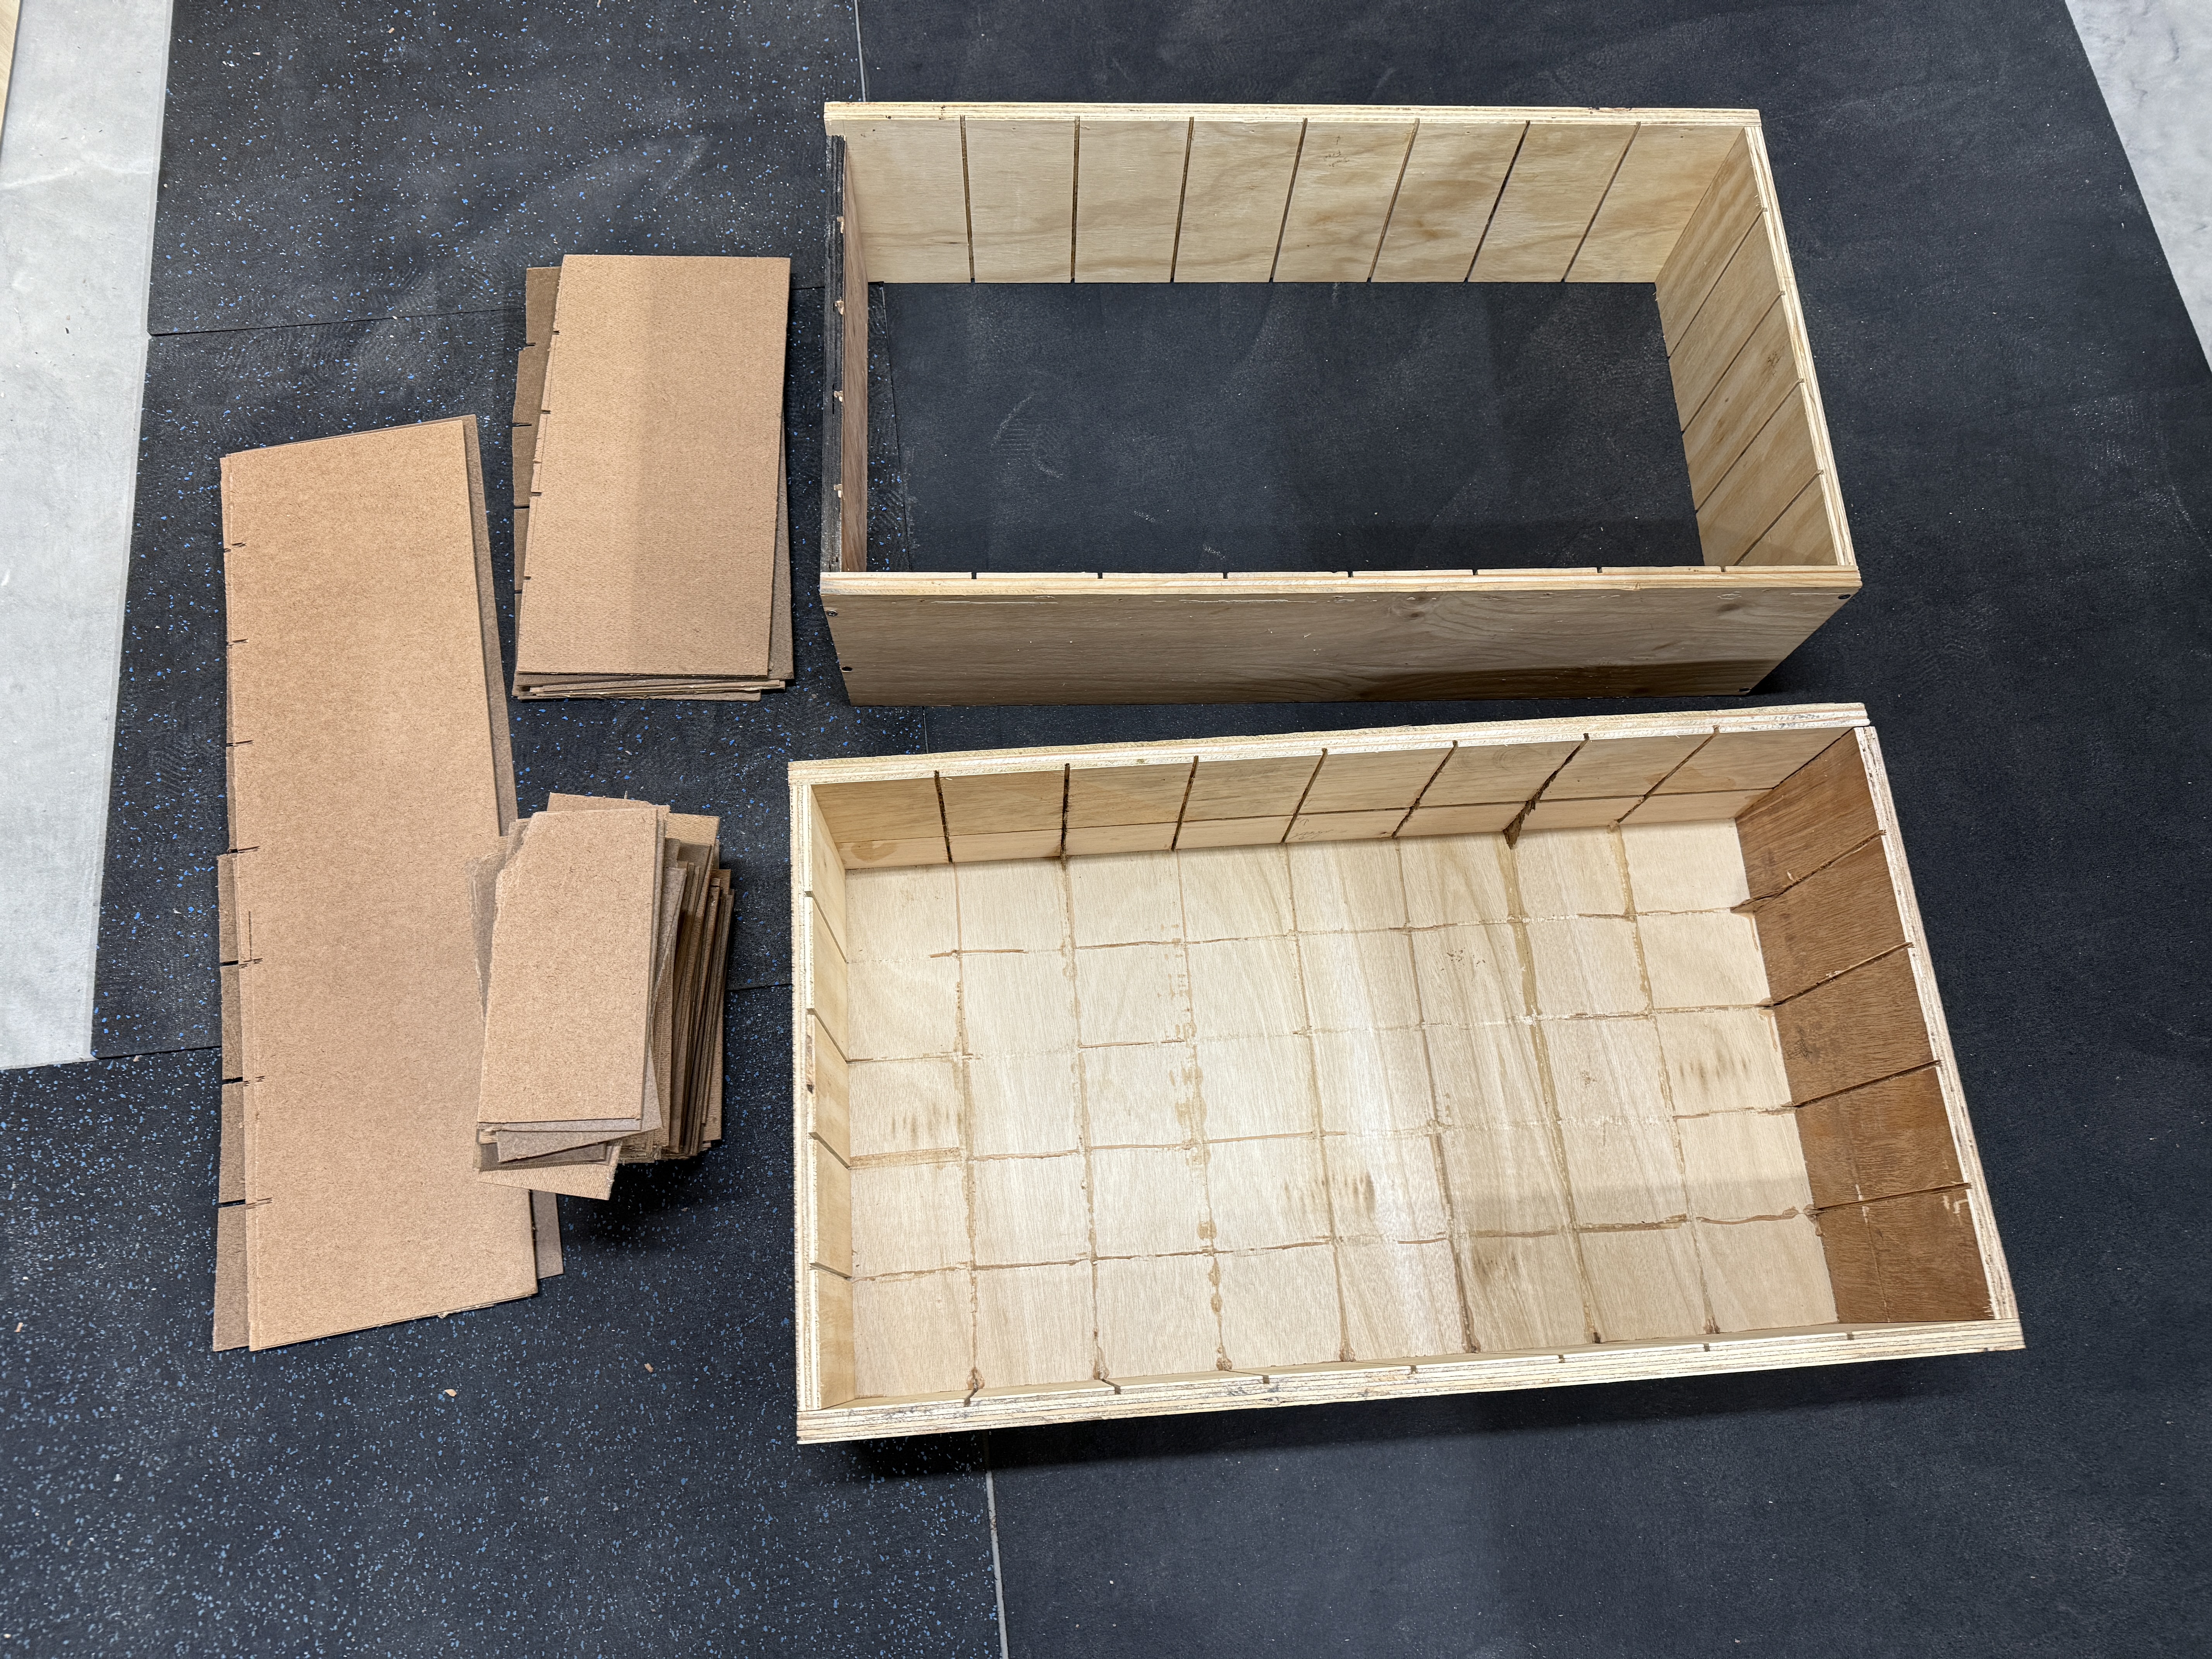
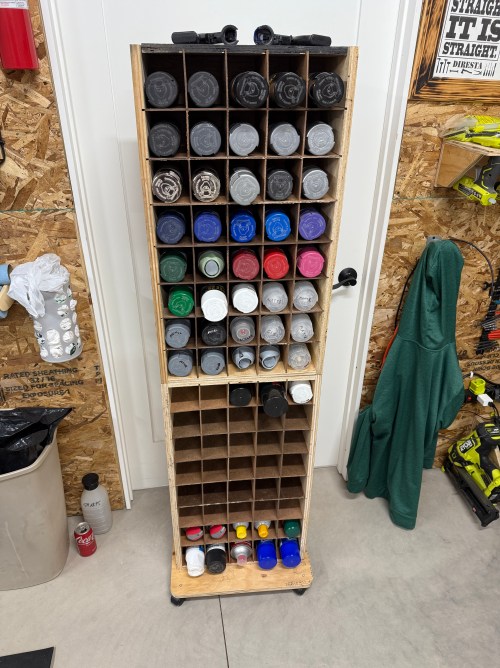
It was built to slide in a shelf at the old house. I was able to get it out and moved to the new house. The 16″ depth was wasted space though. Look at how deep the cans were when laying with the back on the ground (those higher ones are actually a tall can on top of a standard can).
It turns out, a great size for spray cans is about eight inches, so I split it down the middle and wrestled out all of the dividers, which were partially glued in place.
Stack ’em, screw ’em together, and nail a back on the new half.
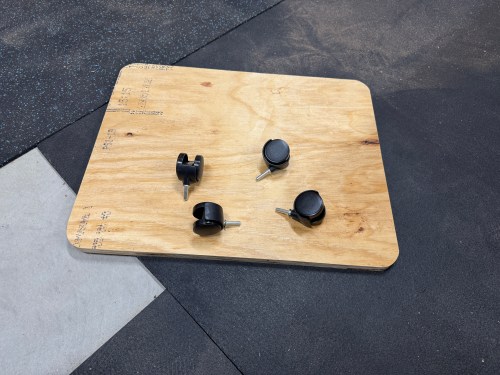
It was very tippy, so I rounded the corners on a larger piece of plywood to make a more stable base and pulled out office chair casters. The casters wouldn’t be great for any heavy shop furniture, so this was the perfect project to use them.
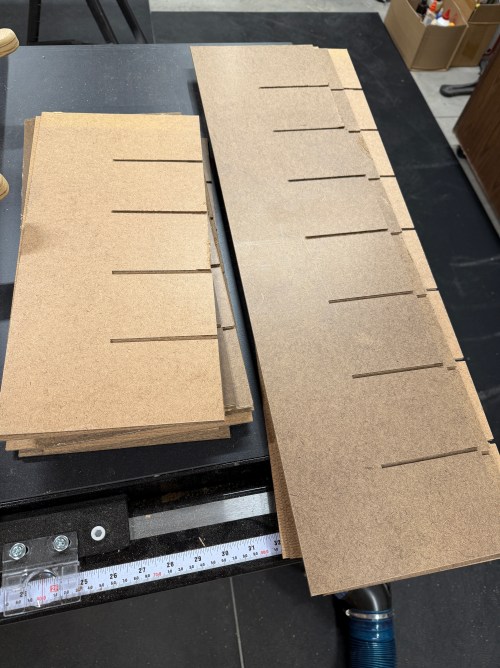
Cutting more dividers and then redoing all of the slots was the worst part of this project. It took well over 250 cuts on the table saw.
A handful of the new hardboard pieces were too long and needed to be trimmed. Other than that, the assembly went much smoother than I expected, with a little persuasion from a dead blow hammer. I have no idea why I used glue on that first iteration. Maybe it was needed with the deeper box, but this one is very stable without a drop of glue.
This is another great upgrade to the shop. After adding all of my spray paint, lubricants, spray adhesives, and other oddball cans there is plenty of room for more.
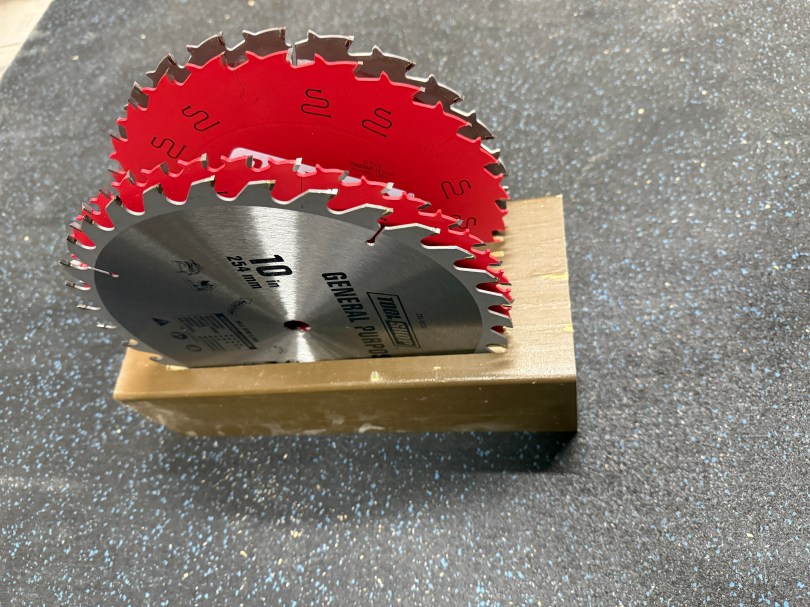
Before I make the outfeed table for my table saw I figured I would work on things to organize everything for the saw. There is a big open space under the right wing, so I’ll be making a cabinet to hold the sled, jigs, blades, and accessories. I had an idea for a saw blade holder, so I took a chunk off an old 6×6″ post, cut some slots, and trimmed the height and length.
I’ll give the holder some sanding around the edges, but otherwise this is done. It’s nice when a build goes according to plan, especially a quick shop project.
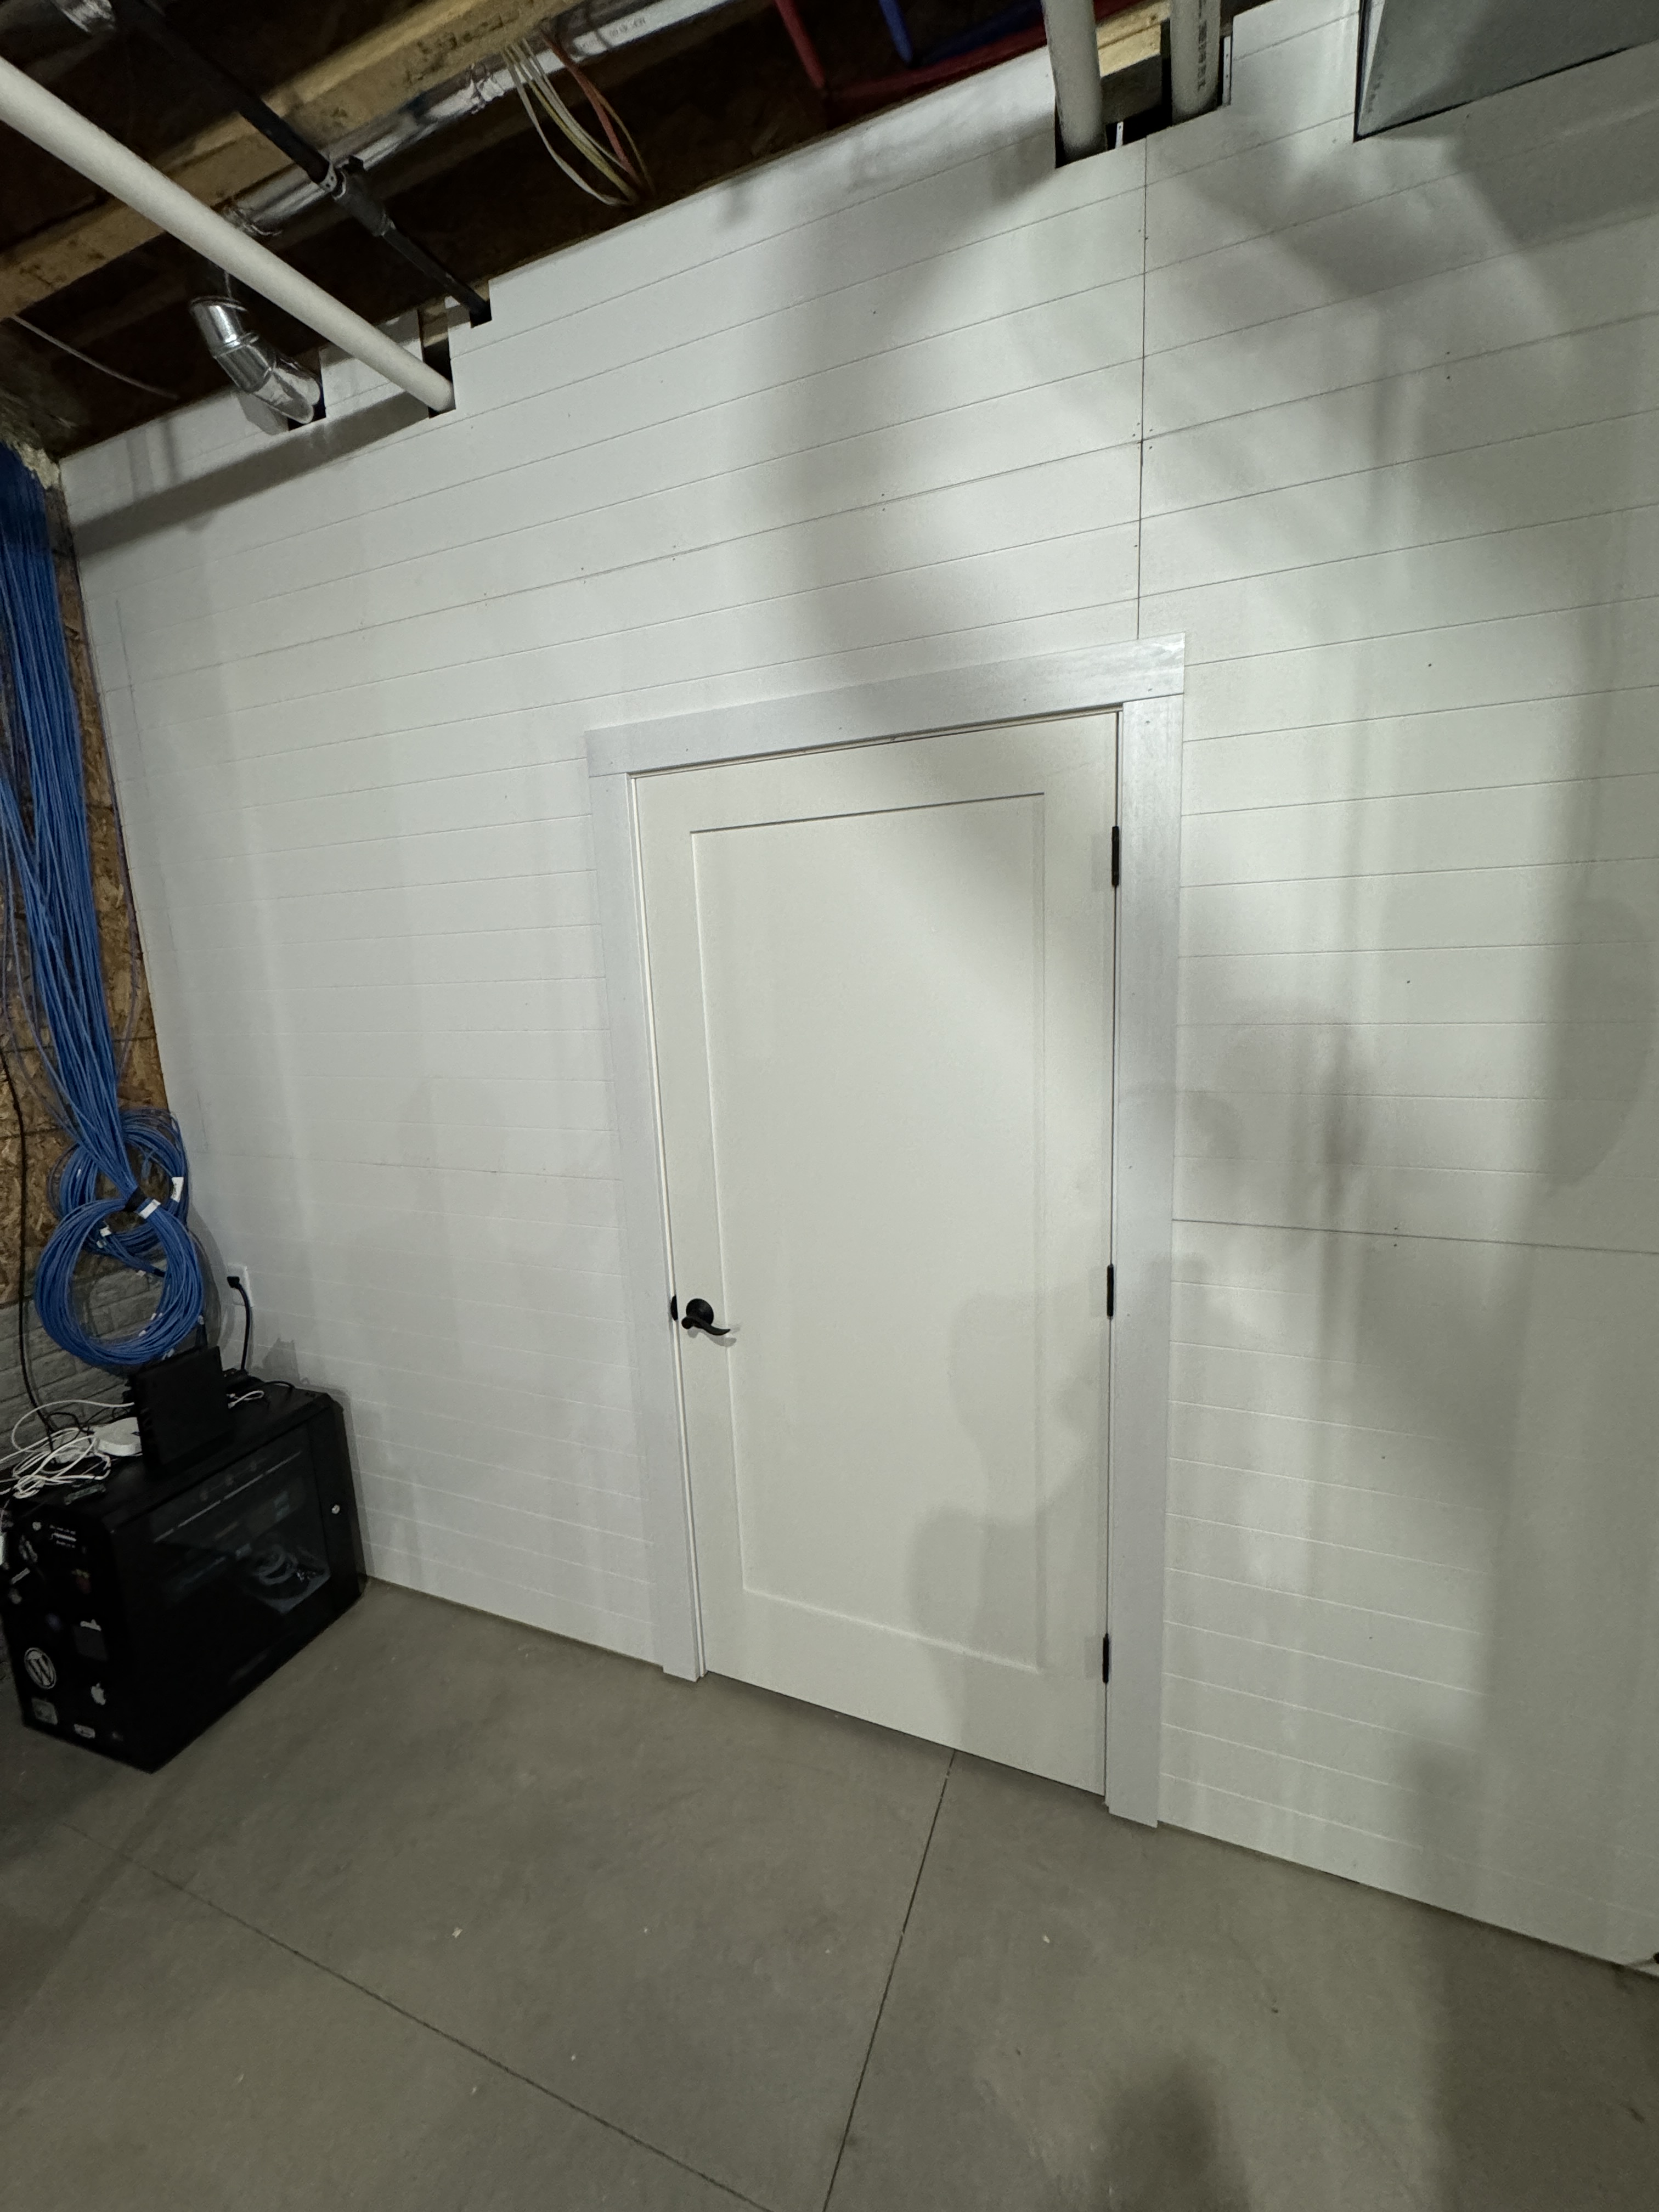
A week after moving in, Dad came down and we built a wall in the basement to close off the workshop and keep sawdust contained. I eventually finished the rest of the show side of the wall and added trim to the door.
The Cat6 cables and networking rack are a project I hope to tackle over the holidays.
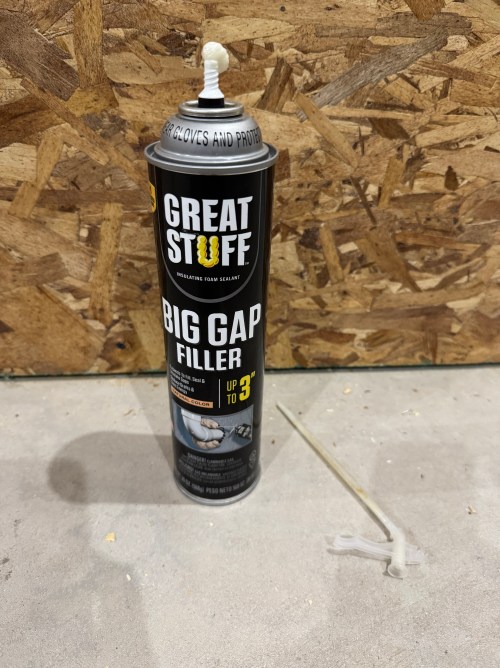
In order to keep as much dust as possible in the shop, I bought a can of spray foam to fill gaps around pipes, ducts, and beams. Since I hade some large gaps, I had to do two applications. I used wider painter’s tape to hold the foam back (picture below was taken during round two).
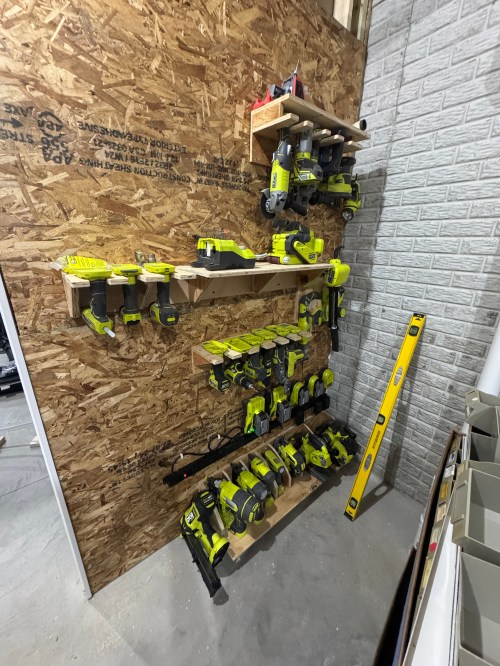
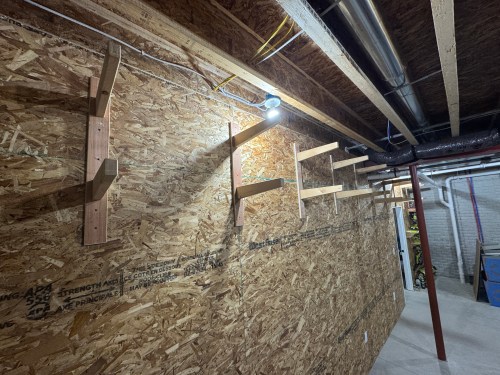
Then I wired all of the shop outlets and put up OSB for my wall material. It was a cheap option at about $15 a sheet, while allowing me to screw lighter things anywhere. The first things to go on the wall were all of my Ryobi storage, since the tools had been scattered across the floor for weeks. I absolutely love the 10 foot foundation, which allowed me to put wood storage high and out of the way.
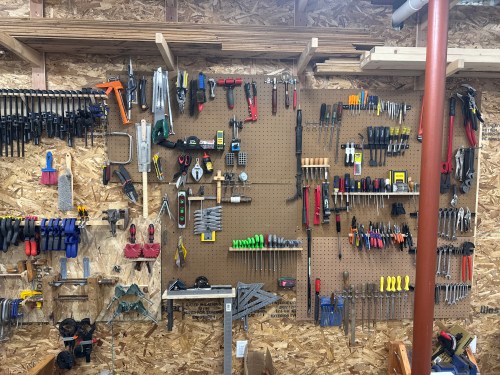
I put up my clamp racks and emptied a lot of boxes to organize my tool wall. The Allen key holder was a quick side project.
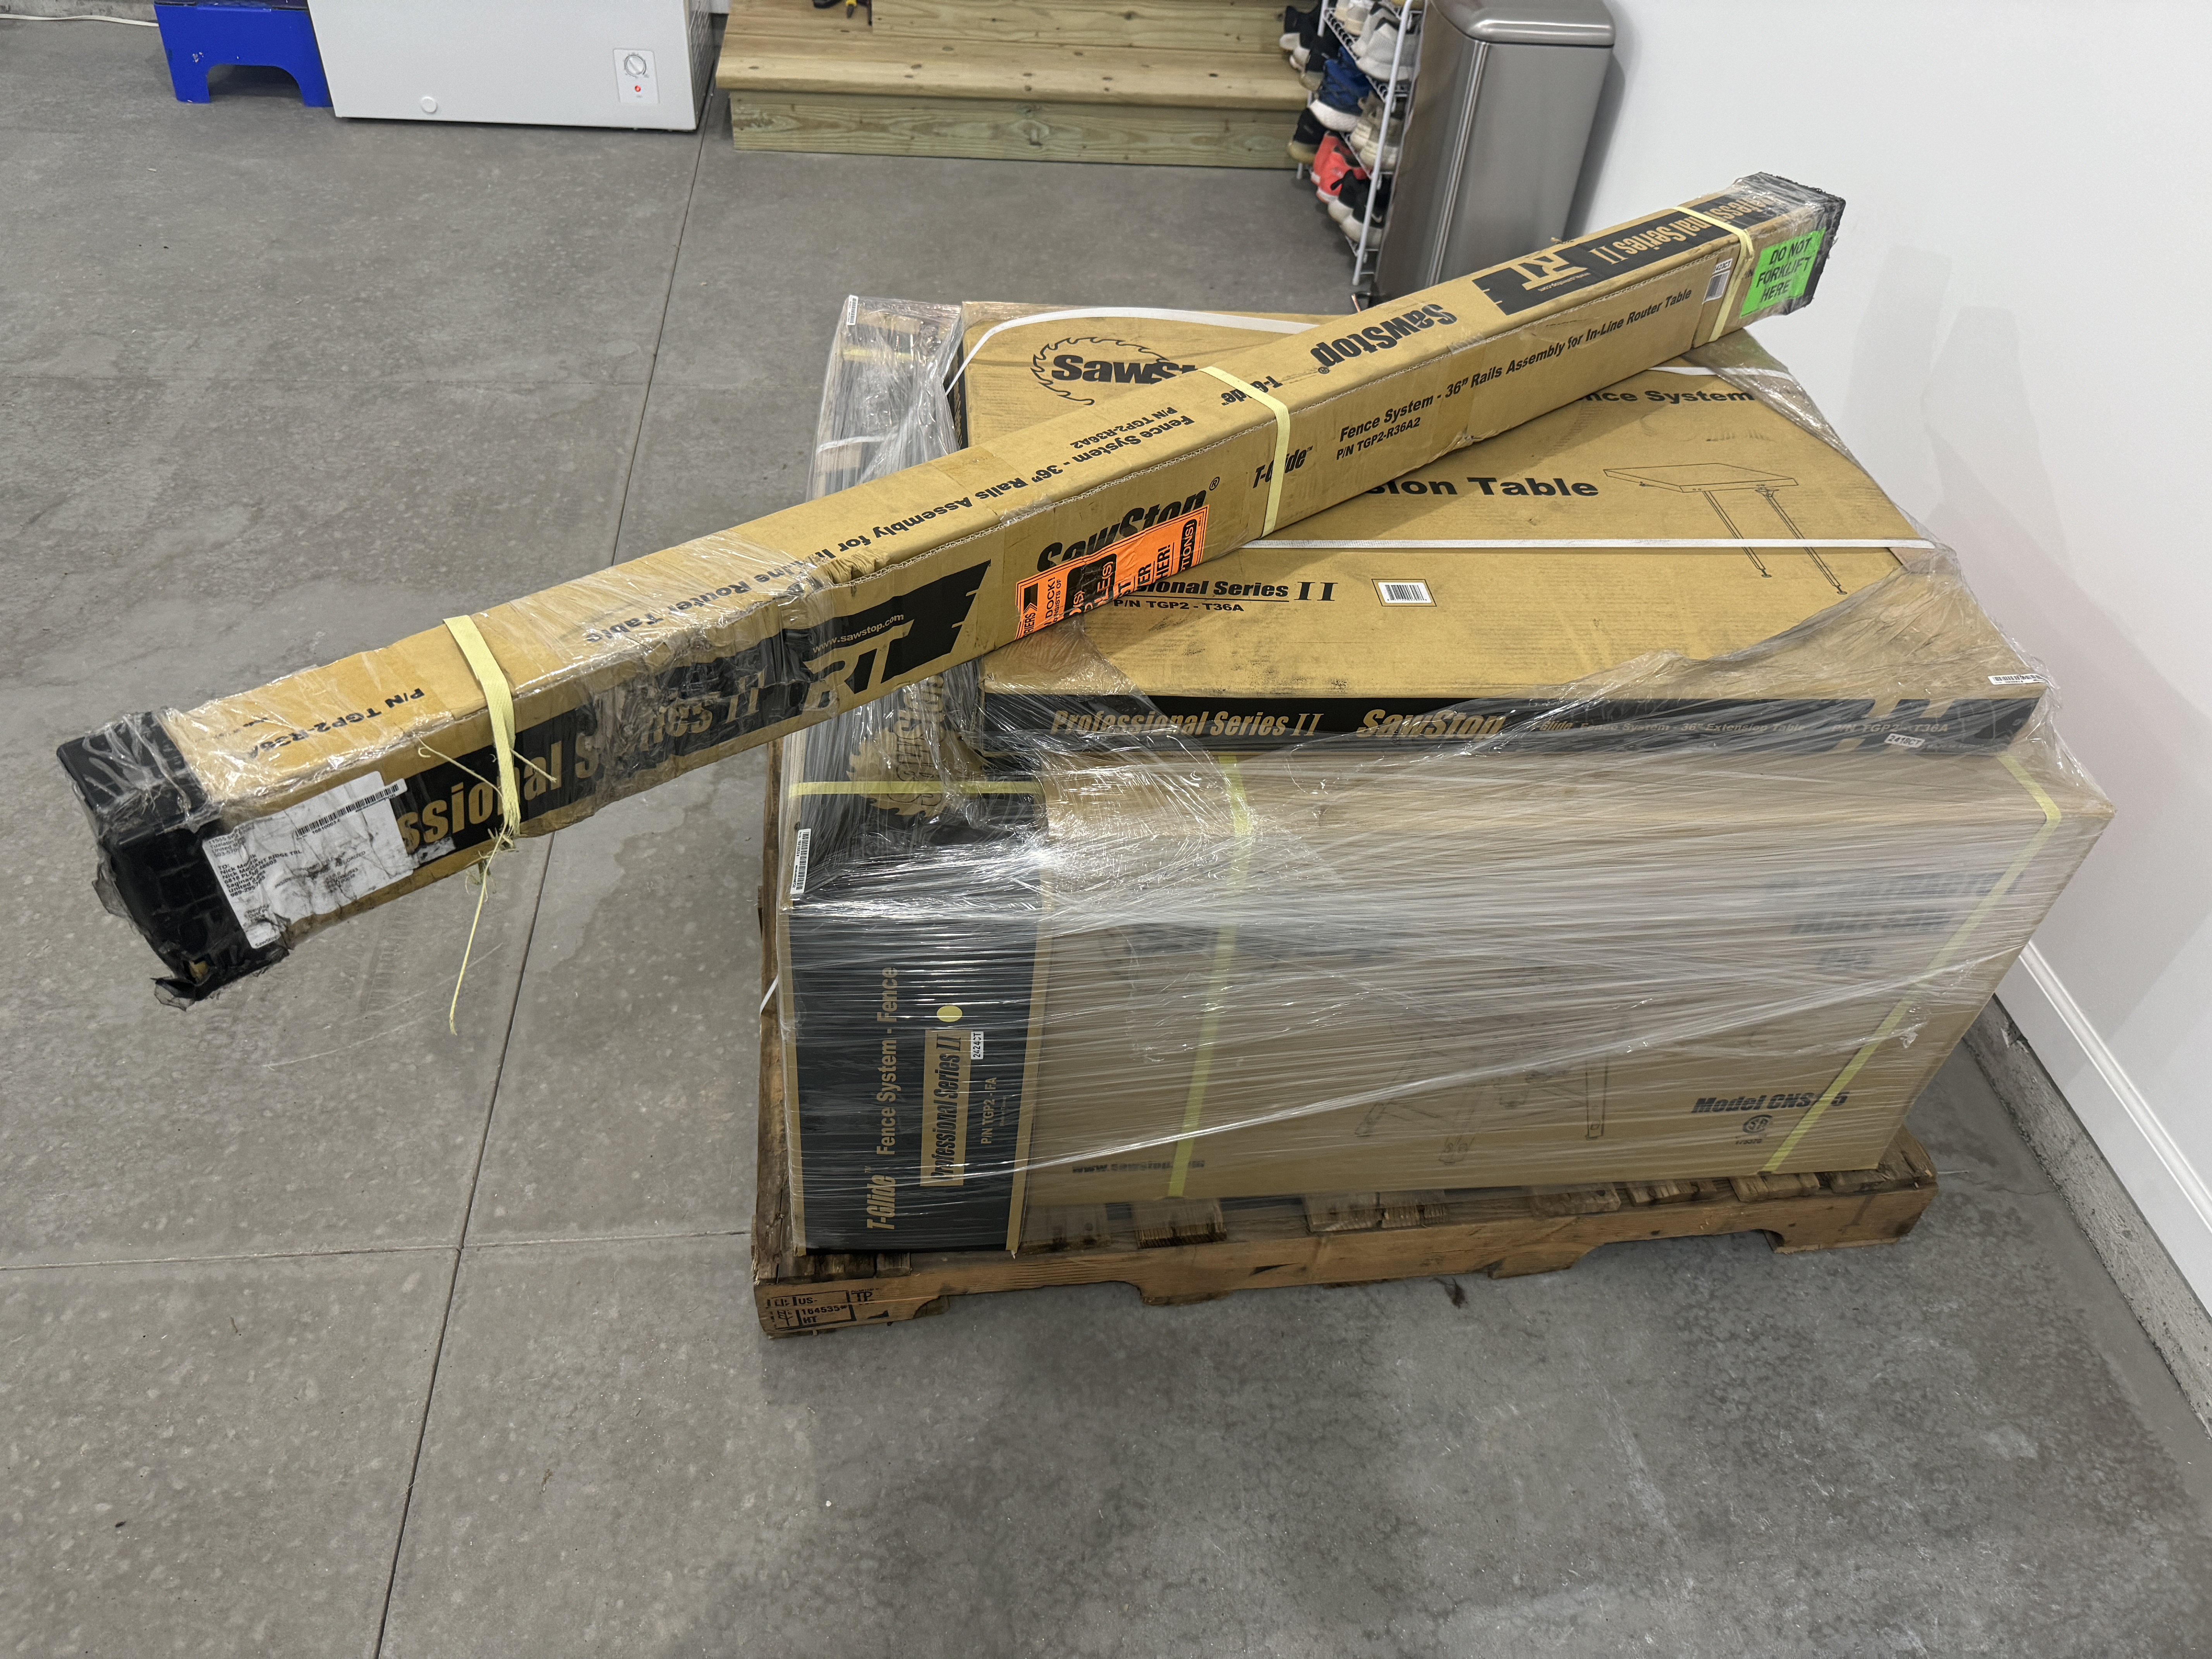
I had wanted a SawStop for years and the move seemed like good excuse to sell my old Craftsman table saw instead of hauling it to a new basement. I bought SawStop’s Contractor Saw with the 36” T-Glide Fence Assembly, Mobile Base, and Cast Iron Wings. She’s a beauty, a joy to use, and the safety features can’t be beat.
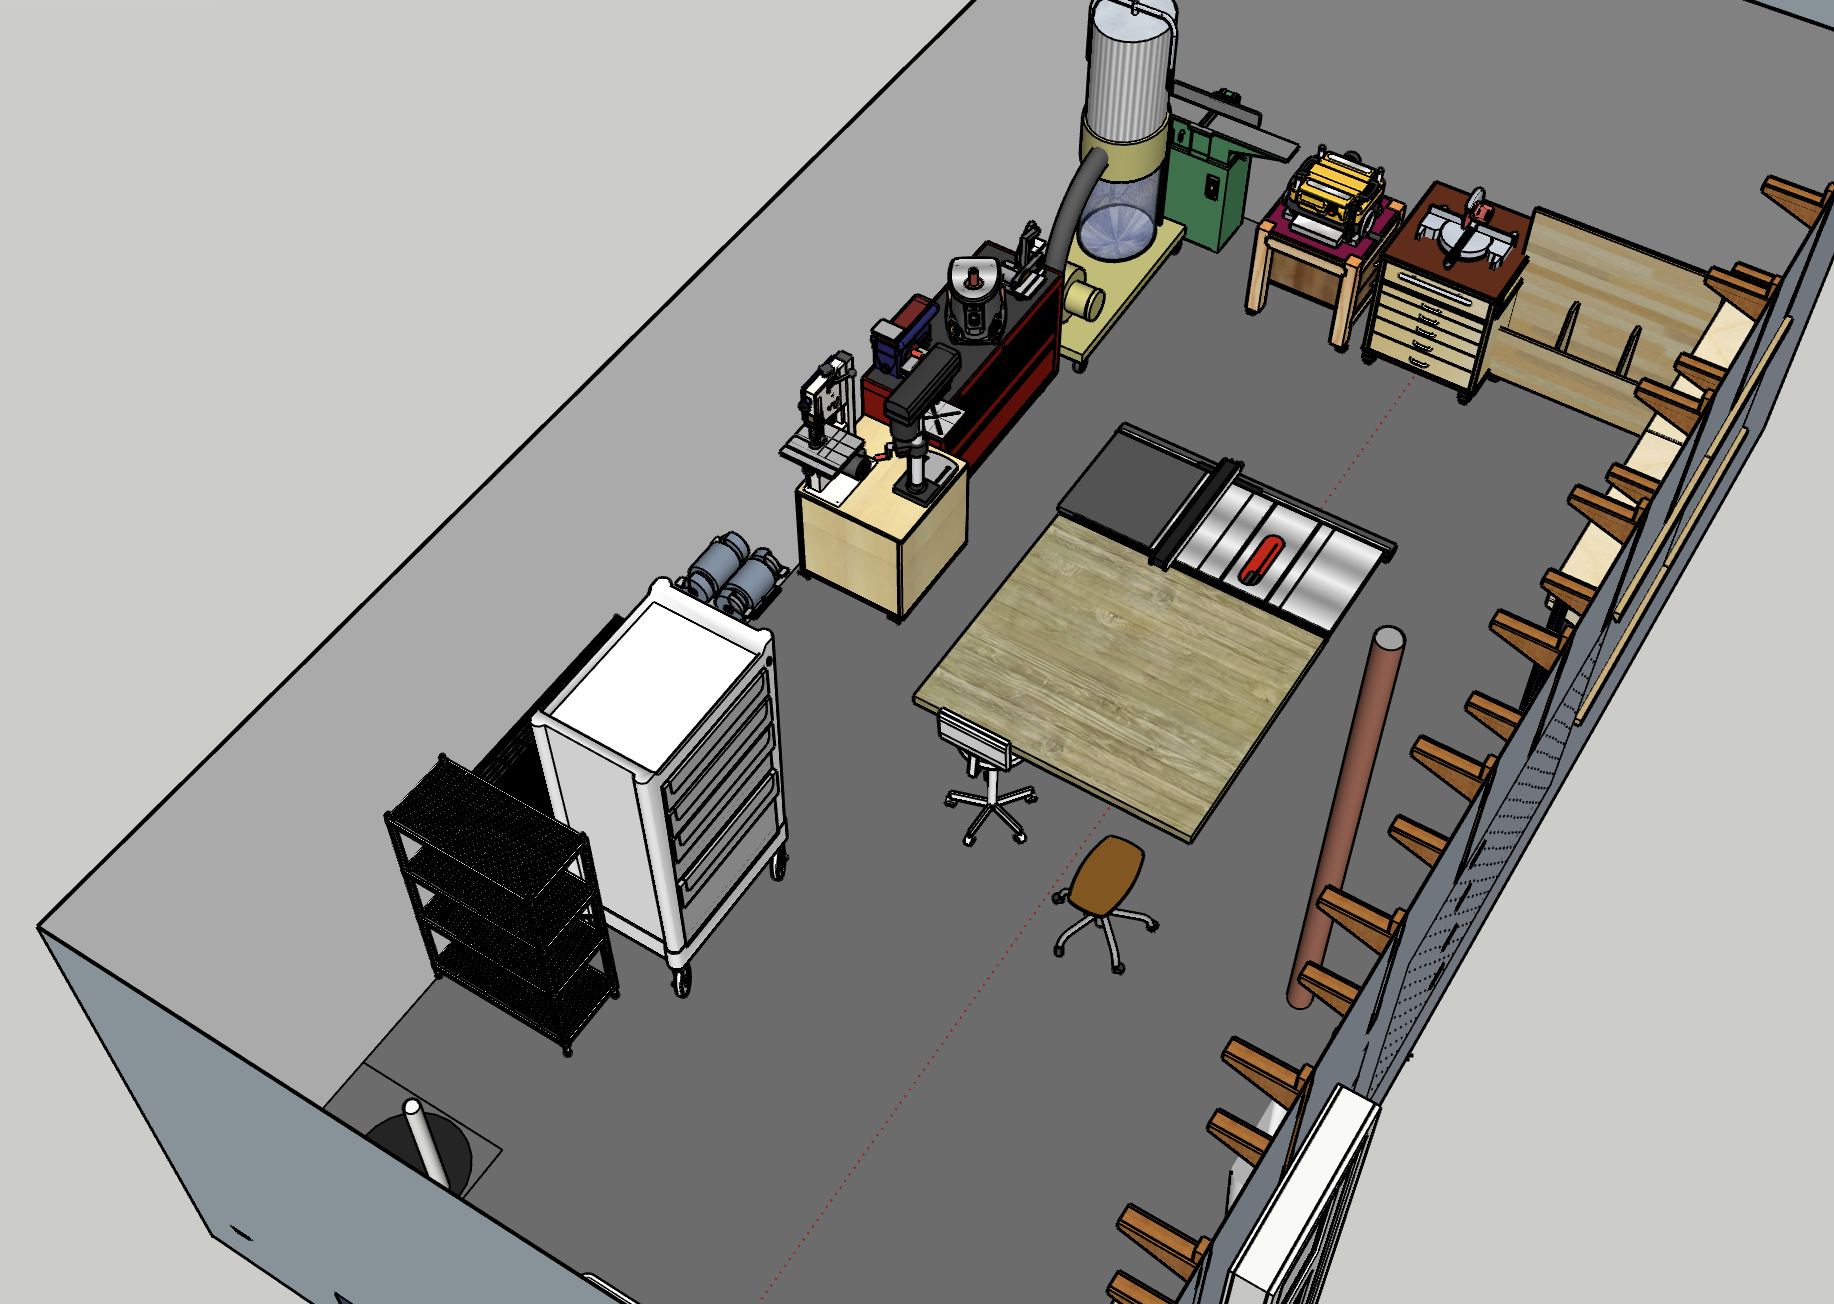
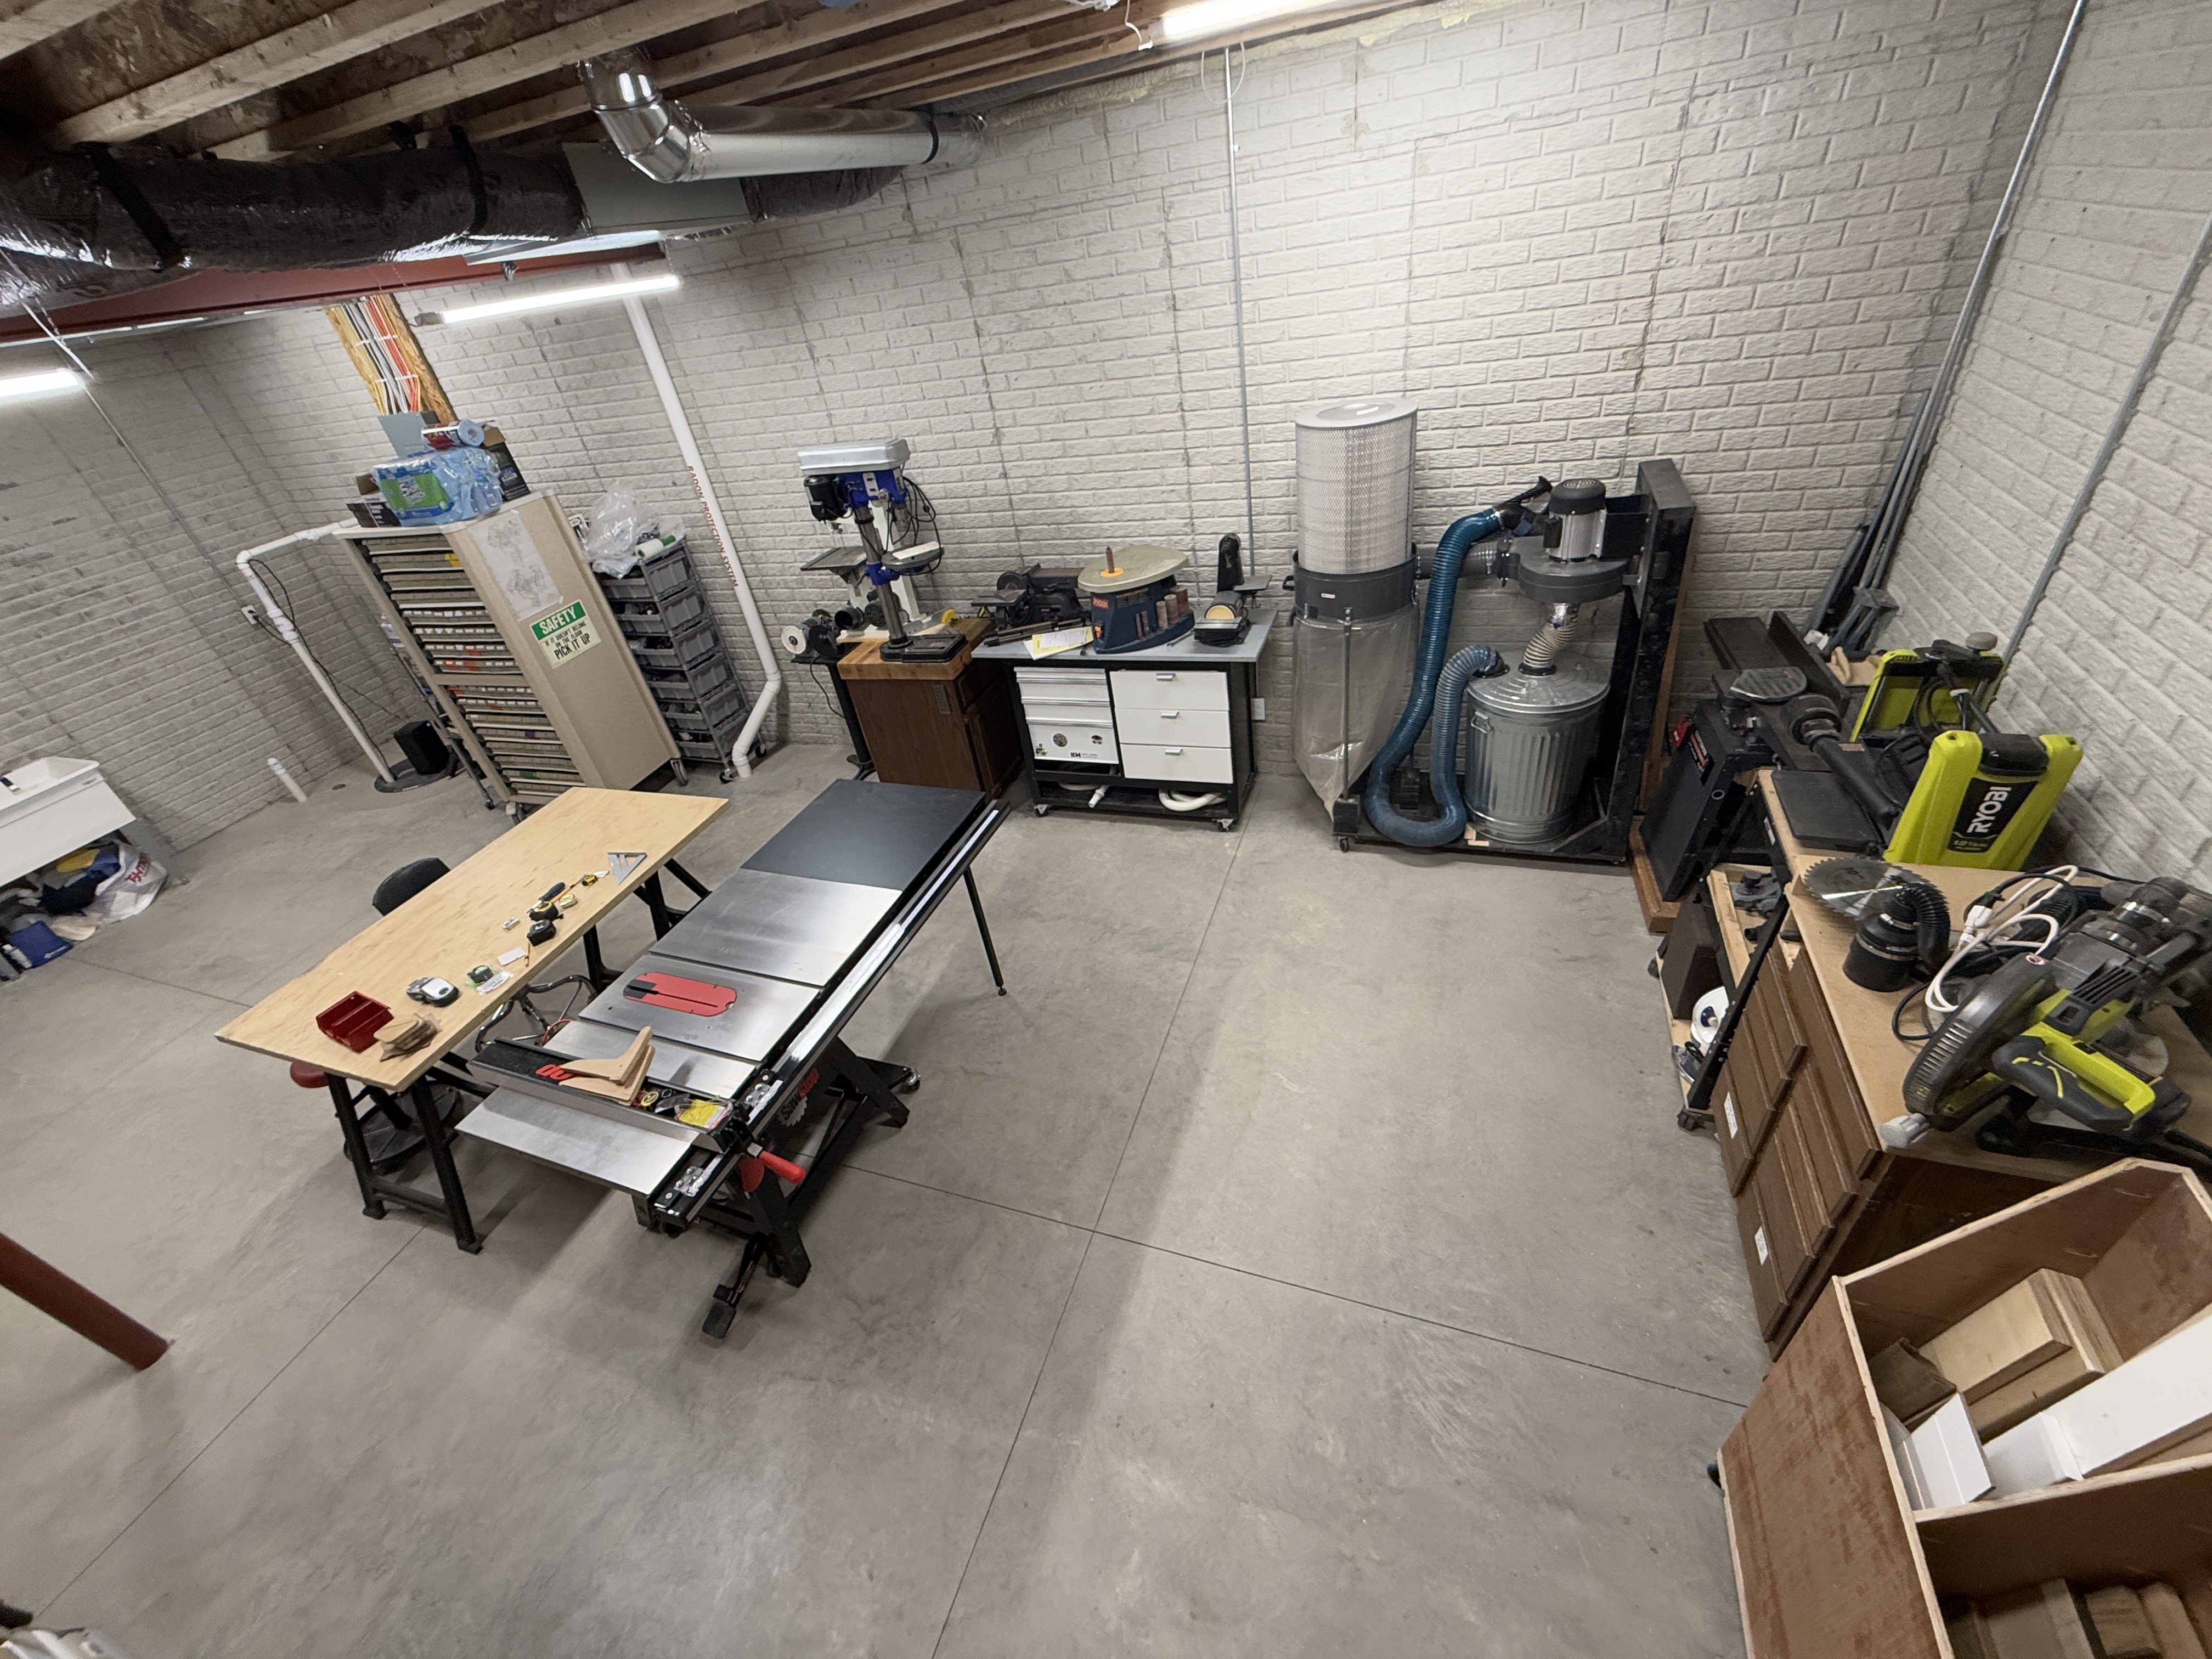
I had a general idea of the layout I was going for in the shop, but in order to get a feel for the space, I measured all of my carts and tools so I could model in SketchUp. I started with the structure, items on the main wall, and things that can’t be moved, like pipes and the shop sink.
Then I needed all of the tool and storage carts. I imported a lot of the items from SketchUp’s 3D Warehouse and scaled everything to the correct size.
Eventually I got to a comfortable arrangement in the model and could physically put things in place. Over the course of several weeks I made a lot of adjustments. I even moved my band saw over to the drill press cart so I could repurpose it’s cart for my planer. I think I ended with a very good first iteration. Here are comparisons of the model and the actual room.
I can start making things again! One of the first builds is going to be an outfeed/assembly table for the table saw. It’ll have some neat features and storage. In the models I made a table top of about the correct size and in real life you see my old table top, which is too small and low, on saw horses.
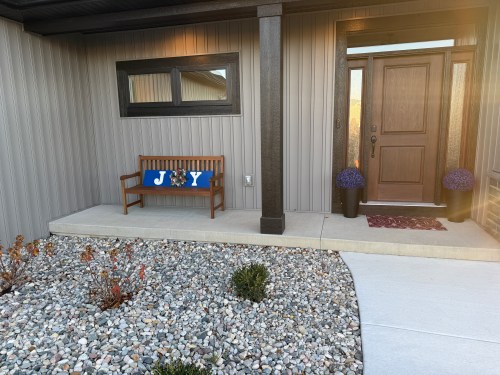
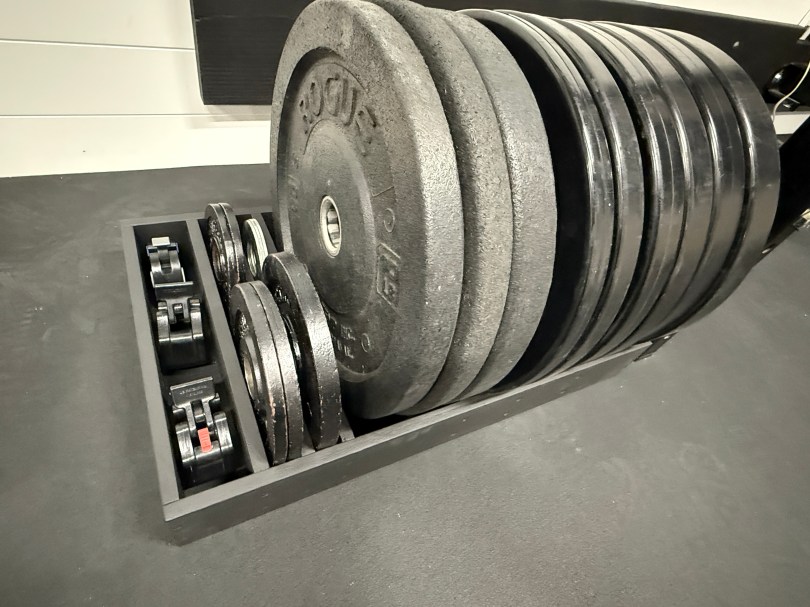
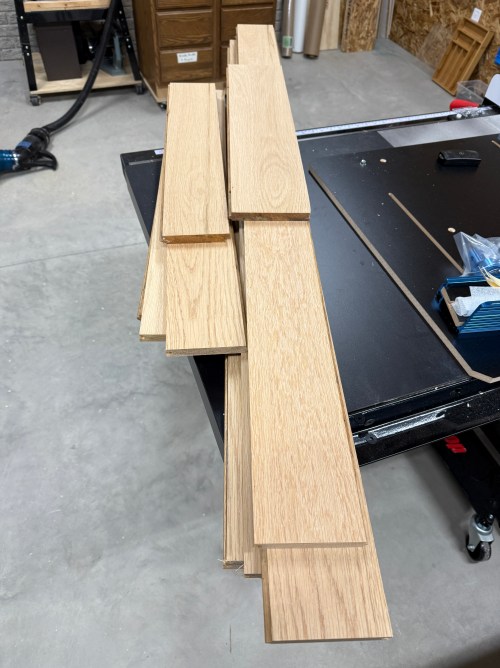
During the move, version 2 of our weight plate storage was tossed in the trash because we sold our 55 pound plates and wanted to evenly split the plates on either side of the rack in our new gym.
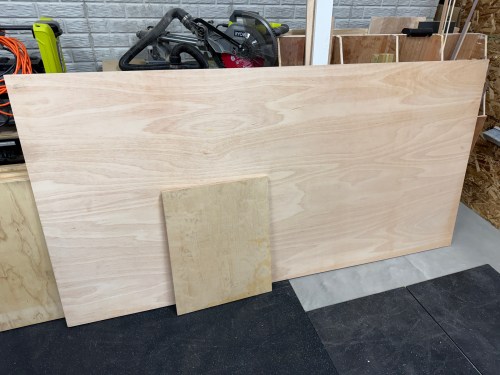
I took some measurements and did a little math for a general idea of how much wood I’d need.
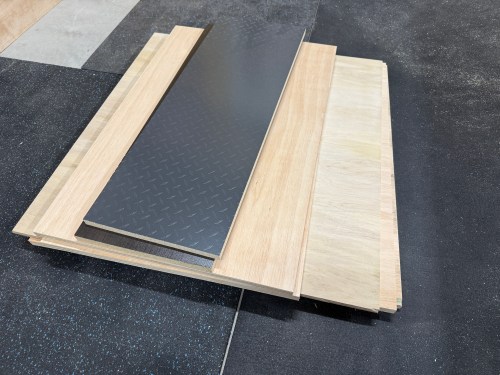
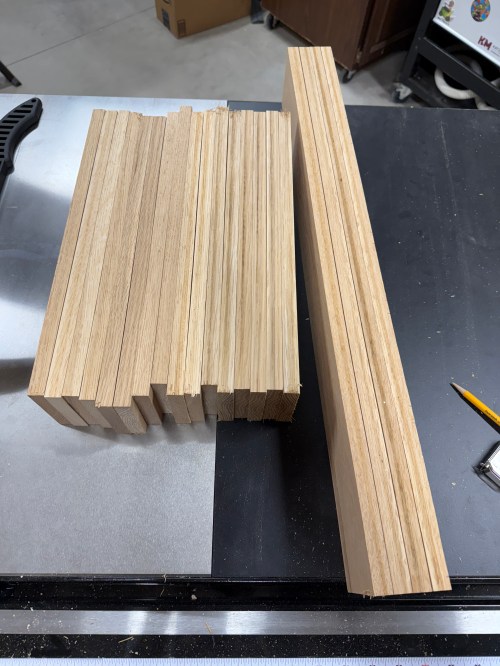
Grabbed some old oak flooring and started processing it on the miter saw, planer, and table saw.
I realized I had measured the full width of the plates, which I don’t need since the storage racks are only at the bottom. After recalculating, I cut a bunch of the dividers and did a mockup, when I realized I could add another slot to hold the barbell collars. The extra spacing on the sides of the plates ended up being less than my original guess as well.
Then I to cut everything to size, and drilled a lot of holes.
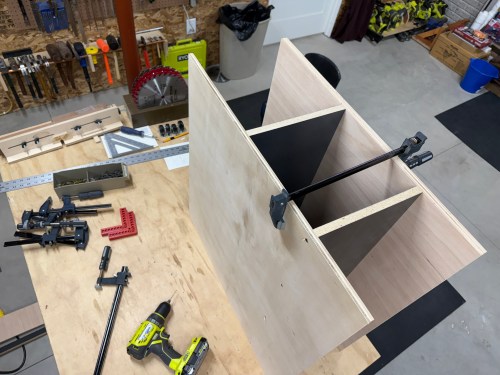
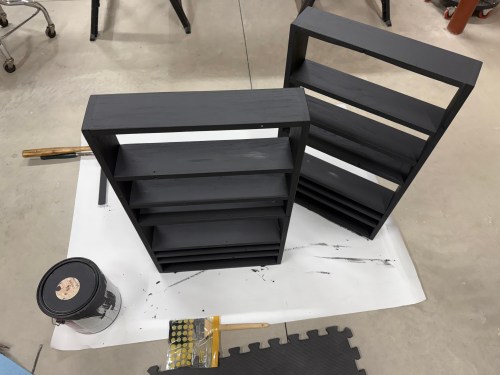
The assembly process was complicated, since I had to individually square up and attach eight dividers. Then the other side needed to have glue applied to all eight dividers before getting 16 holes to line up.
The second one is always easier and I was able to use the assembled rack as my 90° to clamp to.
More sanding and then black paint. Brushing on the paint with the oak’s grain pattern was a challenge, especially in some of the small gaps between dividers, so it took many coats.
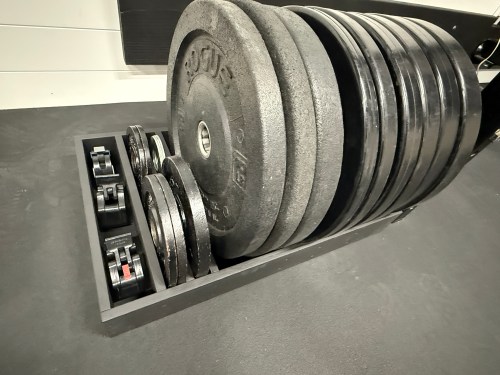
The area looks a lot cleaner and the weights will be a lot easier to use.
Here are the final dimensions for anyone who wants to build their own:
All wood: 5/8″ thick and 3-11/16″ tall
Front and Back: 27-3/8″ long
Dividers: 15-1/4″ long
Gaps between dividers:
2×45#: 5″
2×35#: 3-7/8″
2×25#: 2-15/16″
15# + 2×10#: 5-5/8″
Metal 10#: 1-1/8″
Metal 2×5#: 1-1/4″
Collars: 2-5/8″
Everything will depend on the size of your plates though. I measured the thickness of our plates and ended up adding a half inch for the gaps, which feels good for moving the plates in and out.
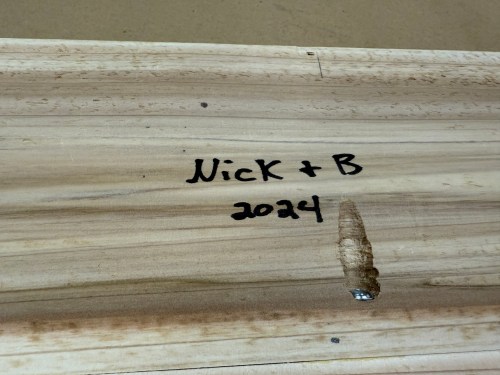
At the Beloved resort in Playa Mujeres (just north of Cancun) Brandi and I went to an activity where we each made an Ojo de Dios, which is Spanish for God’s eye. We’re busy with all kinds of projects at the new house, so we’re using these as our homemade ornaments for this year.
Check out our creations from 2021, 2022, and 2023.