New Workshop

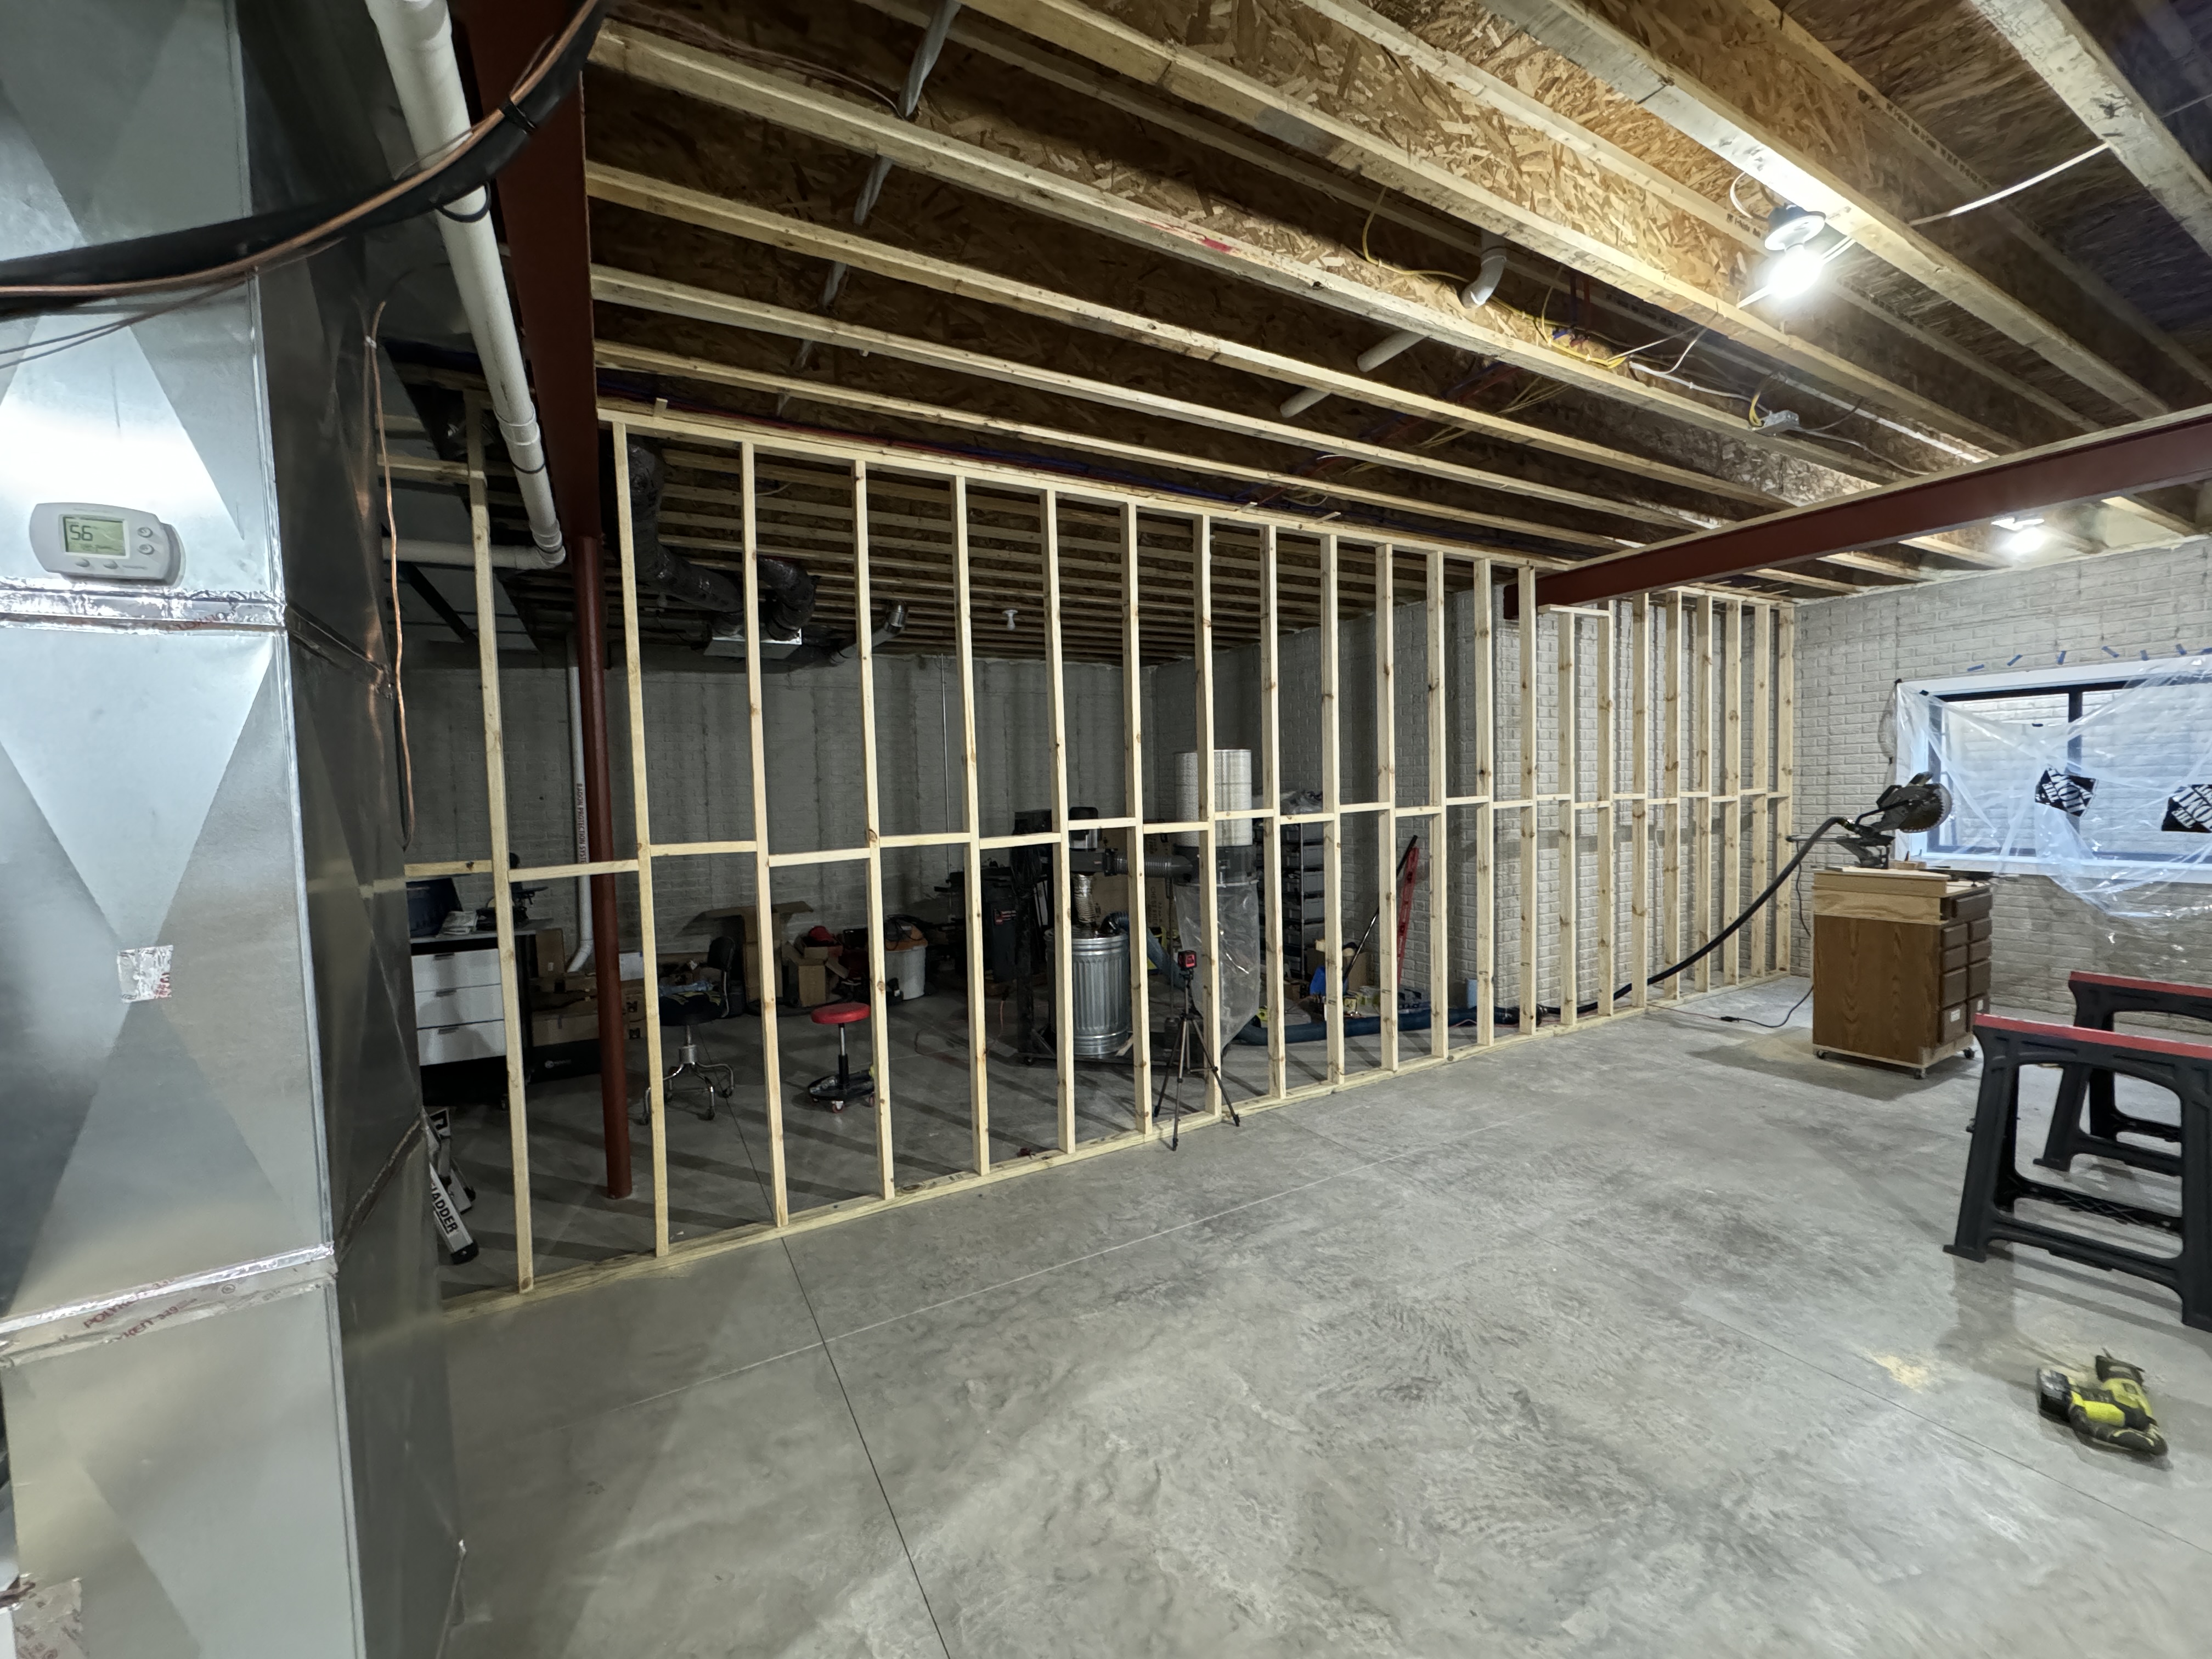
A week after moving in, Dad came down and we built a wall in the basement to close off the workshop and keep sawdust contained. I eventually finished the rest of the show side of the wall and added trim to the door.

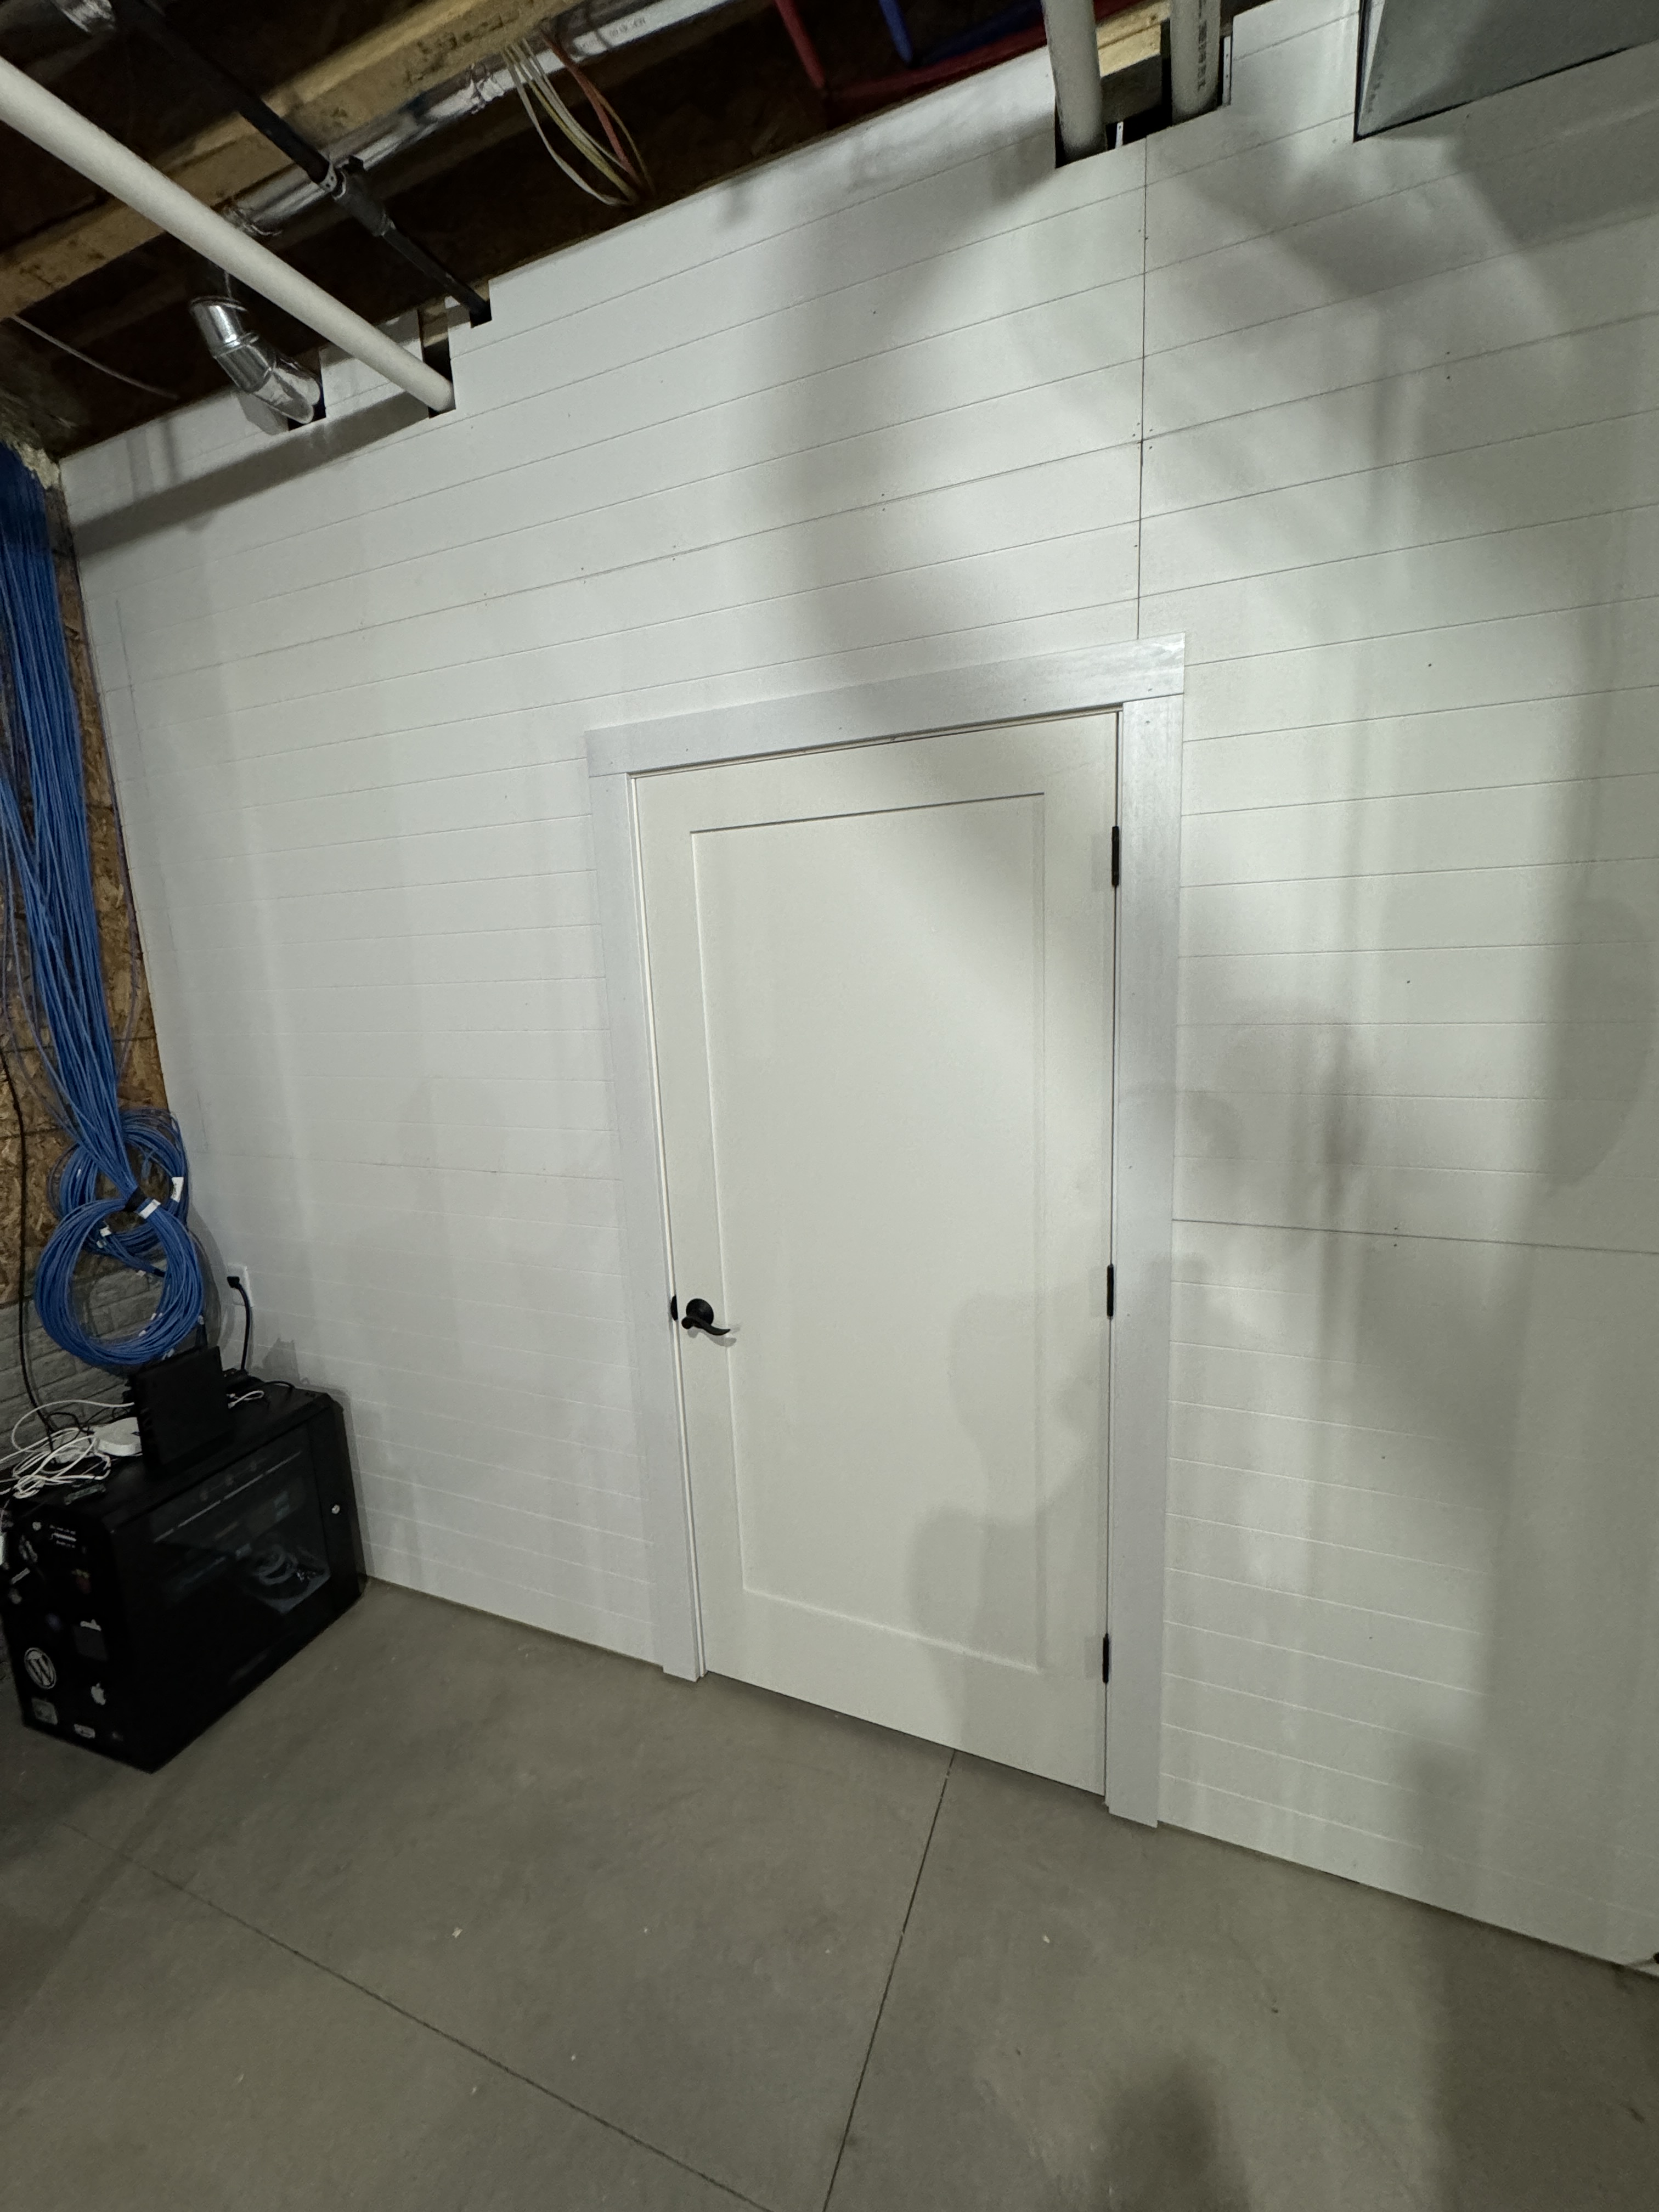
The Cat6 cables and networking rack are a project I hope to tackle over the holidays.

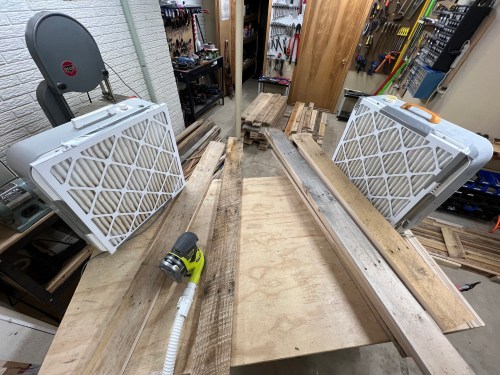
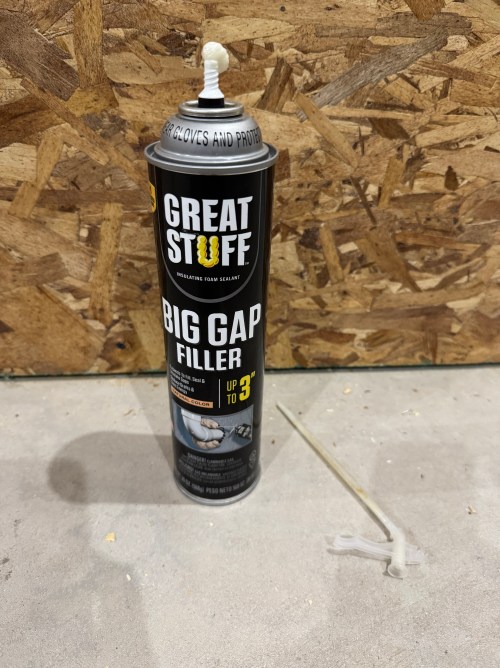
In order to keep as much dust as possible in the shop, I bought a can of spray foam to fill gaps around pipes, ducts, and beams. Since I hade some large gaps, I had to do two applications. I used wider painter’s tape to hold the foam back (picture below was taken during round two).

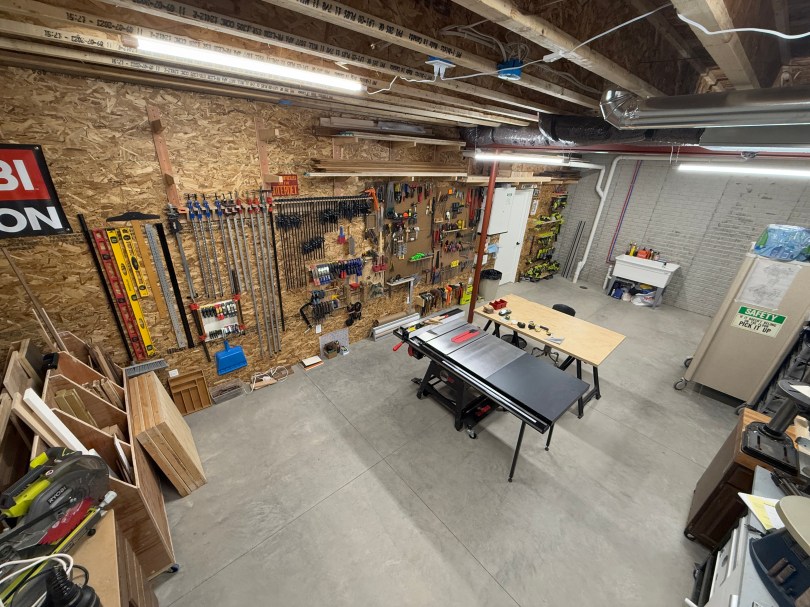
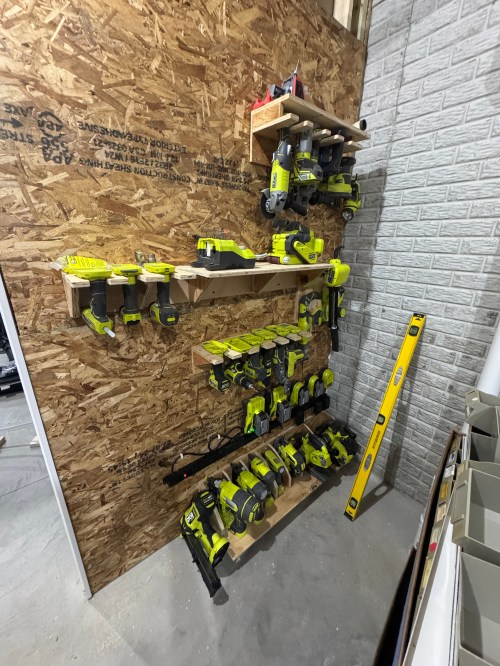
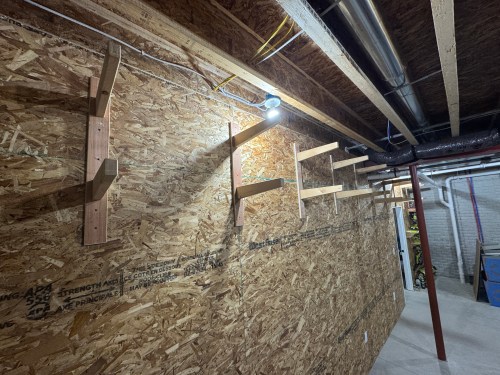
Then I wired all of the shop outlets and put up OSB for my wall material. It was a cheap option at about $15 a sheet, while allowing me to screw lighter things anywhere. The first things to go on the wall were all of my Ryobi storage, since the tools had been scattered across the floor for weeks. I absolutely love the 10 foot foundation, which allowed me to put wood storage high and out of the way.

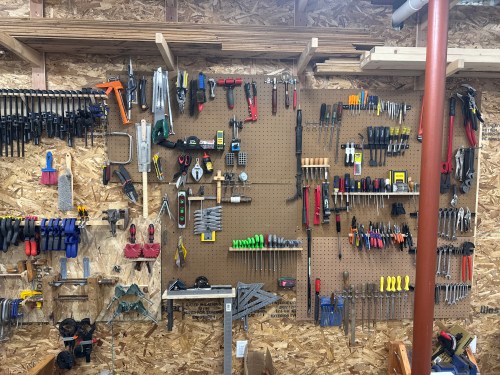
I put up my clamp racks and emptied a lot of boxes to organize my tool wall. The Allen key holder was a quick side project.

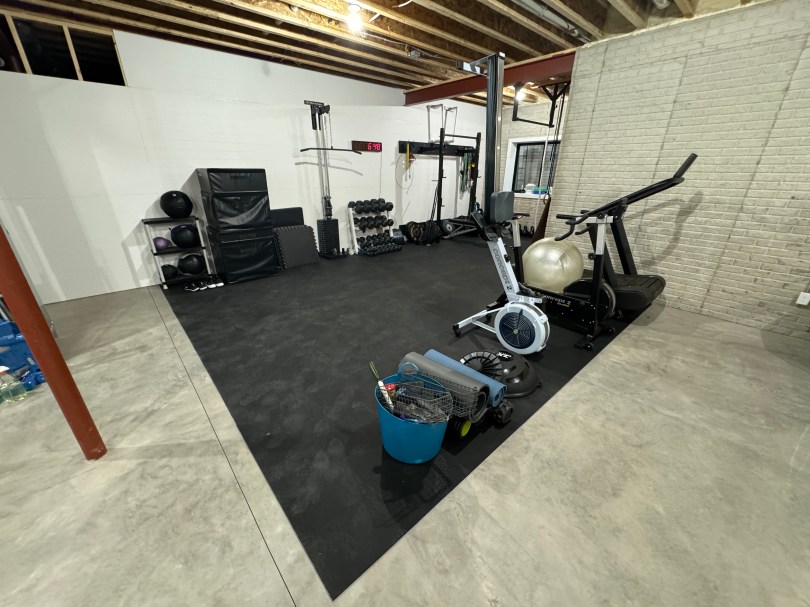
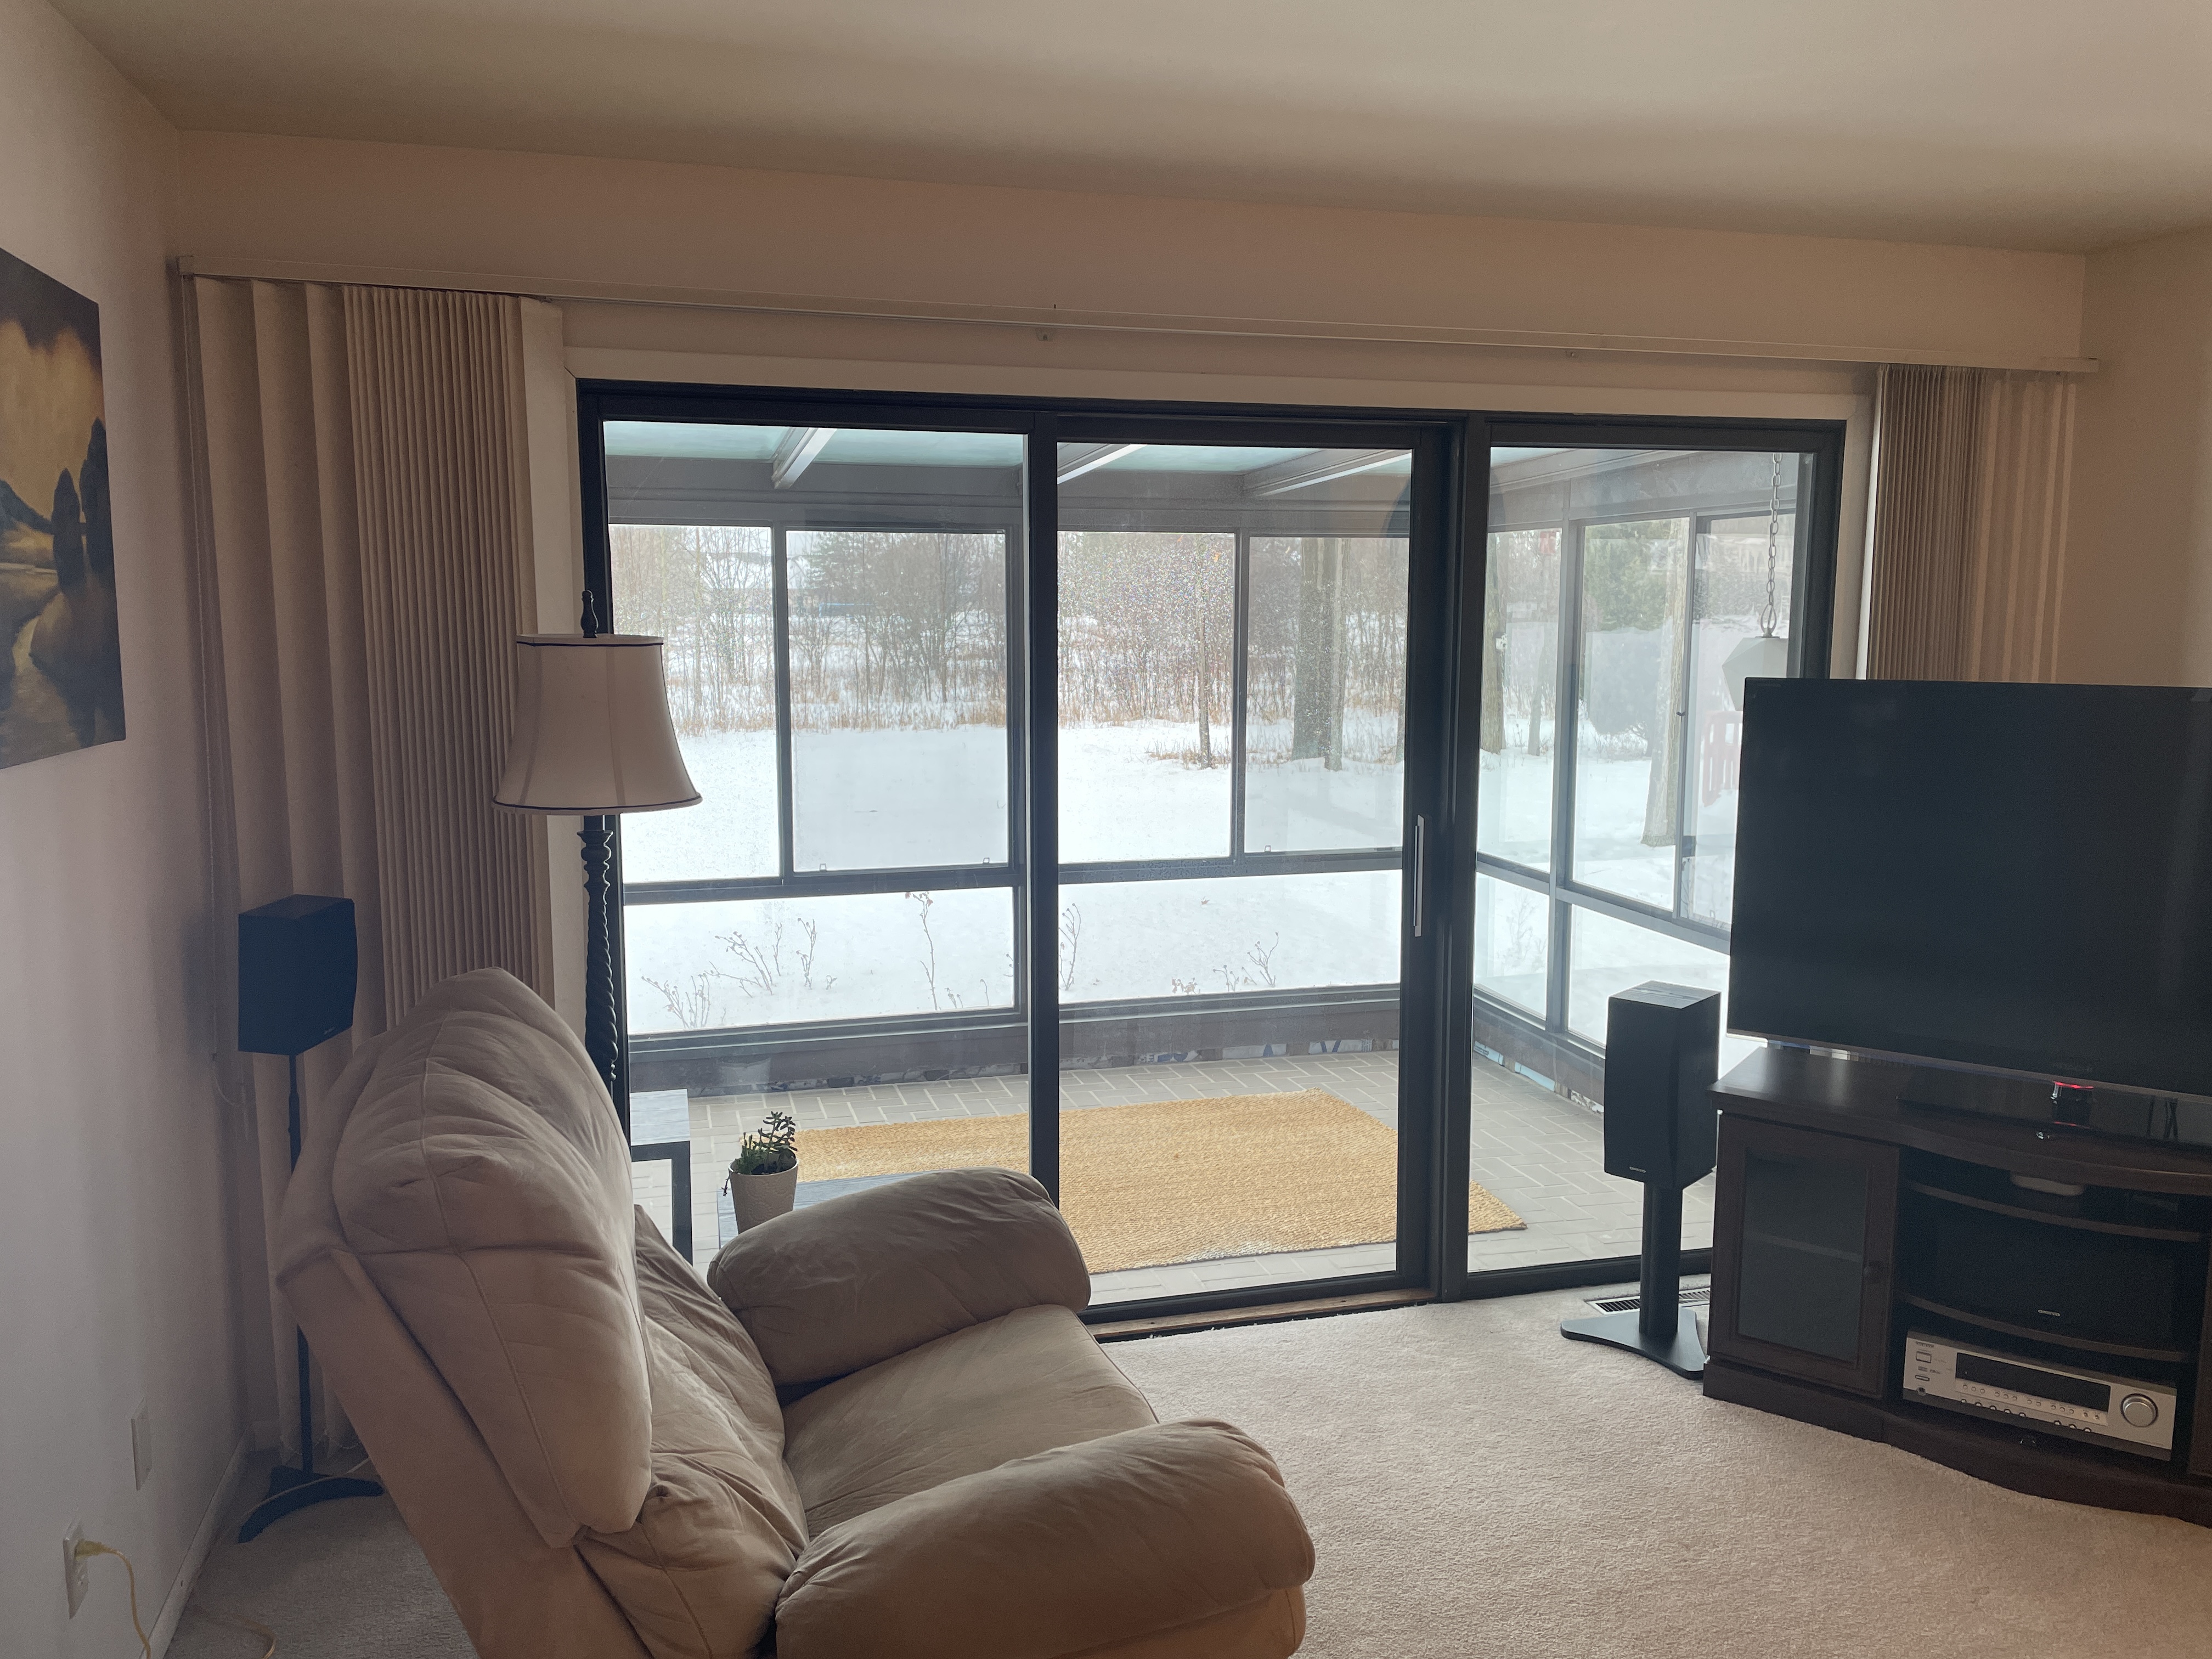
I replaced all of the lighting in the gym and the workshop with a 10 pack of 4′ LED light fixtures for $76 from Amazon and it made a big difference. Here’s a before and after of the gym.

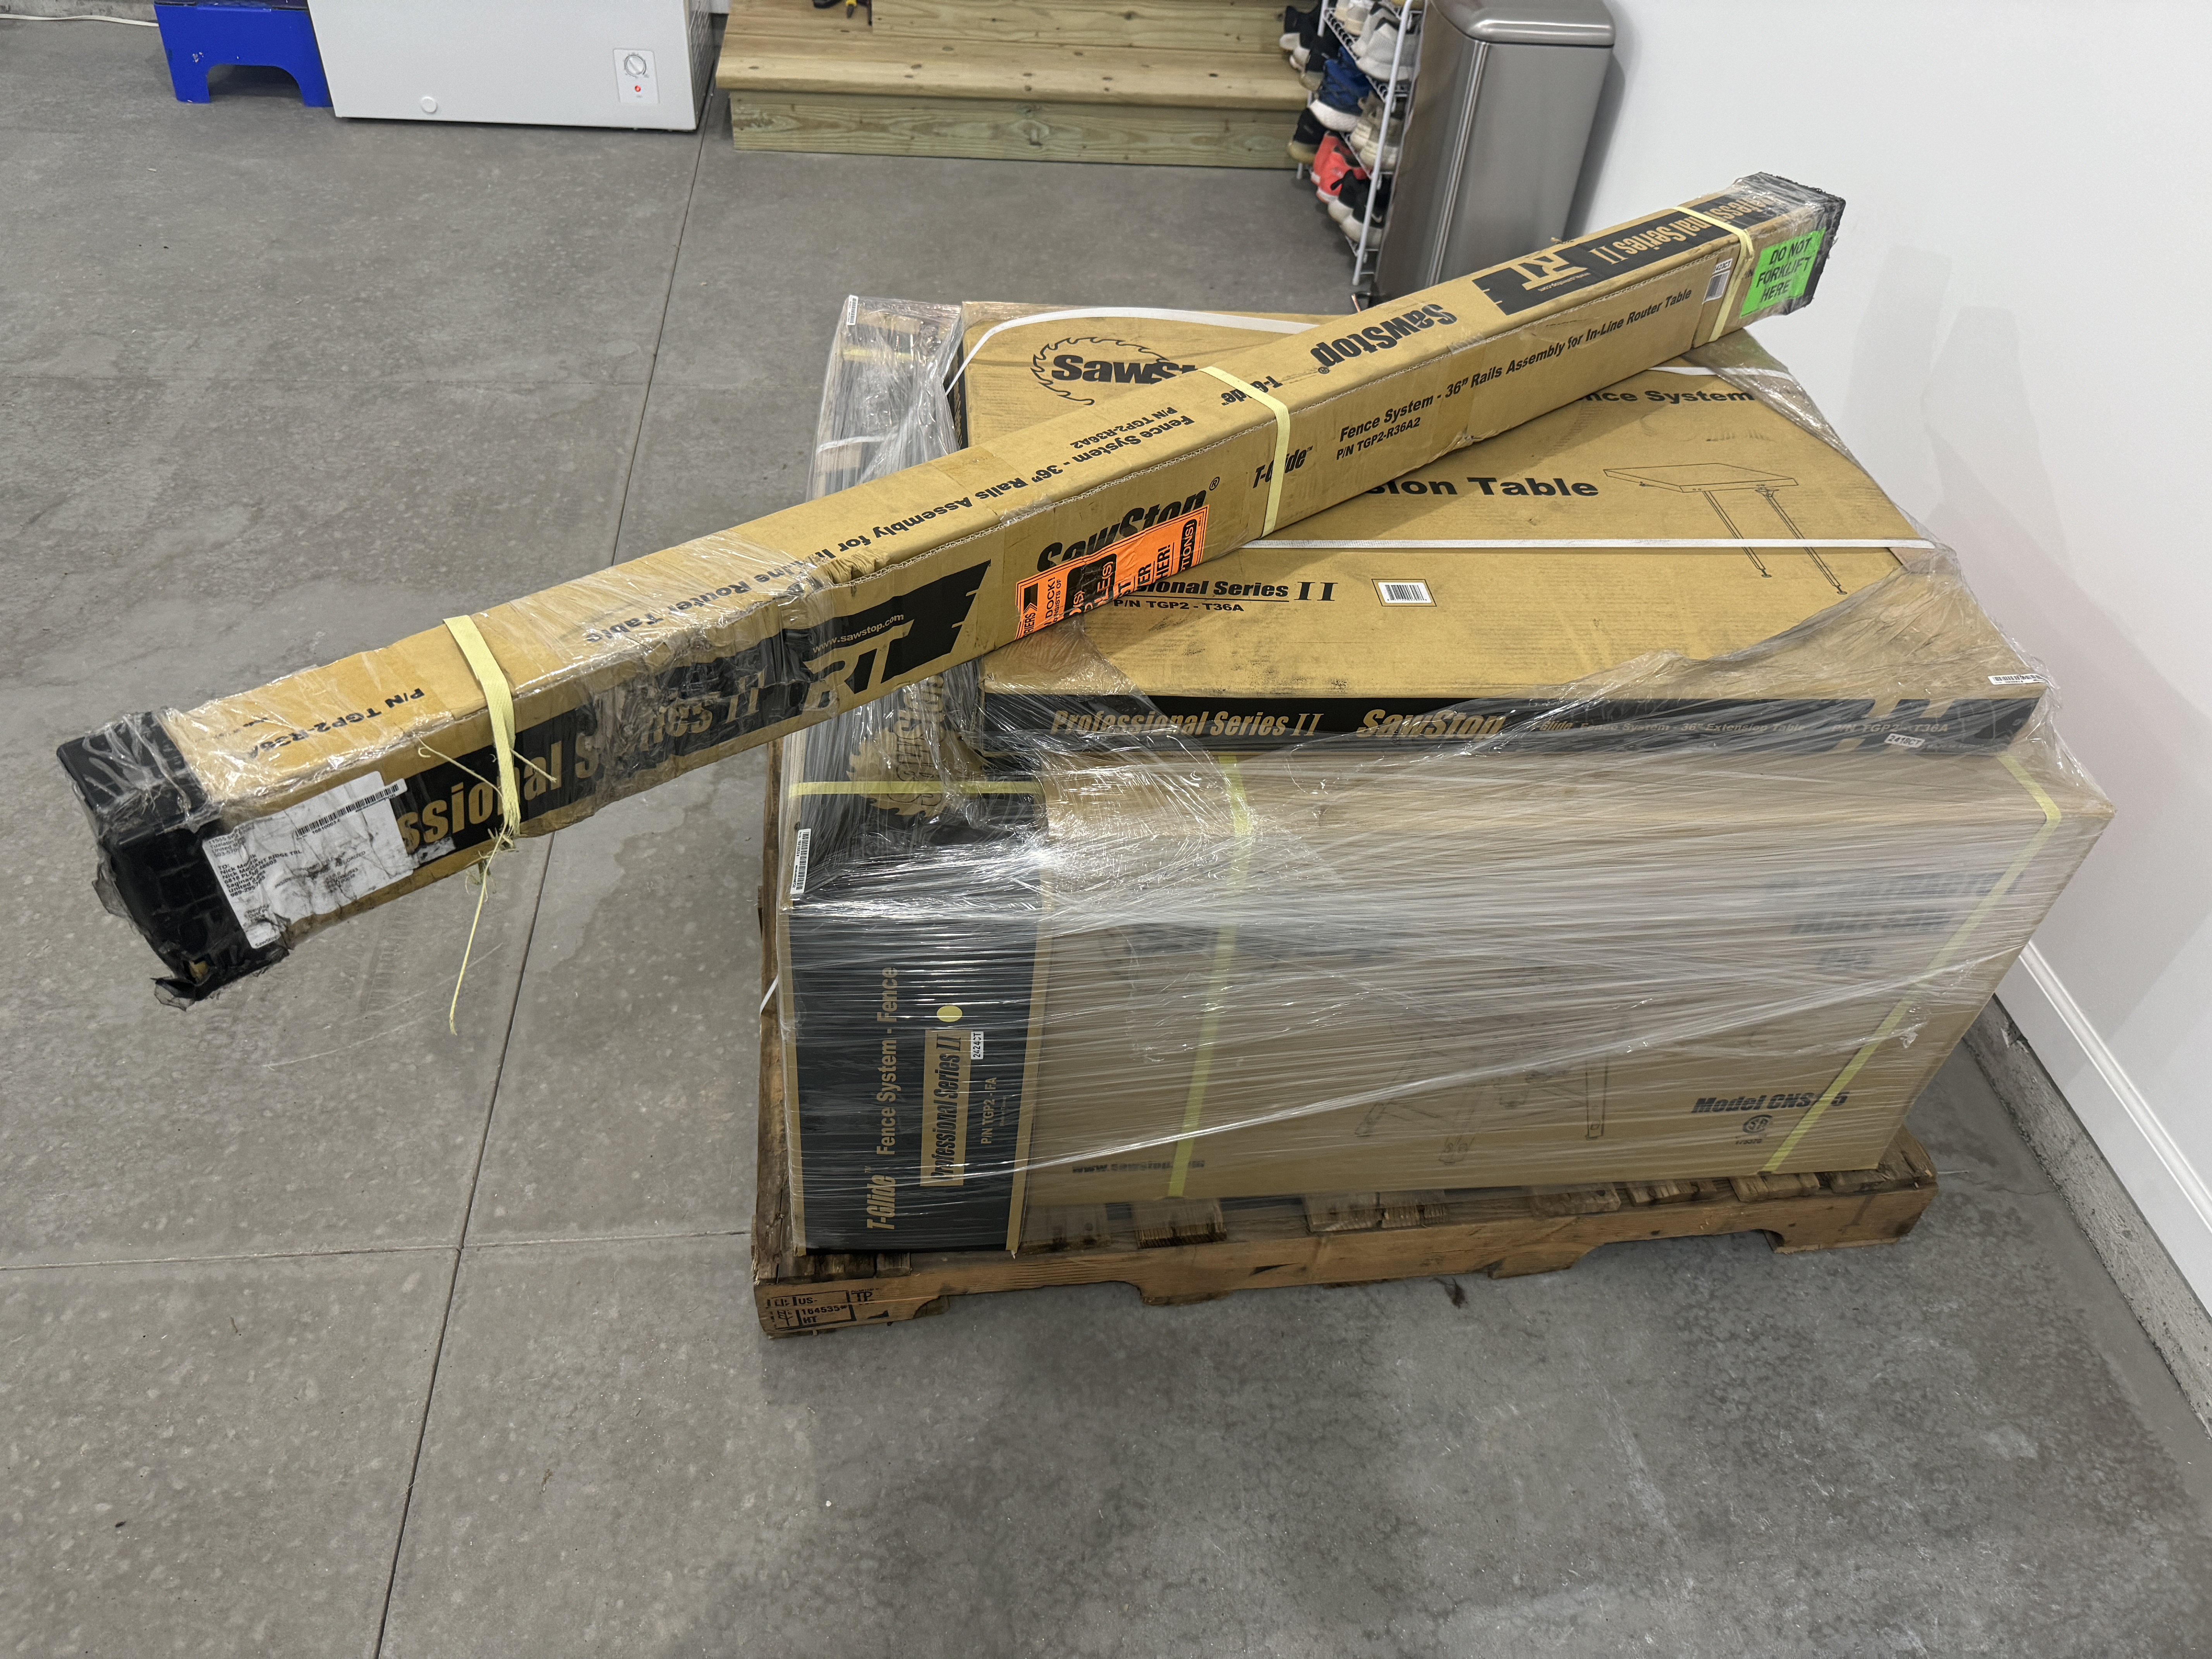
I had wanted a SawStop for years and the move seemed like good excuse to sell my old Craftsman table saw instead of hauling it to a new basement. I bought SawStop’s Contractor Saw with the 36” T-Glide Fence Assembly, Mobile Base, and Cast Iron Wings. She’s a beauty, a joy to use, and the safety features can’t be beat.

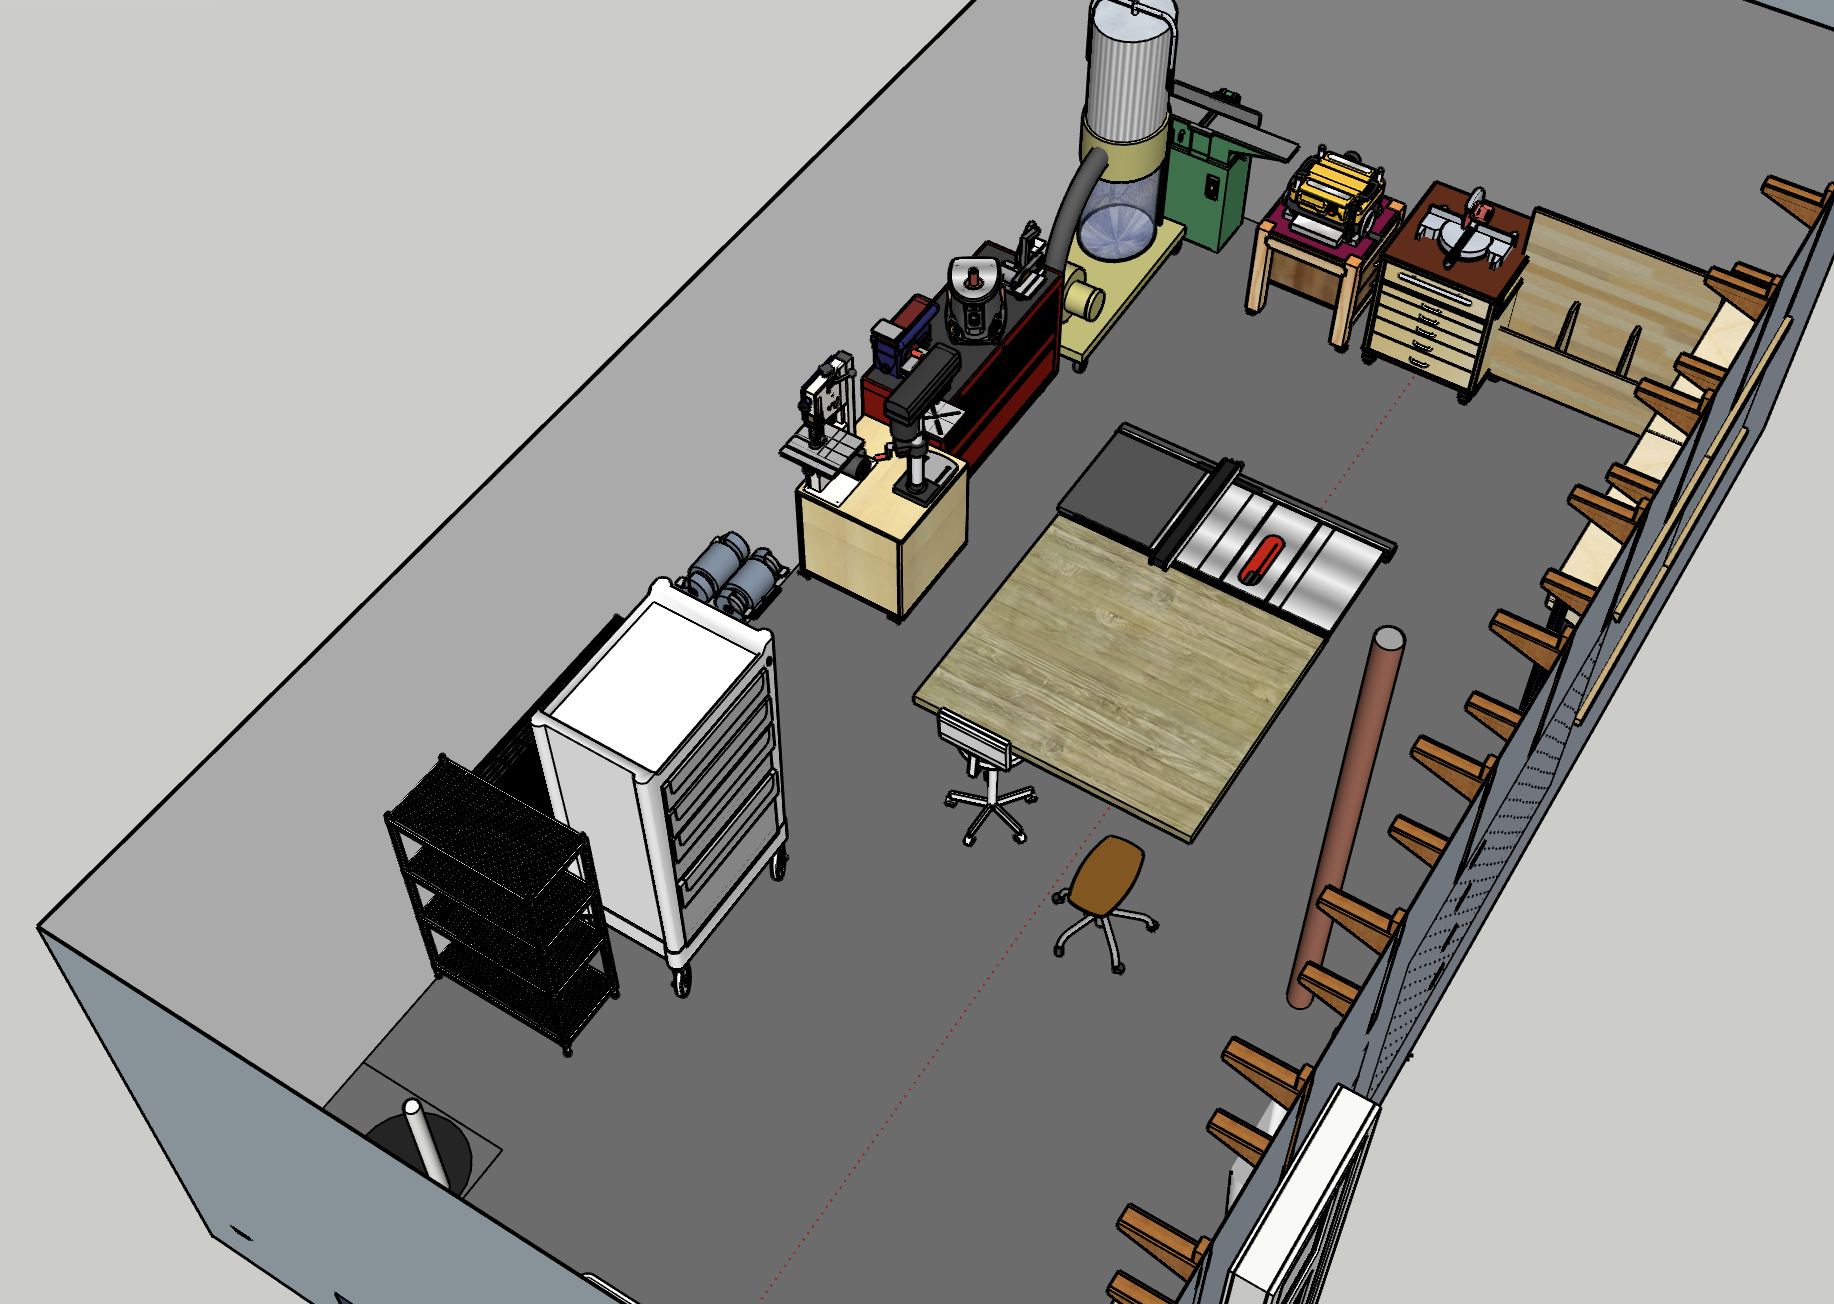
I had a general idea of the layout I was going for in the shop, but in order to get a feel for the space, I measured all of my carts and tools so I could model in SketchUp. I started with the structure, items on the main wall, and things that can’t be moved, like pipes and the shop sink.

Then I needed all of the tool and storage carts. I imported a lot of the items from SketchUp’s 3D Warehouse and scaled everything to the correct size.

Eventually I got to a comfortable arrangement in the model and could physically put things in place. Over the course of several weeks I made a lot of adjustments. I even moved my band saw over to the drill press cart so I could repurpose it’s cart for my planer. I think I ended with a very good first iteration. Here are comparisons of the model and the actual room.

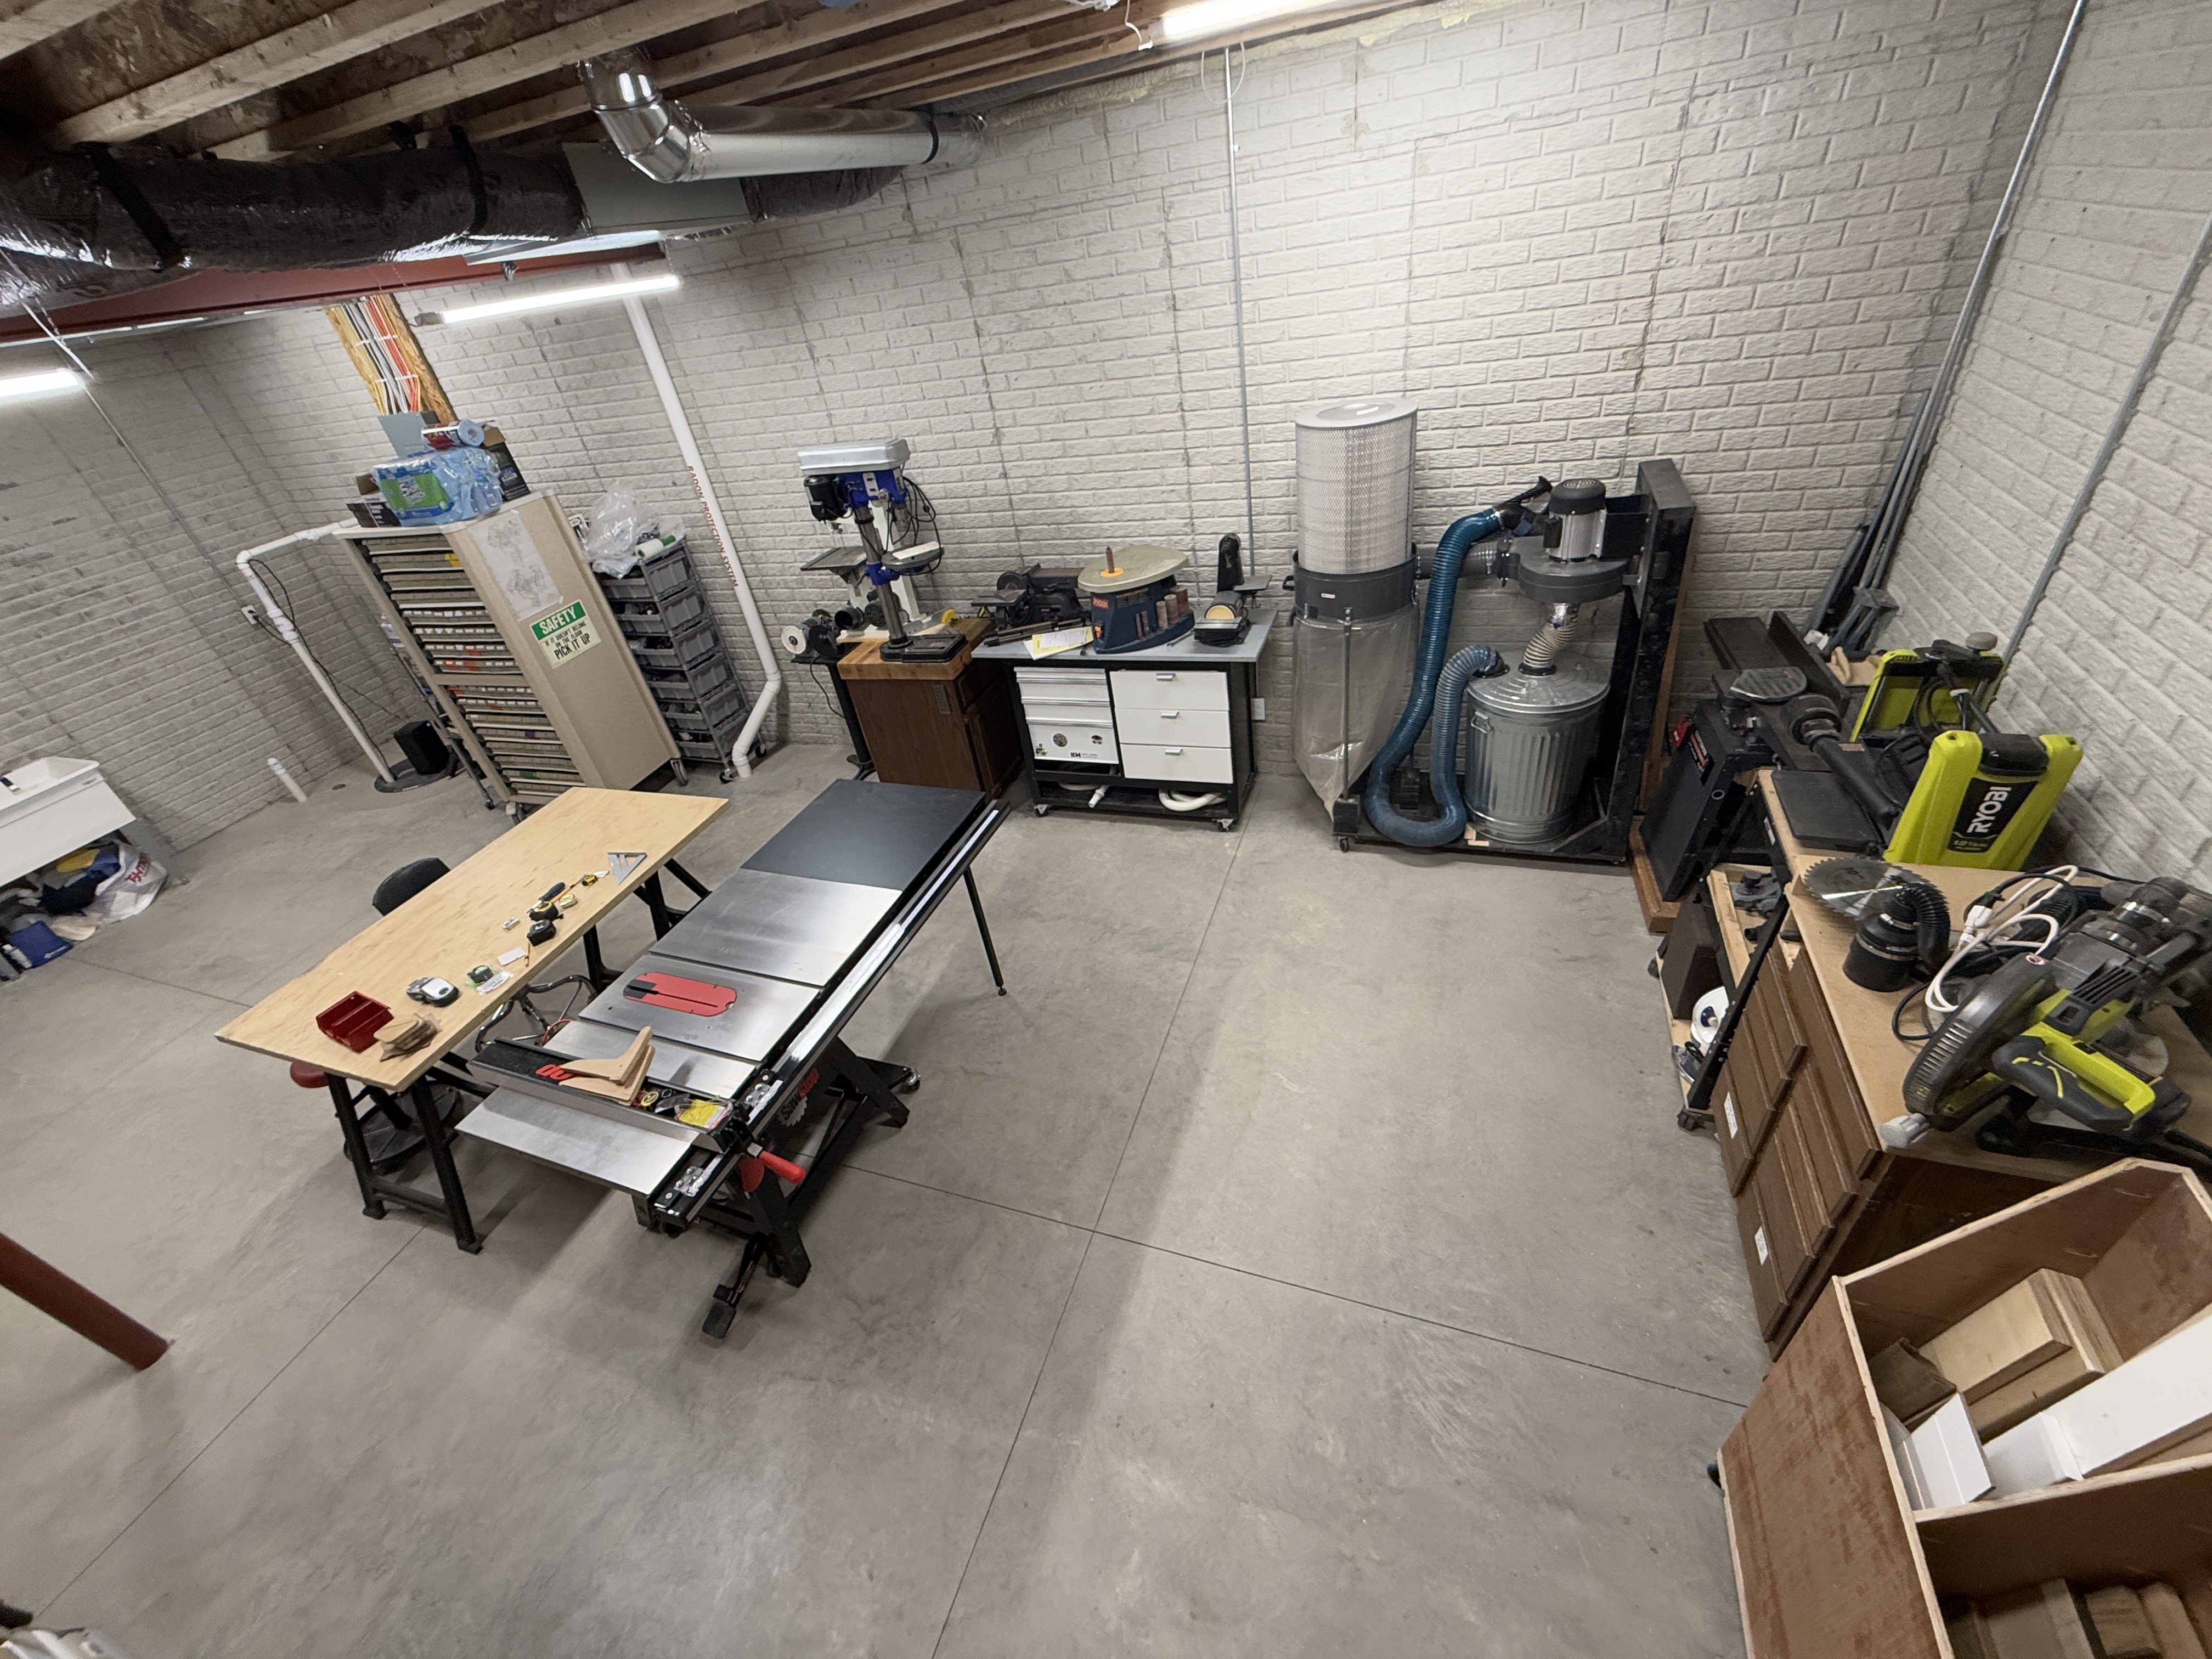
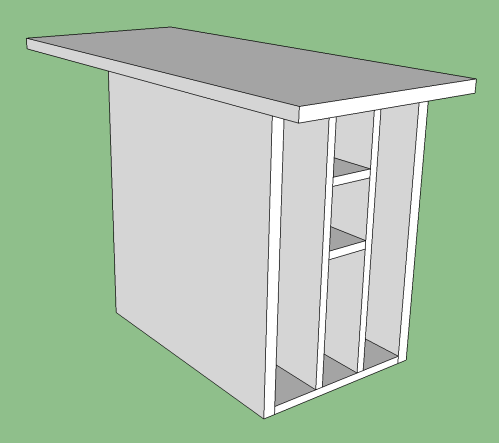
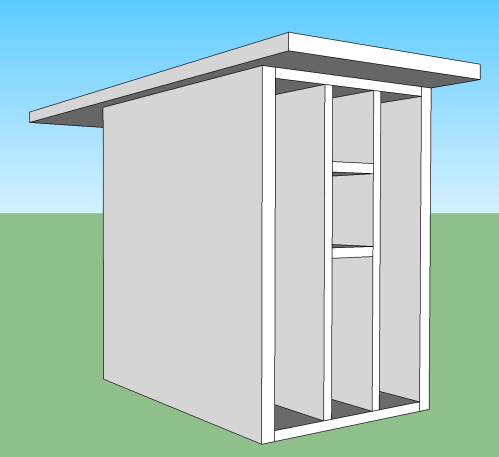
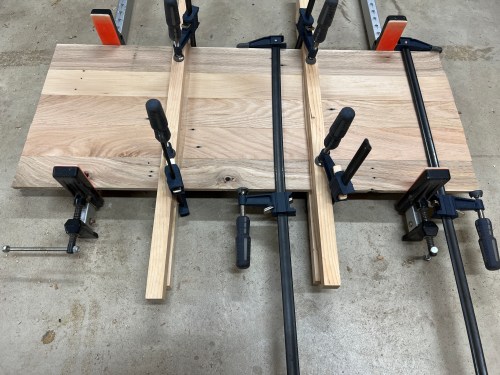
I can start making things again! One of the first builds is going to be an outfeed/assembly table for the table saw. It’ll have some neat features and storage. In the models I made a table top of about the correct size and in real life you see my old table top, which is too small and low, on saw horses.

A Wall and a Home Gym

It’s been a busy few weeks packing and moving to the new house. Actually, it’s been a busy year! Building a 40 foot wall before being fully unpacked is a great idea, right? My dad was up for it, so of course I was. I’d never build a wall before, so framing was a fun challenge. This new project meant buying a couple of new tools, which I always love.

We’re very excited about this new gym area inside the house. No more garage gym for us, which was brutal in the Michigan summers and winters. There is still some organizing to do as we figure out how we use space. The wall isn’t actually finished yet either.

After I finish paneling this area I can get started on the other side of the wall. I picked up 1/2″ OSB for the shop’s wall material, to make it easy to screw small items in anywhere I want. You can’t beat $16 a sheet. Check out this cool storage space for sheet goods I gained by having the wall follow the floor joist.

I’m excited to get this mess of a shop organized, especially with all of my wood and large clamps at the other side of the basement for temporary storage. It’s going to be awesome.

A New House

We’re having a house built!

The planning phase has a been a lot of work, but we made it to the end. The plans are finalized and the construction agreement has been signed. This photo is only a portion of the revisions.

Our first meeting with the builder, Cobblestone Homes, was on August 21st and we signed on December 11th, which was our 13th meeting. In the end, we went with a custom build, heavily inspired by their popular split ranch floor plan. Their plan was too big for us, so we moved in some walls, changed the location of the basement stairs, and made a larger walk-in closet and pantry. We saved about 200 square feet and will get exactly what we want.

I did some early drawings before passing off to the architect. Since this is based off a Cobblestone plan, I believe they hold the copyright. This was my first attempt and we ended up flipping the entire house.

This next drawing I did is very close to what we ended up with. The final plan is 1,947 square feet.

Hopefully we close on the loan in a few weeks and then the lot becomes ours. If the weather cooperates, they should be able to break ground in February. We can’t wait!

Living Room Updates

Last week I was finally able to finish the living room project, before going to Puerto Rico last week. My three month sabbatical started, which gave me a lot of time to work on it. This was the final big phase of a living room remodel. Here are the before and after pictures.

Before
After

Actually that’s not a true before picture because there used to be an old A/C unit built in to the wall. Below is the only picture I could find, which shows the cover that was over it.

Last July or August my Dad and I removed the unit and patched up the wall. Then I had three Mitsubishi mini-splits installed around the house. In April, my Dad and brother came down for a weekend. We took out the sliding glass doors, removed the sunroom, and installed a 5×6’ window.

I had a gas fireplace insert installed a month earlier actually. I put black painted plywood up on two walls, and I installed Select Surfaces Barnwood Spill Defense Laminate Flooring from Sam’s Club. It’s really nice flooring and easy to install.

Bought a new loveseat, the Sonos Arc soundbar and Sonos Sub, and two IKEA bookshelf speakers (Sonos compatible). I’ve put several other speakers throughout the house as well and am really enjoying the Sonos system.

I found an awesome mirror on Facebook Marketplace, which had been in an old farmhouse for over 40 years. It’s in really good condition. The room was really starting to come together.

It was several months before I could spend more time finishing the room though, because I had to fix up the outside wall of the house and build the outdoor gym area. During the peaks of the pandemic last year, my Dad collected and processed a lot of awesome pallet wood, which he gave to me.

I sorted through it all to take out the really twisty stuff and to organize it in to wide and narrow boards. Then I jointed an edge of everything, cut the ends square, ripped to two common widths, and did a rough surface sanding. I wanted to bring out more of the wood’s character, while keeping it rough.

Brandi helped me pick out some stains and we stained about a third to a half of the wood.

After seeing how long it took to stain this stuff I bought the HomeRight Super Finish Max HVLP Paint Sprayer. I laid plastic out on the driveway and gave all of the wood three coats of water-based polyurethane on the face. It only took about 10 minutes per coat, which saved hours of time.

The next day I started at the top of a wall and tried to create a random-ish pattern as I used an 18 gauge nail gun to tack boards to the plywood walls.

I continued the process for the second wall. Then I was able to finish the light switch and outlets. I bought a 65″ Sony A80CJ Series 4K OLED TV from Costco and hung it on the wall with a full-motion mount from Harbor Freight. The mount was easy to use and will allow us to keep the TV pointed directly at the loveseat, where we normally watch TV, or rotate it towards the couch when we have company over. The soundbar hangs under the TV with the Sanus WSSATM1-B2 extendable soundbar TV mount, which was also easy to use.

Now I was able to finish off the floor trim behind the loveseat. I also picked up some rustic looking quarter round for the pallet walls, which blends in well.

To frame in the window, I processed some old 5″ wide oak flooring and gave it three coats of the same water-based poly. For the trim, I used some of the leftover narrow pallet wood.

I really love how the room turned out!

One other little touch was building a shelf/cubby/table next to the loveseat. I wanted a place to put the left channel speaker, store laptops, and set drinks or snacks. My original idea was to have a couple of horizontal slots for the laptops. I was discussing the space limitations of the area with Brandi and she had the idea to make vertical slots instead, which worked out really well. Here’s the SketchUp model.

For the top I processed more pallet wood, glued it together, sanded smooth, applied stain, and did three coats of wipe-on poly. For the cubby unit I used whatever scrap plywood I could make work and painted it black. I didn’t care much about the base since nobody will ever see it unless they’re really going up to inspect it.

I’m so glad to have this project finished and we’re loving the way it turned out. I do have one more thing I’m working on for the wall above the loveseat (done now!) and hope to finish this week or next. Then I’ll be spending the rest of my sabbatical to remodel the kitchen and dining room area.

Converting a Sunroom into an Outdoor Gym Area

I had a sunroom that was over 20 years old, leaked, and it’s foundation had been shifting for several years. I never used it, so it was time to go. This project started in April and though we’ve been using the area for weeks, we finished up last night by moving rocks back in place.

The first step was removing the sliding glass door and putting in a big window.

I hired a company to come in with a Bobcat and hydraulic breaker to remove the 7+ inch concrete slab and posts.

After that was out, I was able to fix up the roof line and put siding on the house.

They did do some damage to my gutter drains, so I made a repair there.

Still had to remove a bunch of sand from the area, so I rented a small dumpster and we hauled a lot of buckets.

My inspiration for the project was this setup I saw online. I mapped out my own layout.

I did a rough sloping job and then we dug three holes four feet deep.

Ordered some materials from Menards, and ended up having to get another 10 bags of cement.

My buddy Kevin was a huge help, getting the two 16 foot 6×6 posts installed. Each one weighed about 190 pounds!

Then Brandi and I were able to install the 12 footer on our own. Between the 3 posts we used 1,500 pounds of concrete!

I painted the posts and leveled the ground as best I could.

Put up the bars, top caps, and painted wall ball targets.

Some of the early plans were to get thick rubber playground flooring tiles, but we eventually decided it wasn’t worth the cost. Used pavers instead.

Turned out great and we’ve been using the outdoor space for one or two workouts a week. It looks good and is a much better use of the space, which wasn’t getting used at all before and had become an eyesore. Now I can finish the inside wall of the house!