I’ve never heard of this one and that’s because it’s an Applebee’s franchise exclusive fountain soda. Rightly so, because they shouldn’t be trying to sell this anywhere. Maybe it was a bad mix at this particular restaurant, because the aftertaste really stood out; it was really strong and very artificial flavoring. A search says it’s “blending blue raspberry and blackberry with Mountain Dew’s citrus base, similar to Voltage but with darker berry notes.” Voltage is one of the rare flavors I’ll buy at the store and Dark Berry Bash tastes nothing like it. I can only give it a 2/10 and it was so bad I’m not sure I’d try it again to find out if I got a bad batch.
Here are my favorite purchases of the year, in no particular order.
I saw the EDJY fingernail cutter in an ad and had to give it a try. It is soooo good. Previously I would cut my left hand nails with a pair of nail scissors and my right hand nails with a typical nail clipper. Then I had to use a nail file to knock down the sharp edges on every finger. This EDJY cutter is extremely quick, catches the cutoffs, and I no longer need to use a nail file. I’m patiently waiting for their toenail cutter, which was supposed to release this year.
A couple of hobby electronics items are the Pinecil soldering iron and a silicon soldering mat. The Pinecil is much smaller, lighter, and easier to use than my HAKKO and it’s cool I can upgrade and modify it. It heats up so quick. The mat protects my desk from solder splatter and keeps everything organized during a project.
I posted about these next two items earlier this year and they are the Putting Thing from WHYGOLF and my L.A.B. Golf DF3 Putter. I love the feel of this club and when I was practicing daily I was putting great. Then I stopped setting aside the time and my putting inside 10 feet turned terrible. I’m committed to more consistent practice next year.
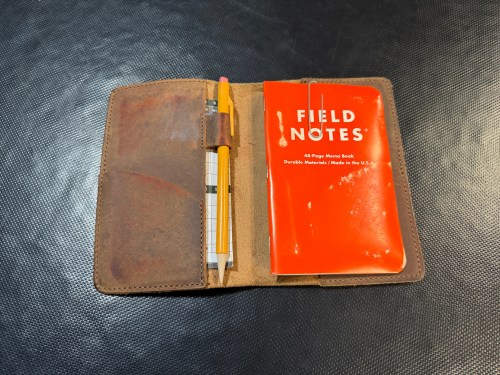
For the last few years I’ve been carrying a Field Notes Expedition Edition (waterproof) on the golf course to keep score and track stats. Before this golf season I bought a leather cover, which fits great in my back pocket to keep the notebook and an official scorecard protected.
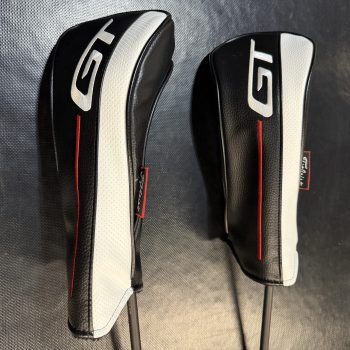
Other additions to my golf bag are Titleist GT2 fairway woods to replace hybrids. I bought the 16.5° (4 wood) and 21° (7 wood). The seven is my favorite and I have the confidence to hit it from anywhere. It goes through the rough like butter and launches the ball like a wedge. One of the greatest shots I’ve ever made was hitting this thing on a par 5 from over 230 yards away to 3 feet for an eagle. It came in so high and soft that it only bounced a foot from where it landed. I want to try their driver before next season.
In November we picked up the Marcy 150 lb. Stack Home Gym to replace our single cable DP Ultra Gympac. It’s already getting a lot of use and expanded the movement options we have in our home gym.
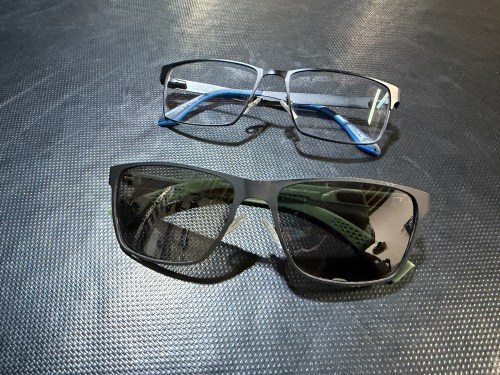
In February I got my eyes checked after some bad headaches and found out I needed glasses. Straight to progressive lenses too! We’d all prefer not to wear glasses, but seeing clearly is better. I also bought sunglasses for the golf course that only use my far prescription.
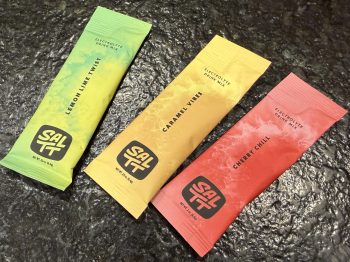
Water with Propel or Gatorade Zero electrolyte packets had been my drink on the golf course for several years and I’d often still end up with headaches on the really hot/humid days. This year I switched to SALTT, which has a lot more electrolytes and the headaches are completly gone. This stuff is great to drink all day every day. My favorite flavors are Cherry Chill and Lemon Lime Twist, while Brandi likes the Caramel Vibes.
I’ve been wanting an everyday truck for years and had a reservation for Tesla’s ugly dumpster for five years, hoping they’d redesign it. Rivian offered me great incentives and an unbelievable trade-in, so I leased a white dual motor performance R1T this summer. It’s a much better vehicle than both the Tesla Model 3 and Model Y I had. I’ve never seen anything like the automatic brights, which adjust to only point low beams at other vehicles, while still projecting high beams everywhere else in front of the vehicle. It’s magic! If you’re in the market, use my referral code (NICK13411712) and we’ll both get a reward.
I’ve tried different bags of coffee (specially ground) to make cold brew, but never cared for any of them so we resorted to buying too many bottles of premade cold brew. This year we decided to try Atlas Coffee Club (referral) and it’s been great. We’re on an automatic subscription for two bags about every two weeks (less frequently in the cold months) and make all of our own cold brew. Each delivery is a coffee blend from a different country, which keeps it interesting.
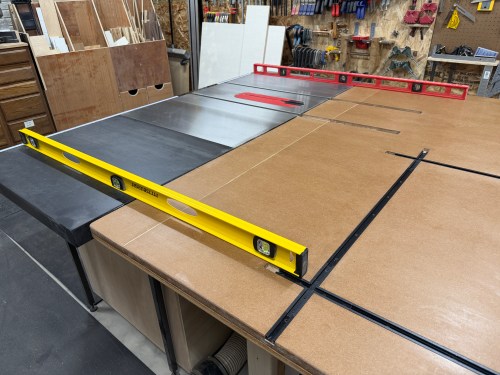
I built the outfeed/assembly table in my workshop around the JessEm Mast-R-Lift II Router Lift. Although I haven’t even used it yet, I love what it’s done to the usability of the space and how much it’s going to improve my build processes. In my old shop taking out the router table was a whole thing and not convenient at all.
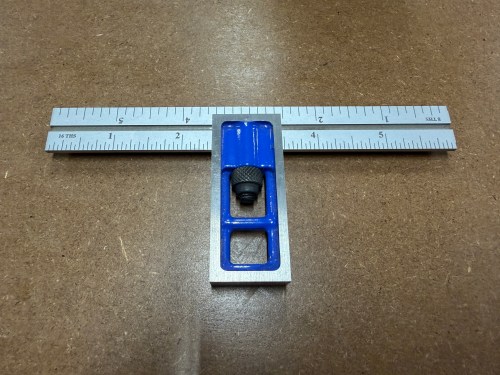
A new tool I reach for all the time is a 6″ double square. Being able to use both sides means I rarely reach for a combination square anymore. I don’t think I’ve ever even used the 45° side of a combination square. I’d like to find a 10 or 12 inch as well.
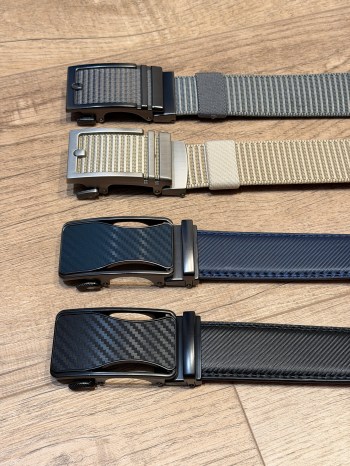
I needed new belts and went with a couple different styles of ratcheting ones. Black and blue dress belts, which still go great with shorts or jeans, and more casual gray and khaki web nylon belts. I love that I’m not limited to holes in the belt for sizing and it’s so easy to loosen after a big meal.
The long sleeve hooded t-shirt from 32 Degrees was an instant favorite and I ended up getting it in three colors: artichoke space dye, heather, and black. I’d wear shorts and a hoodie year round if I could and the thinner t-shirt material is really comfortable.
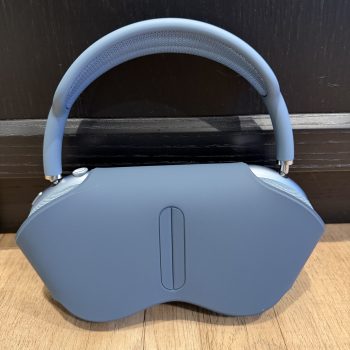
At our 7 year anniversary, Automattic gifts us headphones and I’ve been traveling with the same pair of over ear headphones ever since. I’ve been with the company for over 17 years, so do the math. On a recent trip I noticed the ear pieces were falling apart and I had black stuff all over my head and clothes. So I bought a set of Apple AirPods Max and these things are incredible in terms of comfort and the listening experience.
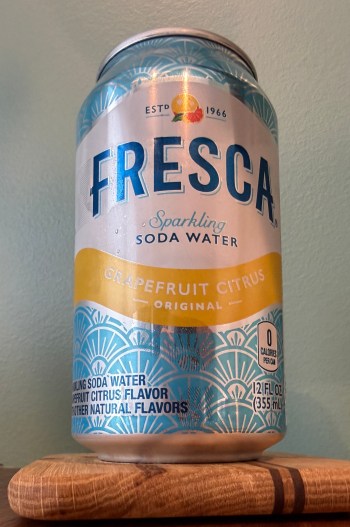
Our resort in Mexico had Fresca in the quick snack area and I’d never had it before. We gave it a try and both loved it. It’s a grapefruit citrus flavored soda water with no caffiene and no calories. It’s delicious and we’ve been buying it here and there for the last couple of months. The Black Cherry flavor is ok too, but not as good.
Trader Joe’s Crispy Jalapeño Pieces are a delicious way to finish this list. Since trying them I never leave Trader Joe’s without several bags in the cart.
This is my fourth year making this post. Look back at 2017, 2018, and 2024. What are some of your favorite buys?
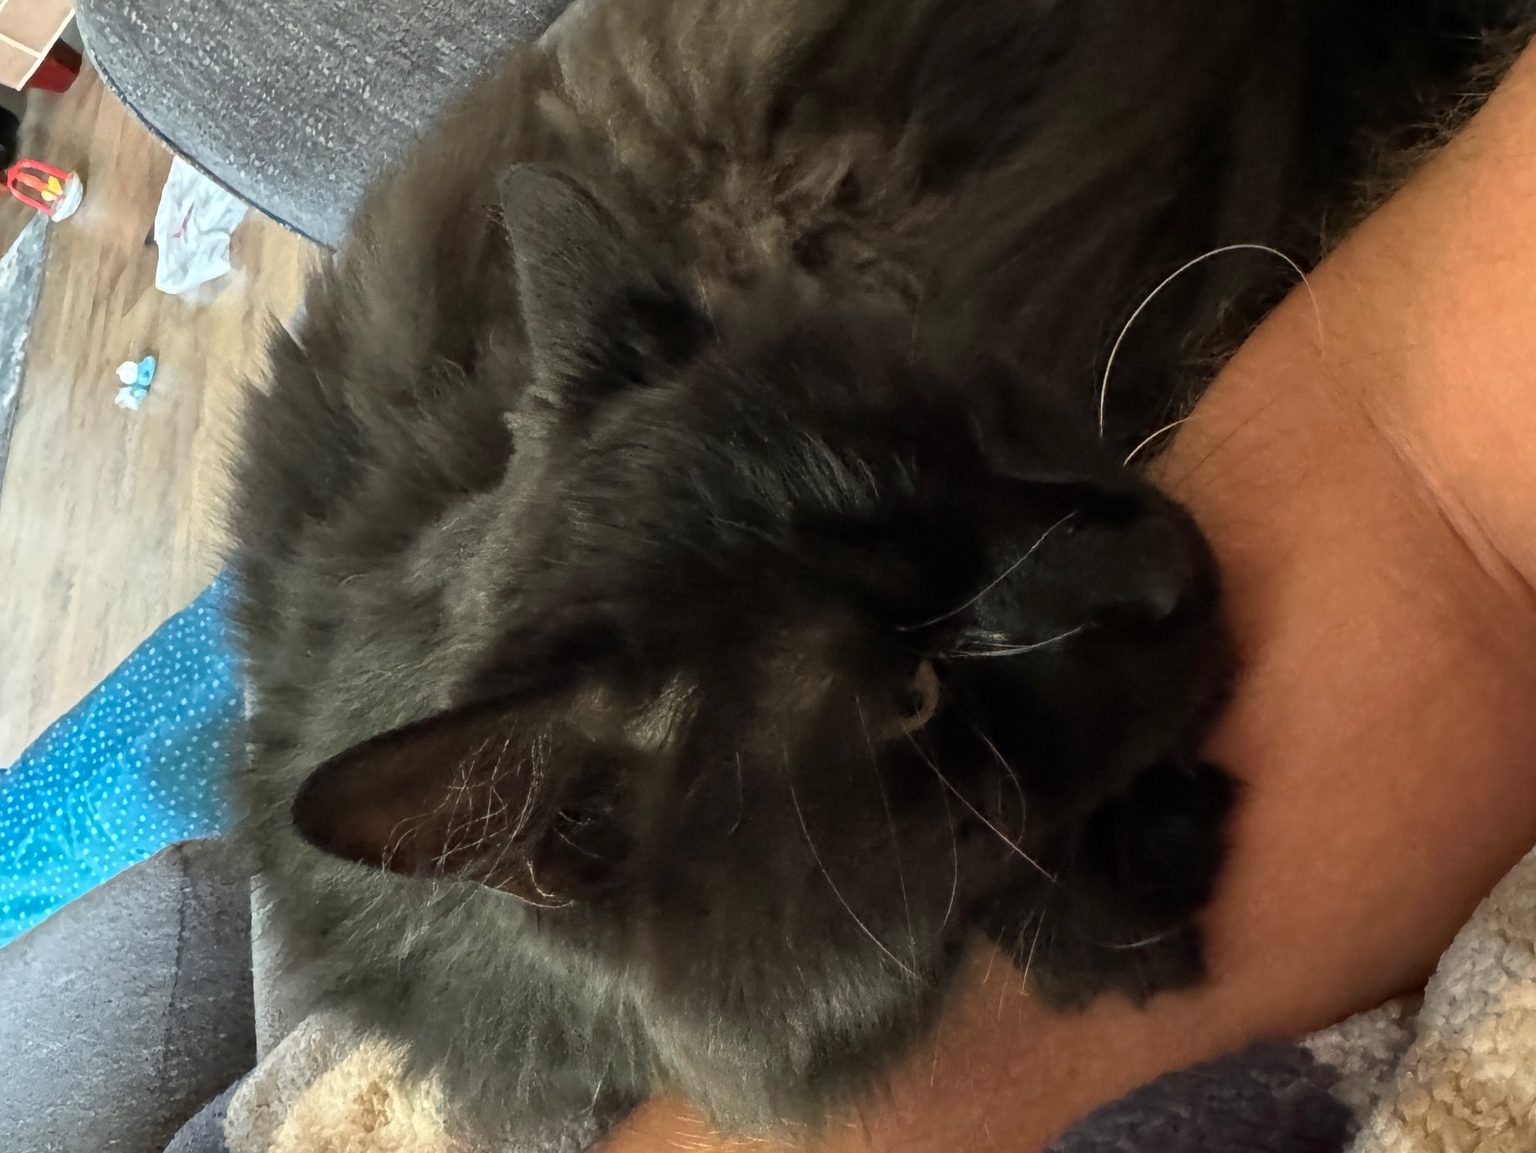
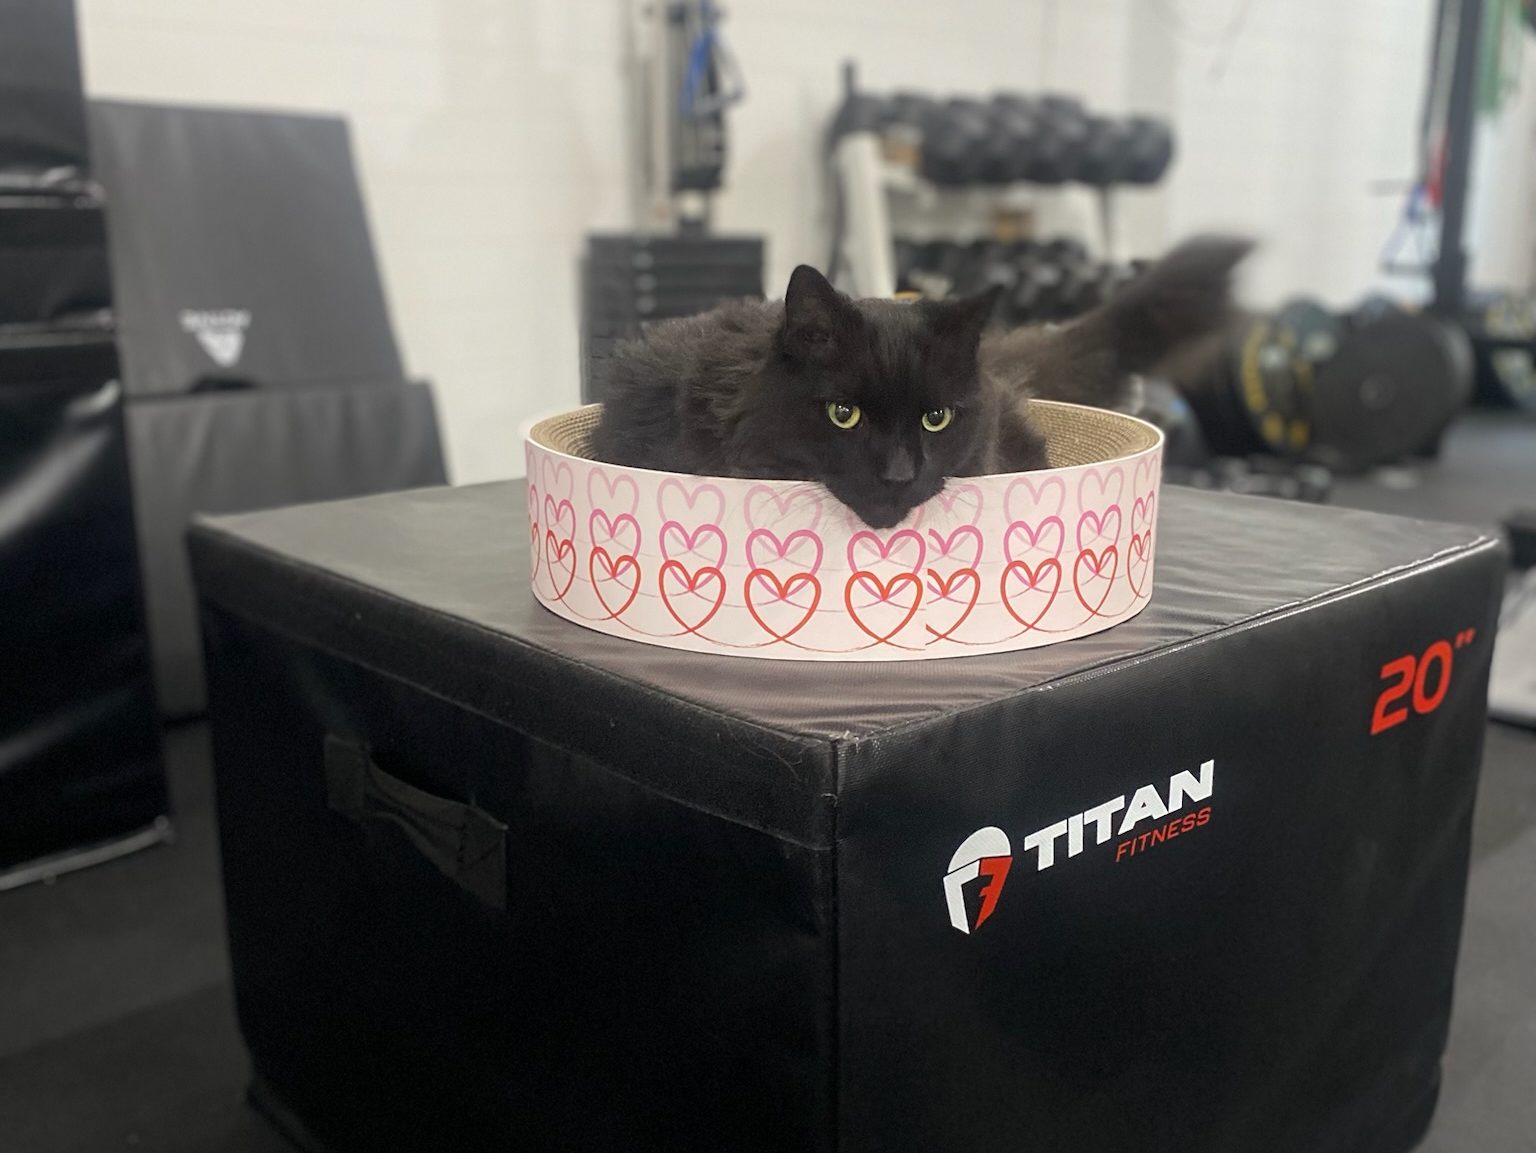
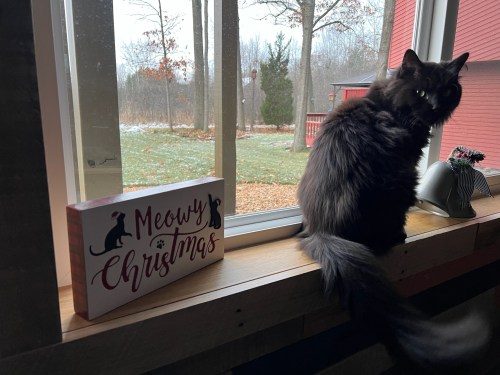
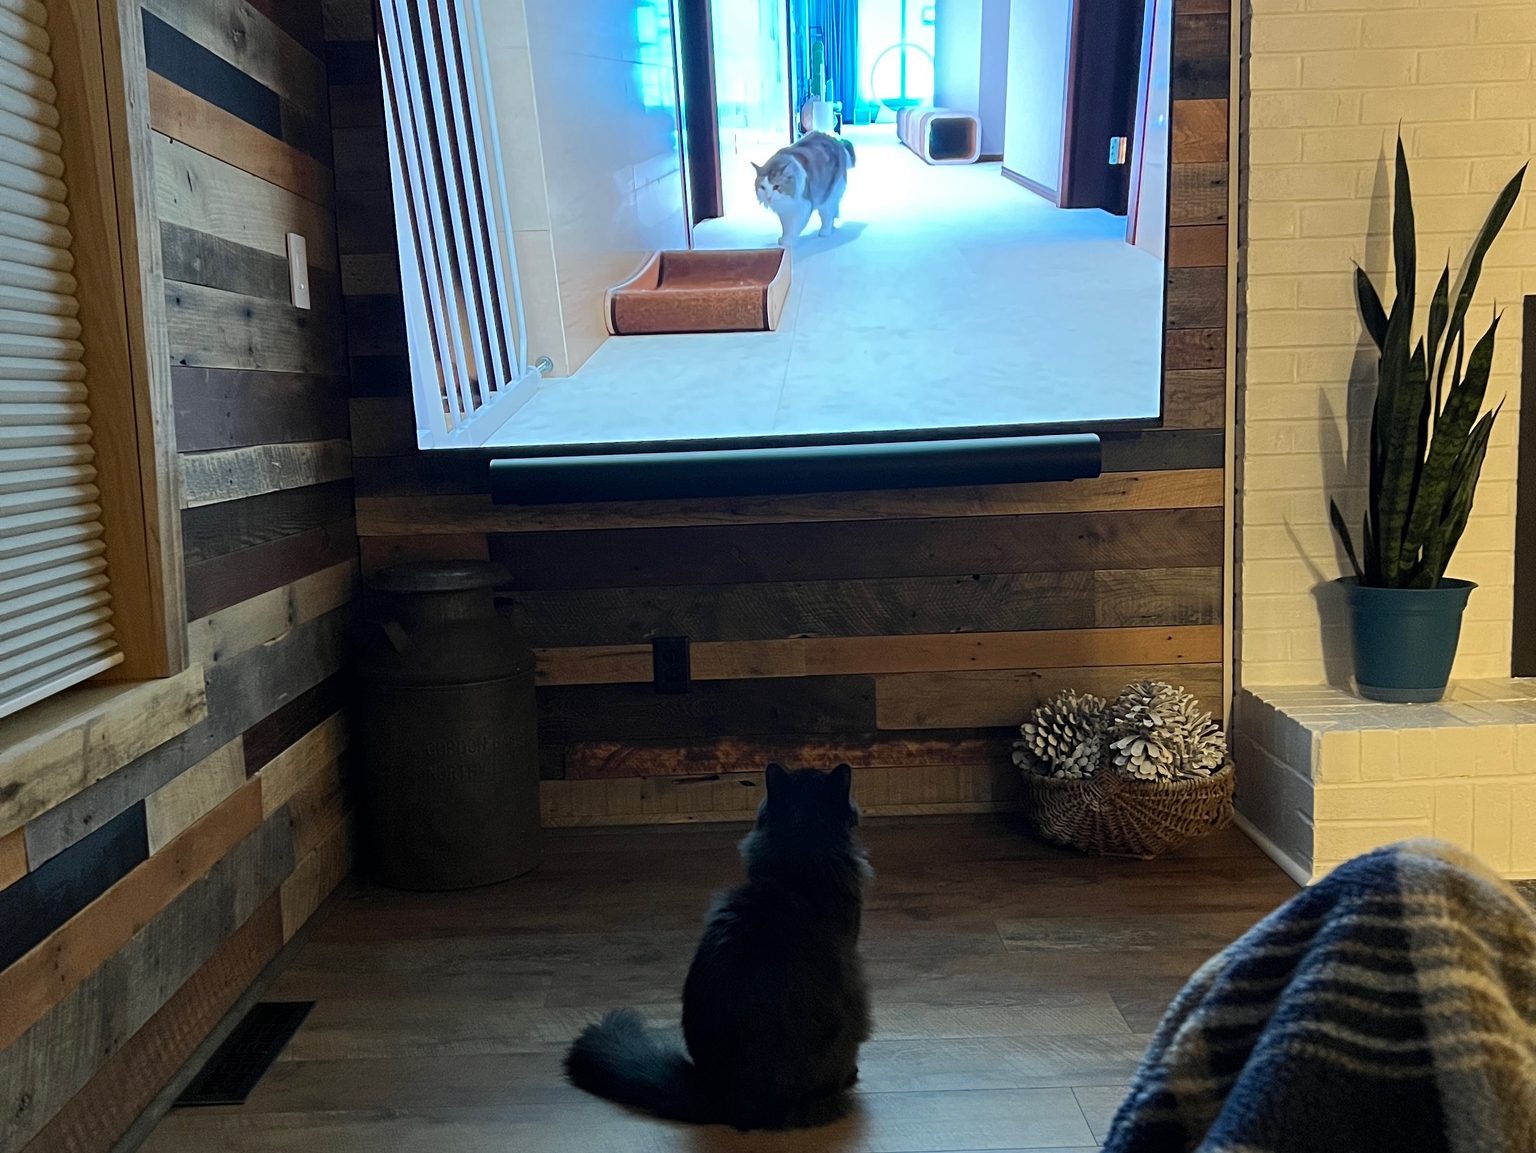
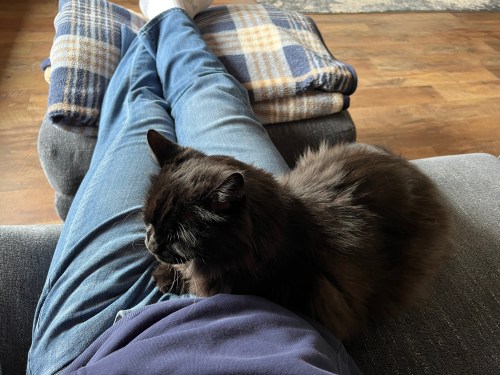
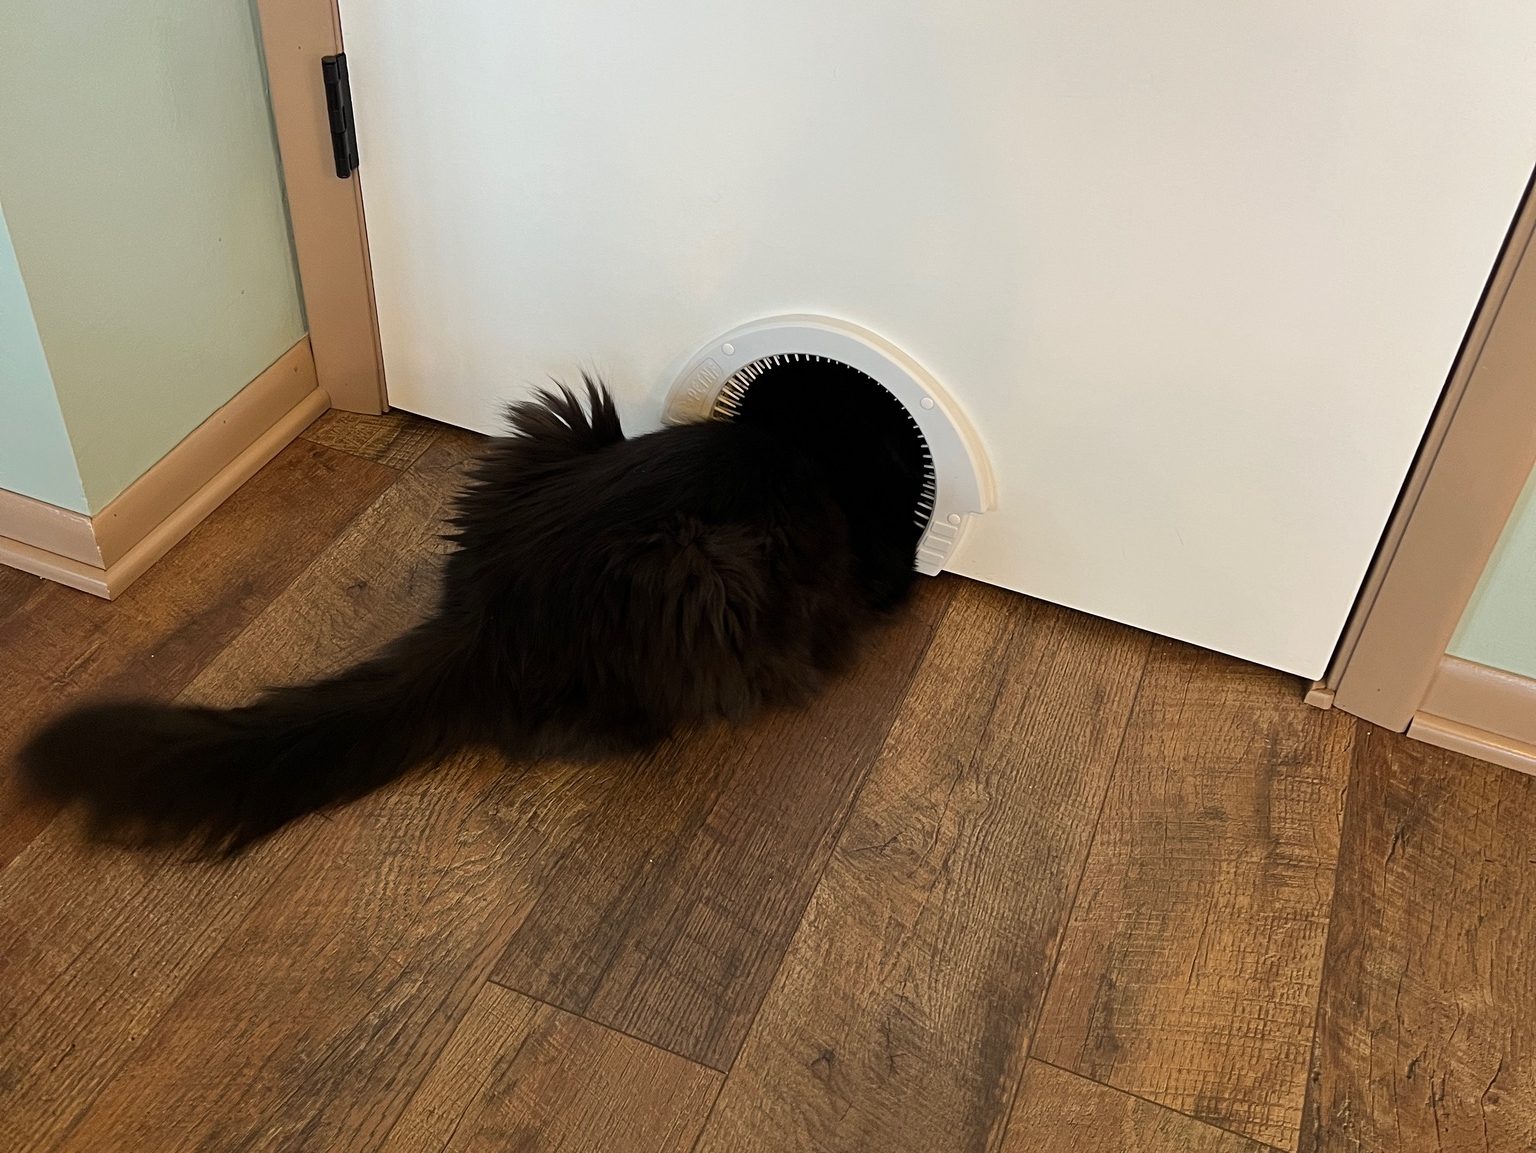
When Brandi moved in she brought her black cat, Ninja, with her. I wasn’t too sure about him because I’d never liked cats. With my job working from home, he quickly became my little buddy and turned me in to a cat guy.
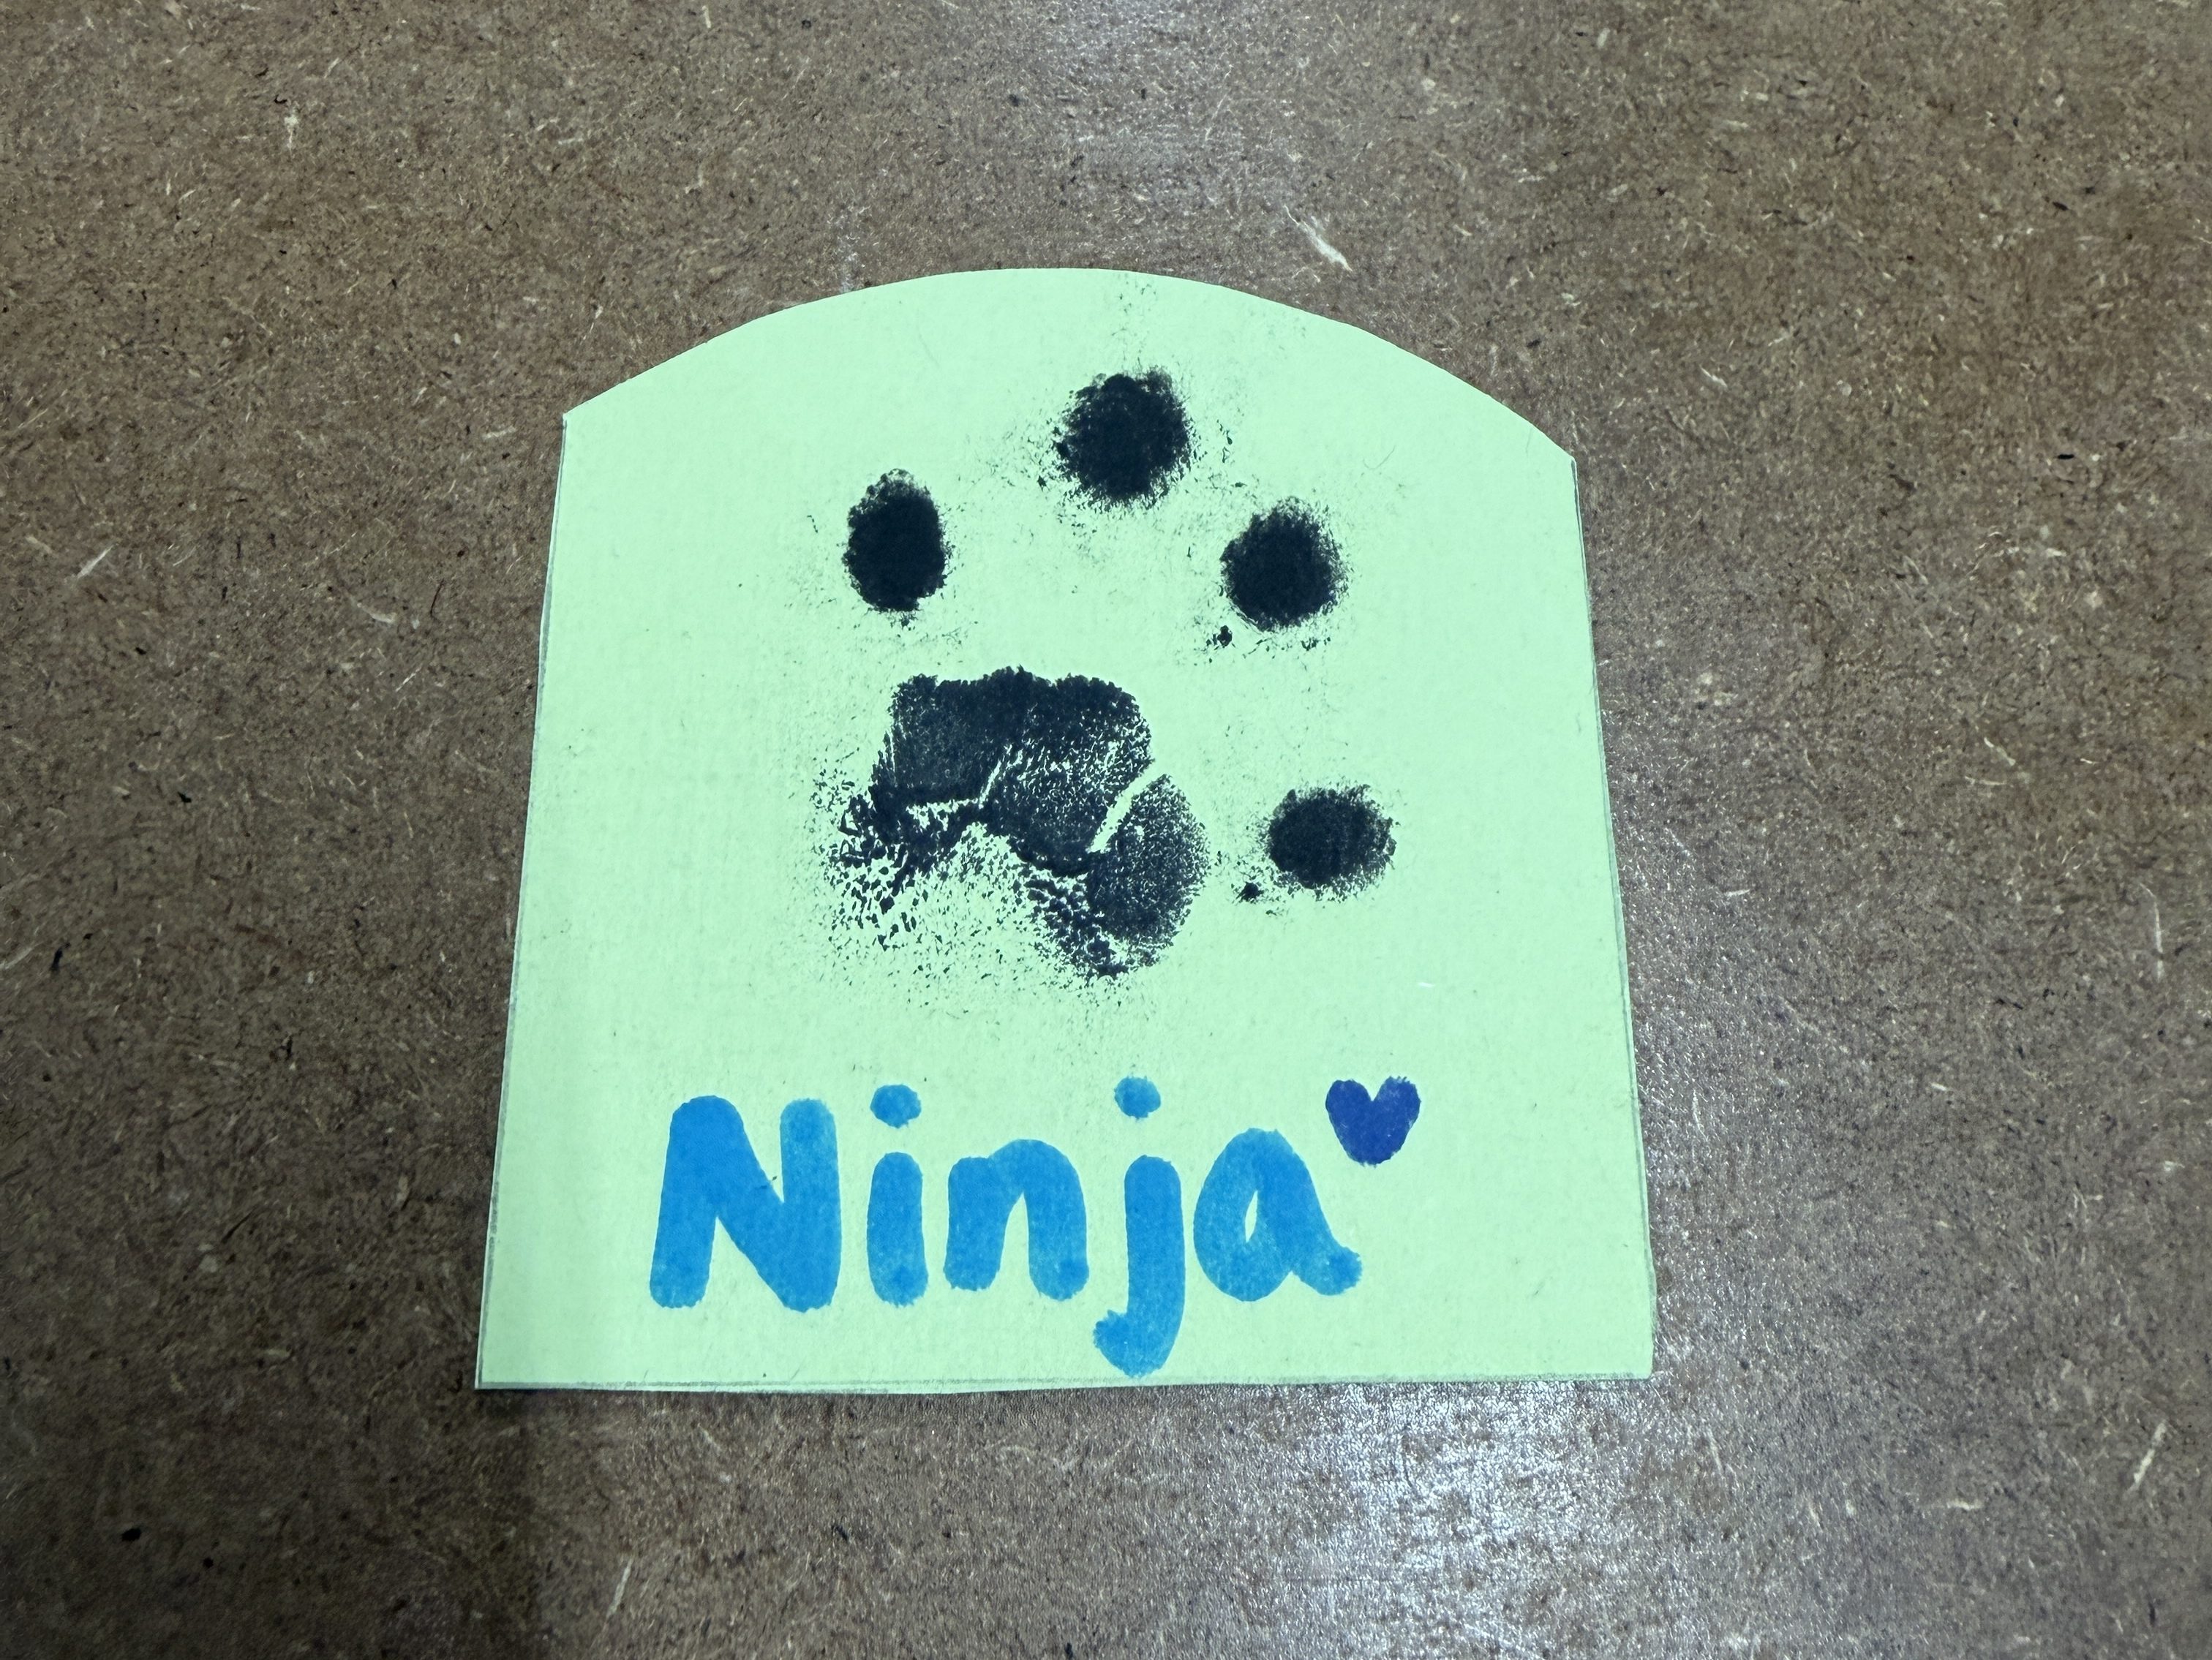
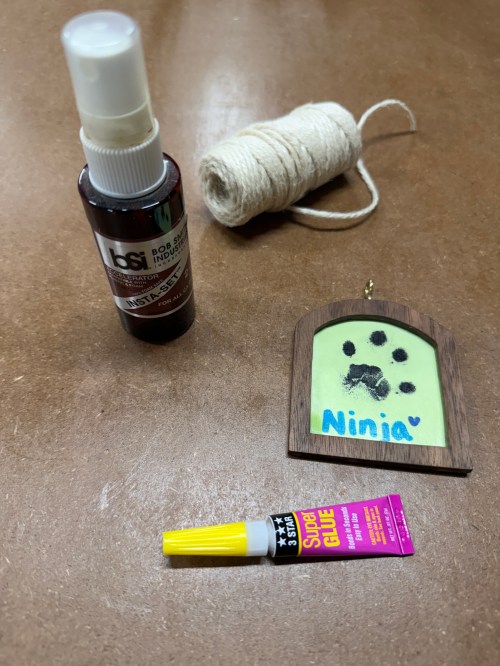
Ninja got sick and we lost him at the end of August, which was really hard. 😿 He was such a good kitty! The vet sent us a sympathy card with his paw print.
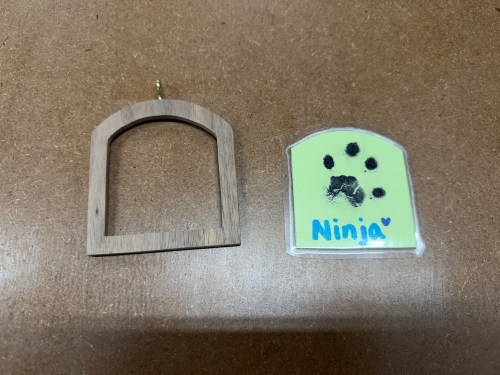
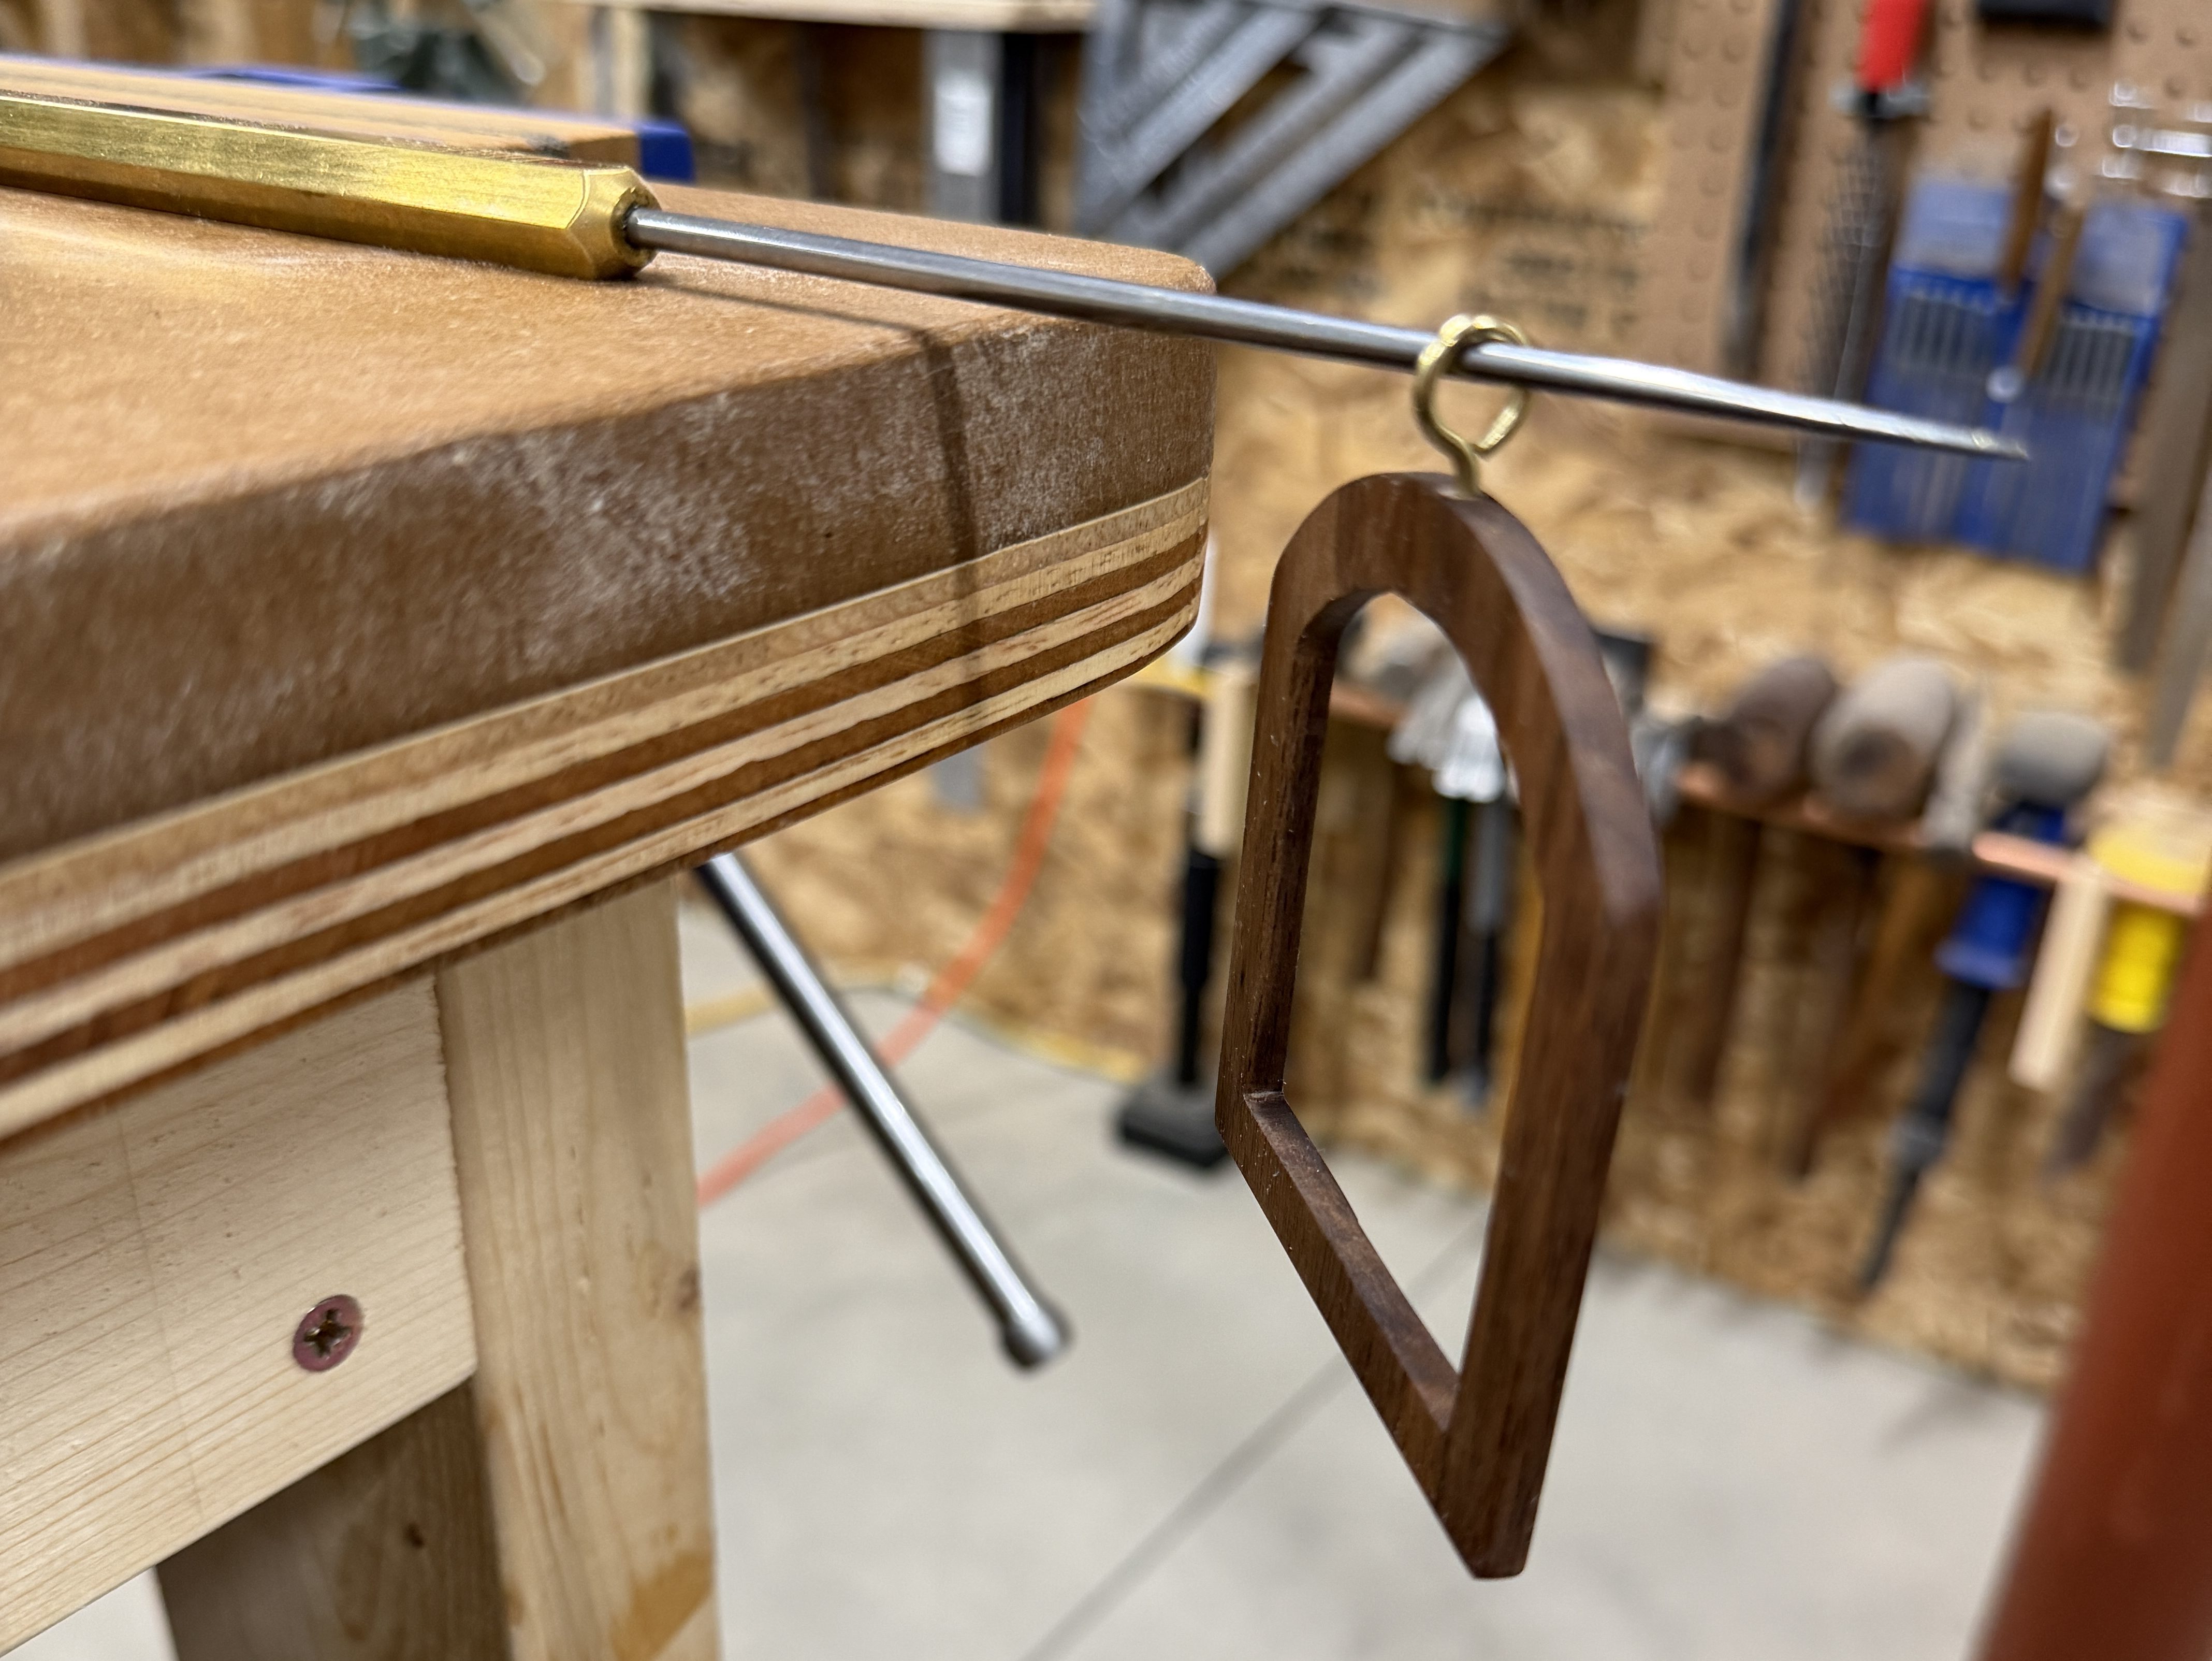
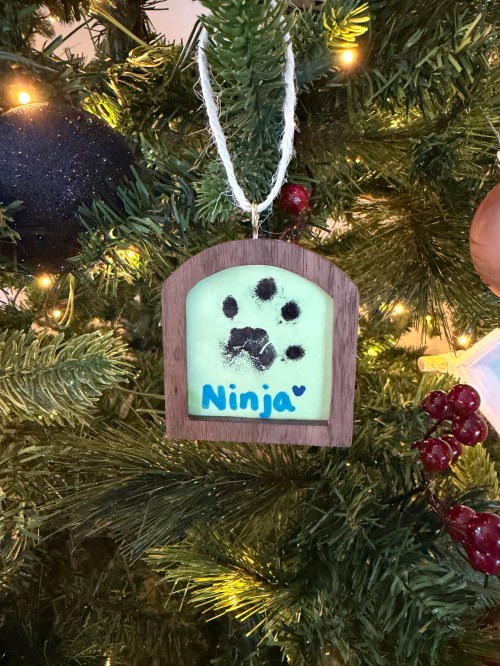
Since holidays are always a good time to remember, we decided to preserve the card in this year’s Christmas ornament and we’ll always have it. Brandi wants to start learning to use some of the tools in the shop, and she got to use the band saw, scroll saw, and sanders while helping to make the frame.
Check out our previous ornaments from 2021, 2022, 2023, and 2024.
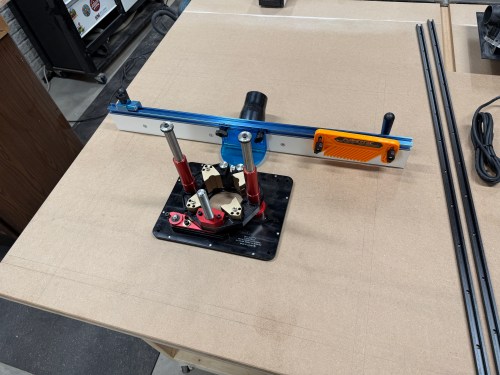
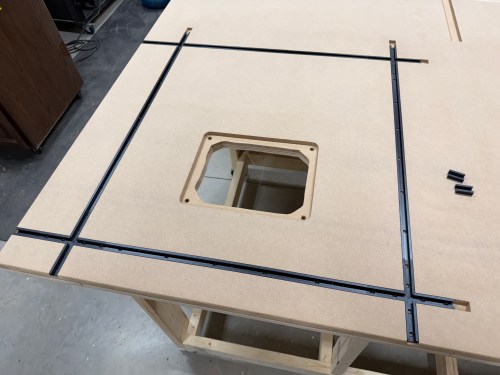
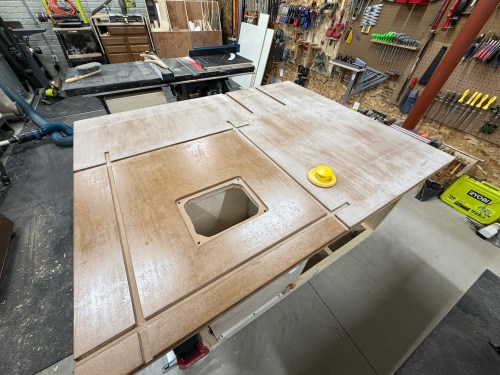
First, I had to figure out exactly where to install everything. I placed the fence and lift (upside down) on the table to get a feel for it. Then I outlined the lift and drew in the T-tracks.
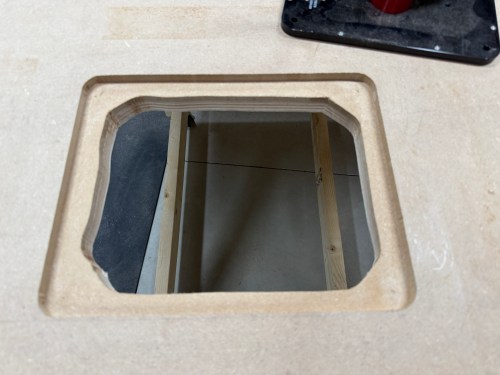
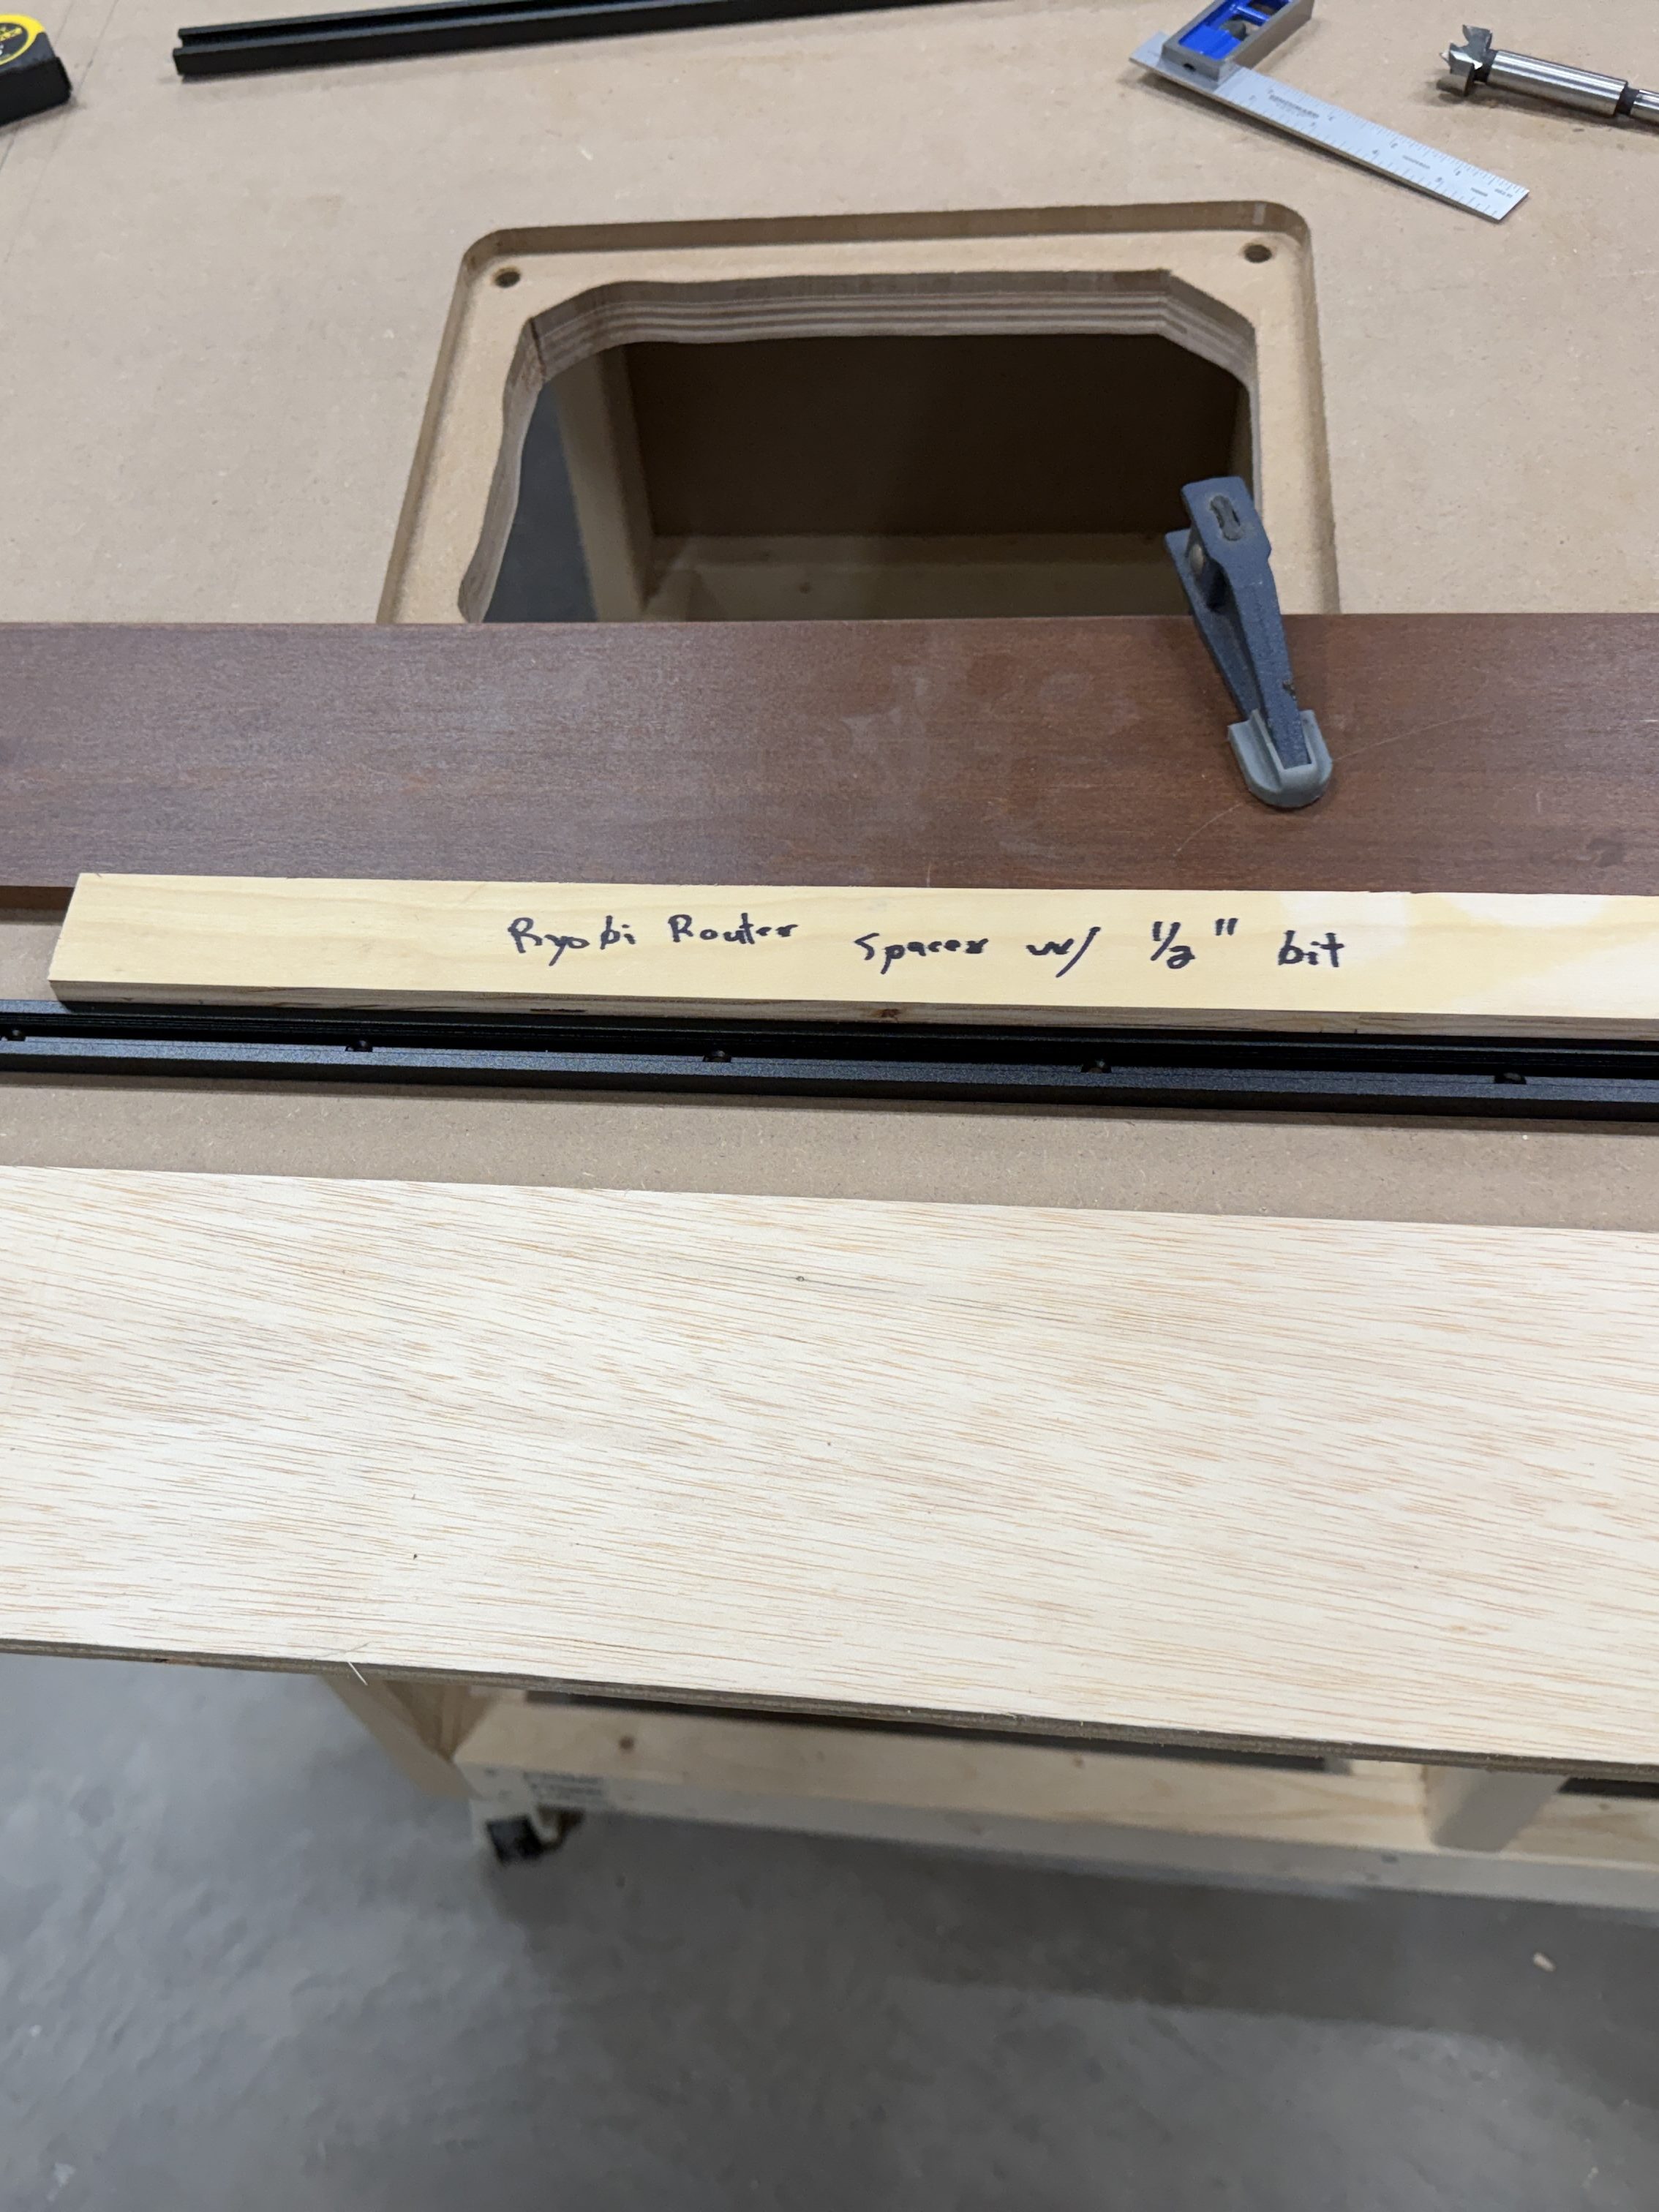
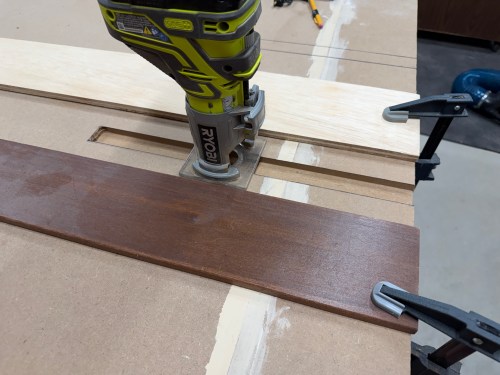
I cut a spacer equal to the distance from my router base to a 3/8″ straight bit. Then I used double-sided tape to secure the border pieces. I removed the material in two passes and cut out the middle with a jig saw. The radius on the corners was much larger than the router bit, so I free-handed those up to the pencil marks.
I installed threaded inserts for the four bolts that secure the lift. Yet my centering was off, so it didn’t work out. I removed the inserts and drilled through to use longer bolts with a washer and nut under the table. I had to drill a recess in the bottom because I couldn’t find long enough bolts.
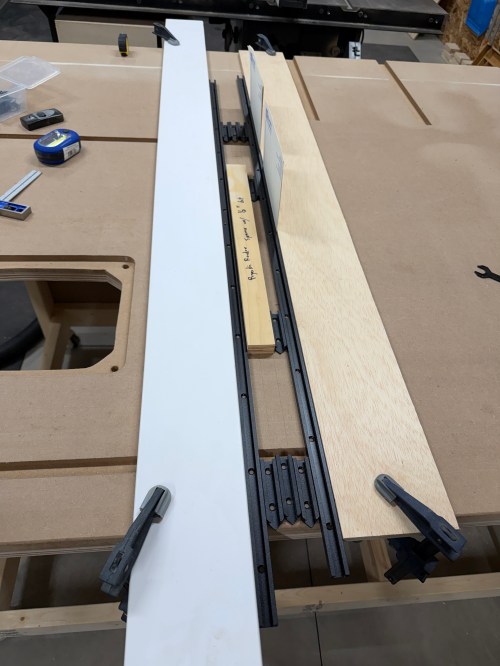
Setting up to route the first T-track took a long time, like when I did the miter slot extensions. I got faster with each one, as I figured out a process and all of the spacing. That same spacer came in handy, as well as pieces of the T-tracks. I measured and cut all of the T-tracks.
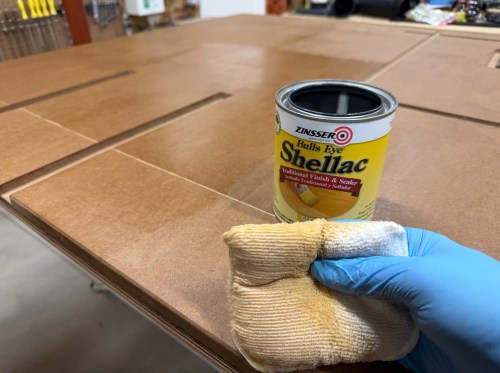
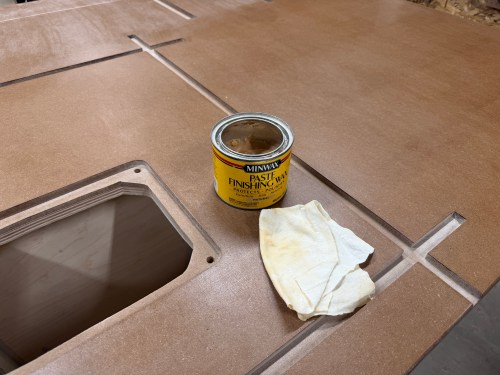
I sanded the top and edges with 80 grit using my random orbital sander .Then I applied four coats of Zinsser Bulls Eye Shellac. A day later I did a light hand sanding with 220 grit and applied paste wax.
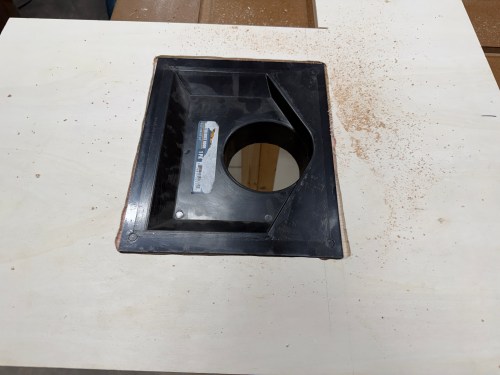
A good router table needs dust collection and here are the parts I used for mine:
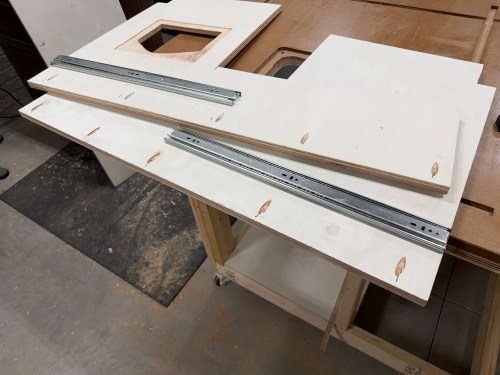
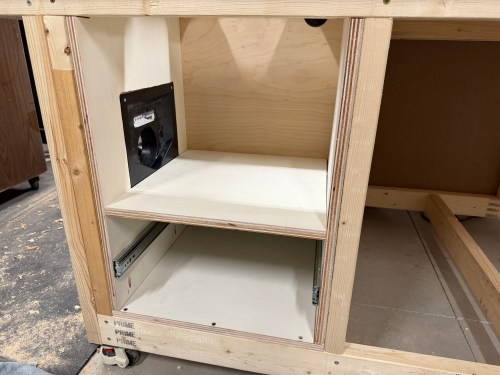
I had to build a cabinet to enclose the router lift, plus a drawer underneath. Due to the table’s frame and a need for the left side, I sketched out a plan. I was making a big version of the L-shaped Tetris piece.
The assembly had to be done inside the frame, due to the cabinet nesting up through the frame. After getting plywood to size, I cut various holes, attached 22″ drawer slides, routed a recess for the dust hood, and drilled pocket holes. It all screwed together quickly.
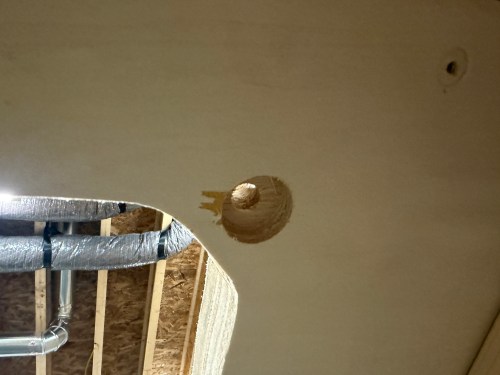
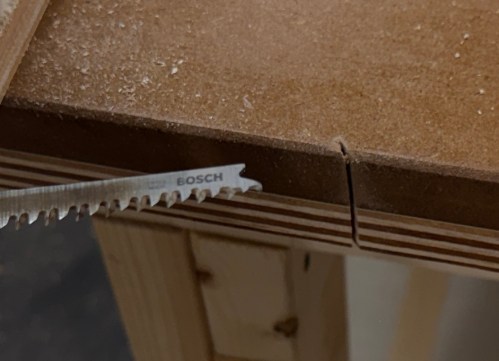
Of course, when using the jig saw, I accidentally cut in to the new table top! I’m the only one who does this, right?
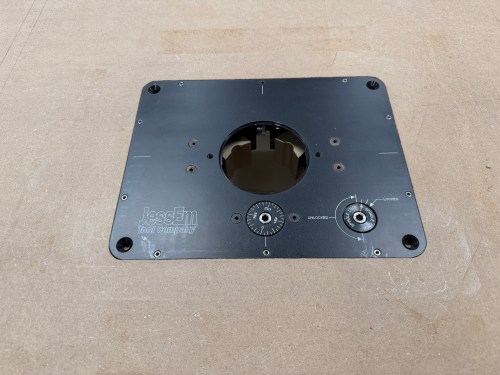
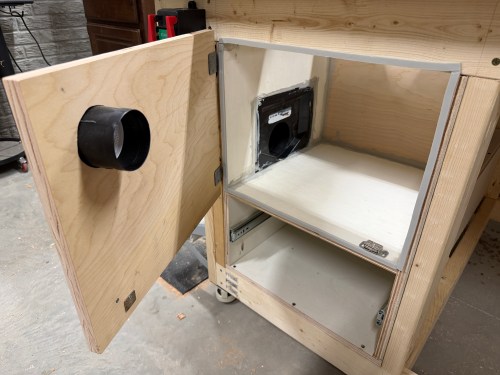
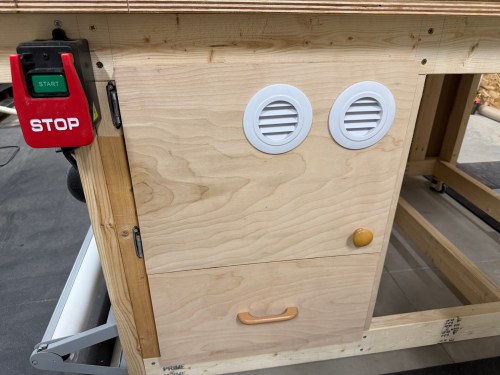
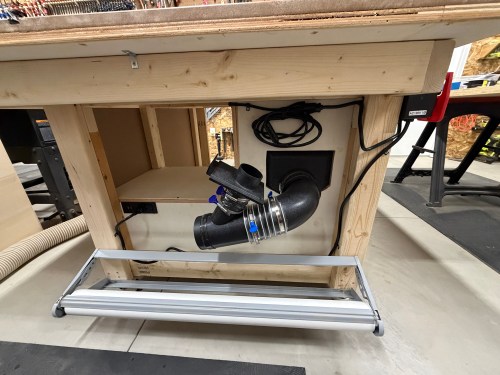
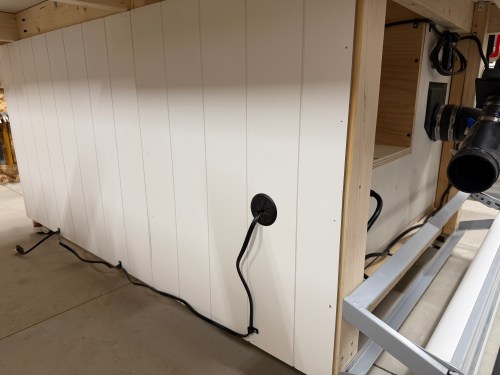
I caulked everywhere inside the dust box. Then I cut a door, mounted hinges, added a magnet close, and used weather stripping to seal it. The door got a hole with a vent cover to supply fresh air to the router and dust collection system. After some use I’ll see if I need to add a second vent. I mounted the lift, leveled it to the table, and bolted it in. The lift doesn’t came with a blank insert, so I bought one from an Etsy store.
Update: I did end up adding a second vent.
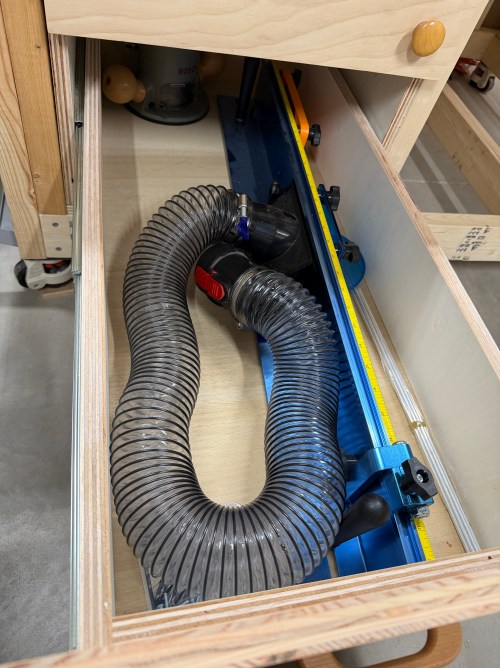
I cut all the pieces for the drawer, cut a rabbet where the bottom would slide in, and drilled pocket holes. Then I glued and screwed it together. Attached a drawer face and mounted a handle.
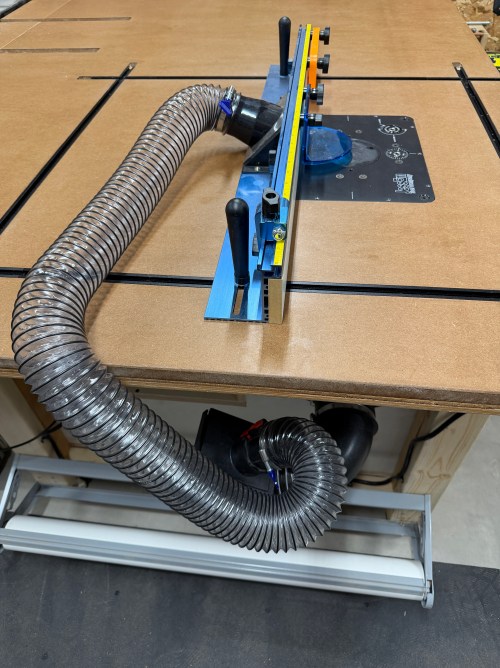
Along the left side of the table, I installed my paper roll dispenser. A 90° and then a Y-fitting connect to the dust hood. A 2.5″ blast gate is attached to the other side of the Y, for a hose up to the fence. The power cord went through a 2″ Desk Grommet on the back side. I screwed a POWERTEC Paddle Switch to the front. These switches makes it quick and easy to turn off the machine with my knee. I put in a recessed power strip with USB ports. Then I clipped in the wires and mounted a heavy duty surge protector power strip. This allows me to plug in the table saw as well.
The final thing was to lower the castor feet to raise the table up to the saw.
It’s so nice to have a large table table in the shop and I’m excited for the router, where it’s easy to use and always ready. Here are some more pictures.
There are the other accessories I bought for the router station, some of which can also be used at the table saw:
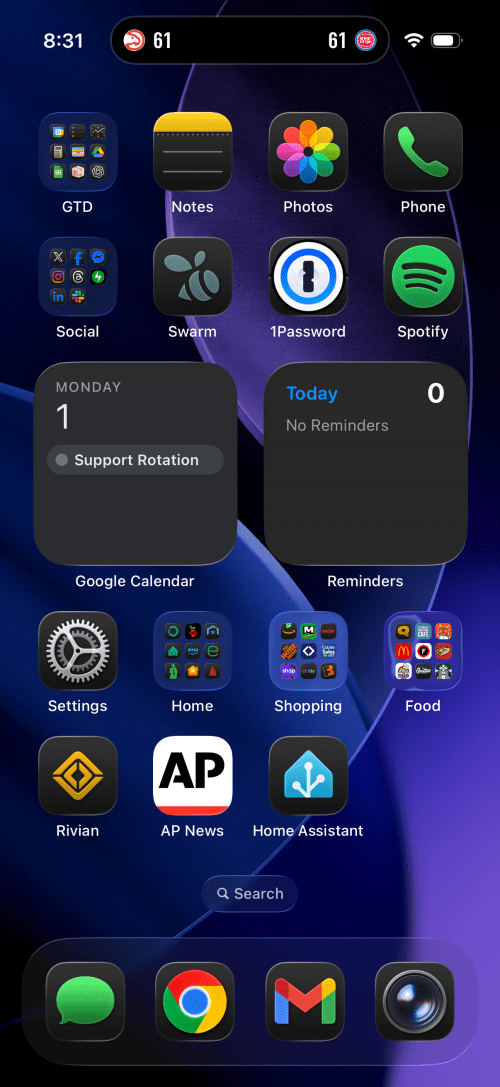
The biggest change I’ve customized it to always use the dark icons, even during the day. The Rivian, AP News, and Home Assistant apps all claim prominent spots on the first page and a few groups moved around.
When I saw that Tiger Woods’ former caddie, Steve Williams, was putting out a book about their partnership on the golf course I ordered it right away. Together We Roared was a good read and I was pleased to see they didn’t give much attention to Tiger’s off the course troubles during those years. The focus was on the golf and the relationship between player and caddie. Williams provided a lot of insight and stories that have never been told and he even opened up his house to his co-author, showing some of his Tiger memorabilia.
This book is great for any golfer, especially a Tiger fan.
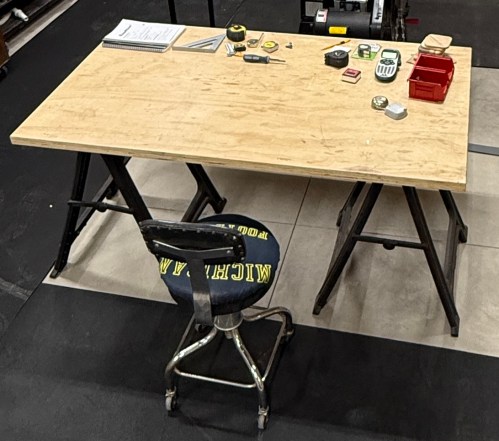
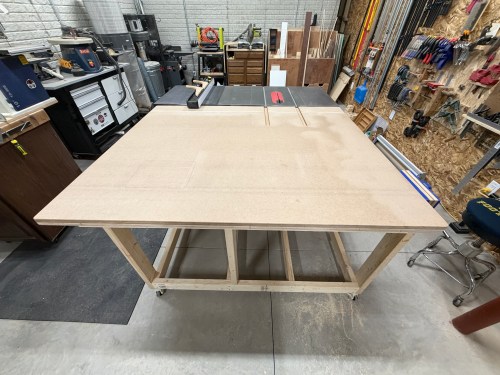
When we moved to the new house, I disassembled my workbench with the plan to build one for the new workshop. More than a year later I was still using the old top on sawhorses and everything I bought for the build was piled up in the corner.
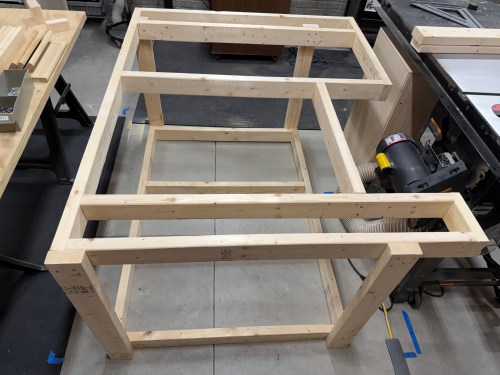
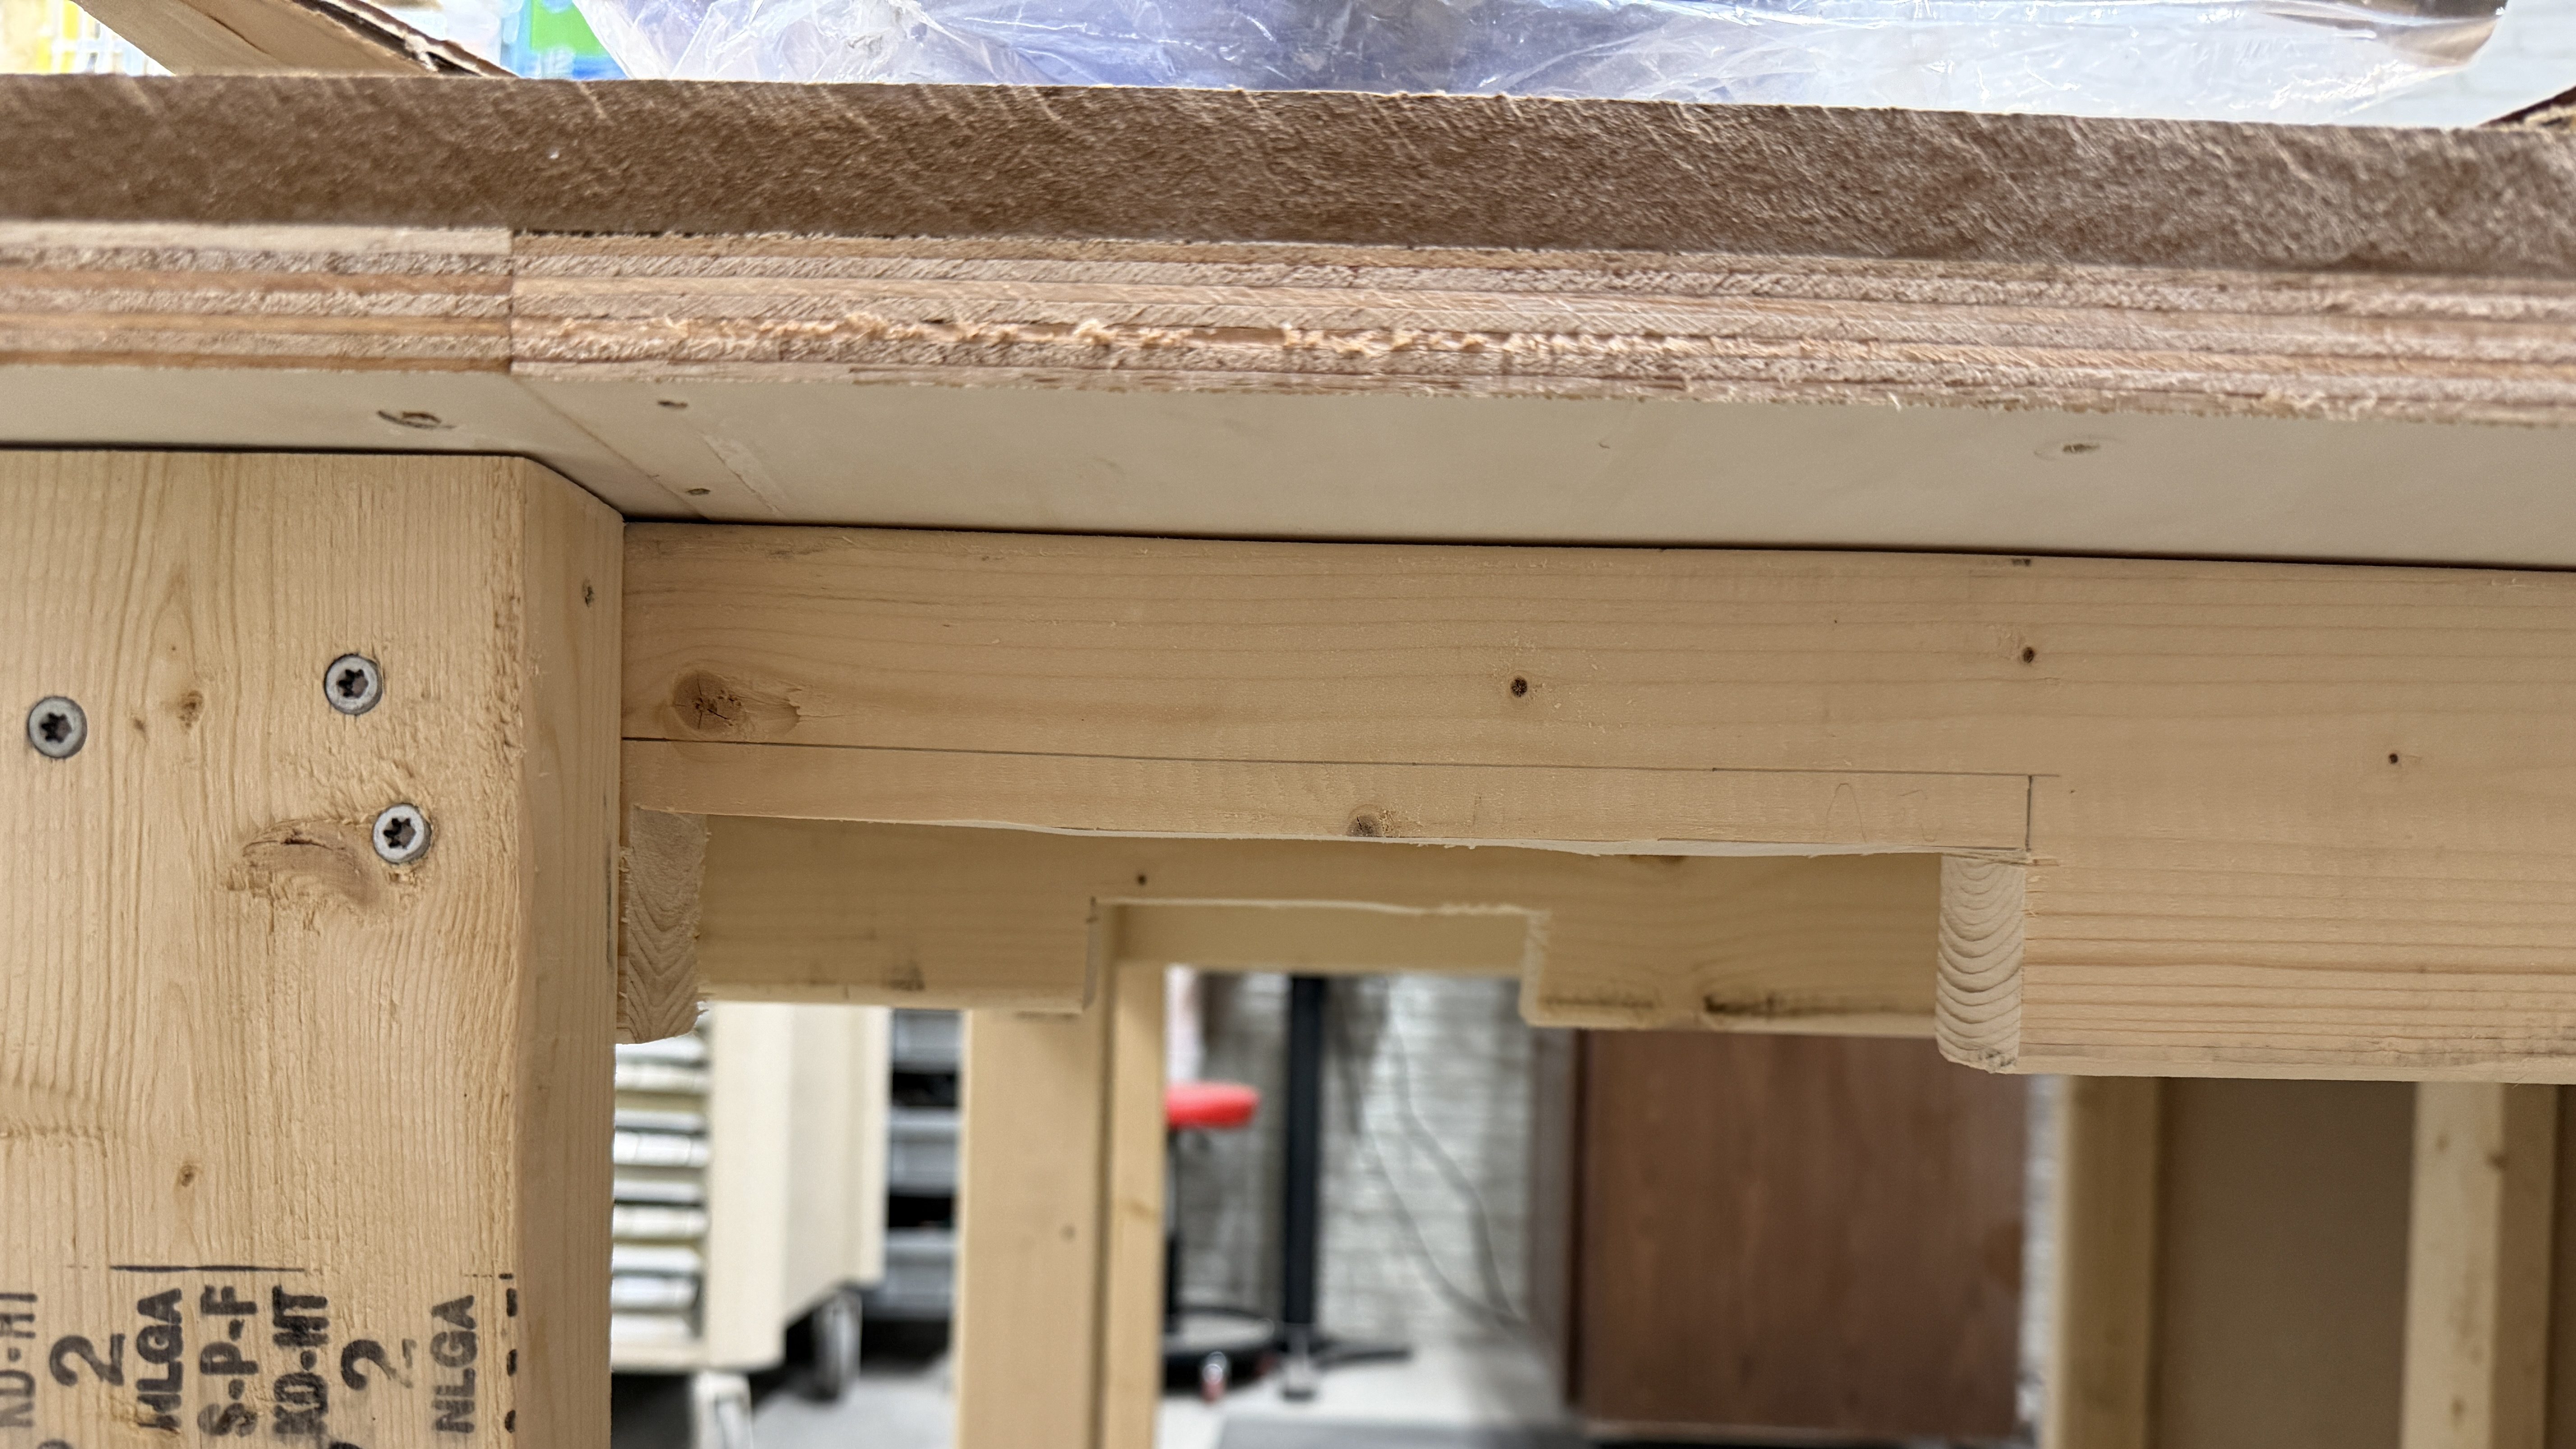
The planning notes and ideas I made last year were a good starting point. I took a bunch of measurements, adjusted to account for the motor when tilting the table saw blade, and mapped it out with blue tape. Made more adjustments, cut all of the pieces from 2x4s, and assembled the frame with 3″ screws. I’ve learned my lesson about not using glue for shop furniture because it’ll likely get taken apart in the future. By only using screws I can reuse the materials when an improved replacement gets made.
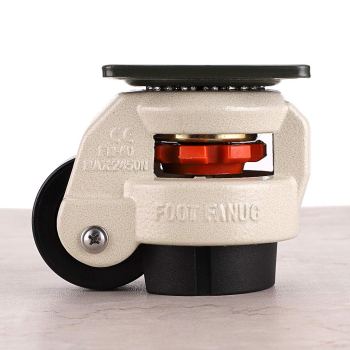
The castors I bought double as adjustment feet, making it easy to raise the height up to the table saw and will make the table stationary 99% of the time.
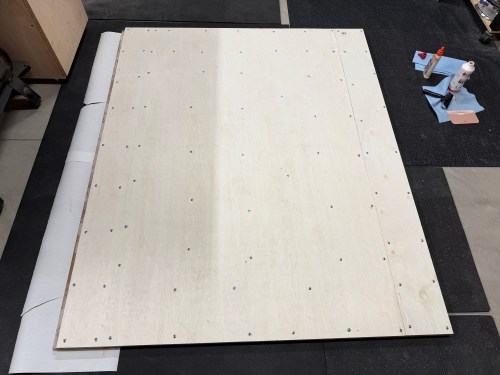
I cut plywood and MDF, then laminated them together, using screws for clamps. Since my top was going to be 66×54″ I had to splice in a six inch strip of each.
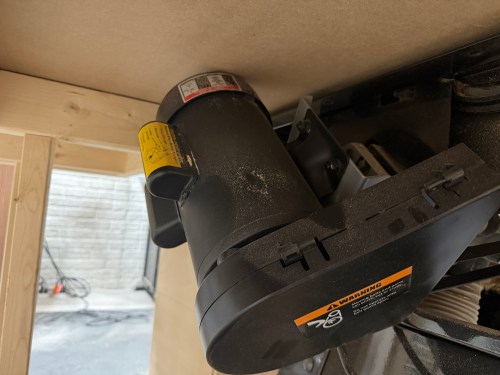
After the glue dried I removed all the of screws and got it up on the frame. Then I checked the height of my table compared to the table saw and it was going to work out well. With the blade at 45° and all the way down it was extremely close to the table top though.
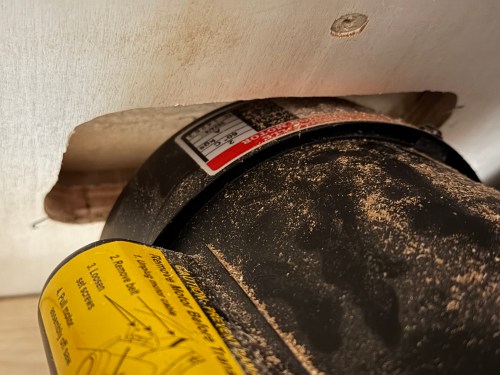
When maxing out the blade height the motor raised about an inch. So I created a clearance pocket with the router.
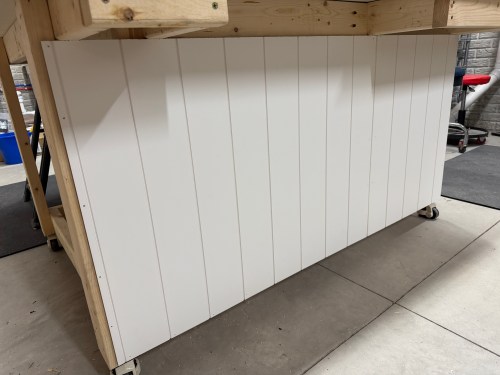
I added a couple more vertical supports along the back of the frame and cut scrap shiplap panelling to rigidify it and close it up.
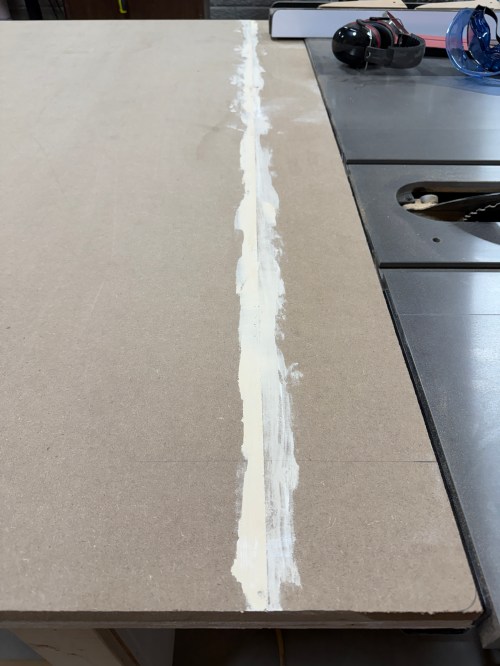
I trimmed all of the edges to size. There was a small gap between the spiced sections of MDF, so I used wood filler.
One inch corner braces with 1/2″ screws were used to attach the top to the frame.
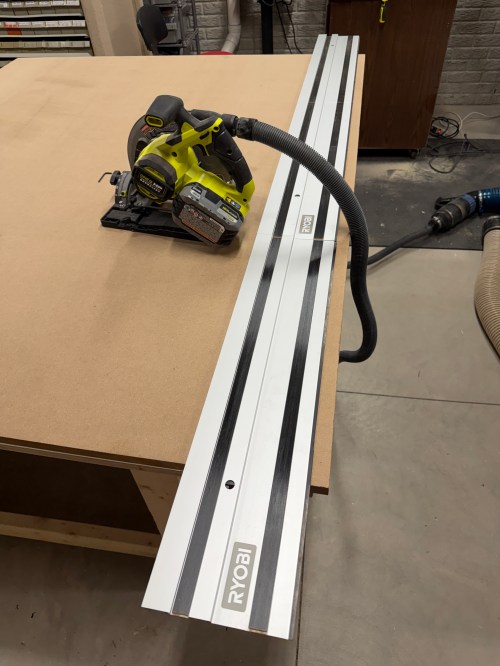
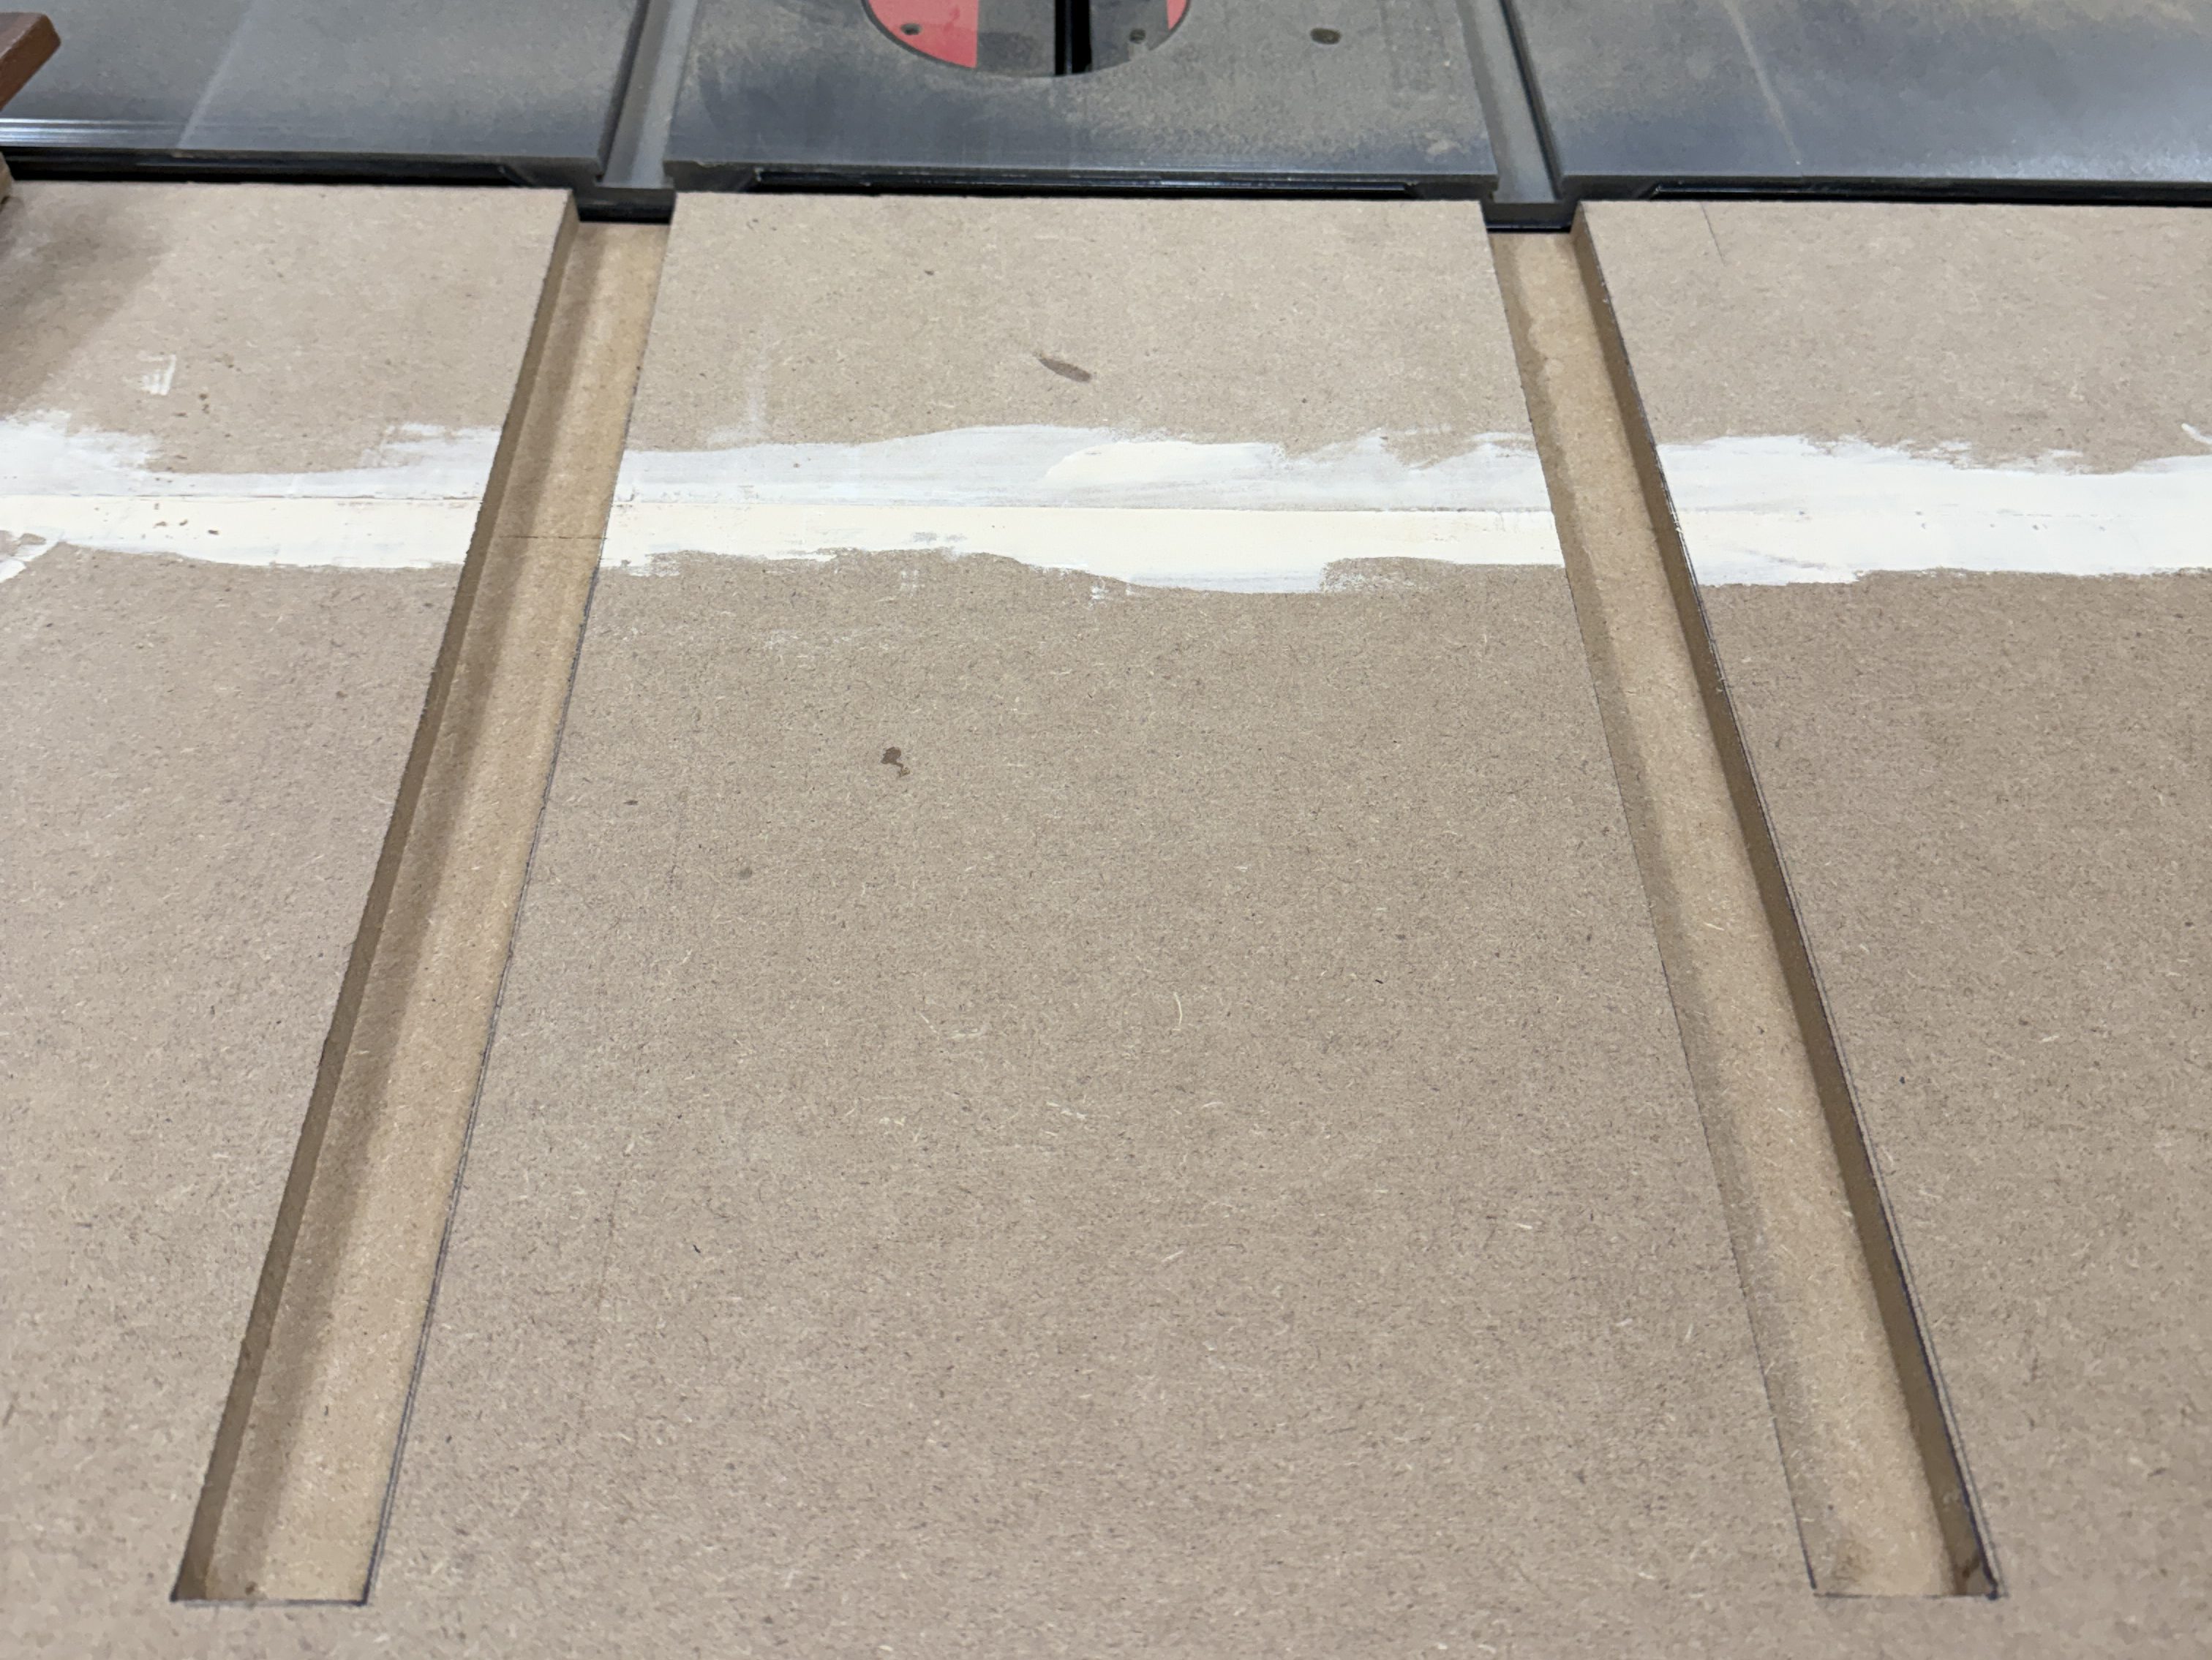
The miter slots were extended from the table saw. I made them wider and slightly deeper, so the outfeed table placement won’t need to be too exact.
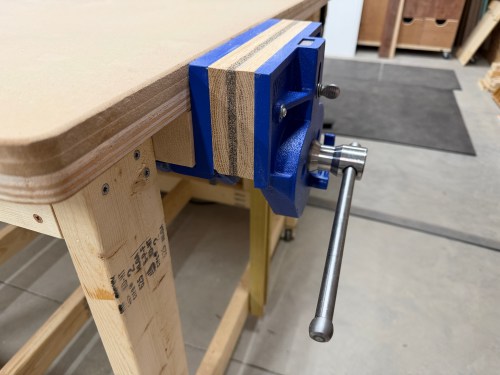
For my vice, I bought a Yost 9″ quick release vice. To mount it I had to remove part of the frame and add blocking.
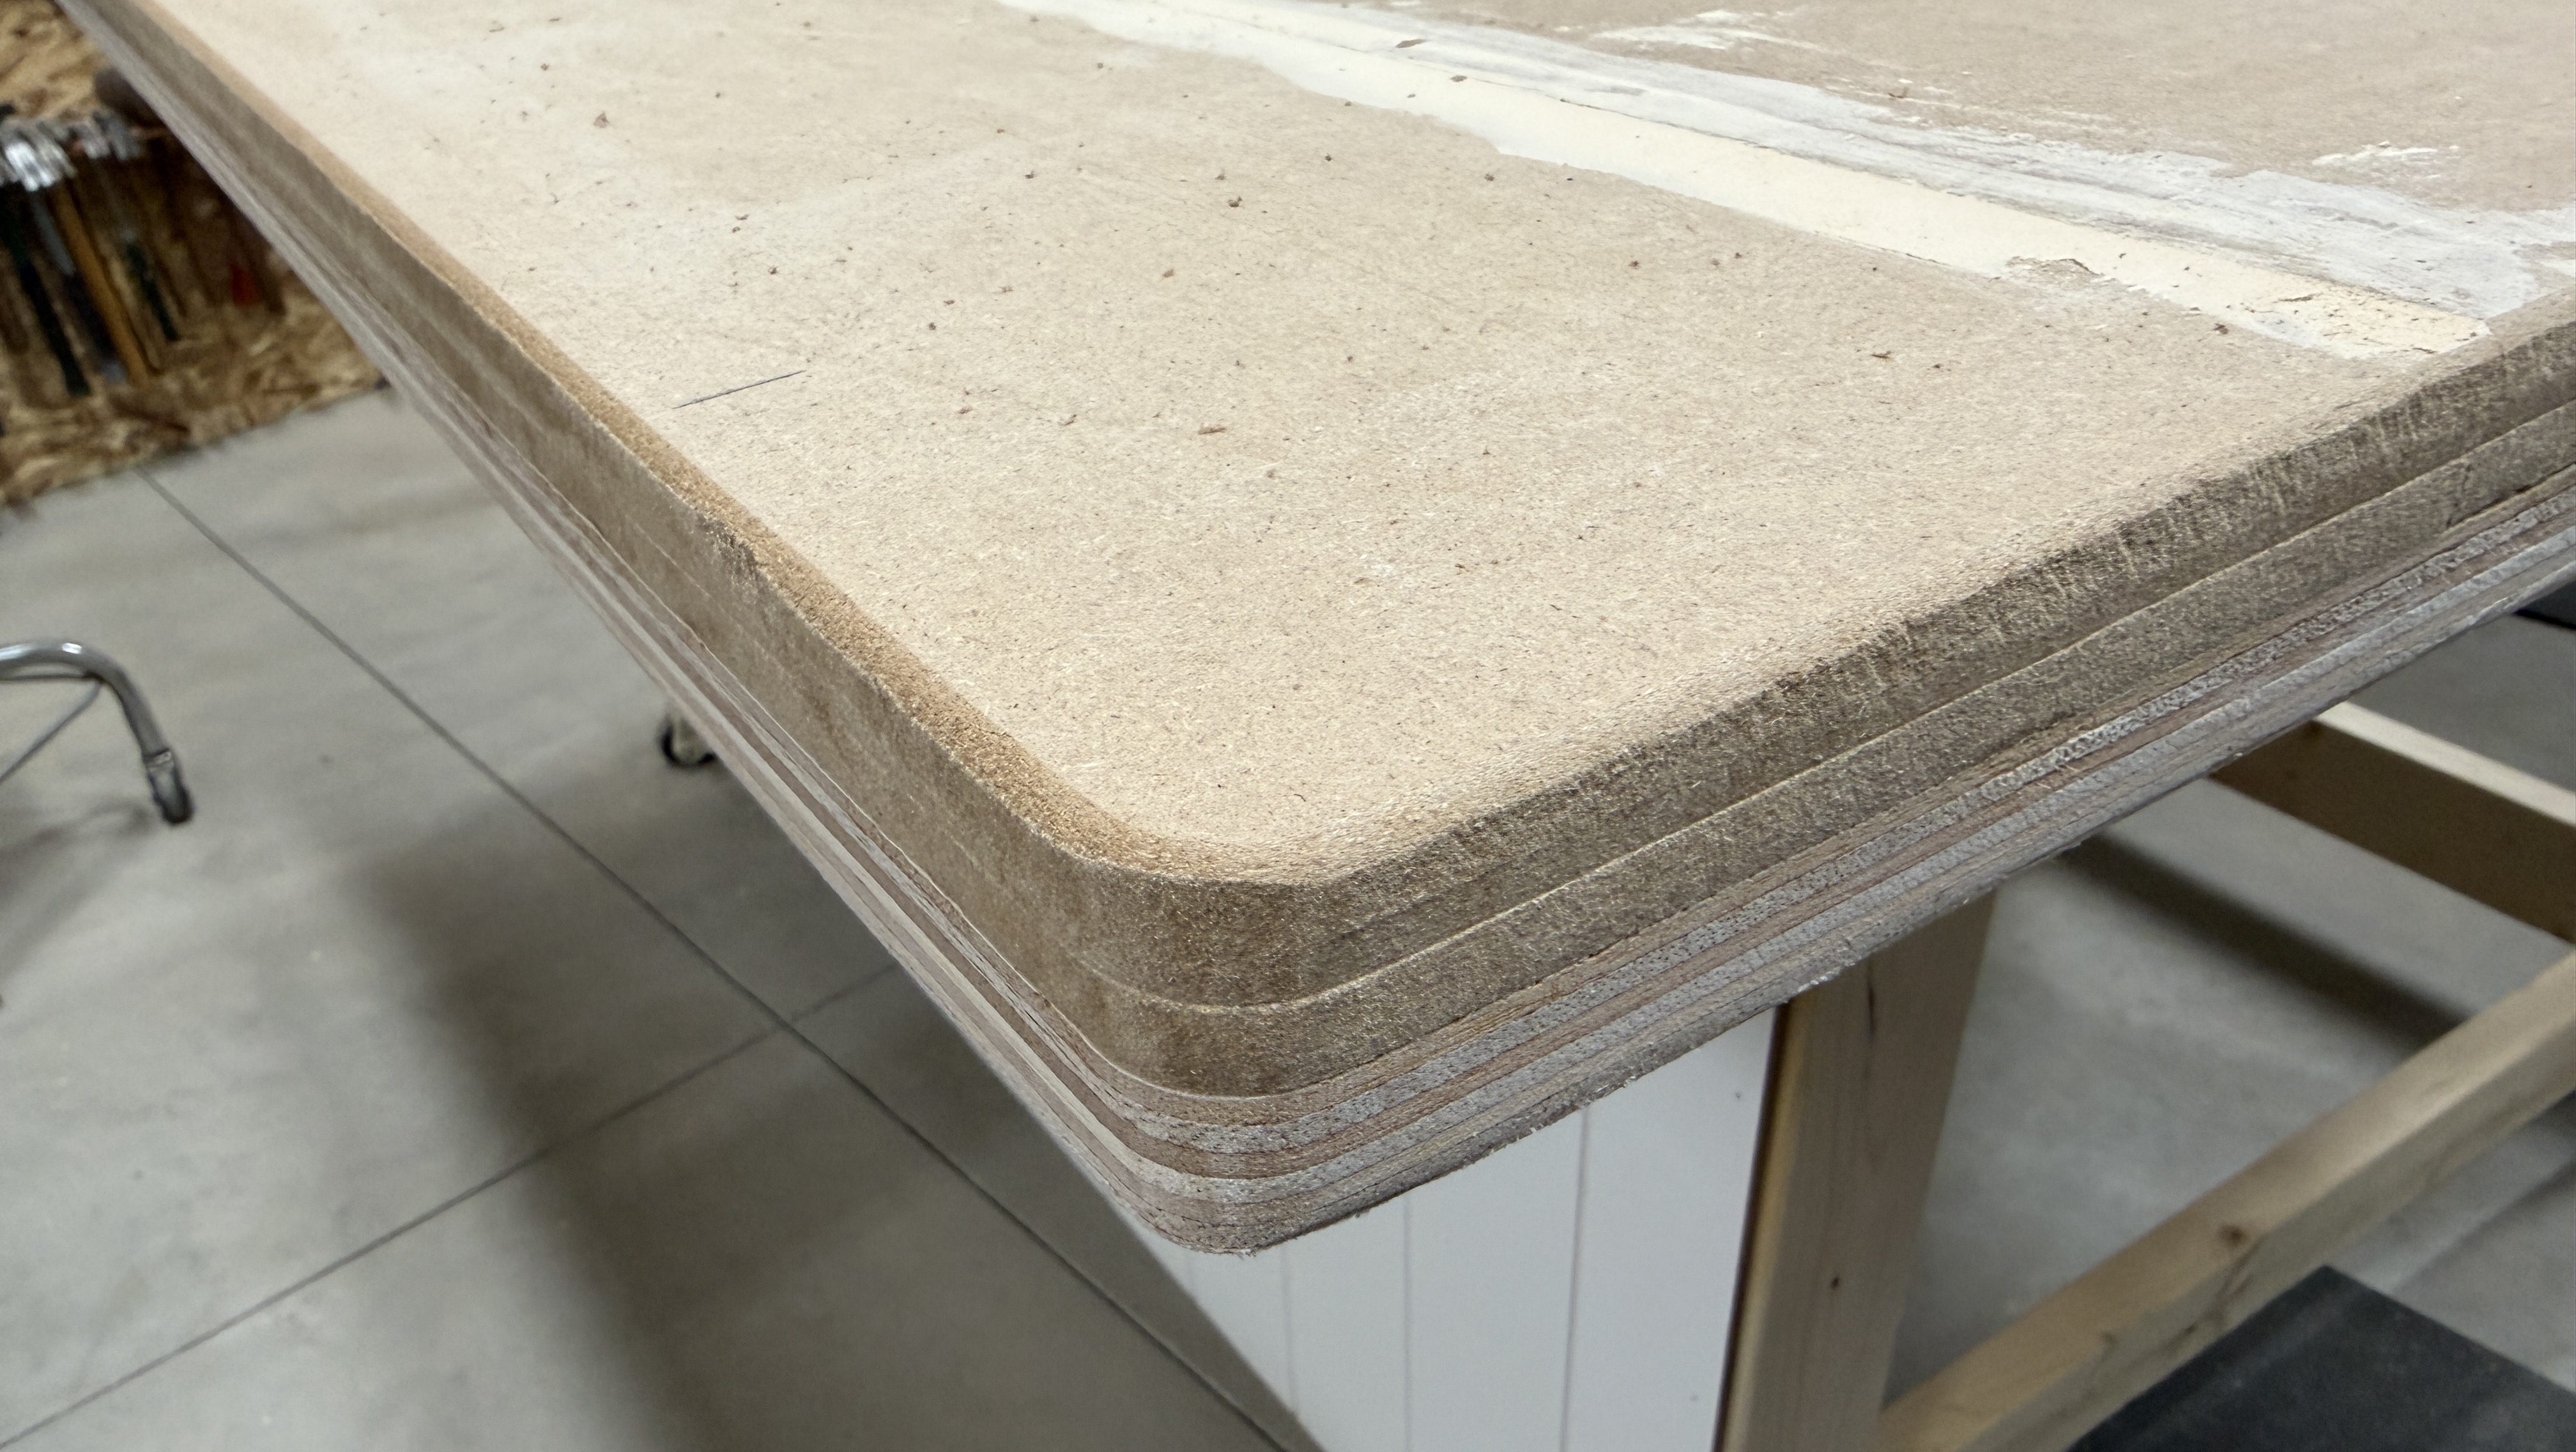
I realized I should finish up the edges of the table, so I quickly rounded the corners, sanded the edges, and added a roundover.
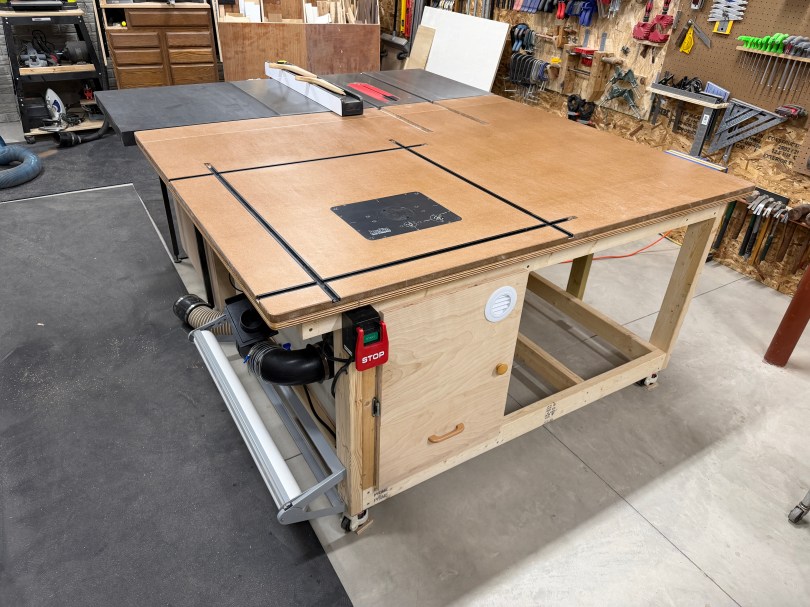
Look at this beauty! So much room for projects and a space underneath for storage.
Continue to Outfeed Assembly Table – Part 2, which is where I add a router station, complete with dust collection. Then Part 3, where I add a bunch of drawers for storage and organization.
While tonight’s show wasn’t as good as originally predicted, I could faintly see a bit with the naked eye. Without the iPhone camera to show me where they were, I wouldn’t have noticed though. We think I got outside at the tail end of peak viewing.
Quite a different show than last year. I never posted the photos from May 11-12, 2024 around midnight, so those are below. We timed that night much better.
An article or ad popped up for this gutter downspout improvement while I was doomscrolling on either Facebook or Instagram and it caught my attention. I’d never even heard of hinges for gutter downspouts, but I quickly I ordered a 4 pack from Amazon. I painted them black to match and the install took about a half hour.
Now when I’m mowing the lawn I can quickly kick up the extension, mow the area, and immediately pull it back down. No more stopping the mower to remove the extension and I don’t have to worry about remembering to put it back on.
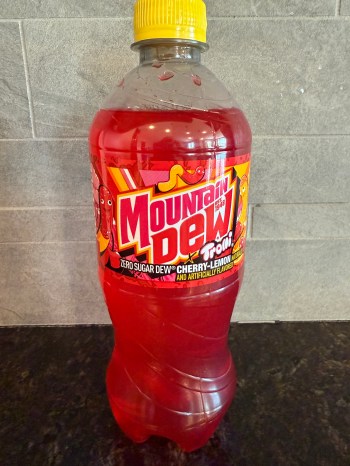
This Trolli flavor is an exclusive to Walmart. It’s a cherry lemon flavor.
Inspired by the iconic Trolli Sour Brite Crawlers gummi candy, this limited-time Mountain Dew flavor delivers a fizzy sweet-and-sour combination with zero sugar. Source
I don’t remember seeing a new flavor that only came in the zero sugar variety. It’s an interesting choice for one based on a very sugary candy!
This is one of the worst flavors I’ve tried in a long time. It has a really bad fake aftertaste, since they had to add something with it not having any sugar and only 15 calories. Giving it 2/10 might even be too high.