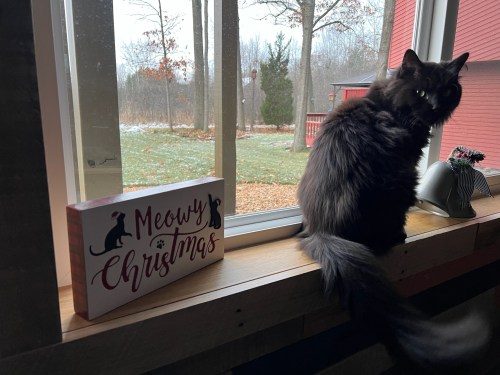
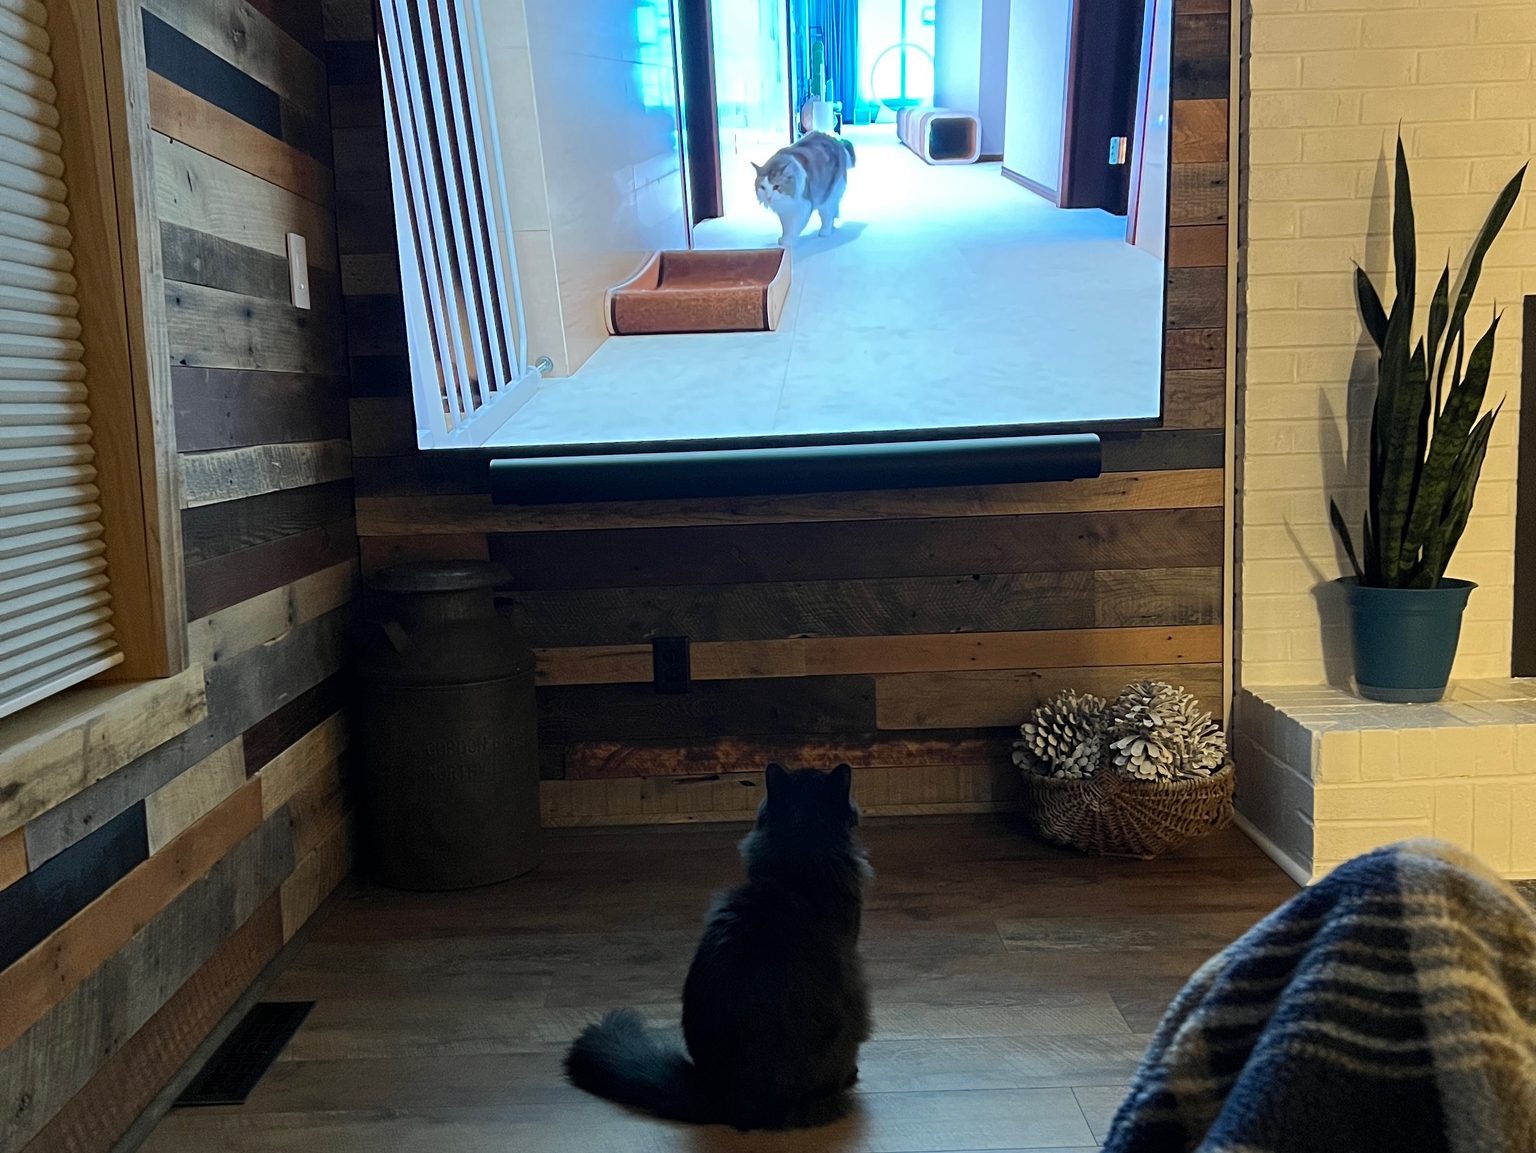
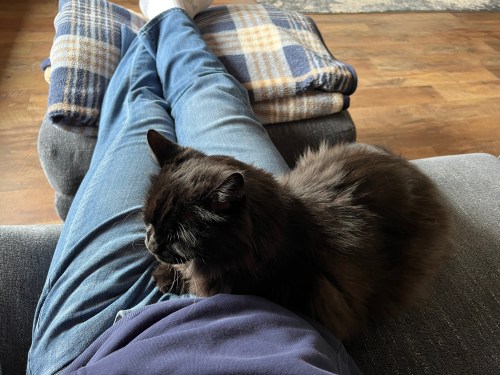
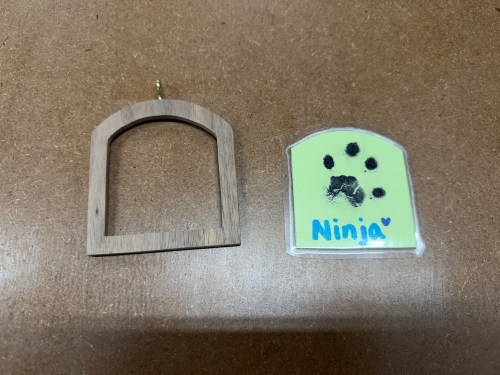
When Brandi moved in she brought her black cat, Ninja, with her. I wasn’t too sure about him because I’d never liked cats. With my job working from home, he quickly became my little buddy and turned me in to a cat guy.
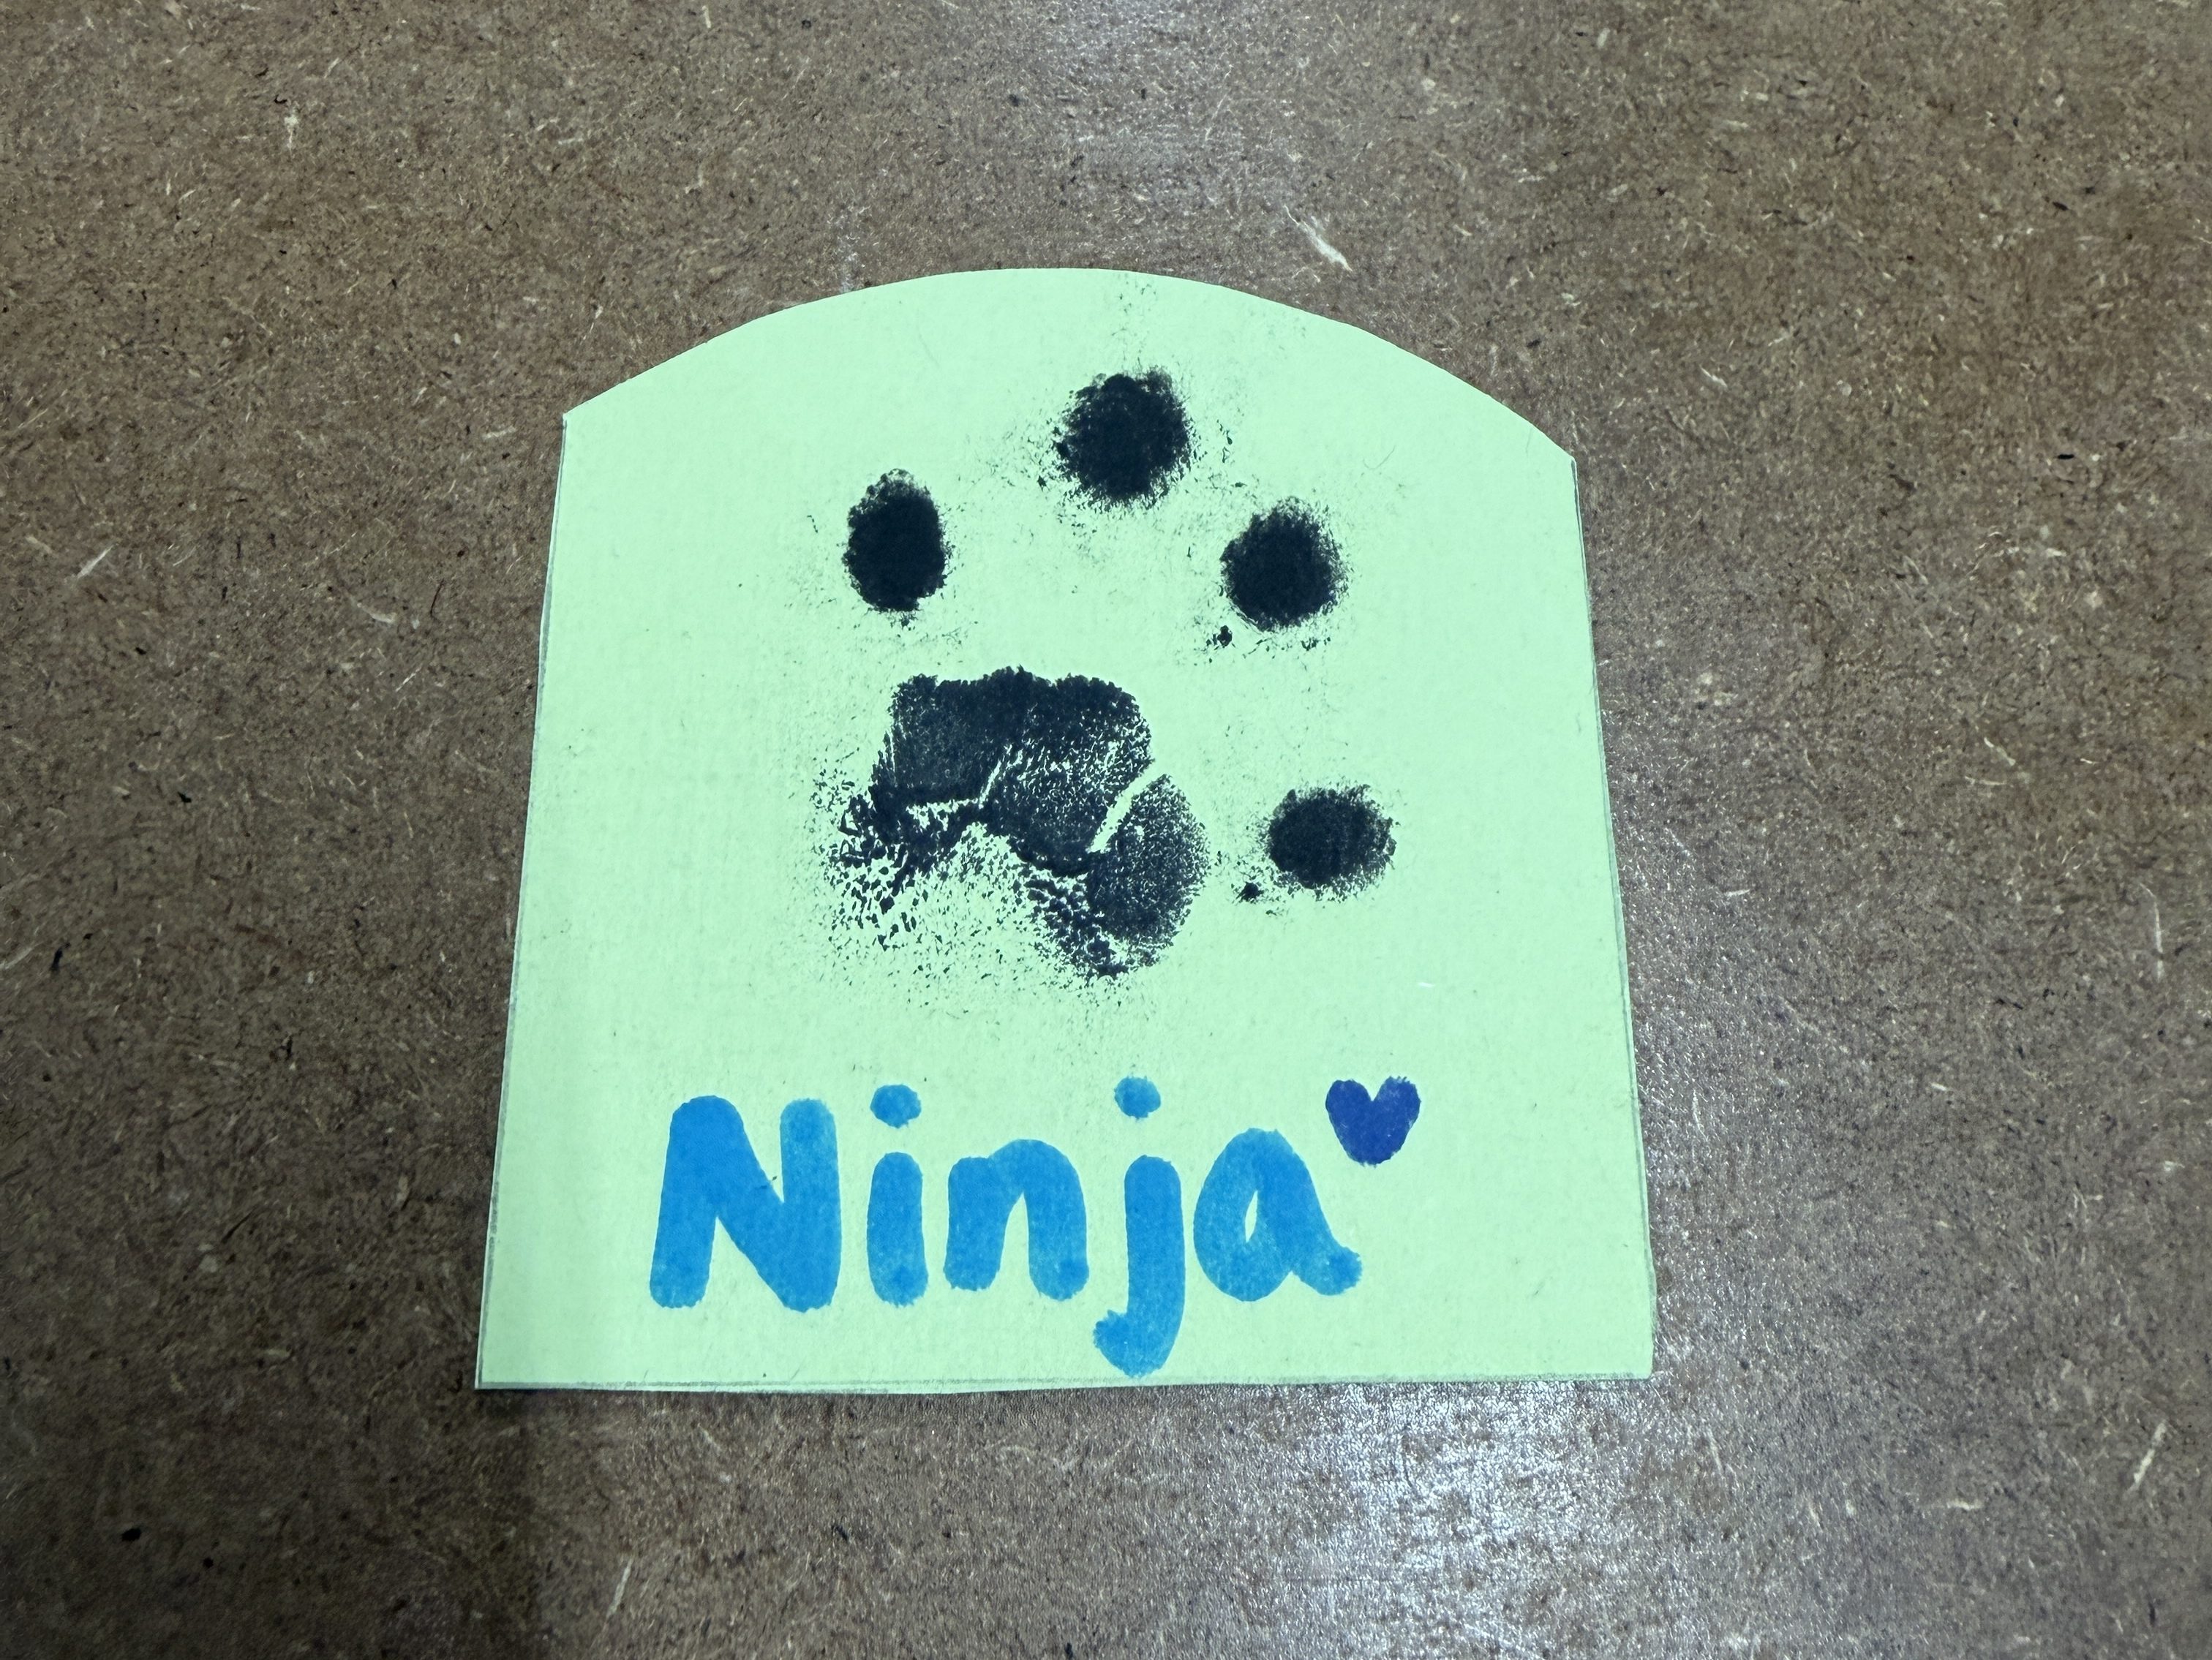
Ninja got sick and we lost him at the end of August, which was really hard. 😿 He was such a good kitty! The vet sent us a sympathy card with his paw print.
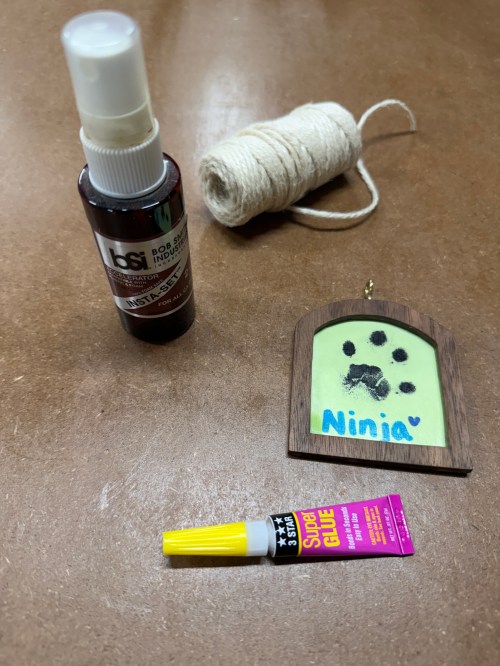
Since holidays are always a good time to remember, we decided to preserve the card in this year’s Christmas ornament and we’ll always have it. Brandi wants to start learning to use some of the tools in the shop, and she got to use the band saw, scroll saw, and sanders while helping to make the frame.
Check out our previous ornaments from 2021, 2022, 2023, and 2024.
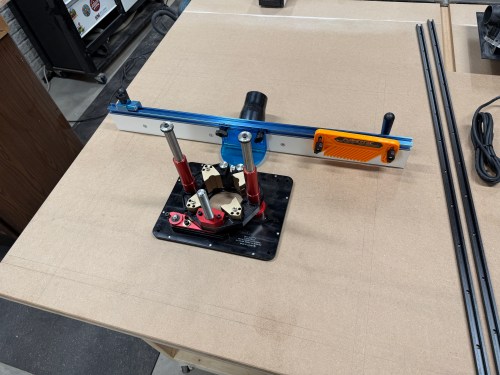
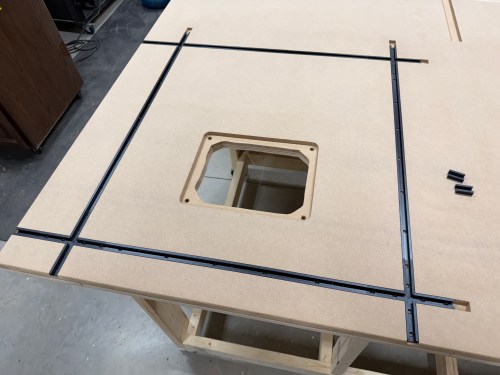
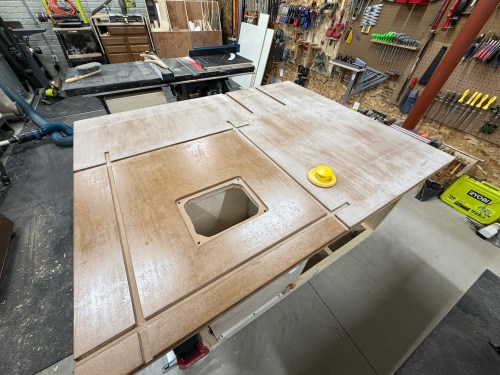
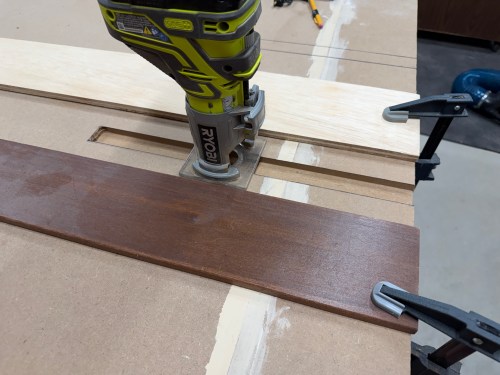
First, I had to figure out exactly where to install everything. I placed the fence and lift (upside down) on the table to get a feel for it. Then I outlined the lift and drew in the T-tracks.
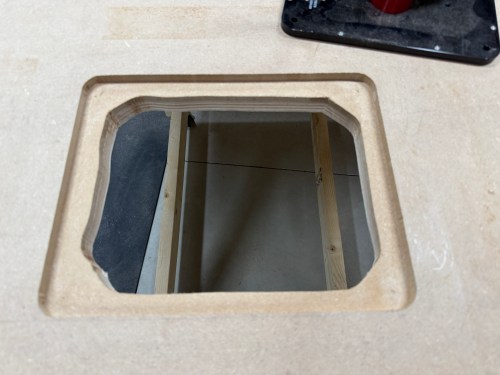
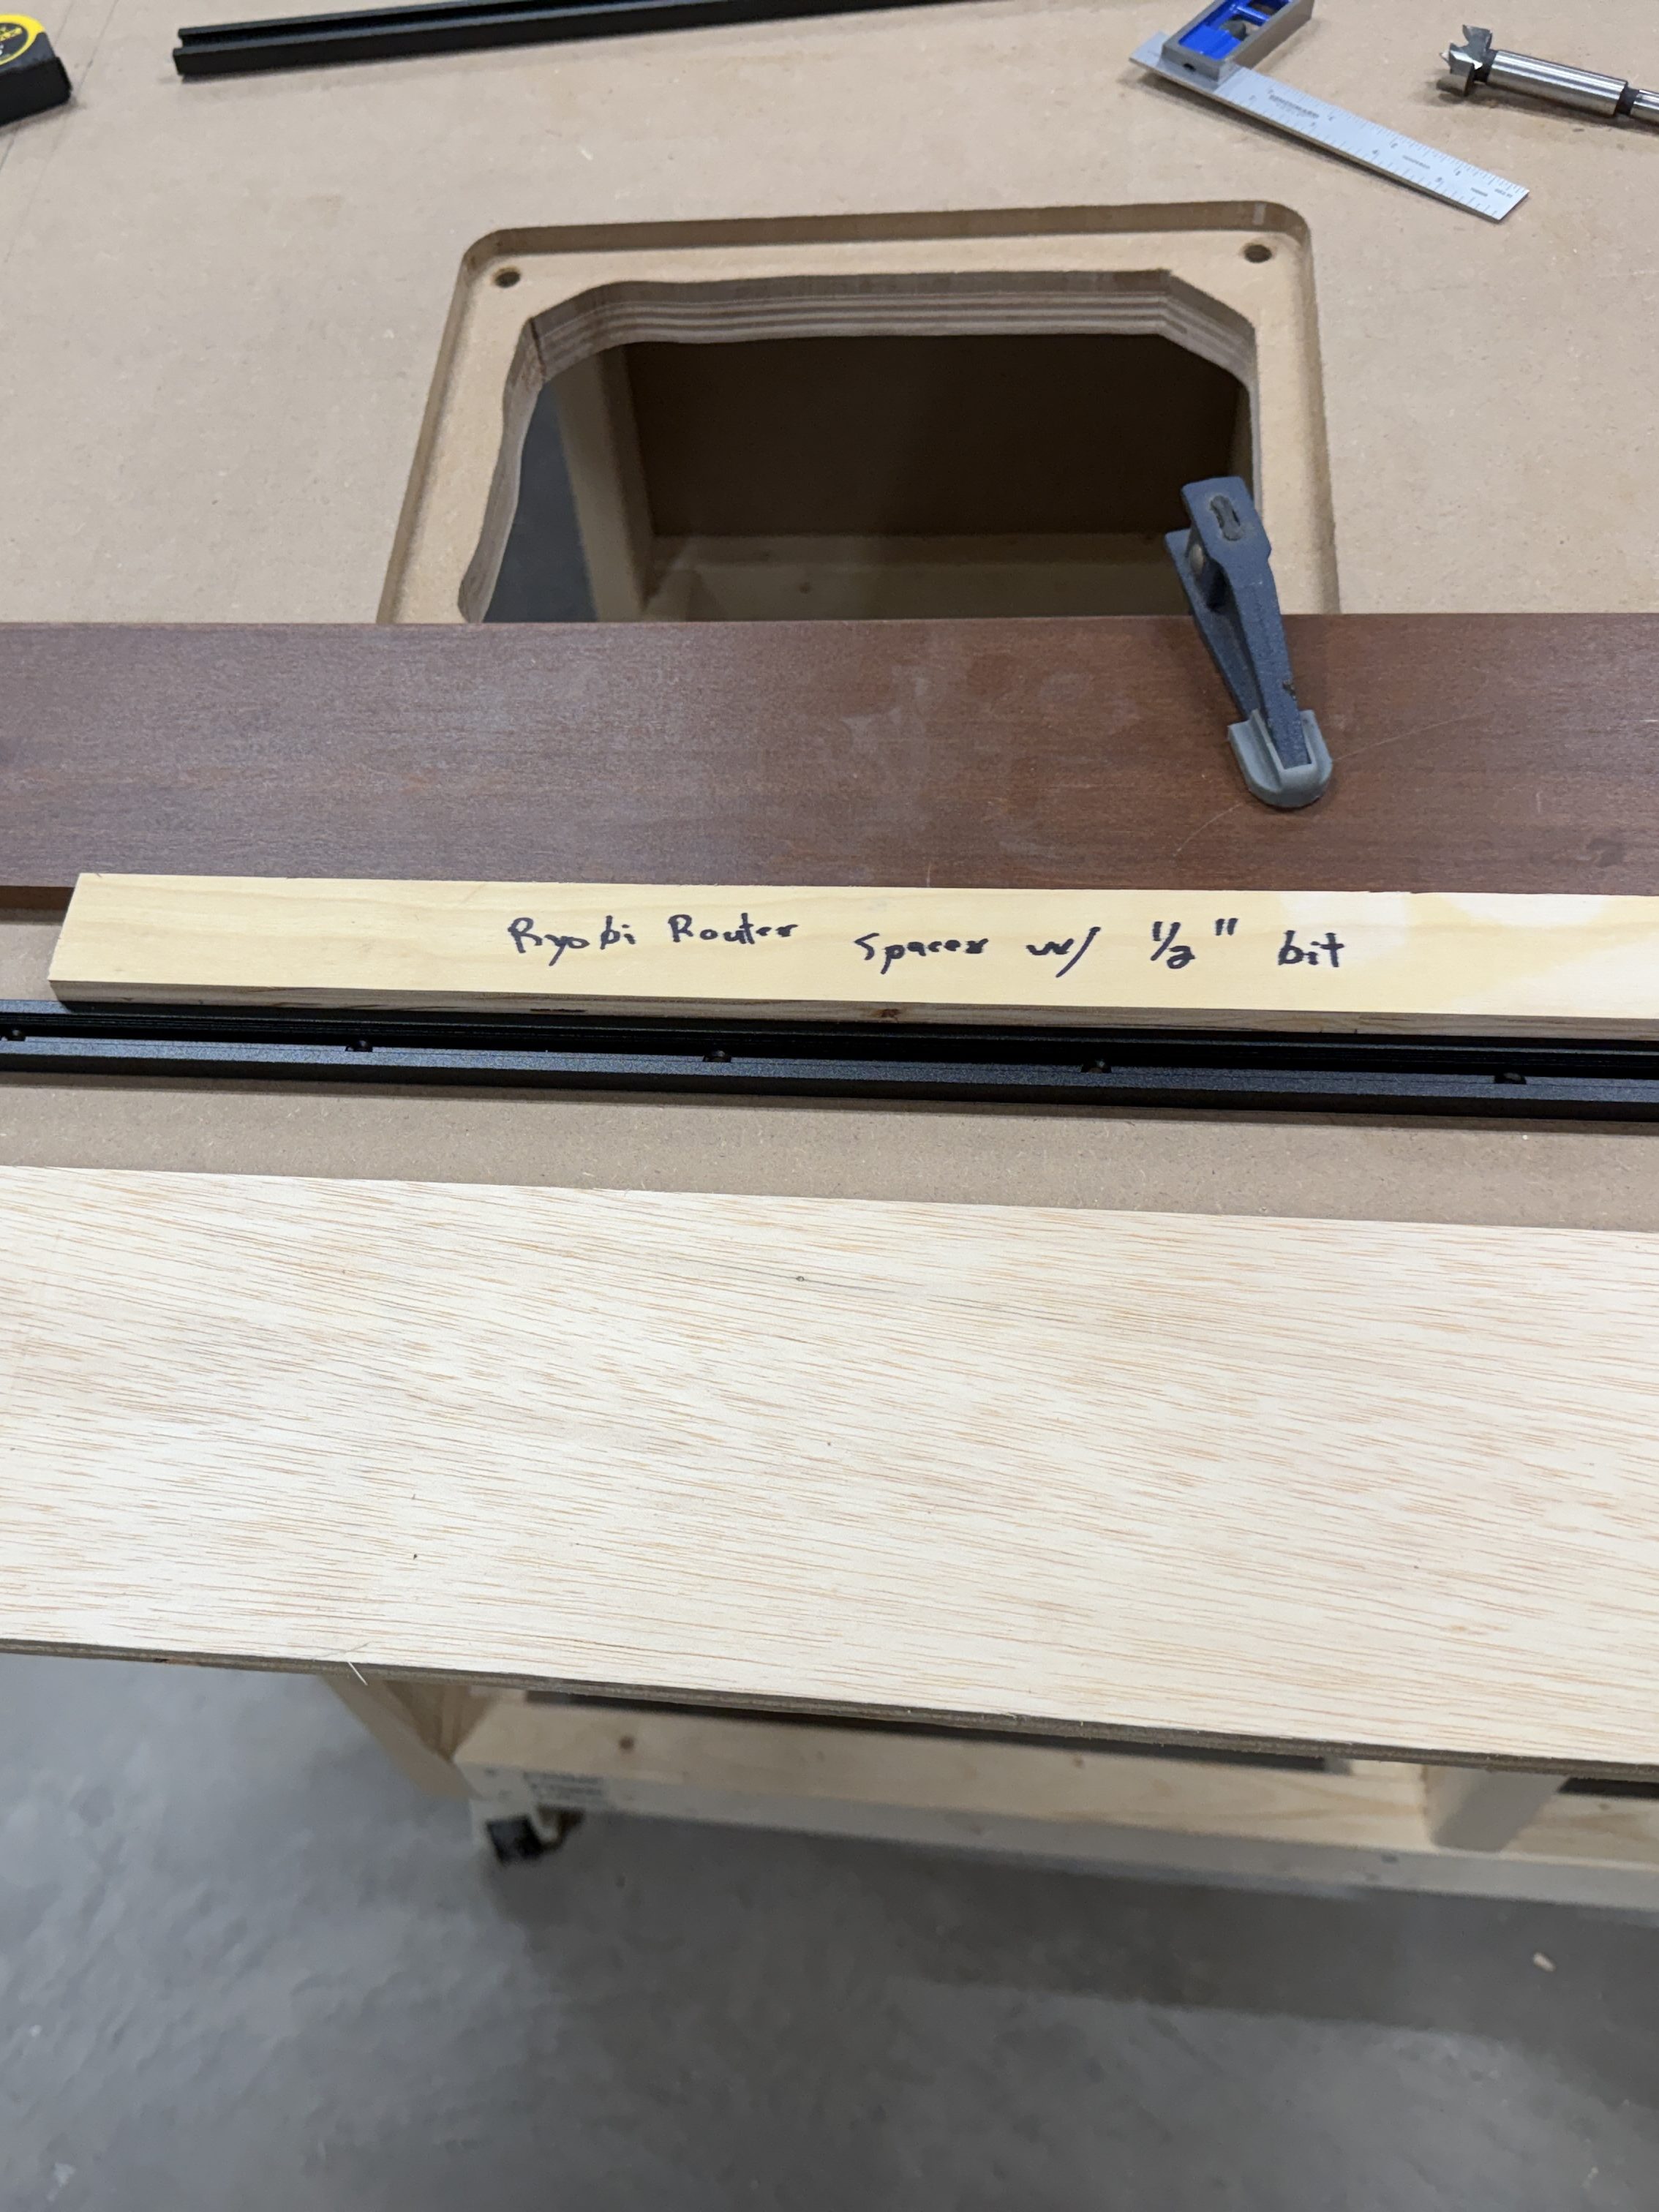
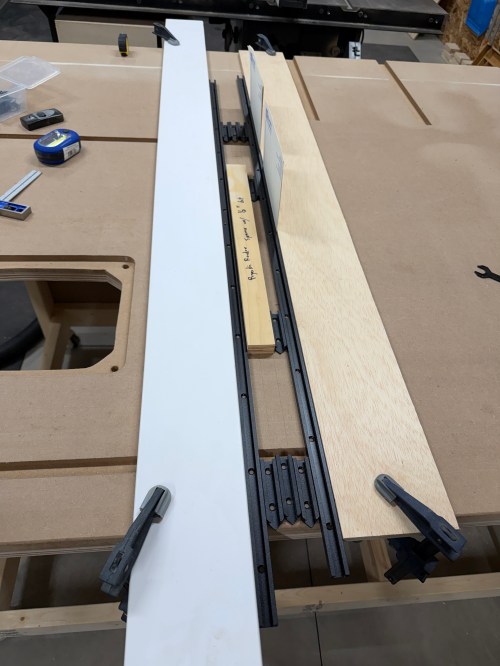
I cut a spacer equal to the distance from my router base to a 3/8″ straight bit. Then I used double-sided tape to secure the border pieces. I removed the material in two passes and cut out the middle with a jig saw. The radius on the corners was much larger than the router bit, so I free-handed those up to the pencil marks.
I installed threaded inserts for the four bolts that secure the lift. Yet my centering was off, so it didn’t work out. I removed the inserts and drilled through to use longer bolts with a washer and nut under the table. I had to drill a recess in the bottom because I couldn’t find long enough bolts.
Setting up to route the first T-track took a long time, like when I did the miter slot extensions. I got faster with each one, as I figured out a process and all of the spacing. That same spacer came in handy, as well as pieces of the T-tracks. I measured and cut all of the T-tracks.
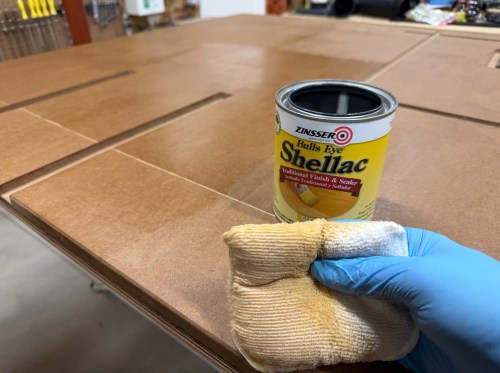
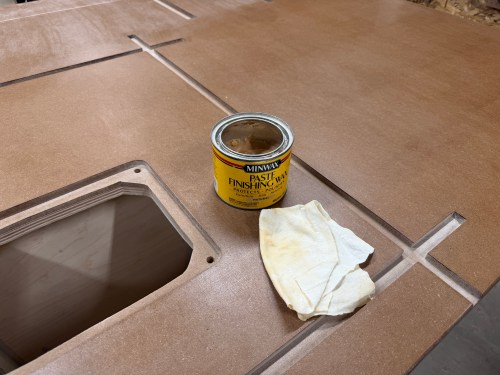
I sanded the top and edges with 80 grit using my random orbital sander .Then I applied four coats of Zinsser Bulls Eye Shellac. A day later I did a light hand sanding with 220 grit and applied paste wax.
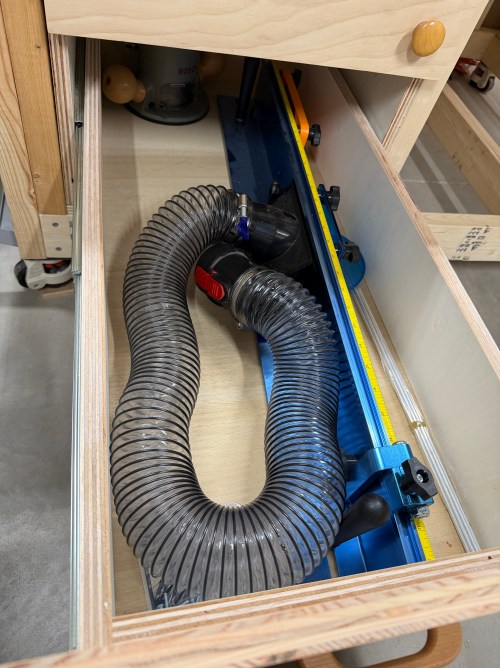
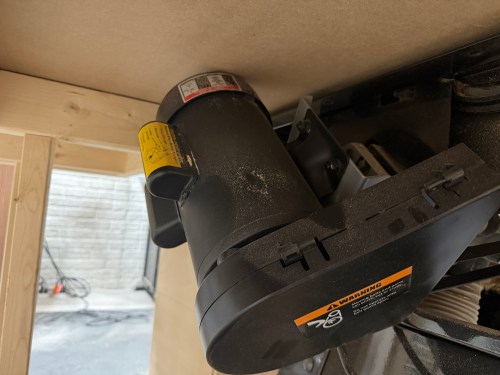
A good router table needs dust collection and here are the parts I used for mine:
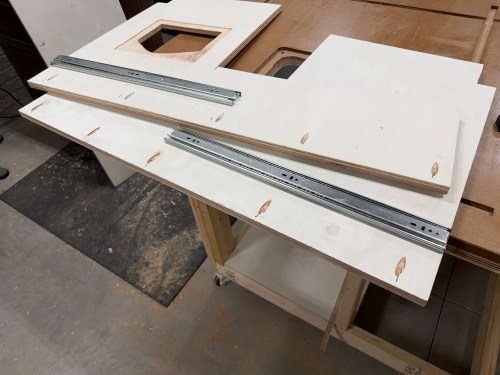
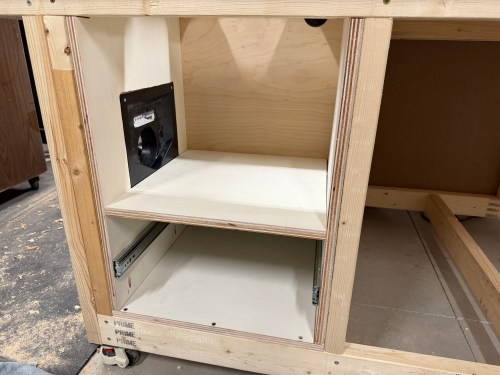
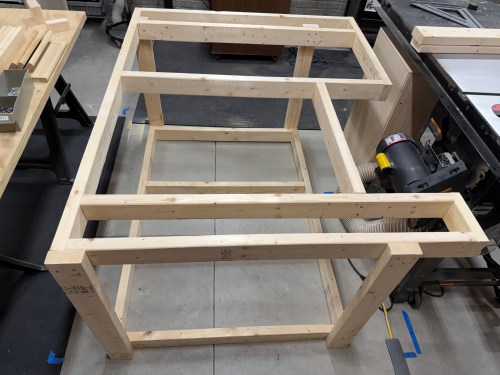
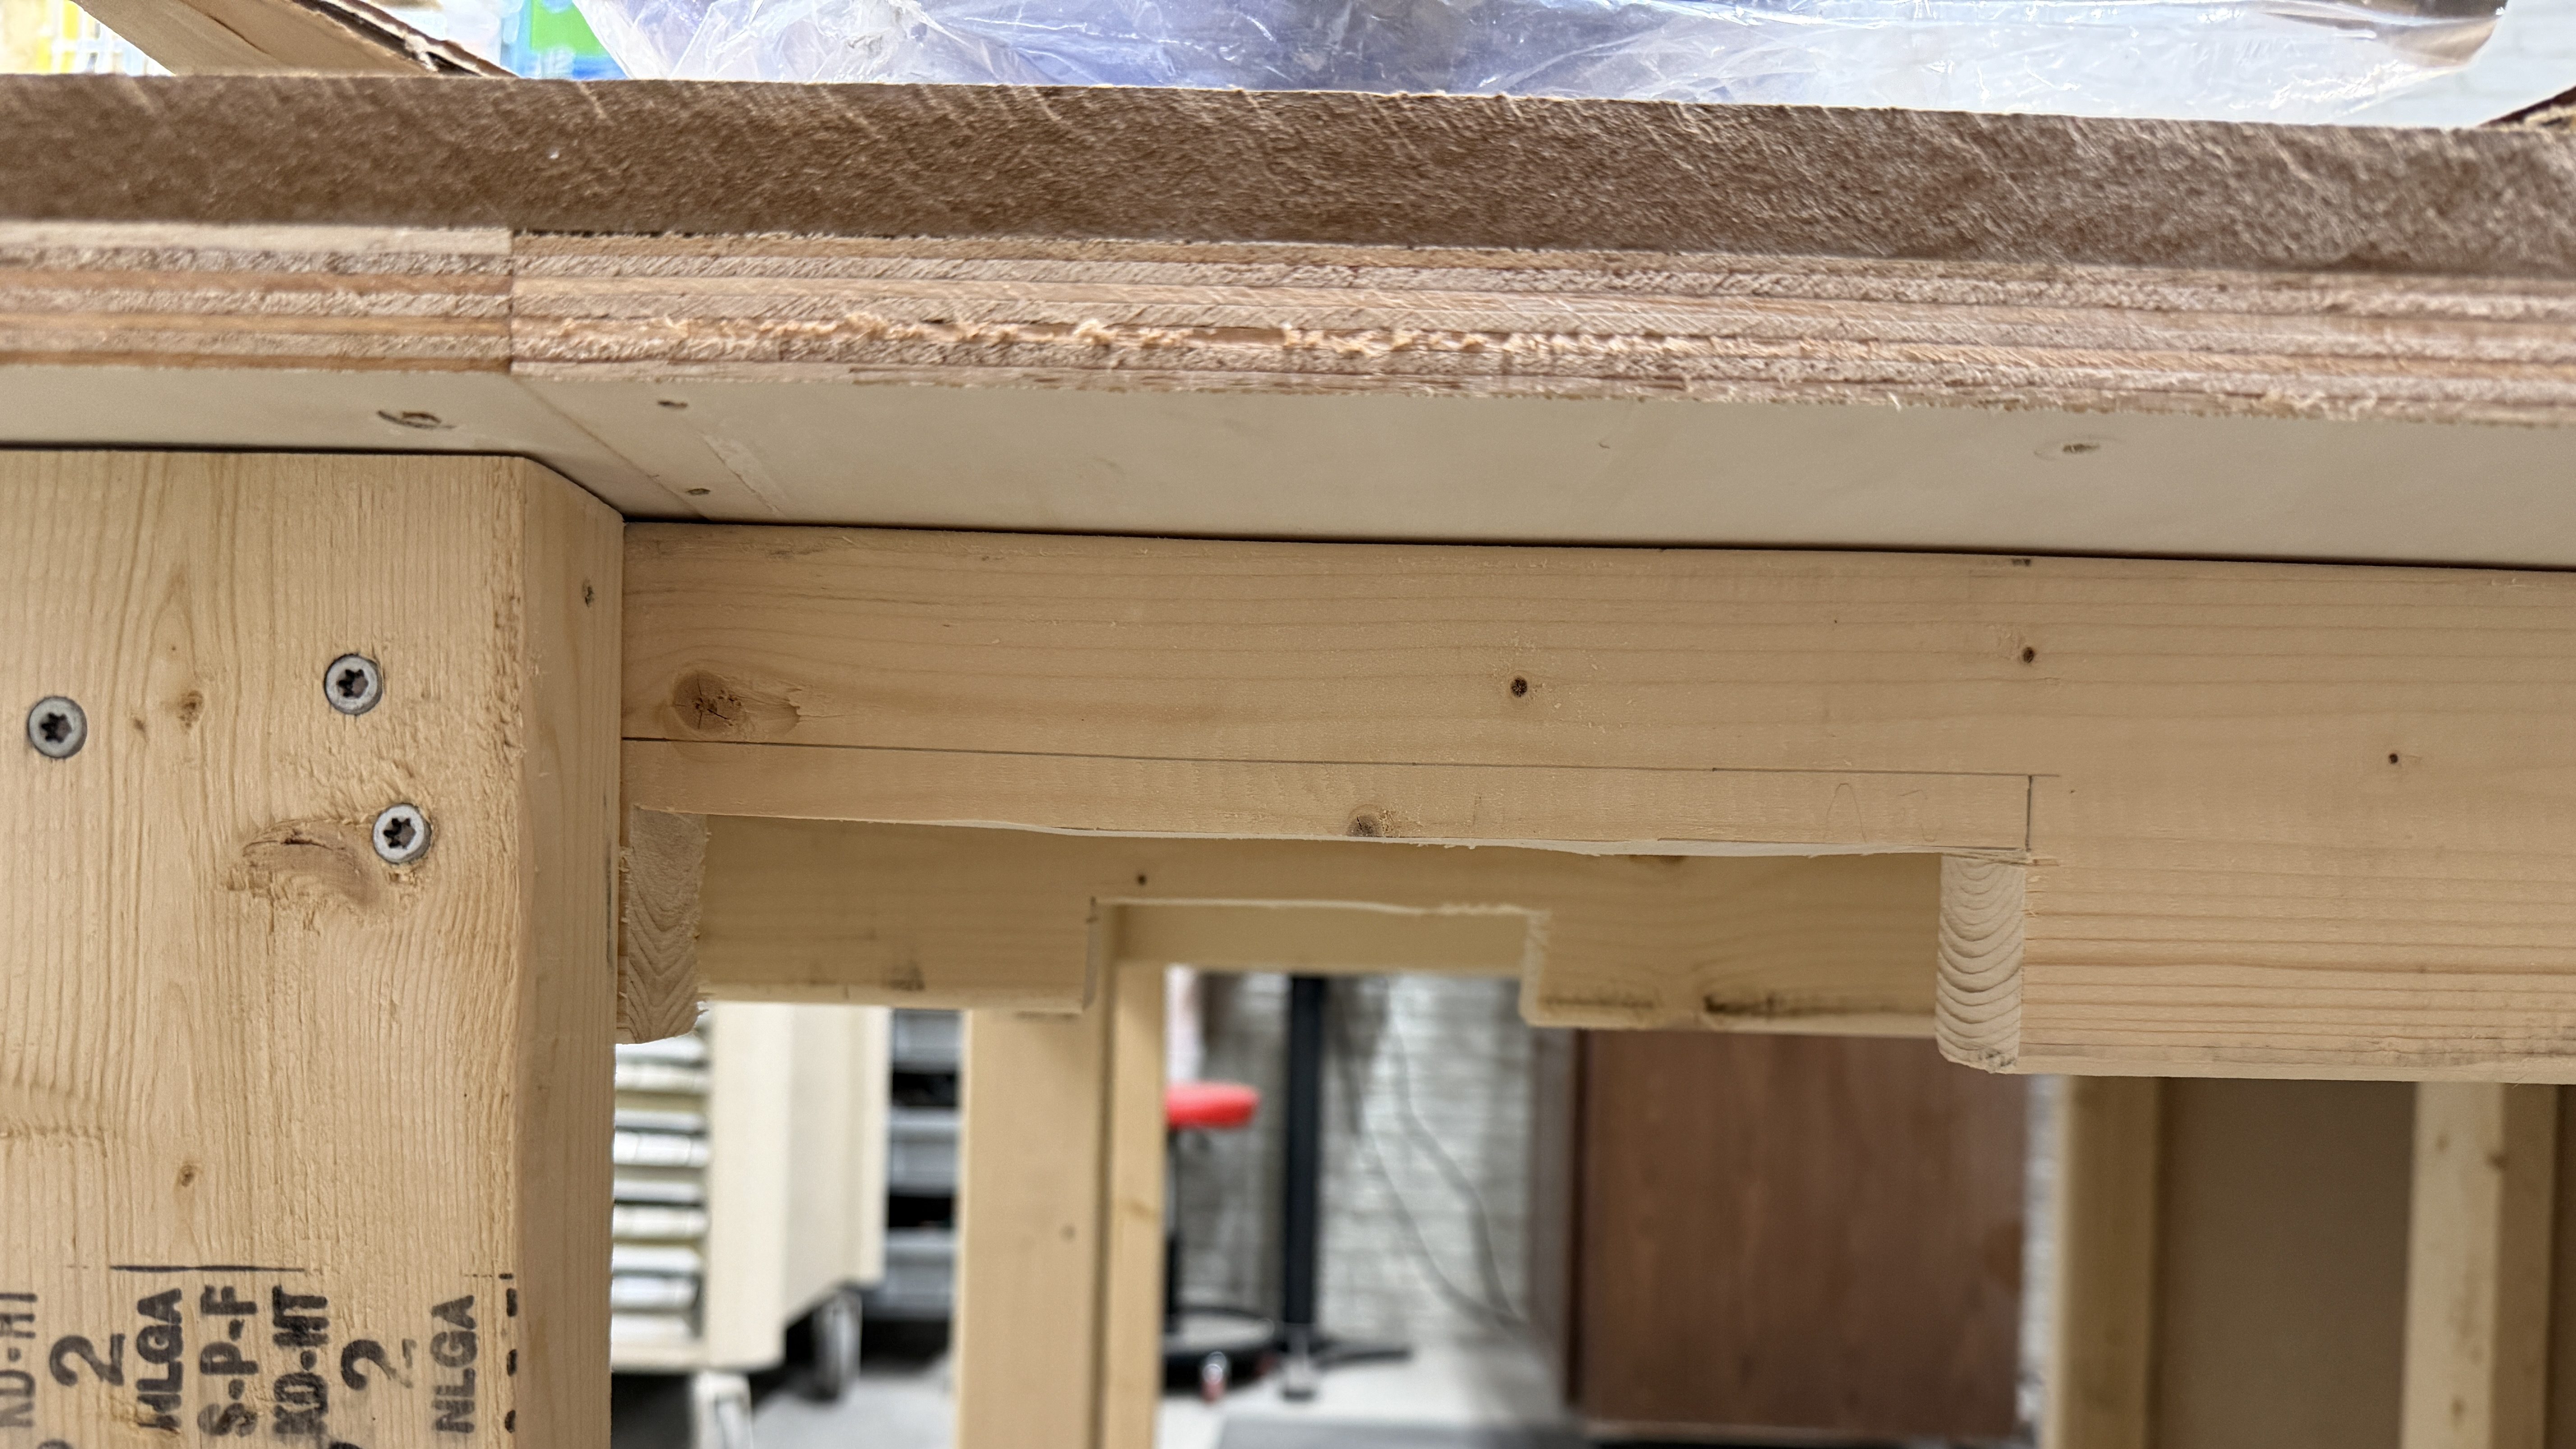
I had to build a cabinet to enclose the router lift, plus a drawer underneath. Due to the table’s frame and a need for the left side, I sketched out a plan. I was making a big version of the L-shaped Tetris piece.
The assembly had to be done inside the frame, due to the cabinet nesting up through the frame. After getting plywood to size, I cut various holes, attached 22″ drawer slides, routed a recess for the dust hood, and drilled pocket holes. It all screwed together quickly.
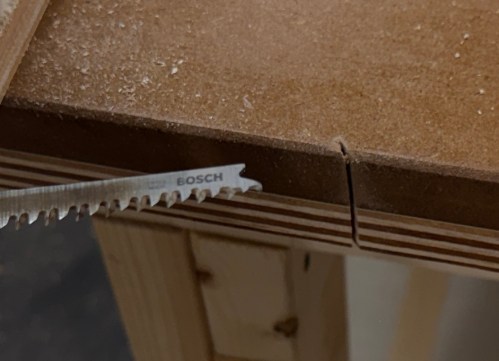
Of course, when using the jig saw, I accidentally cut in to the new table top! I’m the only one who does this, right?
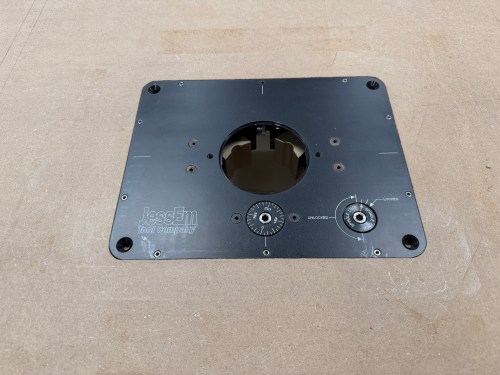
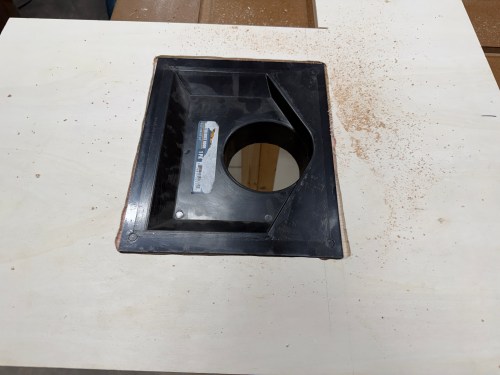
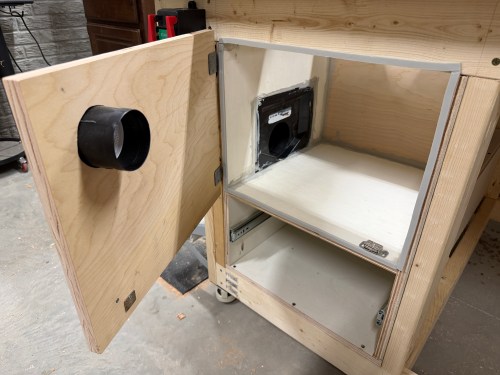
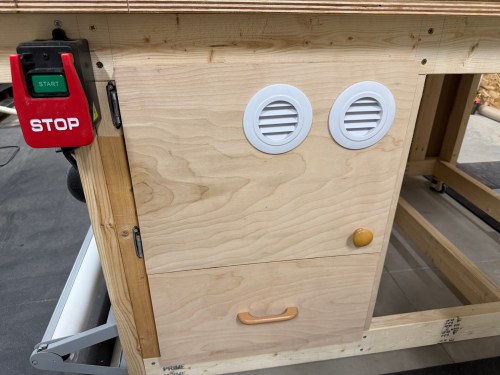
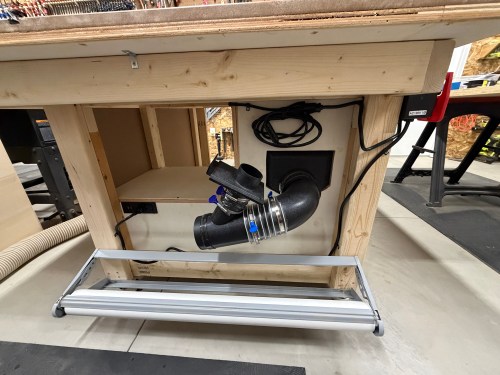
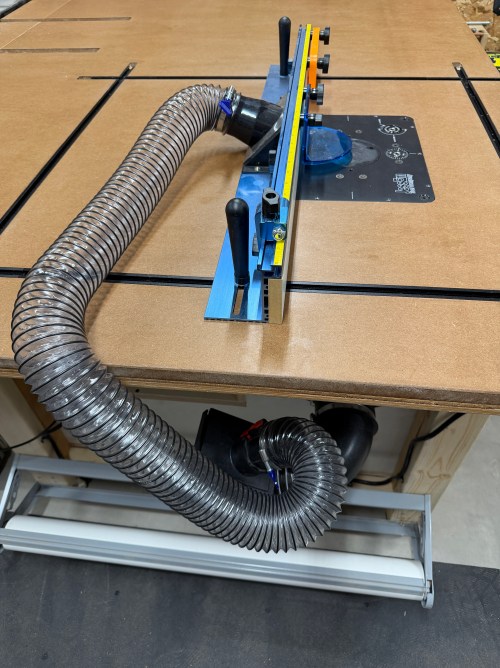
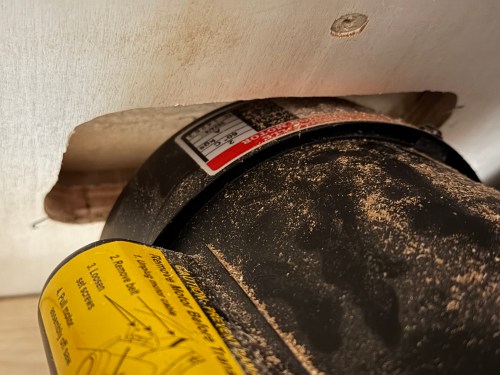
I caulked everywhere inside the dust box. Then I cut a door, mounted hinges, added a magnet close, and used weather stripping to seal it. The door got a hole with a vent cover to supply fresh air to the router and dust collection system. After some use I’ll see if I need to add a second vent. I mounted the lift, leveled it to the table, and bolted it in. The lift doesn’t came with a blank insert, so I bought one from an Etsy store.
Update: I did end up adding a second vent.
I cut all the pieces for the drawer, cut a rabbet where the bottom would slide in, and drilled pocket holes. Then I glued and screwed it together. Attached a drawer face and mounted a handle.
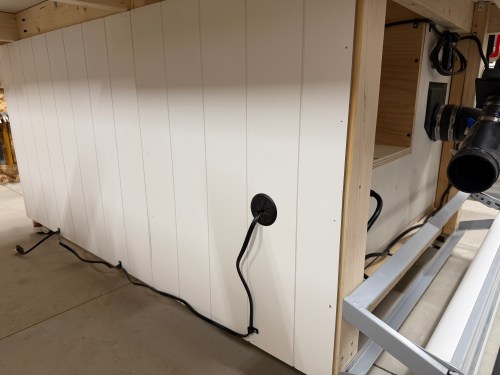
Along the left side of the table, I installed my paper roll dispenser. A 90° and then a Y-fitting connect to the dust hood. A 2.5″ blast gate is attached to the other side of the Y, for a hose up to the fence. The power cord went through a 2″ Desk Grommet on the back side. I screwed a POWERTEC Paddle Switch to the front. These switches makes it quick and easy to turn off the machine with my knee. I put in a recessed power strip with USB ports. Then I clipped in the wires and mounted a heavy duty surge protector power strip. This allows me to plug in the table saw as well.
The final thing was to lower the castor feet to raise the table up to the saw.
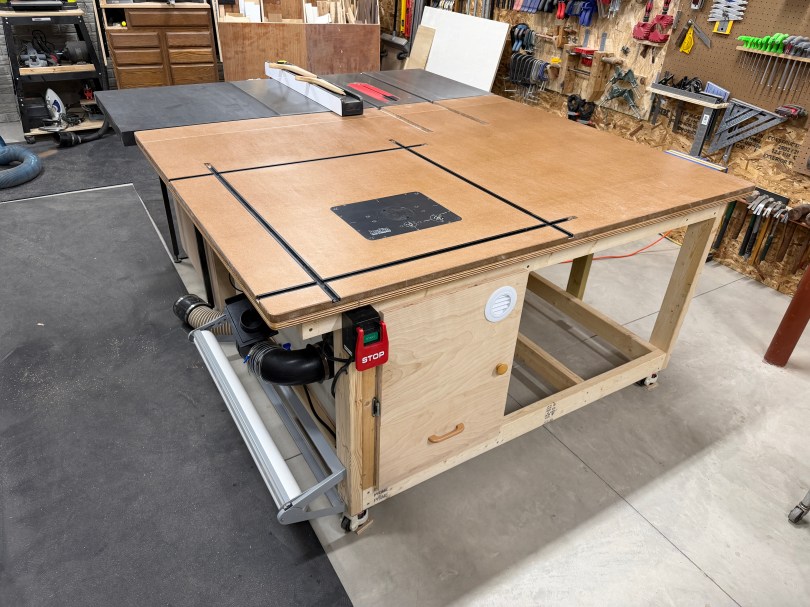
It’s so nice to have a large table table in the shop and I’m excited for the router, where it’s easy to use and always ready. Here are some more pictures.
There are the other accessories I bought for the router station, some of which can also be used at the table saw:
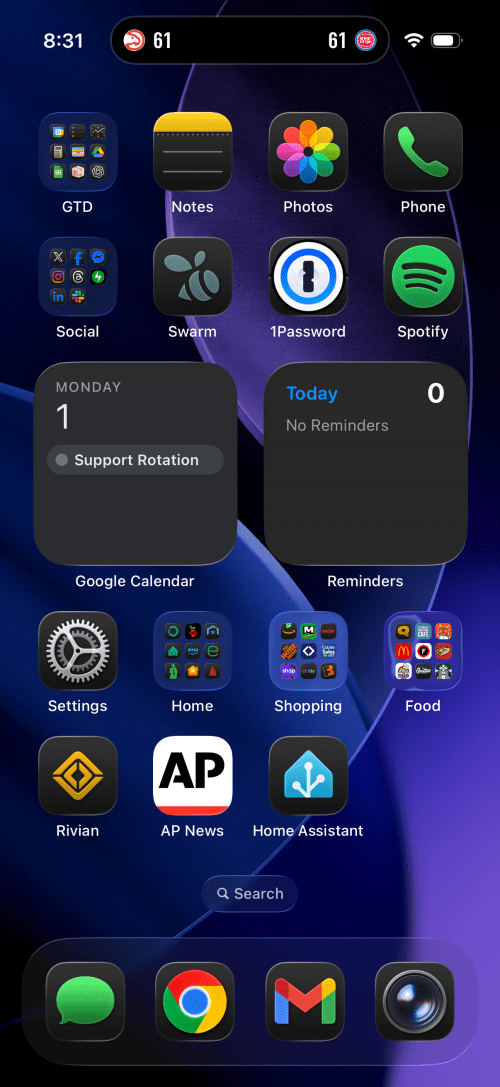
The biggest change I’ve customized it to always use the dark icons, even during the day. The Rivian, AP News, and Home Assistant apps all claim prominent spots on the first page and a few groups moved around.
When I saw that Tiger Woods’ former caddie, Steve Williams, was putting out a book about their partnership on the golf course I ordered it right away. Together We Roared was a good read and I was pleased to see they didn’t give much attention to Tiger’s off the course troubles during those years. The focus was on the golf and the relationship between player and caddie. Williams provided a lot of insight and stories that have never been told and he even opened up his house to his co-author, showing some of his Tiger memorabilia.
This book is great for any golfer, especially a Tiger fan.
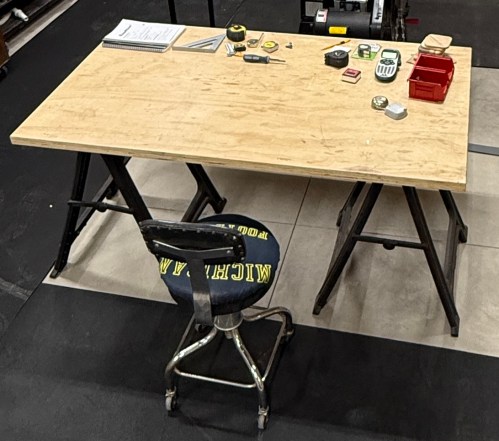
When we moved to the new house, I disassembled my workbench with the plan to build one for the new workshop. More than a year later I was still using the old top on sawhorses and everything I bought for the build was piled up in the corner.
The planning notes and ideas I made last year were a good starting point. I took a bunch of measurements, adjusted to account for the motor when tilting the table saw blade, and mapped it out with blue tape. Made more adjustments, cut all of the pieces from 2x4s, and assembled the frame with 3″ screws. I’ve learned my lesson about not using glue for shop furniture because it’ll likely get taken apart in the future. By only using screws I can reuse the materials when an improved replacement gets made.
The castors I bought double as adjustment feet, making it easy to raise the height up to the table saw and will make the table stationary 99% of the time.
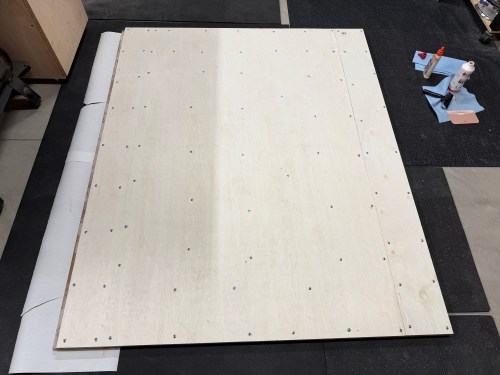
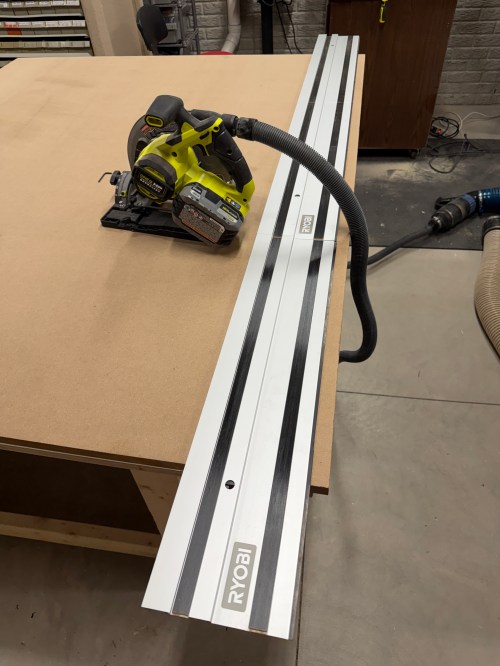
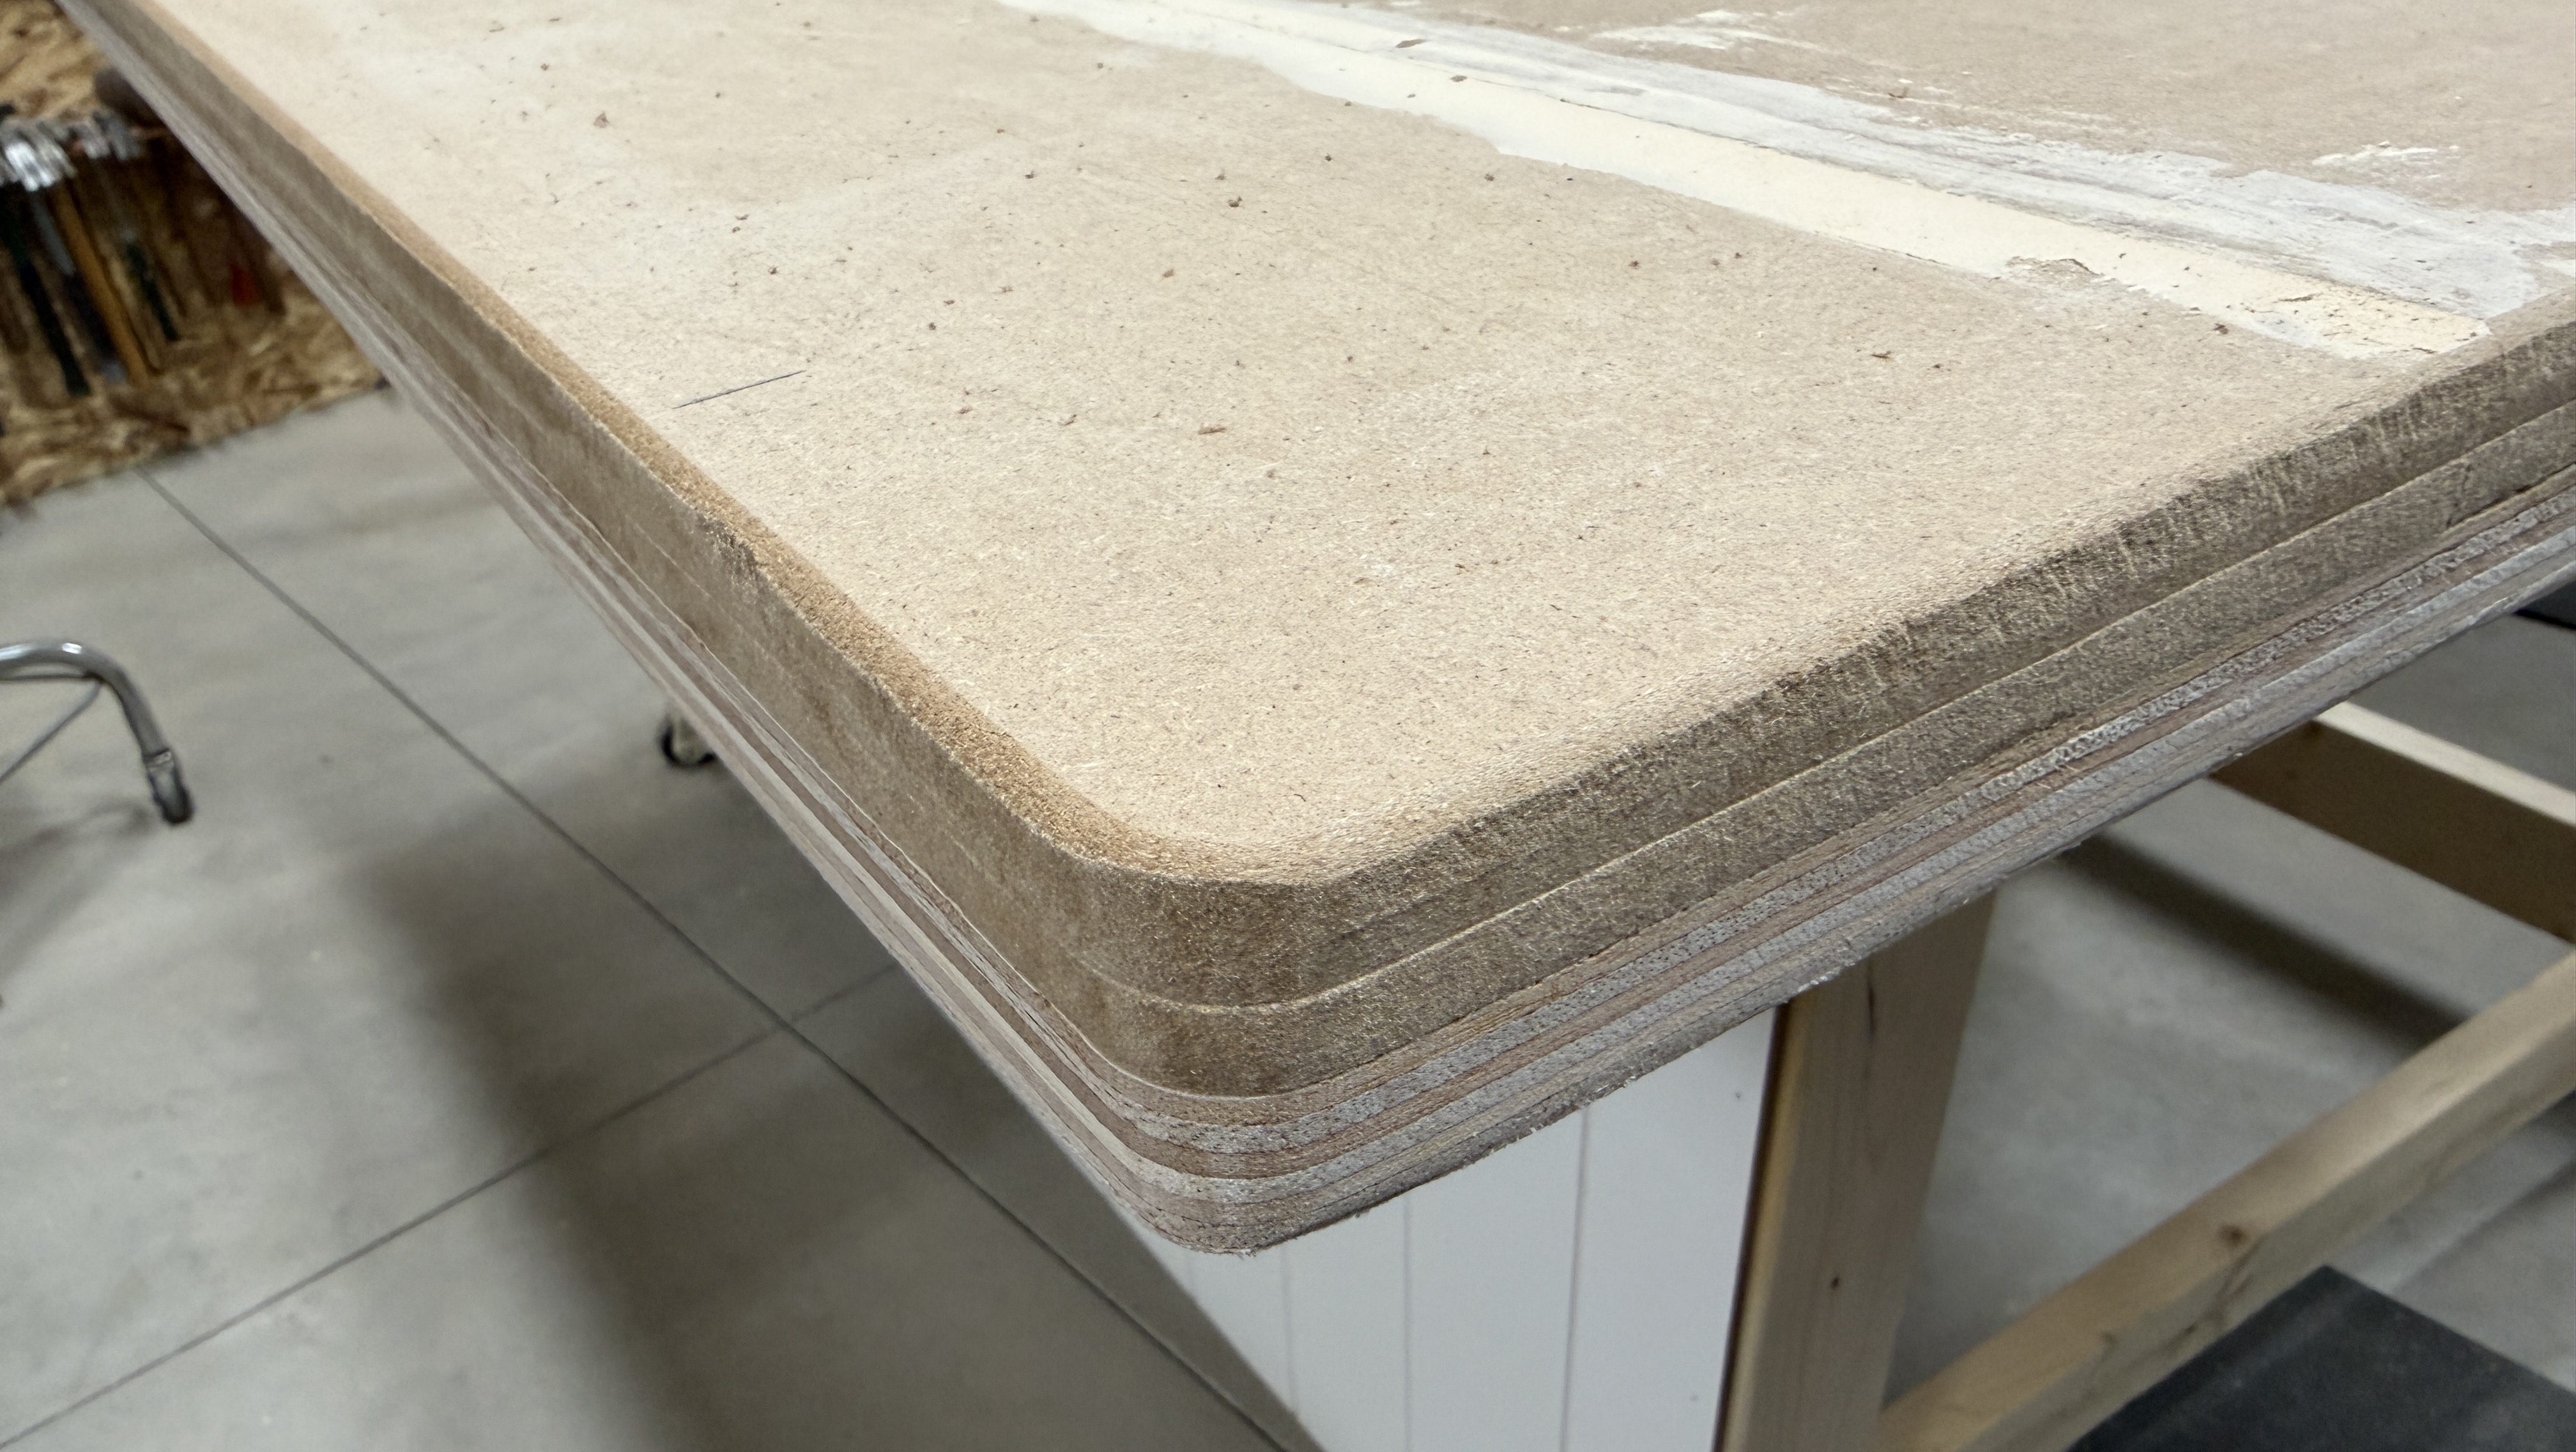
I cut plywood and MDF, then laminated them together, using screws for clamps. Since my top was going to be 66×54″ I had to splice in a six inch strip of each.
After the glue dried I removed all the of screws and got it up on the frame. Then I checked the height of my table compared to the table saw and it was going to work out well. With the blade at 45° and all the way down it was extremely close to the table top though.
When maxing out the blade height the motor raised about an inch. So I created a clearance pocket with the router.
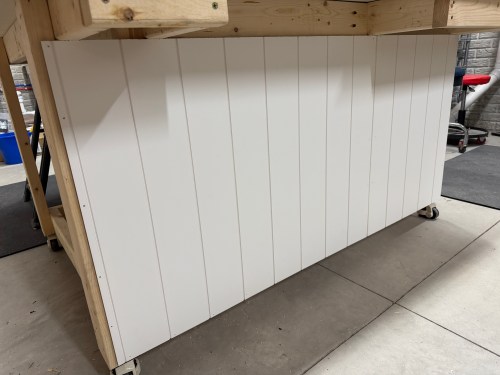
I added a couple more vertical supports along the back of the frame and cut scrap shiplap panelling to rigidify it and close it up.
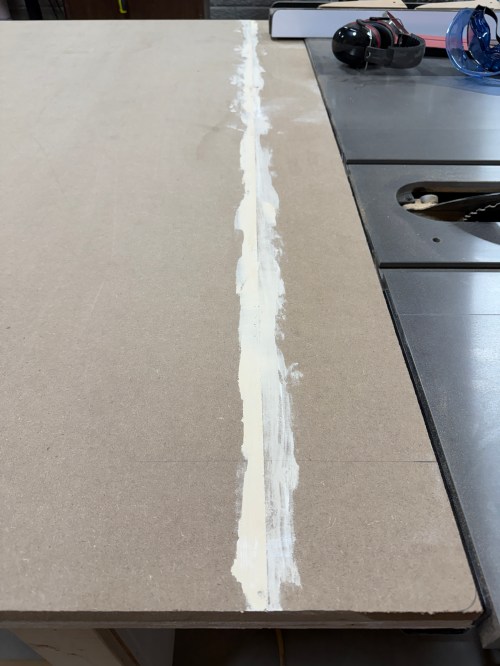
I trimmed all of the edges to size. There was a small gap between the spiced sections of MDF, so I used wood filler.
One inch corner braces with 1/2″ screws were used to attach the top to the frame.
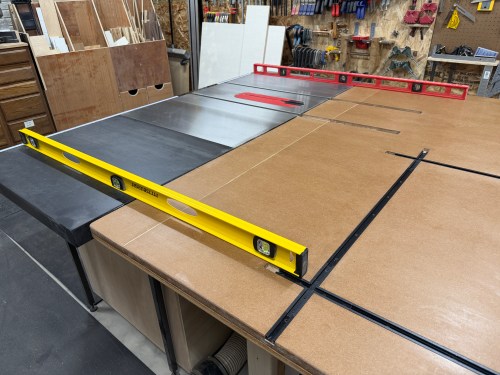
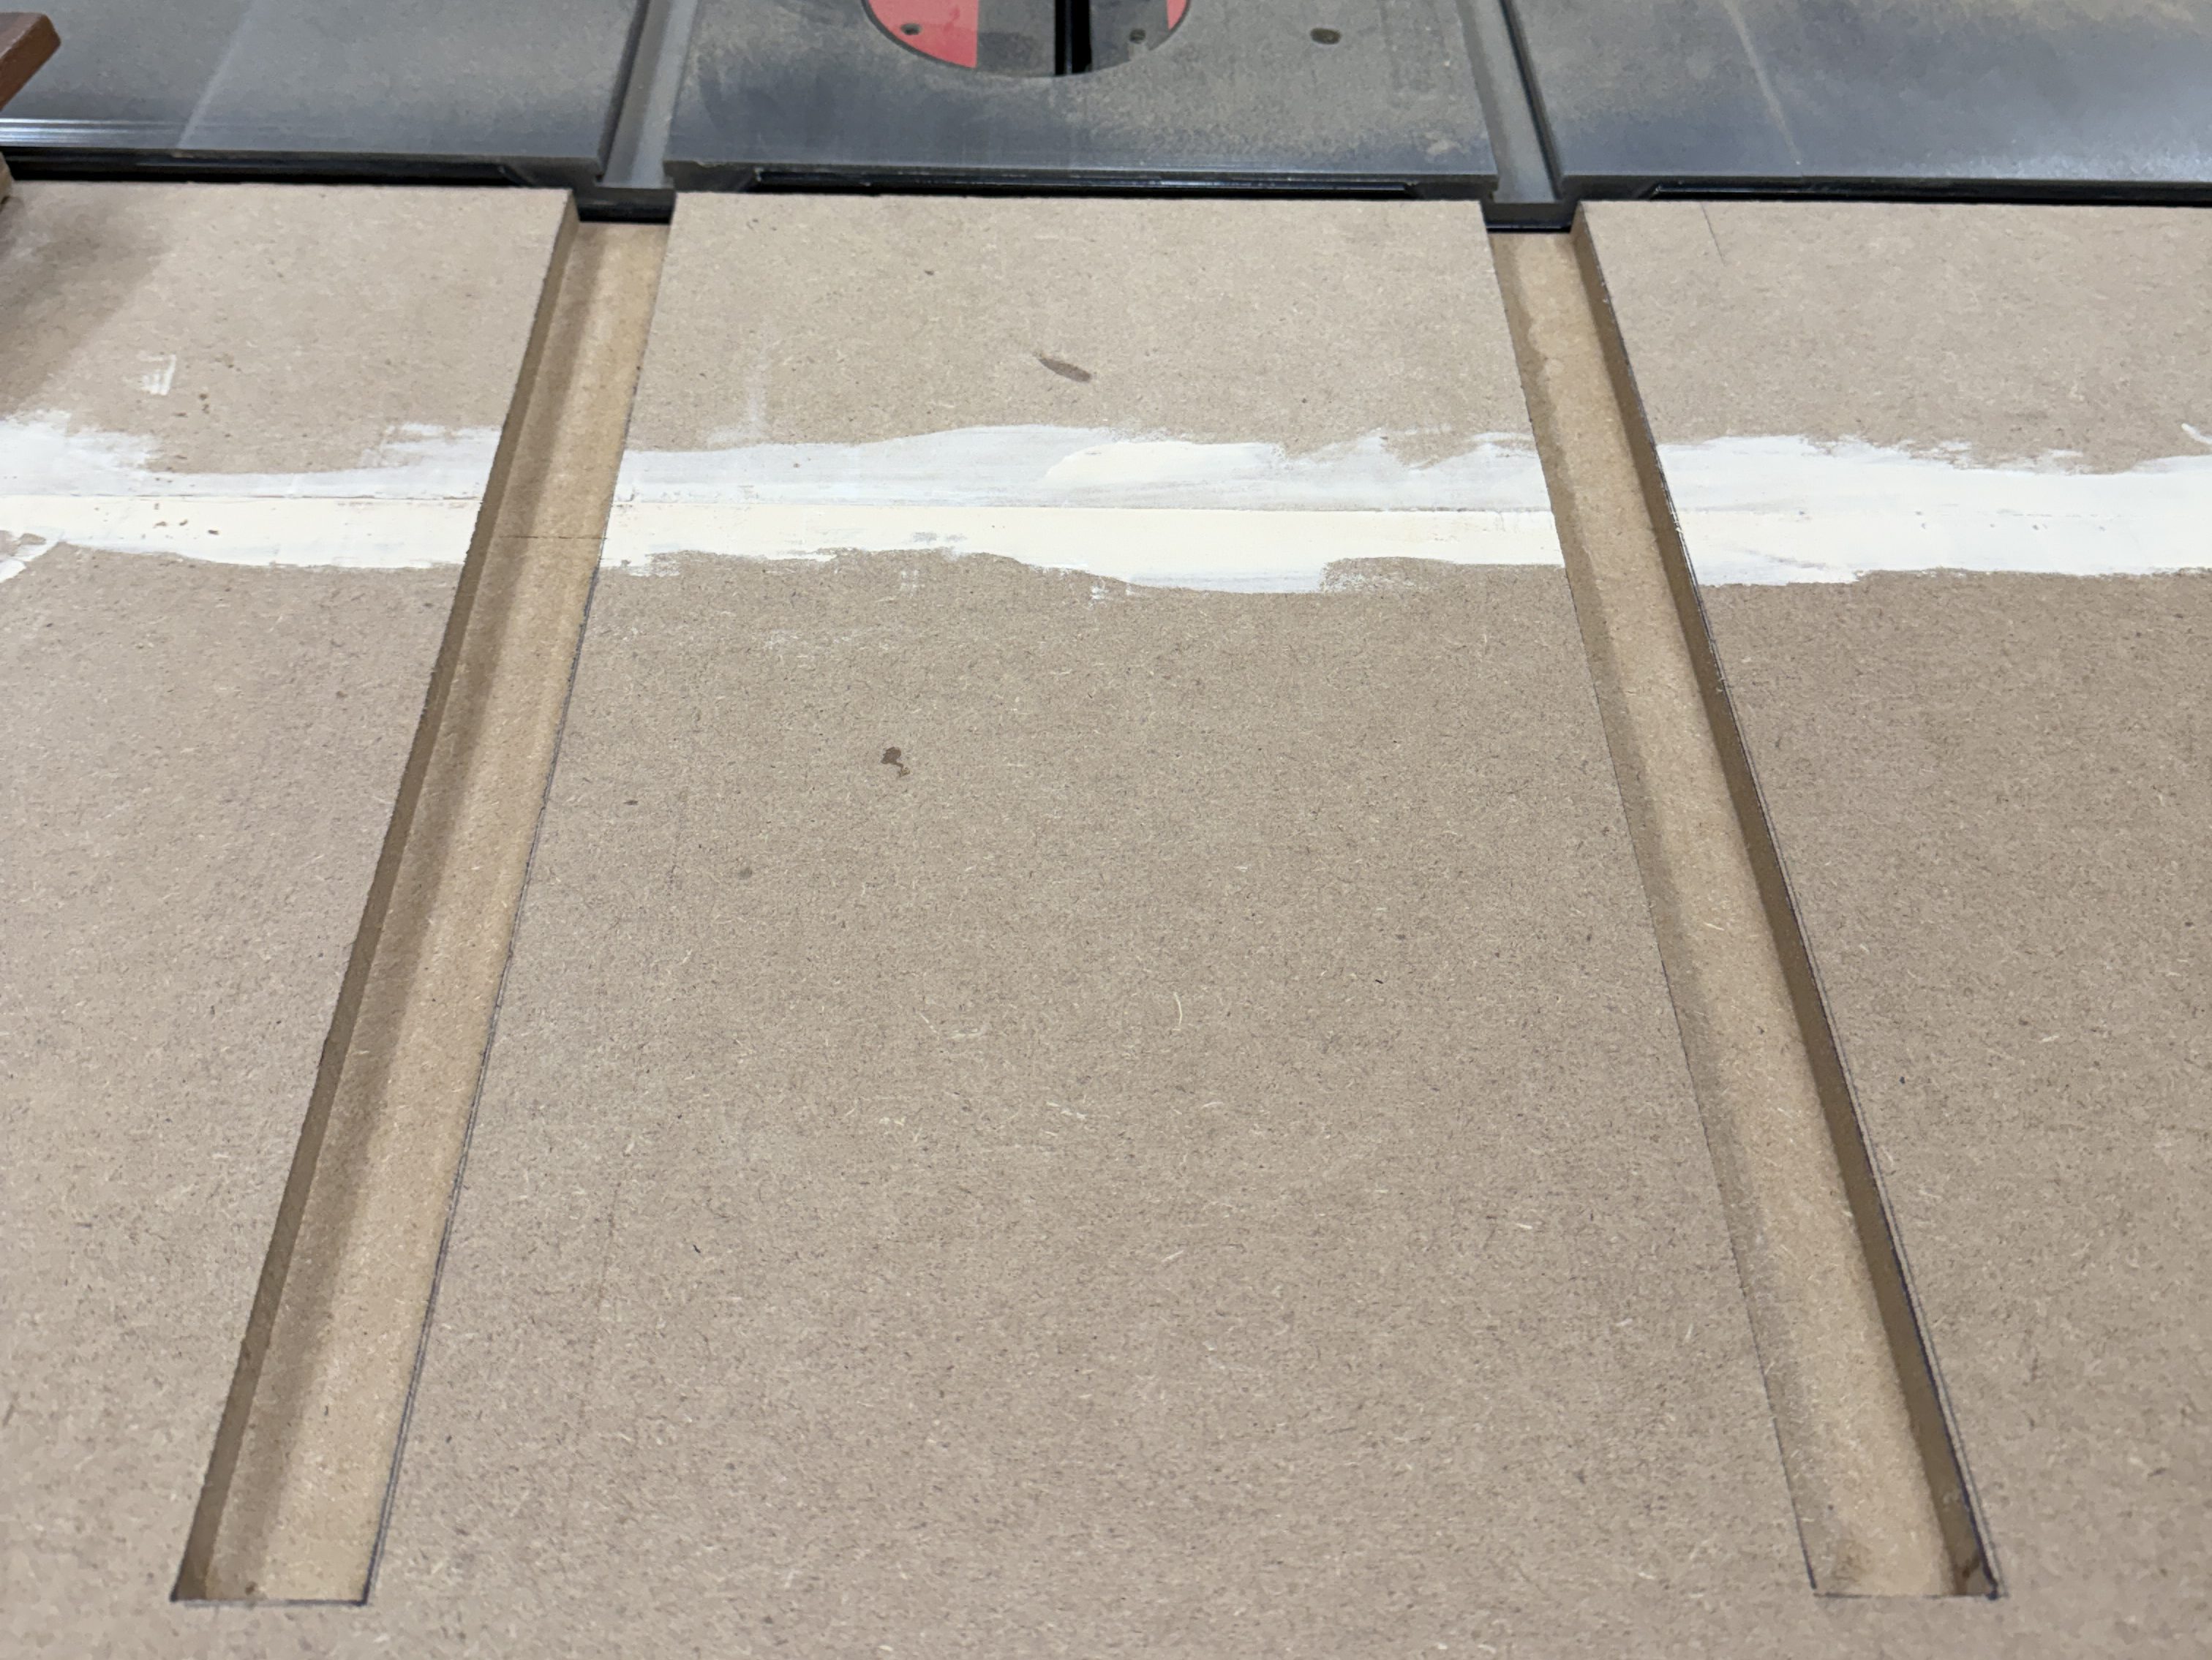
The miter slots were extended from the table saw. I made them wider and slightly deeper, so the outfeed table placement won’t need to be too exact.
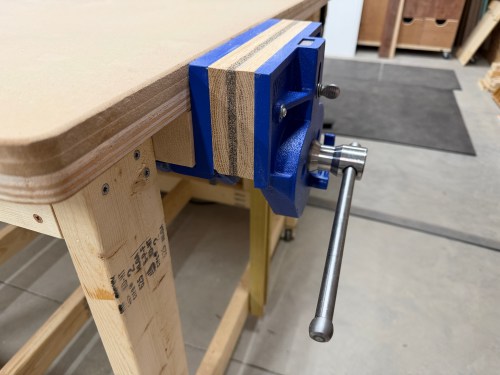
For my vice, I bought a Yost 9″ quick release vice. To mount it I had to remove part of the frame and add blocking.
I realized I should finish up the edges of the table, so I quickly rounded the corners, sanded the edges, and added a roundover.
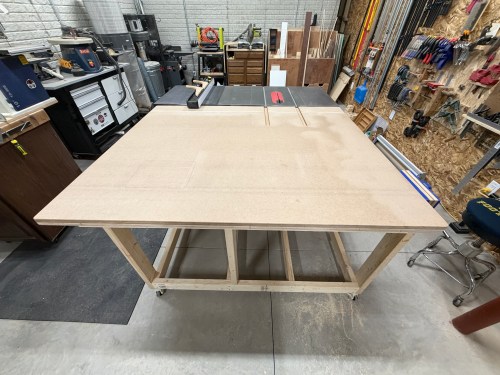
Look at this beauty! So much room for projects and a space underneath for storage.
Continue to Outfeed Assembly Table – Part 2, which is where I add a router station, complete with dust collection. Then Part 3, where I add a bunch of drawers for storage and organization.
While tonight’s show wasn’t as good as originally predicted, I could faintly see a bit with the naked eye. Without the iPhone camera to show me where they were, I wouldn’t have noticed though. We think I got outside at the tail end of peak viewing.
Quite a different show than last year. I never posted the photos from May 11-12, 2024 around midnight, so those are below. We timed that night much better.
An article or ad popped up for this gutter downspout improvement while I was doomscrolling on either Facebook or Instagram and it caught my attention. I’d never even heard of hinges for gutter downspouts, but I quickly I ordered a 4 pack from Amazon. I painted them black to match and the install took about a half hour.
Now when I’m mowing the lawn I can quickly kick up the extension, mow the area, and immediately pull it back down. No more stopping the mower to remove the extension and I don’t have to worry about remembering to put it back on.
This Trolli flavor is an exclusive to Walmart. It’s a cherry lemon flavor.
Inspired by the iconic Trolli Sour Brite Crawlers gummi candy, this limited-time Mountain Dew flavor delivers a fizzy sweet-and-sour combination with zero sugar. Source
I don’t remember seeing a new flavor that only came in the zero sugar variety. It’s an interesting choice for one based on a very sugary candy!
This is one of the worst flavors I’ve tried in a long time. It has a really bad fake aftertaste, since they had to add something with it not having any sugar and only 15 calories. Giving it 2/10 might even be too high.
I finally picked up a cup of the new Mountain Dew flavor, exclusive to Taco Bell. It’s called Baja Midnight and it very good. I think it might be my favorite Baja variant.
Crafted to satisfy the thirst of a new generation, the drink blends passion fruit flavor with the iconic tropical lime taste of MOUNTAIN DEW BAJA BLAST—available exclusively at Taco Bell restaurants.
When I took my first drink I thought it was a berry flavor with a hint of something else, so the passion fruit makes a lot of sense. I’d definitely drink this again. I give it a 9/10.
J.J. Spaun, who won the U.S. Open yesterday, has the DF3 in his golf bag, so this seems like the perfect time to write about the time I’ve spent with mine. Spaun, who switched to the DF3 at the beginning of the year, was second in the field for strokes gained putting and gained over 10.5 shots with the flat stick!
His putting accounts for 64.5% of the 16.31 total strokes he gained on the field, which is impressive. SG came from datagolf.com. I believe this is the first major win by someone using a L.A.B. putter and surely won’t be the last.
I’ve had my DF3 for two months now and I love it. The first two and a half weeks weren’t great though, because I wasn’t using the putter correctly. After some research and experimentation I made changes to my stance and grip. My feel has been brilliant since.
I’d always played traditional putters in the middle of my stance, as I suspect most people do. This shaft is different because it’s offset behind the club face. You have to line up with the ball quite a bit forward in your stance, otherwise the face is open at impact. Here’s a video from the L.A.B. Golf talking about it for the DF 2.1.
Another change that really helped me was adjusting my grip. I had to lighten the pressure applied with my hands so the face can properly square itself up. I also slid my right hand more underneath the grip to limit its influence on my putting stroke. I used their suggestion of the thumbs off drill to get some feel for it and figure out what was comfortable for me.
Then it was a lot of practice, focused on start line. I got this idea from a Lou Stagner thread on Twitter/X. When I practice, I hit 10 putts at a distance of about 10-11 feet and I use the Putting Thing from WhyGolf with all gates set to level 2.
I only ever putt 10 at a time and I record each session. Since I got the putter, I’ve done this 94 times, so I’m struck almost 1,000 practice putts like this. In order to get the passing grade the ball and putter can’t touch any of the gates. I don’t even care what the ball does at the cup. It’s all recorded in a spreadsheet and the chart below shows revolving 100 putt blocks. For example, the first bar includes the first 10 times I played a practice session, the second bar is practice sessions two through 11, and so on.
The last low point under 50%, was right before I made the changes. It was a steady rise from there as the bad sessions fell out of the last 100 attempts and then I’ve consistently been around 80% or better.
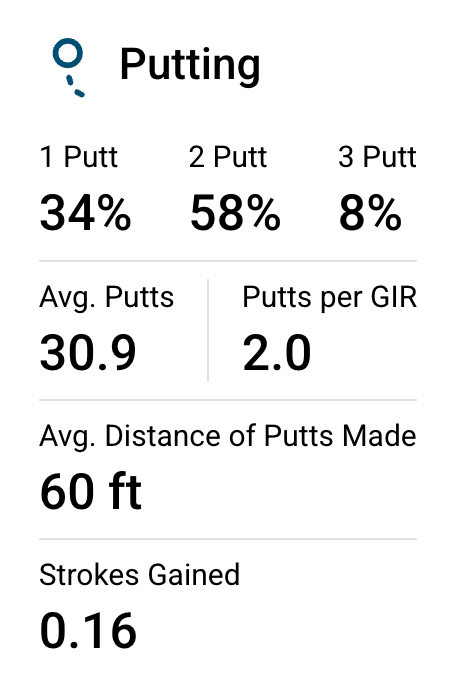
There is more pressure and less than perfect conditions on the golf course though. How am I doing there? I grabbed some putting data from my Shot Scope account. To keep comparisons similar I filtered to rounds at the Sawmill Golf Club, my home course. Here are my 2024 stats, using my previous putter, the Odyssey Red Ball.
Not too bad. I actually gained strokes compared to the average 10 handicap golfer. Here are my stats since May 6th, 2025, when I figured out how to use the DF3.
I’m not making a bunch on my first attempt, actually down 1%, but I’m three putting less than half as much and I’ve gained an extra 1.12 stokes per round. I also pulled the stats for the same 2024 period of dates.
A massive 2.51 strokes better on the greens in 2025 for the same date period.
My start line is better from the lie angle balance technology and practicing with Putting Thing. My distance control is also a lot better from the Directed Force (DF) technology, which is more forgiving on off-center hits.
Date Period
3+ Feet Short
0-3 Feet Short
Within 3 Feet
0-3 Feet Long
3+ Feet Long
2024
13%
27%
75%
48%
12%
2024 (May 6 – Jun 16)
8%
22%
76%
54%
16%
2025
13%
22%
81%
59%
6%
I was unable to limit the data in this table by course, so it’s not as good of a comparison and I believe impacts the shortest putts the most because I struggle getting the ball to the hole on slower greens at other courses. Even so, I’m getting 5-6% more putts within three feet of the hole and fewer are racing past.
Can you see why I love this putter? Of course it won’t be everyone’s weapon of choice, but I suspect many people who give up on theirs don’t understand how to use it properly or put in quality practice time.