From Rest API to MQTT

After the recent changes to my home network and Home Assistant server, I noticed the logs in Pi-Hole were being dominated by the domain I use for dynamic DNS on the box. Roughly 15,000 DNS requests a day out of 30,000 on my entire network. Really skews the ad blocking stats.

Why so many DNS requests? Because home-assistant-pi and home-assistant-temperature-monitor were both using the Home Assistant REST API to fetch data. That’s 15k requests/day with only two of my seven other Raspberry Pis turned on, so it would get worse when I put some of the other Pis into “production” around the house. The temperature project only runs on one box, but the first project in installed on every Pi.

I briefly tried to switch those two projects over to using the local IP address of the server and continue to use the REST API, but with SSL enabled it was complicated. MQTT was already running on the server and those projects publish updates to Home Assistant over MQTT, so it was an easy decision to use it for subscribing as well.

While I was at it, I took the opportunity to simplify a lot of the code and have the devices update more frequently. So far it seems to have solved a couple of lingering stability or connection issues I was having with home-assistant-pi. All of the code changes are available in the respective GitHub repos linked earlier.

Update: I forgot I had home-assistant-pi connecting to google.com in to help with determining the local IP address in Python. Another update to clear that up will eliminate over five thousand DNS requests per day.

HackerBox #0028: JamBox

I like it when the new HackerBox shows up on a weekend.

I always see electronics projects for making some kind of digital synthesizer to generate sounds so it seems to be a common project. It’s one I’ve never done, so I’m looking forward to experimenting with this box.

The official content list from the Instructable:

  • HackerBoxes #0028 Collectable Reference Card
  • Exclusive JamBox Printed Circuit Board
  • ESP32 DevKitC
  • CJMCU PCM5102 I2S Digital-to-Analog Module
  • Four MAX7219 8×8 LED Matrix Modules
  • Five 10K Ohm RV09 Potentiometers
  • Five Potentiometer Knobs
  • Eight Tactile Momentary Buttons
  • Four Adhesive Rubber Feet
  • 3.5mm Audio Patch Cable
  • MicroUSB Cable
  • Earbuds with Case
  • Exclusive HackerBoxes Skull Decal
  • Octocat Fan Art Decal Sheet

Unfortunately the demo code included in the guide only uses the potentiometers, buttons, and LEDs. Will need to do some tinkering to turn this into a synth.

Delta TP305 Planer Dust/Chip Collection

Back in early November I found this Delta TP305 planer for $100 on craigslist.

It was obvious the owner took care of his tools, he had just replaced the blades, and also had a set of new blades, so the price was a steal. It didn’t have any type of dust/chip collection though.

delta-planer-dust-chuteWhen Delta produced this planer, the dust collection attachment was an extra accessory. I decided to make my own because I don’t understand this design. Why would you want your hose hanging over the outfeed? Too much risk of the work piece getting jammed on the way out, which is extremely dangerous.

I found a neat idea on YouTube and went with a similar plan. Here is what the outfeed looks like normally.

I first cut some pieces to make the sides and bottom of a box.

img_0706.jpg

I screwed the right side together. Then I held it up against the planer to get the exact positioning before screwing in the left side. I wanted a snug fit.

img_0708.jpg

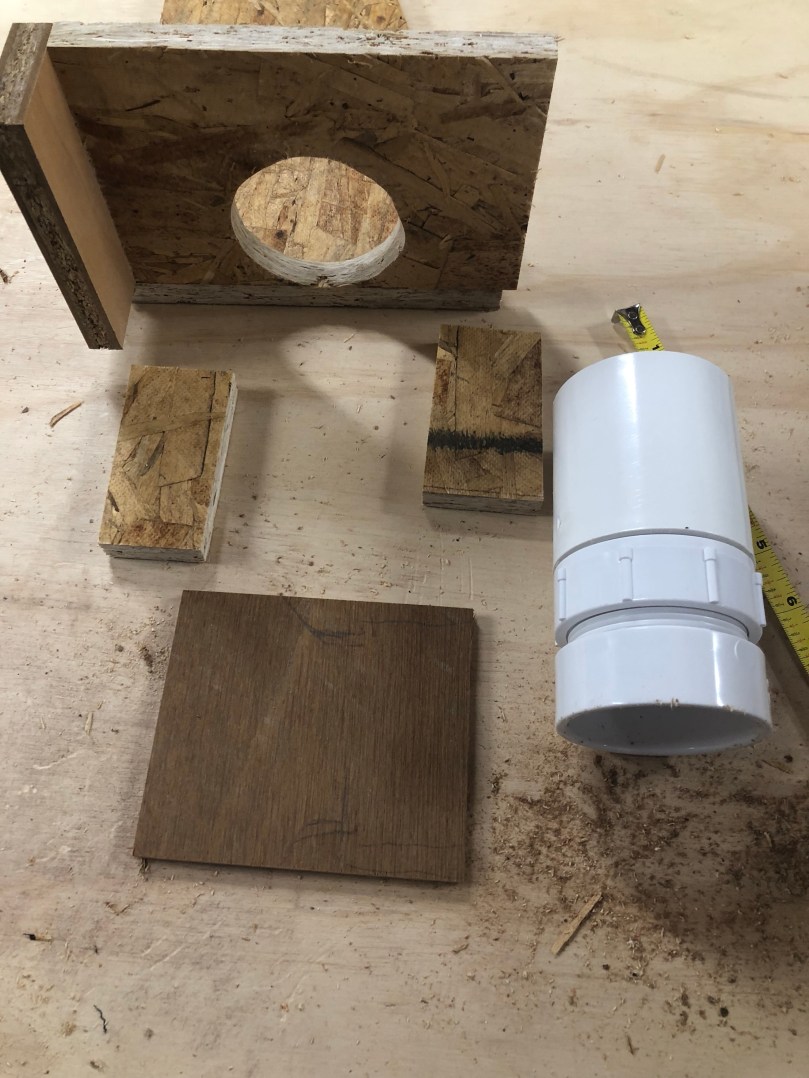
I cut and sanded a hole in the side for some PVC parts.

Grabbed a few scraps that would be used to hold the PVC in place.

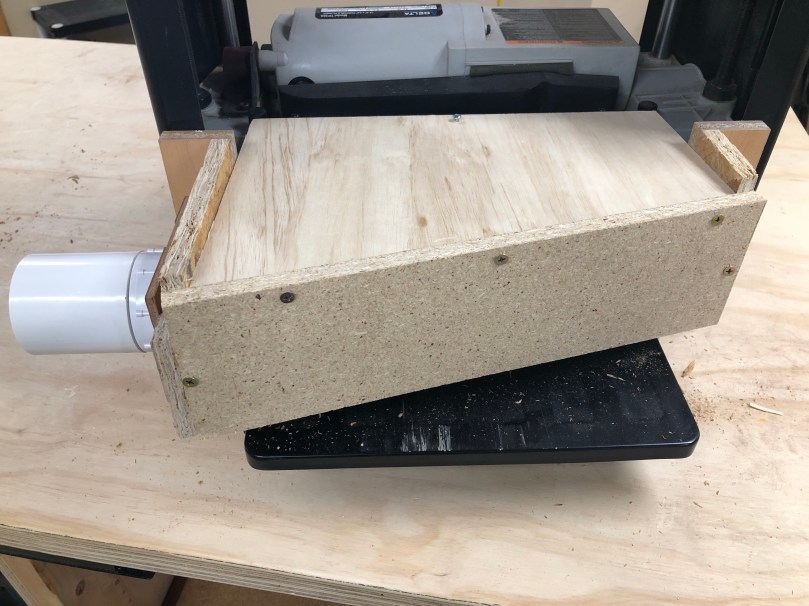
Cut a hole in the thin piece, boxed in the male PVC part, and screw it all together.

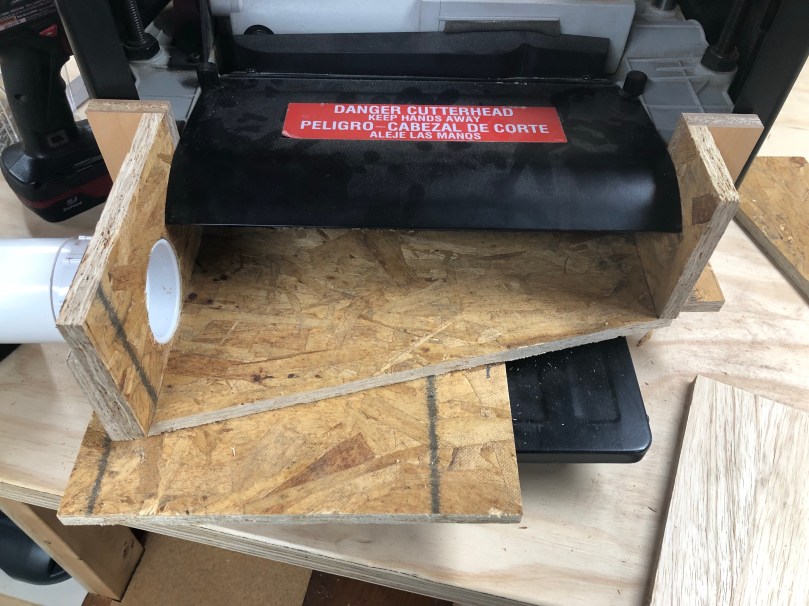
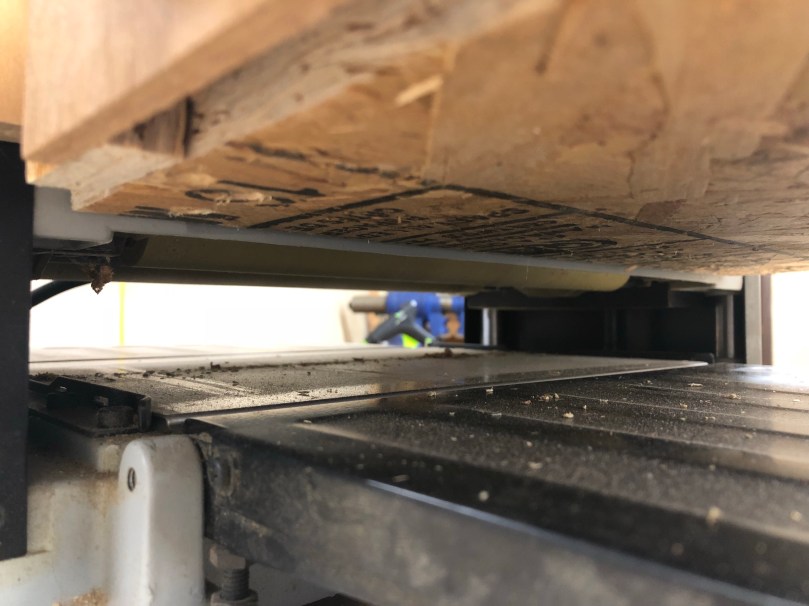
Then I put a spacer under my in-progress box and adjusted the planer’s height. It was important to use a spacer for these next steps because I don’t want the bottom of the box to have any chance of jamming up the wood coming out of the planer. I gave it about 1/8″ of breathing room.

I cut a piece for the top. Then while putting pressure on the edge that makes contact with the planer dust chute I screwed this piece to the sides. At this point I was able to remove the spacer because the tight fit was able to hold the box in place.

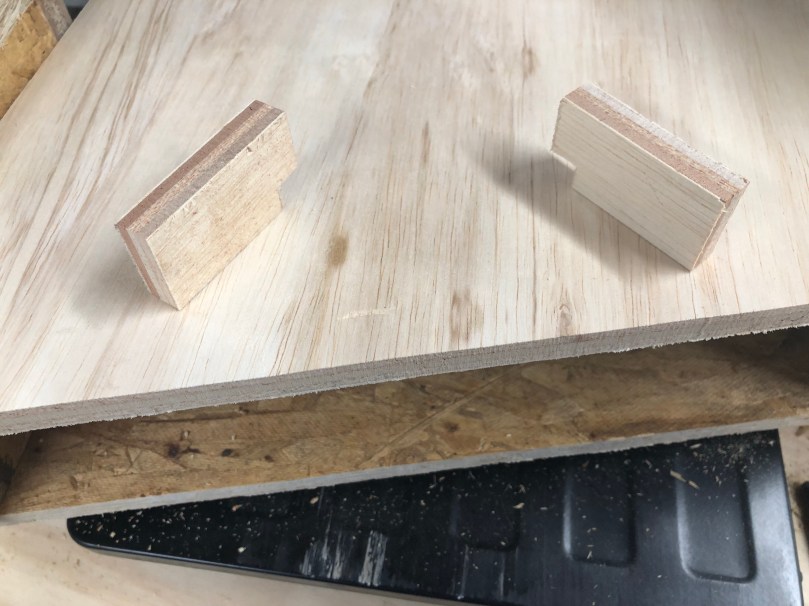
I wanted to prevent the box from sagging or shifting down during use though. So I cut two little pieces.

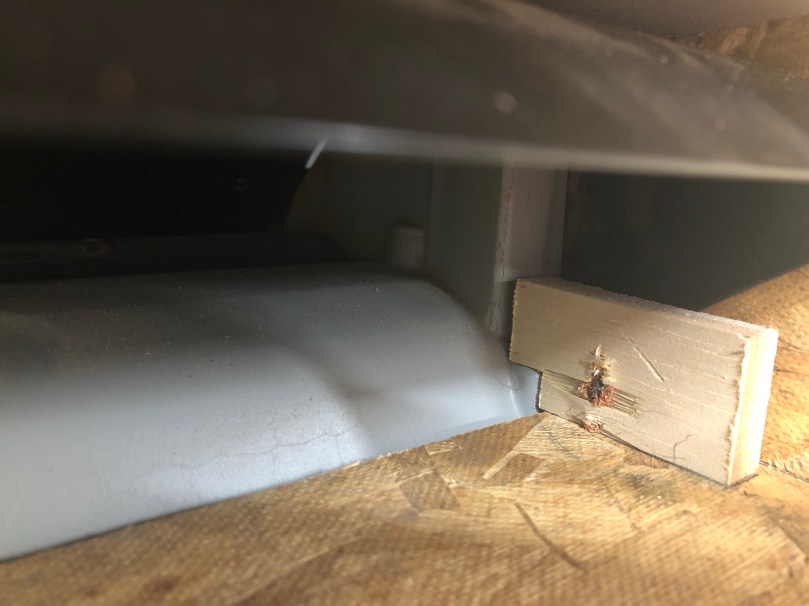
Screwed them in from the bottom on each side.  Notice how the kind of grab on to some ledges of the planer. This is a simple way to prevent the bottom of the box from going any lower.

I drilled a hole in the top and through the metal chute. Combined with the tight fit and those blocks, now this thing can only shift up and away from the outfeed path.

The final step was to square up the back edges, cut a piece, and screw it in. There are no screws on the bottom of the back face because I used a scrap piece that wasn’t tall enough to have room for screws there. I did use some glue though.

Here you can see the clearance between the box and the outfeed I mentioned earlier.

Due to the materials I skipped using any wood glue except when I put the back face on. I did go back and hot glue all of the joints so it would be sealed for a better vacuum.

This was an easy build. The only modification to the planer was the screw hole and the whole unit can be removed by taking out that screw.

How well does it work though? You be the judge…