This Dragon Fruit flavor is exclusive to Walmart, which I just don’t understand. Why not sell it everywhere? After the first or second swing, it was a no for me. Then I got the taste for it and actually enjoyed it. I don’t think I’ve ever ate dragon fruit, so I’m not sure how to explain the flavor. It’s decent though, so I’ll give it a 6.5/10.
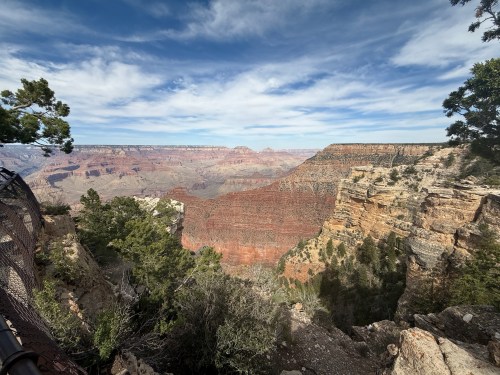
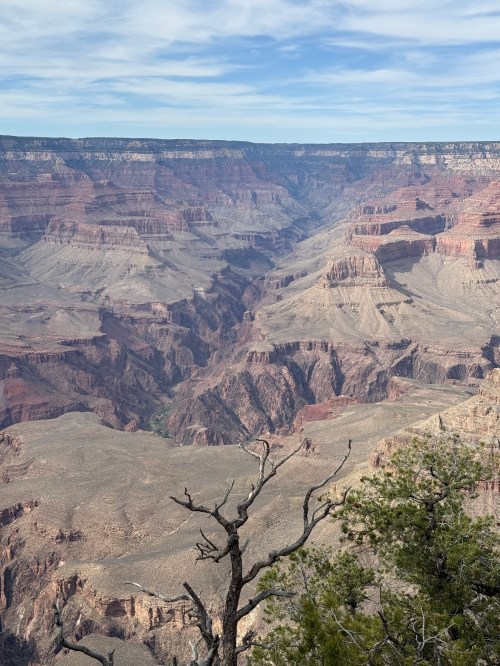
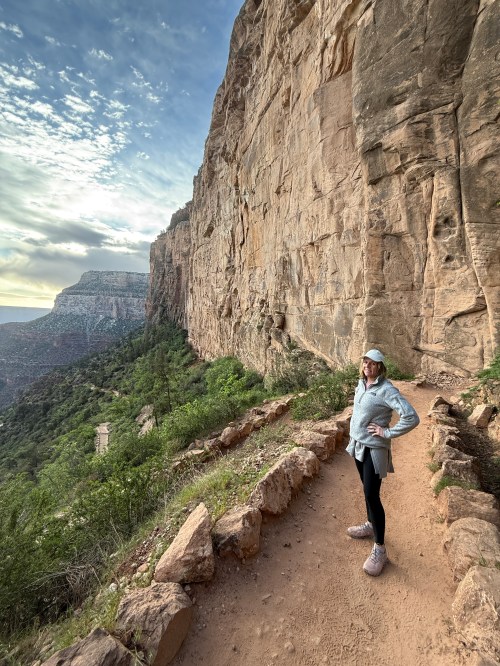
After a couple of days in Phoenix, we drove up to stay in Tusayan and visit the Grand Canyon’s South Rim. In the afternoon we went by visitor center and walked some of the south rim trail. I’ve probably seen thousands of pictures of the Grand Canyon over my life, but nothing prepares you for seeing it in person.
The first views of the Canyon obviously take your breath away, but it’s so much more than that. You feel dizzy, weak, and disoriented. I don’t know how to explain it. The vast width, length, and especially the depth are unlike anything else your brain has ever processed. It is absolutely incredible!
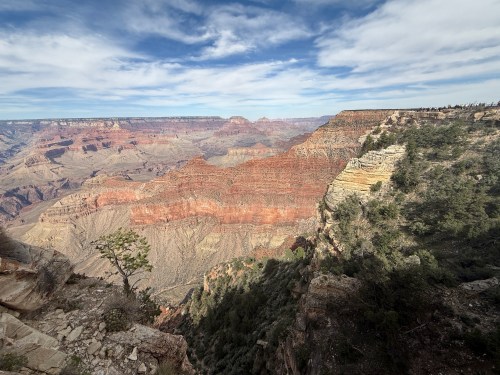
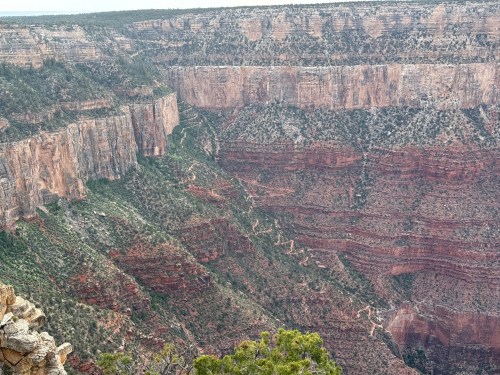
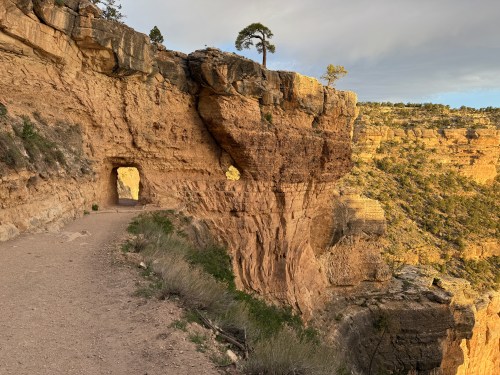
We walked the south rim trail out towards the Bright Angel Trail, which we would hike on day two. We got far enough where we could actually see the trail.
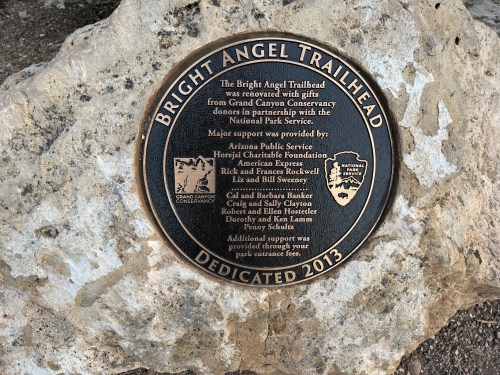
The Grand Canyon National Park does a good job of letting you know what you’ll be getting in to.
The resthouses and water stations along the trail were all open, which is invaluable on a hike like this. We woke up early and were at McDonald’s shortly after they opened at 5am. With Tusayan only being a few miles from the South Rim entrance, we were parking at the trailhead and on our way around 5:30.
It was windy and a bit chilly at the rim, so we started off with too many shirts, which of course meant we had to carry them for the rest of the hike. In our backpack we had:
4 liters of water
Sandwiches
Protein Granola bars
Protein Granola
Electrolyte packets
Sunscreen
Chapstick
Shorts, which we didn’t wear
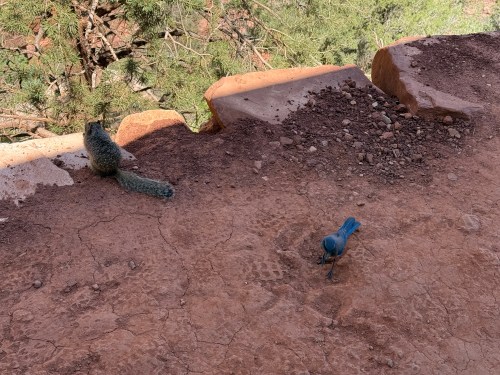
Within a minute of heading down the trail, a dear was coming our way. We stopped and let it decide where to go. They’re pretty good climbers!
After getting away from the rim, we could barely feel any wind and extra shirts came off. We were off on a great hike!
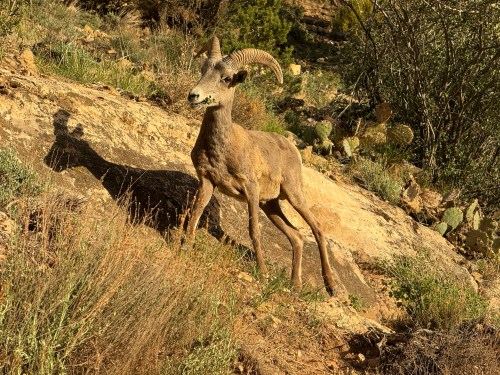
Then we started catching up to a couple who had started their hike just before us. They were pointing to something just above the trail. It was a longhorn sheep that came within 15 feet of us, while eating it’s breakfast!
We only saw a handful of people on the trail during the first hour, and after that we starting seeing a few here and there on their ascent, who had camped overnight in the canyon.
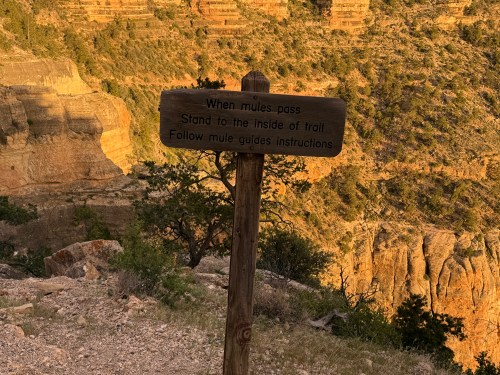
Each 1.5 mile section down took us about 50-55 minutes to travel, plus stops for the bathroom and refilling water. At the 3 mile resthouse, where I believe a lot of people stop and head back up to the rim, was this important sign.
It’s a good reminder that going down is easier on the cardio and it’s the first part of the hike. Going back up later, keeps increasing elevation where the air is thinner, and you’re more and more tired as the long hike continues. Near the end of our descent we did get passed by a pack of mules led by a ranger.
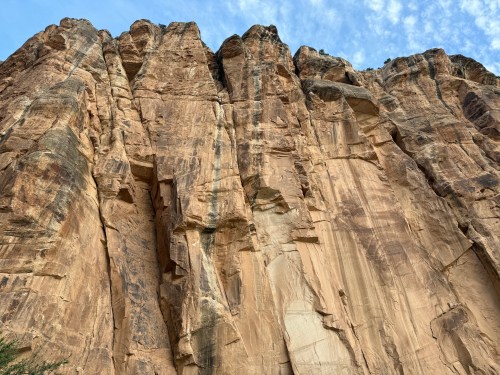
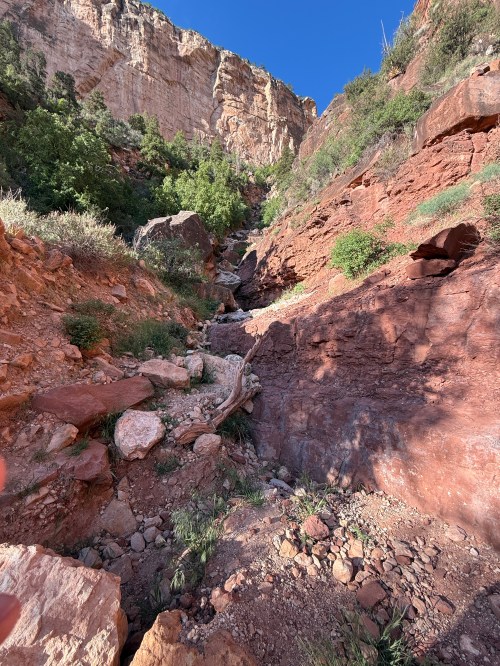
When you get down to Havasupai Gardens and look up, it’s pretty incredible to see how far you’ve hiked. The pictures don’t do it justice, but here are some.
We rested longer and ate some granola at that third resthouse, before starting our journey back up. It took us a little bit more than an hour to get up to the 3 mile resthouse, which was much quicker than the posted estimation saying to plan for twice as long. At this point we took a longer break and ate our sandwiches. We got to the next resthouse in barely over an hour again and saw these two friends. That middle section of the hike felt really good.
The final 1.5 miles were extremely hard and our pace slowed significantly. It’s the steepest part of the trail, at the highest elevation, and you’re exhausted from going over 7.5 miles. It still didn’t take us twice as long as the descent and we took a couple of rests throughout the section, which we never took earlier in the day.
According to Runkeeper, we hiked 9.37 miles with an elevation drop (and climb) of 3,090 feet, in 6:43:55, which includes all of our rest time. Nearly 7 hours! Not bad for a couple in their 40s. This would have been so much easier five years ago, when we were well conditioned.
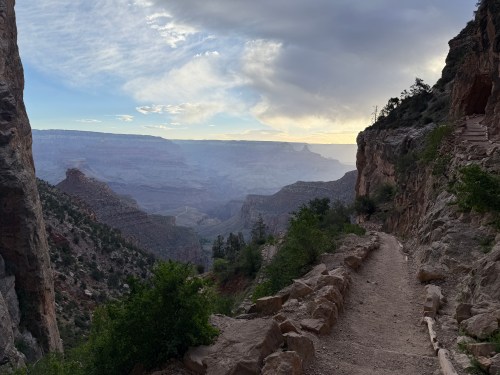
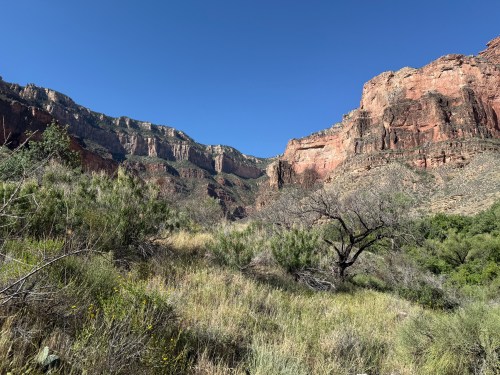
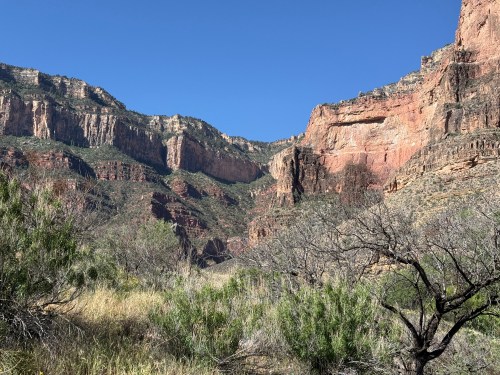
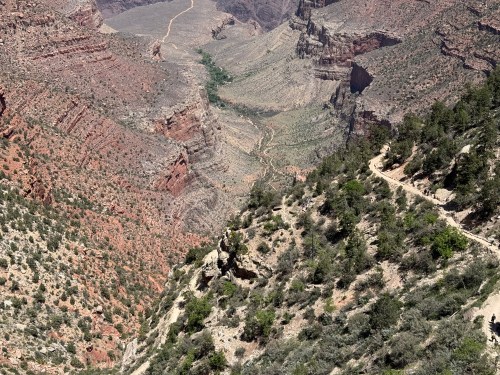
These next two photos were taken 20 minutes before reaching the rim and you can see more of the middle sections of the trail.
The view from the top puts the accomplishment in to perspective. You can barely see the grouping of trees (the long, thin, winding green section down the middle), which is where we went to.
Nearly seven hours out in the Grand Canyon. That is by far the hardest thing either of us have ever done. We were exhausted and could barely walk for a couple of days, but it was worth it.
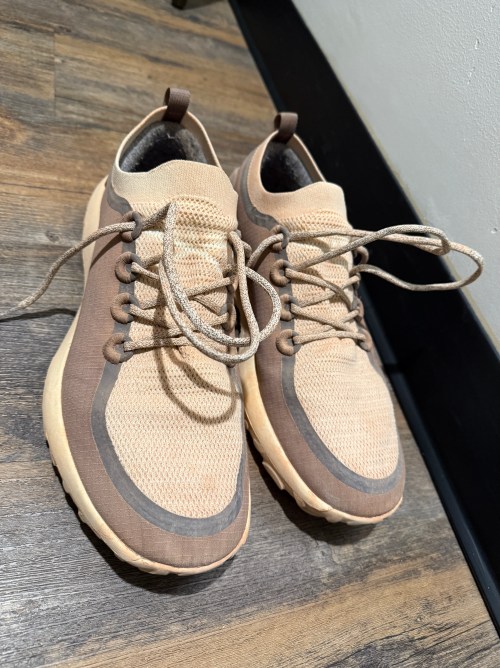
Here’s a neat picture where you can see the lace lines after I took my shoes off because your lower body gets caked with rock dust. These need to be hosed off and thoroughly cleaned.
Even though it was our first hike of this magnitude I have some tips for anyone giving this a try:
Start at sunrise. It’s a long hike and you don’t want to be on the trail during the peak of the day. Even starting this early, your shade is quite limited on the ascent.
Take a backpack. One for every two people is probably good, so you can alternate carrying. A lot of the time we actually each carried a water bottle in a hand to keep weight off our back.
Don’t pick your clothing based on the weather at the rim, especially if it’s really windy (like it was for us). As soon as you’re on the trail for 5-10 minutes you’re stripping off shirts, which you then have to carry. The further you descend, the warmer the temperature is as well; they estimate it can get 10-20° different from the rim.
Get a SPF 50 long sleeve shirt. We got ours from Sam’s Club. Wear a hat, pants, and sunglasses.
Wear good trail/hiking shoes/boots. Make sure you’re not going to get blisters.
Apply sunscreen to your face, neck, ears, and hands every hour or two.
Carry about 2L of water per person, especially for the ascending sections. Refill at each station. Get electrolyte packets (I like the Gatorade ones from Sam’s Club) to mix with water. Keep drinking!
Have enough snacks and a packaged sandwich. Eat before you feel like you need it.
Enjoy the view and take pictures! You’re hiking the Grand Canyon!
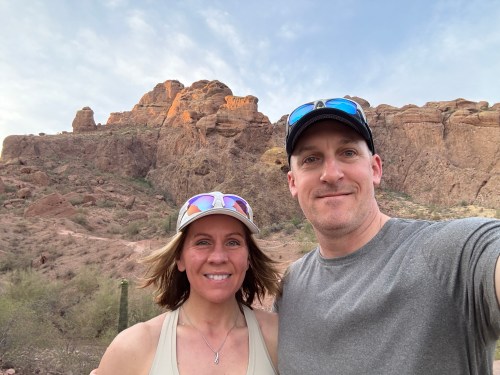
It’s been 13 years since I did a winter migration to Phoenix, AZ, but now I’m out here for a vacation with my wife. Of course we had to hike Camelback, my favorite. It was an early start before 6am to beat the heat. The round trip hike took over twice as long as it used to when I was in CrossFit shape, but we had fun and made without injury! Over 1,300 feet of elevation climb over about 1.1 miles is no joke!!
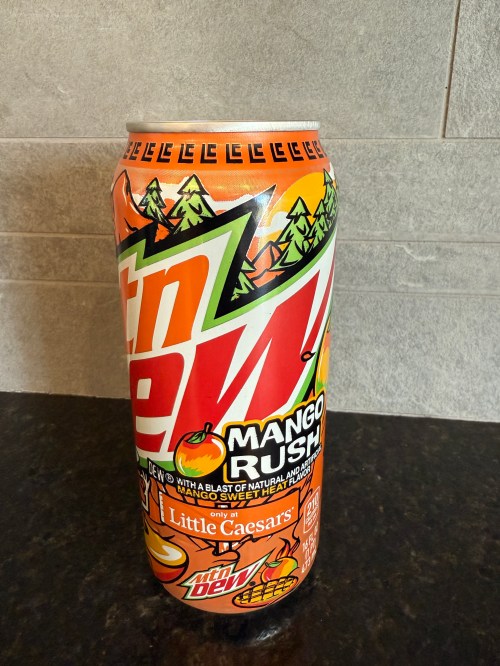
This is special release, only Little Caesars, which a friend picked up for me. I was really curious what the “mango sweet heat flavor” would taste like. The Baja Laguna Lemonade had a “mango lemonade flavor” and it was pretty meh.
When I took a drink, my first thought was, “This is terrible!” I think it may just have been the shock of such a different flavor. It’s actually pretty decent. Fruity with a touch of heat. I’ll say it’s a 7/10.
This new limited edition Mountain Dew is a “tropical citrus punch” and it quite good. The graphics on the bottle show sliced oranges and limes and I definitely get a lot of that. I’d drink this again and give it an 8/10.
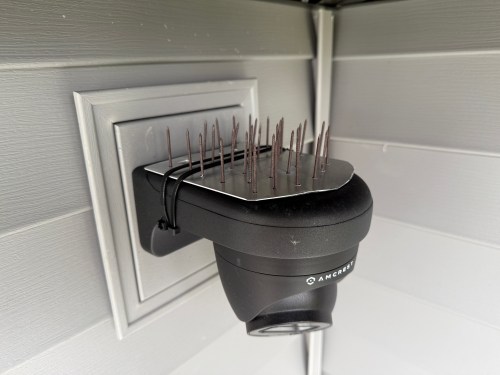
We noticed a robin trying to build a nest on top of our back patio’s security camera. I wasn’t going to let that fly, but after seeing how much is costs to by 20x the amount of bird spike I needed, I made my own. I cut a scrap piece of aluminum, drilled holes in it, added nails, and held them in place with double-sided tape. I wasn’t confident it would hold, so I used zip ties.
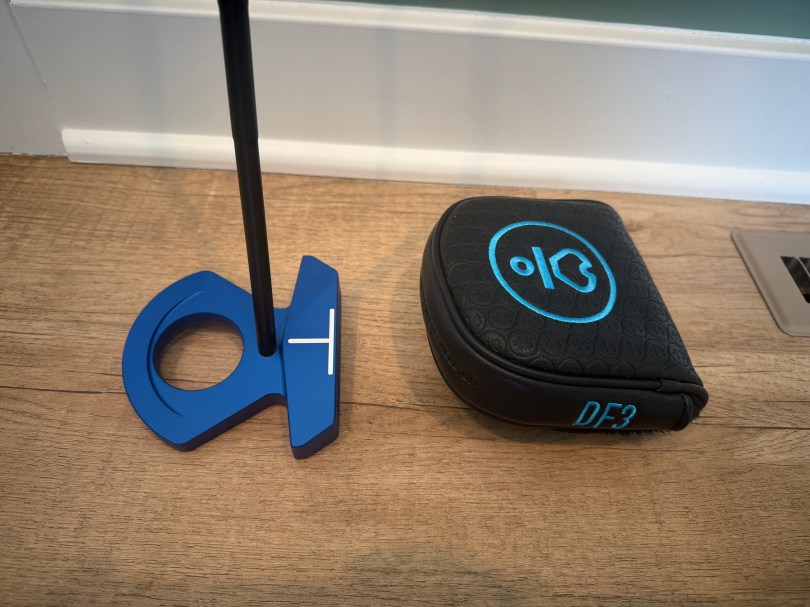
I tested out a DF3 earlier this year and absolutely loved the feel of the lie angle balanced putter. I feel like not having to fight the torque you get from other putters completely frees up my stroke. Of course I went with a custom order and got a blue one, which arrived today!
I went with the Press II 3° grip and alignment mark C.
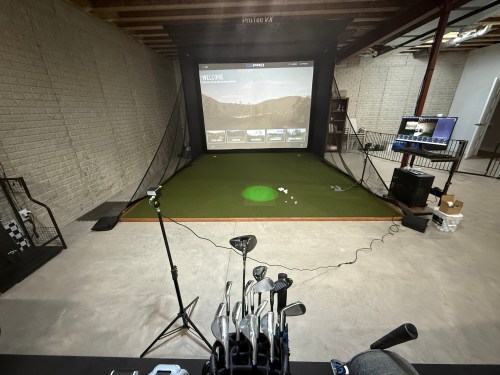
I finished putting up the golf simulator at the end of December and I think three+ months is a pretty good period of time to have some thoughts about everything. In case you missed it, check out my serious on the build:
How much have I really been using it? Initially, not as much as I’d hoped. I’d say I was getting downstairs for 3-4 days a week. Over the last several weeks, especially after getting outside for a quick nine holes, I’ve gotten the itch to play, so I’ve been putting in more time to get ready for the 2025 season. I’ve been able to get on the golf sim 5-6 days a week.
The PC
The computer has been great and no complaints on that build. I can always upgrade memory if I need to. The mouse kind of sucks, so I may switch to a wired one. I do regret not getting a larger monitor, especially with the additions I mention later.
The Environment
The enclosure is holding up well and all of the padding is great; I’ve only had a handful of bad ricochets. The screen does show ball marks (only noticeable if the projector is off), but that may be my fault for using balls too long and initially using some balls with logos or a little marker on them. The turf is holding up well and I don’t see any wear marks where we stand. The hitting strip is really good too and I haven’t felt any wrist or elbow pain at any point. I feel like I can tell when I hit a fat shot, so it doesn’t seem like the club is bouncing up in to the ball for a better shot.
The Other Electronics
The projector has been fine. There are better ones, but I’m not sure the extra cost is worth it yet, because prices will come down on the higher level 4K ones. I couldn’t be happier with the ProTee VX launch monitor paired up with the GSPro software. My yardages are consistent with what I’d expect on the golf course and I’ve had very few shots get missed. ProTee in frequently updating their software and there are so many new courses being updated and released for GSPro every week.
This review may sound like a broken record with everything being so great, but I think that’s due to how much research I did.
Updates
This week I added swing cameras for front and down the line views. Luckily I ordered this stuff from AliExpress before the tariffs kicked in:
They just came in, so I haven’t had a lot of time with them, but so far the cameras are a sweet addition. I need to do some cable management.
I’m working on some fixes and it’s great to be able to check my positions after each swing.
I may sign up for lessons on Skillest, but I’ll see how these fixes go first.
In the Future
I started planning to build a cart for the sets of clubs we bought at an estate sale. Hopefully I’ll make progress soon, because I’m getting tired of looking at them lined up along the wall.
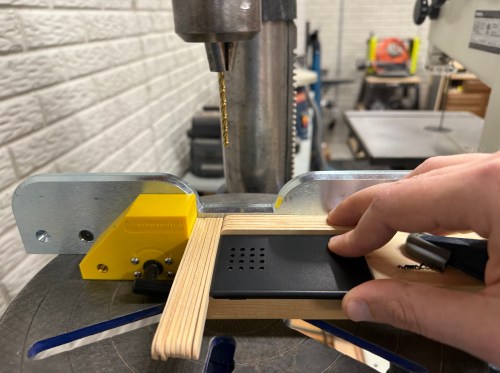
I also want to build a control box with a bunch of buttons I can press with a club so I don’t have to use the keyboard and mouse during a round. That’ll be a fun project combining electronics and woodworking.
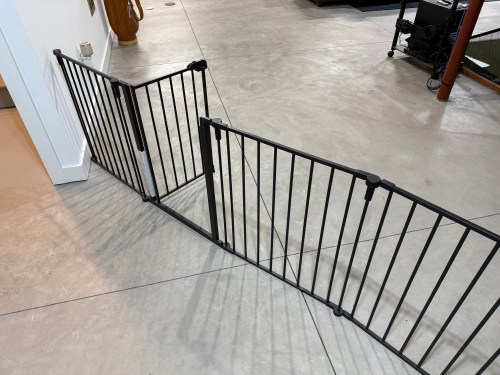
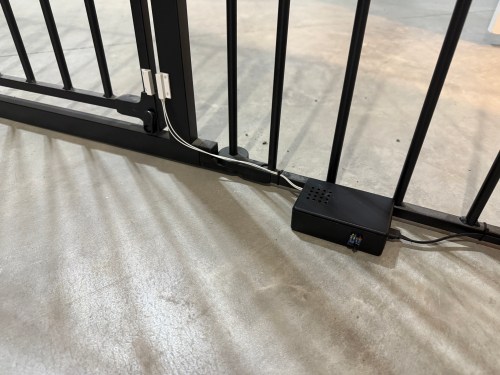
In our basement we have a baby gate, which surprisingly keeps our cat out of the gym and golf sim areas.
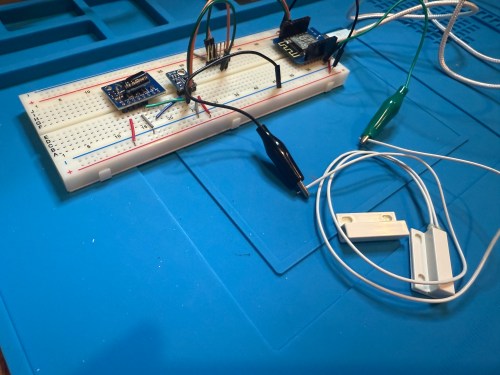
Sometimes we forget to close the gate, so I needed a sensor to monitor its state. I still had the breadboard from the air quality monitor project, so it was quick to add a magnetic door switch and test things out with the D1 Mini clone.
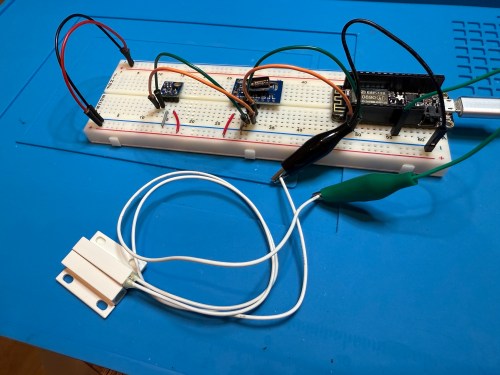
I have extra sensors, so those were kept in the project and allowed me to get rid of the shitty DHT22 I added to the golf remote. Everything worked, but I want to save my last two D1 minis and use them for something with the screens I have for them. So I swapped in an Adafruit Feather HUZZAH ESP8266, which I got with AdaBox 3 or 4 in 2017 and made minor changes to the code.
I figured I might as well use one of the fancy Adafruit Perma-Proto boards I had, which makes soldering all of the connections much easier. As a bonus it was nearly a perfect fit for the case.
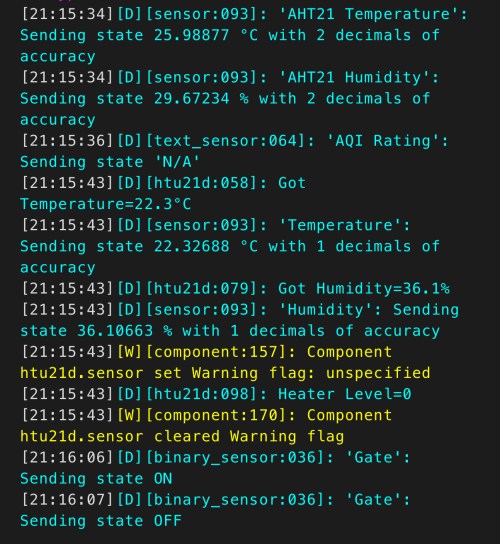
The magnetic switch and Si7021 will live outside the box, so those couldn’t get soldered yet. After connecting power I checked the ESPHome logs to make sure everything was working.
I cut holes in a project box, finished soldering, and used hot glue to secure the board..
I reversed the swing of the gate, placed my device, and attached the two sides of the magnetic switch to the gate.
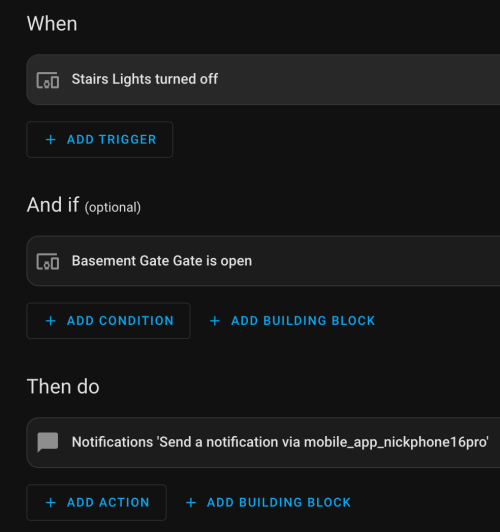
In Home Assistant an automation runs whenever the stairs light is turned off to check the state of the gate. If it’s open, a notification is sent to our phones.
I’m enjoying these little electronics projects, and it feels good to finally put various parts to use.
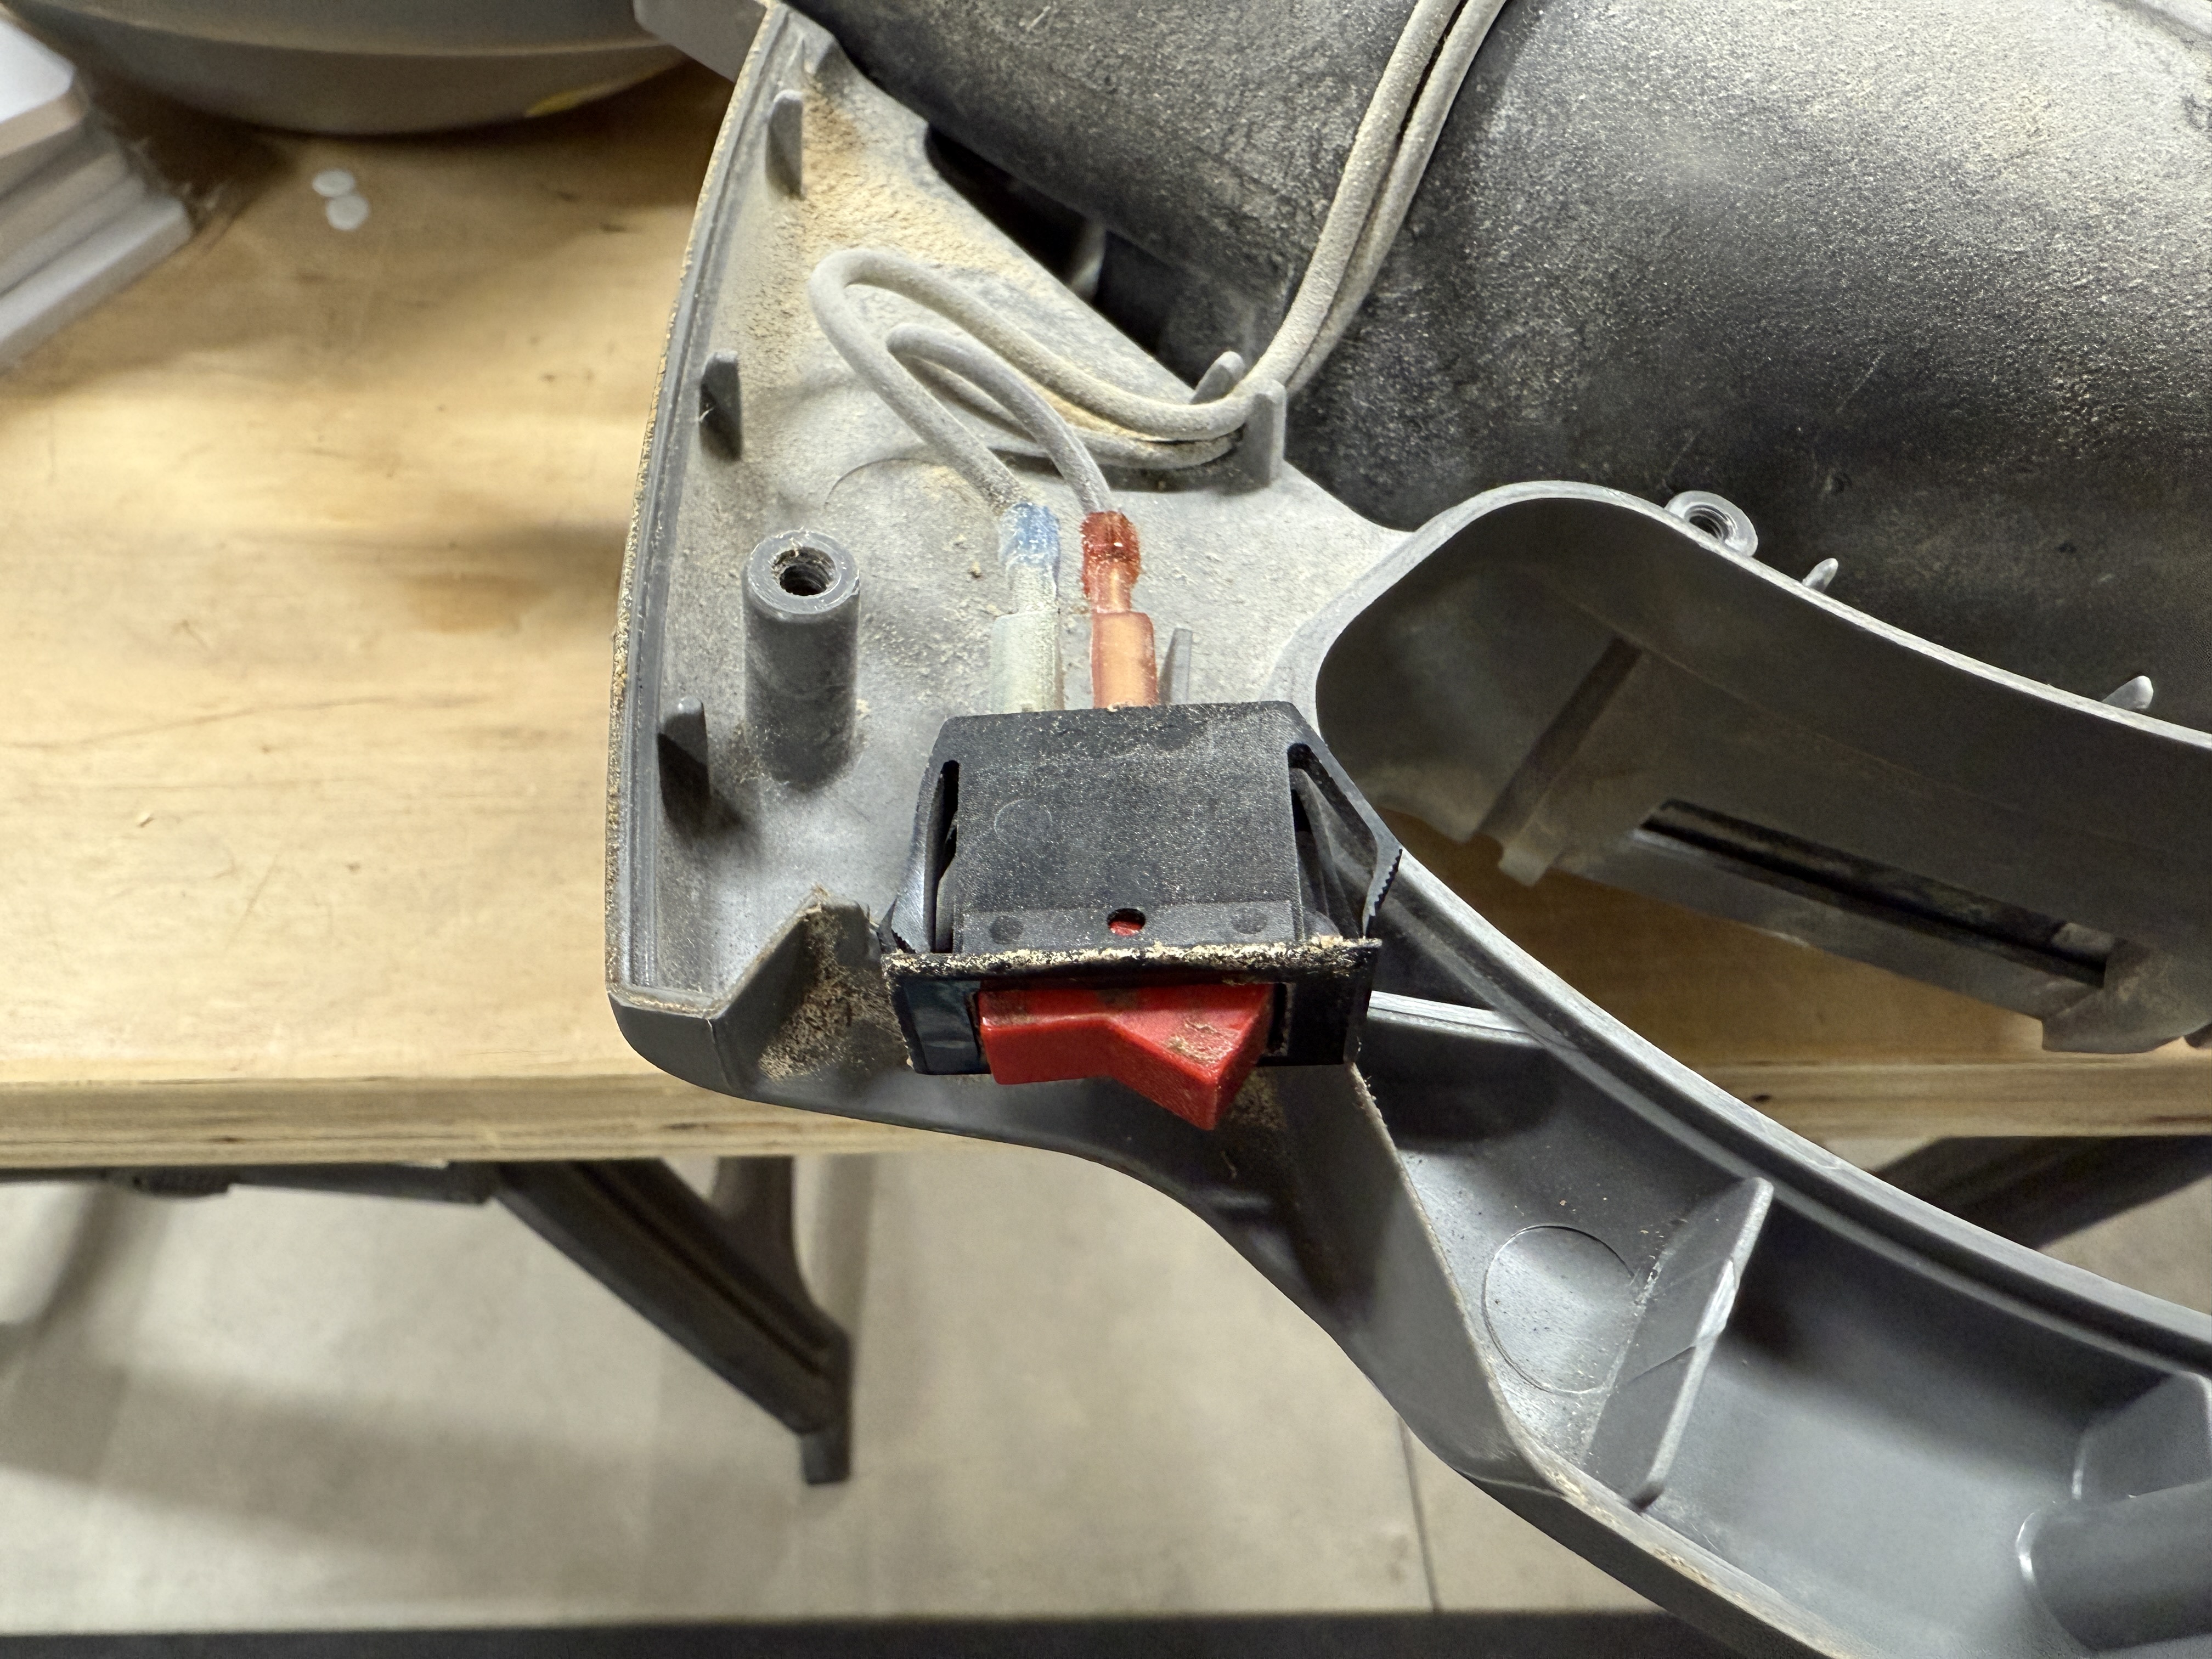
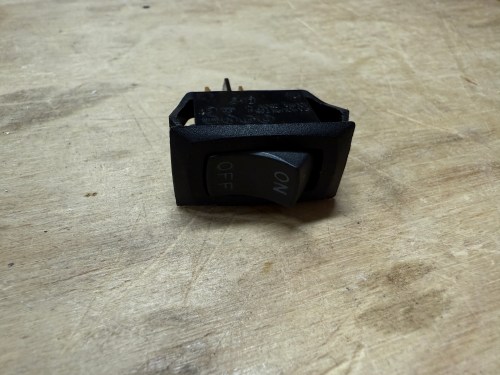
I’ve had this Rigid shop vacuum, from Home Depot, for about 20 years.
At some point in the last year, the switch started having issues. The vacuum would only turn on if the switch was actually pressed in, instead of toggled. I’ve never seen that happen, but I’m guessing it was from the accumulation of dirt and dust getting inside the switch body. Then the switch wouldn’t even push in, so the vacuum wouldn’t run.
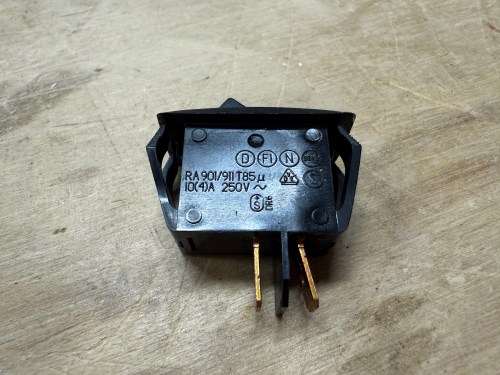
I figured it would be an easy switch replacement, so I removed a bunch of screws to take off the cover. Sure enough, the switch had two wires clipped on to it, and was held in place by the case.
I had a perfect replacement, salvaged from some device I don’t remember, in my collection of electronics parts.
It fit like a glove and the vacuum turned on as if it was brand new. I screwed the case back together and called it done.