
This is the third post in this series about putting a golf simulator in our basement. Part one covered the PC build and part two was all about the environment. This one will cover all of the other electronics and some things that didn’t fit in the first two posts.
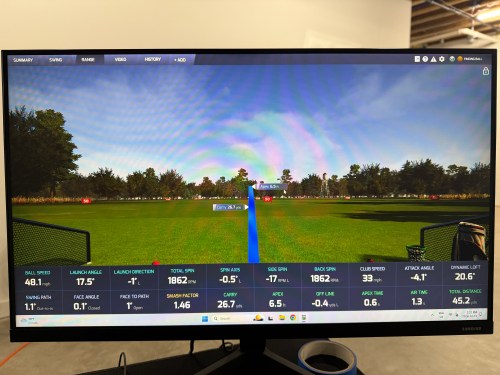
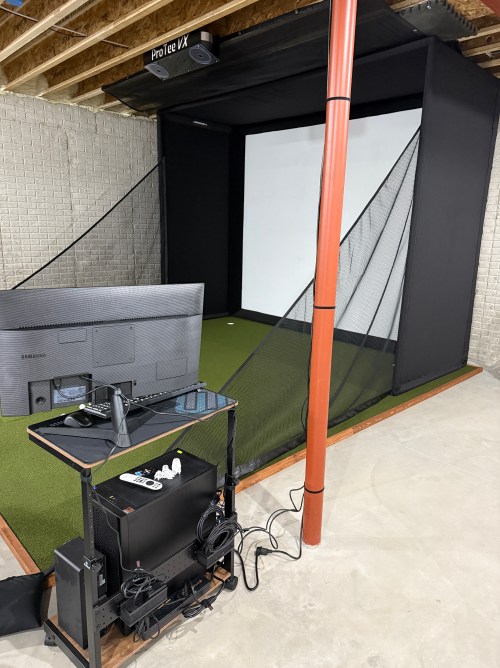
The launch monitor is the piece of equipment that “watches” you hit the golf ball and determines the spin, speed, direction, and angles. I guess you might call it the brains of the operation.
There are a lot of options to choose from; some are cheap and some are extremely pricey. I ended up getting the ProTee United VX with the protector from Indoor Golf Outlet due to the following reasons:
- Overhead unit.
- Doesn’t require special golf balls.
- Doesn’t require stickers on the clubs.
- Protee Labs is updated often. (changelog)
- It provides a lot of data.
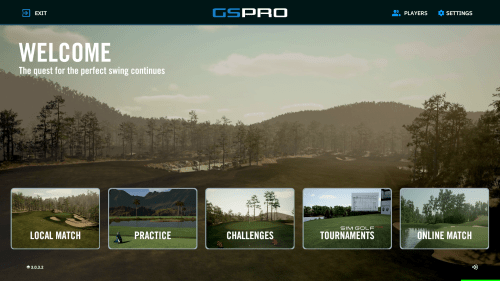
- Compatible with GSPro.
Before installing the unit, I had to do some electrical work in the basement. I removed a couple of lights in the area, rewired some lighting circuits, and added three outlets in the ceiling.

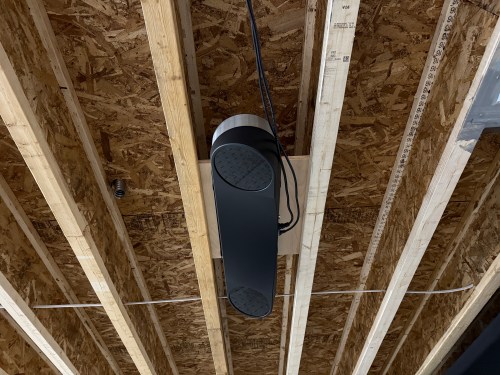
In order to mount the launch monitor to the ceiling I cut a piece of 3/4″ plywood that could fit in between the joists, resting on the bottom of the I-beams. Then I was able to attach the mounting plates directly to the plywood while I was on the ground. I even locked the launch monitor in to the mounting plate and then lifted the entire assembly up to the ceiling. I felt like it was so much easier than trying to align things while working above my head. This also gave me the flexibility to slide it sideways to dial in the placement. I eventually screwed the plywood to the joists.


At this point I didn’t have the turf and the side netting wasn’t installed. I couldn’t resist and had to hit a few shots. Here’s the very first hit, which was a little chip with an 8 iron.
For my projector I went with the BenQ TK710STi from The Indoor Golf Shop, which had good reviews and felt like a good price point to start with. To figure out where to mount it using a VIVO universal mount, I used Projector Central’s throw distance calculator. Learning about the test pattern and creating a custom resolution were very valuable for placement and configuration.


Due to the distance from the PC to the projector being more than 10 feet, a normal cable wouldn’t work. I snagged a fiber optic HMDI cable from Target. I didn’t need 50 feet, but I had a gift card to use there. It took me a bit to realize this type of cable isn’t bidirectional.

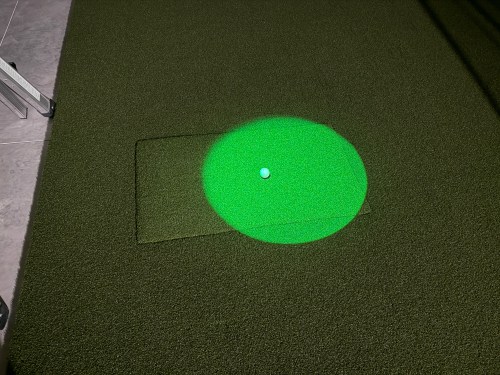
Since most of the basement lights need to be off when using the simulator for a crisper image, I picked up a spotlight to point at the hitting area (the green is quite nice) and a track light (bulbs).


The launch monitor comes with ProTee Labs, which shows ball and club data and allows you to hit on a range. In order to play golf and have other practice options, I got the yearly subscription to GSPro, which is exceptional!
Not necessary for the golf sim, but I bought another Apple TV 4K and a mount. It’s connected to the projector so we can watch movies, football, or anything else. I need to figure out a sound system.


There were several other small purchases, such as an extension cord to run power to the PC, velcro tape to tidy up the wires running down the post, and parts to do the electrical work.

Here’s a video of the golf simulator in action.
I’m excited to see where this can take my golf game. I’ve already started The Strike Plan (from The Practice Manual‘s author) to improve my ball striking and I’m hoping to spend time daily working on my game or having fun with it.
The normal price of the ProTee VX is $6,500 before tax, but I got a bit of a holiday discount. The total cost for everything in this post was a whopping $9,049, bringing the grand total to $14,699. I feel like that’s middle of the road for a home golf sim because you can get really cheap or you can spend more on just a launch monitor! If you have any questions about anything, leave a comment and I’ll be happy to share more.
After I’ve spent more time using the simulator I’ll post some thoughts. There will also be some upcoming side projects.

[…] I mentioned was $3,800 and brings the total to $5,650. The third post in this series covers the other electronics and everything […]
LikeLike
[…] The second post in this series covers my sim environment and the third post covers the other electronics and everything else. […]
LikeLike
[…] Building a Basement Golf Simulator: The Other Electronics […]
LikeLike
[…] The Other Electronics […]
LikeLike