One Handed Drop Cut

The One Handed Drop Cut is a simple way to cut a deck of cards with one hand. This card trick might often be called by the simpler name of the “one handed cut.” The trick only has four steps and is very easy to learn.

Tutorial

The deck of cars is held along the long edges with your thumb on one edge and the fingers on the other side. Release half of the cards with your thumb and they will drop down into your palm.

card trickcard trick

Remove your index finger from the deck, move it below the dropped cards, and push up on those cards until they come in contact with you thumb. Once you reach this point, keep pushing and your thumb will release from the original cards.

card trickcard trickcard trick

These cards will drop down onto the fingernail and knuckle of your index finger. Lower the index finger so that the cards are resting on the fingers.

card trick

Move the thumb towards your finger tips, placing the cards held by your thumb on top of the other cards.

card trick

Videos

One Handed Lift Split Cut

The One Handed Lift Split Cut is very similar to the One Handed Drop Cut with some variations to spice it up a bit.

Tutorial

Hold a deck of cards in your fingers so that the finger tips wrap just over the edge of the deck.

card trick

Use your thumb to lift up half of the deck. The other side of these cards is held by the middle, ring, and pinky fingers.

card trick

Slide your index finger underneath the half of the desk which was left in place. Push up on the cards with your finger until they come in contact with your thumb. This should happen just below the spot where your thumb is holding the other half of the deck.

card trickcard trick

Use your thumb to put a bit of pressure on about half of cards you just pushed up with your index finger. This holds those cards in place. Drop your index finger slowly so that the cards you didn’t put pressure on with your thumb fall down to their original location.

card trickcard trickcard trick

Move your thumb back towards the wrist, letting go of the cards which were lifted in the first stop of the card trick. These cards will fall back on top of the other cards laying flat. Now move your thumb towards your finger tips, causing the remaining cards to lower on top of the rest of the deck.

card trickcard trick

Videos

One Handed Twirl Cut

The One Handed Twirl Cut is a neat looking card trick. It is performed by twirling or twisting half of the deck of cards around and to the back of the other half.

Tutorial

To start the card trick, hold a deck of cards in your right hand. The thumb and middle finger are placed on the short edges of the cards. The index finger is held on a long edge of the cards and is about 1/3 of the length of the card away from the edge held by the middle finger. The ring finger is held in the middle of the other long edge of the cards.

card trick

Move the thumb to the lower corner of the edge it is holding. Separate half of cards from the deck with your thumb by lifting those cards up towards the top corner of this short edge.

card trickcard trick

Continue to raise the half deck up, using the index finger as an axis. As you do this, your pinky finger comes up to brace the corner of the edge being held by your ring finger.

card trick

Rotate your index finger as you lift the cards with your thumb, until you have the two halves of the deck side by side with the index finger in between the two halves.

card trick

Slide the top knuckle of your index finger along the edge of the left half of cards. You are really attempting to move the index finger behind these cards, but you need to slide it along so that the cards do not fall over. Once the knuckle passes to the back of the cards you can bring the other half of the cards (being held by the index finger and thumb) down and behind the original location of the whole deck. The middle finger releases from the left half of cards, which are now balancing on top of the index finger and being held in place by the ring and pinky fingers.

card trickcard trick

Move the index finger out of the way and use your thumb to move the cards all the way behind the original deck.

card trick

Videos

Front to Back Cut

The Front to Back Cut is a card trick that will be easier to perform for people with larger hands. This is due to the fact that during the trick you are almost holding two lengths of cards in your hand. If the distance between the tip of your pinky and the tip of your thumb in a stretched out hand is not more than 7.5 inches you most likely will not be able to perform the trick as described here.

Tutorial

Hold a deck of in your right hand with the thumb on the right long side of the cards, the index finger on the top side of the deck, middle and ring fingers on the left side of the cards, and the pinky on the bottom of the deck.

card trick

Move your thumb down to the lower right corner of the cards. Separate the deck of cards into two halves. Raise the top half of the deck, using your index finger as the pivot point.

card trickcard trick

Keep moving the half deck up until the pinky, index, and thumb are just about in a straight line. During this time you also need to lower the bottom half of cards a little bit.

card trick

Move your index finger in towards the palm a fraction of an inch so that the cards being held by the thumb and index finger can pass by the other cards. Move the cards back towards the pinky finger with your thumb, making sure to pass them behind the cards that were not moved by your thumb. At the same time, bring up those cards just a bit to meet your thumb. The cards will move back into place behind the half of the deck which was previously the bottom half.

card trickcard trickcard trickcard trick
Note

For a variation of the card trick, you can move the half into the middle of the other half instead of behind it. This will take a little bit more practice, but if done correctly the cards will actually be shuffled together a little bit instead of just simply being cut in the middle.

Videos

From the Top

If you’ve ever watched the movie Rounders you’ve seen this card trick. The character of Lester “Worm” Murphy, played by Edward Norton, is showing doing this trick in a scene during the movie. It’s not a hard trick to learn and it isn’t anything flashy, but when someone catches you do it out of the corner of their eye they’ll think it looks pretty neat. I don’t know if the trick actually has a name so I decided to call it From the Top.

Tutorial

Hold the deck of cards in the palm of your hand. You thumb should be placed over the top of the cards and the rest of your fingers come up around the side of the cards.

card trick

Push the top card away from your palm and towards your fingers. Bring your index finger underneath the top corner of this card and keep the rest of your fingers along the edge of the card.

card trick

Life your index finger up and push on the card. At the same time, pull your thumb back towards your wrist. This should allow the card to start flipping up into the air. The middle, ring, and pinky fingers on the edge of the card or even slightly on top of the card. Keep pushing up with your index finger until the card clears your thumb. Then move the thumb back down onto the top of the deck. Make sure to put enough pressure on the deck with your thumb because it will soon be holding the deck in place.

card trickcard trickcard trick

The single card is now held mainly by the tips of the index and middle fingers. Move these fingers as well as your ring and pinky fingers away from the deck so that they are pointing straight out with an open hand. When you do this, the card flips over so that the underside of the card is exposed.

card trick

Videos

Bridge Shuffle

The bridge shuffle can be found in most homes across the world where any type of card game is being played. It could be a game of poker, gin, rummy, go fish, bridge, uno, or anything else involving a deck of cards. Most people who have touched a deck of cards in their life can perform the bridge shuffle with their eyes closed. It is being included on the site for those people who are unable to do it. With a little bit of practice it’s a trick that is very easy to master.

Tutorial

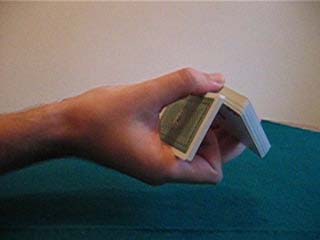
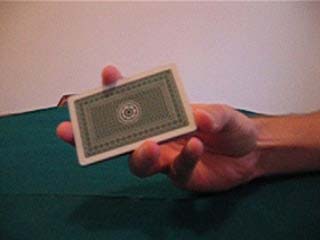
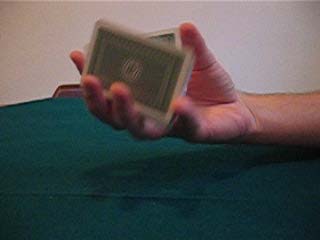
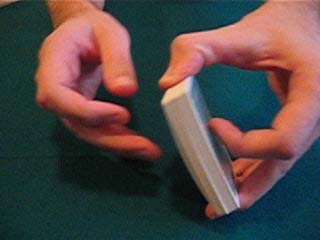
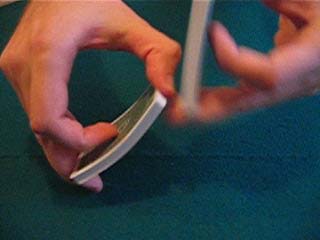
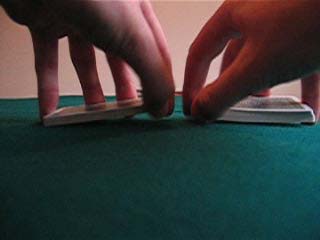
Begin by holding a deck of cards in your left hand. The thumb is placed on one of the short sides of the deck. The pinky, ring, and middle fingers are hold on the other short side of the deck. The index finger is touching the middle of the top card with the fingernail.

card trick

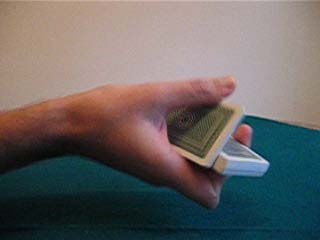
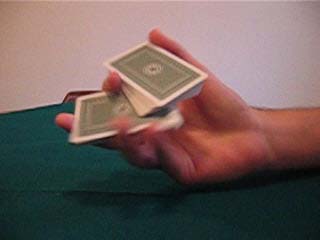
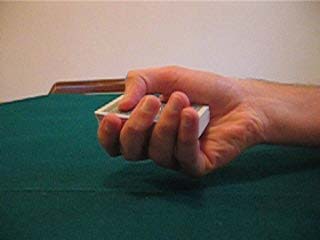
Bring the right hand in towards the cards. The middle and ring fingers of the right hand come in contact with the middle of the bottom of the deck of cards. The left thumb now releases half of the cards it is holding. The right index finger comes over the top of the released cards and moves to the middle of the top released card.

card trickcard trick

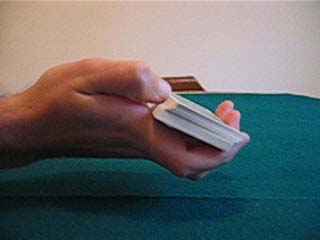
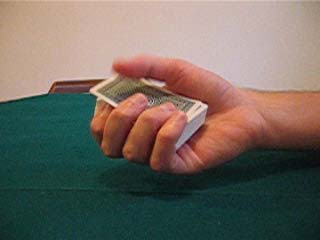
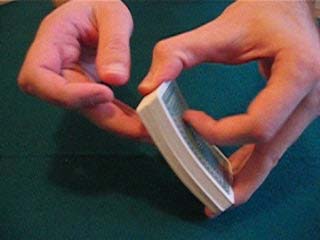
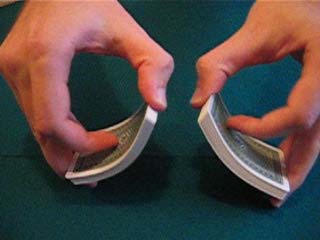
As the index finger is moving into place, the released cards are moving further and further away from the original location, but are still in contact with the middle and ring fingers of the left hand. At the same time, the right pinky moves up and to the bottom right corner of the released cards to keep them from falling. To finalize the separation of the two halves, the right thumb takes the place of the left middle and ring ringers.

card trickcard trick

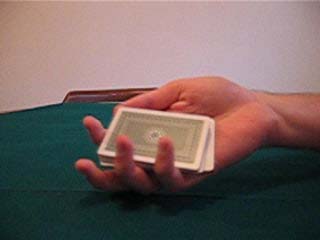
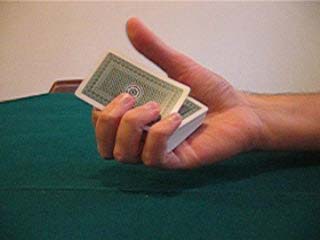
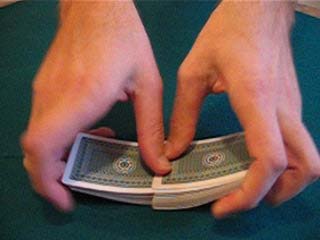
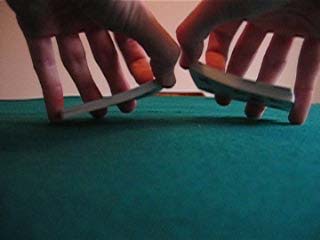
At this point, each half of the deck should be held in the same way by the right and left hand. The thumb is on the inside short end of the cards. The fingernail of the index finger is touching the middle of the top card. The middle and ring fingers are on the opposite side of the cards from the thumb. The pinky is on the corner below the middle and ring fingers to give stability.

card trick

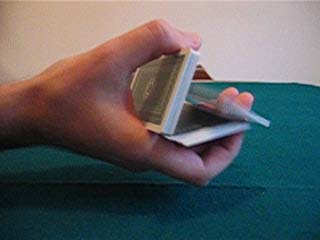
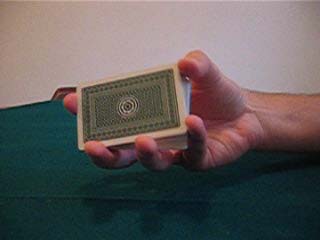
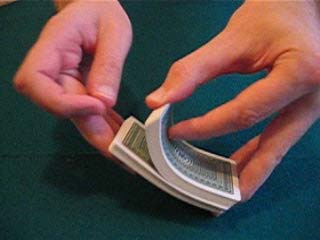
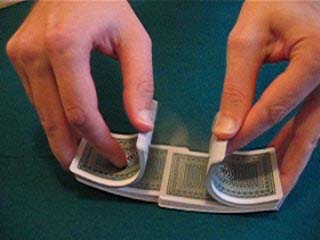
Bring both hands together so your thumbs are about an inch apart. It works well if the middle and ring fingers are touching the table at this point and the thumbs should be 2-3 inches above the table. Push down a bit with your index fingers and allow your thumbs to let go of the cards on each side. When you do this quickly, the cards from each side will mix together in one pile on the table. The cards should have overlapped each other from 1/4 to 1/2 an inch.

card trickcard trickcard trickcard trick

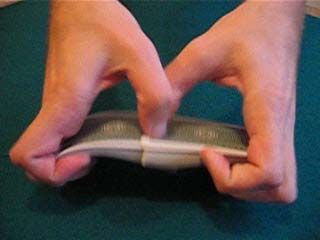
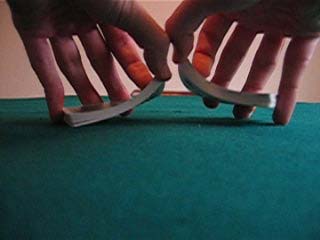
Once all of the cards have been released, move your thumbs down and place them top of the section where the two halves of the deck have overlapped. Move the index fingers off the top of the cards and down next to the middle fingers. The end of the cards held by these fingers will not be touching the table. Move your fingers in towards the middle of the cards, which will also lift the two outside ends of the cards further from the table. The outside edges of the cards should now be in your palms just below the base of your fingers.

card trickcard trickcard trick

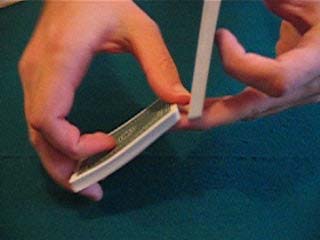
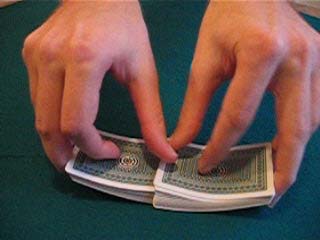
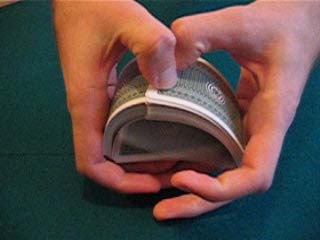
Push up with your fingers on the middle of the cards and allow your thumbs to move up as well. At the same time lower your wrists. The cards should now be in an arch.

card trick

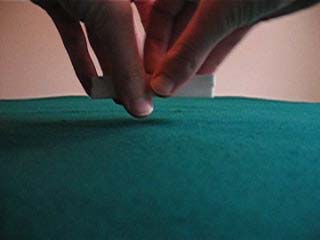
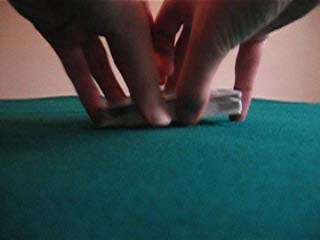
Release the pressure of your fingers that is holding the bottom of the cards. As you do this, the cards will move in towards the middle to form one pile. This does not require any down pressure with your thumbs. Just let gravity takes its course.

card trickcard trickcard trick

You have now shuffled the deck of card. Repeat as necessary.

Videos

Dealer Shuffle

If you have ever played poker in a casino you’ve seen countless dealers shuffle a deck of cards. They don’t do it like the majority of use shuffle cards at home. They can’t because the observant players would be able to track specific cards throughout the deck. The way most people shuffle, they expose at least the bottom cards, but this is not acceptable for a fair game which the casinos strive for. By using the dealer shuffle, you keep people from being able to see the bottom cards or any other cards during the shuffling process.

Tutorial

Begin with a deck of cards in a single pile on the table in front of you so that the long edge is horizontal. Place your thumbs on the side of the deck nearest to your body. The pinky fingers are placed on each respective side of the card. The middle and ring ringers of each hand are placed on the final side of the deck of cards, which is opposite where you placed your thumbs. It doesn’t really matter where you put the index fingers at this point, but I like to place my right index finger on the top card so that my fingernail is touching the card. The left index finger kind of floats out above the deck.

card trick

Cut the deck of cards in half by taking the top half away with your right hand and the bottom half away with your left hand. Once the deck is split take the index fingers and put them on the side of the cards which does not have any fingers. While doing this it helps to straighten out the cards which may have shifted a bit during the cut.

card trick

Move your right thumb to the lower left corner of the right card pile and your left thumb to the lower right corner of the left pile.

card trick

Remove your index fingers from the side of the cards. Put them on top of the cards in a location that is roughly the halfway point between your thumb and middle finger.

card trick

Lift up on each card pile with your thumb and put a little bit of pressure down on the cards with the index fingers. At the same time bring the two parts of the deck closer together.

card trick

Lift the thumb across the corner of the cards so that one by one the bottom cards fall out of each half of the deck. Make sure to do this fast enough so the corners of the cards from each side mix together on the table. Only about a 1/4 to 1/2 an inch of the corners need to actually overlap.

card trickcard trickcard trick

Once all of the cards have been released by your thumbs, move the thumbs back to the side of the cards closest to your body. Push the two halves of the deck together to form a single pile again.

card trickcard trickcard trick

Repeat the process as necessary.

Videos