Set Sound Output via AppleScript

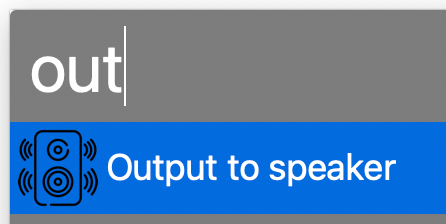
When playing music I usually change my office MacBook’s sound output to a Sonos speaker, which is an AirPlay device. Sometimes the connection freezes and I have to reset output my default device and back to the office speaker. I wanted to automate both of these processes, so I found an AppleScript as a starting point. I modified it and created an Alfred Workflow with a keyword trigger. Here’s my version of the AppleScript. Feel free to modify it for your own use.

	-- This script can be used to set/reset the sound output

	-- Two devices because sometimes the AirPlay device loses connection
	set myDevices to {"LG UltraFine Display Audio", "Office"}

	tell application "System Settings"
		-- sometimes it is already open to Sound, which causes an error
		quit
		delay 0.2
		activate
		delay 0.2

		tell application "System Events"
			tell process "System Settings"
				delay 0.4
				set theWindow to first window
				delay 0.4
			end tell

			keystroke "Sound"
			delay 0.5

			tell application process "System Settings"
				tell its group 2 of scroll area 1 of group 1 of group 3 of splitter group 1 of group 1 of window "Sound"
					tell its radio button 1 of tab group 1
						click
					end tell

					delay 0.3

					tell its scroll area 1
						try
							set theRows to (every row of outline 1)
						on error error_message number error_number
							--display dialog "Error: " & the error_number & ": " & the error_message buttons {"OK"} default button 1
						end try

						repeat with myDevice in myDevices
							set device to myDevice as string

							set found to false

							-- Sometimes the device isn't listed yet, so delay and retry
							repeat 10 times
								repeat with aRow in theRows
									try
										if name of static text 1 of group 1 of UI element 1 of aRow is equal to device then
											set selected of aRow to true
											set found to true

											set volume without output muted
											set volume output volume 10 --100%
										
											exit repeat
										end if
									on error
										--display dialog "Error setting output sound to " & device
									end try
								end repeat

								if found = true then
									exit repeat
								end if
							
								delay 0.5
							end repeat
						end repeat
					end tell
				end tell
			end tell
		end tell

		quit
	end tell

Updated on November 28, 2023 to work with macOS Sonoma 14.1.1.

Updated on March 13, 2024 to retry multiple times if device isn’t listed yet.

Updated on March 21, 2024 to reset volume per device, since the OS remembers the last volume of each device.

Updated on October 8, 2025 to work with MacOS Tahoe 26.0.1.

Pi-hole Port Update Helper

I’m a big fan of Pi-hole. Due to my instance running on the same Raspberry Pi as Home Assistant I have it configured for a different port than the default 80. Each time I run an update for Pi-hole I manually edit the config file and restart the service, because the update scripts reset the port. I finally whipped up a script to take care of it.


sudo cp /etc/lighttpd/lighttpd.conf /etc/lighttpd/lighttpd.conf.old
sudo sed -i -e 's/= 80/= 8081/g' /etc/lighttpd/lighttpd.conf
sudo systemctl restart lighttpd

Reload Your Mac Camera

Last month I bought some simple stickers to cover up the cameras on my laptops. My friend Ingrid bought some fancy covers at about the same time. Ever since, we’ve both been having issues with MacOS recognizing the camera when uncovered. Rebooting the Mac resolved the issue so I figured something was jacked up internally with sensors. Found a solution, but wanted to make it easier than typing in the terminal commands.

I’m an Alfred user, so I made a workflow (available on Github). Save the file and open it, which should import into Alfred. Change the keyword (default is camera) in Alfred if you want.

If you don’t use Alfred, I also made a command script you can launch instead of manually typing in the commands. It’s also on Github. Use File->Save Page in your browser. Open up a terminal window and cd to wherever you saved the reload-camera.command file. Change the execute permissions on the file by running chmod 744 reload-camera.command. Then you should be able to double-click on the file to run the script.

By the way, yes, you probably should cover up your camera, especially if you never use it.

Hiding Password Input When Running a Remote Script

I have a simple local script, which logs into a remote server (my WordPress.com sandbox) via ssh to run a script there. After finishing, it runs another local command (unison) to pull down all of the files. The remote script is also very simple, calling svn update on several repos. If I ssh directly into the server and run the svn script, typing in passwords correctly shows up as a series of asterisks (****). Executing the same script remotely was showing the actual characters in my local terminal. Not ideal for security.

A Stack Overflow comment gave me what I needed. Wrap the ssh command with some stty commands.

stty_orig=`stty -g`
stty -echo

ssh USER@HOST './script.sh;'

stty $stty_orig

This turns off the output of the password entry completely. I never type in the password since it’s a copy/paste from 1Password, so not having the asterisks is no big deal.

Lock Screen and Sleep Display with Quicksilver

Looking for a quick way to lock your screen and put the display to sleep on Mac OS X using Quicksilver?

  1. Download Sleep Display.
  2. Extract the zip file and move SleepDisplay to your Applications folder.
  3. Run the SleepDisplay application at least once.
  4. Fire up Script Editor and enter the following code:

    do shell script "/System/Library/CoreServices/Menu\\ Extras/User.menu/Contents/Resources/CGSession -suspend"

    launch application "SleepDisplay"

  5. Save this script to a location cataloged by Quicksilver.
  6. Create a HotKey Trigger in Quicksilver to run the script. I use command-control-shift-S as my keystroke combination.

I’m running Mac OS 10.5.1 on an iMac and this works great!