While setting up my network, I was struggling to print between my VLANs. I have an HP DeskJet 4155e and these network details:
Default VLAN, where computers and phones are
IoT VLAN, for smart home devices, printers, etc.
Default is allowed to communicate with devices on IoT
IoT is denied from communicating with devices on Default (ACL Deny rule)
I was finally able to get printing to work from MacOS, iOS, and Windows.
Here are the steps that worked for me:
Give the printer a static IP address
Enable IGMP Snooping on both VLANs
Add an mDNS rule for the Printers service from IoT to Default
Add an IP-Port Profile Group for the printer’s IP address and port 631
Add a switch ACL rule permitting that new profile group over TCP to the Default network
I’d found a lot of resources saying to permit various TCP (80, 161, 8289, 9100) or UDP (161, 427, 5353) ports and none of them worked. The key was when I Googled “what port does ipps._tcp.local use” and found TCP port 631.
A big part of the planning for our house included Ethernet wiring because I want to hardwire every device I can, saving the Wi-Fi for devices that require it. It’s much easier and cheaper to get everything wired during the build, instead of adding later. I went through several iterations of the plan and in the end I had the electricians do 42 runs of Cat6:
4 jacks in the office
2 jacks in the office closet
2 jacks in the pocket office
2 jacks in the guest bedroom
4 jacks behind the TV
2 jacks in the living room
2 jacks in the dining room
2 jacks in the pantry
2 jacks in the laundry room
4 jacks in the walk in closet
6 jacks in the master bedroom
10 wires to 5 exterior camera locations (1 extra at each location)
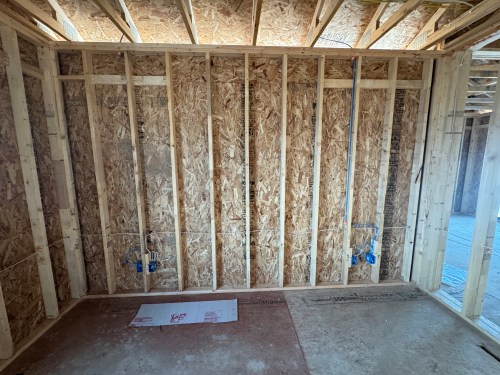
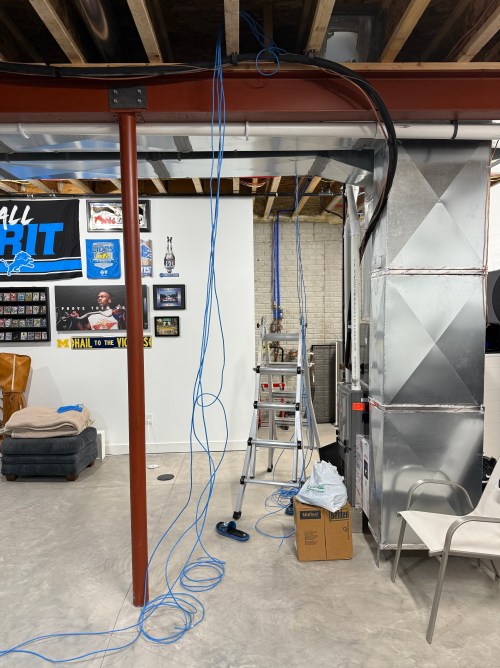
They run it all up through the ceiling. I’m guessing that is to keep it away from most of the electrical. Here’s the master bedroom nightstand wiring as an example.
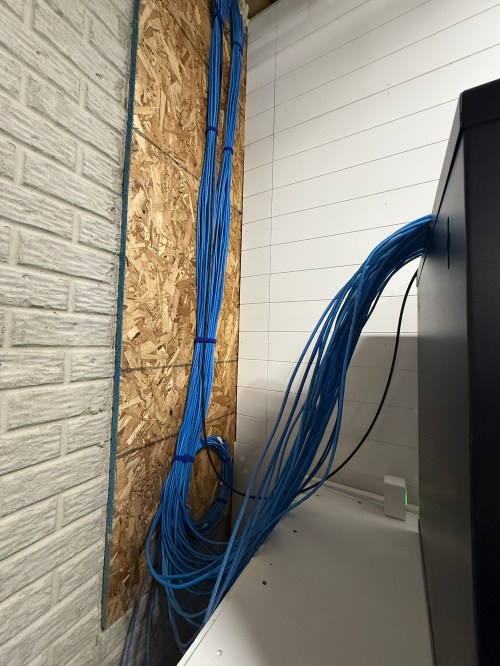
Then all of the cables comes over and down a wall between the laundry room and garage.
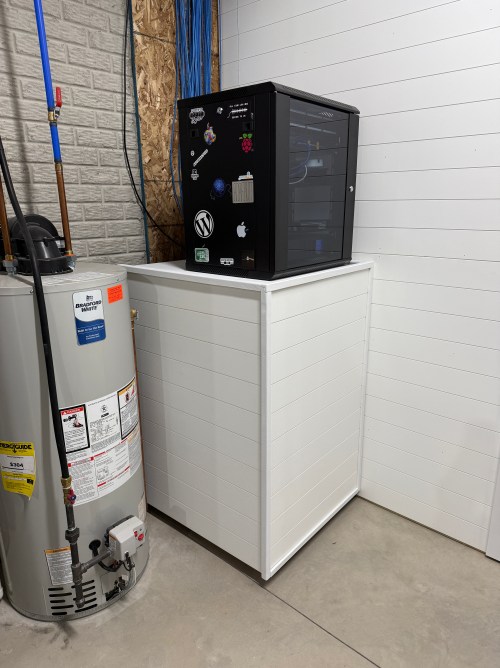
Ending at a single location in the basement.
We built a wall (part 1 & 2) and since we moved in back in August I’d had the cable modem and old eero router sitting on top of the network rack filled with new equipment.
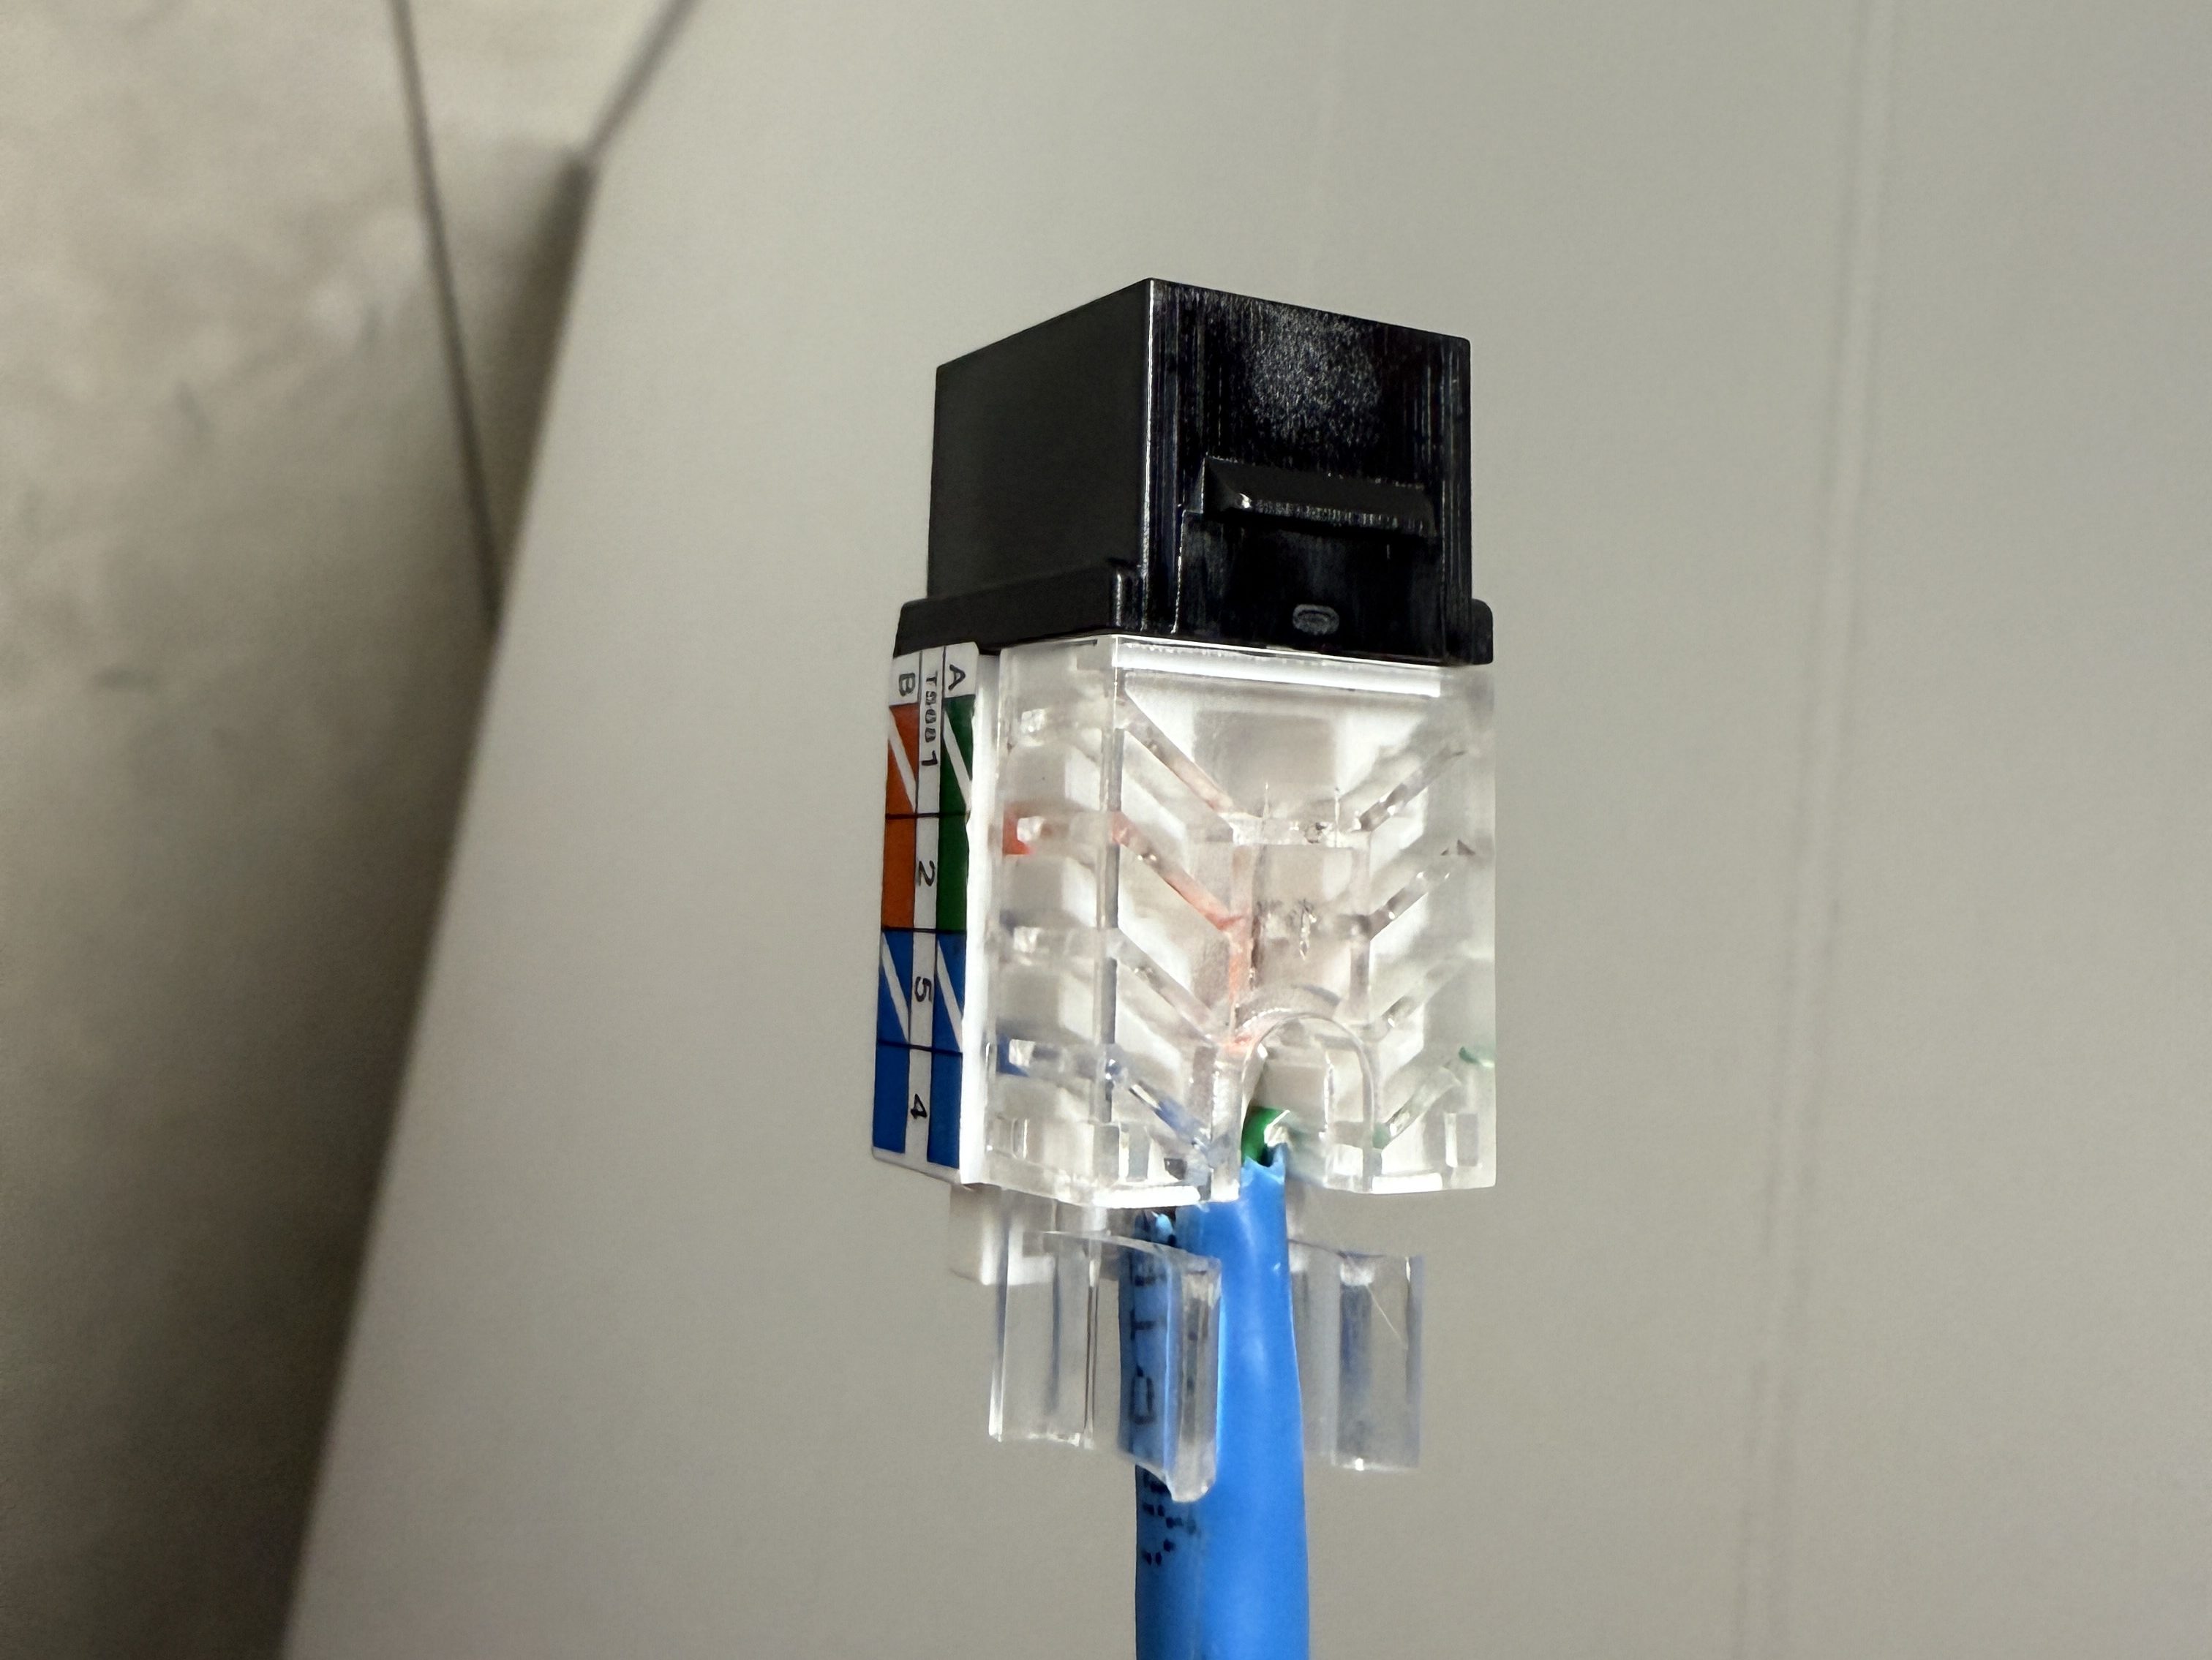
Throughout the house, I put port covers on the unused jacks. Here’s how a wall plate looks with one port open and one covered. The covers will help protect the internals and keep dust out.
What did I buy for my network? A LOT! Here’s all of the stuff for the rack, cables, and tools.
When it came to the actual networking equipment I took a good look at the stuff from Ubiquiti/UniFi. It’s top of the line, which is reflected by the price tag. I decided to go with TP-Link instead, saving a lot of money.
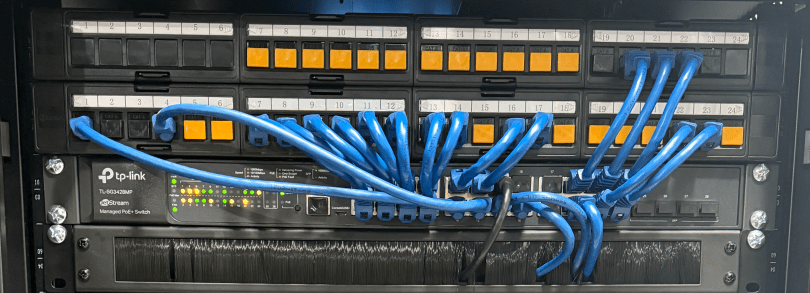
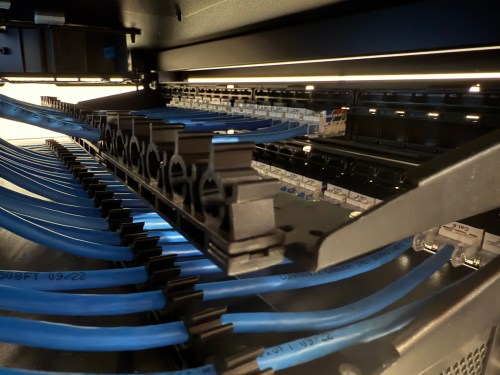
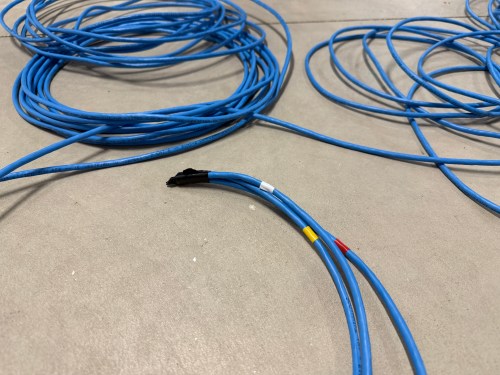
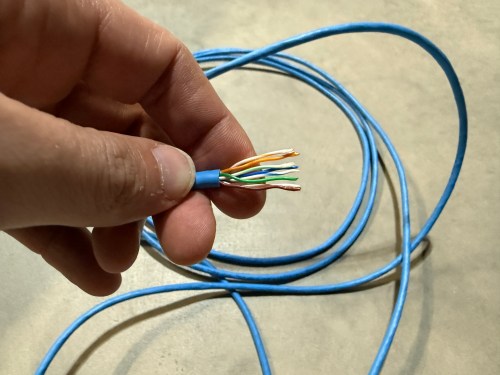
Before I started wiring everything through the rack, I cleaned up the cables.
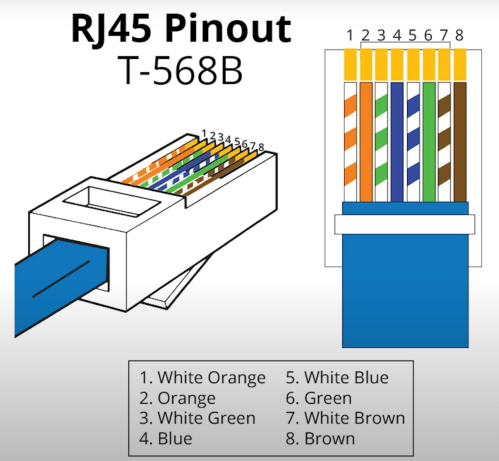
The electricians had done all of the wall jacks throughout the house with the newer T-568B wiring standard, so I followed suit. I learned how to wire the keystone jacks and insert them in to the patch panels.
I’d never done anything like this and it was so much fun. By the end, I was pretty quick with each keystone jack. I highly recommend the Everest 45° ones and the tool for it. The basement needed some Ethernet ports for the golf sim, so I ran four new cables from the rack. I installed a couple of electrical boxes in the ceiling and wired jacks there.
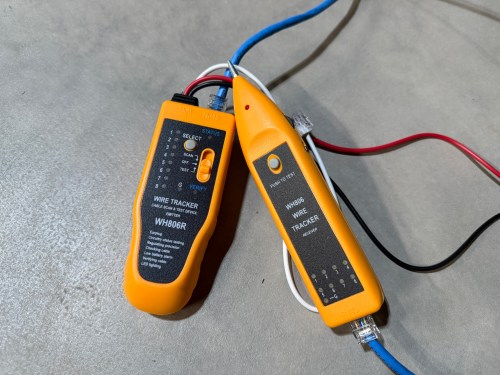
I also needed a custom length Ethernet cable to run from the ceiling jack down to the gaming PC. I’d tried putting RJ45 jacks on the end of an Ethernet cable or two a long time ago and remember it being almost impossible. After watching a quick YouTube video (even though I don’t have pass through connectors), I was able to put both ends on my new cable without a problem and it passed the test.
Then I was able to use patch cables to connect ports on the patch panel to the switch as well as hook up the cable modem, Pi-hole Raspberry Pi, and TP-Link equipment. There’s also a Dell Micro in there, which I’ll cover in a later post about smart home.
When I tried to access the Omada controller I couldn’t bring up the web interface with Chrome on my Mac. After trying a bunch of stuff I checked from my iPhone and it worked. I tried Safari on my Mac which also worked. It turned out I had always prevented Chrome from accessing my local network. I flipped the switch in System Settings and the interface loaded.
At another point I accidentally disabled all of the ports on the switch. The UI splits the switch ports across three pages, and on page two I had clicked the button to select all, unselected a port, and disabled the nine other ports. I quickly realized it disabled 27 of the 28 ports. I was so pissed! Every other UI I’ve ever used will only select the items in view when you click the Select All button, but not the Omada Controller software. In order to get back in I had to access the switch via the USB console, reset the switch to factory settings, and start over.
I’m running four VLANs, named Default, Guest, IoT, and nIoT. IoT is for my Internet of Things (smart home) devices that need to access the Internet and the “n” in nIoT stands for “not” since I don’t want them to access the Internet. The Default and IoT networks are set to get their DNS from my Pi-hole server, which blocks ads and other malicious domains.
Each VLAN has a matching wireless network. The Guest Wi-Fi is set as a guest network, which automatically prevents any device from accessing another. The wireless networks for IoT and nIoT are only set to use the 2.4 GHz band since most of the devices will not work on 5 GHz.
I added mDNS rules for Printers and AirPlay devices from the IoT network to the Default network.
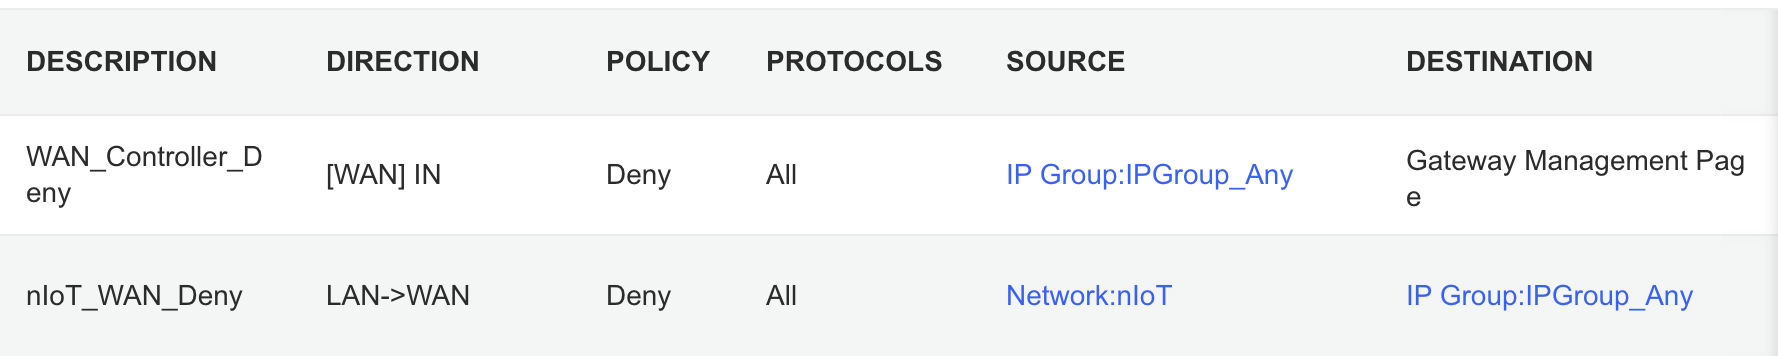
It took me awhile to figure out the ACL rules. I have two for the Gateway. The first prevents any outside IP from accessing my network management page and the second prevents the nIoT network from accessing the Internet.
I ended up with six rules for the switch, since the default behavior of the Omada stuff is to permit everything. With my Pi-hole server on the IoT network I had to allow it’s IP to access anything on the Default network (this should probably be limited to specific ports). I had to allow some ports from the camera IPs to access the Default network and I had to allow some ports from my Home Assistant server to access the Default network. I may find out I need to adjust those ACLs, but more on those smart home aspects in a future post. Then the IoT and nIoT networks are denied from accessing Default and a bi-directional rule prevents the Guest network from accessing any other network.
Seems to be running pretty well. I have some smart home stuff on the network, but haven’t connected any of the light switches yet and have a lot of Home Assistant configuration to do. Originally I didn’t have an access point in the basement, but after a few days realized it was necessary and added one. Here’s a view of the network topology, automatically generated by the Omada controller.
If you upload a floor plan and place walls, the software can even run a wireless coverage simulation. The house has great signal and the yard should get good connections as well.
Power over Ethernet is pretty sweet. It’s so nice not needing power cables for the 10 devices with PoE support.
Time to finish setting up my server and smart home devices. Watch for an upcoming post with all of the details.
Fing is an iOS app that detects devices connected to a network. I ran it about 5 hours in to my DTW->AMS flight last week. Of the 47 devices found, only 12 were reporting as something other than an Apple product.
Mom loved browsing without ads so much during a recent visit she asked me to make a Pi-Hole server for their network. I still can’t believe how much faster browsing is. Great time to grab a Raspberry Pi Zero during Adafruit’s sale.
I had first ready about Hamachi a few months ago on Bryan’s site and finally got around to trying it out this weekend. It’s one slick piece of software. Much easier than setting up a VPN and all that junk.
With Hamachi you can organize two or more computers with an Internet connection into their own virtual network for direct secure communication.
Hamachi is fast, secure and simple. It is also free.
Think – LAN over the Internet.
Think – Zero-configuration VPN.
Think – Secure peer-to-peer.
Access computers remotely. Use Windows File Sharing. Play LAN games. Run private Web or FTP servers. Communicate directly. Stay connected.
I just launched NICKED Up, which will be a type of “home base” for the network of blogs that I run. For full details visit the first post at the new site, titled This is NICKED Up. I’ve closed comments on this post at MDV in order to keep all comments over there.