Home Assistant Air Quality Monitors from IKEA Vindriktning

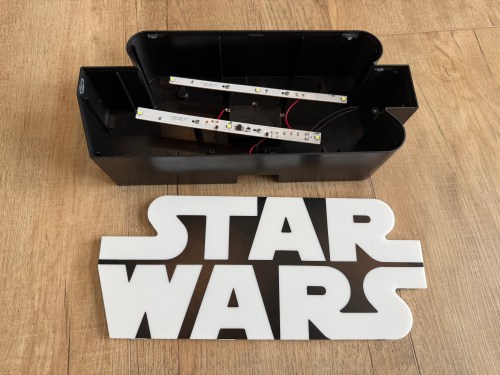
IKEA recently discontinued Vindriktning, their older air quality monitor.

Inside the device, they put a cubic PM1006K particle sensor. I bought three for $16.95 each last year, because I’d seen people hack them by adding sensors and a Wi-Fi microcontroller to send all of the data to Home Assistant. For my modding I bought:

The YouTube video linked above is a great guide to follow. I didn’t connect wires to the fan or the light sensor since I had no use for them. I also didn’t stack my sensors because I wanted the BME280 to be outside of the enclosure, where it would be less affected by the heat produced by the ENS160 and D1.

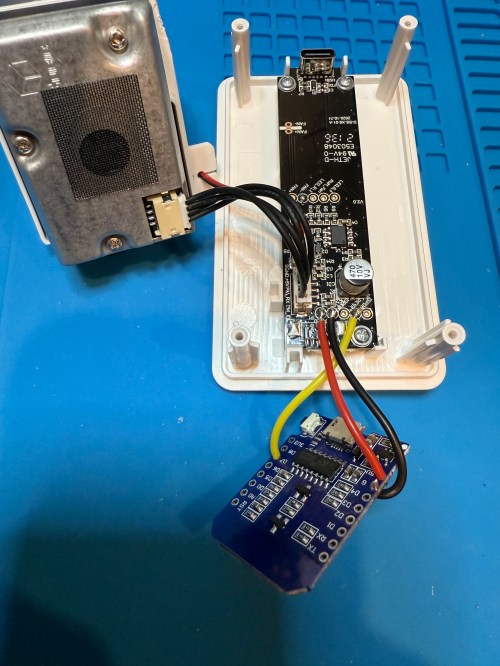
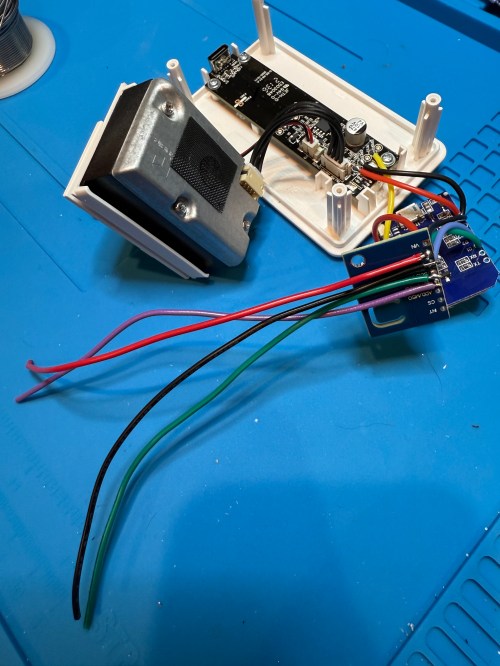
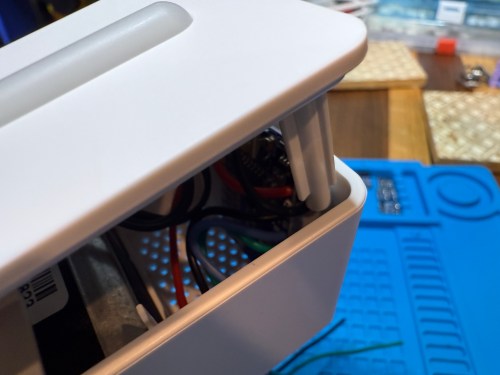
Even with the sensor outside of the case, the BME280 still reads high, because it heats itself up. I actually tested different lengths of wires and placements of the sensor before realizing I was still going to have to adjust the data. An ESPHome filter made the adjustment easy, which I did individually for each unit after comparing to a mobile Ecobee thermostat sensor. This is the code from the unit for my shop.

substitutions:
  slug: shop
  friendly: Shop

esphome:
  name: ${slug}-air-quality
  friendly_name: ${friendly} Air Quality

esp8266:
  board: d1_mini

logger:
  level: WARN

api:
  encryption:
    key: 'xxx'

ota:
  - platform: esphome
    password: 'xxx'

wifi:
  ssid: !secret wifi_ssid
  password: !secret wifi_password
  manual_ip:
    static_ip: xxx
    gateway: xxx
    subnet: 255.255.255.0

i2c:
  frequency: 100kHz

uart:
  - rx_pin: D7
    baud_rate: 9600

sensor:
  - platform: pm1006
    pm_2_5:
      name: PM 2.5µm

  - platform: bme280_i2c
    address: 0x76
    temperature:
      name: Temperature
      id: ${slug}_temp
      filters:
        - offset: -3.38
    humidity:
      name: Humidity
      id: ${slug}_humid
      filters:
        - offset: 7.63
    iir_filter: 16x

  - platform: aht10
    variant: AHT20
    temperature:
      name: AHT21 Temperature
      id: ${slug}_aht21_temp
    humidity:
      name: AHT21 Humidity
      id: ${slug}_aht21_humid

  - platform: ens160_i2c
    address: 0x53
    eco2:
      name: CO²
    tvoc:
      name: VOC
    aqi:
      id: ${slug}_aqi
      name: AQI
    compensation:
      temperature: ${slug}_aht21_temp
      humidity: ${slug}_aht21_humid

text_sensor:
  - platform: template
    name: AQI Rating
    lambda: |-
      switch ( (int) ( id( ${slug}_aqi ).state ) ) {
        case 1: return {"Excellent"};
        case 2: return {"Good"};
        case 3: return {"Moderate"};
        case 4: return {"Poor"};
        case 5: return {"Unhealthy"};
        default: return {"N/A"};
      }

These resources were a huge help when I wired everything up and made changes to the YAML code:

Here is how I’m displaying the data on one of my Home Assistant dashboards.

As I was working on this project I knew I wanted a couple more air quality monitors around the house, which will be finished soon.

Update: I’ve had to make a small update by adding a 47uF capacitor to each ENS160 board, because they have power issues, causing the reading to stop for periods of time. My boards matched up with the right ones in the picture at that link. Here’s a picture of another ENS160 I modified, since it was a tight squeeze to made the modification on the devices I posted about here with everything already wired up. I also realized I was powering these through the 3V3 pin instead of VIN, so I fixed that.

I’ve also improved the display of the data on my dashboard by using mini-graph-card.

Modding a Star Wars LED Sign

Several years ago I bought this sign from T.J.Maxx.

When I plugged it in, I was disappointed. By default it was off with a button on the side to toggle between bright, dim, and off.

I put the sign in a display cabinet with all of the LEGO and I had wanted it to automatically turn on with the rest of the LEDs in the cabinet. I never got to it, so it sat on the shelf for years. Fast forward to setting up home automations at the new house and it was time to fix the problem. The only screw on the back was for opening a battery compartment, so I figured the front had to be snapped in. With a little careful persuasion I gained entry.

I figured the electronics were pretty basic and I was right. The quick fix was to connect the sides of the button/switch.

That worked, but I noticed how flimsy all the wiring was. I replaced the wires going from the USB connector to the board, which had been causing some flickering when bumped.

I was sad at the lack of LEDs though. I could do better, with minimal effort. I took out the circuit boards and found an old five volt LED strip.

With the help of some double-sided tape, I wrapped the strip throughout the case and then also used hot glue.

Much better!

Workshop Dust Collection 2.0: Modding a Harbor Freight 2 HP Dust Collector

I’m going to warn you, this post sucks!

In 2017 I made my own cyclone dust separator with a Ridgid 16 gallon vac. It worked pretty well, but left me wanting something better. Some of the things I wanted in a new system are:

  • More power
  • Larger container
  • Stationary unit
  • Better filtration

What I needed/wanted was something around two horsepower and the clear winner in that category is the one from Harbor Freight. Nothing else even comes close to their price, especially after using a 20% or 25% coupon. In order to make it work really well it needs a lot of mods though.

I looked at some of the complete solutions available and they cost at least a grand. I spent about $540 and could have saved around $100 by going with a cheaper hose and getting creative with connectors. Here’s what I bought:

Sucked my wallet dry!

This is a common project in the woodworking community, so Google can show you to a lot of variations. This 2010 post on lumberjocks.com is almost exactly what I was going for, including the trash can Thien cyclone separator baffle.

Before I get into it, here is the what the Harbor Freight dust collector looks like when it’s assembled and not modified.

hf-dust-collector

I took a few photos during my build. First task was some knolling.

I installed the cyclone kit on the trash can cover and made a Thien baffle.

A very ugly cart was made using scrap wood. The only 2x4s I had were extremely twisted.

I wasn’t sure how the stand was going to support the weight of the motor. Does fine though. I can make it lean if I push on it, but it’s not going to fall over. Most of the time it’ll be sitting in a corner also supported by the trash can under it.

These risers combine with a makeshift wedge, propping up the trash can to mate with the motor.

img_2088.jpg

Here’s the “wedge” platform. I made a design change after the stand had already been built, otherwise it could have been much shorter.

With the trash can and motor jacked up, these layered blocks raise up the bag holder and filter.

img_2090

Two coats of black spray paint.

img_2091

Turned out great, but it takes up a lot of space!

img_2094.jpg

The above picture was featured in Stumpy Nubs video The WORST things you can do in a dusty woodshop.

How is the performance though? I hooked the hose up to my table saw and it started pulling old sawdust out of the saw body. I could actually see things swirling around in there. Huge improvement!

As usual, this project ended up being more work than I expected. I’m really happy with the end result and how well it works. Another upgrade I could make in the future would be to install a larger Rikon impeller for even more airflow.

I’ll have to create some adapters for tools with dust ports smaller than 4″, though the hose kit did come with some for use with 2.5″ ports. Now that I have a system with enough power I can build something around the miter saw.