3-Way Smart Wi-Fi Switch

Last year I installed a bunch of Lutron Caséta switches and remotes with dimming functionality. At the time I forgot to test the ceiling fan in my bedroom. So when I went to use it this summer, I got this nice surprise (turn up the sound)…

Ceiling fans don’t like dimmer switches. I’d done a little searching here and there for a smart 3-way switch alternative, but hadn’t been able to find anything. Then one day while walking through Home Depot I noticed some Leviton Decora Smart switches. I did some research when I got home and ordered a DW15S-1BZ and a DD0SR-DLZ. No dimmers on these. Installation was easy and I can use the ceiling fan again. Check out the difference.

I will mention a few negatives with this Leviton switches. The “remote” is wired in, unlike the Caséta remote which can be placed anywhere. It costs a bit more as well. The last thing probably won’t be a big deal for anyone, but it seems like the system is using a relay because I can hear it click back and forth from across the room when I trigger the switch. The clicking may not be the best for a baby’s room.

Other than those things, the Leviton switches work well so far. Check them out if you’re looking for a 3-way switch.

Home Network Updates

My router had been flaking out, so I picked up a Eero with 1 beacon. Setup was smooth and painless. I decided to use a new Wi-Fi network name, which was not one of my best ideas; reconfiguring about 30 devices was a pain in the ass!hass-io-install

While I was working on my network I took the opportunity to do a fresh install of everything on the Raspberry Pi server running Home Assistant and Pi-Hole. Instead of installing Raspbian and all of the software myself,  I took advantage of Hass.io, which is a preconfigured image and works well. When I first started using Home Assistant, the project was pretty immature so I didn’t use it.

Installing Pi-Hole as a Hass.io add-on is slick. Due to issues with my old router I’d been living without ad blocking for a few weeks and it was horrible. It’s hard going back to a web littered with ads when you’ve been living without them.

Figured I might as well keep going, so I also made a bunch of improvements to the Raspberry Pi Temperature Monitor I use in my garage. Seems to run much more stable, which may also have something to do with the fresh Home Assistant install. Changed a few things with home-assistant-pi as well.

Another big change I made to the server is connecting it to my network via ethernet instead of WiFi. It’s wired in through an AirPort Time Capsule, which is connected to the Eero via a really long cable running through the basement. I bet this has done more than anything to improve the stability and consistency of my system. A bonus of this connection change is the Speedtest reporting inside HA is much more accurate.

Now I need to make time to get more automating done in Home Assistant and publish part 2 and 3 of my home automation series. It’s coming up on a year since part 1, so long overdue.

Home Automation Part 1: Devices

Since I keep putting off a big home automation post due to not having much actual automation done, I’m going to split things up into a series of 3 posts. It’ll make for shorter posts and hopefully motivate me to get my automations done. This first post will share all of the equipment I have around my house, part 2 will be about the software, and part 3 will be about the actual automating.

myq-alertsMyQ Garage Door Opener

Don’t buy one of these. The online service the device communicates with is always having problems. I have mine configured to send me an alert whenever the door is open for at least 30 minutes. Over a 2 day period, all 4 of these notifications shown in the screenshot were incorrect! Happens at least once a month.

I want to see if I can reverse engineer the sensor attached to the door and make my own opener using a microcontroller and a spare remote I have.

Nest Thermostats

My house has a boiler with baseboard heat and 4 heating zones. I have one of these in each location. They work great.

Nest Protects

Alarms for detecting smoke and carbon monoxide. They “talk” to the thermostats as well. I have 3, but hope I never need to find out how well they work.

Nest Cam and the previous Dropcam

One is sitting on an end table pointed at my front door and one is mounted in my garage (mostly so I can check on the garage door if needed).

August Smark Lock with Connect

The lock on my front door. Runs through 4 AA batteries faster than I’d expect, but works great.

Harmony Hub with Ultimate One

I’ve used Harmony remotes for years. Love ’em!

Caséta Wireless

I have 8 switches and 5 remotes (there are a lot of 3-way switches in my house). These were simple to install. Having dimming capabilities is a nice feature.

Belkin Wemo

I have 2 Insight Smart Plugs, 2 Light Switches, and 1 Switch. The thing I like most about the Belkin devices is you don’t need a hub or anything else to control them. Very plug-n-play. I’m not sold on having plugs though. I’m using them for some lamps, but you have to remember not to turn the lamp off with the actual lamp switch otherwise your smart plug is useless.

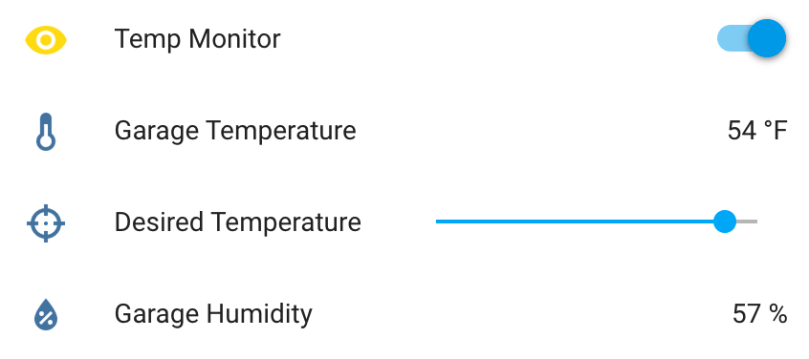
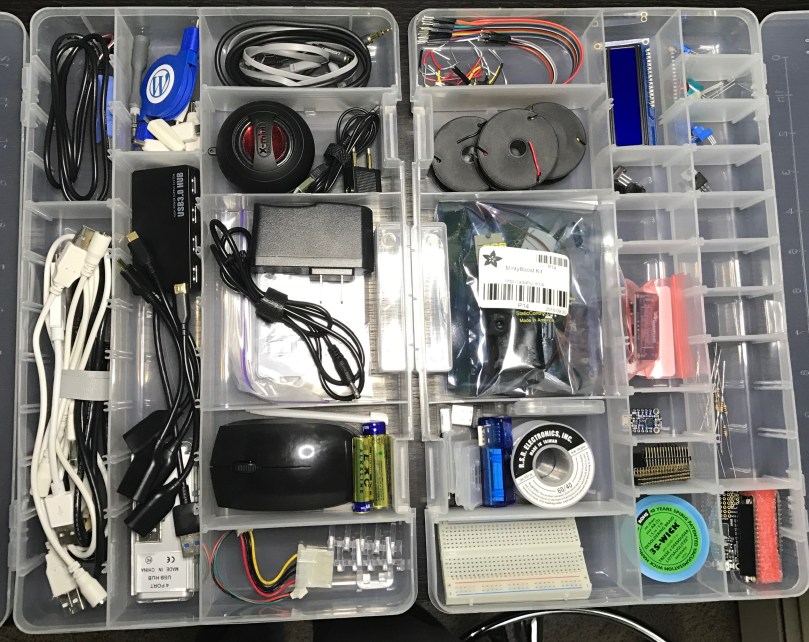
Garage Temperature Sensor/Monitor

Built this device myself using a Raspberry Pi Zero v1.2 and some other electronics parts.

Wink Hub 2

Allows me to access devices from my control system.

Alexa Echo Dot

Maybe my favorite device. I use it every day to control the lights in the main areas of my house.

Automatic Pro

The location and status of my car feeds into my system so I can automate other things.

iPhone – Siri

I don’t use this much anymore with the Echo. Still comes in handy for quickly controlling something though. Will also use the iPhone location for automations of home/away status.

None of the stuff is cheap. We’re still in the early stages of home automation. Watch out in the next couple of years.

Some things I plan to add are:

  • A moisture sensor near my sump pump so I can be alerted right away if something goes wrong. Maybe some sensors in bathrooms as well.
  • This summer I plan to replace a couple of old in-wall AC units. One no longer works and the other is mostly broken. I’ll be buying units I can automate and control.

If you have questions about anything here, let me know.

Garage Monitor Updates

I made some updates to the Garage Temperature Sensor & Monitor. I didn’t like how the desired temperature was set via the app’s configuration file, so I moved it to a slider control in Home Assistant and updated the LCD to always show the value. Only being able to enable/disable monitoring via the device’s button also wasn’t great. I converted the binary sensor I was using to flag monitor mode in HA to a switch control and moved the actual monitoring logic from the Python app to HA automation. Everyhing is updated on GitHub.

updated-garage-monitor-ha.png
Info and controls in Home Assistant
img_8761
Custom temperature and humidity monitor

A New Hobby

My recent Raspberry Pi project combined with more and more interest in home automation led me down a road I didn’t expect. I find some of the home automation products out there limiting. What if I could mess around and build some of my own devices?

I’ve been thinking about putting some type of temperature sensor in the garage for a while. I heat the garage up in the winter for workouts quite often and never know when it’s warm enough. I’d found my first project! I’d need another Raspberry Pi and at least a temperature sensor. I didn’t really know much about extending the functionality of a Pi, other than I’d need to do some soldering and learn a more about electronics, circuits, etc. Enter AdaFruit. It’s a very cool company with an awesome store and a ton of resources to learn.

Adafruit was founded in 2005 by MIT hacker & engineer, Limor “Ladyada” Fried. Her goal was to create the best place online for learning electronics and making the best designed products for makers of all ages and skill levels. Adafruit has grown to over 50+ employees in the heart of NYC with a 50,000+ sq ft. factory. Adafruit has expanded offerings to include tools, equipment and electronics that Limor personally selects, tests and approves before going in to the Adafruit store.

I saw Ladyada’s Electronics Toolkit in their store, which looked like a great way to get started. My favorite item is the “solder sucker” even though I may never use it. Such a cool name.

ladyadas-electronics-toolkit

Then I came across AdaBox.

AdaBox is a quarterly subscription service from Adafruit, centered around products from the Adafruit ecosystem. Each AdaBox will contain a curated set of Adafruit products that will help you get started with do-it-yourself electronics.

Introducing AdaBox!

The second box is shipping out to subscribers soon, but I was too late to jump on board. Lucky for me, they had some AdaBox001 – Welcome to the Feather Ecosystem still in stock, so I ordered one.

adabox-1-contents

It has a wide variety of components. Should help so that I don’t start randomly buying items. I’m hoping to get in on the third subscription, which opens up on the 19th and I will pick up AdaBox002 when it’s available in the store.

Once everything arrived, I started playing around on my kitchen table. I quickly realized it wasn’t the ideal place. I needed a workstation. When I get into something new, I tend to go all-in, which I believe helps me stick with it. So I set a plan to put a second desk in my office and bought more stuff:

I’m excited and really happy with how everything came together.

electronics-workstation.jpg

I found these organizers for about $4 each at Walmart. They work really well for storing all of the tiny pieces.

organizers.jpg

I haven’t built anything yet, but I’m learning a lot and enjoying the process. My list of project ideas is growing and will keep me busy for as long as I want. As a bonus, I now have a standing desk in my office where I can get actual work-work done when I need a break from sitting.