My brother had asked me to help him upgrade some wiring for his shop, because he only had one 15 amp circuit powering the entire shop. Running his planer along with a shop vac would trip the breaker. I’d never installed a circuit breaker, but I was up for the challenge. This weekend I finally got some time to make a trip down.
For the new circuit we decided to use a 20 amp breaker in case he gets a machine that requires more juice. We (Mostly him, because crawling around in the hot attic was all on him.) ran 12/2 Romex wire through the attic and across the porch roof. Then we did a bunch of outlet rewiring to swap two 15 amp outlets with 20 amp ones connected to our new circuit. We also added a new 15 amp outlet from this circuit on the outside of the shop where they could plug in their patio string lights.
We saved the scary part of installing the new breaker for last, which might have actually been the easiest part of the job. The inside of that box is still extremely dangerous when MAIN is turned off, so I just had to be careful not to touch the wrong things (or die). After closing up the box and flipping the switches everything worked as planned!
I’ve been busy with travel, the truck, and summer, so I haven’t posted any projects or videos lately. Several weeks ago I did mess around with a bathroom fan and heater. Here are some pieces of random video from that process.
A few months ago I helped my brother rewire some lights for his shop to use LED bulbs instead of flourescent tubes. I decided to do the same thing for my kitchen light, which had been flickering and didn’t always light up every tube.
Years ago, a friend rhetorically asked me, “Are you an electrician?” after I screwed up some wiring, which left us without heat on the coldest night of the winter. I’d say I’m the perfect man for this job. 😉
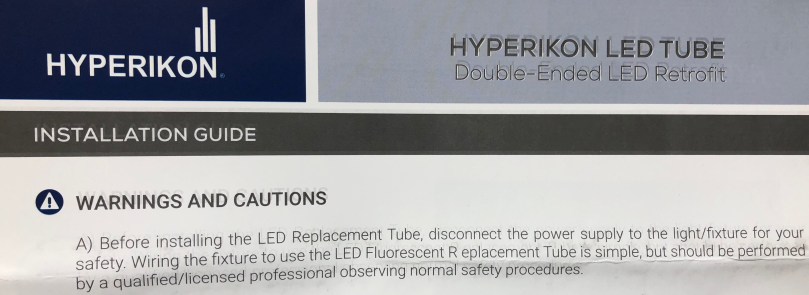
Jokes aside, it is an extremely easy wiring task. Electrical stuff can be scary for a lot of people, so I figured I’d document my process. Fair warning… I am not a professional and I’m not telling you how to do this. This is just an explanation of what I did. I’m also not a lawyer.
I did this at night, guided by some battery-powered LED lights, so the lighting in the photos isn’t very good.
First I TURN OFF THE BREAKER connected to my light. Absolutely no shortcuts here. Then I took the tubes out and removed the fixture covers.
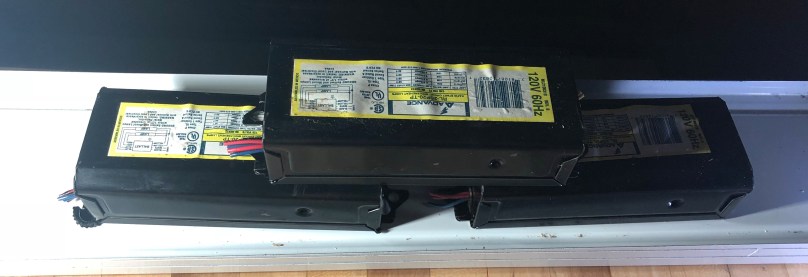
Those black boxes are the ballasts, which limit the current in a circuit. To use LED bulbs those need to be bypassed. I cut all of the wires and removed them.
Then I stripped the ends of every wire I had cut.
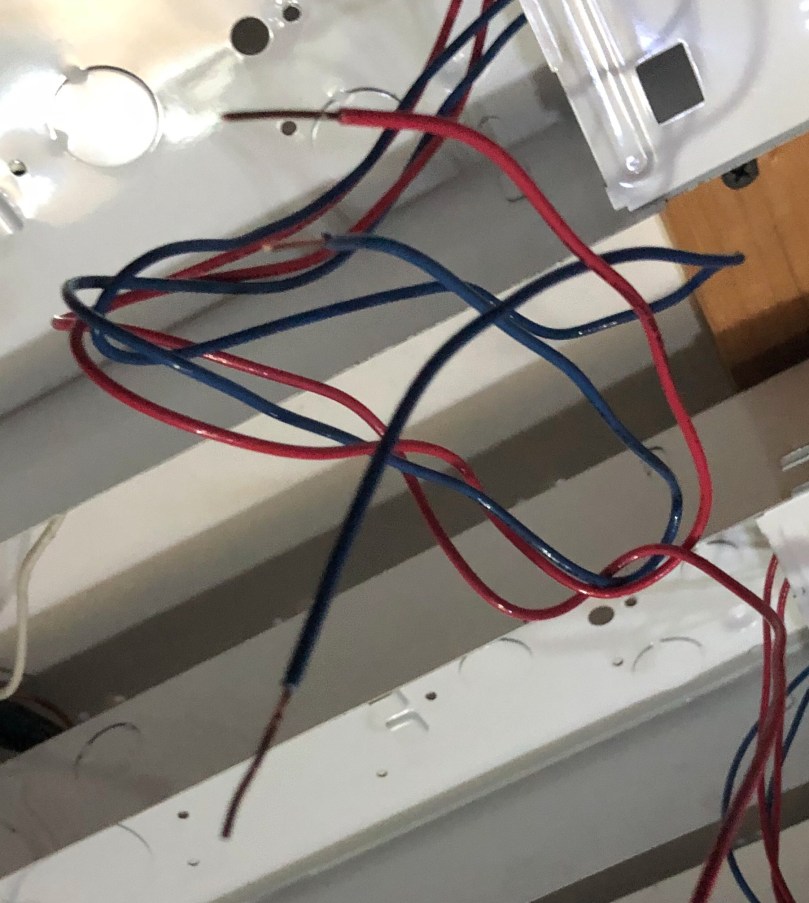
In these particular fixtures, one side used 2 blue and 2 red wires and the other side used 2 yellow wires. The yellow side did use some short white wires to connect one tube to the other, but those white wires were not directly connected to the ballast.
This is the key step. All of the wires on one side of the fixture needed to be connected and then connected to either the black (hot) or white (neutral). It doesn’t matter which side goes to white and which goes to black, but it’s very important that everything on one side of the fixture goes together.
As you can see here I grouped by dark (blue and red to black) and light (yellow to white) colors. I screwed a wire nut on each bundle of wires. When I have 3 or more wires connected like this I gently pull on each wire to make sure nothing will come loose.
Before I closed everything up, I flipped the breaker and made sure the light switch was on. Then I took one LED bulb and tested it in each spot to make sure everything worked. There’s nothing worse than having to take something apart after it’s been closed up. Everything worked great, so I wrapped each wire nut with electrical tape.
For the final step I put the covers back on over the wiring and slipped in the LEDs.
It made a huge difference in my kitchen. Here are some unedited before and after shots.
The camera really shows how green the light was from the flourescent tubes.You can see how much more natural the wood looks.
What happened with that wiring mistake I made years ago? We got drunk and survived a cold night. I woke up early the next morning determined to figure out what I had done wrong. I fixed the mistake and learned not to assume that speaker wire running through a basement ceiling was useless. I’m probably lucky the wires I cut were only used for thermostats instead of something with a higher voltage.
I didn’t let my friend’s joke discourage me from trying. To this day I continue to learn.
I get confused every time I work on a 3-way switch. After I remember to make a diagram to lay out all of the wires I have it makes sense. This was for a Wi-Fi connected switch and “remote” pairing I installed yesterday.
My boiler was having a hard time heating the house for a week or so. After not hearing back from heating companies for several days, on Saturday I woke up to the main floor heating zones being 55° and 58°. Not cool.
It was time for troubleshooting mode. I did a lot of reading and watched a lot of YouTube videos about boiler systems. Eventually I found the problem! The circulator pump has a capacitor for running its motor. This one obviously had blown.
I was able to replace it by stealing the cap out of my spare pump. 🔥 Here is the replacement wired and working, before I put the electrical cover back on.
Simple fix. I bet it would have cost several hundred dollars if one of the heating companies had actually called me back and came to fix this. Plumbing supply web sites don’t even sell the capacitor. They want $55 for a whole new wiring terminal strip! I ordered a new cap for the spare pump on Amazon for less than $4.
After having a cold house for a week I’m even more convinced people are crazy who keep their heat down to save $50 a month instead of giving up something like a daily $3 cup of coffee. I refuse to be uncomfortable in my own house and am very happy to be enjoying 70° again.
The lights in my basement were pretty bad. If you’ve watched any of the videos I’ve done in the workshop you’ve probably noticed. The area pictured below was lit by 2 light bulbs.
Time to fix this so I ordered two sets of 4 LED lights off Amazon. At $20/light I didn’t expect much in terms of quality, but the reviews were solid. They are made with really cheap materials, but function fine. I put 3 of the new lights in this area. Incredible difference!
Each light has a plug instead of wiring and the cord has a switch built-in, which is really nice. I won’t be stuck with my lighting placements if I change my mind and it’s easy to turn individual lights on and off as needed.
The other area of the shop was almost as bad, with some dark corners. It was lit with 3 of the typical tube lights you find in drop ceilings. Here are before pictures…
I wanted to remove the drop ceiling while I was at it so I’d get back about 8 inches of vertical space. I made a time-lapse of this part of the project. Over 6 hours of video at 80x speed to get it down to 5 minutes.
I used the other 5 LED lights in this larger area. When I showed pictures to my buddy he said, “Looks like you painted but it’s only lights.” He’s right! I’m really happy with the results.
I’ve already ordered another batch of lights for the laundry room and bathroom, though I’ll be keeping the ceiling in those locations.
On Saturday I went to help my brother move a thermostat and fix a bit of wiring. You’ll never guess where this cord leads…
The cord (hidden behind the dish washer) takes electricity up to a switch by the kitchen sink, which feeds down to wires under the sink. The wires were laying there with wire nuts. Obviously this was meant for controlling the garbage disposal, so we installed a GFCI outlet and now they can turn it on like you’re supposed to.
I’m come across some weird shit in my old 1979 house, but never anything quite like this. What’s the weirdest wiring configuration you’ve seen?


 Simple fix. I bet it would have cost several hundred dollars if one of the heating companies had actually called me back and came to fix this. Plumbing supply web sites don’t even sell the capacitor. They want


