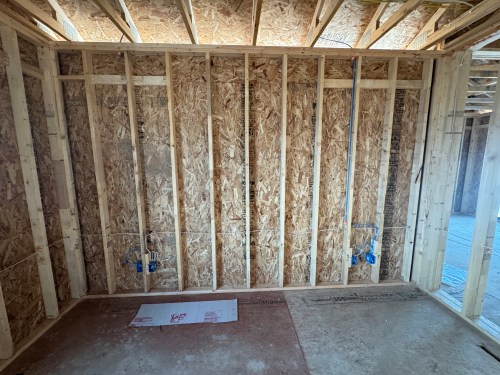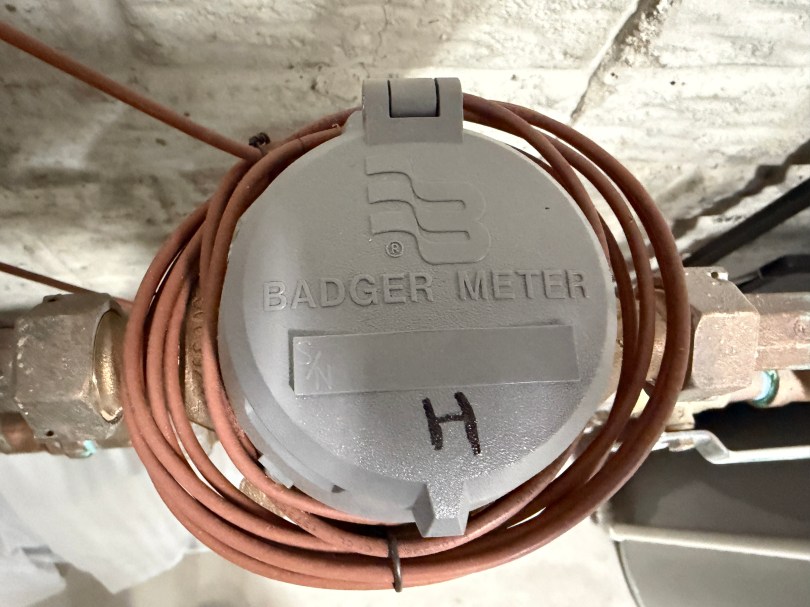
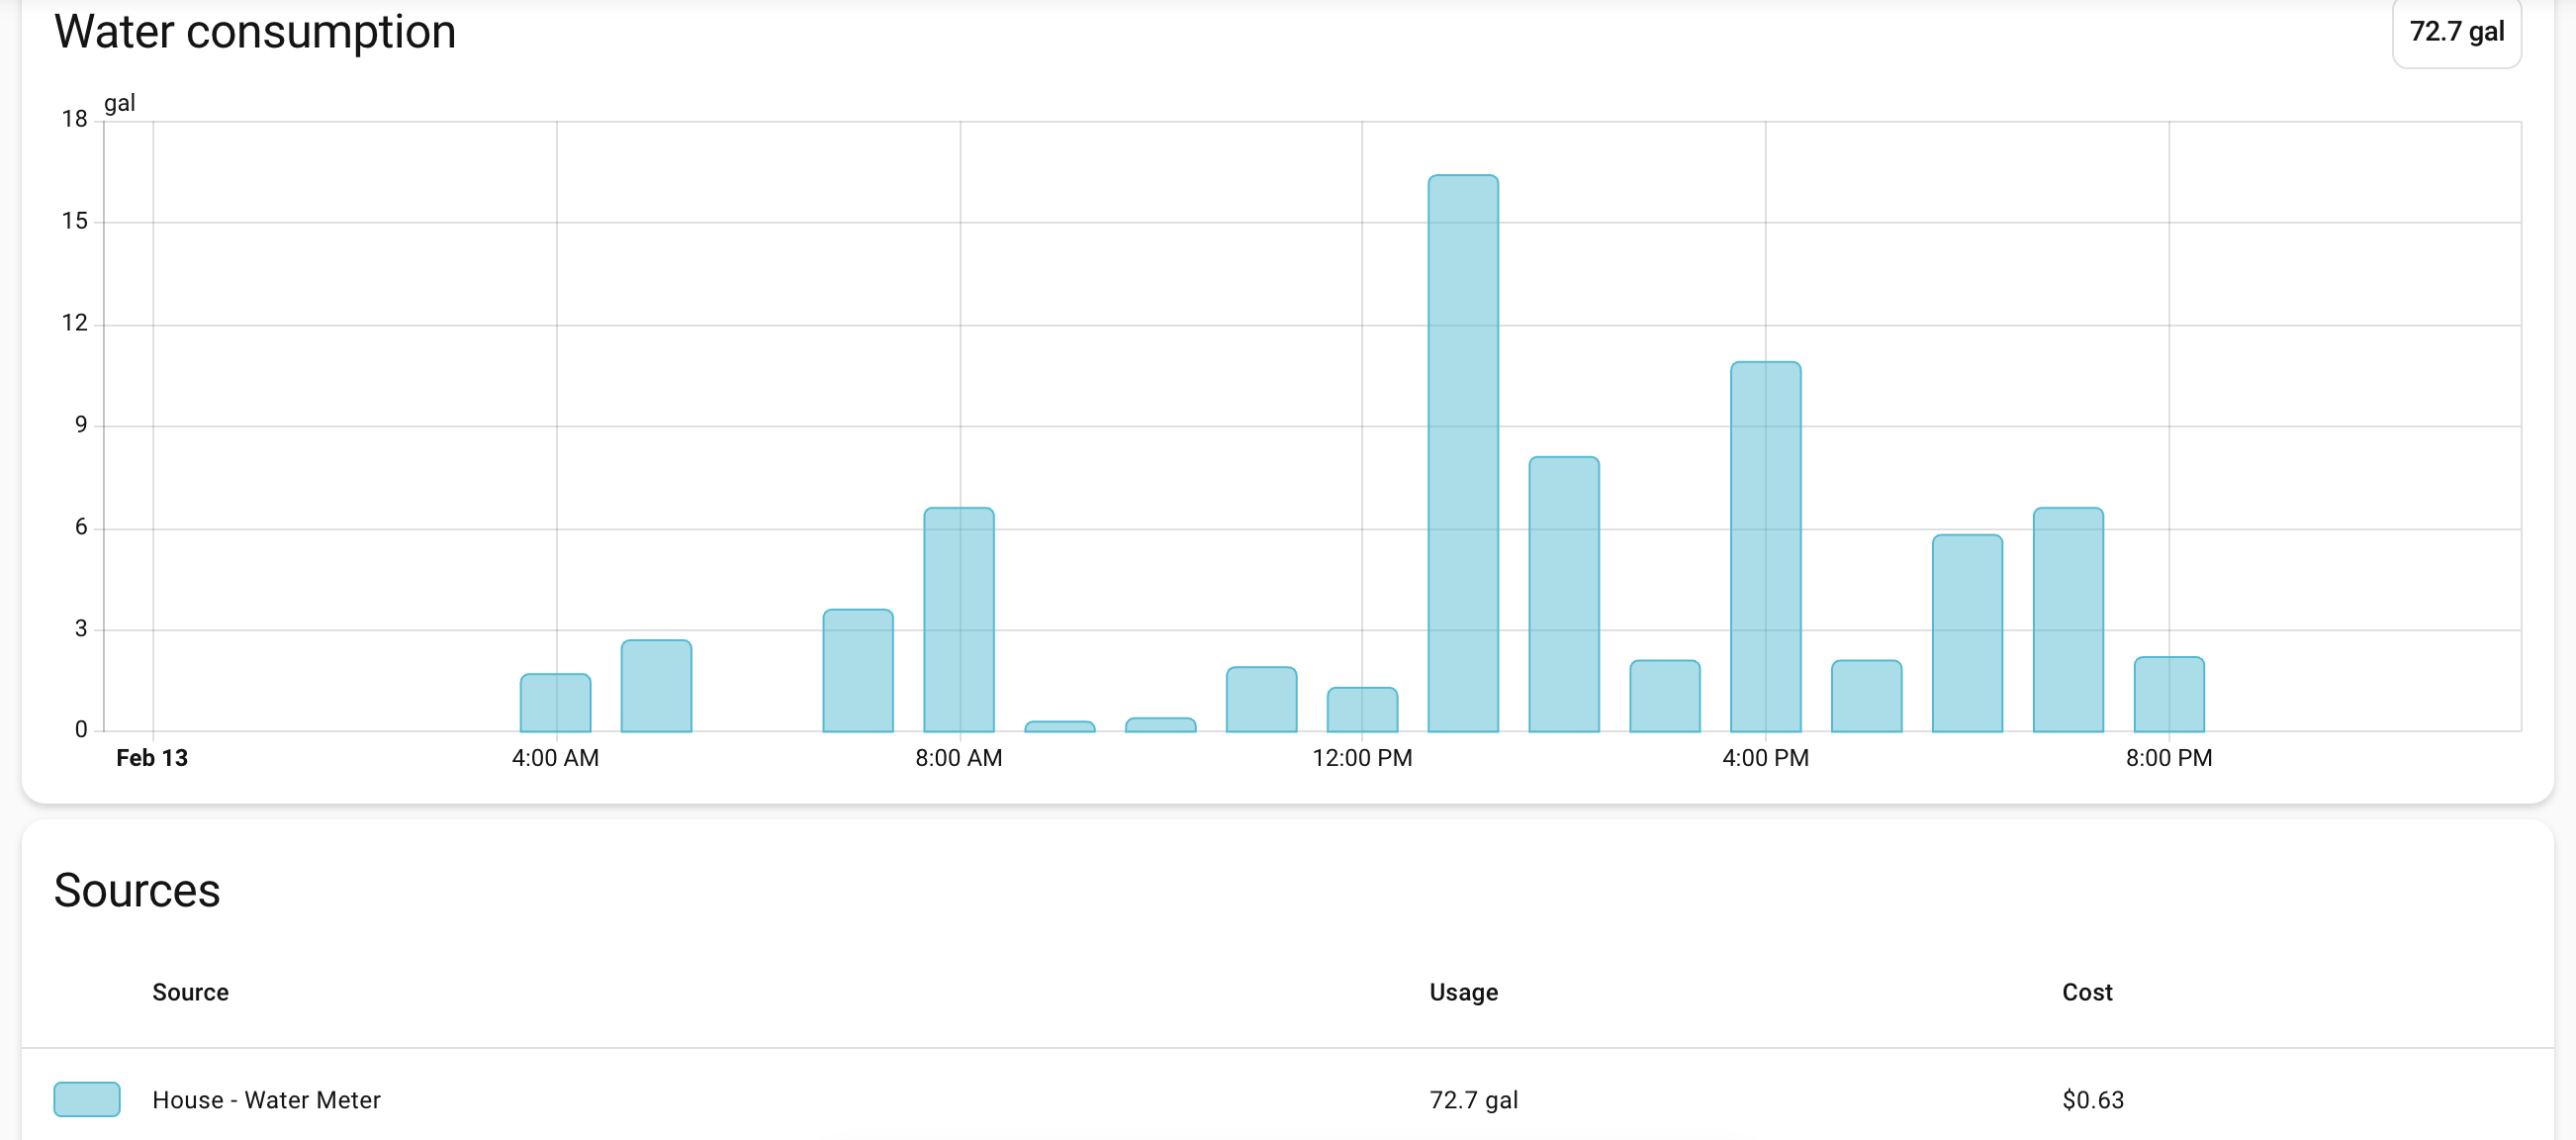
If you have Badger water meters with the Orion Endpoint GIF2014W-OSE, this post should help you read the data for use in Home Assistant. Here is what my meters look like. I have separate lines and meters for the house and outdoor, since they get charged at different rates.

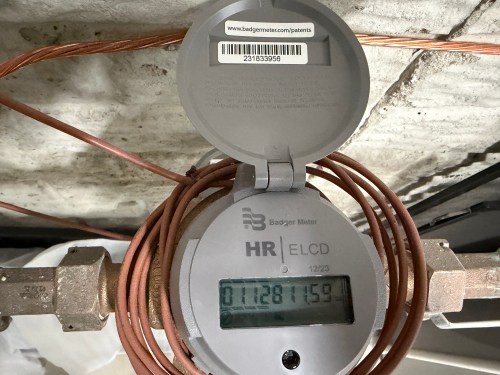
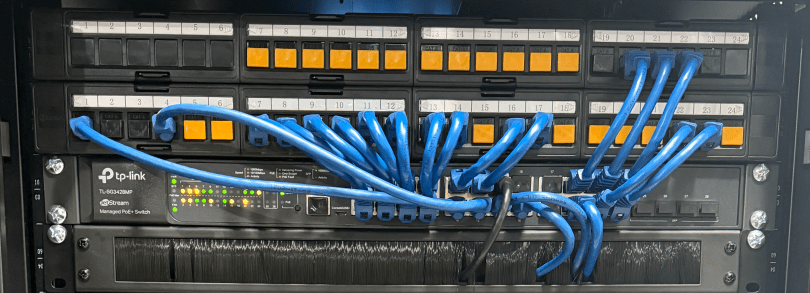
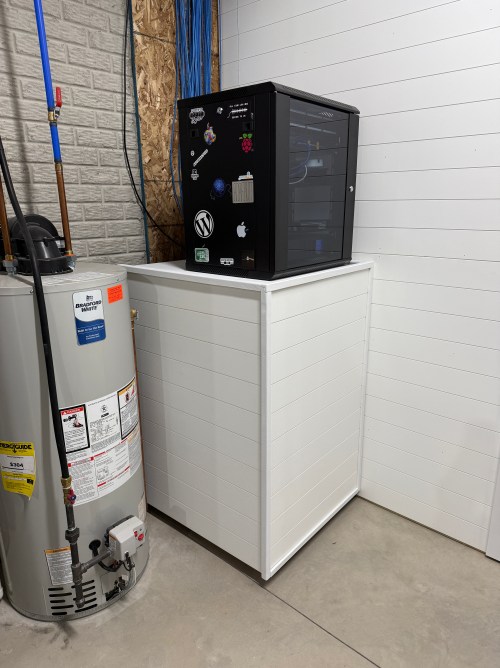
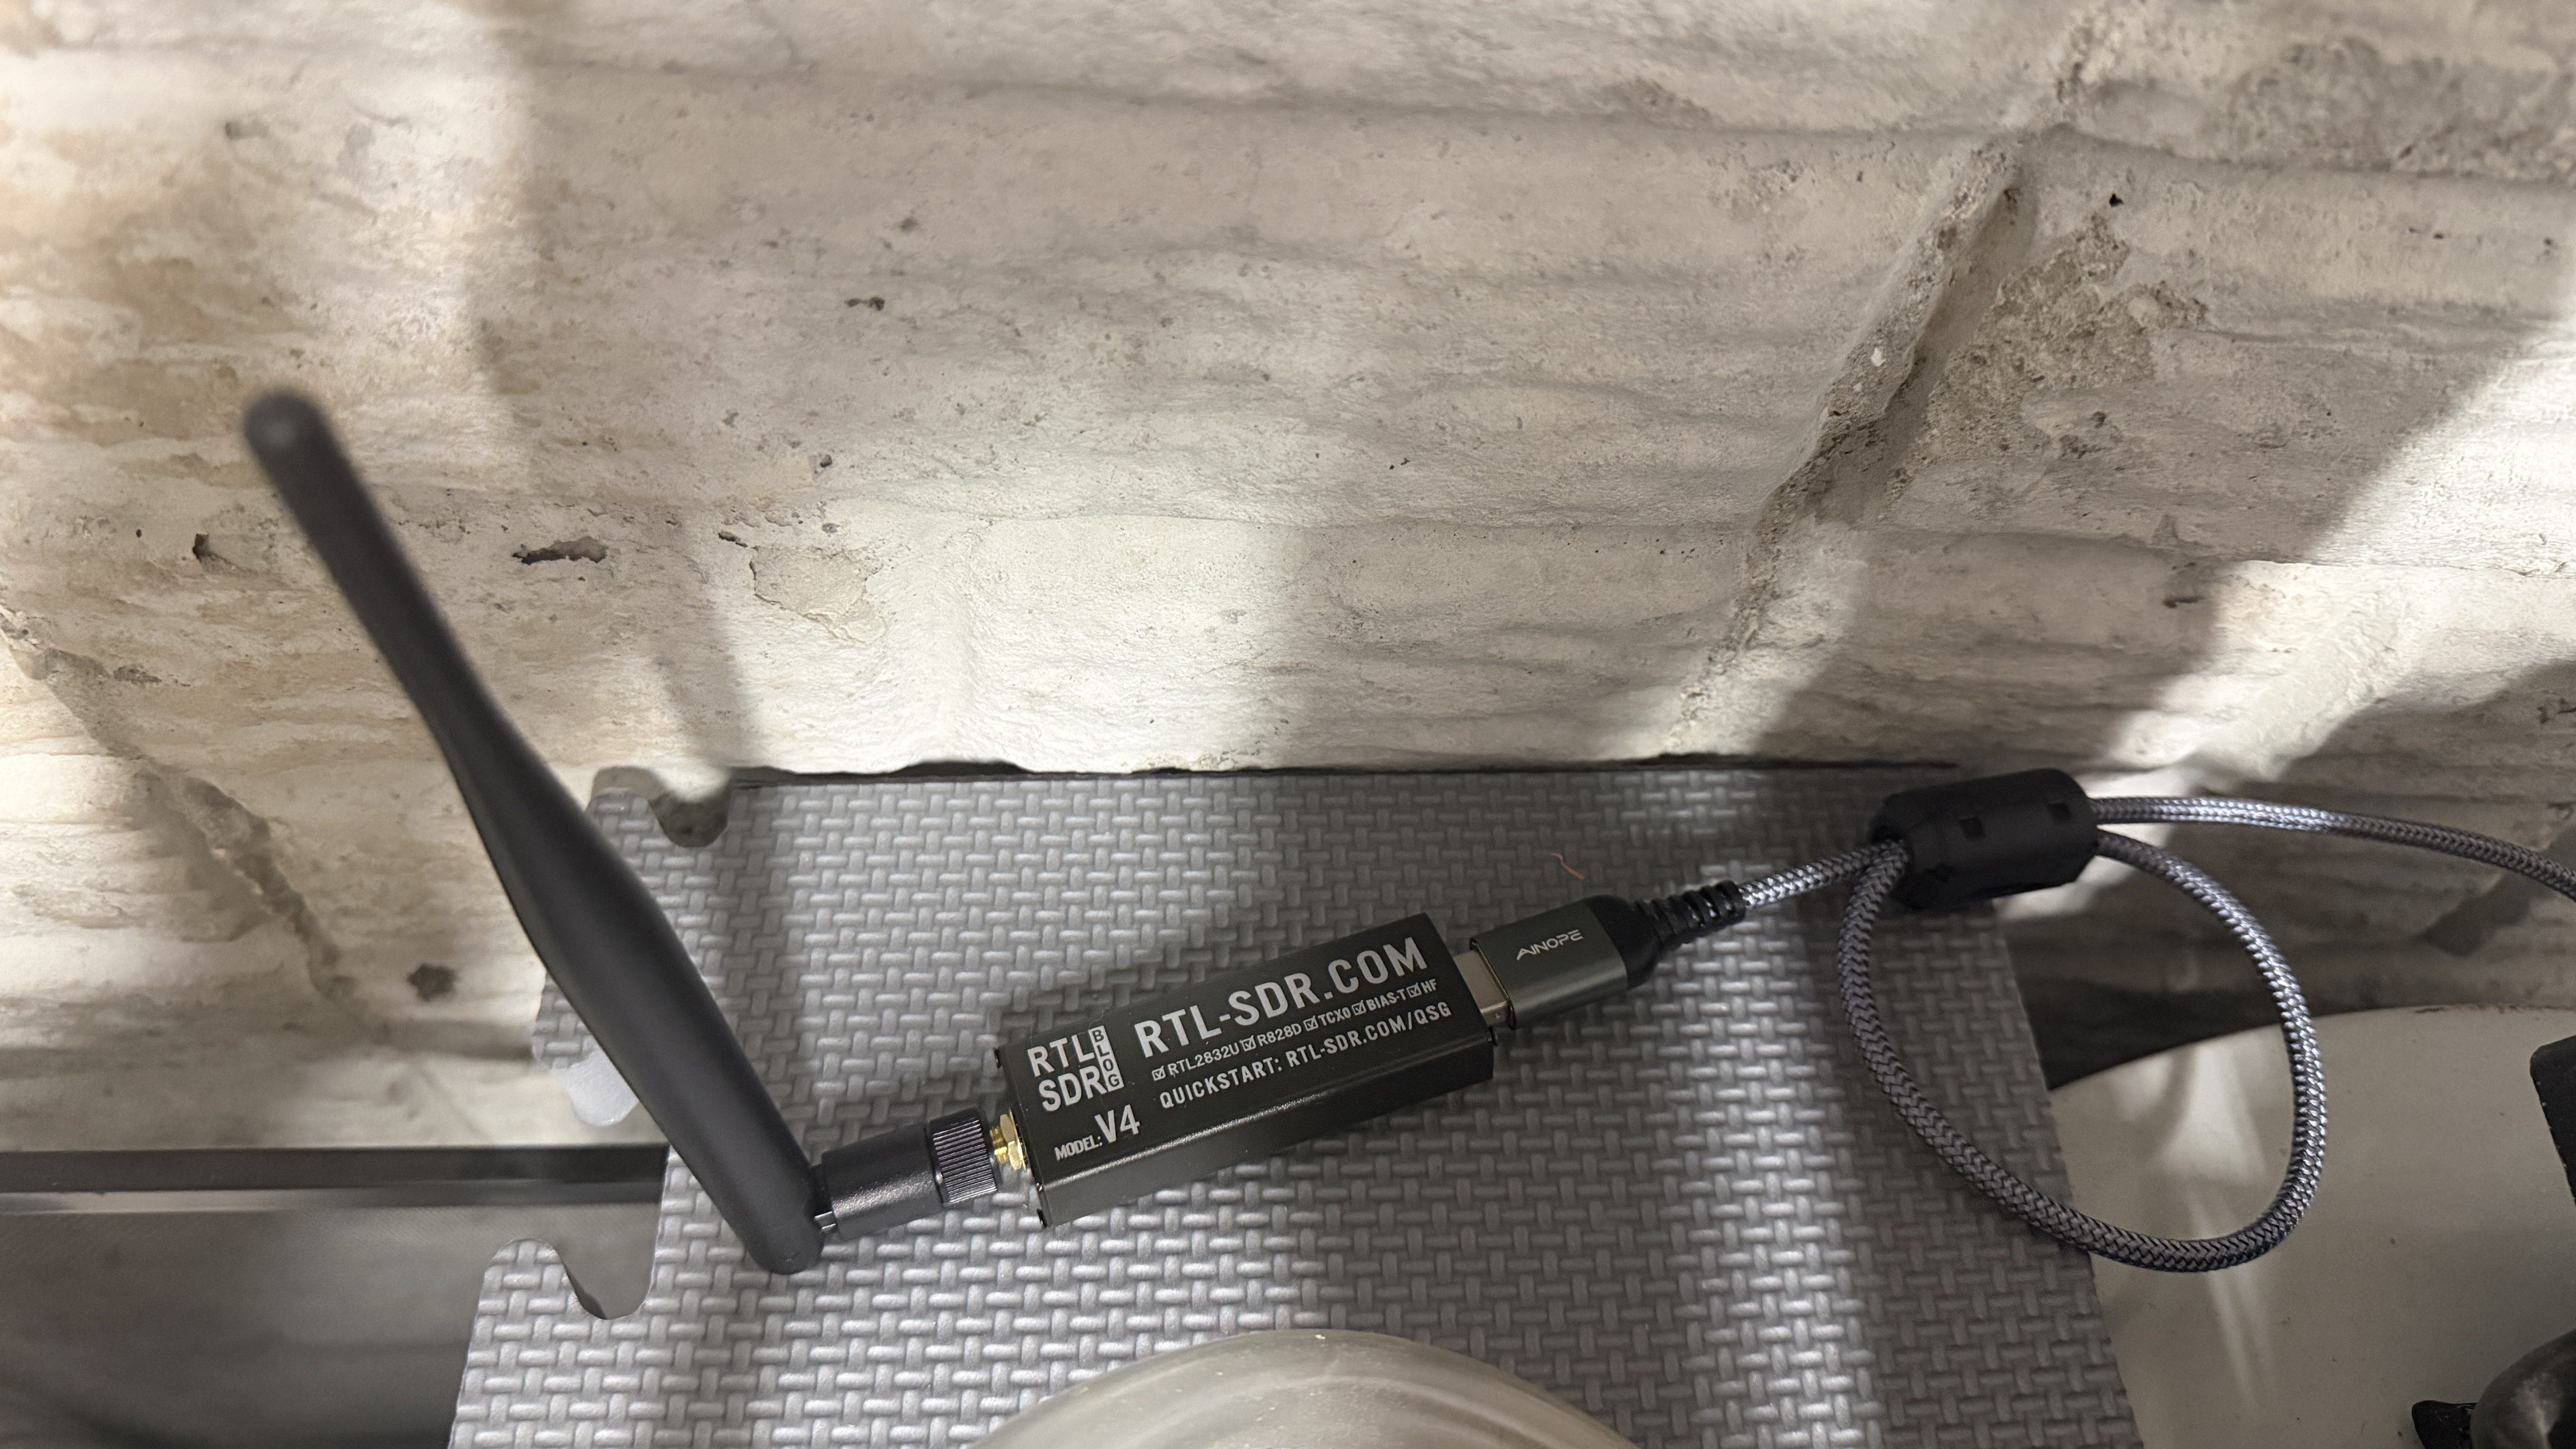
The GIF2014W-OSE broadcasts data from the water meter over radio frequency (RF). Monthly or quarterly the township water department drives around neighborhoods reading these RF signals to determine everyone’s water usage. You can read the same data with a software defined radio (SDR). I’m using a RTL-SDR Blog V4 dongle with a 915MHz LoRa Antenna and ferrite beads (to filter noise) on a USB extension cable. It plugs directly in to my Home Assistant server.
If you want to test the SDR on your computer before setting everything up in Home Assistant check out the rtl_433 repo on GitHub.
To get started in HA, make sure you’re running a MQTT broker. I use the recommended Mosquitto broker. Install the MQTT Explorer and rtl_433 (next) apps. Note, the main rtl_433 HA app wasn’t updated yet with the latest version of rtl_433, which is needed for the GIF2014W-OSE, so that’s why I had to use the (next) version. It may be updated by the time you’re reading this.
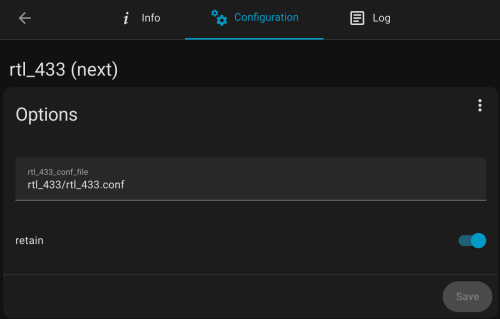
The configuration for the rtl_433 (next) app is stored in a file. I have mine at /homeassistant/rtl_433/rtl_433.conf and here is how my app configuration looks.
Below is a good start for the config file’s contents. Put in your IP address, user, and password.
sample_rate 1600k
gain 28
hop_interval 22
pulse_detect autolevel
pulse_detect minlevel=-35
report_meta level
report_meta noise
report_meta stats:1
output mqtt://[MQTT_IP],user=[MQTT_USER],pass=[MQTT_PASSWORD],retain=1

protocol 282

frequency 905.3M
frequency 906.1M
frequency 906.9M
frequency 907.7M
frequency 908.5M
frequency 909.3M
frequency 910.1M
frequency 910.9M
frequency 911.7M
frequency 912.5M
frequency 913.3M
frequency 914.1M
frequency 914.9M
frequency 915.7M
frequency 916.5M
frequency 917.3M
frequency 918.1M
frequency 918.9M
frequency 919.7M
frequency 920.5M
frequency 921.3M
frequency 922.1M
frequency 922.9M
frequency 923.7M
The water meter endpoint broadcasts across the range of 904.4 to 924.6Mhz and this is going to hop between the 24 frequencies (taken from a GitHub comment) listed in the config every 22 seconds. You may need to tweak the gain, pulse_detect, and other settings depending on your setup. Use your favorite AI to help. If you these next couple of lines to the config file you can see more of what happening, but I wouldn’t leave these in after everything is working.
verbose 7
output json
output log
You can view the HA app’s logs to see more details. When everything is running, open up MQTT Explorer and look for the rtl_433 topics. Hopefully within an hour or two you’ll see something similar to this.
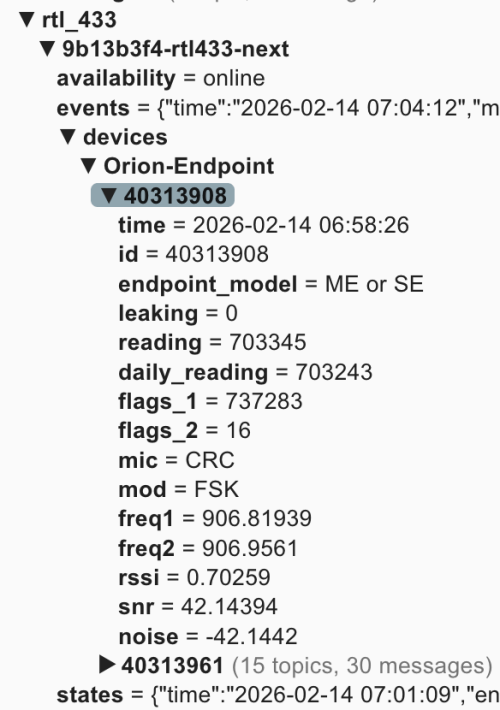
In this screenshot 40338908 and 40313961 are the ids for my meter endpoints. You may see a bunch of other ids for other meters in your neighborhood. You may have physical tags on the devices with their IDs or you can compare the reading values to what is displayed on the water meter.
Now this data can be brought in to Home Assistant. It’ll take some tinkering and customization to fit it all for your HA install. I’m also writing this over a week after setting everything up, so I don’t remember the order of adding everything, but you should be able to do most of it at once and restart. Make sure to update the name, unique_id, source, and state everywhere to fit your needs. The state_topic‘s need to match what you see in MQTT Explorer, and any other cross references have to match your renames. Only use what applies to your situation. If you only have one meter, remove all the outdoor/sprinkler stuff. I’m scraping the Saginaw Township water rates from their web site, so that stuff is going to be very custom, but gives you an idea of what you can do.
In configuration.yaml:
mqtt:
  binary_sensor:
    - name: "House Water Meter Leak"
      unique_id: "house_water_meter_leak"
      state_topic: "rtl_433/9b13b3f4-rtl433-next/devices/Orion-Endpoint/40313908/leaking"
      payload_on: "1"
      payload_off: "0"
      device_class: moisture
    - name: "Outdoor Water Meter Leak"
      unique_id: "outdoor_water_meter_leak"
      state_topic: "rtl_433/9b13b3f4-rtl433-next/devices/Orion-Endpoint/40313961/leaking"
      payload_on: "1"
      payload_off: "0"
      device_class: moisture
  sensor:
    - name: "House - Water Meter"
      unique_id: "house_water_meter"
      state_topic: "rtl_433/9b13b3f4-rtl433-next/devices/Orion-Endpoint/40313908/reading"
      unit_of_measurement: "gal"
      device_class: water
      state_class: total_increasing
      icon: mdi:water-pump
      value_template: "{{ value | float(0) / 10 }}"
    - name: "House - Water Meter Daily Snap"
      unique_id: "house_water_meter_daily_snap"
      state_topic: "rtl_433/9b13b3f4-rtl433-next/devices/Orion-Endpoint/40313908/daily_reading"
      device_class: water
      state_class: total
      unit_of_measurement: "gal"
      entity_category: diagnostic
      icon: mdi:history
      value_template: "{{ value | float(0) / 10 }}"
    - name: "House - Water Meter - Freq 1"
      unique_id: "house_water_meter_freq1"
      state_topic: "rtl_433/9b13b3f4-rtl433-next/devices/Orion-Endpoint/40313908/freq1"
      value_template: "{{ value | float(0) }}"
      unit_of_measurement: "MHz"
      state_class: measurement
      device_class: frequency
    - name: "House - Water Meter - Freq 2"
      unique_id: "house_water_meter_freq2"
      state_topic: "rtl_433/9b13b3f4-rtl433-next/devices/Orion-Endpoint/40313908/freq2"
      value_template: "{{ value | float(0) }}"
      unit_of_measurement: "MHz"
      state_class: measurement
      device_class: frequency
    - name: "Outdoor - Water Meter"
      unique_id: "water_meter_outdoor"
      state_topic: "rtl_433/9b13b3f4-rtl433-next/devices/Orion-Endpoint/40313961/reading"
      unit_of_measurement: "gal"
      device_class: water
      state_class: total_increasing
      icon: mdi:water-pump
      value_template: "{{ value | float(0) / 10 }}"
    - name: "Outdoor - Water Meter Daily Snap"
      unique_id: "outdoor_water_meter_daily_snap"
      state_topic: "rtl_433/9b13b3f4-rtl433-next/devices/Orion-Endpoint/40313961/daily_reading"
      device_class: water
      state_class: total
      unit_of_measurement: "gal"
      entity_category: diagnostic
      icon: mdi:history
      value_template: "{{ value | float(0) / 10 }}"
    - name: "Outdoor - Water Meter - Freq 1"
      unique_id: "outdoor_water_meter_freq1"
      state_topic: "rtl_433/9b13b3f4-rtl433-next/devices/Orion-Endpoint/40313961/freq1"
      value_template: "{{ value | float(0) }}"
      unit_of_measurement: "MHz"
      state_class: measurement
      device_class: frequency
    - name: "Outdoor - Water Meter - Freq 2"
      unique_id: "outdoor_water_meter_freq2"
      state_topic: "rtl_433/9b13b3f4-rtl433-next/devices/Orion-Endpoint/40313961/freq2"
      value_template: "{{ value | float(0) }}"
      unit_of_measurement: "MHz"
      state_class: measurement
      device_class: frequency

scrape:
  - resource: https://saginawtownship.org/departments/public_services/water_distribution.php
    scan_interval: 86400
    sensor:
      - name: "Saginaw House Water Rate Raw"
        select: "article ul li"
        index: 2
        value_template: >
          {{ value | regex_findall_index('Combined:\s*\$?\s*(\d+\.\d+)', ignorecase=True) }}
      - name: "Saginaw Outdoor Water Rate Raw"
        select: "article ul li"
        index: 2
        value_template: >
          {{ value | regex_findall_index('\(Sprinkler Meter\)\s*\$?\s*(\d+\.\d+)', ignorecase=True) }}
In templates.yaml:
- binary_sensor:
  - name: "Outdoor Water Flowing Hourly"
    unique_id: outdoor_water_flowing_hourly
    device_class: moving
    state: >
      {{ states('sensor.outdoor_water_hourly_change') | float(0) > 0 }}
  - name: "House Water Flowing Hourly"
    unique_id: house_water_flowing_hourly
    device_class: moving
    state: >
      {{ states('sensor.house_water_hourly_change') | float(0) > 0 }}
  - name: "Sprinklers Watering"
    unique_id: sprinklers_watering
    device_class: running
    state: >
      {{ is_state('binary_sensor.sprinkler_zone_1_watering', 'on')
         or is_state('binary_sensor.sprinkler_zone_2_watering', 'on')
         or is_state('binary_sensor.sprinkler_zone_3_watering', 'on')
         or is_state('binary_sensor.sprinkler_zone_4_watering', 'on')
         or is_state('binary_sensor.sprinkler_zone_5_watering', 'on')
         or is_state('binary_sensor.sprinkler_zone_6_watering', 'on') }}
  - name: "Outdoor Water Leak Persistent"
    unique_id: outdoor_water_leak_persistent
    device_class: problem
    delay_on: "02:00:00"
    state: >
      {% set water_usage = states('sensor.outdoor_water_hourly_change') | float(0) > 0 %}
      {% set sprinklers_active = states('sensor.sprinklers_active_last_hour') | float(0) > 0 %}

      {{ water_usage and not sprinklers_active }}
  - name: "House Water Nightly Leak Possible"
    unique_id: house_water_nightly_leak_possible
    device_class: problem
    state: >

      {% if now().hour == 6 and now().minute == 0 %}
        {# If water usage increased 7/9 hours from 9p-6a #}
        {# (allowing for minor signal lag and missed reads) #}
        {{ states('sensor.house_water_flowing_9_hours') | float(0) > 6.8 }}
      {% else %}
        {{ states('binary_sensor.house_water_nightly_leak_possible') }}
      {% endif %}
In automations.yaml:
- id: '1770044944973'
  alias: Notify - Water Meter Leak Detected
  description: ''
  triggers:
  - trigger: state
    entity_id:
    - binary_sensor.house_water_meter_leak
    - binary_sensor.outdoor_water_meter_leak
    from:
    - 'off'
    to:
    - 'on'
  actions:
  - action: notify.mobile_app_nickphone
    metadata: {}
    data:
      title: "\U0001F6B0 Water Leak Flag Detected!"
      message: The internal leak flag for {{ trigger.to_state.name }} has been triggered.            This
        usually indicates continuous flow for the last 24 hours.
      data:
        priority: high
        ttl: 0
- id: '1770082584926'
  alias: Notify - Outdoor Water Leak
  description: Alerts family when unexplained water flow persists for 2 hours
  triggers:
  - entity_id: binary_sensor.outdoor_water_leak_persistent
    from: 'off'
    to: 'on'
    trigger: state
  conditions: []
  actions:
  - action: notify.mobile_app_nickphone
    metadata: {}
    data:
      data:
        priority: high
        ttl: 0
        tag: outdoor-leak-alert
        color: '#ff0000'
      title: "\U0001F6B0 Outdoor Water Leak Detected"
      message: 'Unexplained water flow has been detected for over 2 hours. Current
        hourly rate: {{ states(''sensor.outdoor_water_hourly_change'') }} gal.'
- id: '1770084282355'
  alias: Notify - House Water Leak Possible
  description: Water meter usage increased every hour from 9p-6a
  triggers:
  - at: 07:01:00
    trigger: time
  conditions:
  - condition: state
    entity_id: binary_sensor.house_water_nightly_leak_possible
    state: 'on'
  actions:
  - data:
      title: "\U0001F3E0 House Water Alert"
      message: Potential water leak detected! Water usage increased every hour from
        9 PM to 6 AM.
      data:
        priority: high
        ttl: 0
        tag: house-leak-alert
        color: '#ffa500'
    action: notify.mobile_app_nickphone
- id: '1770485349188'
  alias: Count House Water Meter Frequency Updates
  triggers:
  - entity_id: sensor.house_water_meter_freq_1
    trigger: state
  actions:
  - target:
      entity_id: input_number.house_water_meter_freq1_updates_per_hour
    data:
      value: '{{ states(''input_number.house_water_meter_freq1_updates_per_hour'')
        | float(0) + 1 }}'
    action: input_number.set_value
- id: '1770485394121'
  alias: Count Outdoor Water Meter Frequency Updates
  triggers:
  - entity_id: sensor.outdoor_water_meter_freq_1
    trigger: state
  actions:
  - target:
      entity_id: input_number.outdoor_water_meter_freq1_updates_per_hour
    data:
      value: '{{ states(''input_number.outdoor_water_meter_freq1_updates_per_hour'')
        | float(0) + 1 }}'
    action: input_number.set_value
- id: '1770485452657'
  alias: Set - Reset Water Meter Freq Hourly
  description: ''
  triggers:
  - hours: /1
    trigger: time_pattern
    id: scheduled
  - trigger: homeassistant
    event: start
    id: restart
  conditions:
  - condition: or
    conditions:
    - condition: trigger
      id: scheduled
    - condition: template
      value_template: "{{ now().minute < 5 and (last_triggered is none or last_triggered < now().replace(minute=0, second=0, microsecond=0)) }}"
  actions:
  - action: input_number.set_value
    metadata: {}
    target:
      entity_id:
      - input_number.house_water_meter_freq1_updates_per_hour
      - input_number.outdoor_water_meter_freq1_updates_per_hour
    data:
      value: 0
- id: '1770038217308'
  alias: Notify - Saginaw Water Rate Changed
  description: ''
  triggers:
  - entity_id:
    - sensor.saginaw_house_water_rate
    - sensor.saginaw_outdoor_water_rate
    id: rate_changed
    trigger: state
    alias: Saginaw Water Rate Changes
  - entity_id:
    - sensor.saginaw_house_water_rate_raw
    - sensor.saginaw_outdoor_water_rate_raw
    to: unavailable
    for:
      seconds: 30
    id: scrape_failed
    trigger: state
    alias: Saginaw Water Rate Raw Scrape Changes
  actions:
  - choose:
    - conditions:
      - condition: trigger
        id: rate_changed
      - condition: template
        value_template: "{{ trigger.from_state.state not in ['unknown', 'unavailable']
          and \n  trigger.to_state.state not in ['unknown', 'unavailable'] }}\n"
      sequence:
      - data:
          title: "\U0001F4B0 Water Rate Change"
          message: 'Rate for {{ trigger.to_state.name }} has changed! Old Value: ${{
            trigger.from_state.state }} New Value: ${{ trigger.to_state.state }}'
          data:
            priority: high
            ttl: 0
        action: notify.mobile_app_nickphone
    - conditions:
      - condition: trigger
        id: scrape_failed
      sequence:
      - data:
          title: '⚠️ Scrape Error: Saginaw Water'
          message: 'The scrape for {{ trigger.to_state.name }} failed or returned
            non-numeric data.  Stable value of ${{ states(trigger.entity_id.replace(''_raw'',
            '''')) }} is being maintained. Check: https://saginawtownship.org/departments/public_services/water_distribution.php'
          data:
            priority: high
            ttl: 0
        action: notify.mobile_app_nickphone
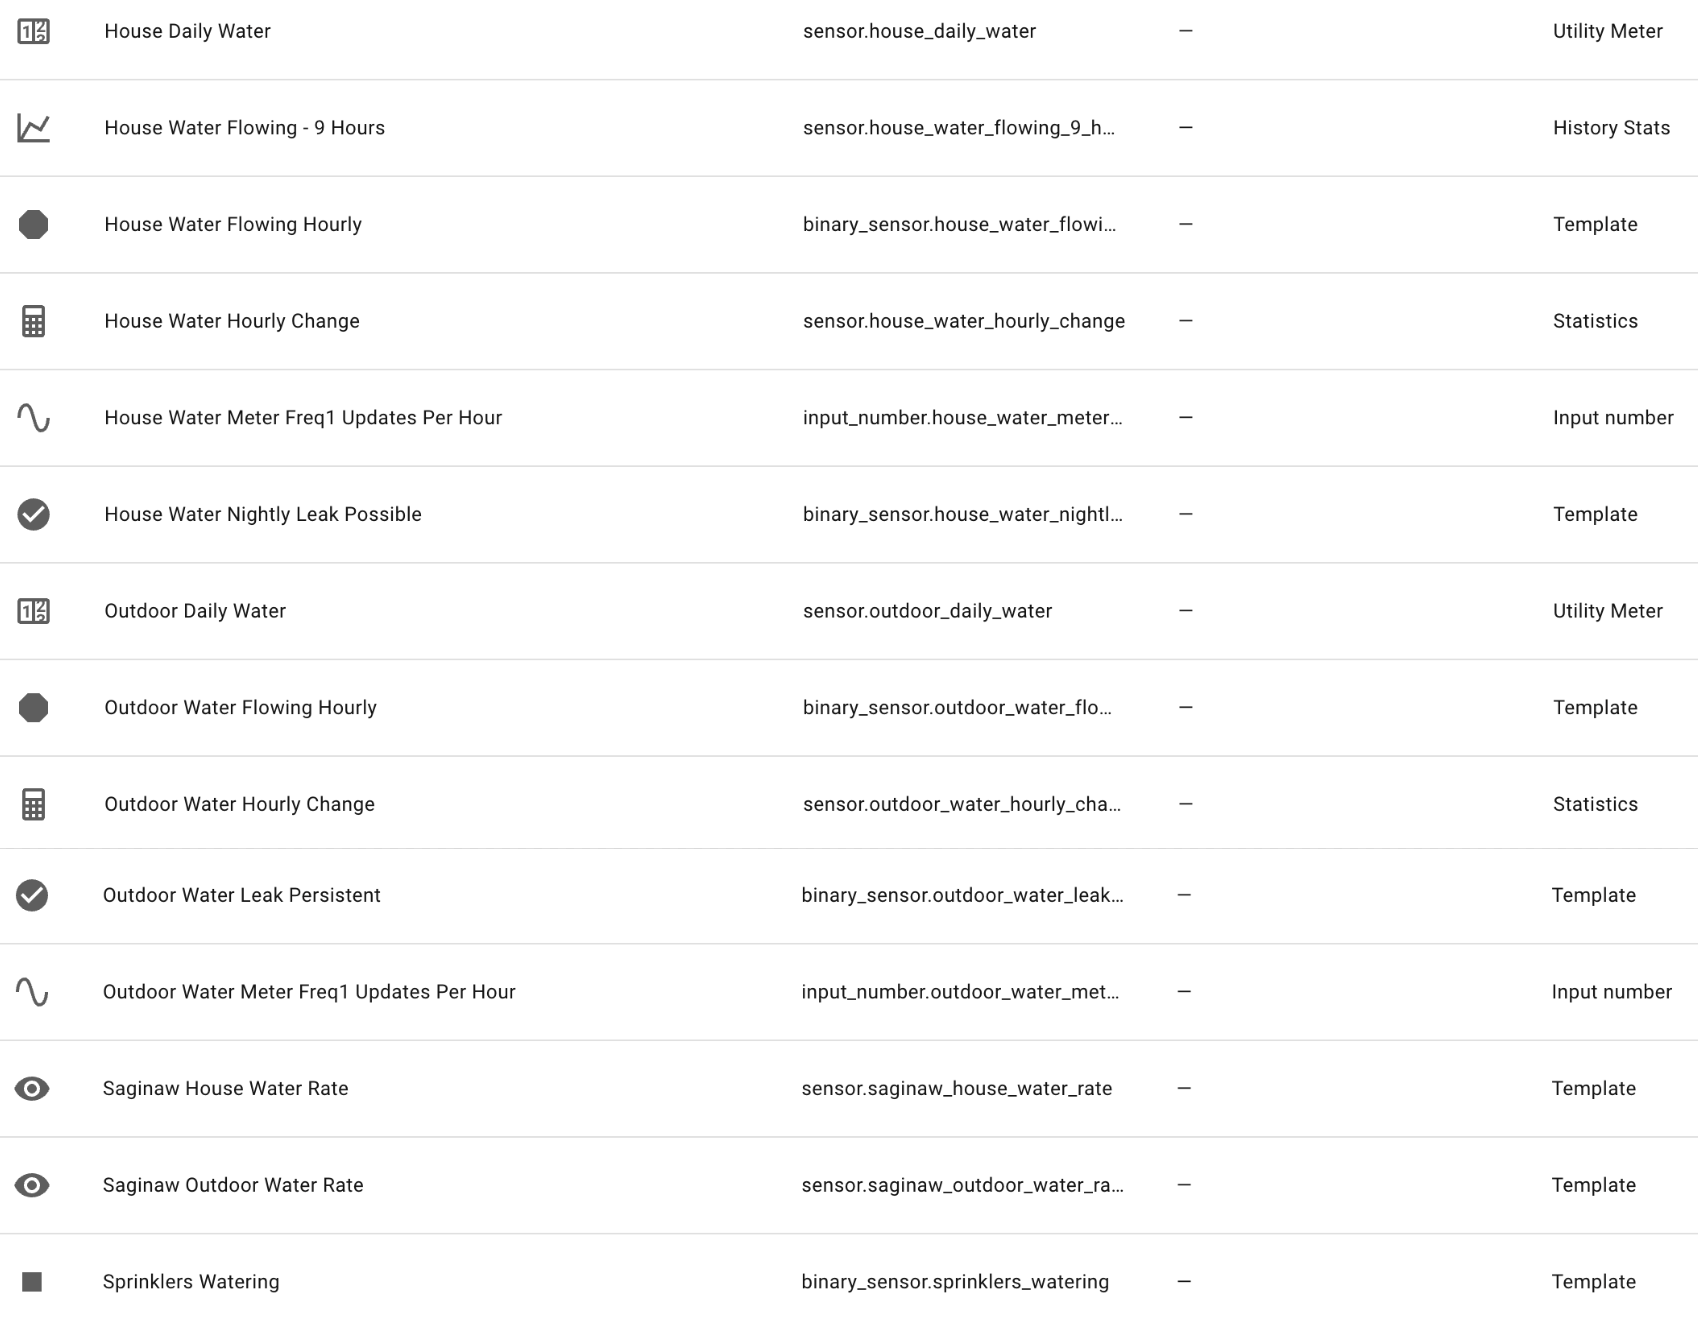
In Devices -> Helpers there are a bunch, but some come from templates above and others when you add the water data to your Energy dashboard (after a reboot and data starts coming in). Here’s my list of helpers:
Some key findings when I started looking at the data. My meters are broadcasting many times per minute, but the gallons used reading only changes at 11 minutes after every hour. They do this to save the endpoint battery I guess. So no realtime data, but hourly is better than nothing.
In the data, there is a leaking flag. From what I’ve read this flag only gets turned on if the usage increases for 24 hours straight. Not great for leak detection, but would have been useful last summer when something busted on a sprinkler line and I didn’t find out for a week or so. I have leak notifications based on these flags, but my custom leak notifications should trigger sooner. If the sprinklers have been off and the outdoor usage increases two hours in a row, I’ll get an alert. If the house usage have been increasing all through the overnight I’ll get an alert in the morning.
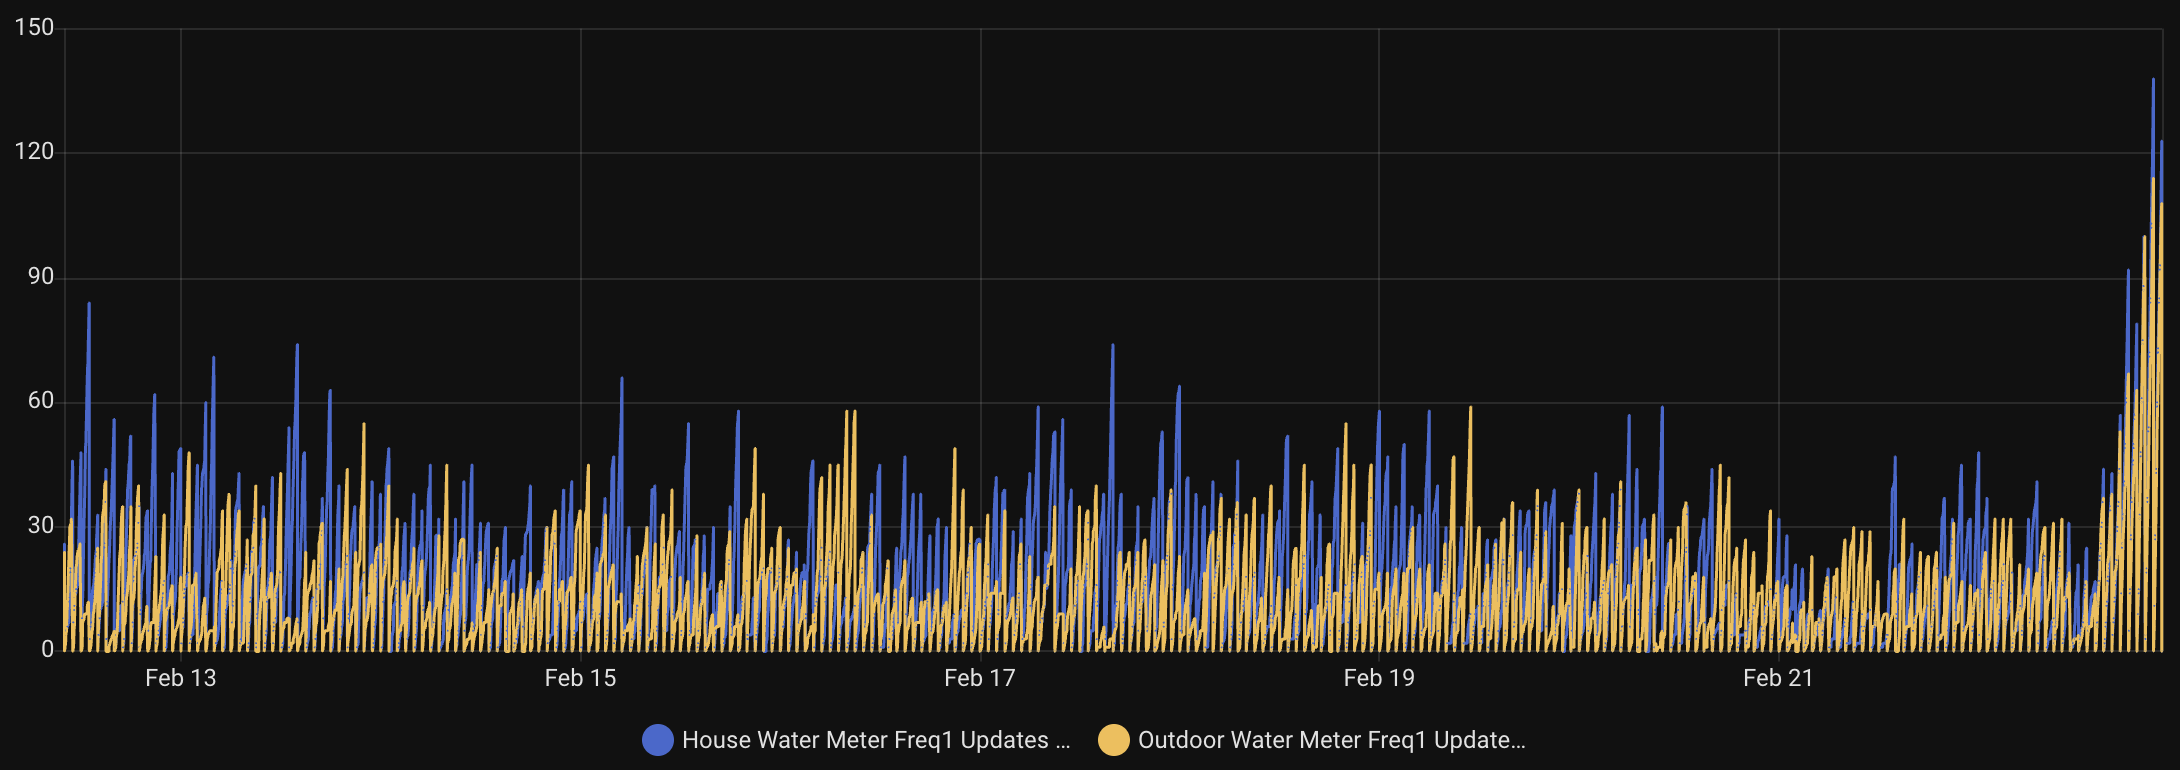
Once everything is setup, let it run. After several days, check out the freq1 sensor data, which should look similar to these graphs.
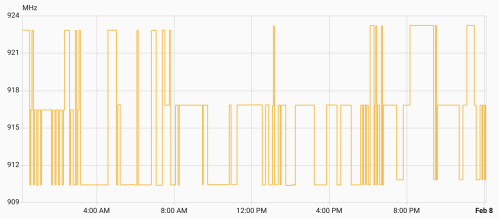
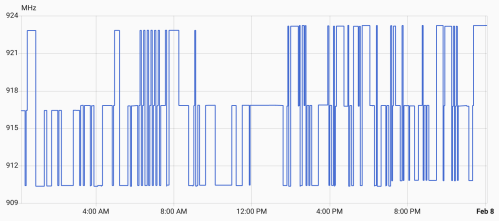
Your meters might be different, but mine hop between three frequencies at a time. There’s a low, medium, and high. Every 8 hours (3:11am, 11:11am, and 7:11pm), one of the frequencies increases by 400MHz, so over the course of a day they all increase. Then one day they all peaked and reset to the lower end of a frequency band.
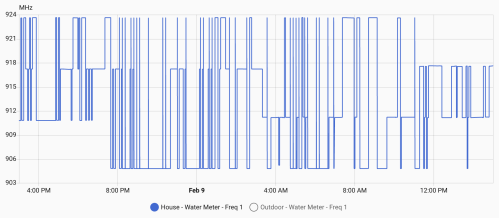
From all this data I knew:
- Low Band: 904.8 – 910.8 MHz with changes at 7:11 pm
- Med Band: 911.2 – 917.2 MHz with changes at 3:11 am
- High Band: 917.6 – 923.6 MHz with changes at 11:11 am
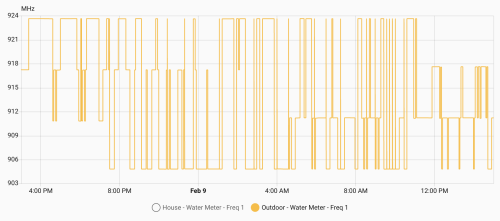
I also tracked how many times per hour I caught data from each meter.
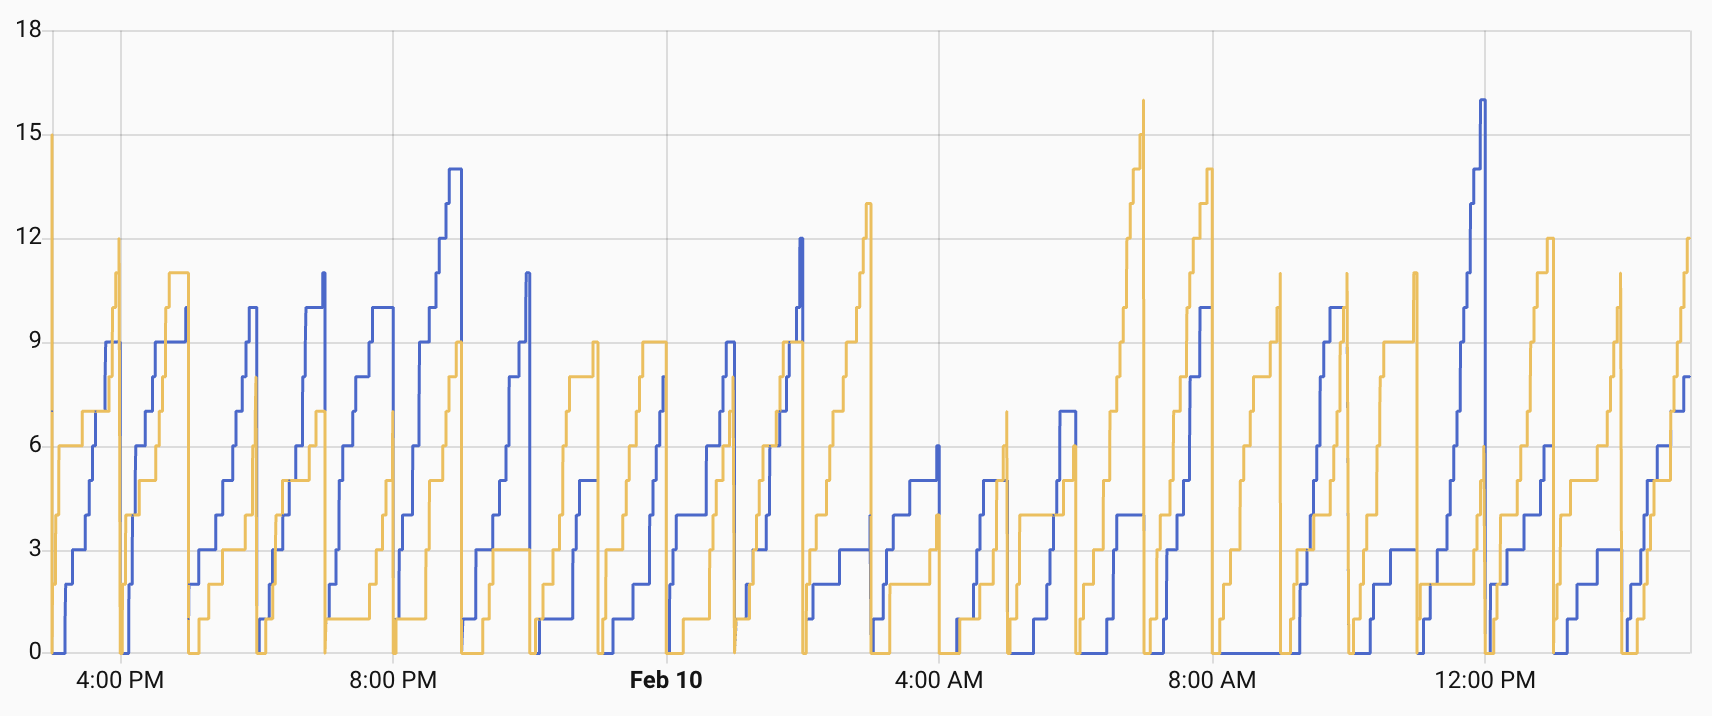
Not bad, but some hours I’d only get one or two data packets for a meter. Technically enough, but there was a risk of missing data. Since I knew the pattern I felt I could do smarter frequency hopping with my SDR to listen for data and then capture a lot more. It worked!
I was getting a lot more reads and rarely less than 10 in any hour. In order to do this I updated the rtl_433.conf file to replace the 24 frequencies with three bands.
# Low band - shifts at 7:11 PM ET (channels 904.8 - 910.8 MHz)
#frequency 904.7M
#frequency 904.9M
#frequency 905.1M
#frequency 905.3M
#frequency 905.5M
#frequency 905.7M
#frequency 905.9M
#frequency 906.1M
#frequency 906.3M
#frequency 906.5M
#frequency 906.7M
#frequency 906.9M
#frequency 907.1M
#frequency 907.3M
#frequency 907.5M
#frequency 907.7M
#frequency 907.9M
#frequency 908.1M
#frequency 908.3M
#frequency 908.5M
#frequency 908.7M
#frequency 908.9M
#frequency 909.1M
#frequency 909.3M
#frequency 909.5M
#frequency 909.7M
#frequency 909.9M
#frequency 910.1M
#frequency 910.3M
#frequency 910.5M
#frequency 910.7M
#frequency 910.9M

# Mid band - shifts at 3:11 AM ET (channels 911.2 - 917.2 MHz)
#frequency 911.1M
#frequency 911.3M
#frequency 911.5M
#frequency 911.7M
#frequency 911.9M
#frequency 912.1M
#frequency 912.3M
#frequency 912.5M
#frequency 912.7M
#frequency 912.9M
#frequency 913.1M
#frequency 913.3M
#frequency 913.5M
#frequency 913.7M
#frequency 913.9M
#frequency 914.1M
#frequency 914.3M
#frequency 914.5M
#frequency 914.7M
#frequency 914.9M
#frequency 915.1M
#frequency 915.3M
#frequency 915.5M
#frequency 915.7M
#frequency 915.9M
#frequency 916.1M
#frequency 916.3M
#frequency 916.5M
#frequency 916.7M
#frequency 916.9M
#frequency 917.1M
#frequency 917.3M

# High band - shifts at 11:11 AM ET (channels 917.6 - 923.6 MHz)
#frequency 917.5M
#frequency 917.7M
#frequency 917.9M
#frequency 918.1M
#frequency 918.3M
#frequency 918.5M
#frequency 918.7M
#frequency 918.9M
#frequency 919.1M
#frequency 919.3M
#frequency 919.5M
#frequency 919.7M
#frequency 919.9M
#frequency 920.1M
#frequency 920.3M
#frequency 920.5M
#frequency 920.7M
#frequency 920.9M
#frequency 921.1M
#frequency 921.3M
#frequency 921.5M
#frequency 921.7M
#frequency 921.9M
#frequency 922.1M
#frequency 922.3M
#frequency 922.5M
#frequency 922.7M
#frequency 922.9M
#frequency 923.1M
#frequency 923.3M
#frequency 923.5M
#frequency 923.7M

# ^ keep blank line
The two uncommented frequencies in each band are the ones on either side of the frequency currently used by the meters. I added a scripts folder and a new update_rtl433_channels.sh file in there.
#!/bin/bash
# update_rtl433_channels.sh
#
# Advances one band's frequency pair in the rtl_433 config.
# Two adjacent frequencies are active per band (channel ± 0.1 MHz).
# Each shift: comment both active, uncomment the next two commented lines.
# At wrap (no more commented lines after active): jump to first two.
#
# Usage: update_rtl433_channels.sh <low|mid|high> [config_path]

BAND="$1"
CONFIG_PATH="${2:-/config/rtl_433/rtl_433.conf}"

if [ -z "$BAND" ]; then
    echo "Usage: $0 <low|mid|high> [config_path]"
    exit 1
fi

if [ ! -f "$CONFIG_PATH" ]; then
    echo "Error: Config file not found: $CONFIG_PATH"
    exit 1
fi

case "$BAND" in
    low)  SECTION="# Low band -" ;;
    mid)  SECTION="# Mid band -" ;;
    high) SECTION="# High band -" ;;
    *)    echo "Error: band must be low, mid, or high"; exit 1 ;;
esac

SECTION_START=$(grep -n "$SECTION" "$CONFIG_PATH" | head -1 | cut -d: -f1)
if [ -z "$SECTION_START" ]; then
    echo "Error: Could not find section '$SECTION' in config"
    exit 1
fi

NEXT_SECTION=$(tail -n +$((SECTION_START + 1)) "$CONFIG_PATH" | grep -n "^# .* band -" | head -1 | cut -d: -f1)
if [ -z "$NEXT_SECTION" ]; then
    SECTION_END=$(wc -l < "$CONFIG_PATH")
else
    SECTION_END=$((SECTION_START + NEXT_SECTION - 1))
fi

echo "Band: $BAND (lines $SECTION_START-$SECTION_END)"

# Find all active (uncommented) frequency lines
ACTIVE_ABS=()
for LINE_NUM in $(seq "$SECTION_START" "$SECTION_END"); do
    if sed -n "${LINE_NUM}p" "$CONFIG_PATH" | grep -q "^frequency "; then
        ACTIVE_ABS+=("$LINE_NUM")
    fi
done

if [ "${#ACTIVE_ABS[@]}" -ne 2 ]; then
    echo "Error: Expected 2 active frequencies, found ${#ACTIVE_ABS[@]}"
    exit 1
fi

FIRST_ABS=${ACTIVE_ABS[0]}
SECOND_ABS=${ACTIVE_ABS[1]}

echo "Active:"
echo "  Line $FIRST_ABS: $(sed -n "${FIRST_ABS}p" "$CONFIG_PATH")"
echo "  Line $SECOND_ABS: $(sed -n "${SECOND_ABS}p" "$CONFIG_PATH")"

# Find the next TWO commented frequency lines after the LAST active line
NEXT_COMMENTED=()
for LINE_NUM in $(seq $((SECOND_ABS + 1)) "$SECTION_END"); do
    if sed -n "${LINE_NUM}p" "$CONFIG_PATH" | grep -q "^#frequency "; then
        NEXT_COMMENTED+=("$LINE_NUM")
        if [ "${#NEXT_COMMENTED[@]}" -eq 2 ]; then
            break
        fi
    fi
done

if [ "${#NEXT_COMMENTED[@]}" -lt 2 ]; then
    # At end of section — wrap to first two
    echo "End of section, wrapping to first two"

    sed -i "${FIRST_ABS}s/^frequency /#frequency /" "$CONFIG_PATH"
    sed -i "${SECOND_ABS}s/^frequency /#frequency /" "$CONFIG_PATH"

    WRAP_LINES=()
    for LINE_NUM in $(seq "$SECTION_START" "$SECTION_END"); do
        if sed -n "${LINE_NUM}p" "$CONFIG_PATH" | grep -q "^#frequency "; then
            WRAP_LINES+=("$LINE_NUM")
            if [ "${#WRAP_LINES[@]}" -eq 2 ]; then
                break
            fi
        fi
    done

    sed -i "${WRAP_LINES[0]}s/^#frequency /frequency /" "$CONFIG_PATH"
    sed -i "${WRAP_LINES[1]}s/^#frequency /frequency /" "$CONFIG_PATH"
else
    echo "Advancing: commenting $FIRST_ABS,$SECOND_ABS, uncommenting ${NEXT_COMMENTED[0]},${NEXT_COMMENTED[1]}"

    sed -i "${FIRST_ABS}s/^frequency /#frequency /" "$CONFIG_PATH"
    sed -i "${SECOND_ABS}s/^frequency /#frequency /" "$CONFIG_PATH"
    sed -i "${NEXT_COMMENTED[0]}s/^#frequency /frequency /" "$CONFIG_PATH"
    sed -i "${NEXT_COMMENTED[1]}s/^#frequency /frequency /" "$CONFIG_PATH"
fi

echo ""
echo "Active frequencies:"
grep "^frequency " "$CONFIG_PATH"
This file needs a permissions change. Install the Terminal & SSH app in HA, start it, open it, and type:chmod +x /config/config/update_rtl433_channels.sh.
In configuration.yaml:
shell_command:
  rtl433_shift_low: 'bash /config/scripts/update_rtl433_channels.sh low /config/rtl_433/rtl_433.conf'
  rtl433_shift_mid: 'bash /config/scripts/update_rtl433_channels.sh mid /config/rtl_433/rtl_433.conf'
  rtl433_shift_high: 'bash /config/scripts/update_rtl433_channels.sh high /config/rtl_433/rtl_433.conf'
In automations.yaml:
- id: '1770813439694'
  alias: RTL 433 - Shift Low Band Frequencies
  description: Advances low band frequencies at 00:11 UTC daily
  triggers:
  - trigger: template
    value_template: '{{ utcnow().strftime(''%H:%M'') == ''00:11'' }}'
    id: scheduled
  - trigger: homeassistant
    event: start
    id: restart
  conditions:
  - condition: or
    conditions:
    - condition: trigger
      id: scheduled
    - condition: and
      conditions:
      - condition: template
        value_template: '{% set m = utcnow().hour * 60 + utcnow().minute %} {{ 11
          <= m <= 16 }}'
      - condition: template
        value_template: '{% set lt = state_attr(''automation.rtl_433_shift_low_band_frequencies'',
          ''last_triggered'') %} {{ lt is none or lt.date() < now().date() }}'
  actions:
  - action: shell_command.rtl433_shift_low
  - delay:
      seconds: 5
  - action: hassio.addon_restart
    data:
      addon: 9b13b3f4_rtl433-next
  - action: homeassistant.update_entity
    target:
      entity_id: sensor.rtl_433_freq_hops
  mode: single
- id: '1770813477228'
  alias: RTL 433 - Shift Mid Band Frequencies
  description: Advances mid band frequencies at 08:11 UTC daily
  triggers:
  - trigger: template
    value_template: '{{ utcnow().strftime(''%H:%M'') == ''08:11'' }}'
    id: scheduled
  - trigger: homeassistant
    event: start
    id: restart
  conditions:
  - condition: or
    conditions:
    - condition: trigger
      id: scheduled
    - condition: and
      conditions:
      - condition: template
        value_template: '{% set m = utcnow().hour * 60 + utcnow().minute %} {{ 491
          <= m <= 496 }}'
      - condition: template
        value_template: '{% set lt = state_attr(''automation.rtl_433_shift_mid_band_frequencies'',
          ''last_triggered'') %} {{ lt is none or lt.date() < now().date() }}'
  actions:
  - action: shell_command.rtl433_shift_mid
  - delay:
      seconds: 5
  - action: hassio.addon_restart
    data:
      addon: 9b13b3f4_rtl433-next
  - action: homeassistant.update_entity
    target:
      entity_id: sensor.rtl_433_freq_hops
  mode: single
- id: '1770813511146'
  alias: RTL 433 - Shift High Band Frequencies
  description: Advances high band frequencies at 16:11 UTC daily
  triggers:
  - trigger: template
    value_template: '{{ utcnow().strftime(''%H:%M'') == ''16:11'' }}'
    id: scheduled
  - trigger: homeassistant
    event: start
    id: restart
  conditions:
  - condition: or
    conditions:
    - condition: trigger
      id: scheduled
    - condition: and
      conditions:
      - condition: template
        value_template: '{% set m = utcnow().hour * 60 + utcnow().minute %} {{ 971
          <= m <= 976 }}'
      - condition: template
        value_template: '{% set lt = state_attr(''automation.rtl_433_shift_high_band_frequencies'',
          ''last_triggered'') %} {{ lt is none or lt.date() < now().date() }}'
  actions:
  - action: shell_command.rtl433_shift_high
  - delay:
      seconds: 5
  - action: hassio.addon_restart
    data:
      addon: 9b13b3f4_rtl433-next
  - action: homeassistant.update_entity
    target:
      entity_id: sensor.rtl_433_freq_hops
  mode: single
Make sure to uncomment the correct frequencies in each band, update the automation trigger times, and make sure the slug for the rtl433-next app is correct. Each time an automation runs the active frequencies are updated for the associated band. Since they should be on both sides of the frequency used by the water meter both can read the RF broadcasts. When it gets to the end of the band’s frequency list, it shifts up to the top of the list. Since I need to make sure these three automations run, even if a restart happens at trigger time, there is some retry logic built in.
A lot of this is dependent on your water meters and situation, but hopefully it gives you enough information to make it work.
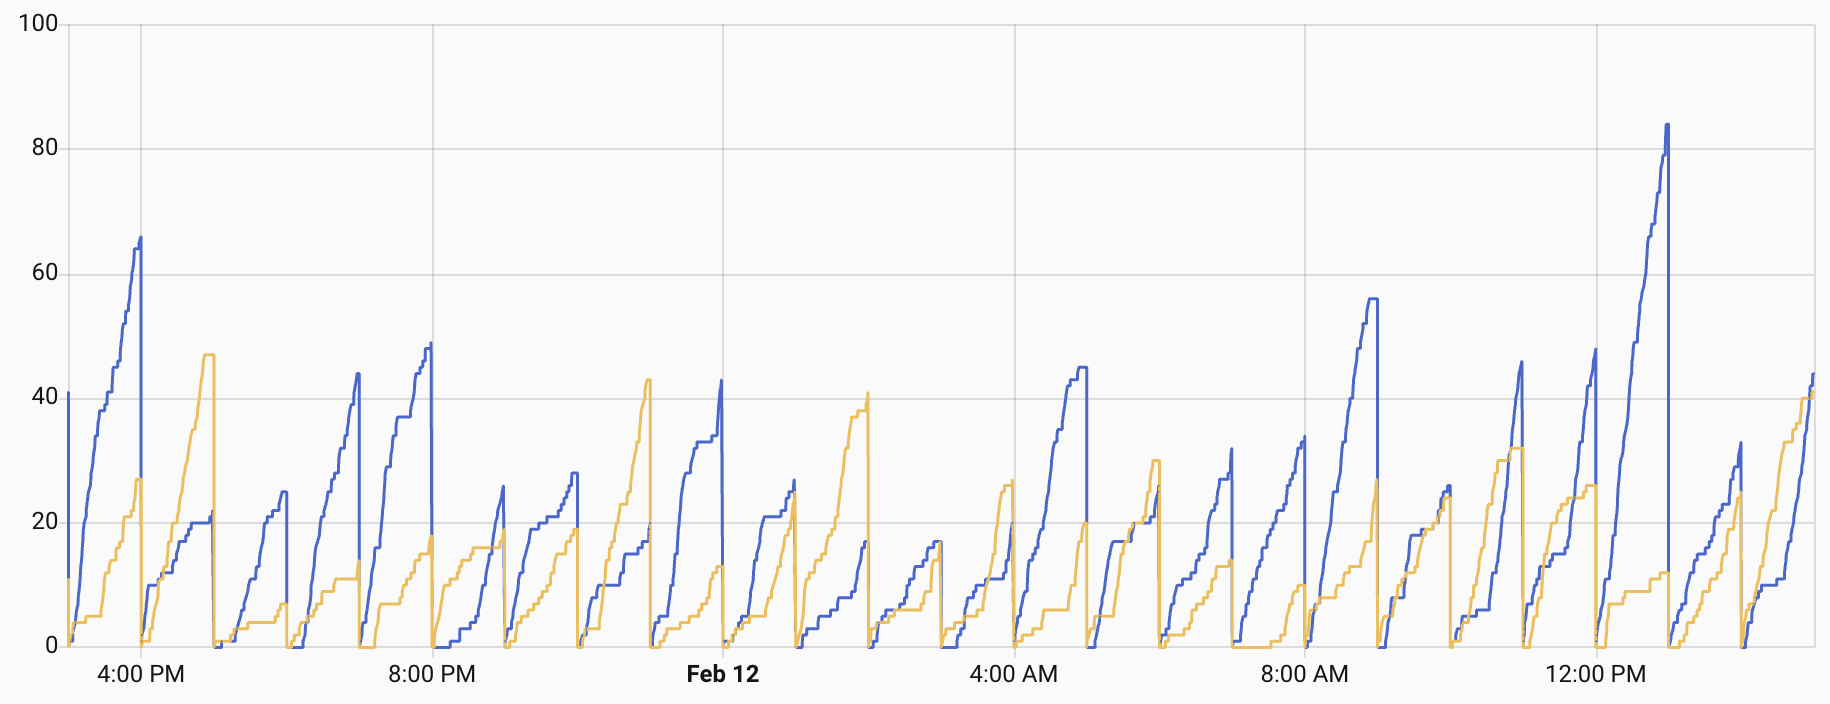
Update: After getting everything setup, I had some issues, collected more data, tested, collaborated with AI, improved the location of my SDR, and got it working much much better. The code is updated above and now I’m collecting 100 or more data points per meter during some hours. Check out the hourly data read counters and how much taller the bars at at the end of this chart!