Spare Bedroom Updates

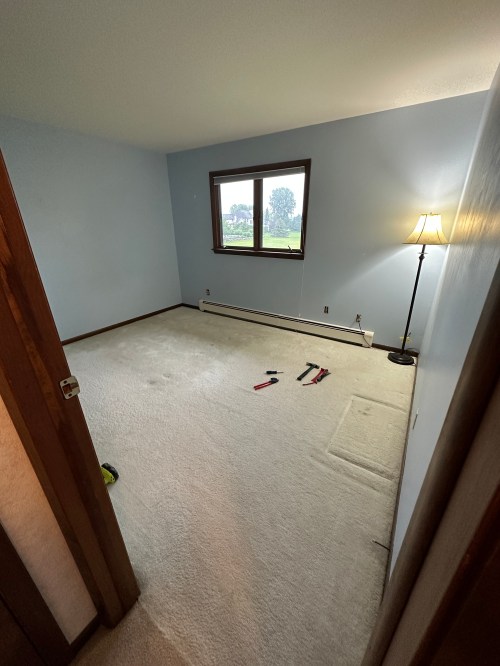
We had the idea to convert one of the spare bedrooms in to a closet for Brandi. Here’s what the room looked like after clearing it out.

After pulling out the carpet (and maybe painting?), we decided to design and build (not ourselves!) a house. Very exciting and we’ve been working through the process for a few months now.

So plans changed for the room. We painted the walls and inside of the closet with a white to brighten things up. Here you can see a bit of how dirty it looked in the closet.

We painted some shelving (the actual shelves are missing here) in the corner of the closet instead of installing new stuff. Here’s a look after paint.

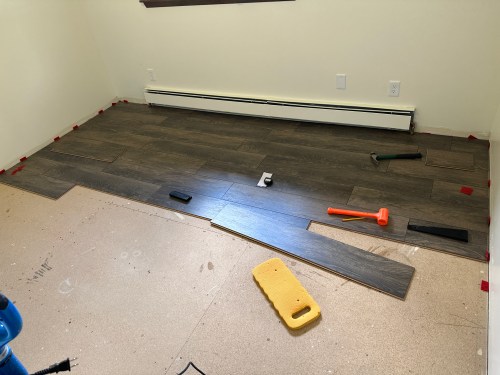
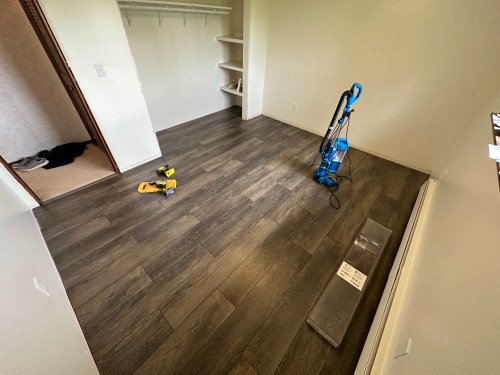
With the upcoming move we bought cheaper flooring from Menards instead of getting the stuff we’ve used from Sam’s Club. The cheaper stuff is definitely harder to work with and I did the room by myself in about 6-7 hours.

The room didn’t have any ceiling lighting, which I’ll never understand. So I installed a ceiling fan and rewired the switch, which previously controlled an outlet.

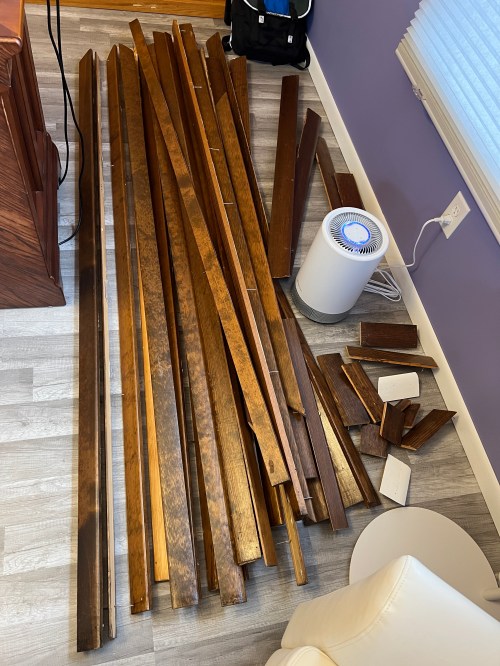
I cleaned up and restained the trim instead of buying new stuff. There wasn’t any trim in the closet, so I bought white PVC trim for simplicity. I still need to get some quarter round for the room since a few flooring edges show.

I don’t like the floor style, but the next owner’s can worry about it. This was cheap and did the job. If we hadn’t already tore out the carpet, we would have left the room alone, saving a bunch of time and money.

Nitrile Glove Dispenser

As I was finishing my closet reorganization I couldn’t help myself and had to make something. I have three sizes of nitrile gloves.

This gave me an idea based on plastic bag organizers I’ve seen on Facebook Marketplace.

I made a quick sketch, took some measurements, and grabbed plywood scraps.

It was a simple construction, using wood glue and pin nails to hold it together. I did screw on the back in case I ever need to get inside. I carved in the letters with whatever bit was on my rotary tool.

The top and bottom were made long so I could screw the unit in place.

I did finish organizing and cleaning the closet, so here are before and after pictures.

I’m glad that’s done. Time for some non-shop projects.

Hallway Flooring and More

After the living room and kitchen, the plan was to run the same flooring through the hallways. When we bought the flooring for the kitchen we get enough, so it had been piled up in my office since November. Here’s the old flooring my dad and I had installed in 2013.

Needed a bit of a break after the kitchen project, so after a few weeks we finally got started. I removed all of the trim and some doors that were in the way.

Of course, the project grew from there. When we removed the double doors from the hobby room it really brightened up the space.

Since we never close those doors we decided not to put them back up and with the hallways having wallpaper I’d have to do something with the door jamb. With the closets empty we noticed how bad the walls were, so it was a good time to refresh the paint. The shelving in the broom closet was terrible so we’d install all new adjustable shelves. My DIY automated lighting in there had failed, so I found a LED strip with motion sensor on Amazon for about $25 that works great. Of course I had to run a new electrical line up from the basement and install an outlet. I had also wanted a place to plug in the Ryobi 40v batteries used for the snow blower and lawn mower, so it worked out.

It was fun trying to figure out how to piece flooring around the stairs.

I chopped the top off of the shoe rack I had made for workout shoes and moved it from the broom closet to the coat closet. We have a lot of shoes!

There was a lot of finishing work with trim and new quarter round, but we’re so glad to have it all completed.

Automated Closet Lighting

After building a rack for my workout shoes a couple of weeks ago, I wanted to tackle another thing about the broom closet that has been bugging me for years. It never had a light! I put together a rough video of the entire process.

I’m really happy with how it turned out, especially since I was able to use parts I had in my electronics collection. The whole thing uses a simple circuit, cost less than $10, and doesn’t require WiFi or any fancy connections. The Working of Transistor as a Switch page on Electronics Hub was a big help. I ended up using a PNP transistor in my circuit without resistors because the LEDs were dimming and I wanted maximum brightness.