
It’s been too long since I posted about designing a speaker in SketchUp, but other projects moved up on my priority list between then and now. Well, over the last few days I finally made the speaker. In the end, the delay was worth it, because several of the steps were a lot easier with tools I’ve acquired over the last few months.
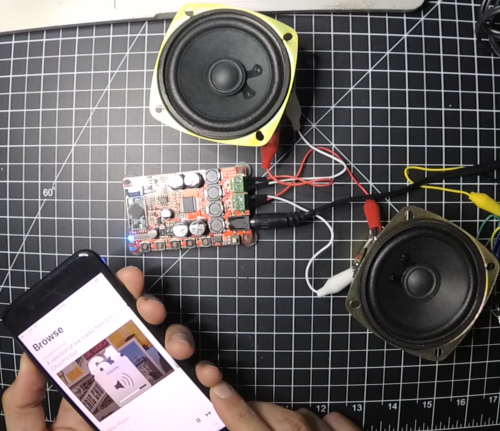
Other than the design, the first step was to get a board. I ordered the INSMA TDA7492P Chip 25W+25W Wireless Bluetooth 4.0 Audio Receiver Digital Amplifier Board on Amazon after watching 2 otherbuilds with the same board. To make sure it was going to work, I hooked up my speakers for a quick test. I salvaged the speakers out of on old set of computer speakers I had in college.

I ordered a couple of different button styles from AliExpress, so I tried both types out, ultimately deciding to use the larger buttons which also had a blue LED ring. The smaller buttons were nice but not right for this project.
I did those tests around the same time I was designing the speaker. Several months passed before I touched any of the components again. Since I wanted to use my own buttons, switch, and LEDs I needed to figure out the best ways to connect in to various points on the board. This involved a lot of poking and prodding with a multimeter. I figured everything out and did all of the soldering and wiring prep work to help with assembly once the box was built.

I had taken some general measurements when iterating on the design, but I thought it would be a good idea to create a cardboard model before cutting any wood. This mockup of the walls was an inch too short, but it let me get an idea of what kind of space would be on the inside. Knowing that the 1/2″ plywood would use up a lot more area, I increased several dimensions and changed the angles on the 3 front pieces.

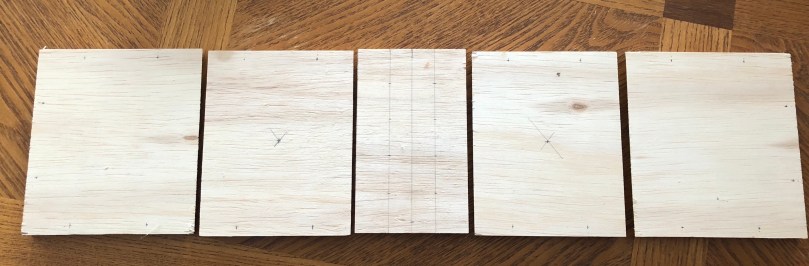
After cutting the 3 front pieces and two sides, I measured and marked all of the spots where I needed to drill holes.
Then I spent a lot of time with the drill press. There was a lot of measuring and calculating because pretty much everything going on the front face needed some kind of recess.

It was looking pretty good!

Since I hadn’t updated my SketchUp plans for the changes, it was tricky getting the correct sizes for the top, bottom, and back pieces. I ended up screwing some parts together in a step-by-step process and then making small cuts on the new pieces to inch up on the fits. At the end I had to do a bunch of sanding on the front face, which was the last piece I screwed together. It was really cool seeing the design come to life.

Time for some finishing work. I sanded edges and cleaned off all of the dust before I did a quick coat of spray paint. I wanted to try a neat technique I’d seen, so I did a bunch of sanding to rough up the paint. Then I coated everything with 2 coats of stain/poly, while doing a light sanding in between. After the first coat of stain, I unscrewed everything to apply the final coat because I wanted to make sure nothing was stuck together on the joints.

After letting everything dry it was time to work on the guts. I used the time-lapse recording option on my YI 4K Action Camera for the first time, which worked well, so here it is with voice-over to explain what I’m doing during the assembly process.
I wanted to give it a coat of Minwax paste finishing wax when I was done, but with all of the buttons and speakers in the way it would have been too hard to work around them. Should have done it before. I’m pretty thrilled with how the paint and stain combo turned out.


The dimensions ending up being 5″ tall, 10″ wide, 4.5″ deep at the sides, and 5.75″ deep in the middle. It weighs just under 4 pounds with most of that coming from the 2 speakers. It’s hard to get a sense for the size in the cropped images above, so for scale here is a comparison with a beer bottle.

I’ve been using an old Jawbone Jambox for music in my garage gym. This is so much more convenient because it plugs in and has a permanent spot. No more worrying about a dead battery or trying to find the Jambox when it’s time for a workout.
Whenever I was using the Airdyne or Ski Erg, it was hard to hear the Jambox. Judging by the test below, I should be able to crank the tunes now. I played 30 seconds of “Welcome to the Jungle” with both speakers, starting at the 1:00 mark, and increasing the volume every 5 seconds.

[…] few areas of my upper legs are lit up! Could it be from those squat jumps? Finished making my Bluetooth speaker. It’s soooo nice having some real volume in the […]
LikeLike
Looks great! Good job. 👍🏻
LikeLike
Great job! You should be featured in something like https://www.crunchreviews.com/audio/best-portable-bluetooth-speaker/ :):):)
LikeLike